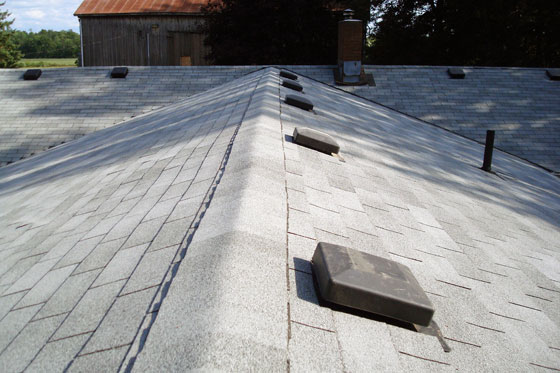
Matt’s a numbers guy, so as the roof was his project, it’s only fitting that I summarize his work in a statistical fashion.
Here, in a series of lists, is the story of how we reshingled our roof ourselves.
Schedule breakdown
- Day 1 – 1.5 hours
Matt loads the shingles and other materials onto the roof. Thank goodness for rooftop delivery.
Day 2 – 10 hours
Matt, his Dad and I strip more than three-quarters of the old shingles off the roof. And then we cross our fingers for the night and don’t cover it with a tarp. - Day 3 – 15 hours
Shingling begins. Matt, his Dad and his friend (a former professional roofer) complete about two-thirds of the roof and strip the remaining old shingles. Fingers are still crossed and the naked part of our roof is still untarped when we go to bed that night. - Day 4 – 14 hours
I take a personal day to stay home from work, and Matt, his Dad, my Dad and I finish shingling the roof. - Day 5 – 6 hours
Matt and his Dad do clean-up picking up nails and shingles from around the house and out of the eaves troughs. - Total: Five people 46.5 hours–note that nearly 40 of those hours came over just three days
I have to say a huge massive thank you to Matt’s dad and his friend. It was hot, dirty, heavy, uncomfortable work, and they put in a lot of hours, especially Matt’s dad, just to help us out. They supplied tools, equipment and expertise, and we could not have done this without them.
I have to say thanks as well to our roofing supplier AMA Roofing. They were a complete cold call, and we had a great experience. From the office staff I dealt with on the phone to the delivery man who brought the materials to the house, Matt and I were both very impressed. They spent a lot of time answering all of our questions and provided great guidance about how much to order and how to install everything. I highly recommend them.
Materials breakdown
- 110 bundles of shingles – used 102 bundles
- 22 pieces of drip edge (176 lineal feet) – used none, as there was a strange flashing/drip edge installed on the roof that we ended up reusing
- 48 lineal feet of valley
- 14,400 nails (120 coils) – used only 75 coils. We had so many nails left over because we had to buy two cases, as we would have been short with just one.
- 3 rolls of ice & water shield (240 lineal feet)
- 6 roof vents (we found an additional four in the driveshed that we were able to use)
- 1 special roof cap/vent for the kitchen hood fan exhaust
- 8 rolls of tar paper – used 7 rolls
- 6 tubes of roofing tar
- 10 sheets of plywood – used only part of one sheet for three small patches. Despite the awful state of our shingles, the plywood underneath was in good shape.
You’ll notice that we went with a very light grey shingle. Its official name is dual grey, and it’s a combination of black, grey and white stones. At times it reads almost green or blue from the ground. This is not what I was going for at all, but I can live with it.
My biggest goal in choosing the colour of the roof was to pick something light. White roofs are more eco-friendly, because they reflect more of the sunlight, rather than absorbing all of that heat into our house. We didn’t want to go with a true white roof, but we chose a light colour to give us as much reflectivity as possible.
By the numbers
- Total roof square footage: 3,375
- Average temperature: 29.82ºC (not including the humidex)
- SPF: 60
- Cost savings from doing it ourselves: $7,000 (this is a guess, as we didn’t actually get a proper quote from professional shinglers)
- Hours between installing the last shingle and the first rain drop: 10. And then it rained for three days straight.
Casualties
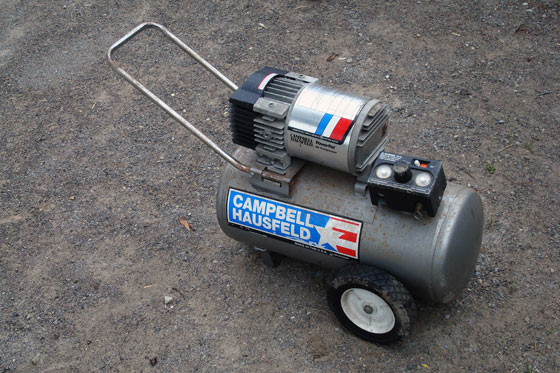
- One air compressor – it literally went up in smoke
- Three shirts – Matt wore white in the hopes that he would be slightly cooler, and I’m not even going to try and wash those poor shirts
- Two pairs of gloves – Matt and I both wore through the fingertips
- One shower loofa – used to be white, now is the colour of shingle scum
- One pair of shoes – the soles melted and are now completely misaligned
I was a little bit uncertain about tackling the roof reshingling all on our own. This is a big job and does require a certain amount of know-how to do it right–know-how that Matt and I didn’t have at the start. As it came time to order the materials and figure out exactly how we were going to do this thing, I was very nervous and did consider calling in professional help. However, I’m a big believer that everything happens for a reason, and as we got closer to starting the work there were a few signs that showed me we were going to be okay:
- A tremendously positive, helpful and encouraging phone call with our roofing supplier. Getting the quote and talking through the project with Debbie at AMA boosted my confidence tremendously.
- Kit, another roofing novice who shared my trepidation–or as she wonderfully described it “grim determination wrapped around an unmistakable sense of dread,” single-handedly shingled her donkey barn.
- Matt’s friend, a former professional roofer, rearranged his schedule so that he was able to come and help for a day.
- This Old House had a segment on roofing–and yes, we took notes.
As well as everything worked out, I cannot recommend roofing as a DIY. This is a really tough job, and Matt basically knocked himself out getting this done. I’m incredibly grateful that he’s willing to take something like this on, but we’ve both agreed we won’t be doing this ever again.
Final lessons
- There’s a fine line between stubborn and stupid, and we ended up deep in dingbat territory
- Bungalow = big roof. Big, big, biiiiiiiiiiiiig roof
- Don’t try this at home. Seriously, folks. Don’t.


Great Post! The roof looks amazing! Your hard work paid off for sure! This weekend hopefully you truly do NOTHING!
We’re ready for a vacation from renovation!
Anytime someone does a roof, the next thing you hear them say is “Never. Again.” (Which is a lie, of course, because now that you know how it’s really hard to pay someone to do it.) Roof looks great from what I can see… very awesome that you got it all done!
I can’t argue with the cost savings. We’re thinking when it comes time to do it again we might be able to afford steel. And that’s likely something we wouldn’t tackle ourselves (but never say never). Congrats on making it through your tough week, Kit. Thanks for stopping by.
Whew, you got it done just in time! You guys did an amazing job. Unbelievable that you melted your shoes and wore through your gloves.
Roofing is unbelievably tough work.
Ugh, I have no desire at all to try it!