Summer is my favourite time of year, and we’ve been having such a good summer so far. We’ve had lots of relaxing time at home with the animals, the garden, crafts, books, baking and projects. We went up north camping for a week. We’ve met up with friends and family. There’s been strawberry picking, haying, bonfires, kayaking and swimming.
As I wrote last month, my goal is to do summer. We’re filling it with as much fun, relaxing, play and memories as we can, and there’s more to come.
Here are some of the other things that have been part of our summer so far.
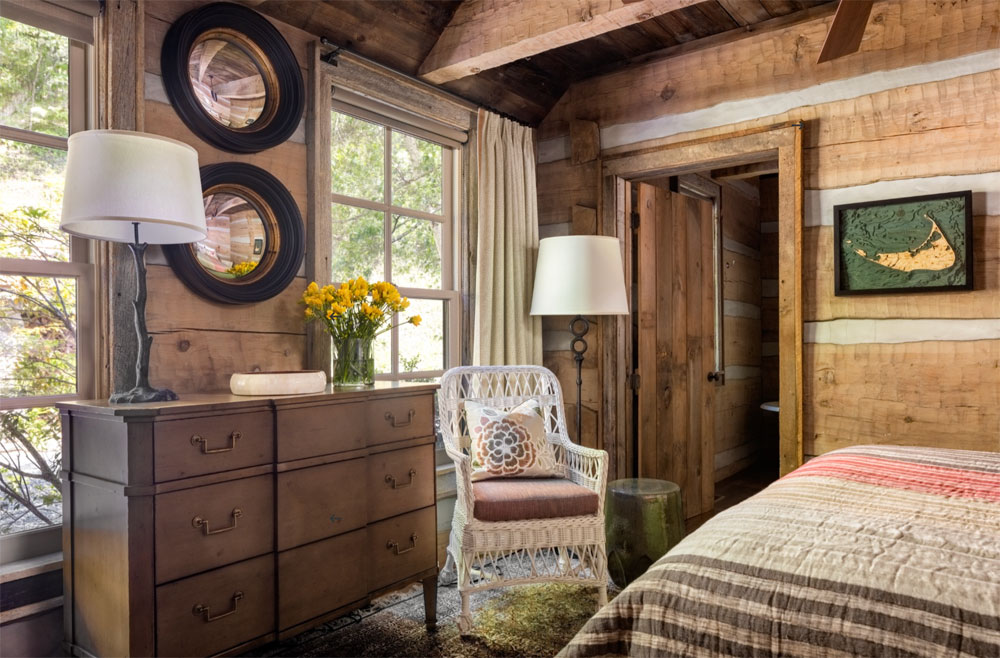
This North Carolina mountain home feels rustic, traditional and comfortable. A lovely getaway.
Our camping week highlighted how little I need social media. I came home and purged my Instagram. I’m now following only family, close friends and a few organizations that are doing work that’s important to me.
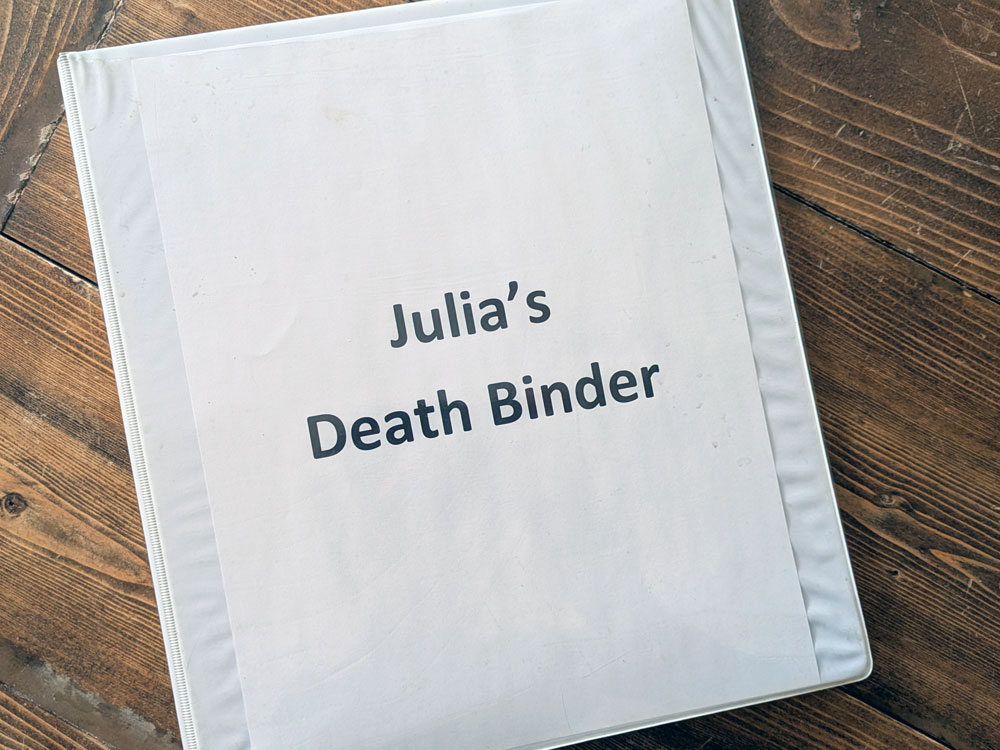
Seeing all the wildfires happening (and experiencing the smoke ourselves) has given me new motivation to finish my death binder. If we ever have to evacuate, having copies of all of these important documents will be helpful.
On the topic of wildfires, The Uninhabitable Earthby David Wallace-Wells was a tough, but informative read. “We are still building… committing ourselves blindly to generations being punished by natural disasters… We tell ourselves we are “developing” the land… What we are really building are bridges to our own suffering.”
“If we go through life assuming everything will be complicated, and then it is complicated, doesn’t that make us better prepared? … If we expect life to be complicated, and life is complicated, then life is simple, right?”
The Eyes & The Impossible by Dave Eggers (Another good summer read. Though more life philosophy than a children’s book.)
We have not had water in the barn for the whole time we’ve lived here. (By water, I’m meaning running water flowing from a tap. Not a leak. We have some of those.)
It has not been a big deal because for 13 of those years, we had no need for water in the barn.
When the chickens and turkeys arrived, they needed water, but I could easily keep them supplied with a small bucket. I filled it from the hose on the patio and carried it out to the barn. Even their big waterers weren’t a big deal to carry back and forth a few times a week. In the winter, I had a clean bucket that I filled at the kitchen sink and dumped into a barn bucket.
But ducklings are another matter. Ducks need water.
We started the ducklings with a small barrel in their run. It took a 5 gallon pail to fill even this small tub. Hauling a full 5 gallon pail out to the barn every morning was more of a workout than I wanted.
I made it a week and then I called the plumber.
We had water in the barn, kind of. The issue was to figure out if it worked.
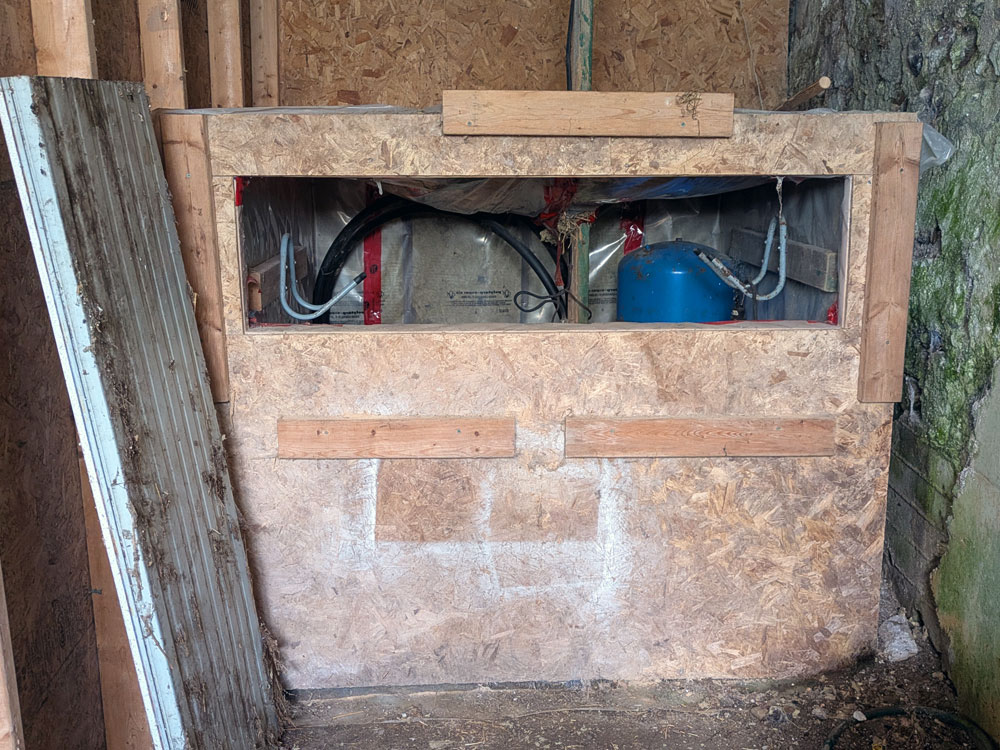
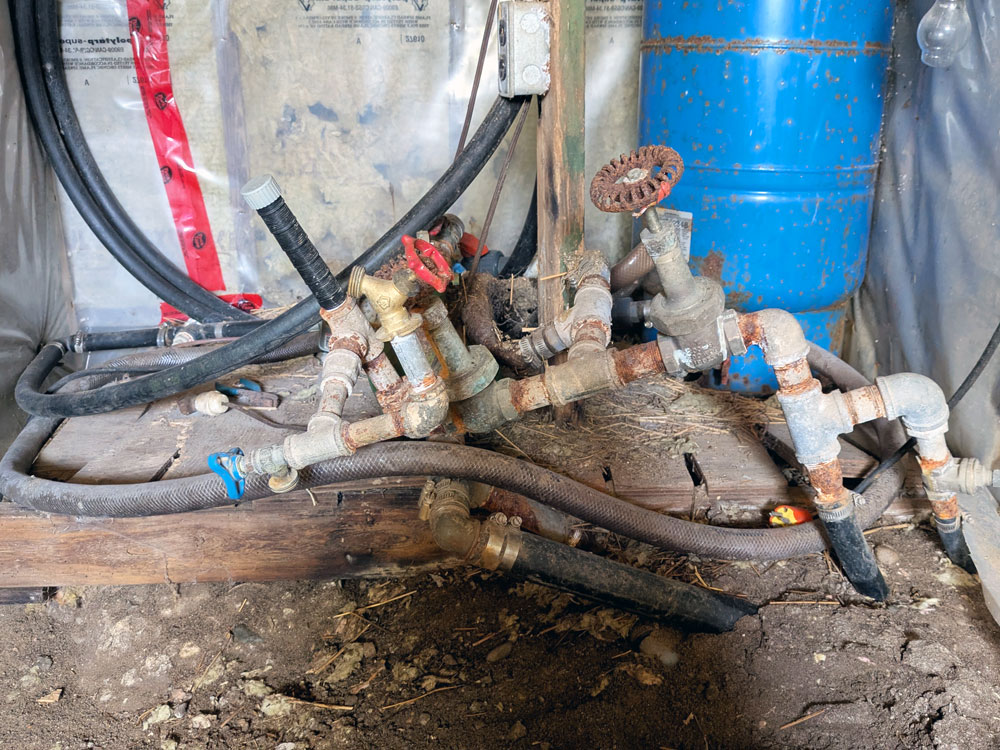
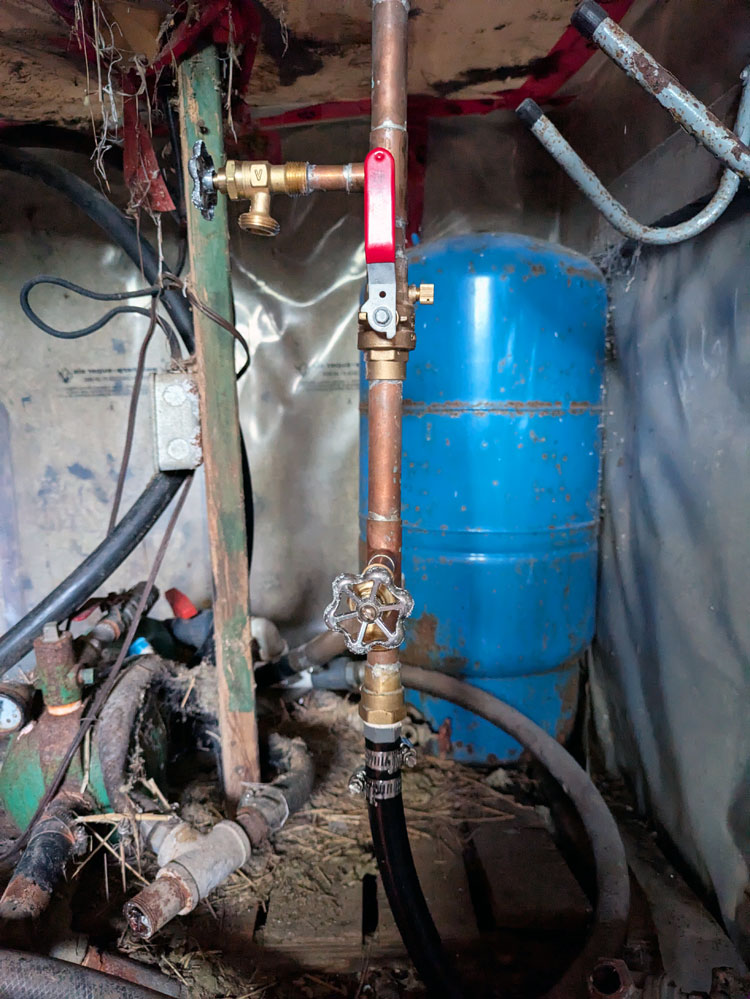
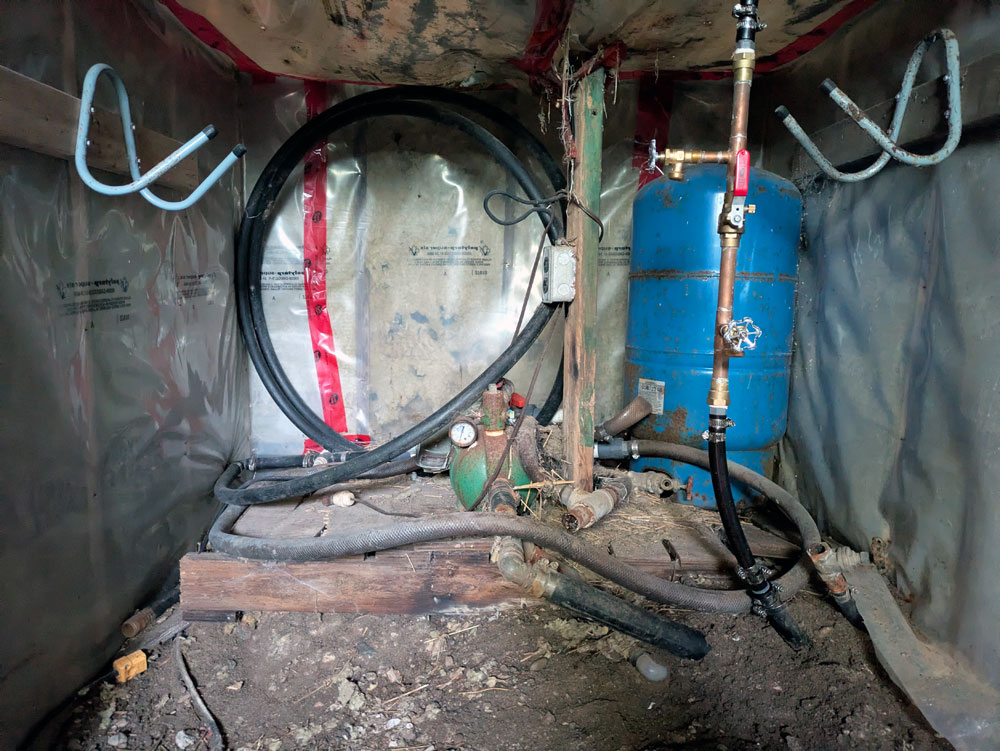
When we first moved to the farm, all the water was in the barn. The well flowed to the barn, where the pump then sent it to the house. Everything was in an insulated box, heated by a lightbulb. The equipment was old and some was not working properly.
The set up was questionable, so we drilled a new well and installed a new pump and treatment system in the house. Then we ignored all of the equipment in the barn, figuring it was a problem for another day.
Well, the ducklings moved to the coop and another day arrived.
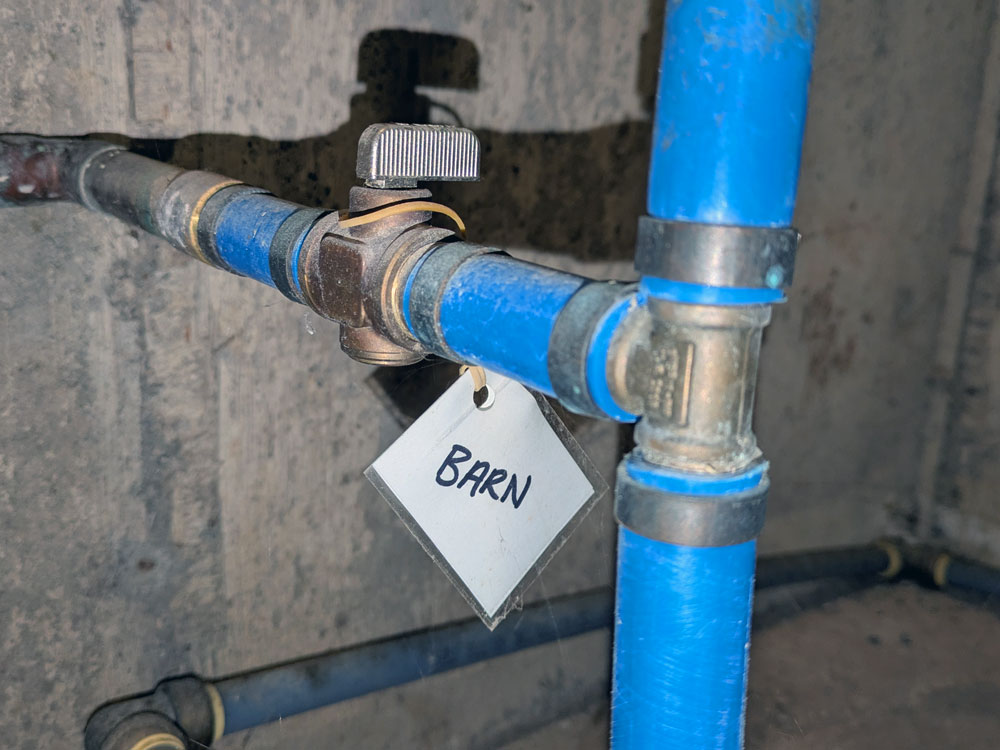
When we installed the new well, our contractors connected to the old pipe that ran from the barn. The idea was we could reverse the flow and push water from the new well back to the barn. So my question to my plumber was, “Can we do that?”
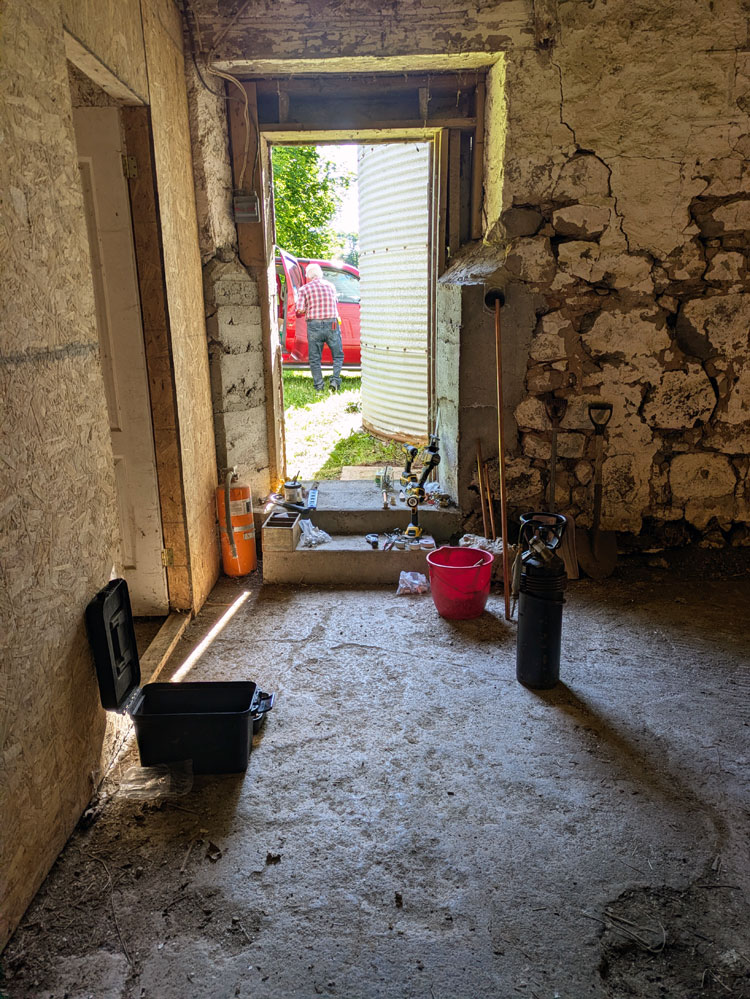
The first step was to figure out which pipe was the right pipe. The pump, tank and pipes in the barn were a mess. Four pipes disappeared into the ground. Which one was connected to the house? The plumber took a guess, cut a pipe, and I ran back to the house to open the valve labelled “barn.” (At least I knew which pipe was which at one end.) The plumber was able to see where the water came out, so that told us what pipe to use.
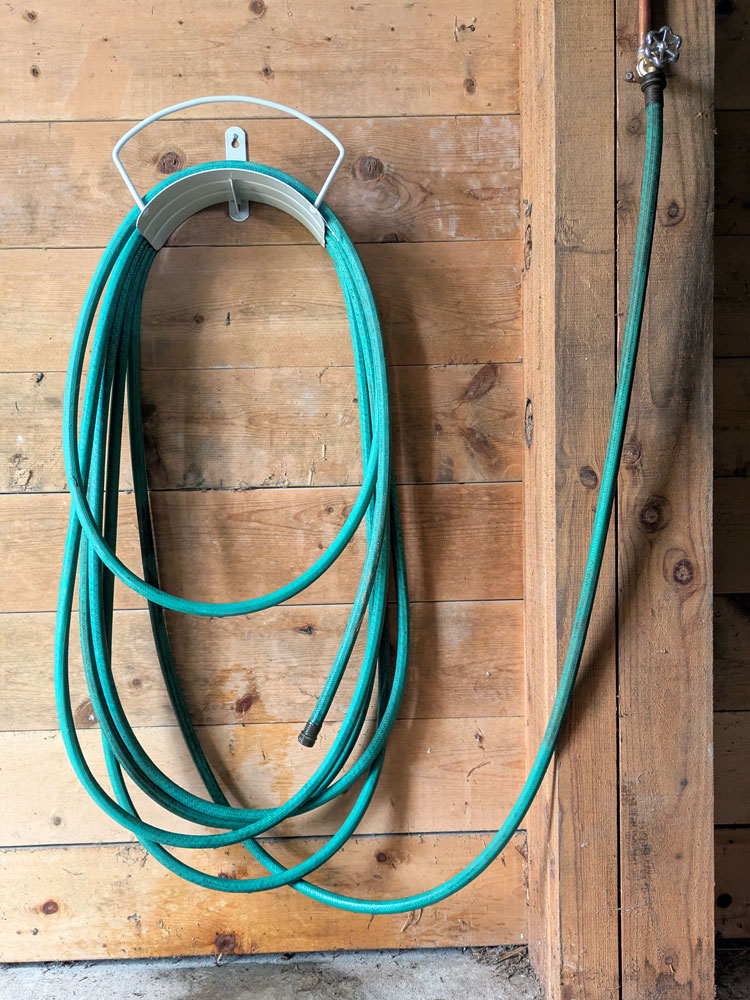
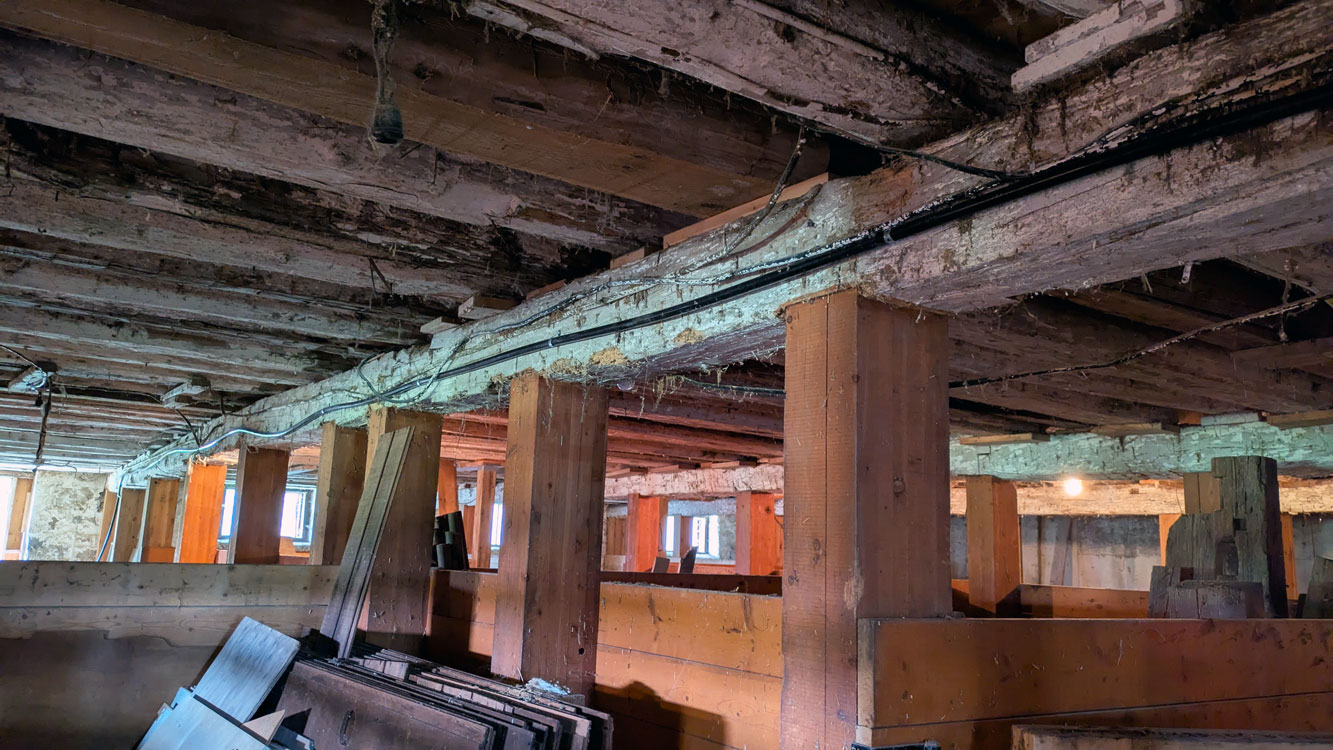
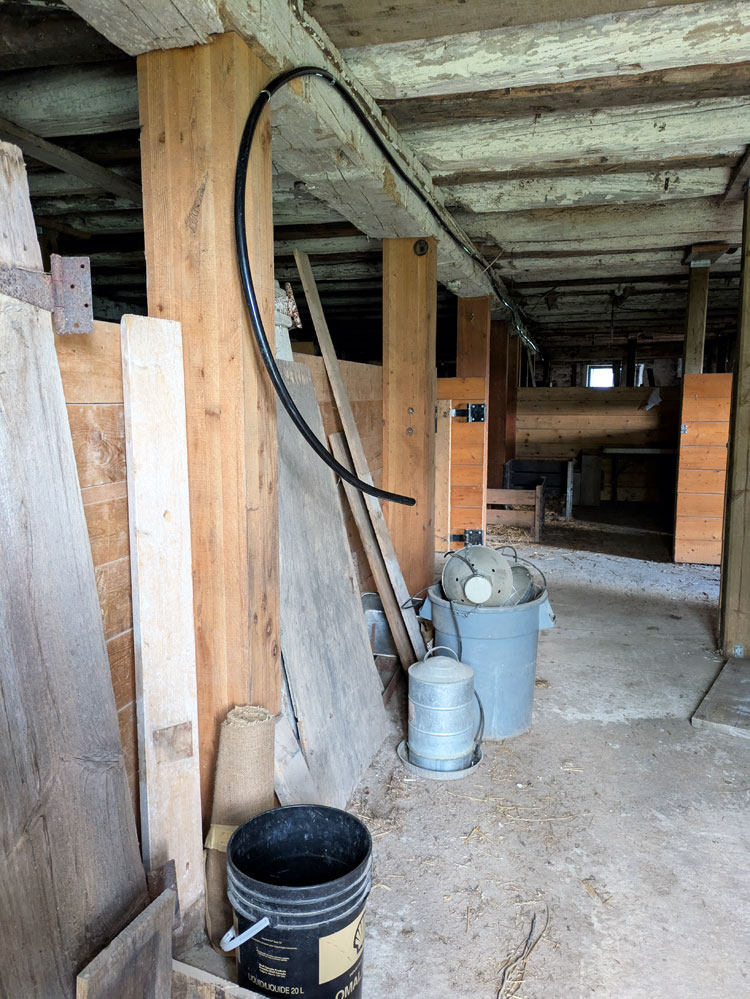
Then we had to get from the end of the pipe to the coop. Completely on the other side of the barn. I bought 100 feet of waterline and strung it across the barn, screwing it into the beams as I went.
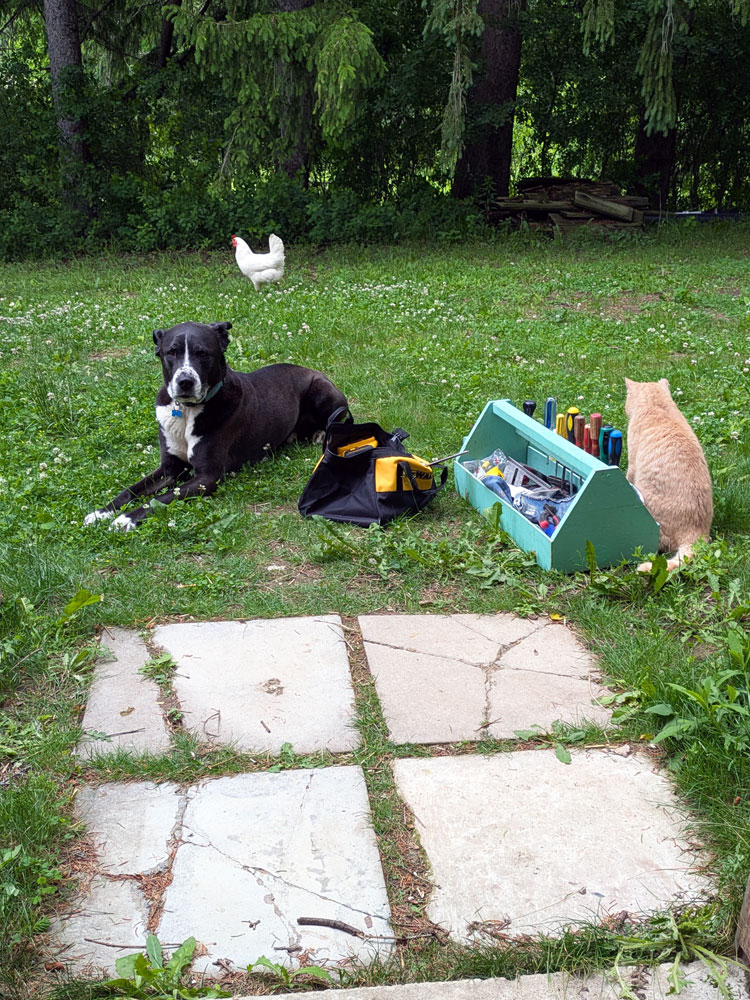
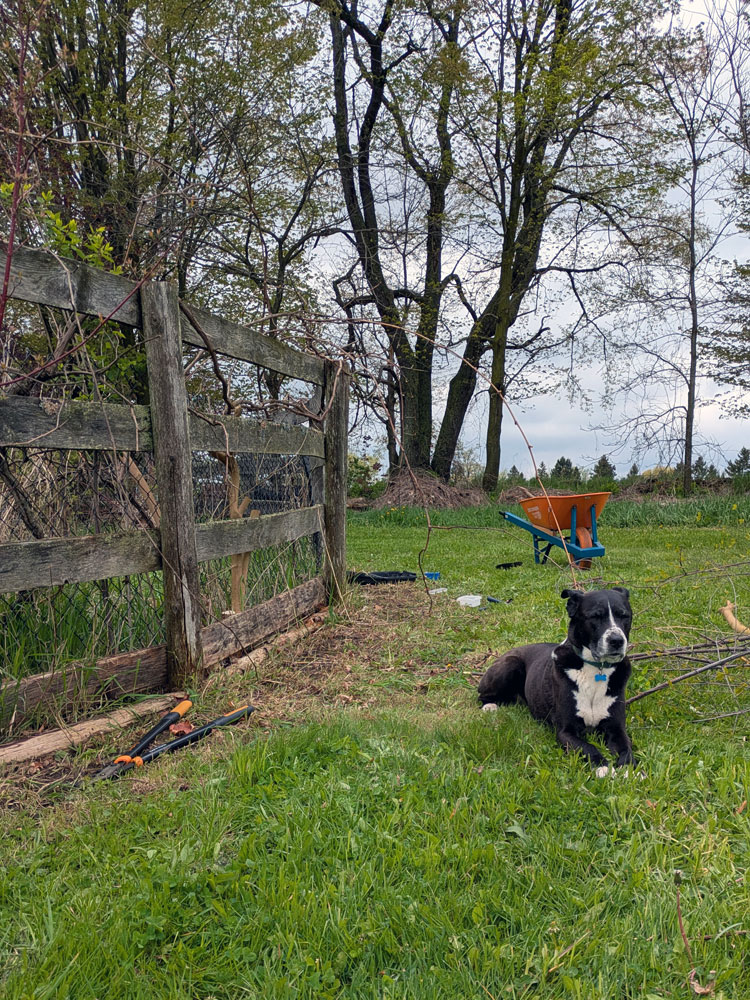
Gratuitous picture of my cute work crew. Note, the ducklings, the instigators of this work, are not present.
The plumber came back and tied into my new waterline. He gave me a tap at the coop side, where I could install a hose that would fill tubs outside in the run or buckets in the pens. Back at the old pump box, he gave me a new shut off valve and two clean out taps, so I can drain the line for the winter.
It has been so nice to have water at the barn.
It also enables me to upgrade the ducklings’ tub. I’m on the hunt for a bathtub. If you hear of anyone getting rid of an old tub, please let me know.
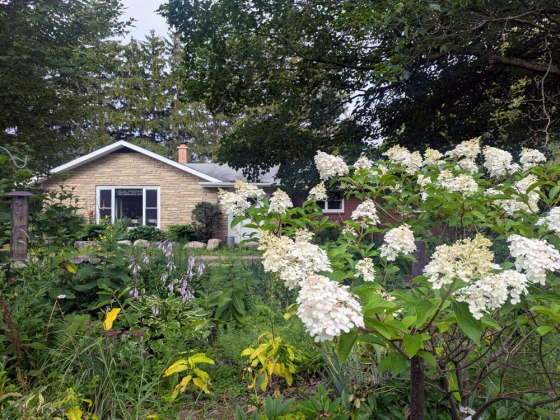
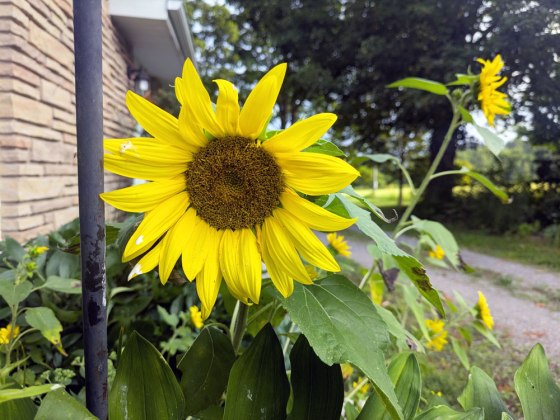
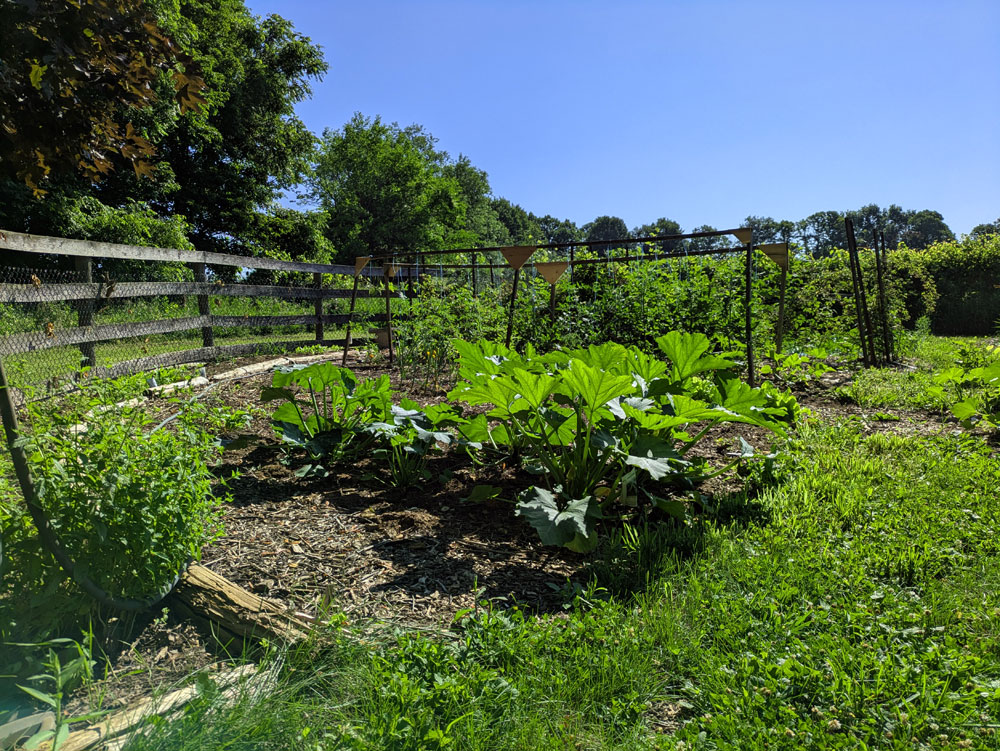
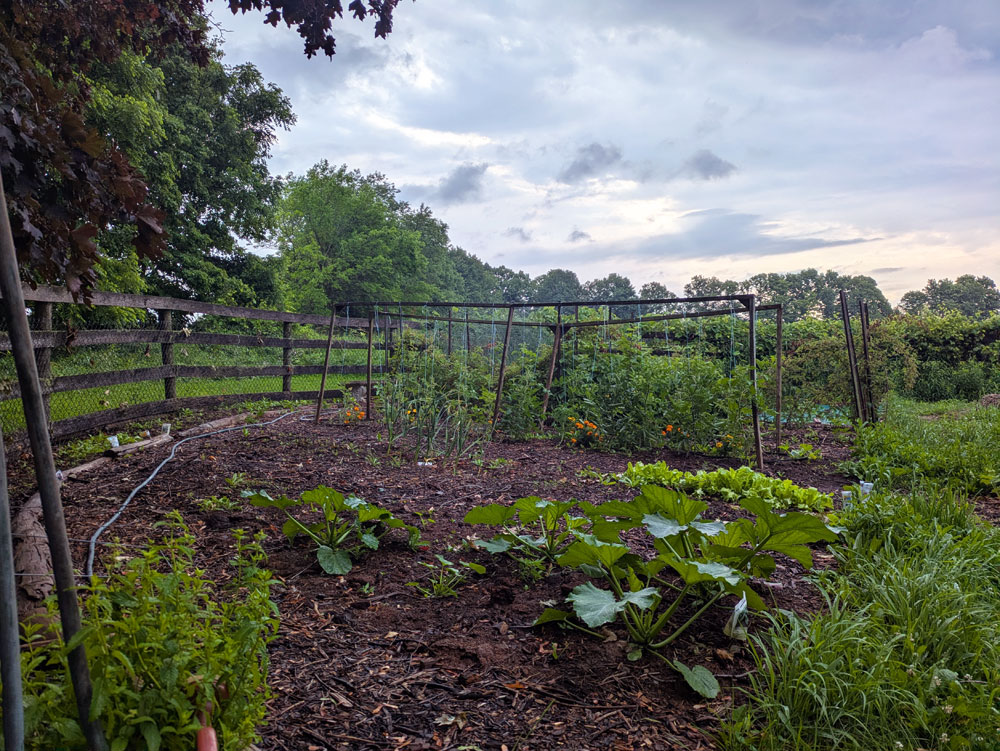
The garden is growing! I know that’s what it’s supposed to do, but it hasn’t done that for several years, so it seems remarkable.
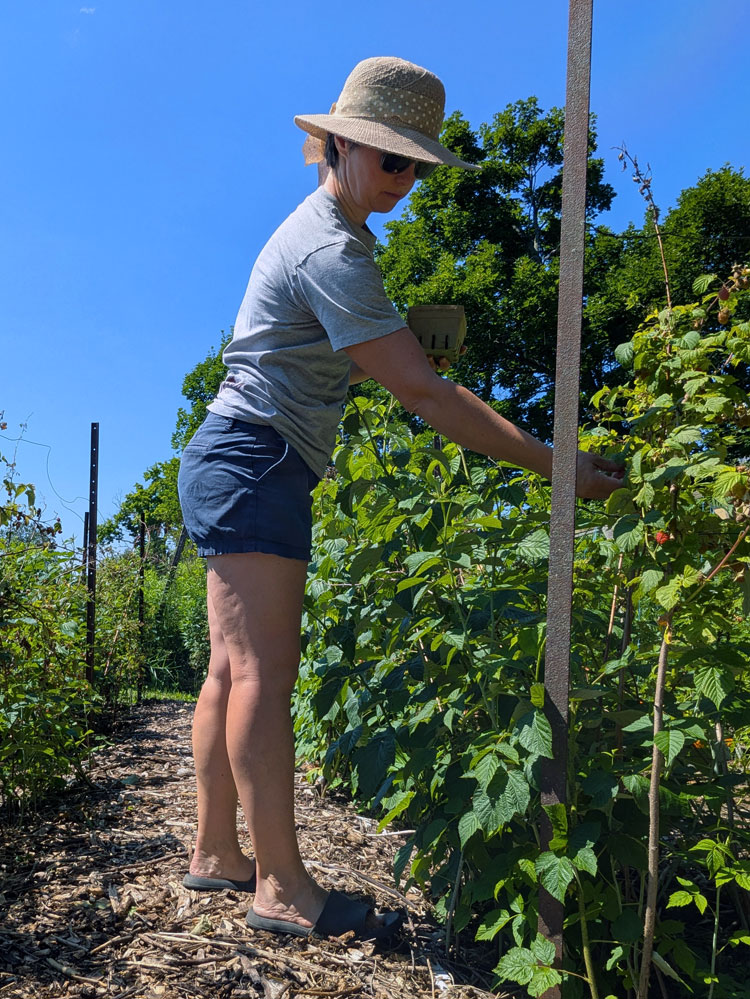
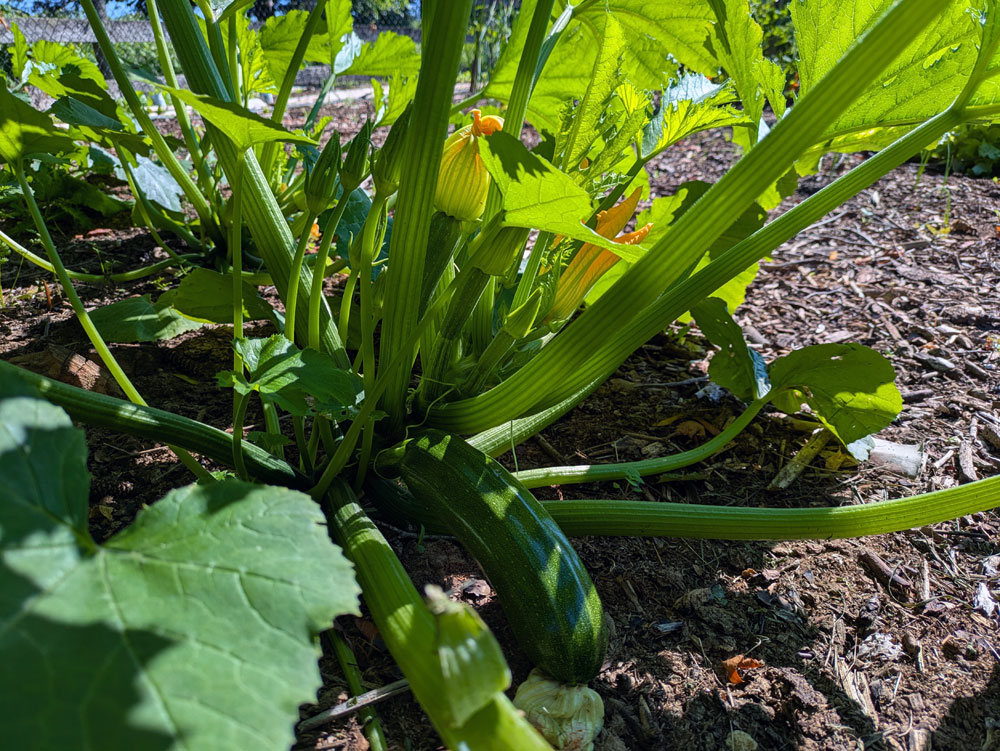
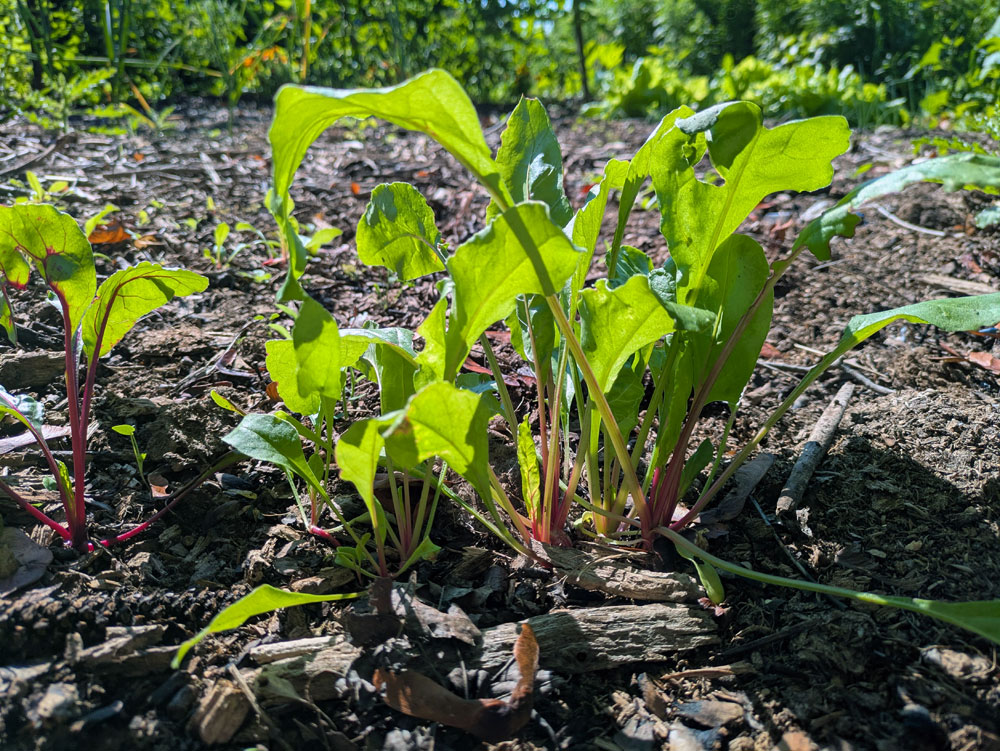
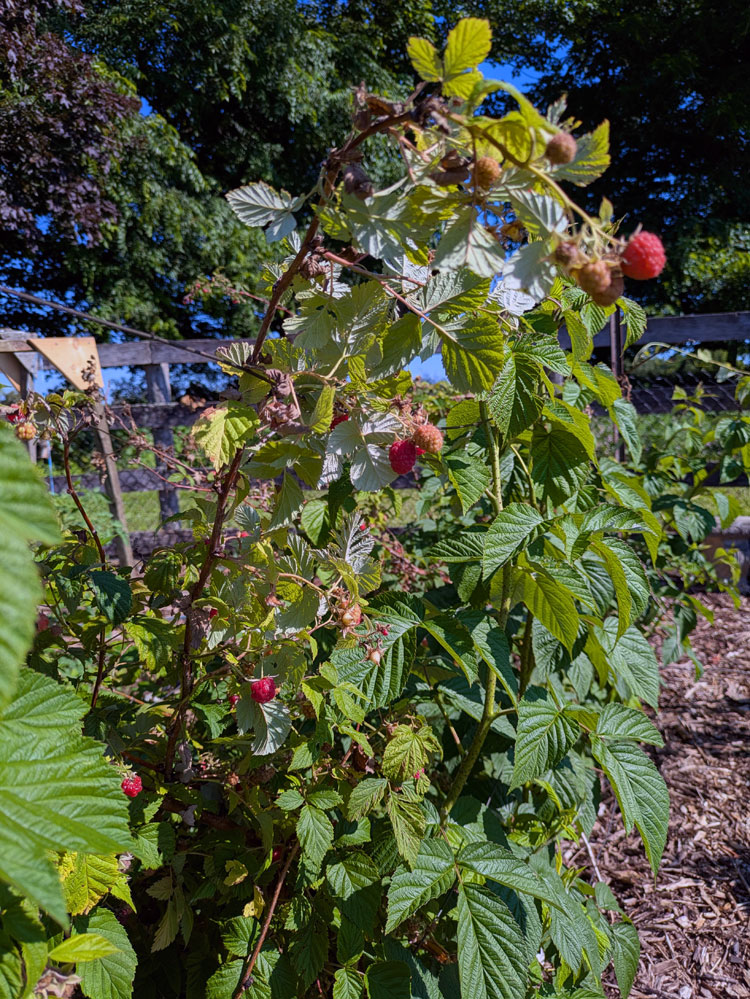
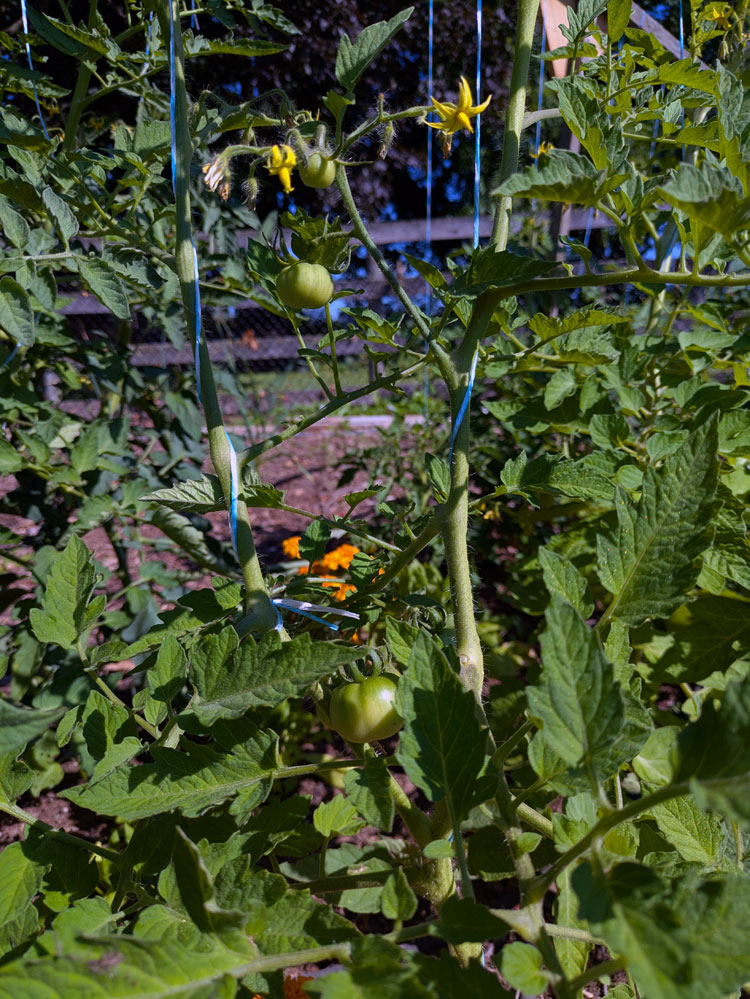
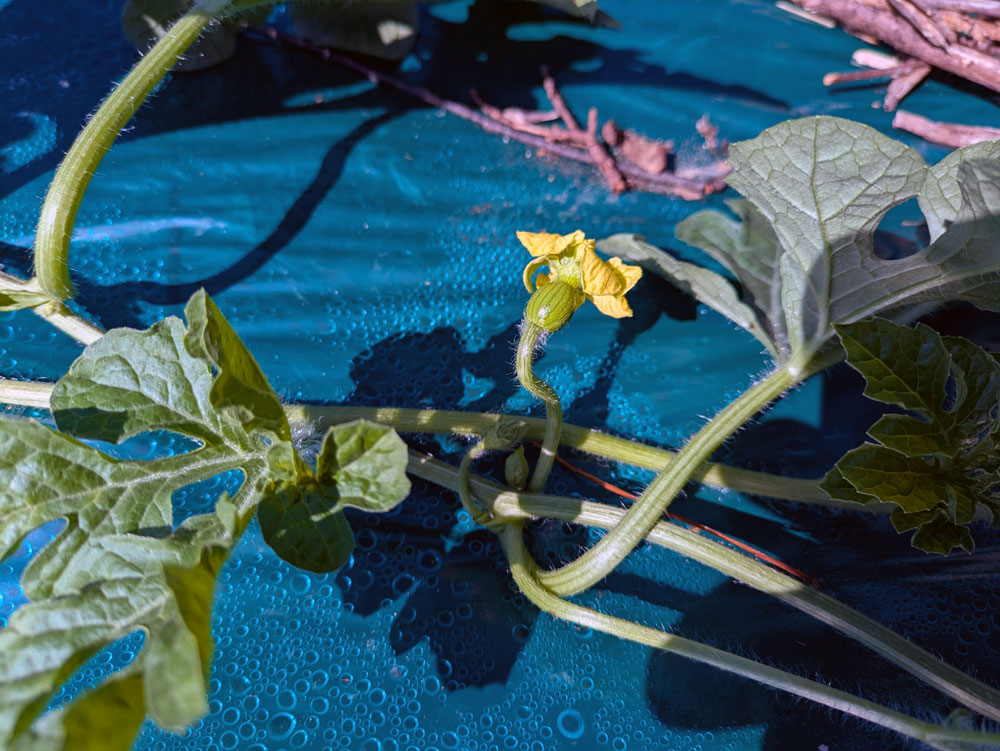
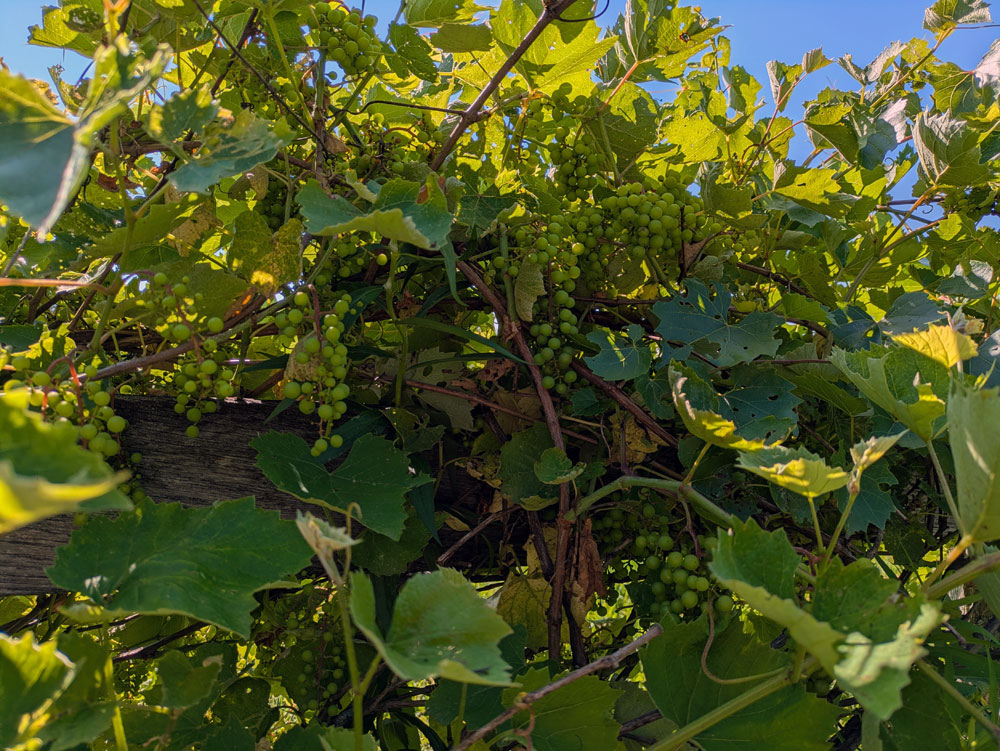
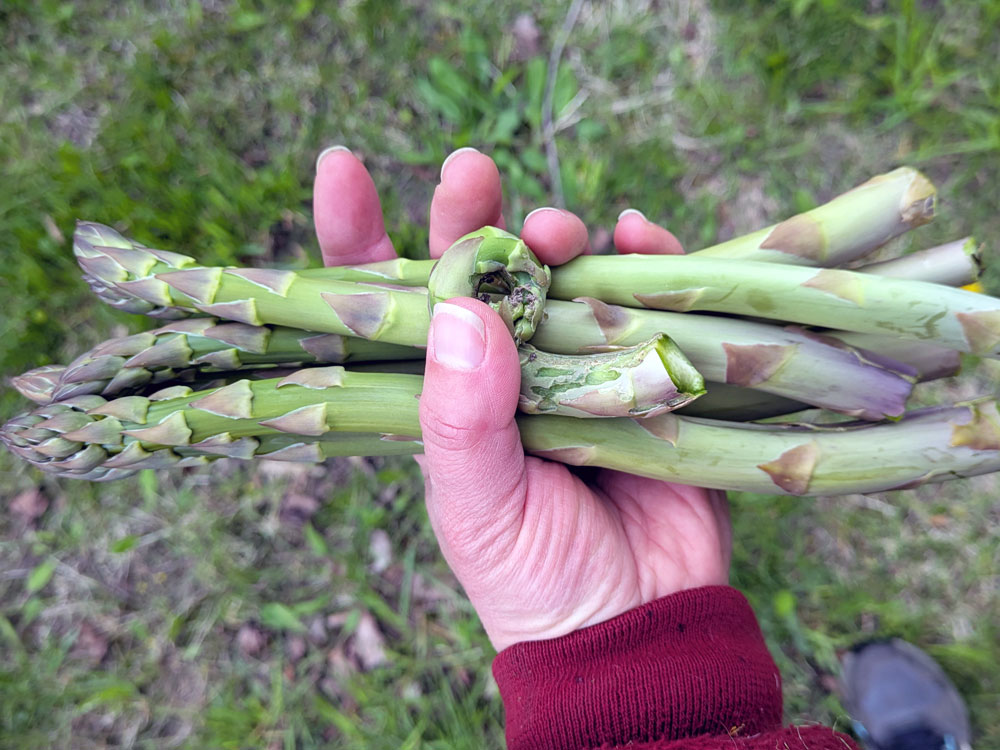
We’re picking raspberries every day and at dinner yesterday we ate our first zucchini (of what I’m sure will be many). We’ve had lettuce and garlic scapes. We’re watching tomatoes, watermelon, beets, carrots, onions, spinach and grapes get bigger. The asparagus has fully gone to seed. We’re hoping some of Ellie’s flowers bloom.
I’ve repaired the tomato trellises, ignored the squash trellis and am experimenting with green plastic (IRT mulch) for the watermelons.
We’re weeding regularly, which feels like less of a chore when we’re so excited by the growth and prospect of harvests.
First zucchini. We grilled it for dinner. It was delicious.
Beets.
These onions are Ellie’s special project. She’s been so diligent about weeding them, even when they were as small as blades of grass and our compost had sprouted millions of miniscule weeds. Lettuce is in the background.
Carrots with garlic in the background.
Raspberries are a little sparse after not being pruned for several years. We’re picking about a pint of berries every day and lots of new canes are shooting up.
So many tomato plants. Lots of blossoms. Fruit starting to grow. Very helpful to grow them on a trellis.
Watermelons on IRT mulch. The vines are starting to go crazy. The plastic is supposed to warm up the soil, helpful in our shorter growing season. It’s also suppressing weeds better than I expected.
Teeny tiny baby watermelon.
Asparagus gone to seed. Grapes going crazy tangling themselves in the ferns. My ancient tarp still hanging around.
So, so many grapes.
Slide the centre bar to see the garden grow.
There is more work to be done and more harvests to come. I’m looking forward to it all.
I started 2026 with a small list of home goals. Just three.
I really enjoy setting home goals every year. I like planning my projects, being organized with my time, working towards something, achieving what I set out to do. Even with a smaller number of goals, being clear about what I want to do helps me feel focused.
We’re already halfway through the year, so it’s time to check in on how I’m doing so far.
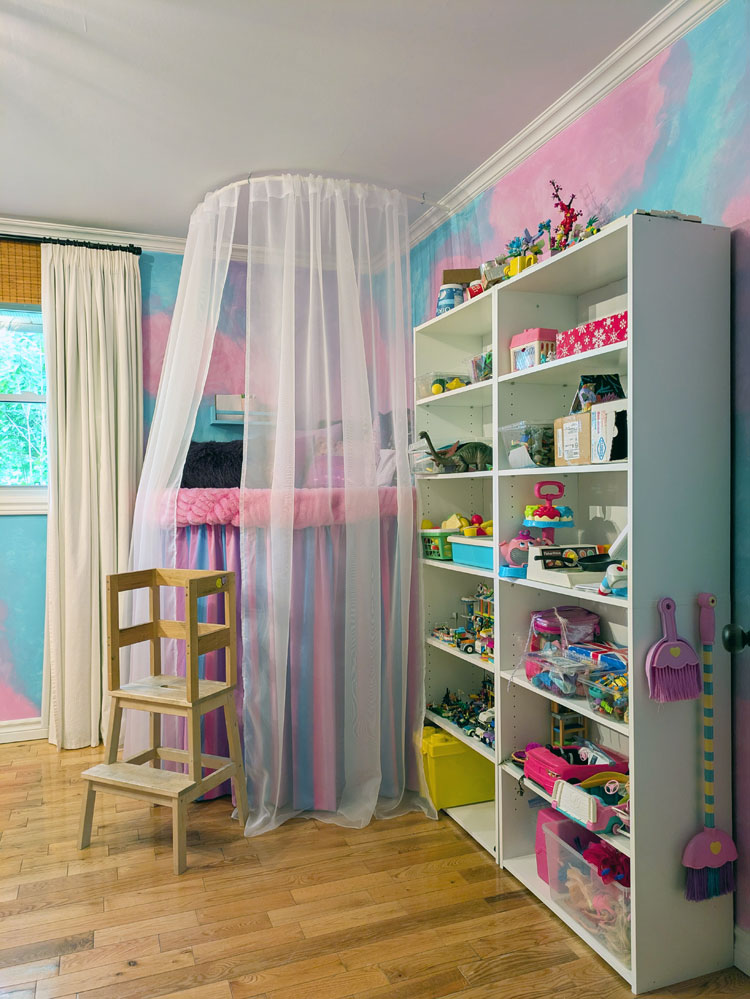
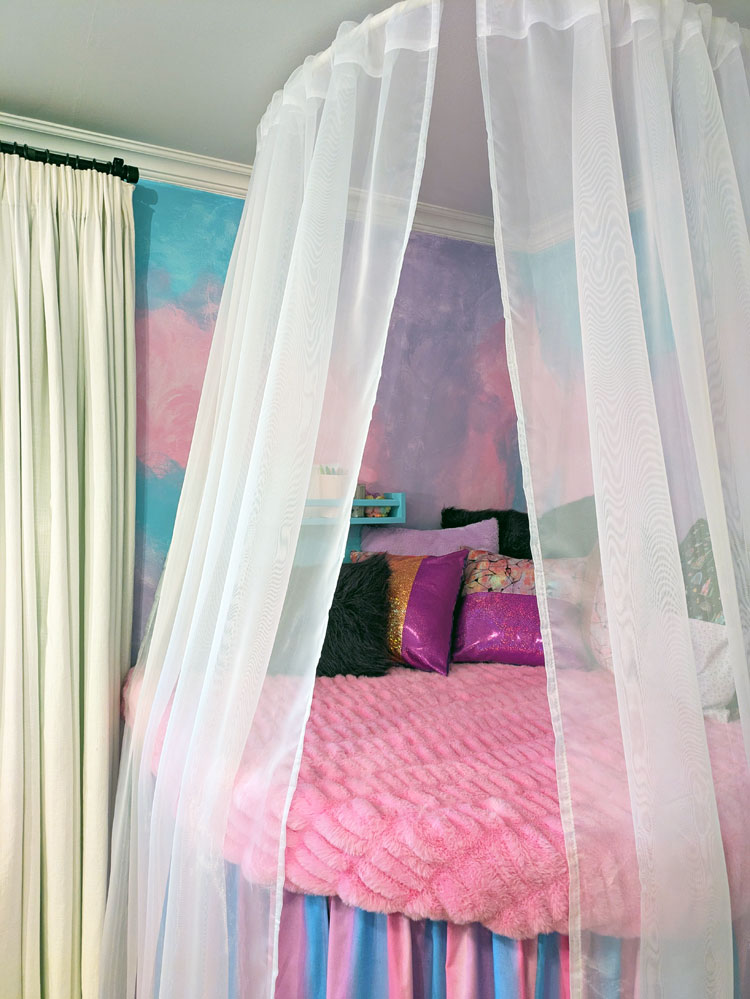
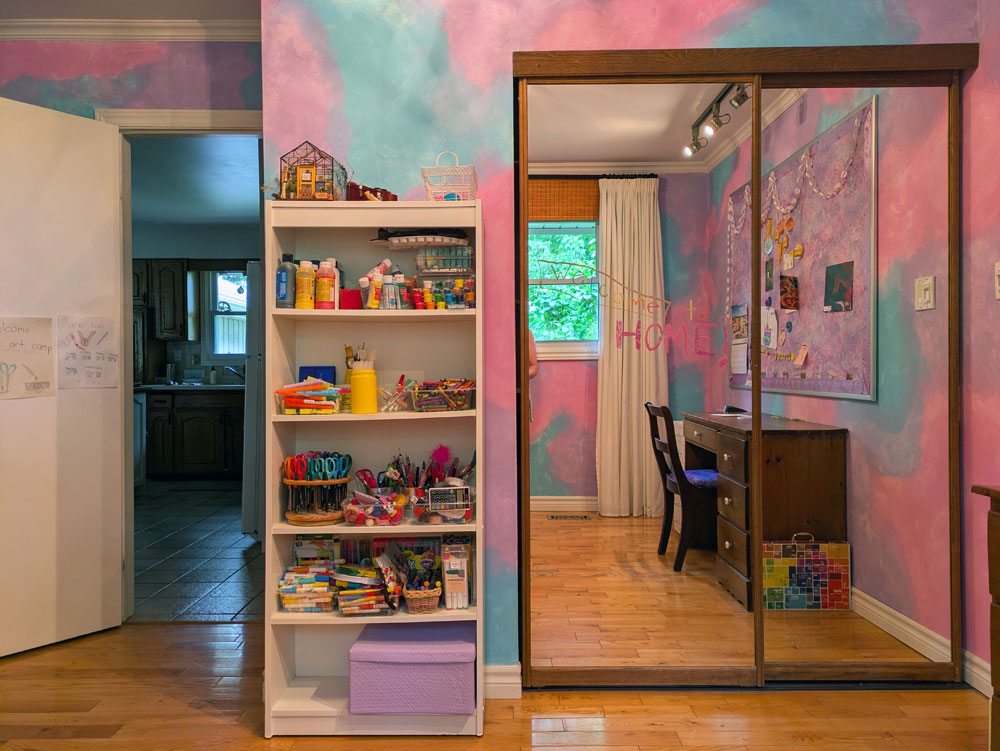
Ellie’s playroom
Ellie’s playroom was the first project of the year. And it’s done! There was a bit of construction and a lot of decoration and organization. This was a pretty fun project, and I’m so pleased with how it turned out. This room is the perfect representation of Ellie.
The vegetable garden has been my major focus this year. After years of neglect, it was very overgrown, and it’s taken a lot of work to get it to a useable, plantable state. I’ve successfully cleared–and planted–half the garden. Ellie and I have been diligent about visiting and weeding it pretty regularly, trying to give it the attention it needs.
We have tomatoes, spinach, lettuce, onions, carrots, zucchini, beets, watermelon, raspberries, grapes and lots of flowers growing. We’ve eaten asparagus, garlic scapes, lettuce and raspberries so far. I’m really proud of what we’ve accomplished and am optimistic we might be entering a new era for gardening at the farm.
I feel like I’m finally making progress on preparing for the worst, after having it on my to-do list for many years. I’ve updated my will and put all of my important documents together in a “death binder.” I have more to do, but I’m feeling much more comfortable with where I’m at.
I feel the same about my 2026 home goals list overall. Comfortable with where I’m at. With having a smaller number of goals, I’ve been able to be very focused and I’ve made good progress on all of my projects.
I’m feeling pretty proud of what I’ve accomplished and that gives me some excitement to see what else I can do with the remainder of the year.
How are you feeling about 2026? What’s your biggest accomplishment so far this year? What are you most proud of for the first half of 2026?
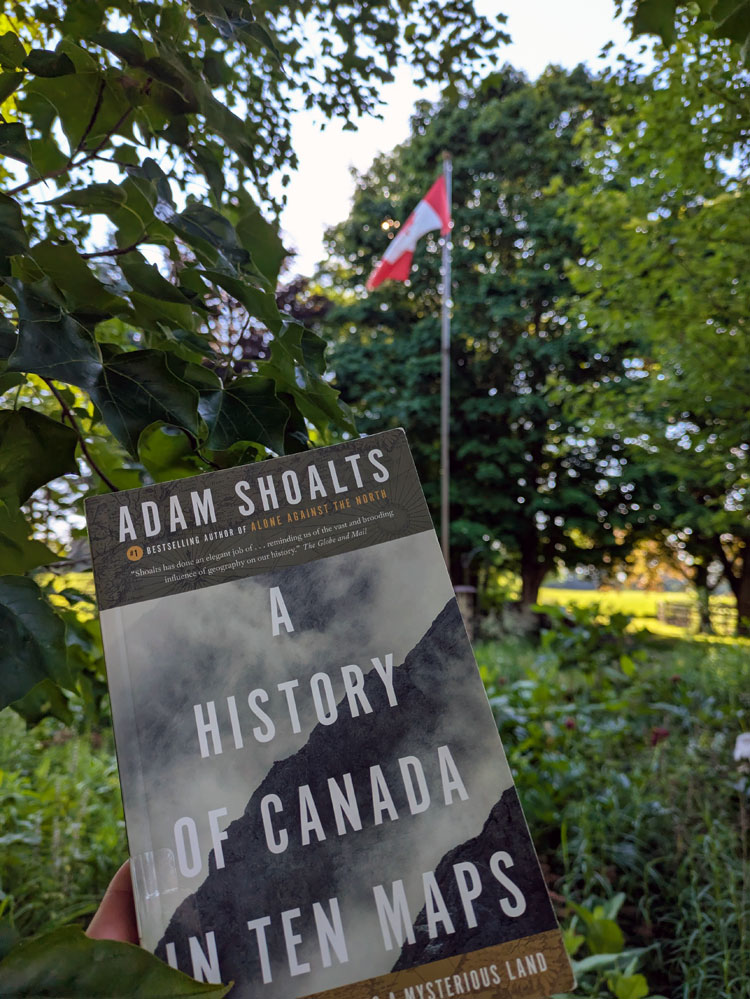
“From a historical point of view, “Canada” is a changing thing.”
A History of Canada In Ten Maps by Adam Shoalts
I recently read A History of Canada In Ten Maps by Adam Shoalts. It was one of the most engaging explanations of Canada’s history that I’ve experienced. The book reminded me that Canada–any country–is not fixed.
From the Indigenous nations to the Vikings to the French, English, Americans, fur companies, and explorers, territory was always shifting. Even in my life, borders were redrawn when Nunavut became a territory in 1999.
Beyond the physical environment and official boundaries, attitudes and opinions change.
Shoalts wrote, “If there’s been one constant throughout Canada’s history, it’s been our wilderness… Unspoiled wilderness… is the bedrock of our country–the harsh but beautiful reality that gives meaning to our national identity.”
While wilderness may be part of our national identity, I’m not sure many Canadians feel wilderness at the heart of their personal identities. Many exist so distant from nature, let alone wilderness.
While the farm is far from unspoiled wilderness, we live closer to nature here than most people do. We feel the rhythms of the seasons, pay closer attention to the changes in the weather, see what is happening in our environment more clearly. How low or high is the creek? How hard is the ground? How green are the fields? What colour are the trees?
With global warming, those observations are weighted with anxiety. But they are also lifted with possibility. This property has the potential to grow food, filter water, hold carbon, make oxygen, provide homes. I feel a responsibility to care for this small section of Canada. To do my best for the land and everything that lives here. To do my best for Ellie’s future.
Shoalts ends his book with a plea to preserve wilderness.
“The Haudenosaunee concept of “Turtle Island”–the idea that all North America is a fragile, interconnected ecosystem that humans share equally with plants and animals–offers one such possibility. Perhaps the revival of… Indigenous knowledge holds out the hope that we’ll recognize Canada’s remaining wild lands and wildlife for the irreplaceable gifts that they are.”
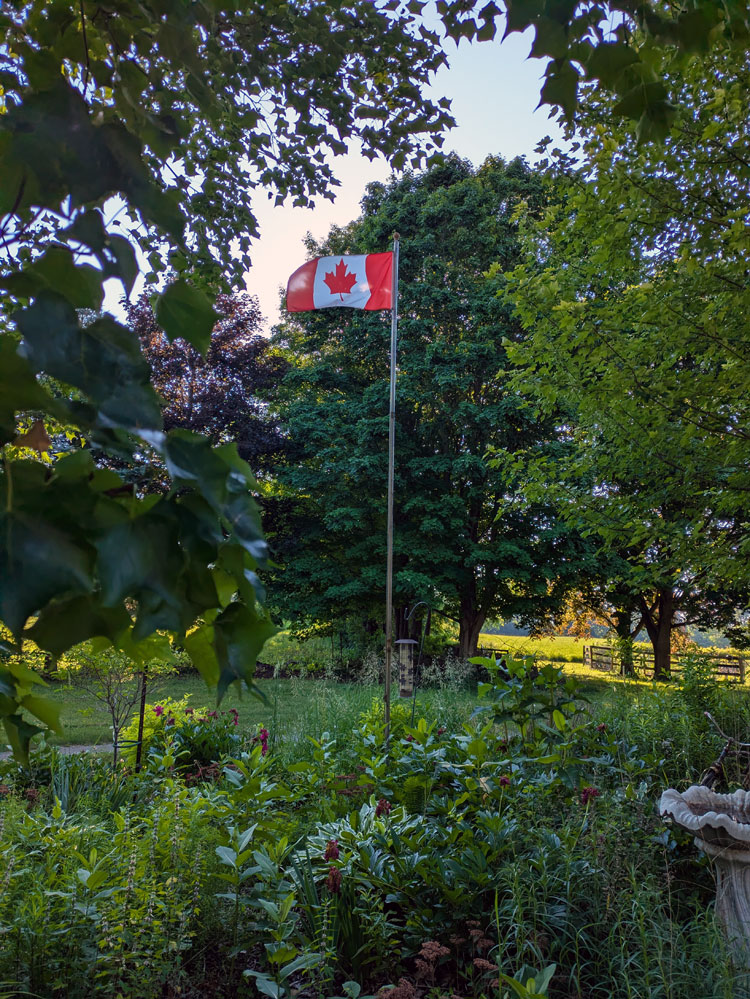
On Canada Day, this feels like a good wish for our country.
Summer holidays have officially begun for our family. I celebrated convocation with my students last week. Ellie finished school, and we headed north to Matt’s Aunt’s cottage. We made it back in time for the major summer festival in my hometown.
As always, our objective is to do summer. Fill it with as much fun, relaxing, play and memories as we can.
We’re already off to a good start.
Here are some of the things we’re looking forward to and some of the things I’ve enjoyed recently.
I live my day as if it was the last Live my day as if there was no past… Doin’ it all night, all summer Gonna spend it like no other
Sometimes my phone starts playing music. Rather than explaining it as just a technical glitch, I like to believe it’s Matt, my Dad or his Mom with a message for me. The other day the above song came on, and no matter what buttons I pushed it wouldn’t stop playing. I had never heard it before, but it felt like a good description of how I’m thinking about this summer.
Finding creative places to read this summer has been a fun exercise. (Ellie is taking “exercise” literally. See photo above.)
This scavenger hunt from our local conservation authority has good ideas no matter where you live.
The ducklings have moved to the coop. I’m looking for a bathtub to add to their run and a chest freezer (doesn’t have to work) to store food. If you hear of someone getting rid of one, please let me know.
Another Canada Day story, this year marks 35 years of the Heritage Minutes. “It’s amazing how a simple moment, a minute, can encourage you to learn more and to talk about more and to be involved with the discussion around our past, our present and our future.”
This quote has been on my mind since Father’s Day.
“We’re just here to be memories for our kids… Once you’re a parent, you’re the ghost of your children’s future.”
Matt and my Dad are now memories and ghosts for Ellie and me. Someday I’ll be the same for her. This summer will be part of how Ellie remembers me in her future.
Those memories don’t have to be big.
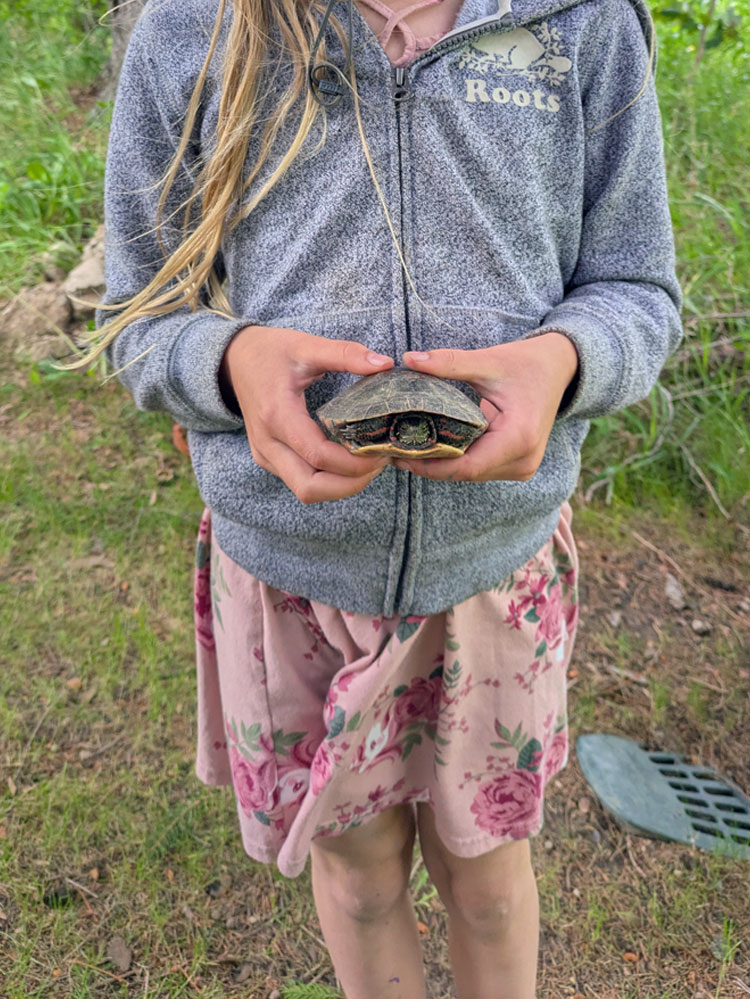
I hope they will be our tradition of camping out on the summer solstice, the day the turtle showed up in the chicken run, the playground I made her, hiking in the woods, and all the love and joy we share.
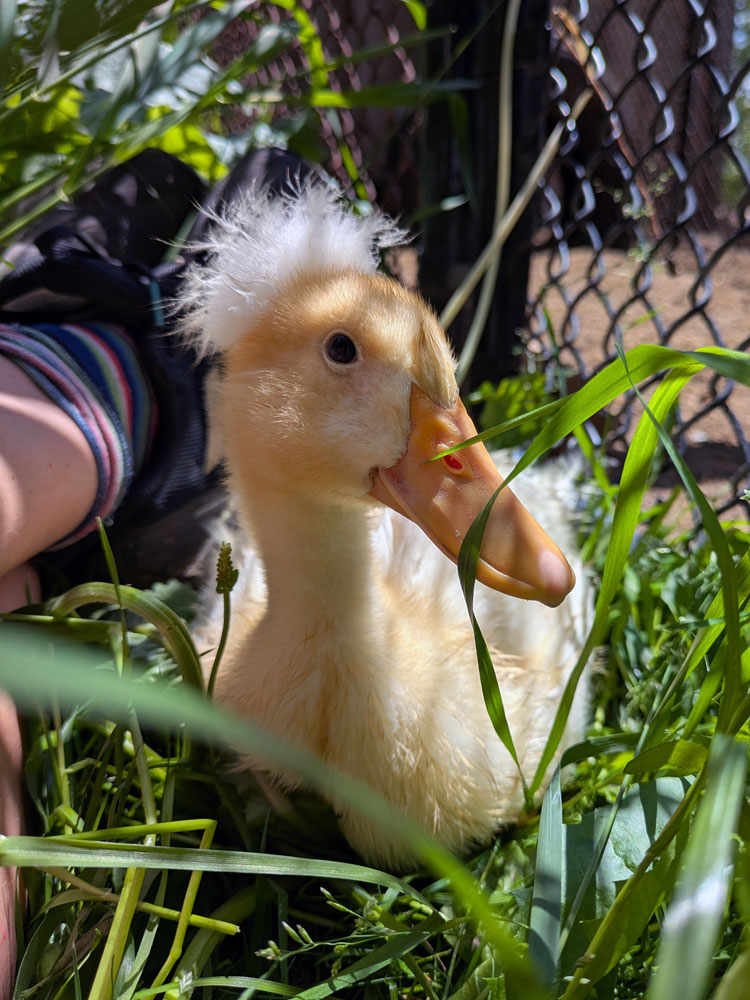
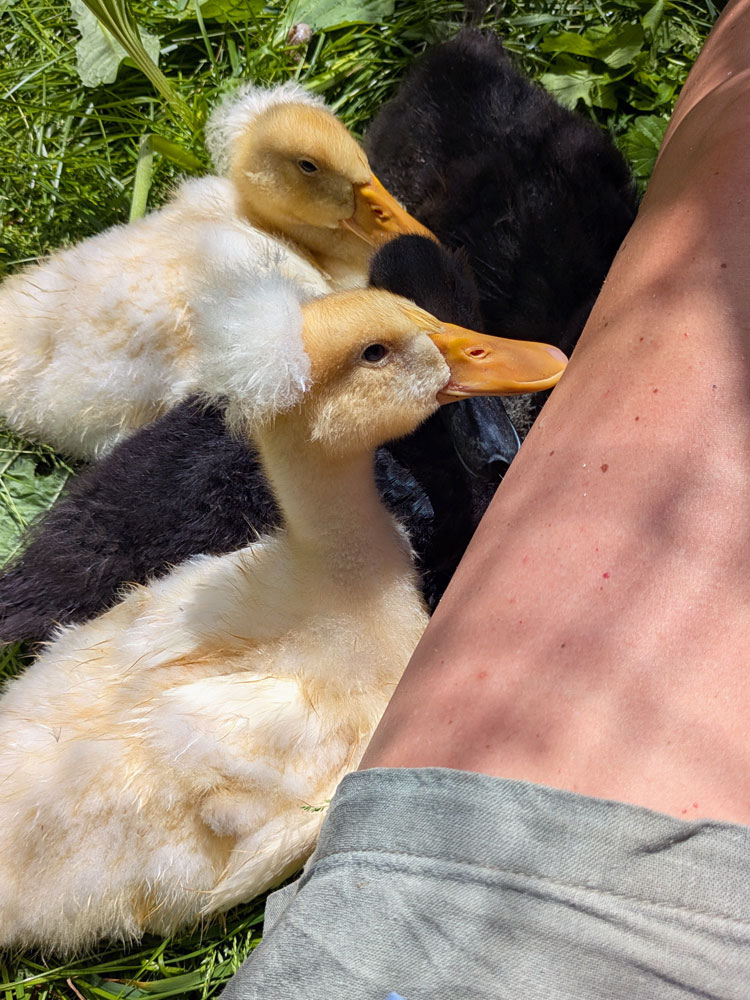
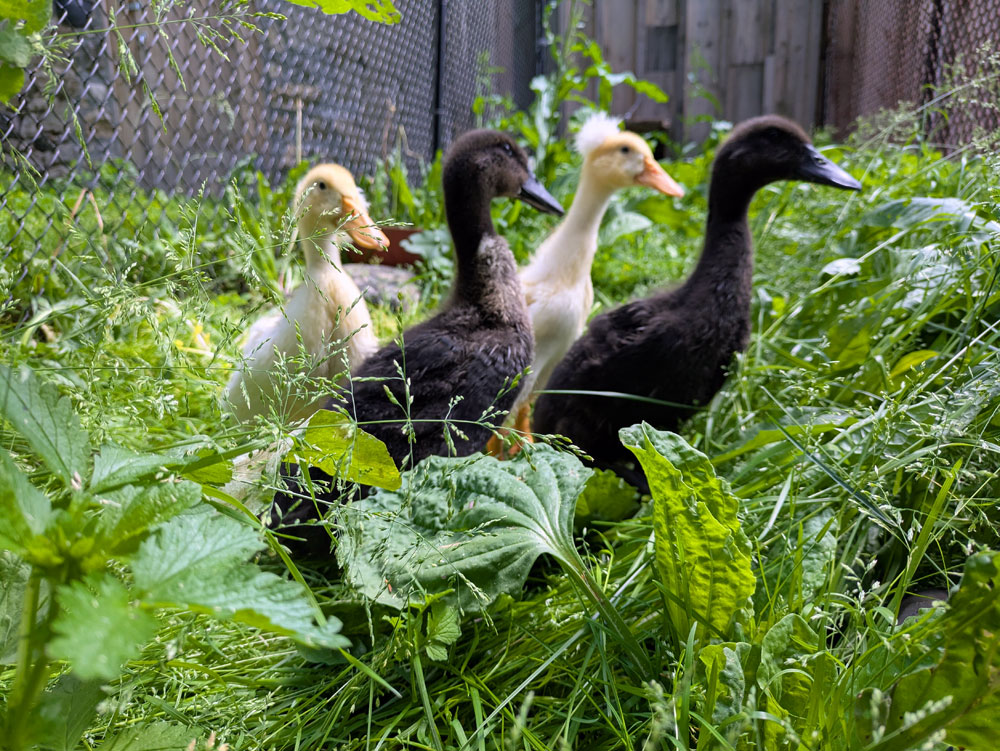
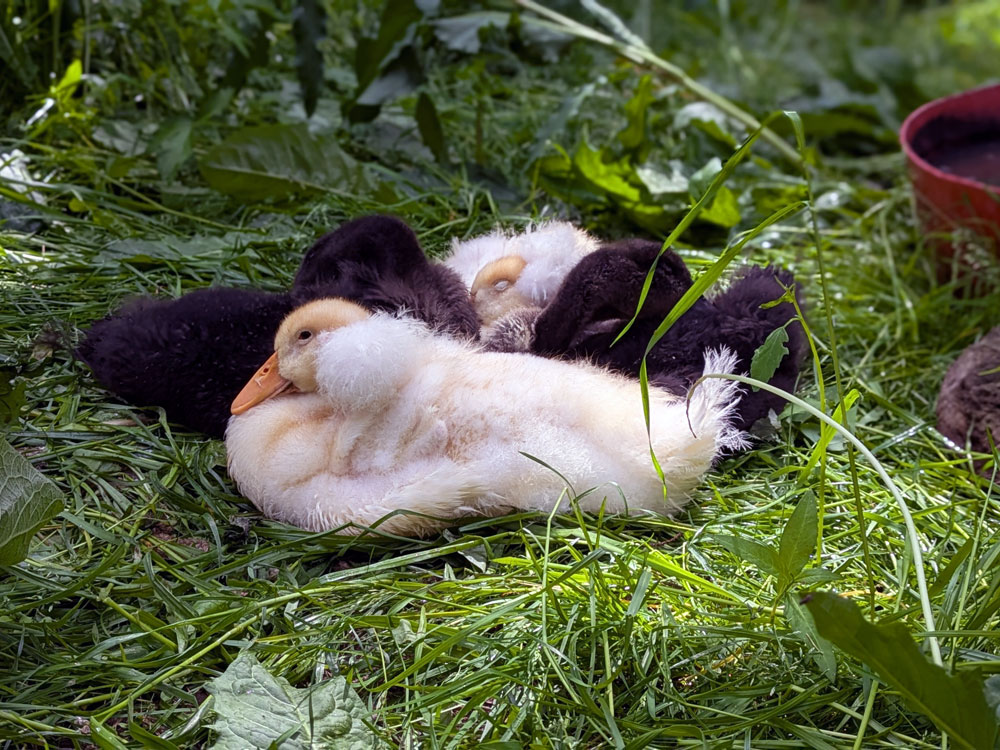
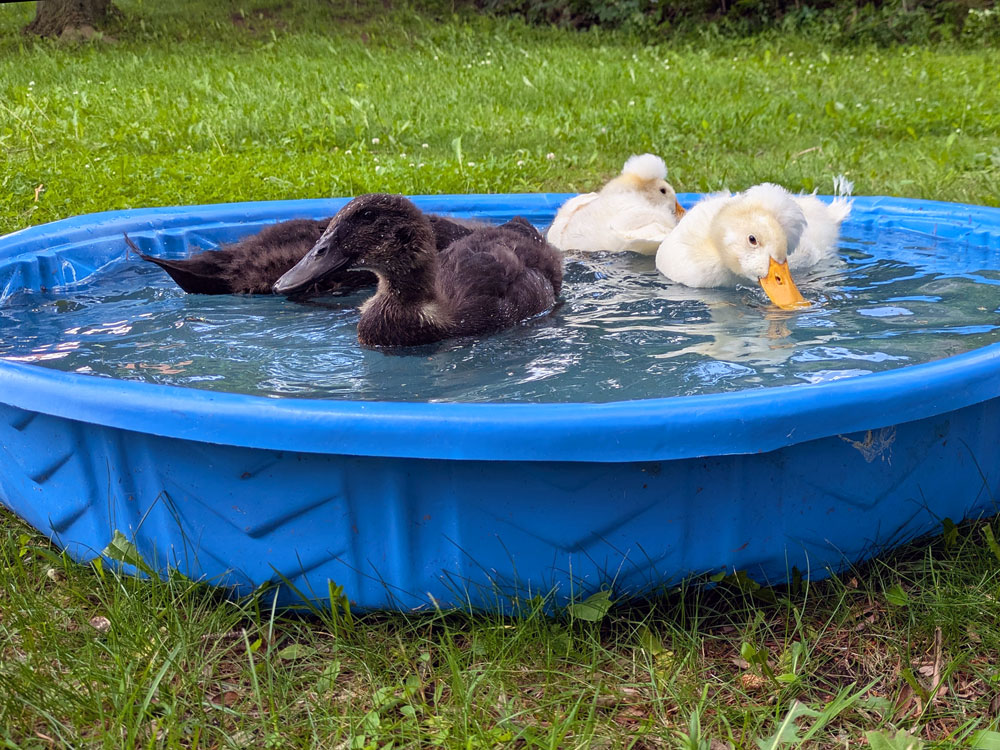
The ducklings have made the move to the coop. This week, they will turn 5 weeks old. They still don’t have their full feathers, but they have grown so much.
We brooded in the house for just over 3 weeks. The challenge with ducklings–which I knew–is water. Even the littlest ducklings want to be in water, need to be in water, love to be in water. I set things up as best as I could in the brooder to limit the splashing, but everything was still very wet.
When I felt like the temperatures were warm enough and the birds were big enough, they moved out.
The ducklings have their own section of the coop separate from the chickens. They have an indoor pen with an attached outdoor run.
When I first put them in the run, they were pretty unsure. I sat with them, and they stayed close. Very close.
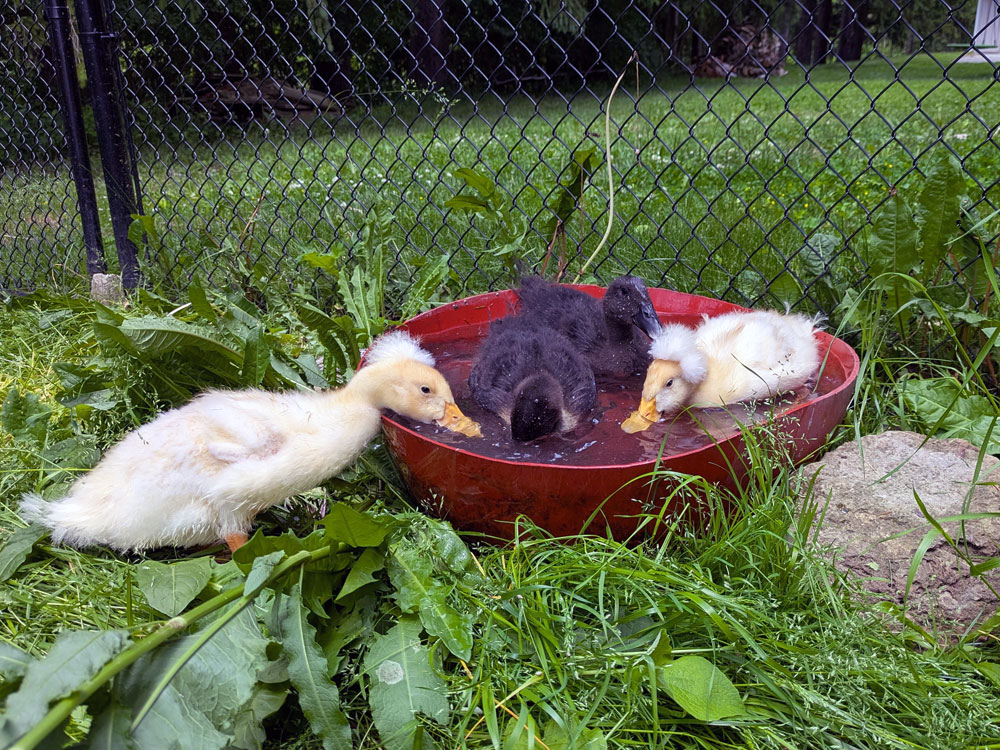
Ellie and I had found a section of an old plastic barrel, so we put that in the run so that they had a small tub for swimming. They quickly discovered the tub and happily hopped in, so that made them more comfortable. They loved nibbling on all the weeds and grasses in the run, so that helped too.
The drama came at night when it was time to go in the coop. They had no idea what to do. I lifted them one by one and passed them through the small door to Ellie who was inside. Then I locked them in. When I came out in the morning and opened the door, I was able to talk them into coming out on their own, though they had no idea how navigate the ramp and tumbled off the side (it’s a very short fall, and ducklings bounce pretty well).
The second day, we repeated the ritual. The third evening they were able to walk up the ramp into the coop by themselves with us herding them from behind, and they were confident enough to come out by themselves in the morning. They have now figured out that the coop is a good place and they go in and out on their own. I still lock them in at night, though the run is very secure and I don’t really think they’re at risk.
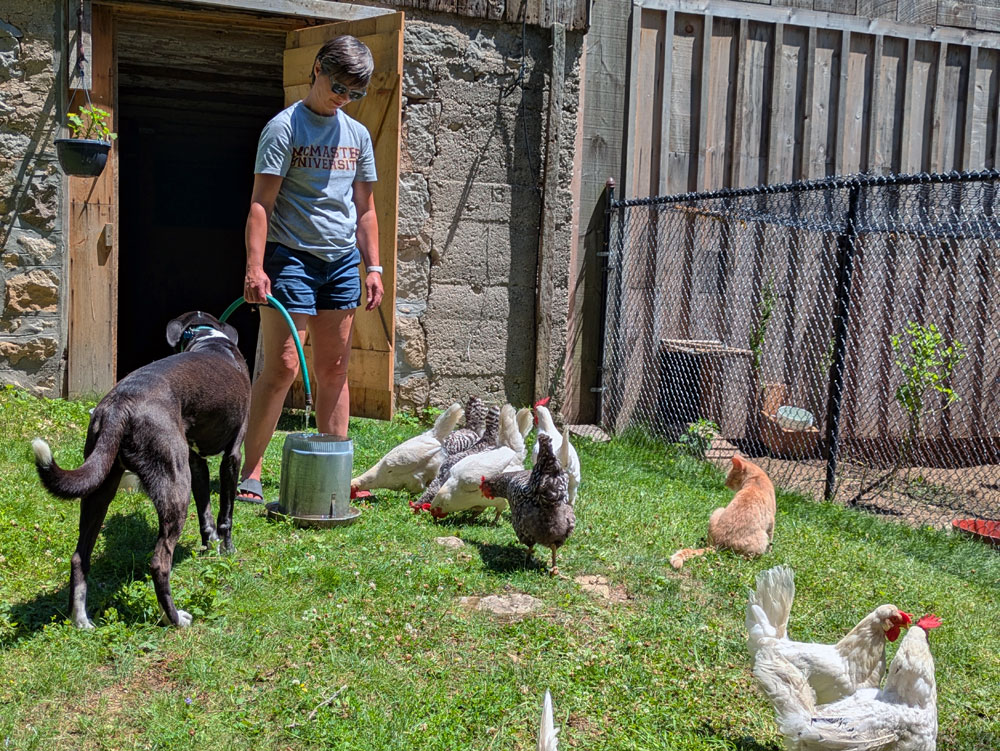
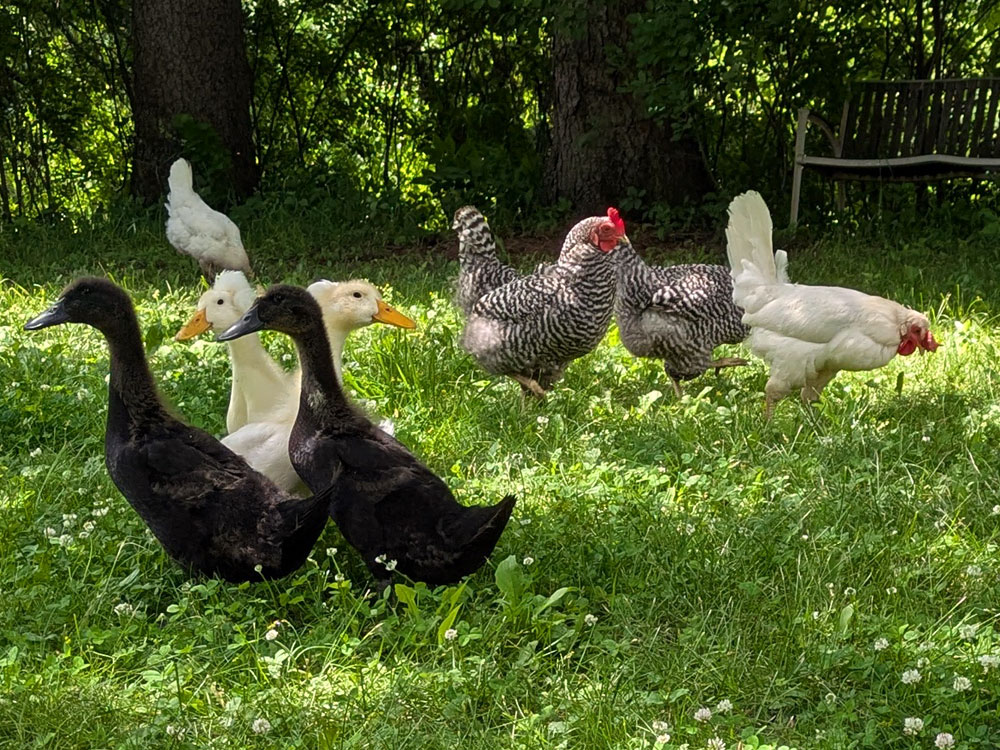
We’ve also started letting them free range a bit during the day. If we’re outside, we tend to let the chickens out. So we’ve included the ducklings. Again, it took them awhile to build their confidence. Walking through the gate was hard. But they feel safest with us, so they will come to where we are (usually at top speed). They also know their baby pool is across the yard, so that’s additional motivation.
The other day the chickens were between the ducks and us, and the ducklings blasted right through the flock. They did not care that anyone was in their path. Our big barred rock, Boss-Boss, didn’t know what to do when all four ducklings were coming straight at her.
And that’s why I got ducklings. They are hilarious and fun and we love having them.
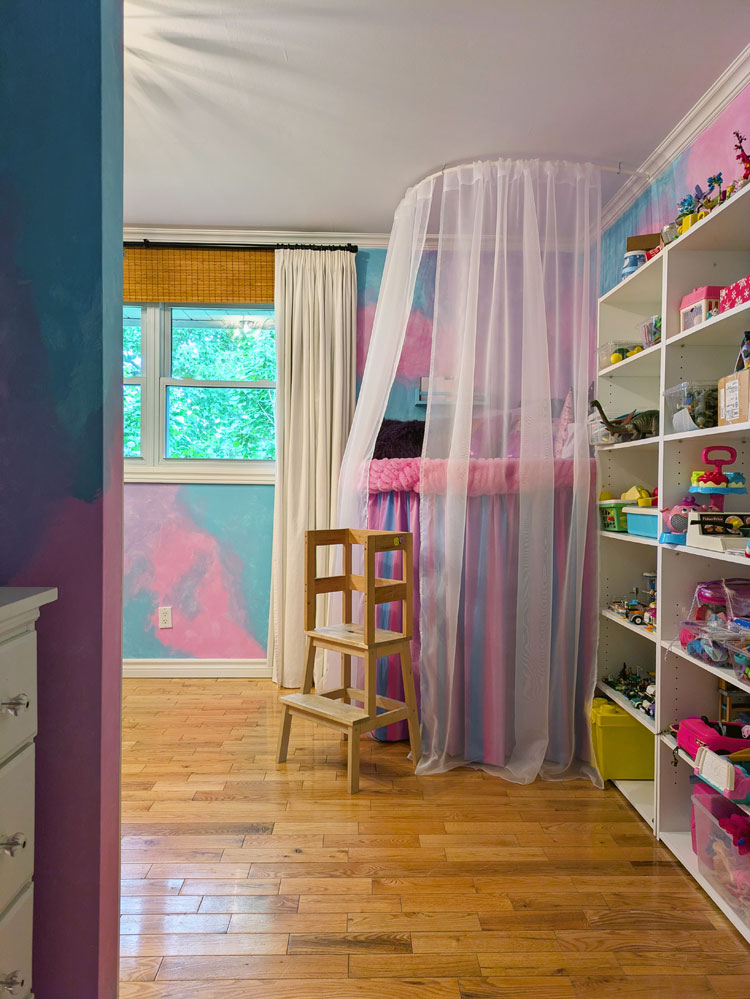
In my Home Goals post at the start of this year, I wrote, “Our girl is so creative and I really want to give her a special space for whatever she wants to do.” This room is exactly that.
It started with removing the pocket door that led into my bedroom and closing up the opening. There was demolition, framing, electrical, drywall. It took a while. Then we painted the walls pink, purple and blue tie dye. I questioned the paint a bit. It felt like a lot. But as I added furniture and accessories, it became much more livable. And it definitely fits with Ellie.
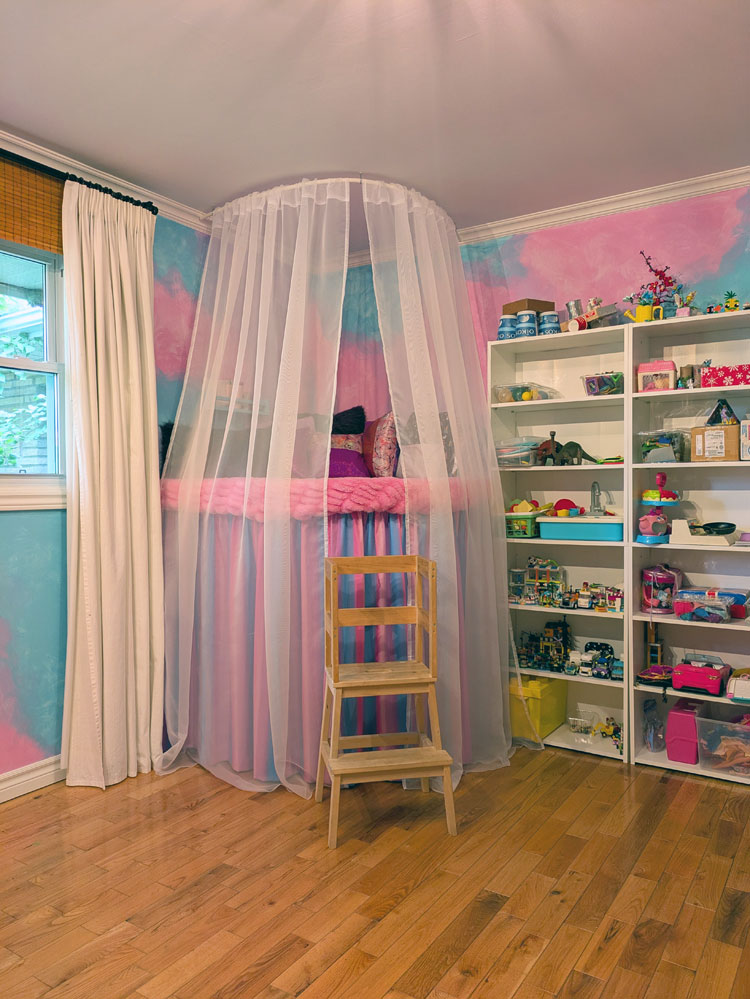
Next up was the cozy corner, her elevated loft reading nook. Curtains provide privacy. Cushions, pillows and blankets provide coziness. I often find Ellie here, either above or below.
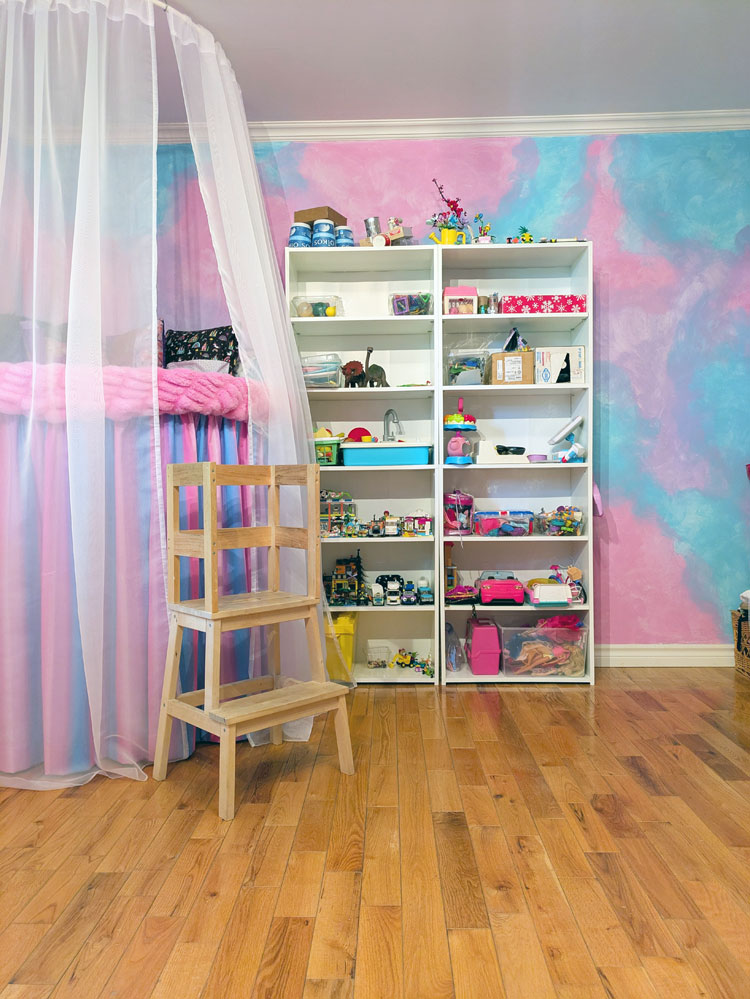
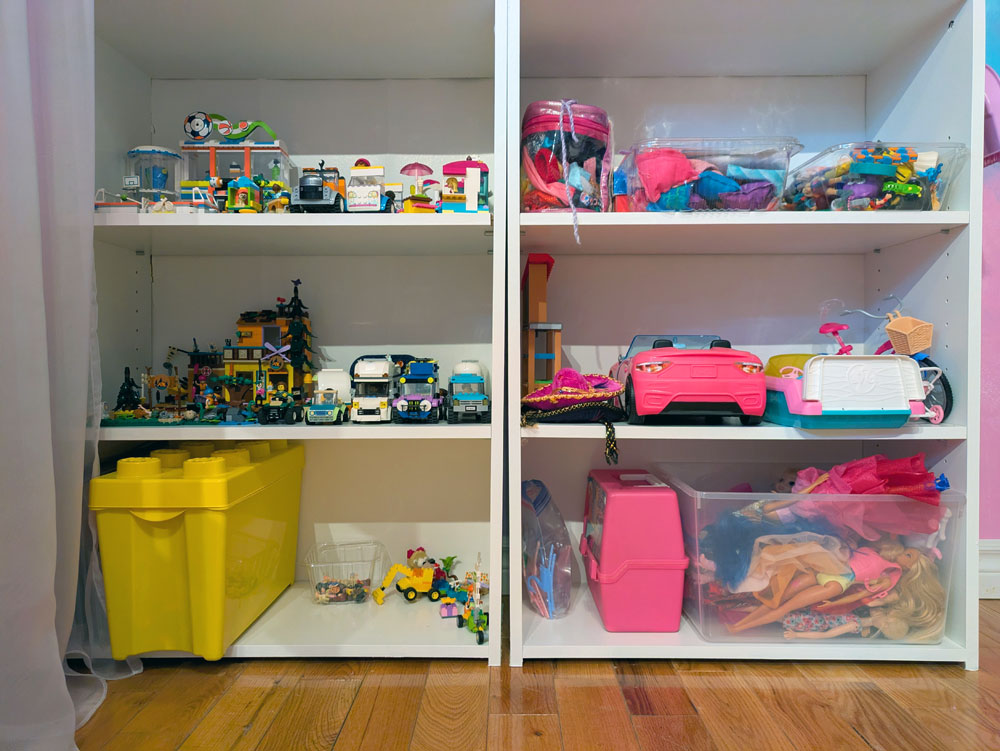
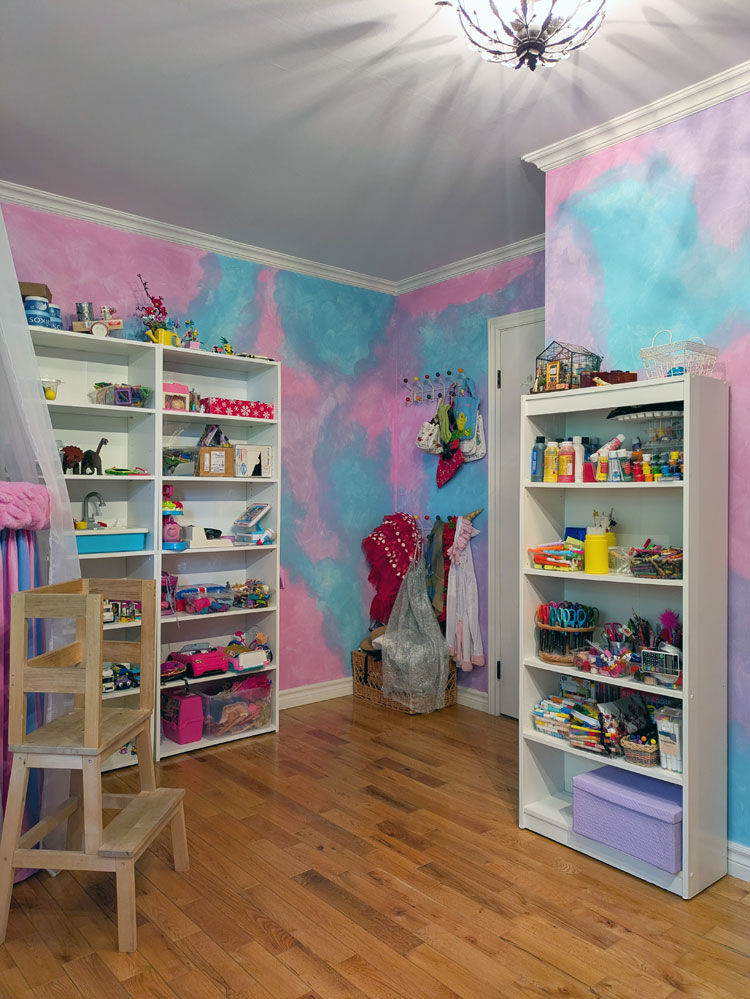
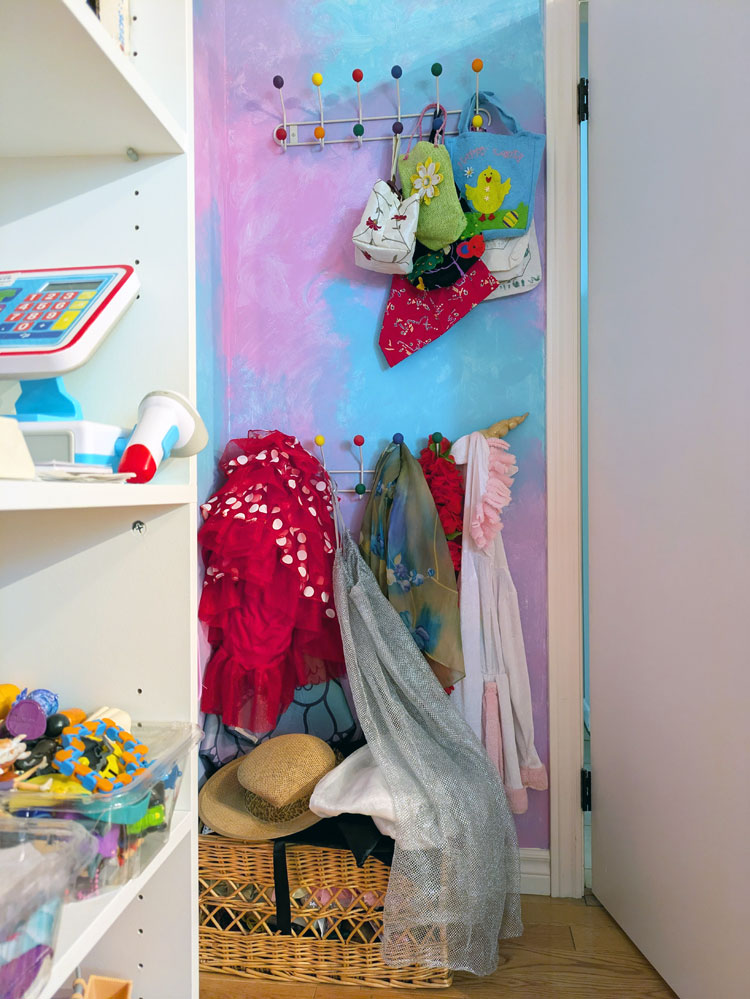
I brought in shelves to store craft supplies, toys and even display some of her creations. Open storage is important for our girl, who needs to see her things to use them. More shelves and bins are in the closet for lesser used items, like craft kits, additional supplies and her dolls.
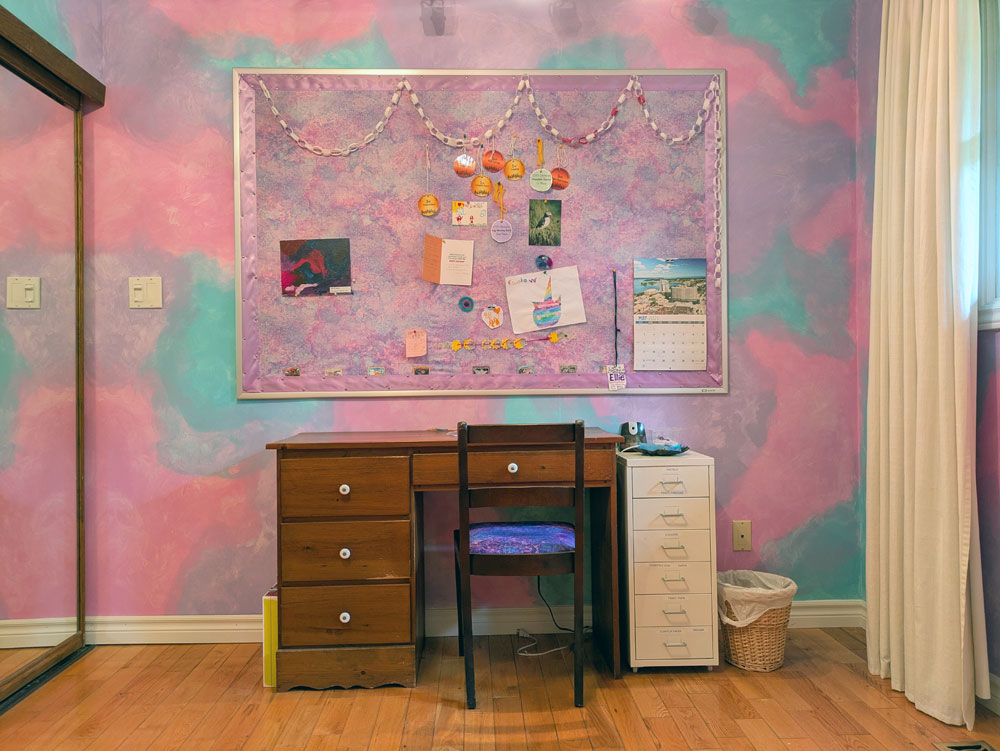
Matt’s desk sits against the wall. Ellie has always chosen to work on the floor, but she’s now using the desk. I like that this desk–and the whole space–will grow with her as her interests and needs change. The chair came with the farm and I keep recovering the cushion. This time Ellie and I did it together in a dark purple fabric. A lighter version of the same fabric covers the large bulletin board that hangs above her desk.
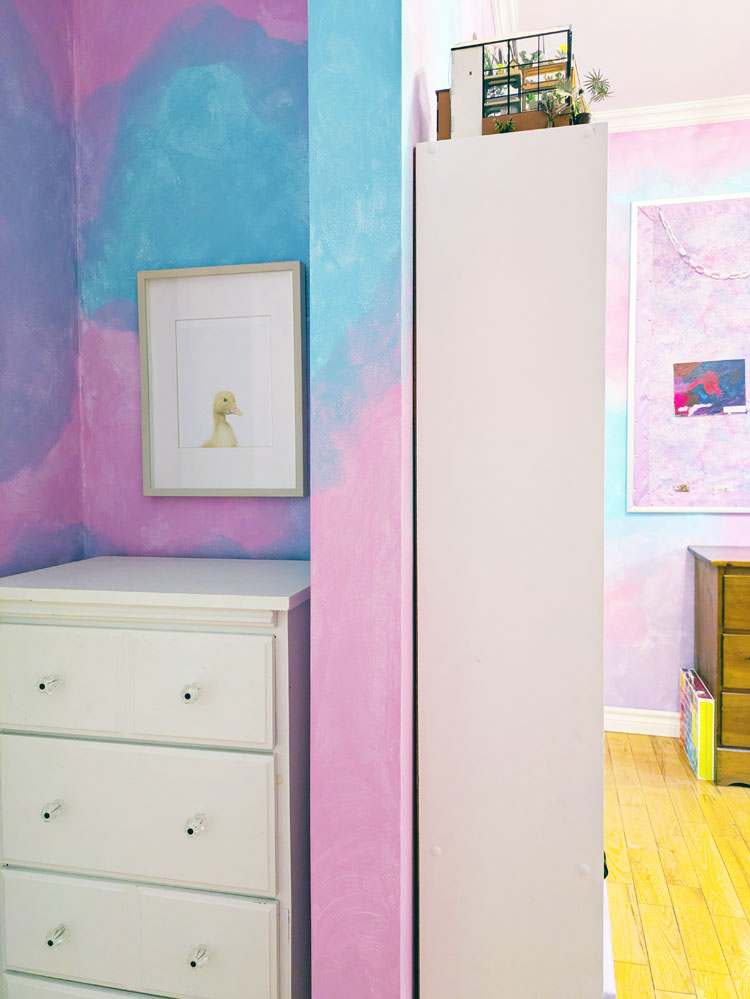
Tucked behind the door is a dress-up zone with the Eames hang-it-all hooks I made for her nursery. The small narrow dresser I made for the little nook on the other side of the door holds play-do. Above the dresser, we hung the duckling picture from her nursery. Ellie really wanted to keep this picture, and it fits perfectly here.
This room is completely Ellie. It holds all of the things she likes and gives her space to do the things she likes. It was an interesting process to design the space with her. Her nursery and bedroom were really designed by me, using my perspective of who she is, what she likes and what would look nice. The playroom is her, and it was really fun to think about who she is, what she wanted and how to put it all together.
Now, she is using the room all the time. Whether she’s making year-end cards for her teachers, sculpting with her 3-D pen, reading in the cozy corner, braiding yarn, playing restaurant, dressing up in a fancy outfit, or any of the many other things she likes to do, she can do it all here.
I’m really grateful I am able to give her this space.
Did you have a playroom growing up? What’s your favourite memory of your play space? Do you have a grown-up playroom now? What’s your favourite part of the playroom? What would your ideal playroom have?
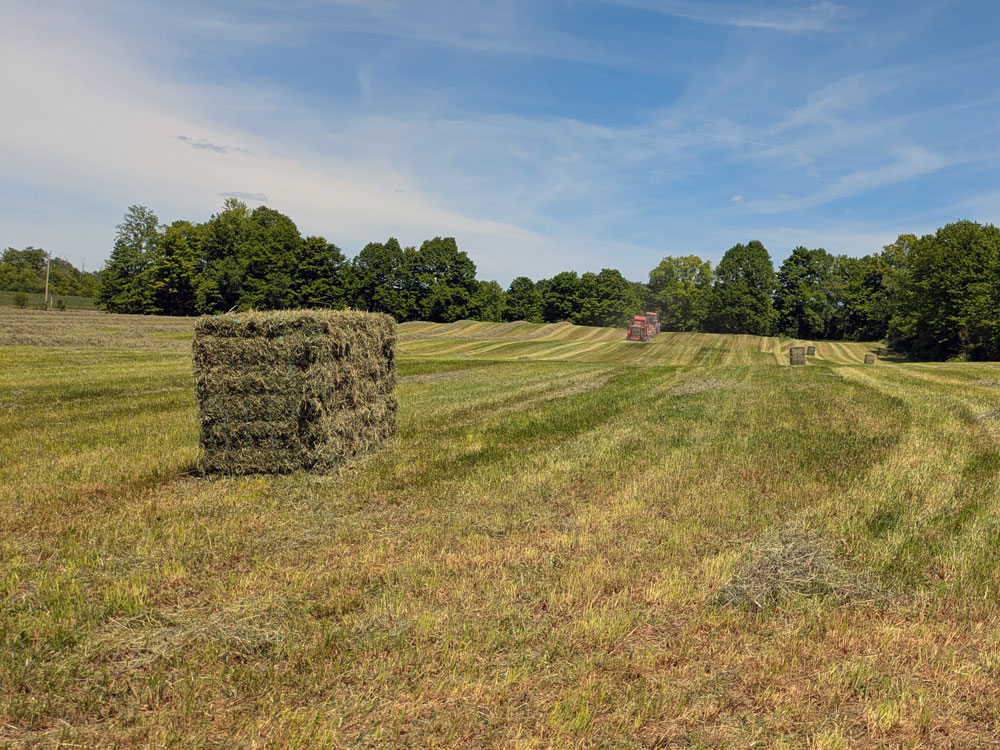
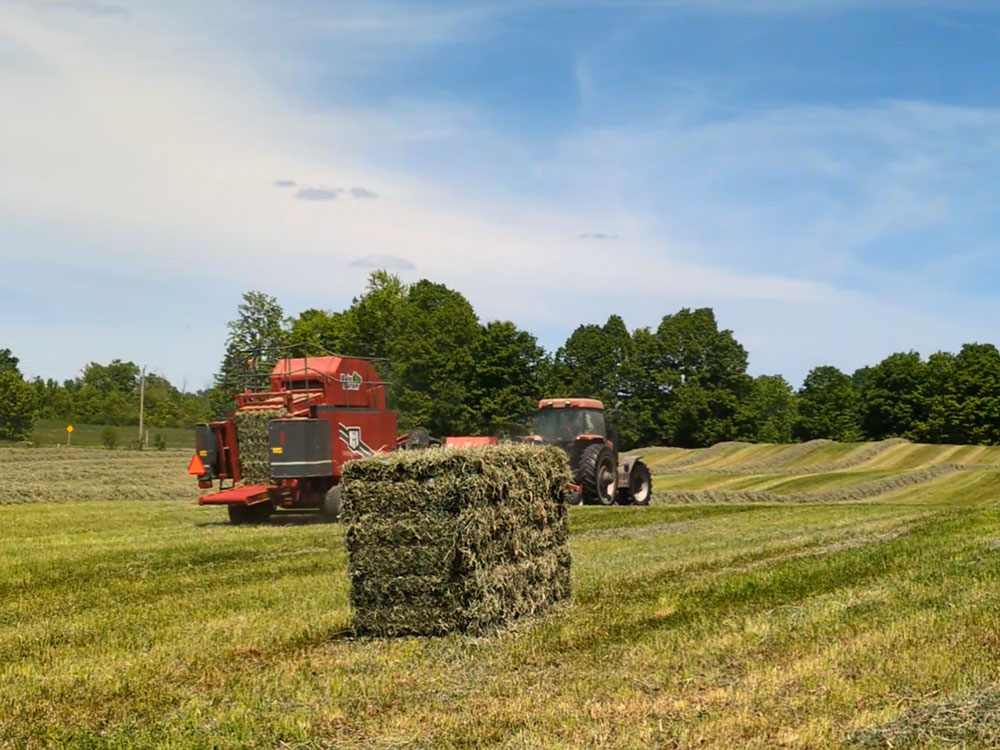
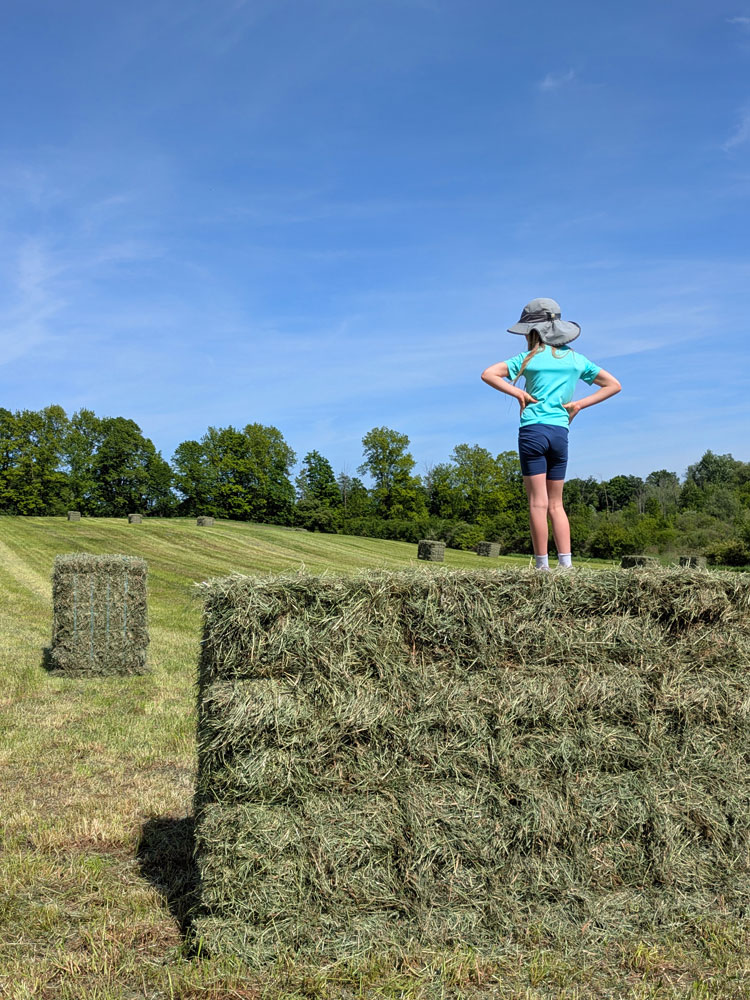
We had our first hay harvest of the year last week. I think it was our fastest ever. The weather was hot, sunny and dry, and our farmers did all six fields in just a few days.
After so many years living at the farm, seeing the giant machines rolling into the fields is still a special moment. Even more special is Ellie’s enthusiasm to climb up on the bales every single time.
The day after they finished, the rain came to start growing the next cut.
Are you seeing any harvests around you? What summer traditions never get old for you?
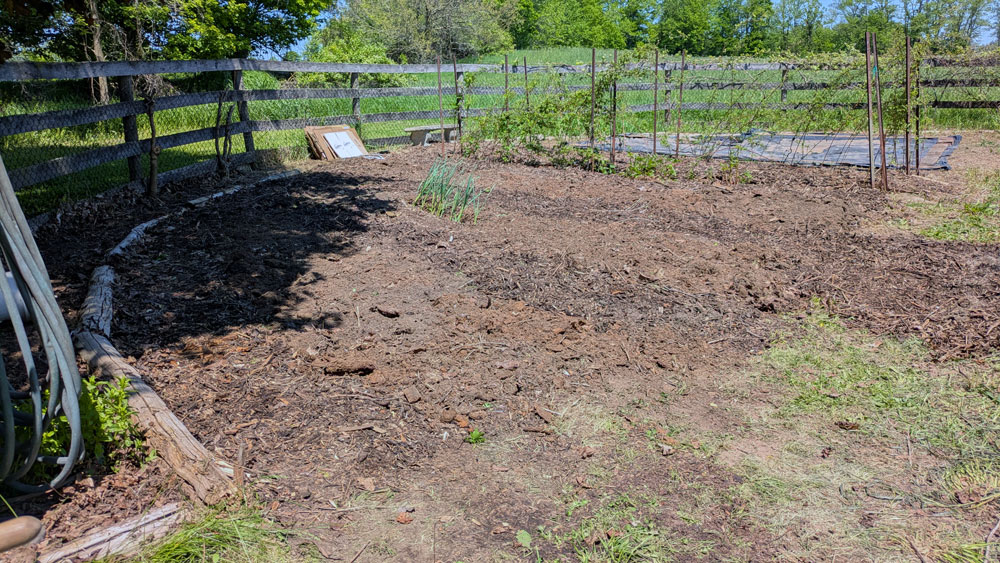
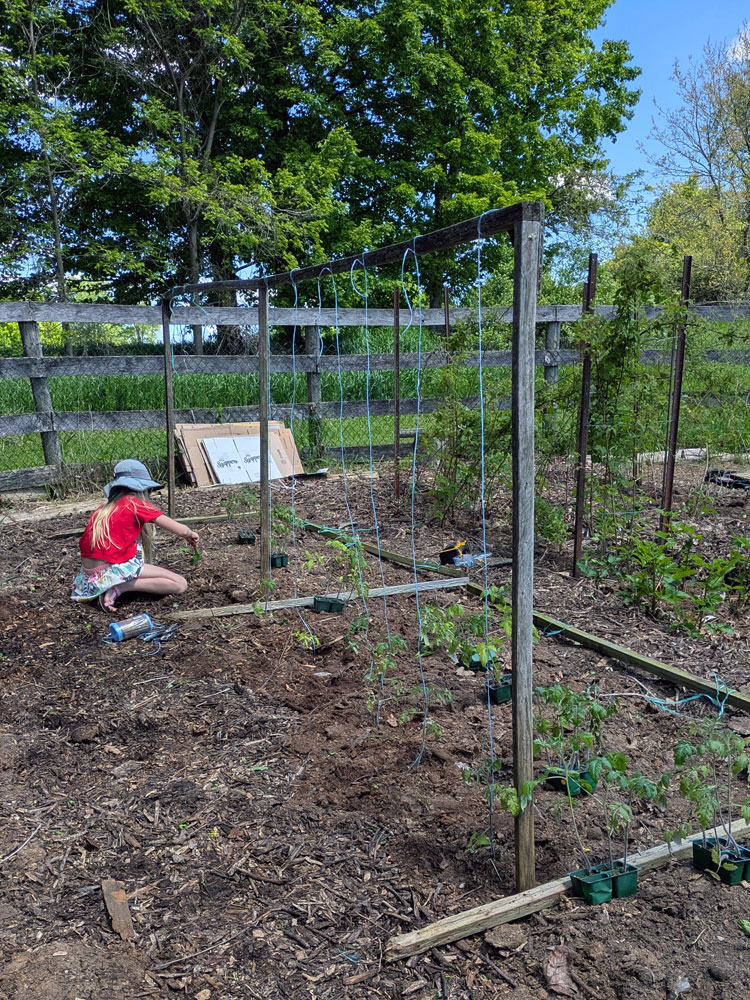
This past weekend was garden weekend. The date Ellie and I had decided to plant the vegetable garden. And we did. After a month of work, one quarter of the vegetable garden was ready for planting.
We have 25 tomato plants in the ground. There are 12 more that we have to find spots for. Ellie had great success with her seeds and plans to make lots of tomato soup this fall. We put in two rows of onions, which will also come in handy for the soup.
We have many more seeds to go and much more of the garden to clear, but major progress has been made.
At the start of May, I shared my to-do list for getting the garden back to a manageable state. Here’s how I did.
Edge the garden – I made it all the way around the outside, raking leaves, cutting back grass, weeds and trees. I have been carefully mowing around the edge to try and keep it clear. I would like to break out my weedeater to clean up even more.
Remove trees – I cut an embarrassing number of trees over the last month. Embarrassing because it shows just how much I have neglected the garden. Some were very tangled in the fence. Some had firewood size trunks. Some roots were particularly stubborn. The trees will come back to the garden as woodchips. My brush pile has grown a lot over the last month and has farther to go. Half of the garden is completely untouched, and there are more trees to tackle.
Prune raspberries – All of the old canes are gone. The live canes are tucked into the wires. The rows are weeded. The path between them is mulched. Everything is much cleaner.
Prune grapes (?) – I did not end up pruning the grapes. For now, I decided to just wrangle them. This meant gathering all of the wild vines that were growing in all directions and wiring them to the fence. The vines stretch almost halfway around the ring. One vine was dead, but the other seven are alive and seem to be doing well. We have so, so, so many bunches of baby grapes. We also have quite a few grape flea beetles, which I’ve been picking off and squishing. If the grapes grow and ripen, we will have quite a crop this year. Cleaning up the grapes has also made it much easier to mow around the outside of the garden.
Repair trellises – I added some wires to the berry trellises. I could definitely tighten the original wires but am hoping I might not have to. I pulled out the tomato trellises on the weekend when Ellie was planting her seedlings. They are in really rough shape and are currently held together with hope and as many screws as I could drill into the old brittle wood. They will definitely need some reinforcement to make it through the season and then a complete rebuild. The squash A-frame still needs some repairs, but it’s in the untouched half of the garden, so a lot of things need to happen before the trellis makes it to the top of the list.
Establish planting beds and pathways – Very little trace of the beds and paths I’ve built in past years remained. I’m trying a no dig approach, so to start over I mowed the weeds extremely short and then laid down cardboard to suppress them from growing back. Over top of the cardboard I layered woodchips (if it’s a path) or compost (if it’s a planting area). I made three very wide beds, and that is where Ellie and I started planting.
The year of the garden will be continuing. Now I have to maintain what I’ve established. I also want to work my way around the rest of the garden and clear more sections. Here’s what’s next on my list.
Keep planting – We have quite a few seeds still to go.
Make space for watermelons – Ellie’s seedlings include some watermelons, so we want to get them in the ground as soon as possible to maximize the growing season. Our seed provider recommends using landscape fabric to help warm up the soil. It would also help manage weeds, so I think we’re going to try that.
The squash A-frame – The squash trellis is adjacent to the future watermelon plot, so clearing space for the watermelons leads very easily into this section. I need to clear the space under the trellis, screw the trellis back together and then finally we can plant. I’d like to try using one side of the trellis for peas and cucumbers, so there’s more motivation to make this structure useable again.
I am very proud of where the garden is at now. We’ve even had a harvest with our asparagus. Picking asparagus and immediately cooking it for dinner is a special way to enjoy our food and it motivates me to keep working on the garden.
I hope I can keep the momentum and motivation going as the year of the garden continues.
Are you gardening this year? What’s the biggest success you’ve had so far? What’s the biggest challenge you’re facing?