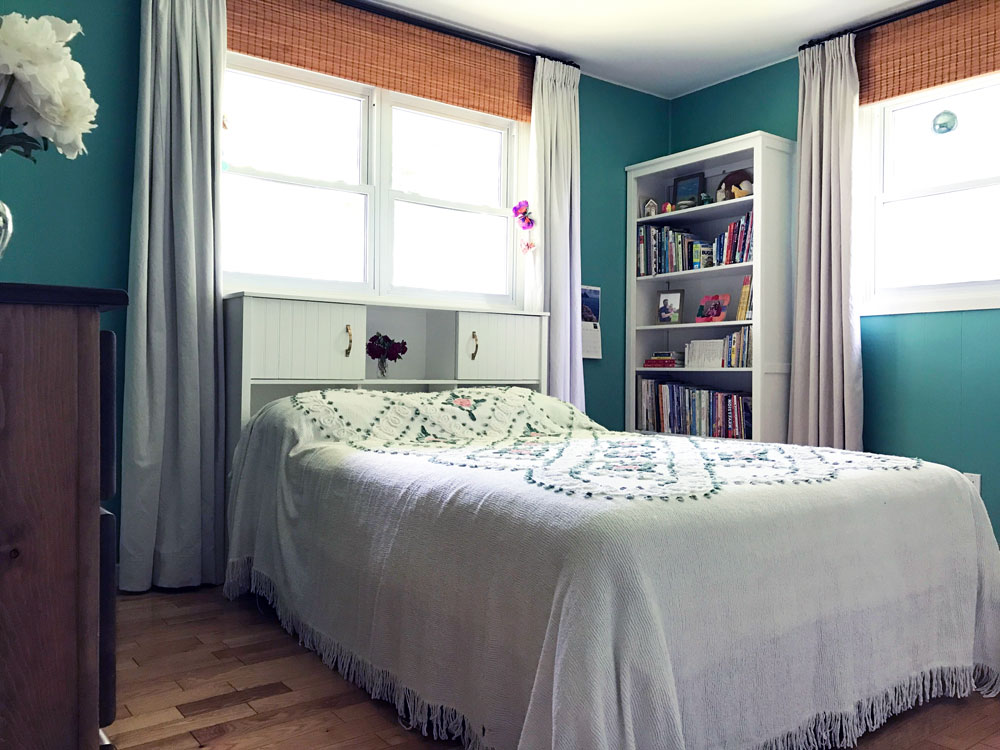
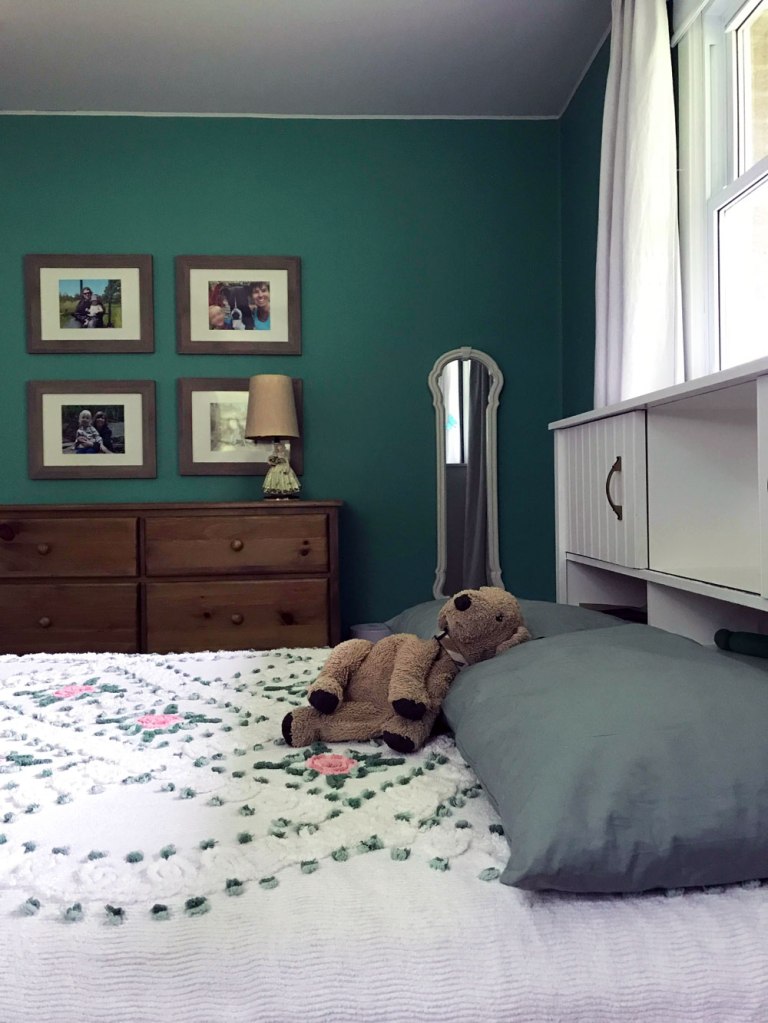
Ellie’s new room is officially done. It’s green, floral, fresh, vintage, thrifty, personal and her.
When I first came up with the plan to have Ellie move rooms, she was not enthused. But as we started planning her new room, she became more and more excited. Finally she was so excited she gave me a deadline. She wanted to sleep in her new room by Tuesday night (this was about a week earlier than I had planned). So I finished off most of the final touches and our girl moved in.
This was over a year ago.
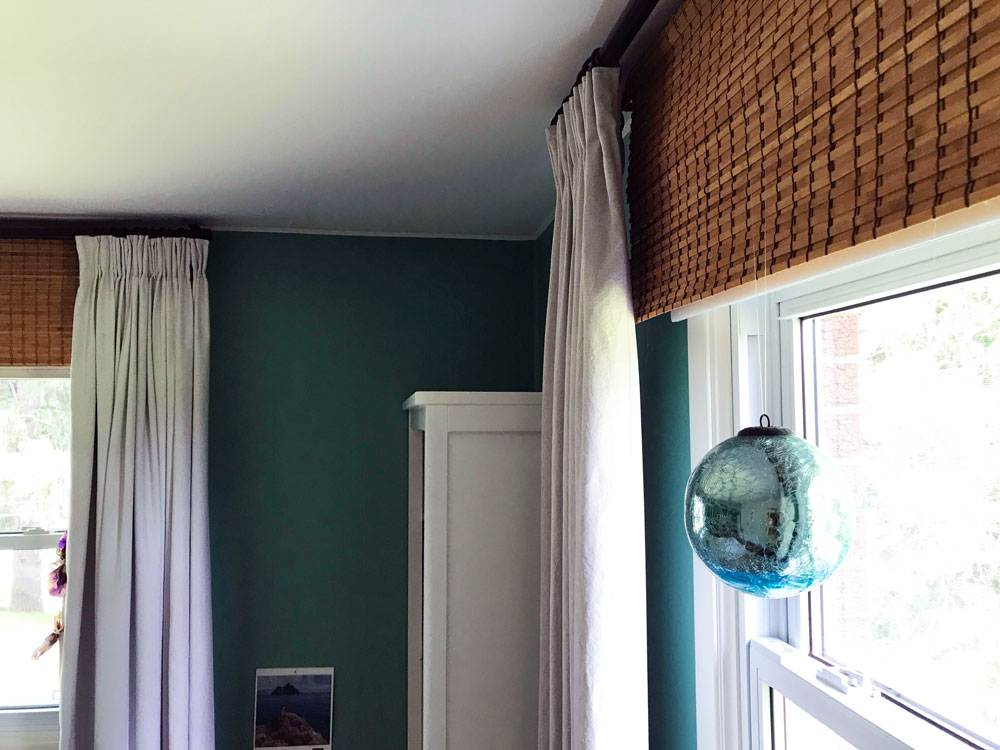
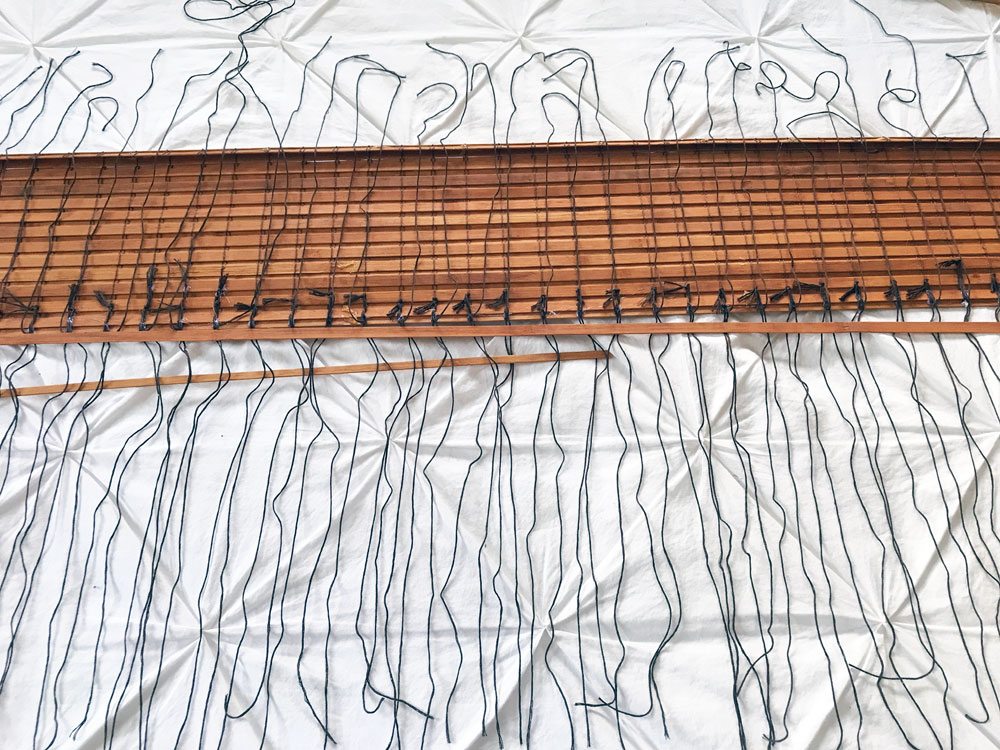
The final, final touch was some bamboo valances to cover the blackout roller blinds. I finally installed these at the end of June, and her room is officially done.
I actually like that the reveal is a year after she moved in, because she’s added some of her own details to the space now–as she should. (And she’s added even more since these photos were taken, as over the weekend we hung a little cuckoo clock Matt’s Dad brought her from Switzerland.)
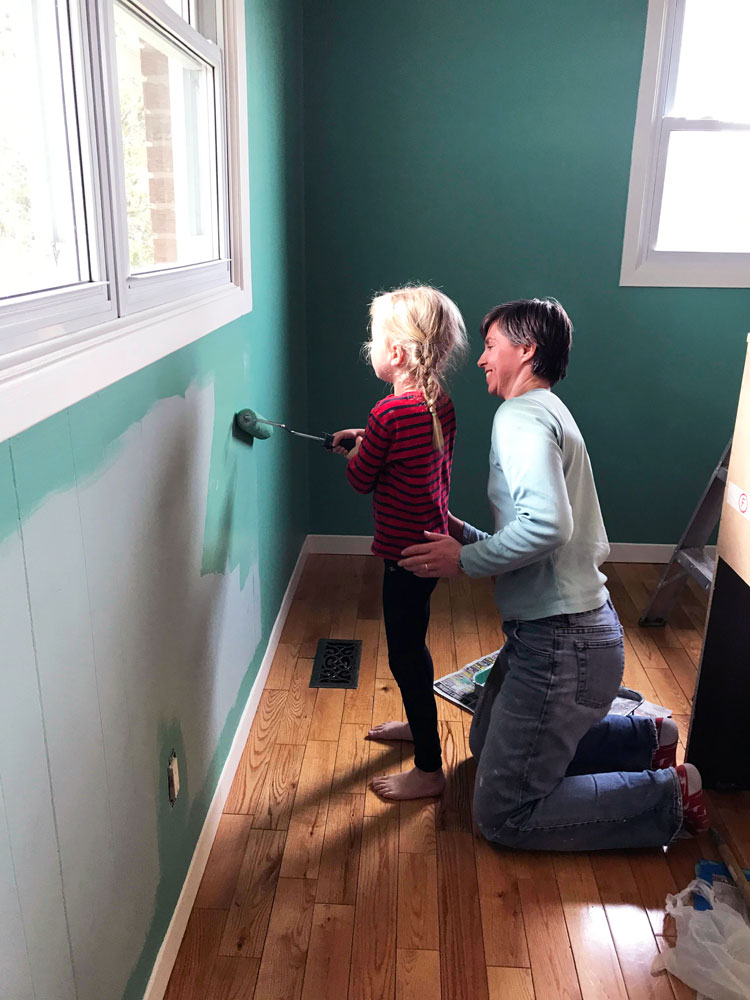
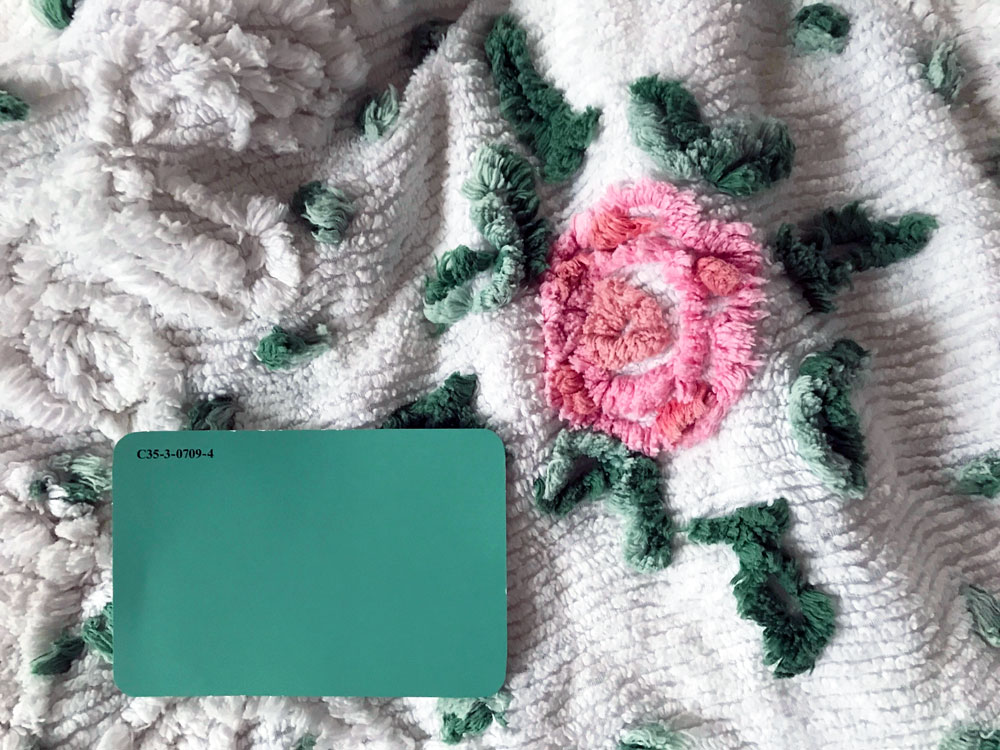
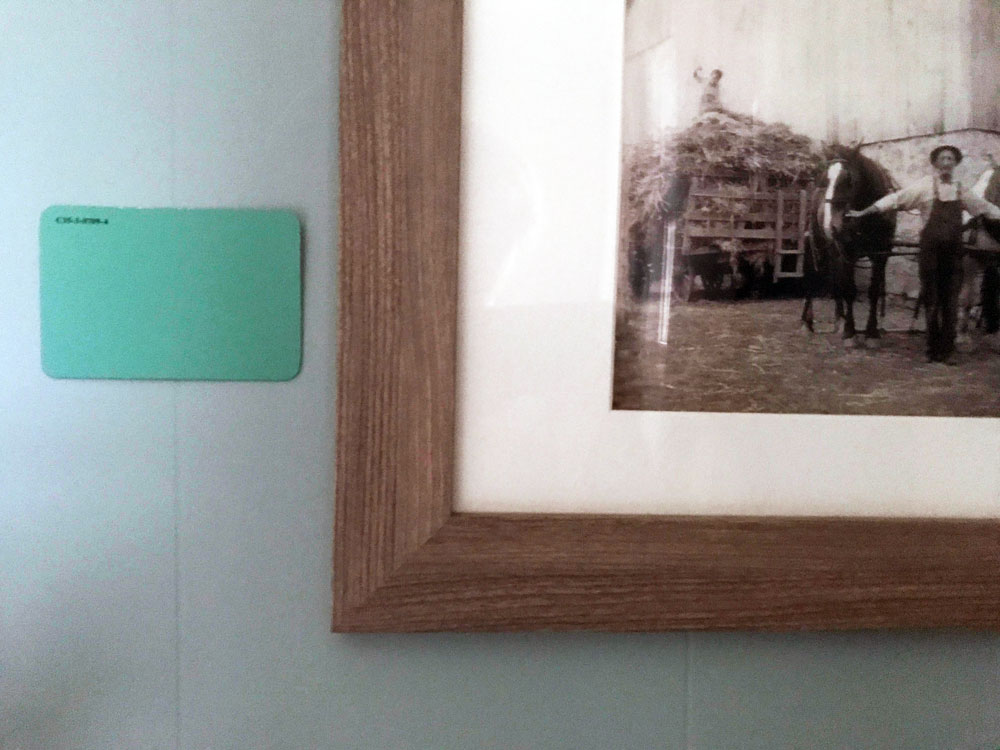
Ellie’s favourite colour at the start of the makeover was green, and she chose the paint chip she liked (Calmness C35-3-0709-4 by BeautiTone from Home Hardware). It’s much brighter than I would have chosen, but it ended up working perfectly with the vintage bedspread I wanted to use. Of course, by the time she moved in she informed me her favourite colour was no longer green. It was purple. But she’s tolerated the green.
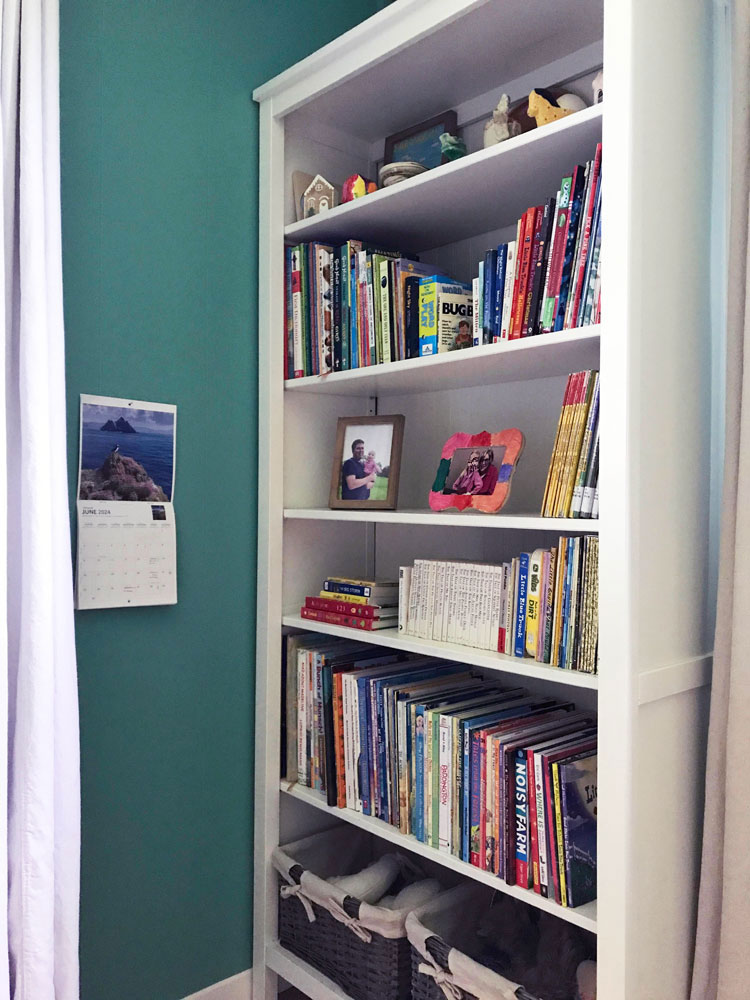
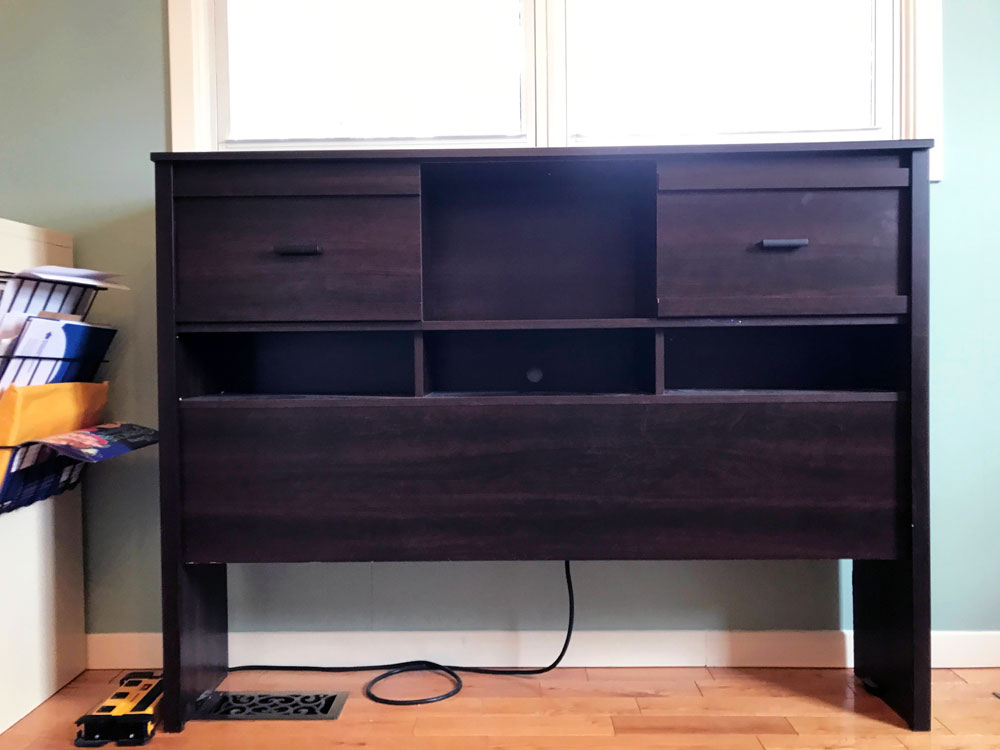
In Ellie’s old room, she had my childhood bed, which had cubbies with sliding panels in the headboard. She liked those secret hiding spots and requested the same style in her new bed. I had plans to build a headboard, but then I found a double size headboard with cubbies in a thrift store. I was amazed at my luck and that re-energized me to get moving on the makeover.
I added bead board to the headboard to match Ellie’s bookcase and then painted the whole thing white. I attached the headboard to an old metal bedframe that we had in the barn, and Ellie picked out some handles for the sliding panels. It all came together so well. The cubbies are full of “treasures.”
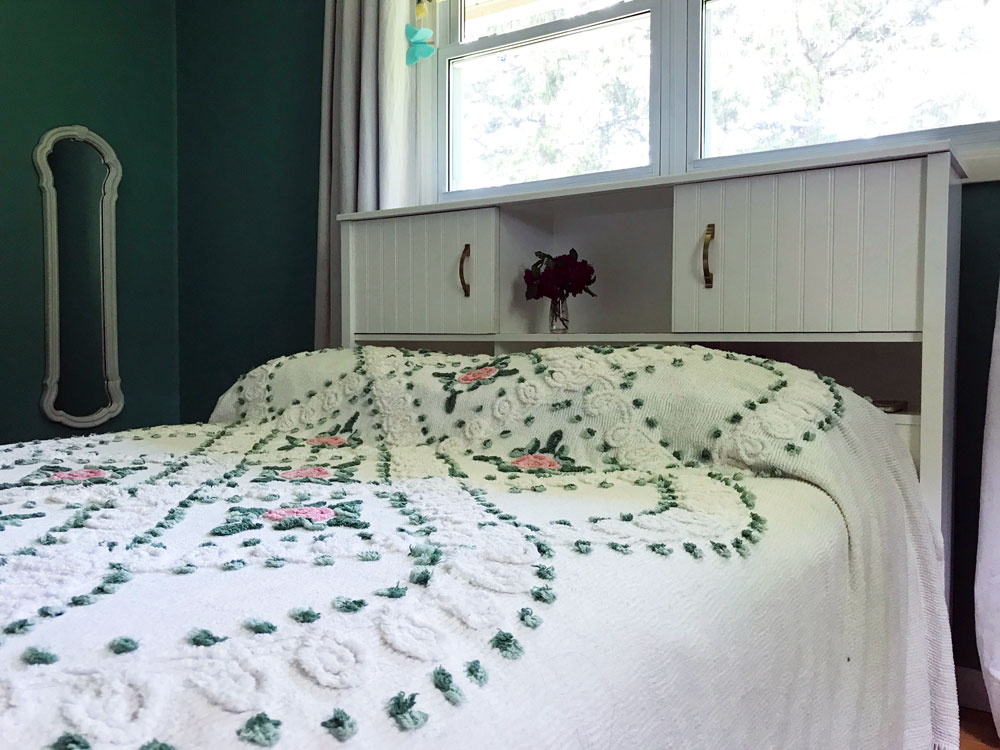
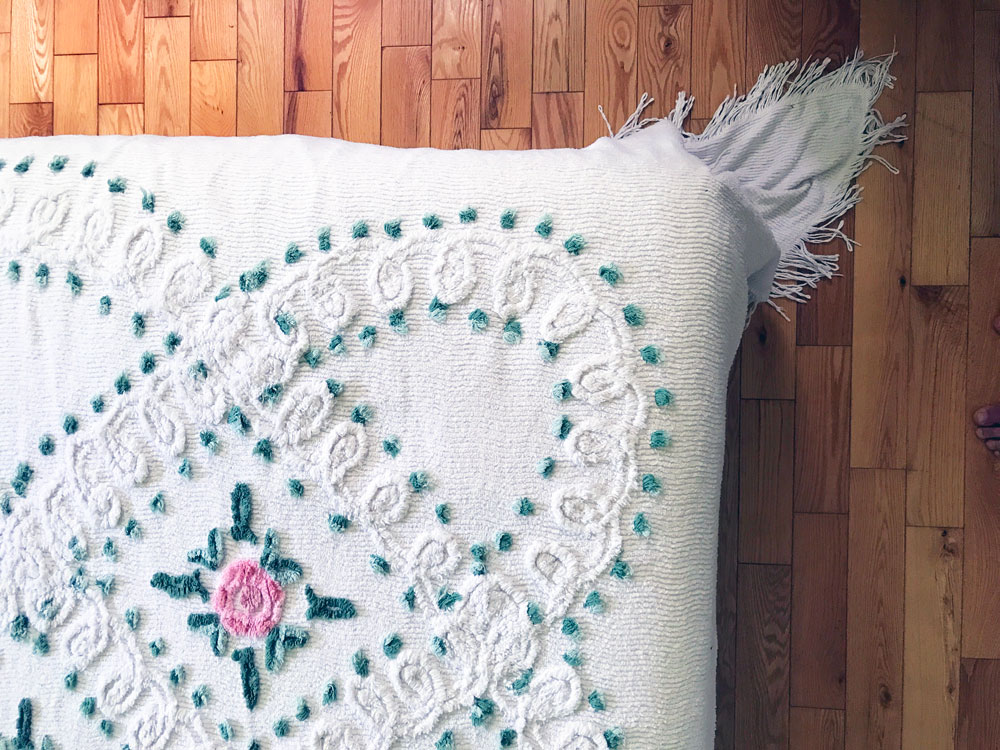
The bed is covered with a vintage chenille bedspread from my grandparent’s cottage. I love this bedspread so much. The colours are so vibrant and the contrast of the green and the pink is so pretty. Plus the fringe is super fun.
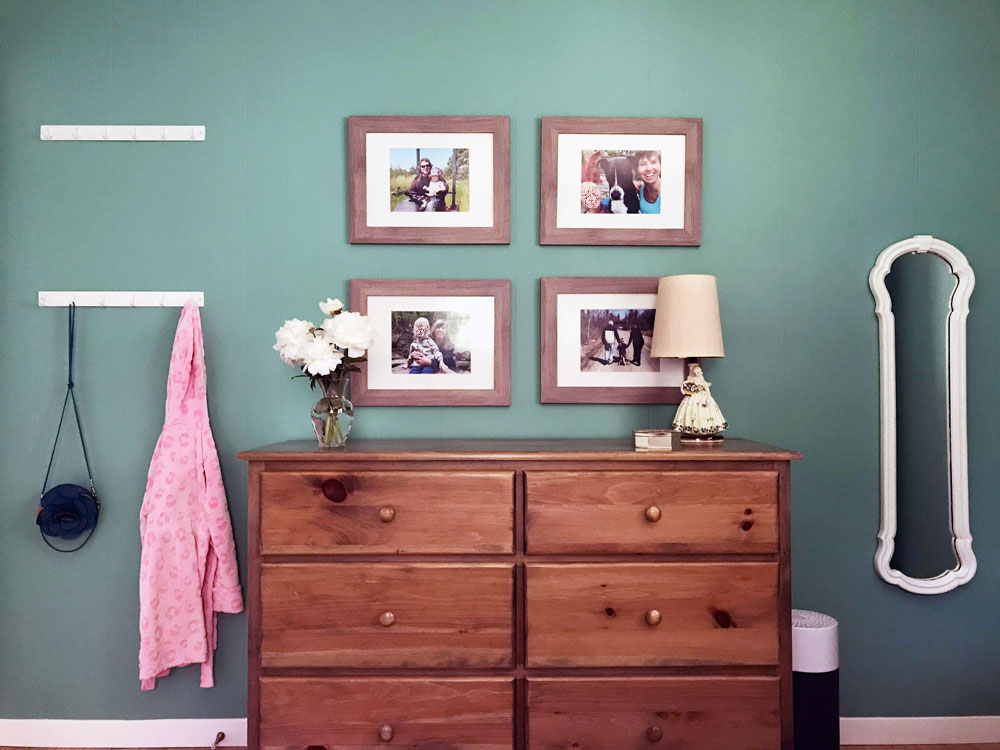
The bookcase and dresser moved from Ellie’s nursery and they work great here. The mirror I thrifted for this space when it was the guest room.
I also moved in her Ikea Strandmon wing chair. It is too large for the space and we don’t use it anymore for reading, but it’s been a comfort to Ellie to have the chair. As excited as she was for her new room, she was only up for so much change.
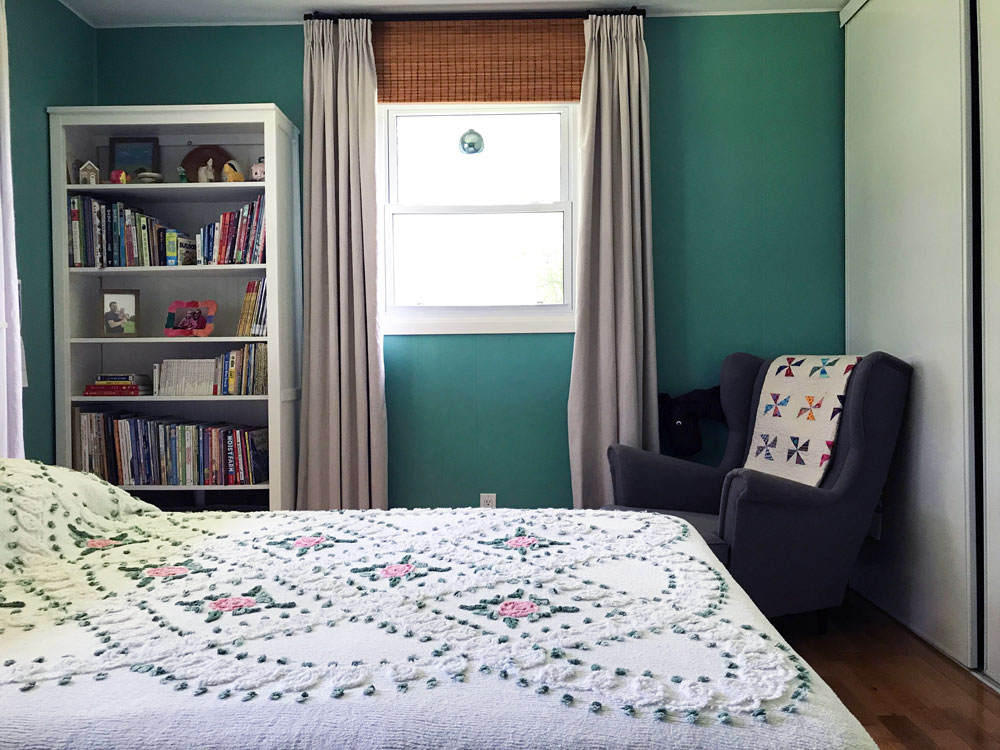
I kept the same dropcloth curtains that I sewed for this room back when it was the guest room, but I added blackout lining. Probably unnecessary since I also bought blackout blinds. We’ve never had to close the curtains. I like that they’re a neutral colour but not white. They add a little bit of contrast and also soften the bright green walls.
The bamboo valance is a technique I’ve used in all of our bedrooms so far. I even used the same blind, just chopping it up for each window. The delay in finishing Ellie’s room was that I didn’t have very much blind left. I had to reweave part of it to make sure it was long enough to cover the top of the window. This was a tedious job that took me awhile.
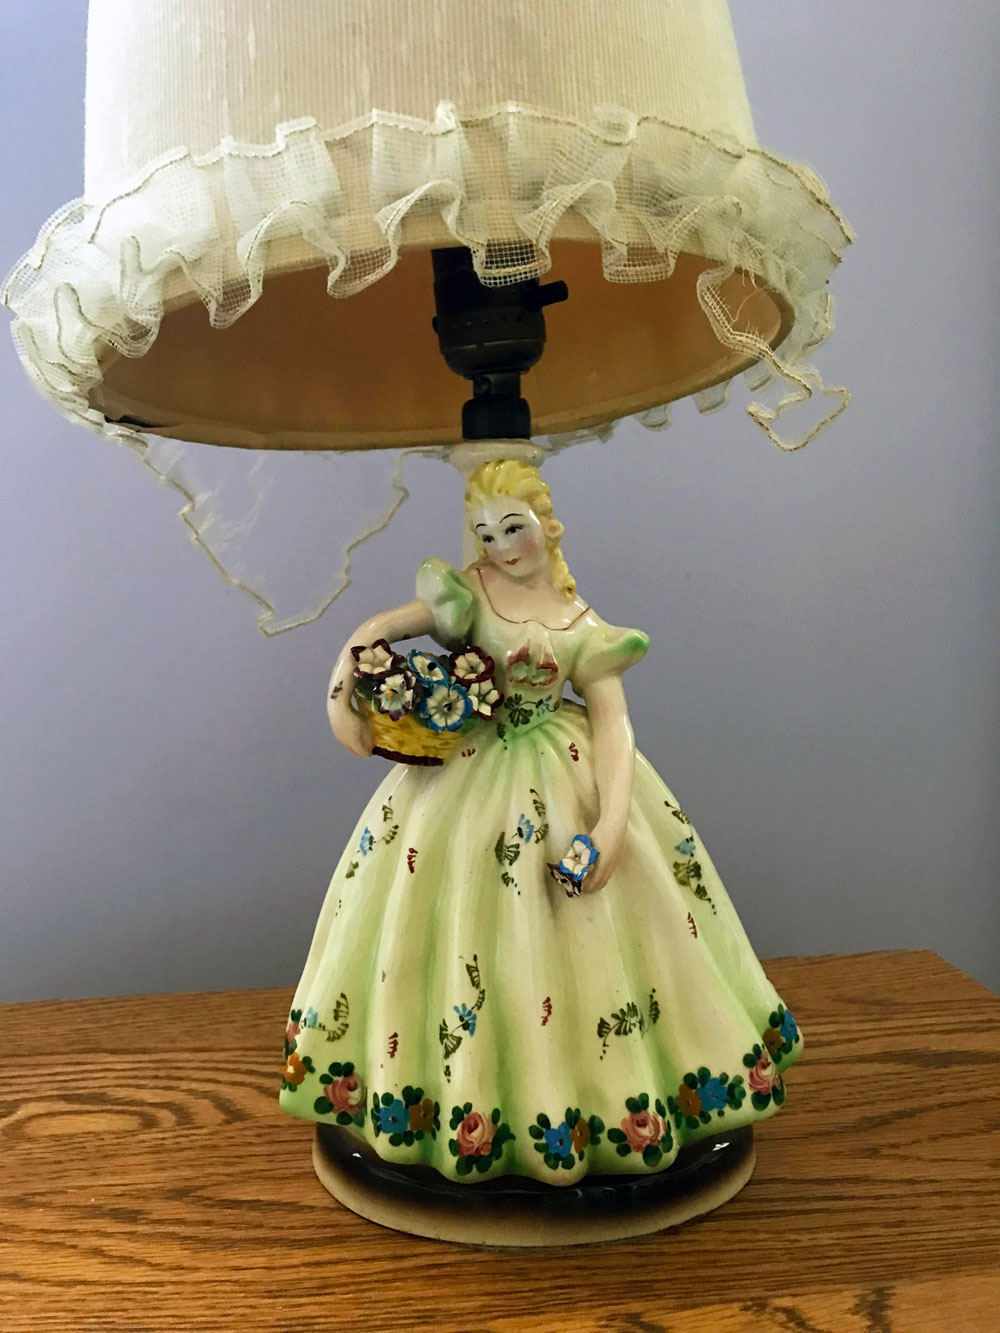
On top of Ellie’s dresser is a treasure that I’ve had in mind for her room always. My Mom’s flower girl lamp. My Mom’s grandparents had a furniture store, and she remembers going in when she was about Ellie’s age and being able to pick out whatever she wanted. She chose this lamp. The lamp was in my room for a little while when I was little. I love that it’s in Ellie’s room now.
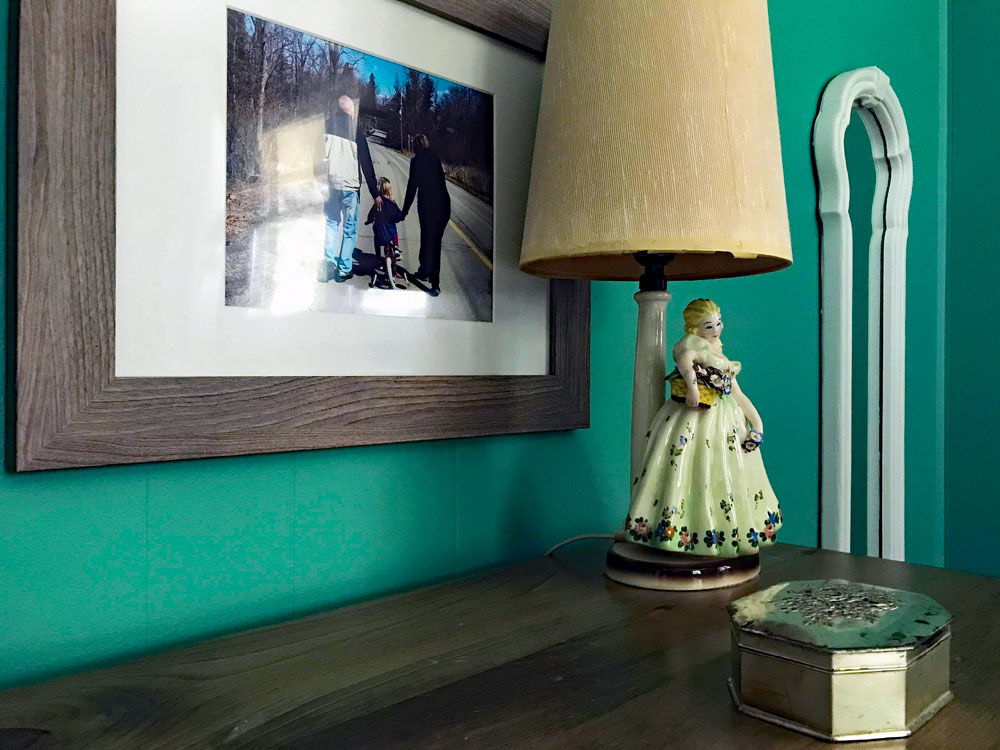
Above the dresser are four photos of Ellie with Matt, me and her grandparents. I wanted her to see how much she is loved and have these important people present for her every day.
She’s added her calendar to the wall, coffee filter butterflies on the curtains, a sparkly glass ball in front of the window, suncatchers on the windows, lots of toys and treasures in the headboard cubbies and other places too.
It’s become a really fun, comfortable space that is unique to her.


