The middle

The part we all wait for in DIY is “look at the beautiful room/garden/furniture/shelfie/whatever I made!” The middle while you’re waiting is less beautiful, less photogenic, less interesting.

I’m in the middle.

I feel like I have little to report. But I like the regularity of writing a blog post for every Monday, so here I am. Schedules and deadlines–even when self-imposed–work well for me. In both blogs and renovations.

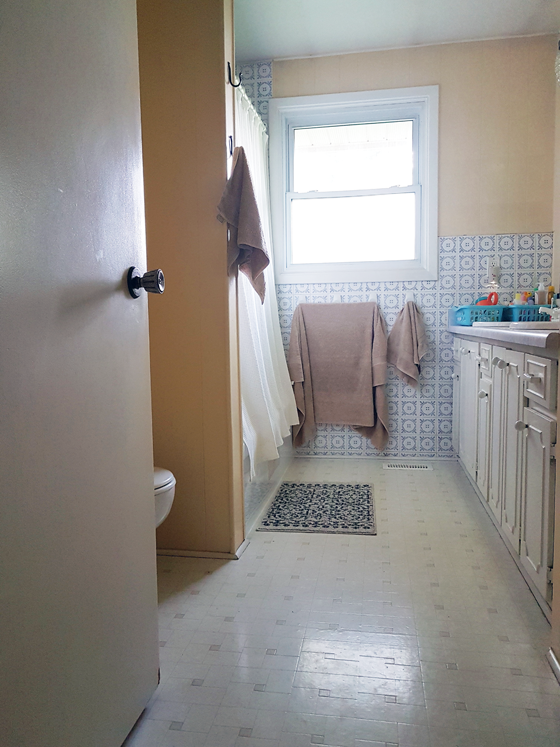
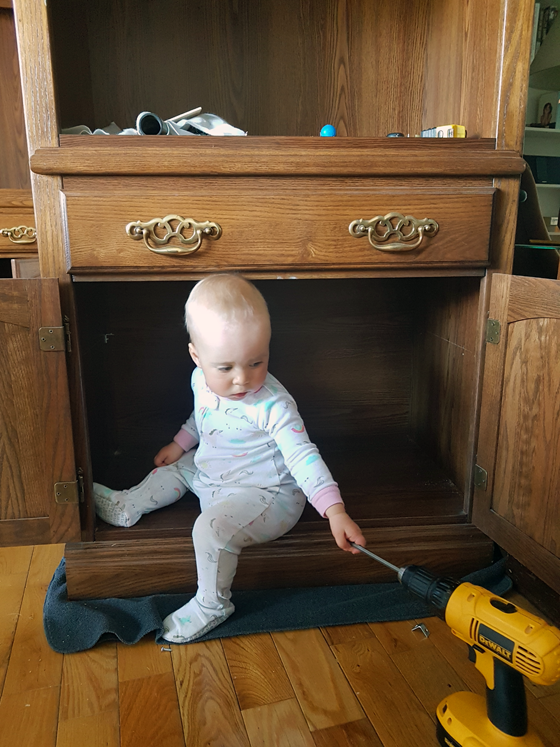
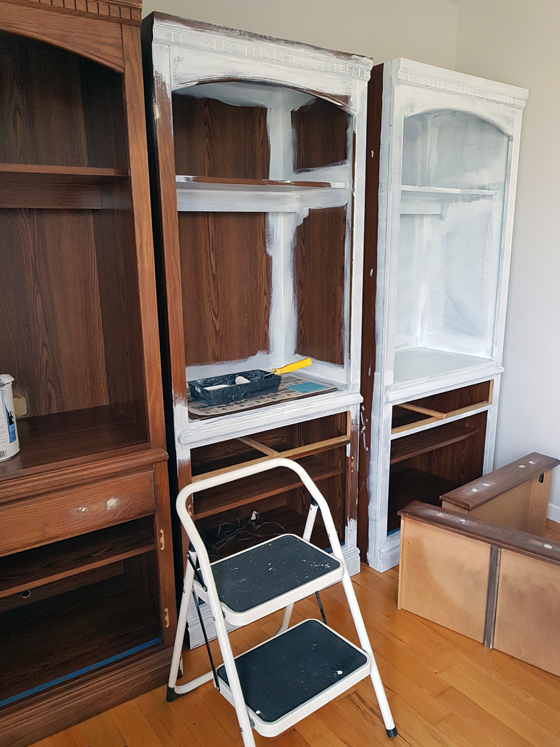
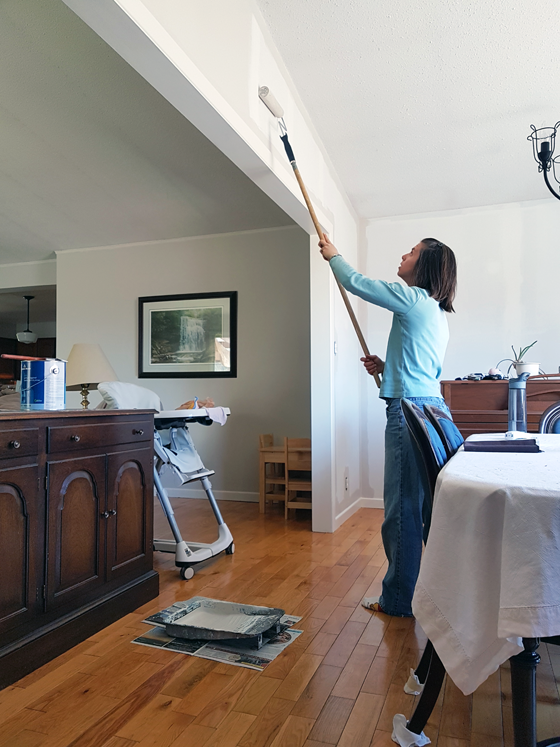
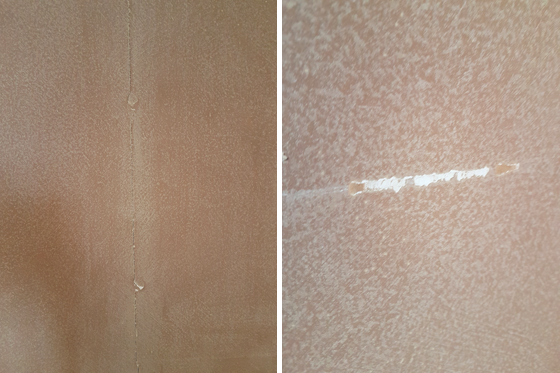
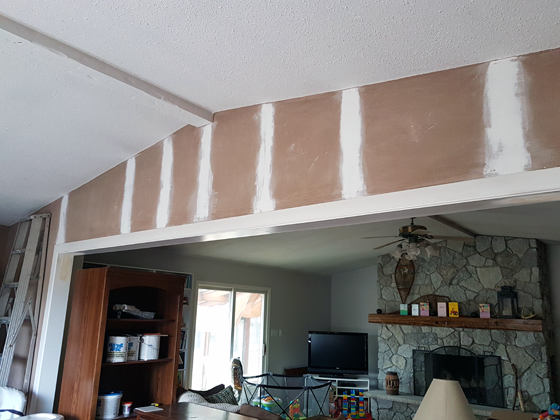
Ellie’s room makeover is on track. We’ve had paint week. Last week was window week (curtains are tedious, so I’m not giving you a whole blog post about the HALF A DAY I spent ironing or the wait at Ikea to return a too short curtain rod).

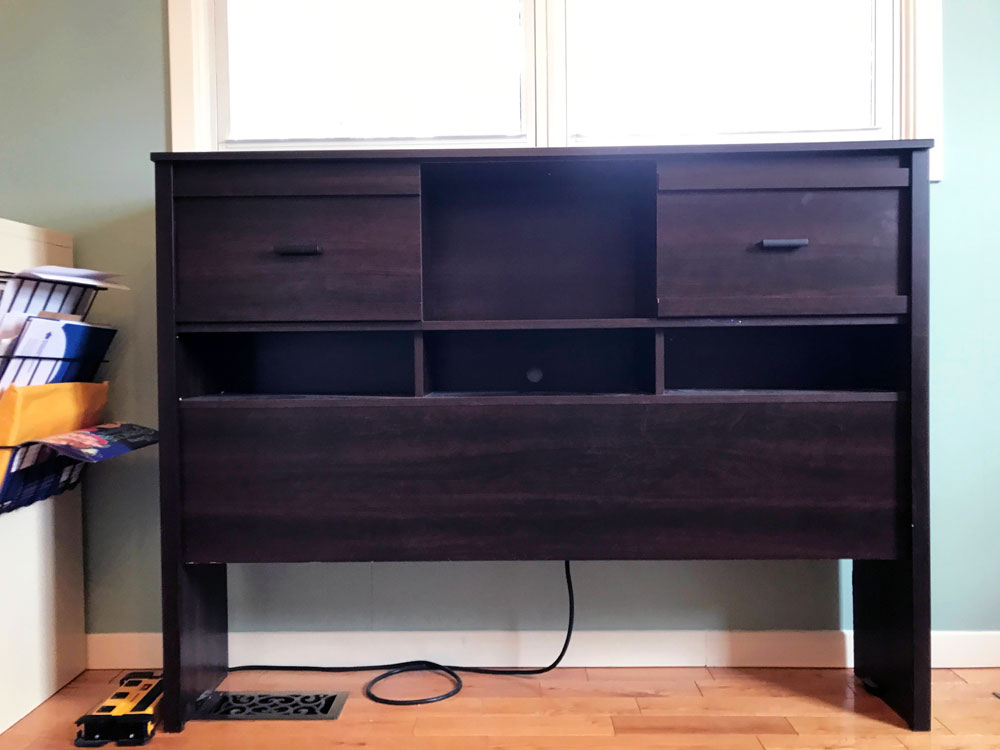
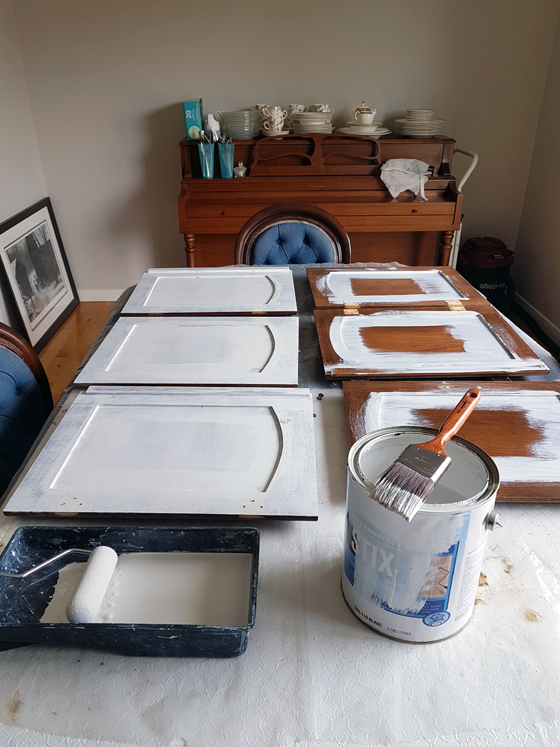
This week is bed week. I’ve washed the dusty bedframe, added beadboard to the headboard, bought a new can of primer and am ready to begin painting the headboard. The mattress is being delivered on Thursday.

We’re on track. In fact, we’re on track for lots of projects. As with Ellie’s room, there’s not much to share yet, but I’m going to mention them anyway.
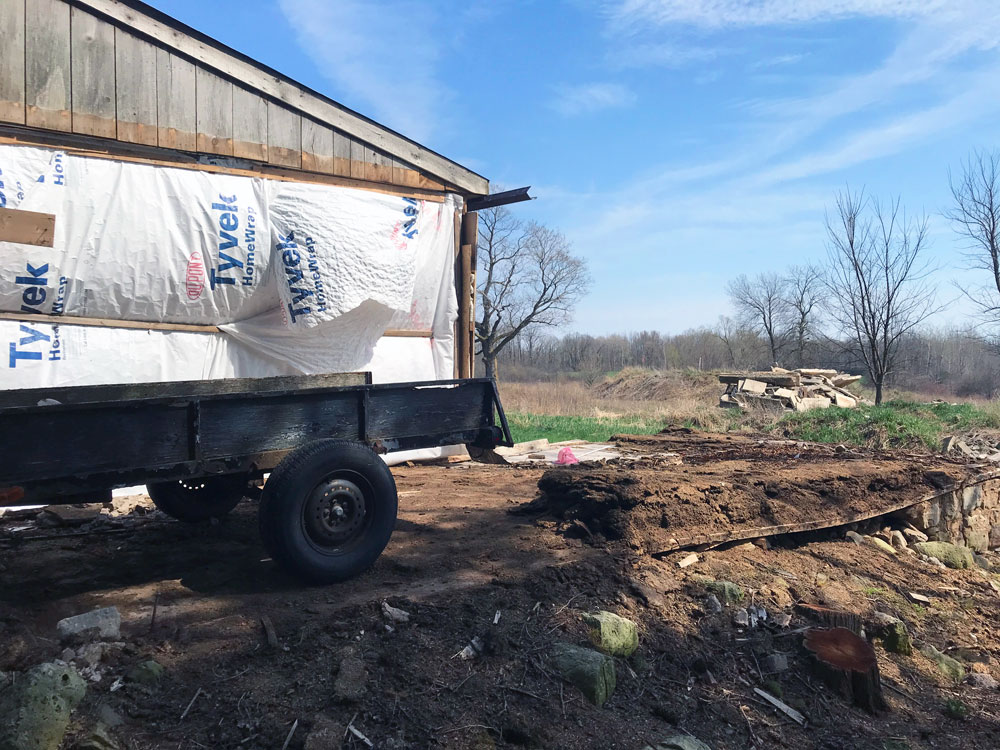
Coop

I’m halfway through clearing the manure off the old coop foundation. Getting to this point involved detaching the the snowblower from the tractor and recharging the tractor battery, so there was progress on several fronts.

Patio

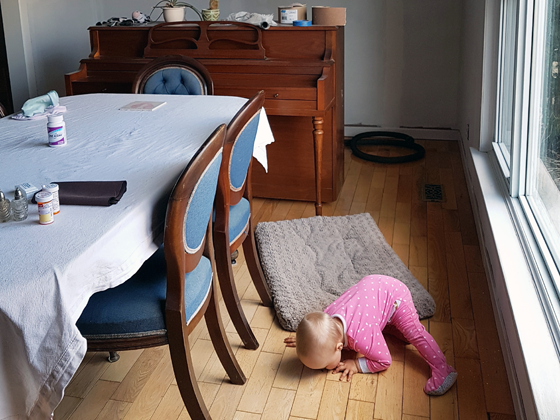
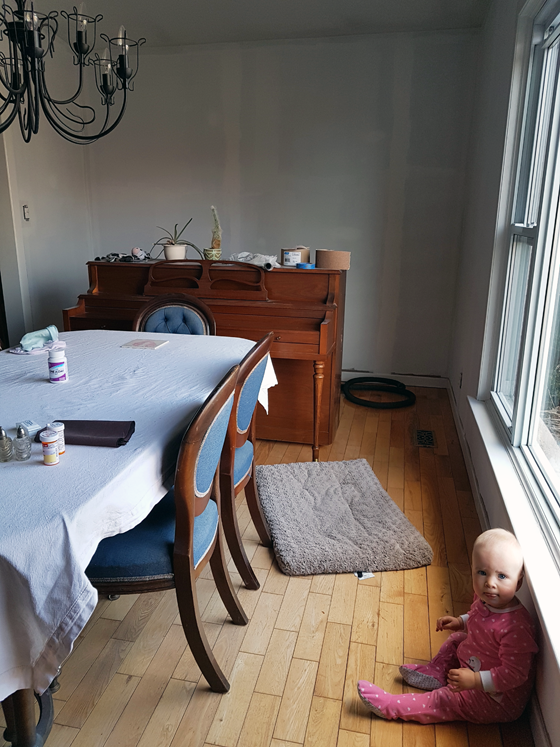
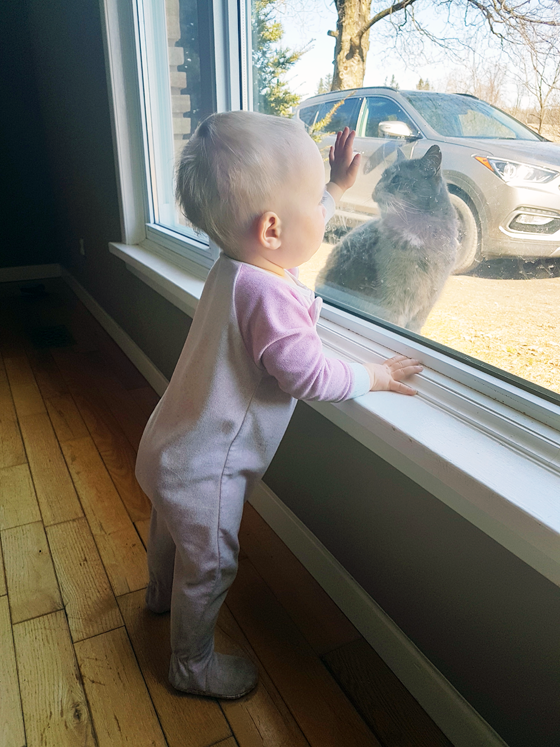
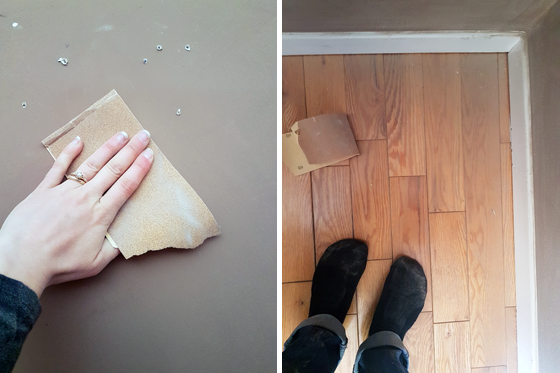
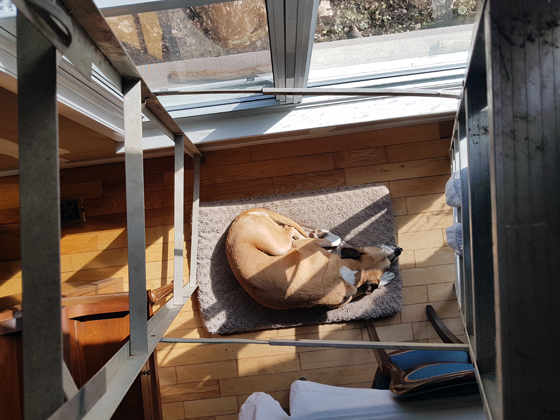
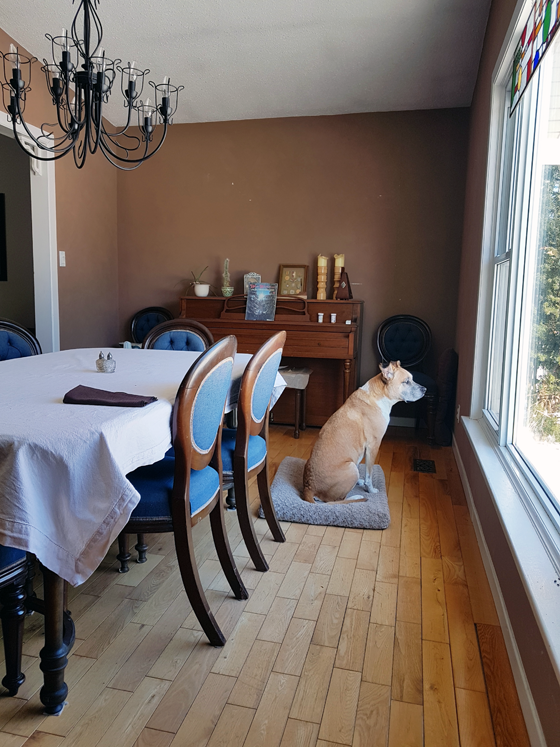
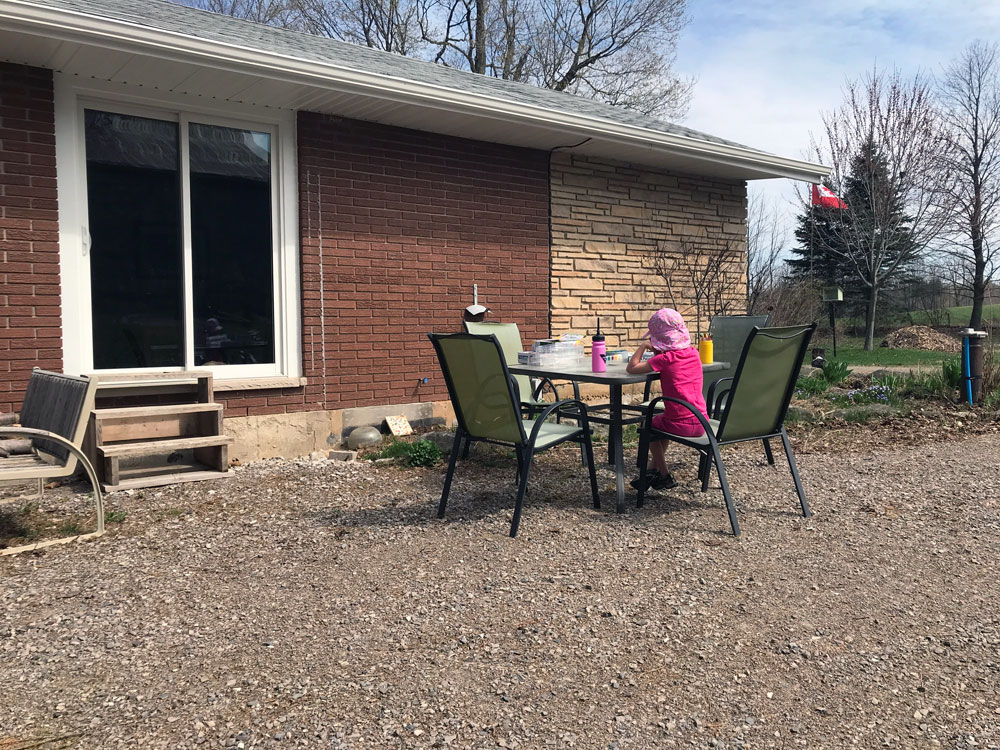
We had some lovely weather last week, so Ellie and I enjoyed breakfast and lunch on our currently-imaginary-but-hopefully-soon-to-be patio and confirmed that, yes, we would like a proper place to eat and sit. Cigo sprawled in the sun. We set up a small table and chairs and confirmed that they should fit on the new patio. Construction should start sometime in May (fingers crossed).

Gardens

Garlic is up in the vegetable garden. Transplants to the new turnaround garden seem to have survived. I have bales of cardboard and piles of mulch (and a brand new pile of very old manure) ready to be spread around. May may be garden month.

We keep moving ahead. Progress may not always be as quick as I want (I still can’t believe it took me a whole morning to iron curtains), but I know I’m getting closer to that beautiful, photogenic, interesting moment.

What projects are you in the middle of? How do you schedule projects? What tips do you have for persevering through the middle?

Ellie’s room makeover

Ellie’s room makeover was the first project of the year. We got started in January, clearing out the old guest room and coming up with a plan for the space. And then we stalled.

This is a relatively simple project that could be done in a week. A different kind of blog would even do it as a weekend makeover. We are now at the beginning of April, which means Ellie’s room has been going on for three months.

It’s time to get moving.

Fortunately, something happened a few weeks ago that brought my motivation back. I found a headboard.

Dark wood headboard

Ellie’s directive was that she wanted the same bed that she had, just bigger. I had planned to construct a headboard with a built-in shelf. But while browsing a thrift store, I found a double headboard that had shelves and sliding door cubbies, just like her current bed. I’m going to give it a coat of paint, attach it to a metal bedframe that we already have, buy a new mattress and cross this task off my list.

Speaking of the list, here it is.

Empty room – We finally got (pretty much) everything out this weekend. The big furniture was dragged into the middle of the room.

Furniture grouped in the middle of the room

Paint walls – We patched the holes, primed the patches and picked up the paint. Hopefully it goes on the walls this week.

Window treatments – I ordered new curtain rods which have already arrived. Blinds are on order. I need to sew a blackout lining for the existing dropcloth curtains. Then install my layered window treatments.

Bed – The doors to the headboard’s cubbies are going to get a little makeover, then I will paint everything white. I need to buy a new mattress and box spring. I dug the metal bedframe out of the driveshed. It needs a good cleaning and then I can attach it to the headboard.

Decorate – We’ll need some pictures on the walls, some accessories, a mirror.

Move in – We’ll make the bed, hang her clothes in the closet, bring in her books, and hopefully our girl will like her new room.

My plan is to tackle one thing a week (painting week, window week, bed week, etc.) until we’re done. Painting is up first.

Child painting a wall while standing on a small ladder

The One Room Challenge, which kicks off this week, is providing a little extra motivation. While I’m not officially joining up, I love the ORC for how it helps me focus and gives me a deadline. So I’m making Ellie’s room my own personal One Room Challenge.

Stick with me. We’ll get this done… eventually.

Anyone else have a stalled home improvement in progress? How do you stay motivated during projects? Have you made any good thrifting scores recently?

Three simple ways to refresh your home

The One Room Challenge continues this month, and I’ve been inspired to revisit some of my previous ORC rooms.

I still love all of the spaces that I did through the ORC. But with any space, time can take a toll. Maybe your needs change, things get worn, or you can add something to make the room new again.

Here are my tips on easy ways to freshen up a room.

Clean

The laundry room was my very first One Room Challenge. The black and white colour scheme and shaker cabinets still feel pretty current. The pipe drying rack and towel bar work really well. I love the style and the function of the whole space.

Black and white shaker cabinets with chrome hardware in the laundry room

But there’s some lint gathering on the floor, cobwebs in the corners and detergent drops on the counter. A good cleaning will make the room feel fresh and make me like it even more.

I’ll also be spending some time in the guest room (aka my sewing room 2.0). My original office/craft room was the ORC project, not the guest room where my sewing machine has lived since Ellie arrived. But I need an excuse to motivate me to sort the paperwork that’s been piled on top of the filing cabinet.

Repair

The master bedroom was my second One Room Challenge. The DIY headboard, wallpapered closet doors and repainted dresser have all held up really well. But a few fixes are needed.

Audubon print of a heron in my bedroom

The guide fell off of my nightstand drawer, so now every time I pull out the drawer, it drops and will crash to the floor if I don’t catch it. Hammering the guide back onto the drawer should be a very simple repair.

The second repair comes from not doing things properly the first time. When I hung the Audubon prints on either side of our beds, I skipped adding a picture wire across the back of the frame, and instead simply hung the frame itself from nails tapped into the wall. The picture frames have bent from the weight–it’s not a good look. I’ll be adding wires and rehanging the pictures, and hopefully the frames will return to their rectangular shape.

Also on the list? Rebalancing the washing machine and a paint touch-up in the laundry room,

Tweak

Sometimes after living with a space–even one you love–for awhile you realize there’s something missing. Our dining room is our most recent ORC, completed just this spring. I hoped to build doors for the upper section of our china cabinet during the makeover, but ran out of time.

White china cabinet in the dining room

The ORC goes so fast that there are often parts of a makeover that don’t get done. Even though I’m not participating in the ORC, watching everyone’s projects motivates me to return to the dining room and maybe finally build the doors.

I also have some other ideas for simple updates. In our bedroom, I’m going to freshen up our bedding with some new pillow cases. And in the laundry room, I’d like to sew a faux roman shade for the window.

One of the best parts of the One Room Challenge and other room makeovers is that you end up with a new beautiful space. These simple updates can ensure that you continue to enjoy your space for years to come.

Are you revisiting any room makeovers that you’ve done in the past? What tweaks do you want to make in your home?


Imaginary One Room Challenge – Phase 1 bathroom makeover

The One Room Challenge kicked off last week. I’m not a regular participant in the challenge, but I wish I was. It’s such a good way to update a space and actually complete a project. I love the rooms that I’ve done in the past (check out the laundry room, master bedroom, my office and dining room). I also love following the ORC, seeing everyone else’s makeovers.

This fall, I will mostly be an observer rather than a participant (though I do have plans for a few updates this month that I’ll hopefully be sharing soon).

But I’ve been having fun doing an imaginary makeover.

I started thinking about the main bathroom and how I could update it in advance of our big gut makeover (which I’ve talked about before and is still a someday project).

Main bathroom

I’m not a big fan of phase 1 renos. I feel like they can be a lot of work and potentially a lot of money, only to be ripped out in a few years.

However, we’ve lived here for more than 7 years and the main bathroom still looks exactly the same as when we moved in. A few updates a few years ago could have made it a more enjoyable space. (Although we have added a baby to the tub, which gives a whole lot of joy.)

Baby in a bathtub

Here’s the bathroom as it looks now. It’s a big space with a nice window, lots of storage, counterspace and everything you need in a bathroom. However, it’s dated and some parts of it–tiles, caulking, faucets, even one of the sinks–are actually broken.

Main bathroom before

Main bathroom before

Bathroom Before Collage

To fix all of the issues, we will need to do a full gut. However, there are some simple updates that could make the bathroom look a lot better now. Here’s a moodboard with some of my ideas.

Moodboard for phase 1 bathroom makeover

Sources: Vanity | Mirror | | Floor tile

The biggest change would be simply painting the walls. They are fake paneling that was painted yellow who knows when. The yellow clashes with the purple-ish tile and the Care-Bear-esque countertop. Fresh white paint would help the tile and counter and would also make the paneling look more like on-trend vertical shiplap.

If I painted the walls, I’d want to take down the big sheet mirror. The silvering is deteriorating in a few spots and the mirror is very dated. I could frame it out, but I like the idea of injecting some wood tones and different shapes with a pair of arched top mirrors.

The makeover could easily stop here and I’d be happy. But if I was going to make this project worthy of the ORC, here’s what else I’d do.

Build wood shelves over the toilet. These could add some decor and storage. It would be nice to get the bins of Ellie’s bath toys, washcloths and soap off the counter.

To go with the wood shelves, I’d update the linen closet by facing the shelves with wood strips and covering the floral shelf paper with plain white.

The white cabinetry is looking a bit dingey. If the walls go white, the vanity might be a place to introduce some more contrast and make the colours of the tile and counter make more sense. (Aside: This photo shows how a frame can make a big mirror look more current.)

Grey bathroom vanity

Source: Juniper Home

The current floor introduces yet another colour to this room. Beigey taupe, which, of course, goes with nothing else. There are so many options out there today for simple peel-and-stick tiles, which could simply be laid over top of the existing vinyl. This could be a place to introduce some fun pattern, although I don’t want anything too busy to clash further with the counter and wall tile.

An alternative to new flooring would be a better rug. A nice runner that would cover more of the floor and serve the function of a bathmat could be a good option.

While I’m updating the floor I would also remove the terrible metal transition strip in the doorway. Not only is it ugly, it’s also not screwed down properly, so it rattles every time you step on it–every time for 7 years.

Alas, it’s likely going to be 7 years and counting for this bathroom. The dreaming is fun though and I know one day this room is going to be everything I imagine.

Are you participating in the One Room Challenge–for real? Or do you have an imaginary makeover happening as well? How do you feel about phase 1 makeovers?

Dining room reveal – One Room Challenge Week 6

I love our dining room. It’s where we start our day and watch the sun come up over the fields. We have a great view across the farm and can watch whatever wildlife is around. At the end of the day, we come together again to share dinner with the dog under the table and the cat on the window sill.

Whether it’s everyday meals or occasions with extended family, this room gives us lots of special moments. And now, the space measures up to what happens in it, and I love it even more.

Welcome to the final week of the One Room Challenge and the reveal of our new dining room.

Bright and fresh dining room

If you’re new here, welcome to our farm. My name is Julia, and I live on a 129-acre farm in Ontario with my husband, Matt, our one year old daughter, Ellie, our rescue dog, Baxter, and #theworldsbestbarncat, Ralph (who loves sitting on the dining room window sill).

We moved here 7 years ago and have been fixing up our 1970s era ranch style house ever since. Our style is a bit traditional, a bit country, with lots of personal elements, thrifting and DIY.

Which brings us to the dining room. You can get caught up on this project with all the dining room ORC posts: the plans (week 1), sanding and patching (week 2), the start of painting (week 3), more painting (week 4), beginning the china cabinet makeover (week 5).

Six weeks ago this room was dark. The brown walls were rough, cracked and scuffed. The thrifted shelving unit that is our china cabinet was all kinds of brown and dated.

Vaulted ceiling in the dining room

Now the walls are smooth and light thanks to a lot of sanding and two coats of Abalone by Benjamin Moore (mixed at 75%). All of the trim also got a fresh coat of paint (Cloud White by Benjamin Moore).

My go-to Cloud White was also the solution for the china cabinet. Painting this was not fun–especially when I decided I needed to do a third coat–but it was absolutely worth it. This cabinet gives us so much storage and now it’s no longer a black (brown) hole in the room.

I feel like all of our special dishes and family heirlooms look so much nicer in the white cabinet than in the wood (and yes, I desperately need to polish my silver).

Vintage shelving unit used as a china cabinet


China cabinet

You may notice that the cabinets are lacking hardware. This is my second ORC reveal without hardware. There’s another unfinished part of the china cabinet. I plan to build glass doors for the upper sections, as I don’t believe in dusting. Those will come in the next couple of weeks.

Vintage shelving unit used as a china cabinet

The wall opposite the china cabinet holds Matt’s grandmother’s piano. Ellie and I play on it occasionally already, and I hope one day to teach her to actually play it properly. I love the beautiful heritage from her Great-Grandma, her Daddy’s family and her Mama.

The Coonley Playhouse-style stained glass (inspired by Frank Lloyd Wright) was made for us by Matt’s uncle.

Bright and fresh dining room

The picture was a gift from Matt’s parents. The barns look very much like our two barns–although we’ve never seen that many deer that close to the house.

Deer painting above a piano

There are a few more things I want to do in here, but I’m really happy with where we are after these 6 weeks. Finishing another room is a big accomplishment. More importantly, every time we sit down for another meal together, it feels so nice to be in a bright, beautiful space.

Interested in seeing other beautiful makeovers? Visit the One Room Challenge to check out all of the other participants’ reveals.

One Room Challenge Guest Participant logo

Thanks for following along on the dining room makeover.

Starting over – One Room Challenge Week #5

Last week I said that week 4 of the One Room Challenge is the hard one. For me, this time around it was week 5.

Here are the previous updates on this dining room makeover:
Week 1 | Week 2 | Week 3 | Week 4

Nothing tragic happened. I started painting the cabinets as I’d planned. But the whole “started” thing felt hard.

Priming cabinet doors

I felt like I was restarting this makeover. I was removing hardware, shelves, drawers, doors. I was patching holes and sanding. I was priming.

Ugh. Prep is not the fun part of DIY for me. Although Ellie enjoyed having a new fort.

Ellie sitting in the china cabinet

Even once I started painting, I wasn’t having fun yet. It just reminded me that I don’t like painting cabinetry. All of the angles, molding and curves that need to be cut in, all of the different pieces that need to be primed and then painted–twice. Just not my favourite.

So that’s a lot of complaining.

Sorry to be a downer.

Snapping out of it now.

I started painting the china cabinet. Yay!

Painting the china cabinet

This was a maybe on my initial task list, so the fact that I got to this part of the makeover is a good accomplishment.

The dining room, which had brightened up a lot already thanks to the lighter paint on the walls, gets brighter every day as the wall of dark brown cabinetry slowly goes fresh creamy white.

I really feel like the white paint is going to transform these circa-1990s entertainment units into a super functional and beautiful china cabinet.

I have another coat to go, but I think it’s doable before the big reveal next week. Next week! We’re almost at the end of this One Room Challenge.

Before we get to the end, check out the other participants’ progress at One Room Challenge.

One Room Challenge Guest Participant logo

Does anyone else struggle with the prep part of DIY? Have you ever had a project where you feel like you’re starting over? Are you yay or nay on painting cabinetry?


Extra motivation for One Room Challenge Week #4

Week 4 is often the stage in the One Room Challenge where things become a little more… challenging.

The initial excitement has worn off. Perhaps you’ve encountered a few hiccups. Maybe your plans have changed or you’re not progressing as quickly as you thought.

For some extra motivation–or an extra challenge–for week 4, I decided to host a Good Friday dinner with my family.

In our dining room.

Which is in the middle of a makeover.

This means the room is filled with cans of paint and assorted tools. There is a skim of dust on pretty much every surface. All of the furniture is pulled away from the walls so that I can paint behind it. There’s not room to extend the table so that everyone has a place to sit.

Primed dining room

My Mom kept saying, “We’re your family. You don’t have to fuss for us.”

Make no mistake, Matt and I tend not to fuss for very much, and we’ve entertained a lot in the middle of numerous renovations. However, I draw a line at having a place to sit for the people that we’ve invited.

So I put on a bit of a push to get the painting done.

Painting the dining room with a roller

I found I could paint half the room–cut and roll–in 2 hours. Also measured as one baby nap. So I figured I’d be done in 4 days. Instead, I did 2 baby naps and 2 night shifts after she’d gone to bed.

And all the painting was done in 2 days, well before people arrived for dinner. In fact, I had time to vacuum and mop the floors, reinstall the cover plates, push the piano and china cabinet out of the way and add the leaves to the table. Woo-hoo.

On Friday night, everyone had a place to sit, and we had a great time with family.

Also nice, my sister arrived with her router, router table and a case of bits. I’m hoping this router is easier to use than my Dad’s and will help me make the doors for the china cabinet.

So the ORC continues. I’m feeling okay about week 4. Two weeks to go. I might be heading into the homestretch.

To see the other participants’ progress (some of whom are definitely not in the homestretch–I’m getting nervous for some people!), visit One Room Challenge. The designer participants share their updates on Wednesday and the guest participants post on Thursday.

One Room Challenge Guest Participant logo

How do you motivate yourself as projects progress? Do you have any stories of entertaining while renovating? How did you celebrate Easter?


Breaking out the paint brushes – One Room Challenge Week #3

Primed walls in the dining room

Painting has started in the dining room! Happy dance!

I will qualify this to say the walls are only primed and only the trim has actual paint, but there was a brush, a roller and a can. It is yet another step on my One Room Challenge journey.

If you want to catch up on the previous updates on the dining room makeover, here is week 1 and week 2.

Another important update: the floor licking continues. Why?

Ellie in the dining room

“I detect dust, dog hair and yesterday’s lunch.”

Do not be distracted by the weird–yet very cute–baby. We’re here to talk ORC. Back to the program.

The prime is thin and the drywall patches show through, but already the white(ish) walls make the room feel much brighter. They also highlight the dirtiness of the popcorn ceiling, which I’m trying to ignore.

Ellie in the primed dining room

“Is this wall wet? Am I getting paint on my jammies?”

Over my years of DIYing, I’ve learned that I prefer to paint the trim before the walls. I find it easier to cut the walls up to the trim as opposed to the trim up to the walls, if that makes sense (I’m a freehander, not a taper). While it’s possible that the trim may get spattered or dripped on when I’m painting colour onto the walls, I’ve not had a lot of issues with this, and minimizing the tedium of cutting is worth it for me.

Baby inspecting the primed dining room

“Ummm… Mama, I think you missed some spots.”

The walls will happen this week. I’ve chosen Abalone by Benjamin Moore, mixed at 75%. This is the same colour we used in the adjacent living room, kitchen and hall.

The dining room is kind of its own room thanks to the archway, and I considered using a different colour in here. However, Stacy at Blake Hill House made the point that our house is open concept enough that the dining room and living room feel like they’re one room, so keeping the colour consistent makes sense. Thanks Stacy for the input.

At the start of the One Room Challenge, I said that if I can just paint the walls I’d be satisfied. I’m feeling like this will likely be achievable.

Here’s where I’m at on my original task list:

  • Sand the walls
  • Patch cracks and holes
  • Prime walls
  • Paint trim
  • Paint walls
  • Fix broken window
  • Hang art
  • Build doors for china cabinet
  • Paint china cabinet

Almost halfway there.

To see the other participants’ progress, visit One Room Challenge. The designer participants share their updates on Wednesday and the guest participants will be posting on Thursday.

One Room Challenge Guest Participant logo

Who else has a live-in inspector for their DIYing? What do you paint first, trim or walls? How do you choose paint colours in adjacent rooms?


Off to a quick start – One Room Challenge Week #2

Welcome to week 2 of the One Room Challenge.

If you’re new to my blog, welcome. My name is Julia, and I live on a 129-acre farm in Ontario with my husband, Matt, our one year old daughter, Ellie, our rescue dog, Baxter, and #theworldsbestbarncat, Ralph.

Ellie and Ralph in the dining room

We moved here 7 years ago, and since then we’ve been working on our fixer-upper 1970s era ranch style house with lots of DIY, thrifting and occasional professional help. Our style is a bit traditional and full of very personal elements, with country touches to make our house look like it belongs in its farm setting.

The dining room is the last makeover before we start more major renovations like a garage addition, new kitchen or bathroom.

In last week’s post, I shared my plans for this update.

Today I thought I’d give more of an overview of this space.

Pros:

The dining room is a large room. A vaulted ceiling and a big archway to the living room make it feel even larger.

It has a big window that offers an amazing eastern view across the farm. Watching the sunrise over the fields while we have our breakfast is a beautiful way to start the day. (The Frank Lloyd Wright Coonley Playhouse-style stained glass was made for us by Matt’s uncle.)

Coonley playhouse Frank Lloyd Wright inspired stained glass panel

Over the years, we’ve collected vintage and thrifted furniture that are perfect for our traditional style: Matt’s grandmother’s piano, an antique dining table, 8 chairs that turned out to be a pretty good match to the table, and after an incredibly lucky thrifting score 3 circa-1980s bookshelves/TV/entertainment units that stand in for our china cabinet.

Cons:

Like every room in our house, the dining room was rough–literally. The walls felt like sandpaper and the ceiling is popcorn. Add to that stains, scuffs, holes and cracks in the drywall and the trim, and the room was not pretty.

It was also dark. Even with the large window, the dark brown walls make the room feel dim. Another issue arose this winter when one of the panes in the window cracked. It’s on my list to be fixed during this ORC.

All of the furniture, except the piano, needs a makeover. The table and chairs need to be refinished. The chairs need new upholstery. And the china cabinet needs to leave the 80s behind for fresh white paint.

Vaulted ceiling in the dining room

Someday, I plan to cover the popcorn ceiling with planks. But for now, I’m going to be relying on the power of paint and focusing on the walls and hopefully the china cabinet.

And with the motivation of the ORC, I’ve gotten off to a quick start on this project.

The update

I sanded the walls smooth and made so, so much dirty dust. Vacuuming has been the central task of this makeover thanks to the baby crawling around–and occasionally licking the floor (why?).

Sanding rough dirty drywall

And then I got started patching all of those holes and scuffs and cracks. I knew the walls were rough, but I hadn’t noticed how many cracks there were.

Cracks and scratches in drywall

Patching cracks in drywall

Patching drywall

More sanding, more patching, more sanding–and lots of vacuuming to try and keep the baby out of the dust.

My other crew member, Baxter, was not helpful. He loves the morning sunbeam in the dining room and even the threat of 7 years bad luck from laying under the ladder wouldn’t keep him from his favourite napping spot.

Baxter laying under the ladder

My luck seems to be good so far. One week in and the walls are smooth and ready for priming. The floor–and the baby–is relatively clean. Onward with the challenge.

You can check out all of the ORC participants later this week. The designer participants share their updates on Wednesday and the guest participants will be posting on Thursday.

One Room Challenge Guest Participant logo

Is anyone else dealing with rough walls or ceilings? How about battling dust? Who else has a helpful DIY crew?


Dining room makeover plans – One Room Challenge week #1

Alright. I’m doing it. I am stepping onto the train that is the One Room Challenge.

It’s been awhile since I’ve joined the ORC, so for those that don’t remember or if you’ve perhaps not heard of the One Room Challenge, this is a 6-week event where bloggers all over the world redo one room.

Here are my projects from the last times I participated:

The ORC has grown over the years, and it’s now a massive event with featured designers, sponsors and some serious, serious projects.

My project this time around is not that.

That’s one of the reasons I was hesitant about joining the challenge. (That, and making sure I can actually commit to finishing this room in 6 weeks.)

I want to redo the dining room.

Baxter sitting in the dining room before it's painted

Really, if I can just paint the walls, I’ll be happy. That doesn’t seem up to the level that is the One Room Challenge.

However, a main feature of the ORC is how inclusive it is. All people, all projects are welcome. This is a motivating, inspiring, encouraging undertaking.

So here I go.

The dining room. The (third) last untouched room in our house (the other two are the kitchen and bathroom which will be a completely different scale of renovation). So let’s call it the last untouched room, okay?

Vaulted ceiling in the dining room

I mentioned some of my goals and plans for this room already this year. But to kick off the challenge, here is the official plan:

  • Sand the walls
  • Patch cracks and holes
  • Prime walls
  • Paint trim
  • Paint walls
  • Fix broken window
  • Hang art
  • Build doors for china cabinet
  • Paint china cabinet

The china cabinet is the big question mark in this project. A couple of years ago, I’d absolutely be able to finish both the walls and the cabinet. However, since my new crew member arrived last year, project time has been pretty much reduced to nap times… although she does try to be helpful.

Ellie vacuuming in the dining room

Stick around and see how far I we make it.

And visit One Room Challenge to check out all of the other participants.