Three simple ways to refresh your home

The One Room Challenge continues this month, and I’ve been inspired to revisit some of my previous ORC rooms.

I still love all of the spaces that I did through the ORC. But with any space, time can take a toll. Maybe your needs change, things get worn, or you can add something to make the room new again.

Here are my tips on easy ways to freshen up a room.
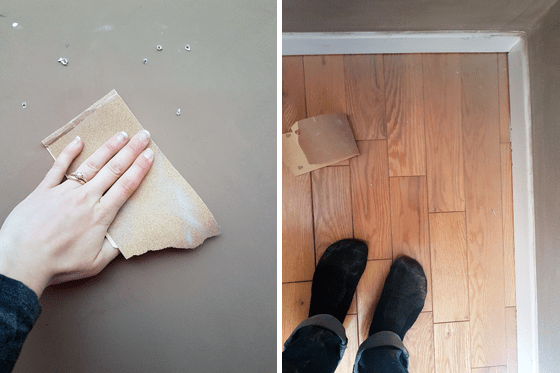
Clean

The laundry room was my very first One Room Challenge. The black and white colour scheme and shaker cabinets still feel pretty current. The pipe drying rack and towel bar work really well. I love the style and the function of the whole space.

Black and white shaker cabinets with chrome hardware in the laundry room

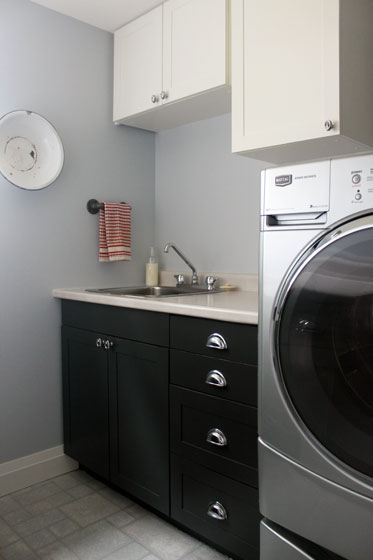
But there’s some lint gathering on the floor, cobwebs in the corners and detergent drops on the counter. A good cleaning will make the room feel fresh and make me like it even more.

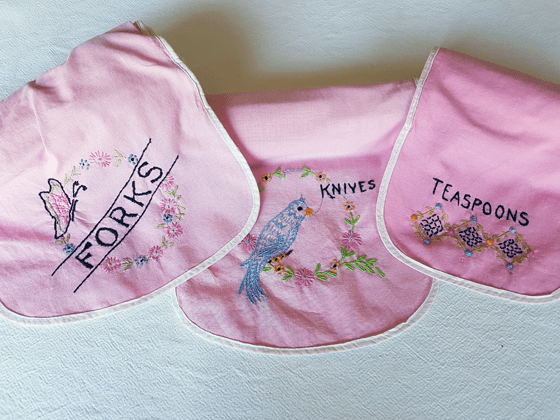
I’ll also be spending some time in the guest room (aka my sewing room 2.0). My original office/craft room was the ORC project, not the guest room where my sewing machine has lived since Ellie arrived. But I need an excuse to motivate me to sort the paperwork that’s been piled on top of the filing cabinet.
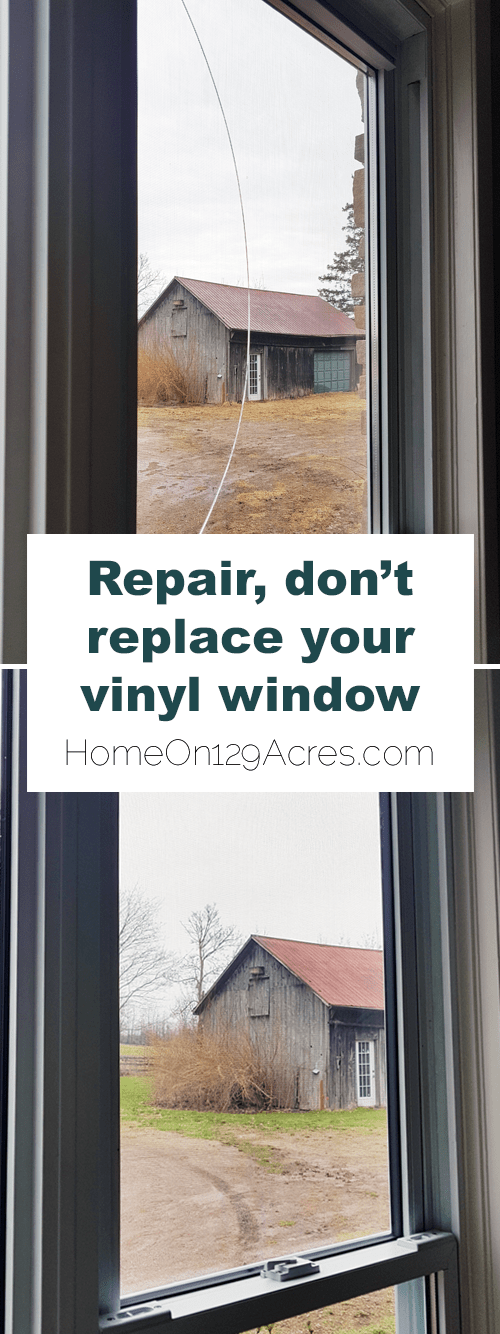
Repair

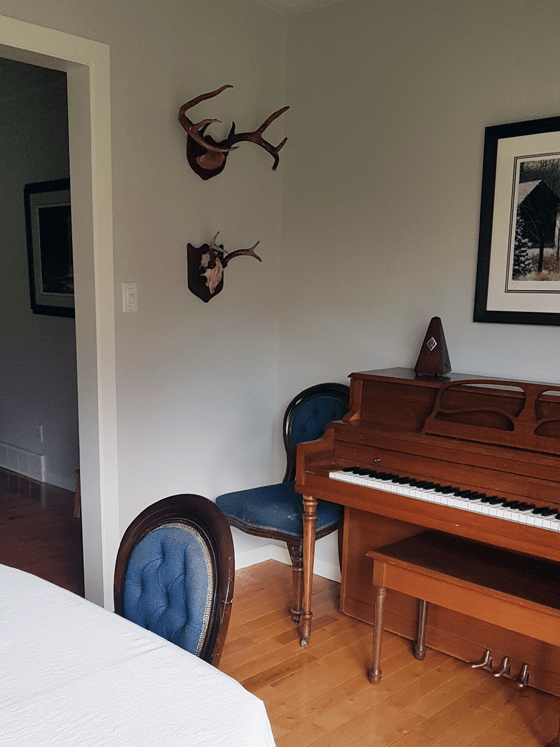
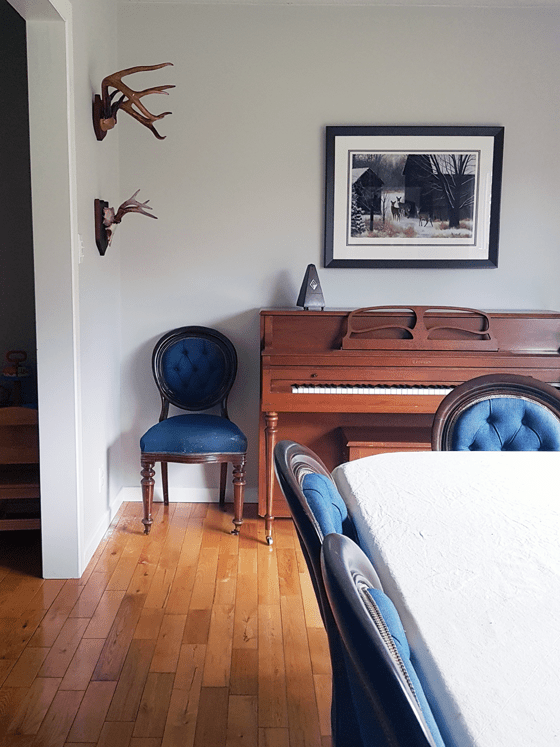
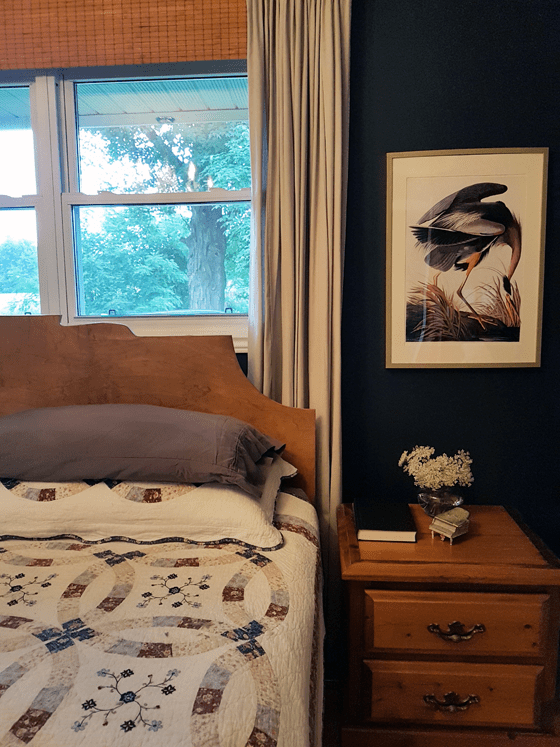
The master bedroom was my second One Room Challenge. The DIY headboard, wallpapered closet doors and repainted dresser have all held up really well. But a few fixes are needed.

Audubon print of a heron in my bedroom

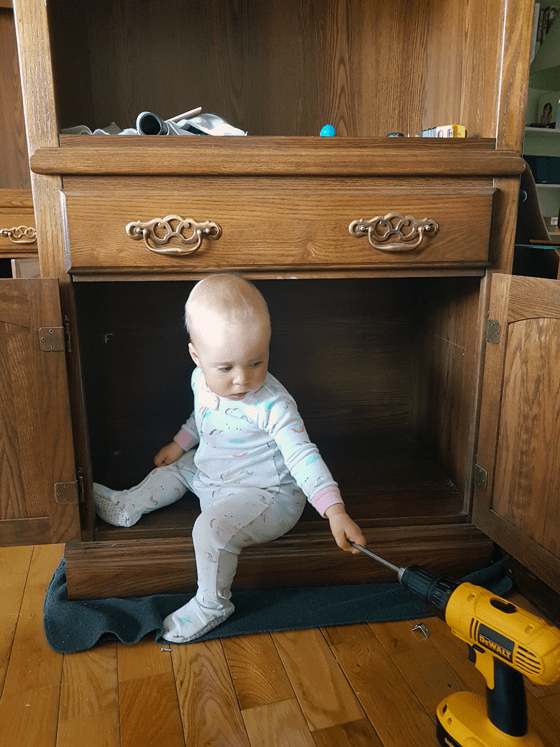
The guide fell off of my nightstand drawer, so now every time I pull out the drawer, it drops and will crash to the floor if I don’t catch it. Hammering the guide back onto the drawer should be a very simple repair.

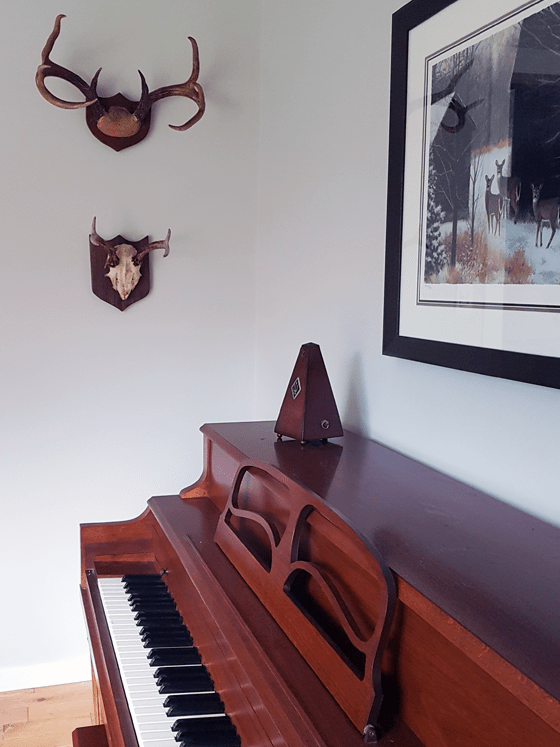
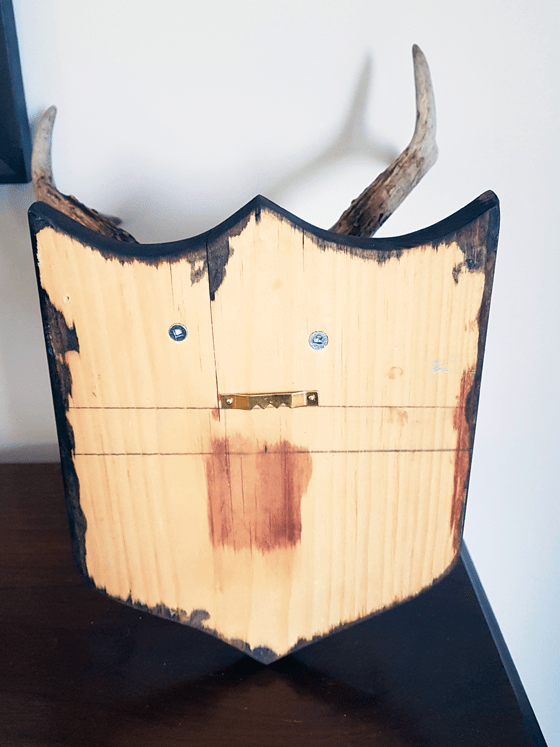
The second repair comes from not doing things properly the first time. When I hung the Audubon prints on either side of our beds, I skipped adding a picture wire across the back of the frame, and instead simply hung the frame itself from nails tapped into the wall. The picture frames have bent from the weight–it’s not a good look. I’ll be adding wires and rehanging the pictures, and hopefully the frames will return to their rectangular shape.

Also on the list? Rebalancing the washing machine and a paint touch-up in the laundry room,

Tweak

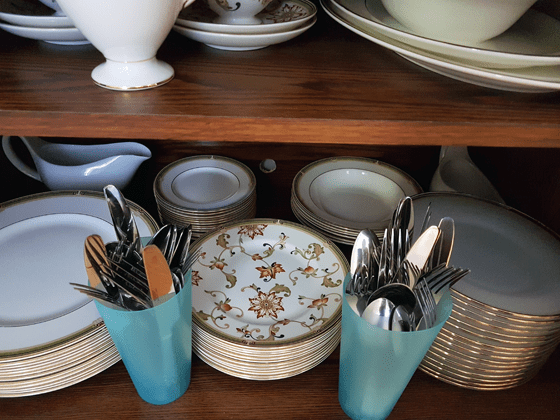
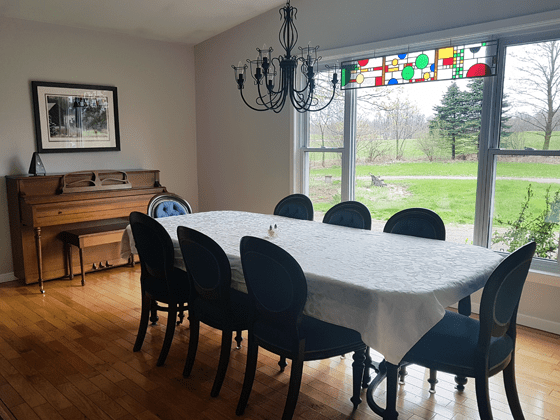
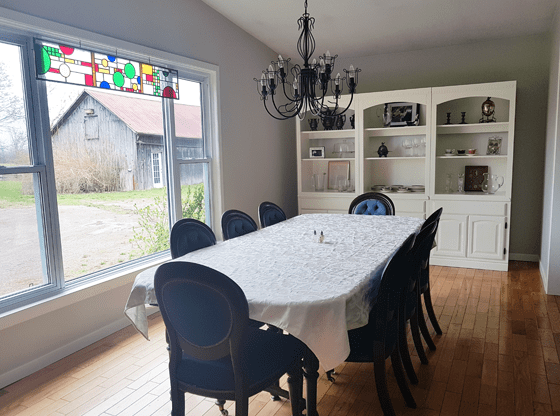
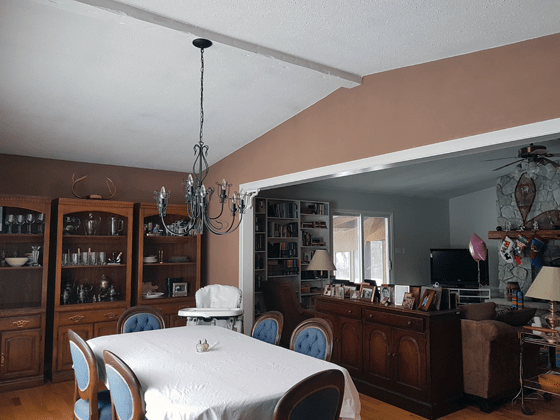
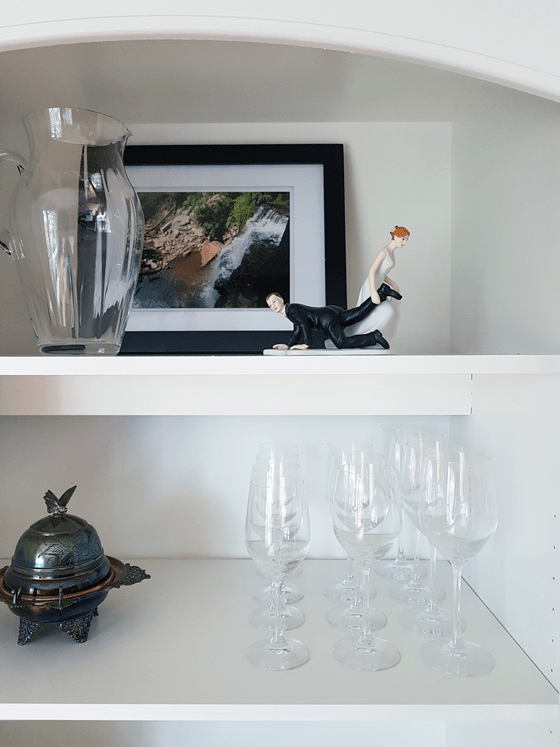
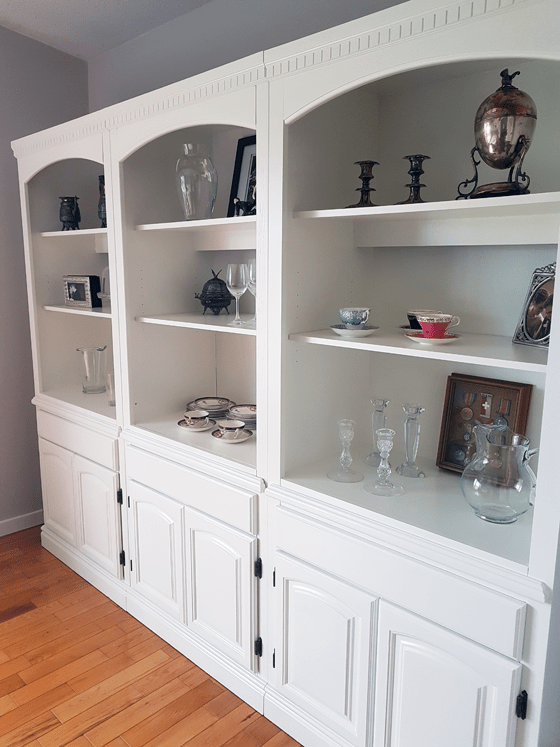
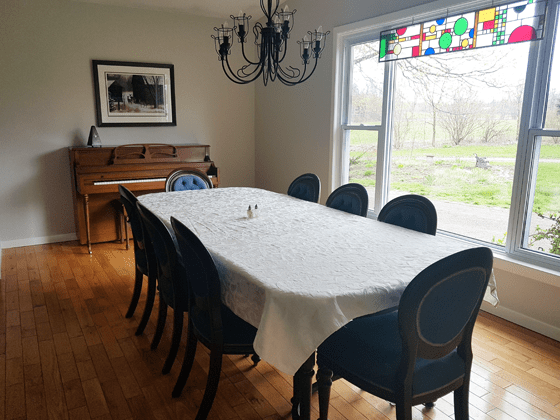
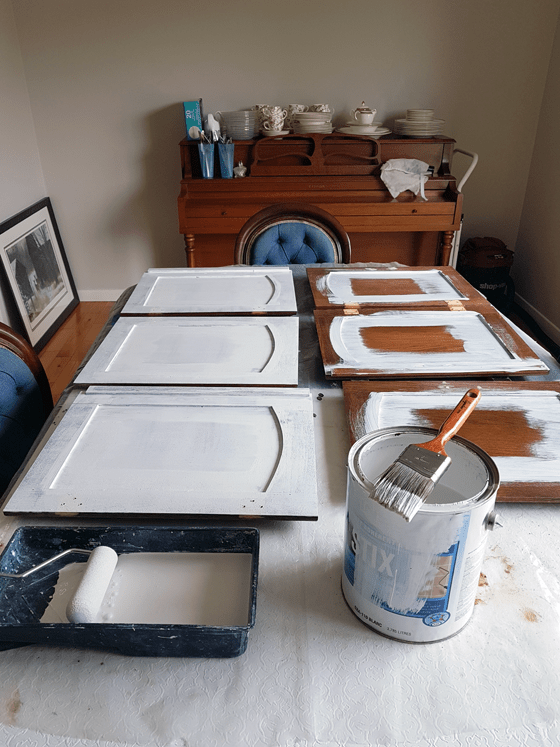
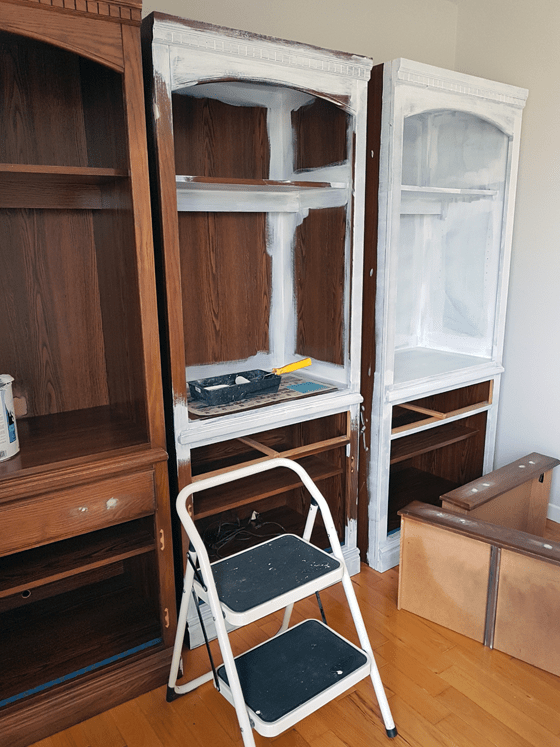
Sometimes after living with a space–even one you love–for awhile you realize there’s something missing. Our dining room is our most recent ORC, completed just this spring. I hoped to build doors for the upper section of our china cabinet during the makeover, but ran out of time.

White china cabinet in the dining room

The ORC goes so fast that there are often parts of a makeover that don’t get done. Even though I’m not participating in the ORC, watching everyone’s projects motivates me to return to the dining room and maybe finally build the doors.

I also have some other ideas for simple updates. In our bedroom, I’m going to freshen up our bedding with some new pillow cases. And in the laundry room, I’d like to sew a faux roman shade for the window.

One of the best parts of the One Room Challenge and other room makeovers is that you end up with a new beautiful space. These simple updates can ensure that you continue to enjoy your space for years to come.

Are you revisiting any room makeovers that you’ve done in the past? What tweaks do you want to make in your home?


Embroidering with my great-grandmother

Embroidered fabric cutlery holder

I am one of those people who loves my “nice” dishes. I picked out a china pattern when we got married and I was grateful to receive crystal wine glasses as a wedding gift. I love pulling them out when we have a family dinner.

Some day, I hope I’m able to add a set of silver cutlery to my “nice” collection.

Even if I don’t have the silver yet, I have a place to keep them.

Rolled cutlery holders

I’m not sure what these are called. They have little sleeves for the various utensils, and then they roll up to tuck in the drawer. They protect the cutlery from scratches and keep them organized.

Rolled cutlery holder

These holders were made by my great-grandmother and me, which I think is so, so cool. (My great-grandmother died before I was born.)

A few years ago I was helping my Mom organize some things in her sewing room, and we found these holders. The spoon and fork ones were done, but the knives was barely started.

I haven’t done embroidery in years, but I liked the idea of finishing the set. I also liked the idea of having a place to store extra cutlery. While we don’t have a silver set, we do have lots of cutlery for those family dinners, and my storage technique was not ideal.

Cutlery stored in plastic cups

I especially liked the family heritage.

I tried to pick colours similar to the ones my great-grandmother chose and mimic her stitch patterns, and I’m really happy with how the set turned out.

Rolled cutlery holders


Do you have a silver, china or crystal set? How do you store extra dishes? Any other embroiderers out there? What craft or organizing projects have you been up to?


Deer in the dining room

Hello. It’s been a little while. Thanks for your patience during my blogging holiday. We’ve had a lovely summer, and having this time all together is something I will always treasure.

Our days have been filled with all kinds of fun, including a few little projects. One of the projects was a final decorative touch in the dining room. Hanging two sets of antlers in the corner.

Two sets of antlers hanging in the dining room

This was always part of my original plan during the One Room Challenge this spring, but in the finishing stages it was cut.

The delay was mostly due to one set of antlers not being mounted. It took me some time to figure out how I wanted to mount them and how to do it.

The first set of antlers came from Matt’s Grandpa. We’ve had them for awhile, but haven’t had a good place to put them. They’re mounted and varnished and quite old.

Two sets of antlers hanging in the dining room

I decided to try to make our new antlers match the old ones as much as possible. I traced the mounting plaque, but made it a bit taller, as the skull plate on the new antlers was a bit larger. I know the skull plates are typically trimmed and covered, but I actually like seeing the bone. I’ve written about my (potentially strange) attraction to skulls before. If antlers are considered attractive, why can’t the bone be as well?

Covered skull on mounted antlers

Mounted antlers unvarnished and uncovered skull

I also decided to keep the antlers natural rather than varnishing them. I like the light tone of the antlers and wanted to highlight their natural beauty.

The next step was to try to match the colour of the plaque. I didn’t want to buy new stain for such a small project, so I tried blending a few different stains. I got close, but not exact. Part of that is likely due to a difference in the woods. The grain of the new plaque is much more pronounced than in the old one.

I was nervous about attaching the antlers to the plaque, but it worked out much better than I expected. Online tutorials prescribe bolting the antlers to the plaque. I simply drilled pilot holes in the skull and then screwed through the back of the plaque into the bone using regular screws. The skull seems secure, so I hope that it will hold.

The final touch was adding a picture hanger to the back of the plaque.

Back of mounted antlers

I put both antlers in the corner next to our deer painting. When I first photographed the dining room for the reveal post, this corner looked very empty. Over the last few months, I’ve gotten used to its emptiness–part of my draw to a bit more minimalism. However, since the antlers are a bit hidden in the corner, the room doesn’t feel too busy.

Two sets of antlers hanging in the dining room

I like that the antlers are finally on display. I feel like displaying them honours the animals. While my preference is always to see deer alive walking around outside, these deer in some ways live on as I appreciate their antlers every day.

Are you a fan of antlers in decor? Do you have any antlers at your house?


Tiptoeing towards (a bit more) minimalism

A project in one part of the house brings chaos to others. By the end of the dining room makeover, the kitchen floor was in a state I prefer not to think about. The guest room still hasn’t entirely recovered from being the dumping ground for all of the things I removed from the dining room.

But while there was chaos in most places, the dining room itself–once it was finished–was calmer than ever. And it wasn’t just the fresh light paint.

White china cabinet in the dining room

In preparation for painting the china cabinet, I emptied everything out of it. In the process, I designated many dishes for donation. Shot glasses and bar stuff that we don’t need. Wedding gifts that we’ve never used. Extra serving pieces. Wrap it up, pack it up, take it out.

When I reloaded the china cabinet, there was so much breathing room. All of our dishes fit easily, and on the upper shelves where we have some of our more special items on display, we could actually see them. They weren’t lost in a mass of clutter.

China cabinet

I also took down the stained glass window and the display of family photos from behind the couch to protect them from paint spatters.

When the room was finished I was reluctant to put these things back. If you’ve been following along for any amount of time, you know I’m super sentimental and love all of the family and personal touches we have around our home. So I was really surprised I didn’t want to have the stained glass Matt’s uncle made for us, or my hand-picked favourite family photos back on display.

Those things are super precious to me. But without them, the dining room felt calmer–a feeling that I liked.

Vintage shelving unit used as a china cabinet

There’s a push for minimalism–or at least paring down–by a lot of bloggers these days. While I will likely never be a Marie Kondo devotee, I am feeling a pull to simplify. I love my stuff, but maybe I don’t need quite all of it. Maybe some of it is more precious than others.

When the dining room makeover began, I had felt pressure about what to do with the top of the piano. What should I put there? How should I style it? During the challenge, I realized I didn’t have to do anything. The top could just be empty. There’s the metronome (functional) and the art Matt’s parents gifted to us on the wall above, and that’s it.

Deer painting above a piano

Inspired by the feeling I felt in the dining room, I’m now looking at the rest of the house. The bookcases in the living room, my closet, the kitchen–what do I actually need and love?

How about you? Anyone else making a move towards minimalism? How do you balance sentimental collections while making your home feel calm and uncluttered?


Repair, don’t replace, your broken vinyl window

Vinyl windows have a good reputation for being low maintenance and energy efficient. However, they sometimes get a bad rap for longevity–as in they only last so long before they have to be replaced. Wood window aficionados will talk about how their windows can be repaired multiple times and last for decades or even centuries.

When I walked into the dining room one morning a couple of months ago and saw that one of the panes of glass had cracked, I was immediately anxious. All of our windows are vinyl, and the one in the dining room is huge. Replacing it would be expen$$$ive.

Cracked window pane

After a bit of research, I discovered that there was in fact a way to repair the broken pane, and I didn’t have to replace the whole window.

Phew.

This was one of the tasks on my One Room Challenge to-do list, but I didn’t go into any details during my ORC posts. You’ve seen the new dining room, but I wanted to share more on the window.

The dining room window is made up of five panes of thermal glass. The centre is a large fixed pane. At either end we have a double hung window. The upper sash on the right side was the one that cracked.

Dining room window

My online search uncovered multiple window repair companies. I picked four and called them up.

I asked about their process and timelines, gave them the measurements of my window and got a rough quote.

The quotes were all over the map: $450+tax on the high end to $175 all-in on the low end. For reference, our pane was 17 1/2 inches wide by 28 1/2 inches high.

Beyond that, between the different companies everything was pretty much the same. Someone would come to the house to measure the window accurately. They would then order the new pane of glass. It would be a thermal pane, just like the rest of the window. The new window would arrive in 2 to 3 weeks and then a repair person would return to install it. Install would be quick, about an hour.

The company with the cheapest price (The Glass Medic for locals) had a bunch of super positive reviews online, so I decided to go with them.

There was a slight delay as delivery schedules were adjusted for the Easter holiday, but our new glass arrived, along with the our installer, Mark.

Repairing a vinyl window

The old glass was held in place with plastic strips. Mark popped them off and lifted out the broken pane.

Repairing a vinyl window

He cleaned the frame carefully and put little spacers in place to allow room for the glass to expand–so it hopefully doesn’t break again.

Repairing a cracked vinyl window

Repairing a cracked vinyl window

Repairing a cracked vinyl window

He put the new thermal pane in place and reinstalled the strips. Then he wiped off the window,  and the job was done.

Repairing a cracked vinyl window

Repairing a cracked vinyl window

I am super happy with our repaired window. Obviously I’m very relieved we didn’t have to replace the whole thing. I’m also somewhat surprised that I hadn’t heard of these types of repairs before.

Repairing a cracked vinyl window

Broken panes, broken seals, a variety of issues can all be repaired. This obviously saves money, but also saves waste as a whole window is not going in the garbage (an often cited objection to vinyl windows).

What type of windows do you have at your home? Have you ever broken a window? We’re not sure how ours cracked. Mark said it could have been a long-time fault in the glass that finally came out. Have you ever fixed a window? Or replaced one?

Repair, don't replace, your broken vinyl window

Dining room reveal – One Room Challenge Week 6

I love our dining room. It’s where we start our day and watch the sun come up over the fields. We have a great view across the farm and can watch whatever wildlife is around. At the end of the day, we come together again to share dinner with the dog under the table and the cat on the window sill.

Whether it’s everyday meals or occasions with extended family, this room gives us lots of special moments. And now, the space measures up to what happens in it, and I love it even more.

Welcome to the final week of the One Room Challenge and the reveal of our new dining room.

Bright and fresh dining room

If you’re new here, welcome to our farm. My name is Julia, and I live on a 129-acre farm in Ontario with my husband, Matt, our one year old daughter, Ellie, our rescue dog, Baxter, and #theworldsbestbarncat, Ralph (who loves sitting on the dining room window sill).

We moved here 7 years ago and have been fixing up our 1970s era ranch style house ever since. Our style is a bit traditional, a bit country, with lots of personal elements, thrifting and DIY.

Which brings us to the dining room. You can get caught up on this project with all the dining room ORC posts: the plans (week 1), sanding and patching (week 2), the start of painting (week 3), more painting (week 4), beginning the china cabinet makeover (week 5).

Six weeks ago this room was dark. The brown walls were rough, cracked and scuffed. The thrifted shelving unit that is our china cabinet was all kinds of brown and dated.

Vaulted ceiling in the dining room

Now the walls are smooth and light thanks to a lot of sanding and two coats of Abalone by Benjamin Moore (mixed at 75%). All of the trim also got a fresh coat of paint (Cloud White by Benjamin Moore).

My go-to Cloud White was also the solution for the china cabinet. Painting this was not fun–especially when I decided I needed to do a third coat–but it was absolutely worth it. This cabinet gives us so much storage and now it’s no longer a black (brown) hole in the room.

I feel like all of our special dishes and family heirlooms look so much nicer in the white cabinet than in the wood (and yes, I desperately need to polish my silver).

Vintage shelving unit used as a china cabinet


China cabinet

You may notice that the cabinets are lacking hardware. This is my second ORC reveal without hardware. There’s another unfinished part of the china cabinet. I plan to build glass doors for the upper sections, as I don’t believe in dusting. Those will come in the next couple of weeks.

Vintage shelving unit used as a china cabinet

The wall opposite the china cabinet holds Matt’s grandmother’s piano. Ellie and I play on it occasionally already, and I hope one day to teach her to actually play it properly. I love the beautiful heritage from her Great-Grandma, her Daddy’s family and her Mama.

The Coonley Playhouse-style stained glass (inspired by Frank Lloyd Wright) was made for us by Matt’s uncle.

Bright and fresh dining room

The picture was a gift from Matt’s parents. The barns look very much like our two barns–although we’ve never seen that many deer that close to the house.

Deer painting above a piano

There are a few more things I want to do in here, but I’m really happy with where we are after these 6 weeks. Finishing another room is a big accomplishment. More importantly, every time we sit down for another meal together, it feels so nice to be in a bright, beautiful space.

Interested in seeing other beautiful makeovers? Visit the One Room Challenge to check out all of the other participants’ reveals.

One Room Challenge Guest Participant logo

Thanks for following along on the dining room makeover.

Starting over – One Room Challenge Week #5

Last week I said that week 4 of the One Room Challenge is the hard one. For me, this time around it was week 5.

Here are the previous updates on this dining room makeover:
Week 1 | Week 2 | Week 3 | Week 4

Nothing tragic happened. I started painting the cabinets as I’d planned. But the whole “started” thing felt hard.

Priming cabinet doors

I felt like I was restarting this makeover. I was removing hardware, shelves, drawers, doors. I was patching holes and sanding. I was priming.

Ugh. Prep is not the fun part of DIY for me. Although Ellie enjoyed having a new fort.

Ellie sitting in the china cabinet

Even once I started painting, I wasn’t having fun yet. It just reminded me that I don’t like painting cabinetry. All of the angles, molding and curves that need to be cut in, all of the different pieces that need to be primed and then painted–twice. Just not my favourite.

So that’s a lot of complaining.

Sorry to be a downer.

Snapping out of it now.

I started painting the china cabinet. Yay!

Painting the china cabinet

This was a maybe on my initial task list, so the fact that I got to this part of the makeover is a good accomplishment.

The dining room, which had brightened up a lot already thanks to the lighter paint on the walls, gets brighter every day as the wall of dark brown cabinetry slowly goes fresh creamy white.

I really feel like the white paint is going to transform these circa-1990s entertainment units into a super functional and beautiful china cabinet.

I have another coat to go, but I think it’s doable before the big reveal next week. Next week! We’re almost at the end of this One Room Challenge.

Before we get to the end, check out the other participants’ progress at One Room Challenge.

One Room Challenge Guest Participant logo

Does anyone else struggle with the prep part of DIY? Have you ever had a project where you feel like you’re starting over? Are you yay or nay on painting cabinetry?


Extra motivation for One Room Challenge Week #4

Week 4 is often the stage in the One Room Challenge where things become a little more… challenging.

The initial excitement has worn off. Perhaps you’ve encountered a few hiccups. Maybe your plans have changed or you’re not progressing as quickly as you thought.

For some extra motivation–or an extra challenge–for week 4, I decided to host a Good Friday dinner with my family.

In our dining room.

Which is in the middle of a makeover.

This means the room is filled with cans of paint and assorted tools. There is a skim of dust on pretty much every surface. All of the furniture is pulled away from the walls so that I can paint behind it. There’s not room to extend the table so that everyone has a place to sit.

Primed dining room

My Mom kept saying, “We’re your family. You don’t have to fuss for us.”

Make no mistake, Matt and I tend not to fuss for very much, and we’ve entertained a lot in the middle of numerous renovations. However, I draw a line at having a place to sit for the people that we’ve invited.

So I put on a bit of a push to get the painting done.

Painting the dining room with a roller

I found I could paint half the room–cut and roll–in 2 hours. Also measured as one baby nap. So I figured I’d be done in 4 days. Instead, I did 2 baby naps and 2 night shifts after she’d gone to bed.

And all the painting was done in 2 days, well before people arrived for dinner. In fact, I had time to vacuum and mop the floors, reinstall the cover plates, push the piano and china cabinet out of the way and add the leaves to the table. Woo-hoo.

On Friday night, everyone had a place to sit, and we had a great time with family.

Also nice, my sister arrived with her router, router table and a case of bits. I’m hoping this router is easier to use than my Dad’s and will help me make the doors for the china cabinet.

So the ORC continues. I’m feeling okay about week 4. Two weeks to go. I might be heading into the homestretch.

To see the other participants’ progress (some of whom are definitely not in the homestretch–I’m getting nervous for some people!), visit One Room Challenge. The designer participants share their updates on Wednesday and the guest participants post on Thursday.

One Room Challenge Guest Participant logo

How do you motivate yourself as projects progress? Do you have any stories of entertaining while renovating? How did you celebrate Easter?


Breaking out the paint brushes – One Room Challenge Week #3

Primed walls in the dining room

Painting has started in the dining room! Happy dance!

I will qualify this to say the walls are only primed and only the trim has actual paint, but there was a brush, a roller and a can. It is yet another step on my One Room Challenge journey.

If you want to catch up on the previous updates on the dining room makeover, here is week 1 and week 2.

Another important update: the floor licking continues. Why?

Ellie in the dining room

“I detect dust, dog hair and yesterday’s lunch.”

Do not be distracted by the weird–yet very cute–baby. We’re here to talk ORC. Back to the program.

The prime is thin and the drywall patches show through, but already the white(ish) walls make the room feel much brighter. They also highlight the dirtiness of the popcorn ceiling, which I’m trying to ignore.

Ellie in the primed dining room

“Is this wall wet? Am I getting paint on my jammies?”

Over my years of DIYing, I’ve learned that I prefer to paint the trim before the walls. I find it easier to cut the walls up to the trim as opposed to the trim up to the walls, if that makes sense (I’m a freehander, not a taper). While it’s possible that the trim may get spattered or dripped on when I’m painting colour onto the walls, I’ve not had a lot of issues with this, and minimizing the tedium of cutting is worth it for me.

Baby inspecting the primed dining room

“Ummm… Mama, I think you missed some spots.”

The walls will happen this week. I’ve chosen Abalone by Benjamin Moore, mixed at 75%. This is the same colour we used in the adjacent living room, kitchen and hall.

The dining room is kind of its own room thanks to the archway, and I considered using a different colour in here. However, Stacy at Blake Hill House made the point that our house is open concept enough that the dining room and living room feel like they’re one room, so keeping the colour consistent makes sense. Thanks Stacy for the input.

At the start of the One Room Challenge, I said that if I can just paint the walls I’d be satisfied. I’m feeling like this will likely be achievable.

Here’s where I’m at on my original task list:

  • Sand the walls
  • Patch cracks and holes
  • Prime walls
  • Paint trim
  • Paint walls
  • Fix broken window
  • Hang art
  • Build doors for china cabinet
  • Paint china cabinet

Almost halfway there.

To see the other participants’ progress, visit One Room Challenge. The designer participants share their updates on Wednesday and the guest participants will be posting on Thursday.

One Room Challenge Guest Participant logo

Who else has a live-in inspector for their DIYing? What do you paint first, trim or walls? How do you choose paint colours in adjacent rooms?


Off to a quick start – One Room Challenge Week #2

Welcome to week 2 of the One Room Challenge.

If you’re new to my blog, welcome. My name is Julia, and I live on a 129-acre farm in Ontario with my husband, Matt, our one year old daughter, Ellie, our rescue dog, Baxter, and #theworldsbestbarncat, Ralph.

Ellie and Ralph in the dining room

We moved here 7 years ago, and since then we’ve been working on our fixer-upper 1970s era ranch style house with lots of DIY, thrifting and occasional professional help. Our style is a bit traditional and full of very personal elements, with country touches to make our house look like it belongs in its farm setting.

The dining room is the last makeover before we start more major renovations like a garage addition, new kitchen or bathroom.

In last week’s post, I shared my plans for this update.

Today I thought I’d give more of an overview of this space.

Pros:

The dining room is a large room. A vaulted ceiling and a big archway to the living room make it feel even larger.

It has a big window that offers an amazing eastern view across the farm. Watching the sunrise over the fields while we have our breakfast is a beautiful way to start the day. (The Frank Lloyd Wright Coonley Playhouse-style stained glass was made for us by Matt’s uncle.)

Coonley playhouse Frank Lloyd Wright inspired stained glass panel

Over the years, we’ve collected vintage and thrifted furniture that are perfect for our traditional style: Matt’s grandmother’s piano, an antique dining table, 8 chairs that turned out to be a pretty good match to the table, and after an incredibly lucky thrifting score 3 circa-1980s bookshelves/TV/entertainment units that stand in for our china cabinet.

Cons:

Like every room in our house, the dining room was rough–literally. The walls felt like sandpaper and the ceiling is popcorn. Add to that stains, scuffs, holes and cracks in the drywall and the trim, and the room was not pretty.

It was also dark. Even with the large window, the dark brown walls make the room feel dim. Another issue arose this winter when one of the panes in the window cracked. It’s on my list to be fixed during this ORC.

All of the furniture, except the piano, needs a makeover. The table and chairs need to be refinished. The chairs need new upholstery. And the china cabinet needs to leave the 80s behind for fresh white paint.

Vaulted ceiling in the dining room

Someday, I plan to cover the popcorn ceiling with planks. But for now, I’m going to be relying on the power of paint and focusing on the walls and hopefully the china cabinet.

And with the motivation of the ORC, I’ve gotten off to a quick start on this project.

The update

I sanded the walls smooth and made so, so much dirty dust. Vacuuming has been the central task of this makeover thanks to the baby crawling around–and occasionally licking the floor (why?).

Sanding rough dirty drywall

And then I got started patching all of those holes and scuffs and cracks. I knew the walls were rough, but I hadn’t noticed how many cracks there were.

Cracks and scratches in drywall

Patching cracks in drywall

Patching drywall

More sanding, more patching, more sanding–and lots of vacuuming to try and keep the baby out of the dust.

My other crew member, Baxter, was not helpful. He loves the morning sunbeam in the dining room and even the threat of 7 years bad luck from laying under the ladder wouldn’t keep him from his favourite napping spot.

Baxter laying under the ladder

My luck seems to be good so far. One week in and the walls are smooth and ready for priming. The floor–and the baby–is relatively clean. Onward with the challenge.

You can check out all of the ORC participants later this week. The designer participants share their updates on Wednesday and the guest participants will be posting on Thursday.

One Room Challenge Guest Participant logo

Is anyone else dealing with rough walls or ceilings? How about battling dust? Who else has a helpful DIY crew?