Mudroom reveal

Our mudroom is done–for now. This room was the first on my home goals list for this year. I had just five small tasks to do, and they are finally finished.

Today, I’m giving a tour of the space and highlighting some of my favourite features.

The secret behind the picture

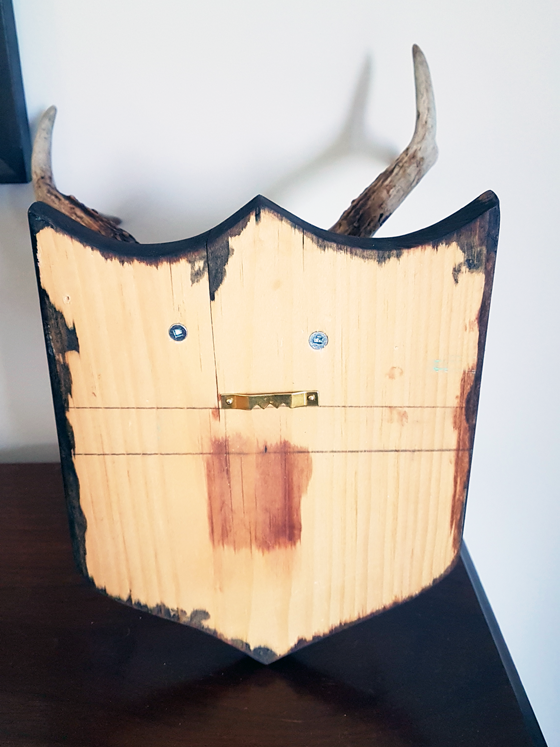
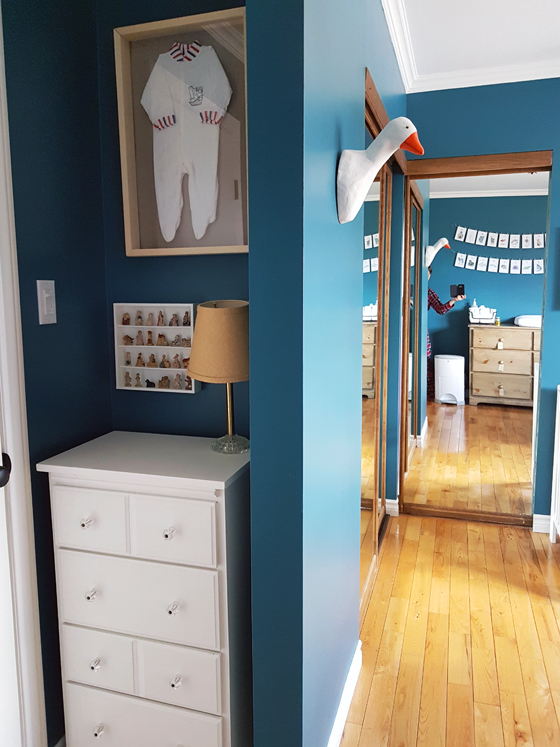
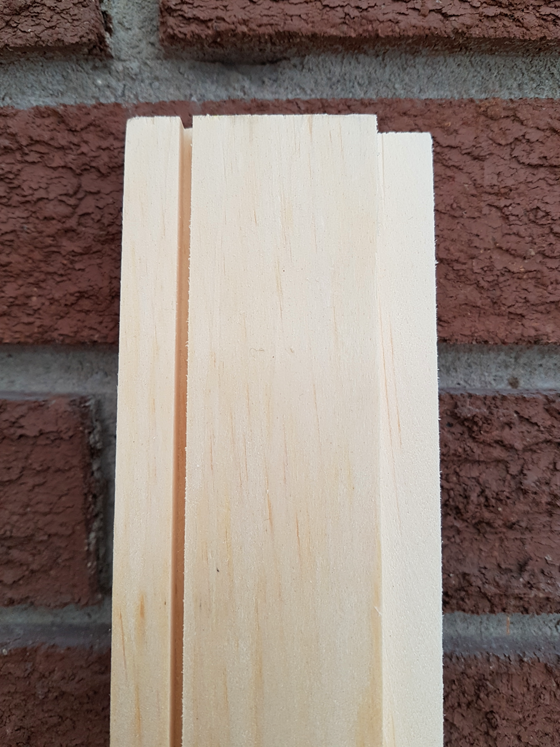
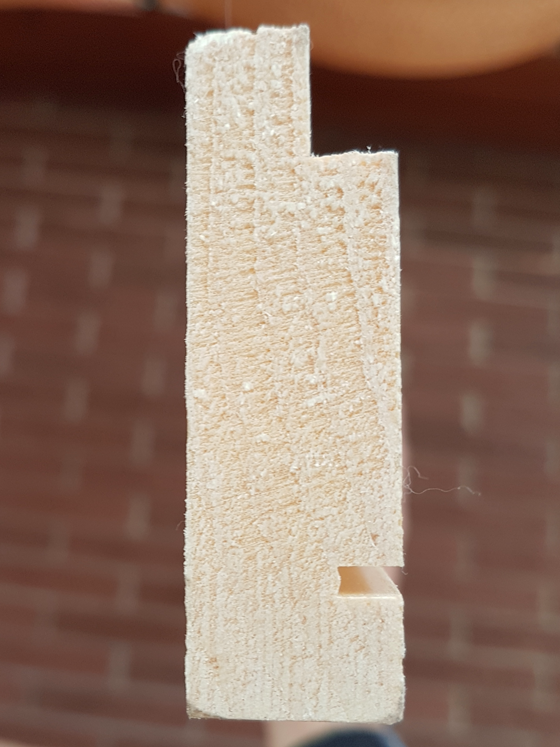
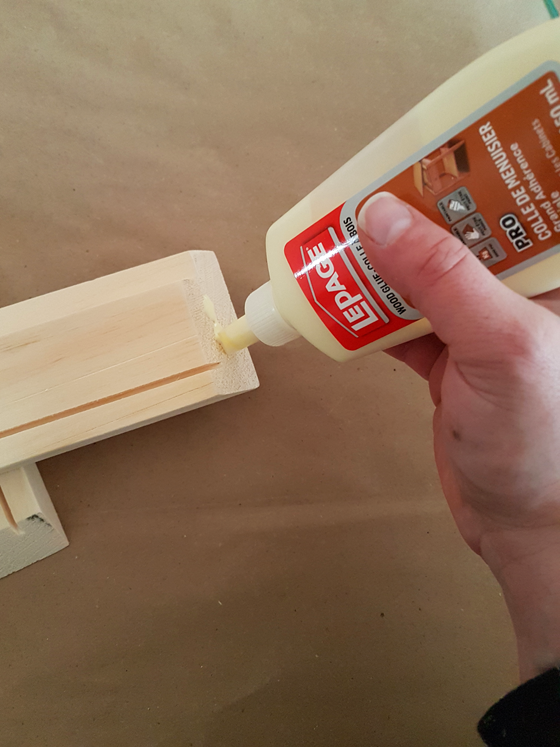
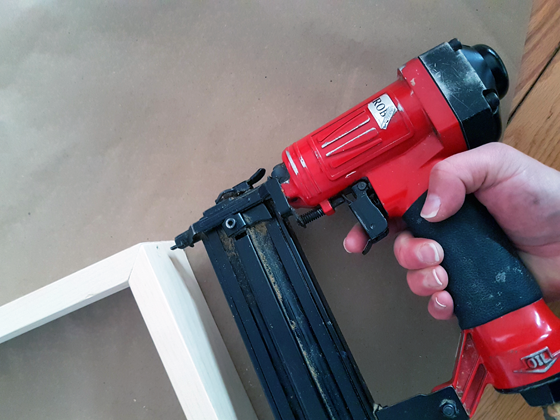
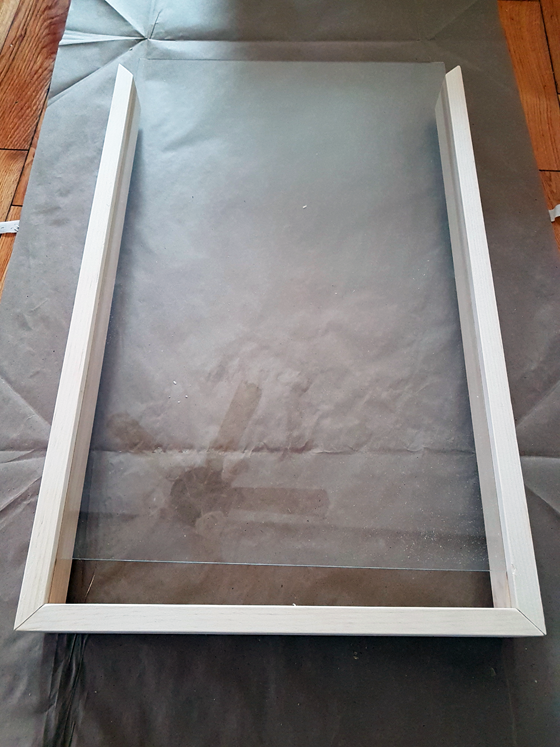
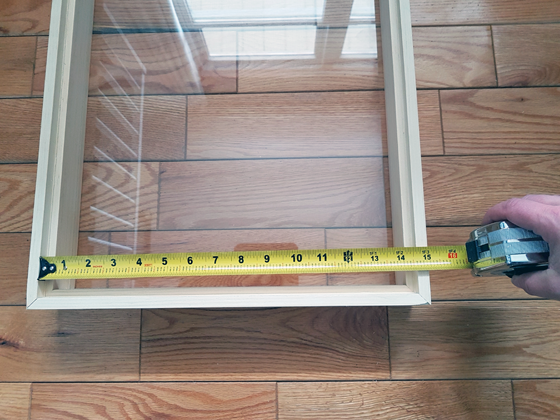
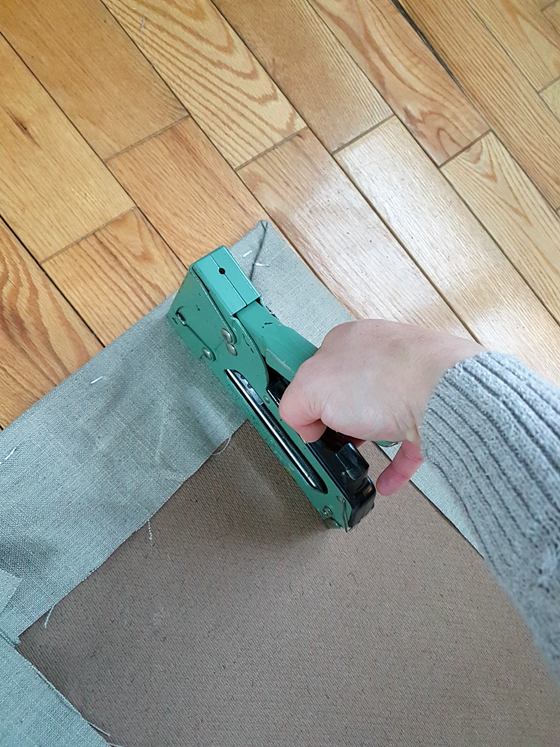
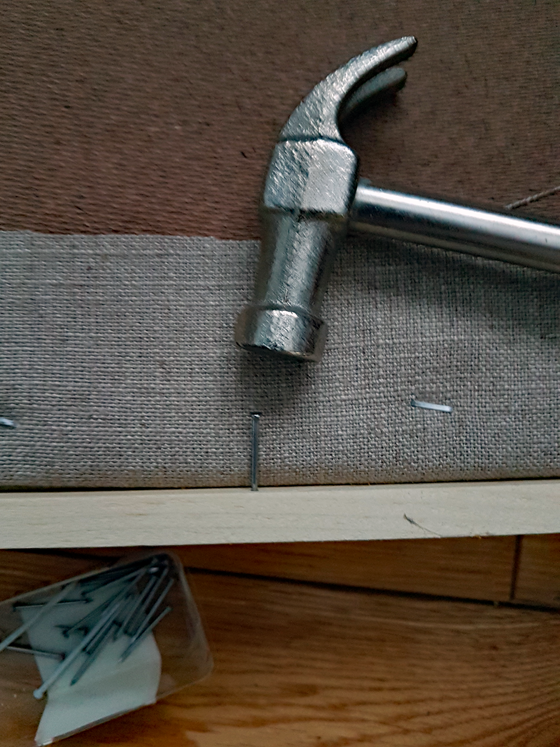
Let’s start with the hidden (literally) gem. I’m particularly proud of how this secret cupboard turned out.

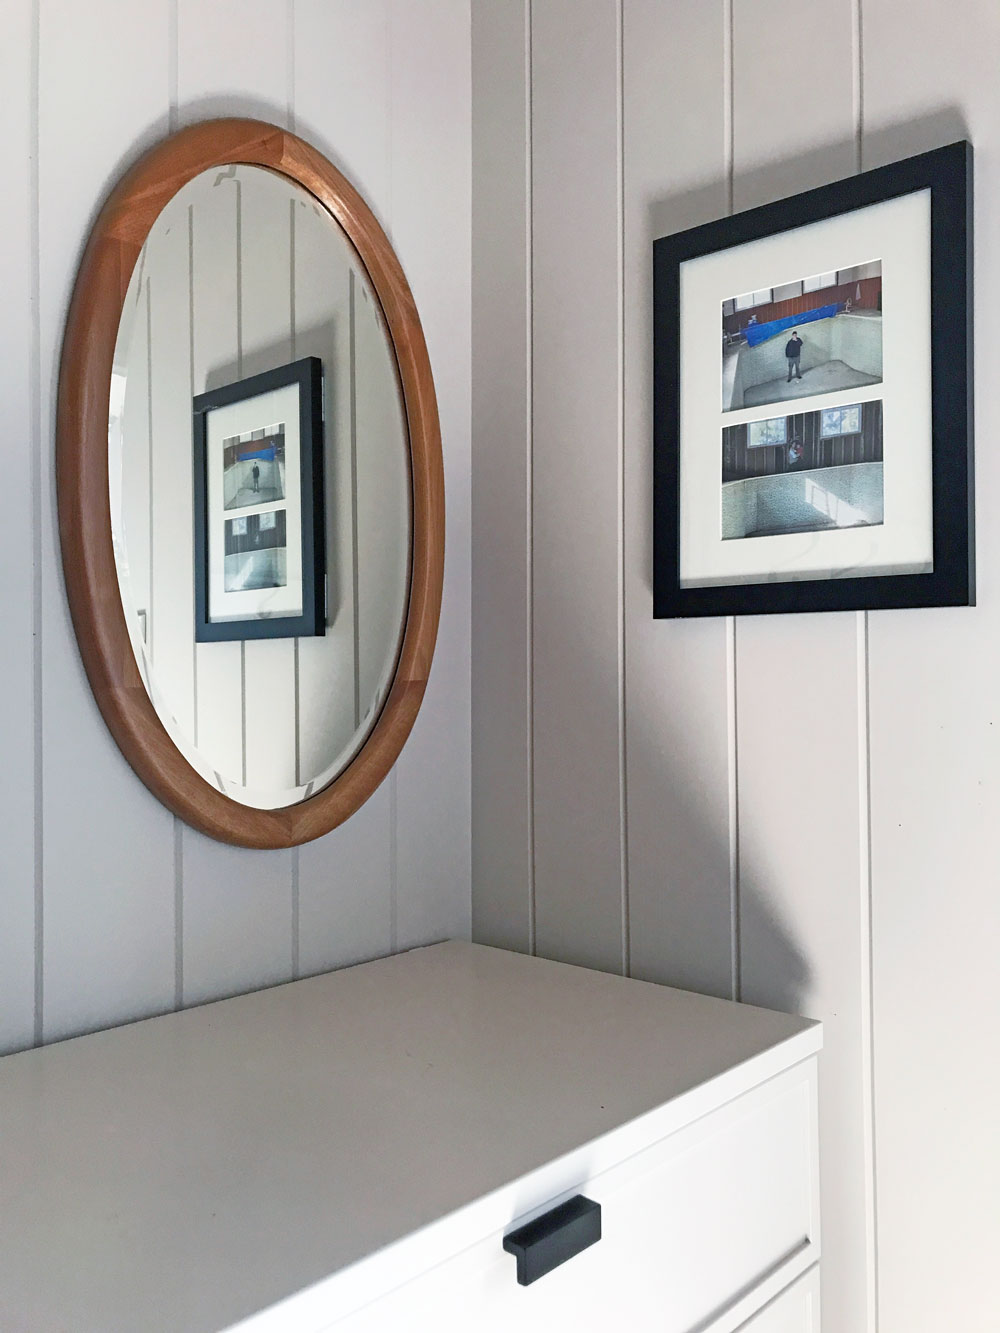
One weekend, I built a little box. When our contractors arrived, I asked one of them to install it in the wall next to the door. Then I attached hinges to a picture frame and installed it over the box. Inside the box, I screwed two rows of little cup hooks. Voila, hidden key cupboard.

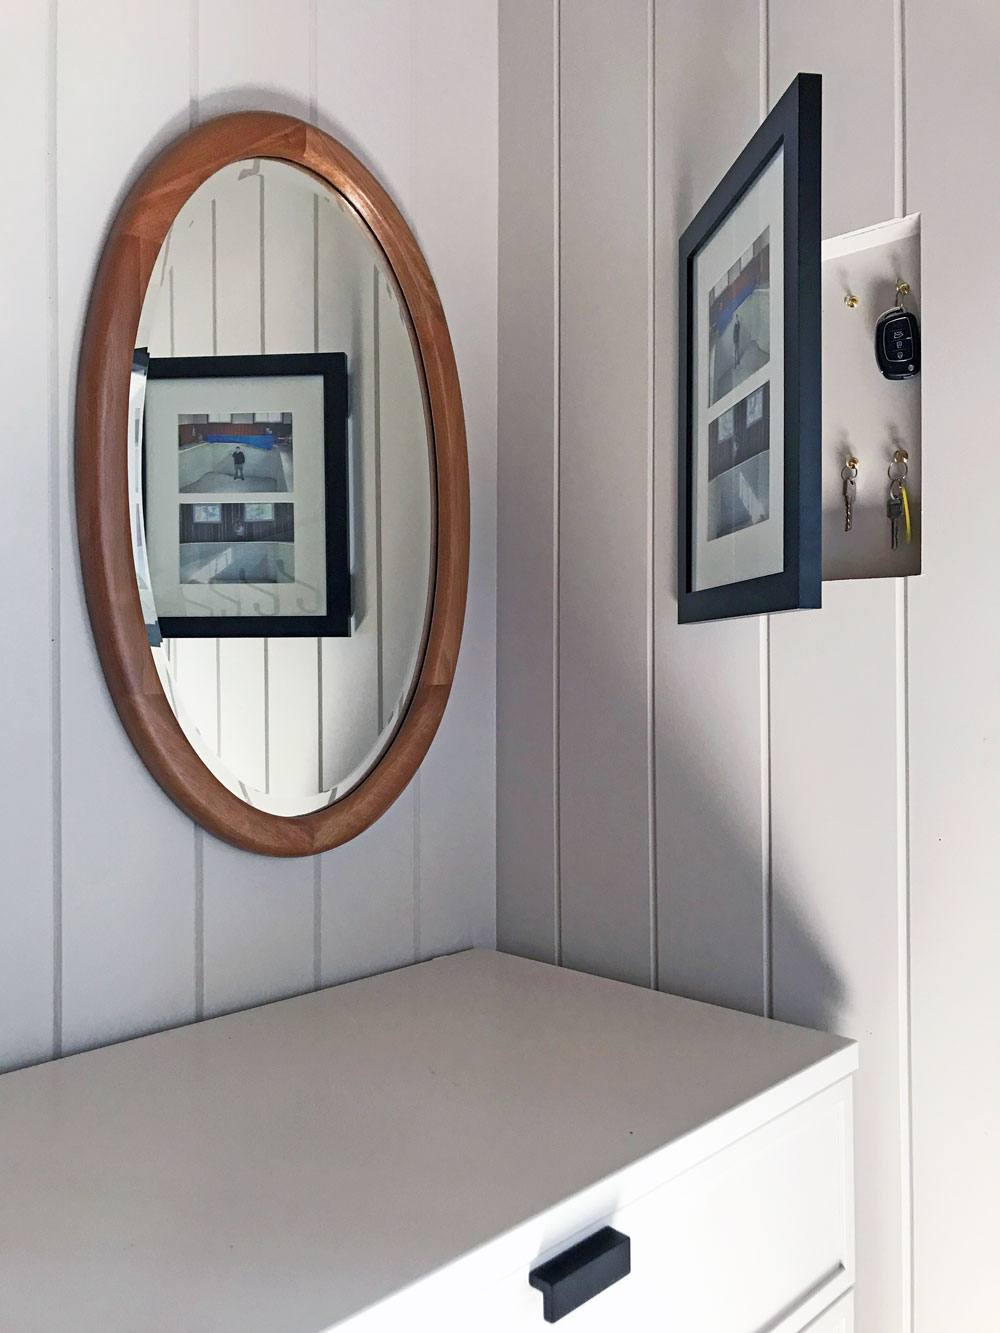
I like having our keys hung up, rather than jumbled together in a basket in the drawer. Originally I’d planned to find a farmy painting for the door. But when I couldn’t find the right size, I decided to go with photos. I chose a picture of Matt in the pool during our home inspection, and then I selected another photo of Ellie and me in the pool during demolition. A literal snapshot of the history of the mudroom, and our little family together in this space we dreamed about.

Figure it out furniture

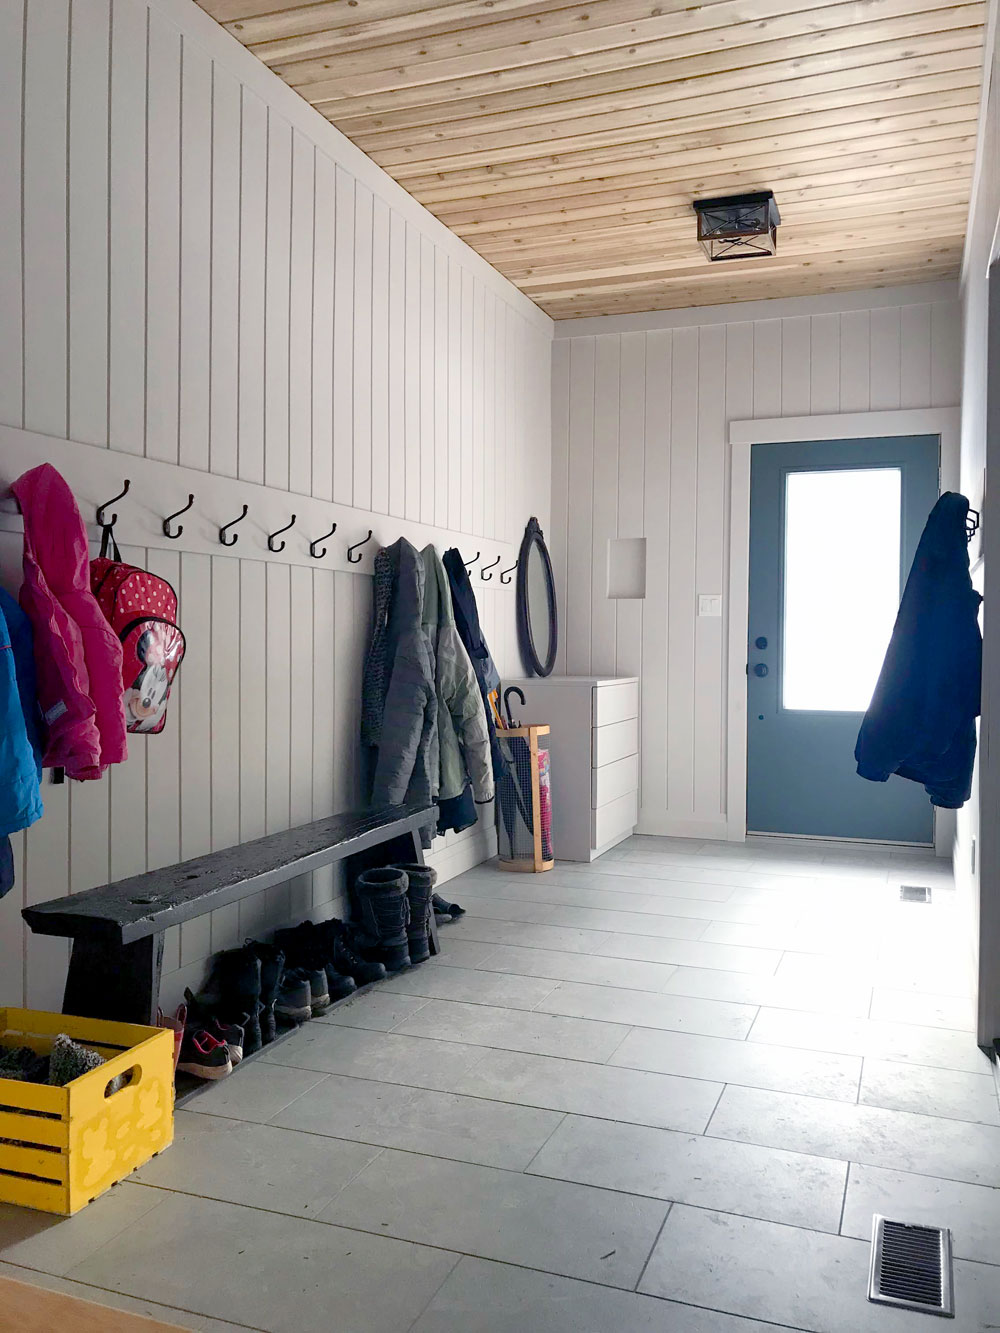
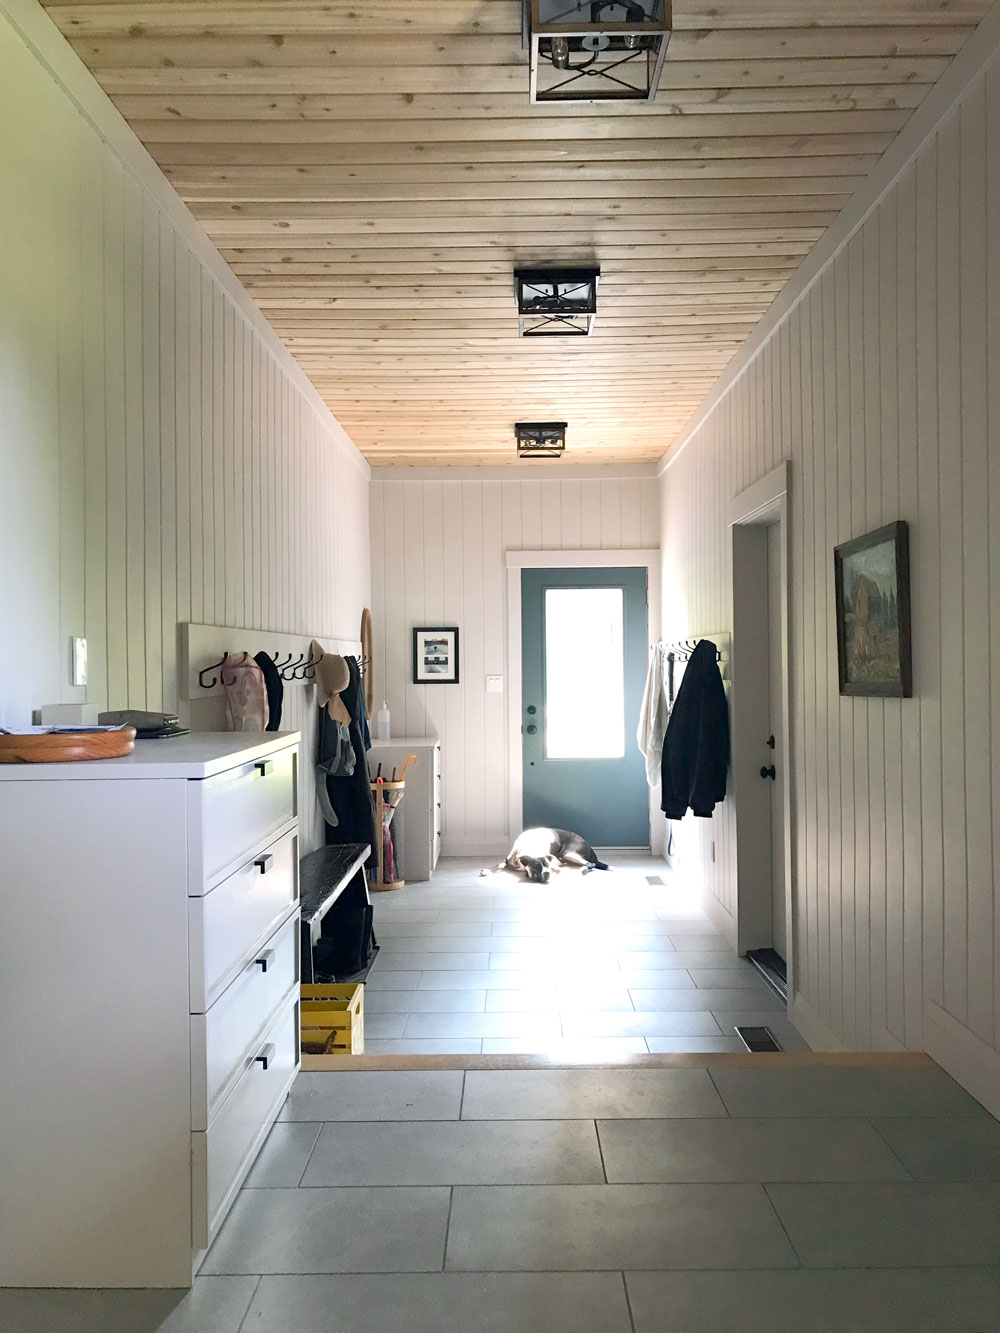
Someday the mudroom may have beautiful built-ins. But for now, we’re making it work with free hand-me-down dressers, our homemade bench and other DIYs. And honestly, they’re working great.

The dressers look fresh after a coat of paint to match the walls. Spraying the hardware to match the black hooks that we used in the room was the finishing touch. The dressers are likely not going to be here forever (the one on the landing is too small and the one by the door is too big), but they’re doing everything we need.

The upper one holds puzzles, colouring books and games for Ellie. Plus cards, flyers, coupons. It’s also our mail drop, wallet and phone charging station. The lower one holds sunglasses, sunscreen, bug spray, masks and some outdoor toys and tools. In the winter it stashes hats, mitts and scarves. Both dressers have empty drawers, so we have more than enough storage for now.

Matt’s nephew and I made the bench almost nine years ago. I’ve been surprised by how much I like having the free-standing shorter bench. It gives space for my longer coats to hang freely, instead of puddling on the seat. Ellie is still a bit short to reach too high, so having her hats or other gear in a dresser drawer or a bin on the floor works best for her, rather than putting them on a too high shelf.

Living with the space as it is now gives me an idea of what we need and what works best.

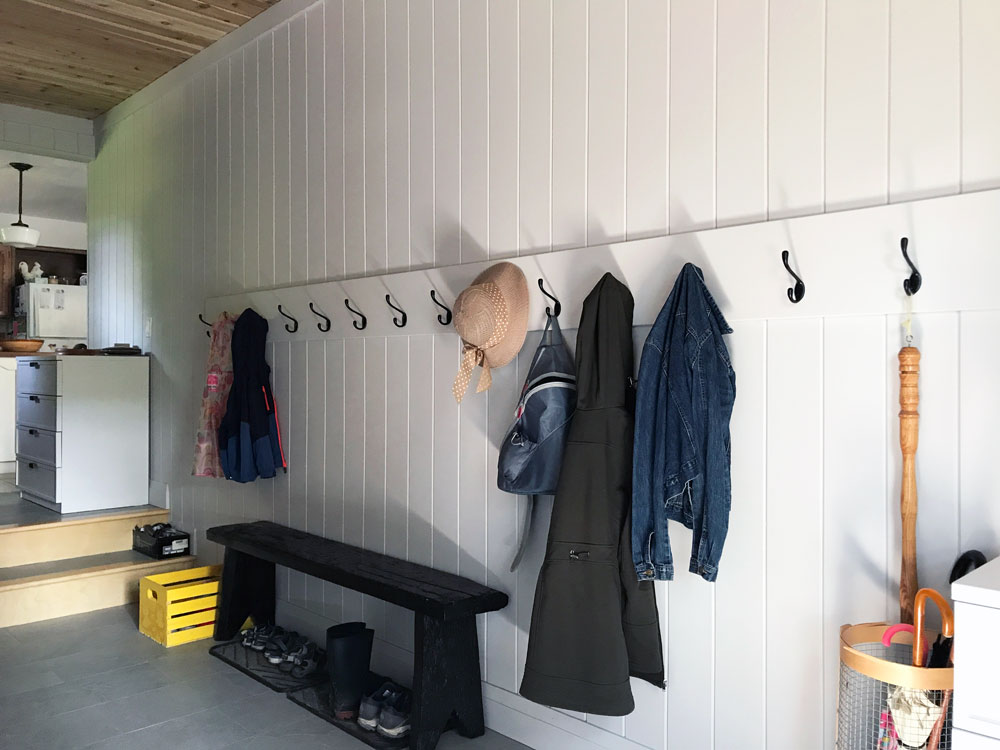
A little bit country

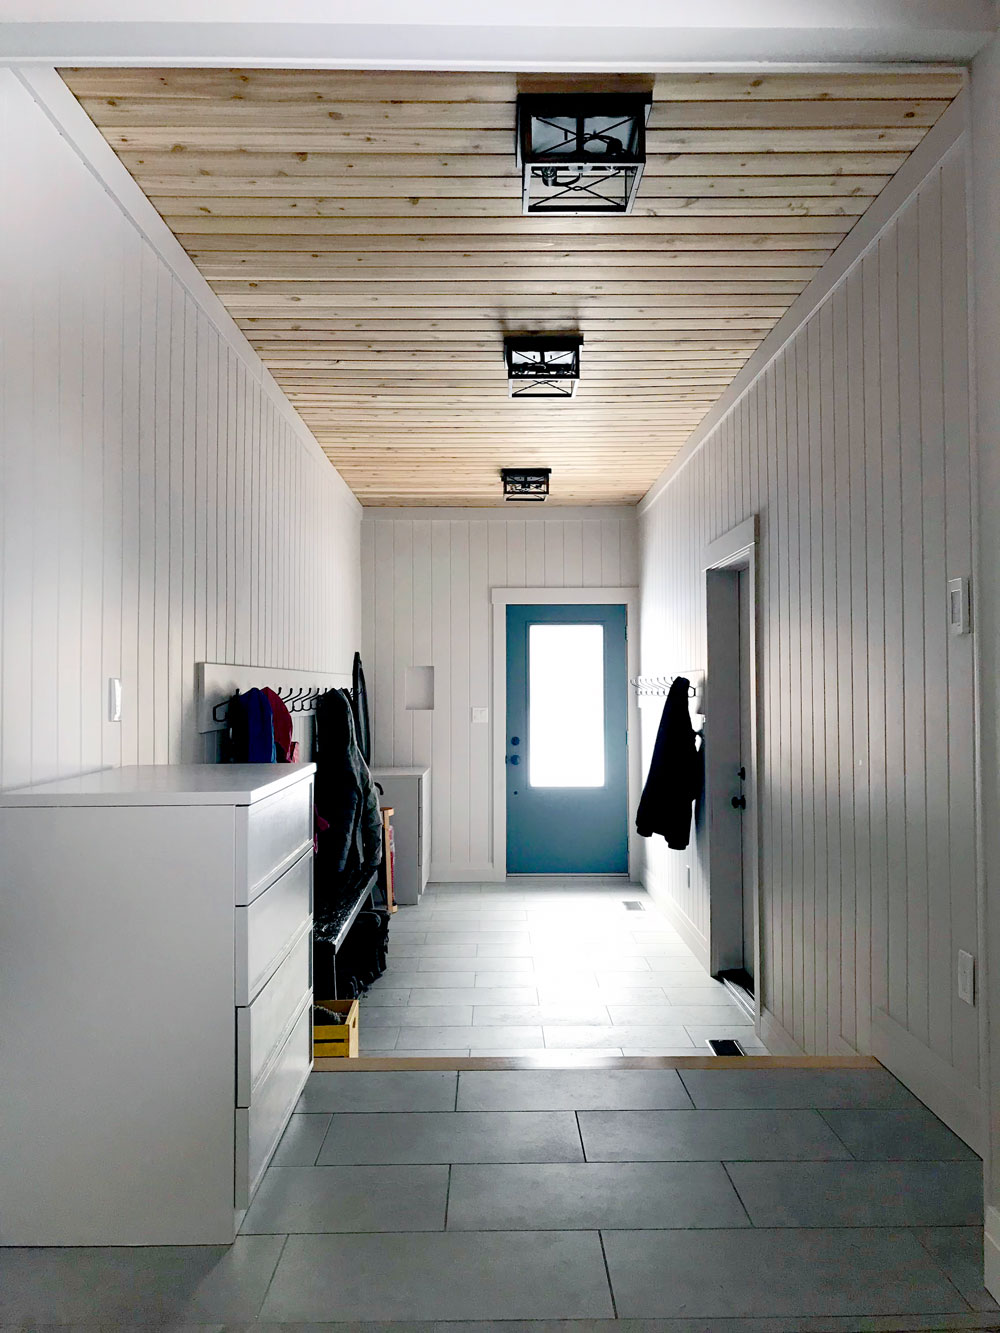
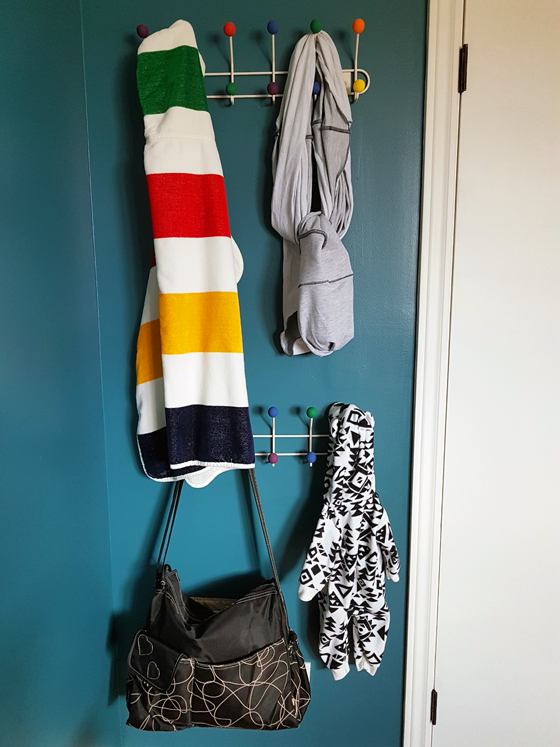
We live on a farm, but we don’t have a farmhouse. With every tweak we make, I try to inject more country character. The V-groove paneling on the walls, cedar on the ceiling and simple black hooks are all examples of that.

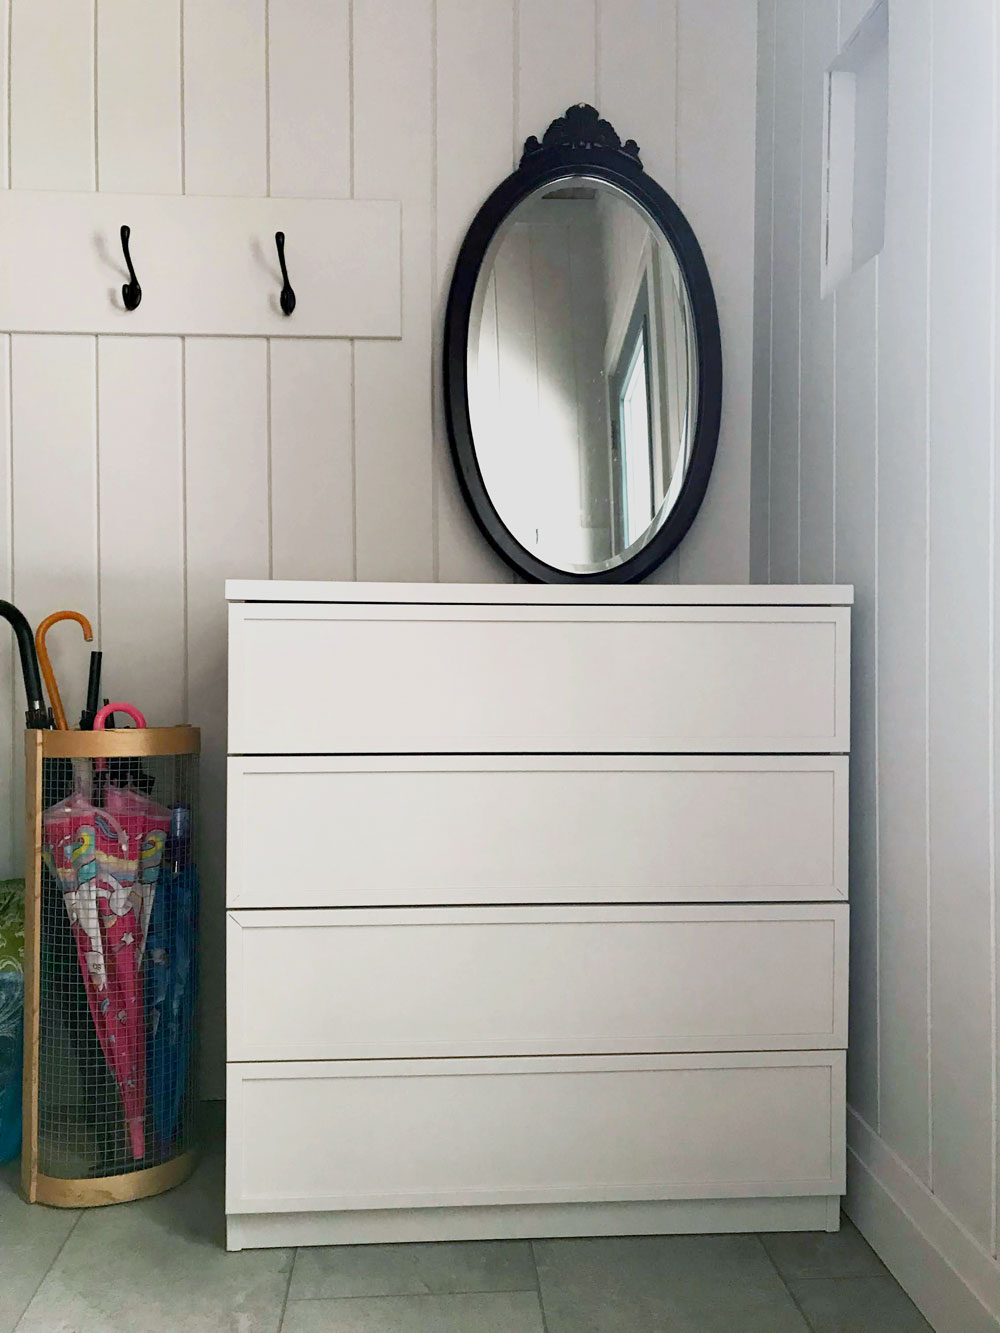
The mirror is another. It was a bit ornate when I found it in the thrift store. Removing the decorative top piece and the cherry-esque finish countrified it a lot. The factory finish was so hard and thick, but patience and a lot of sandpaper prevailed. Finding the right way to refinish it took a bit. Everything I put on the wood turned red. Finally, I went with simply varathane. That countrified it the rest of the way.

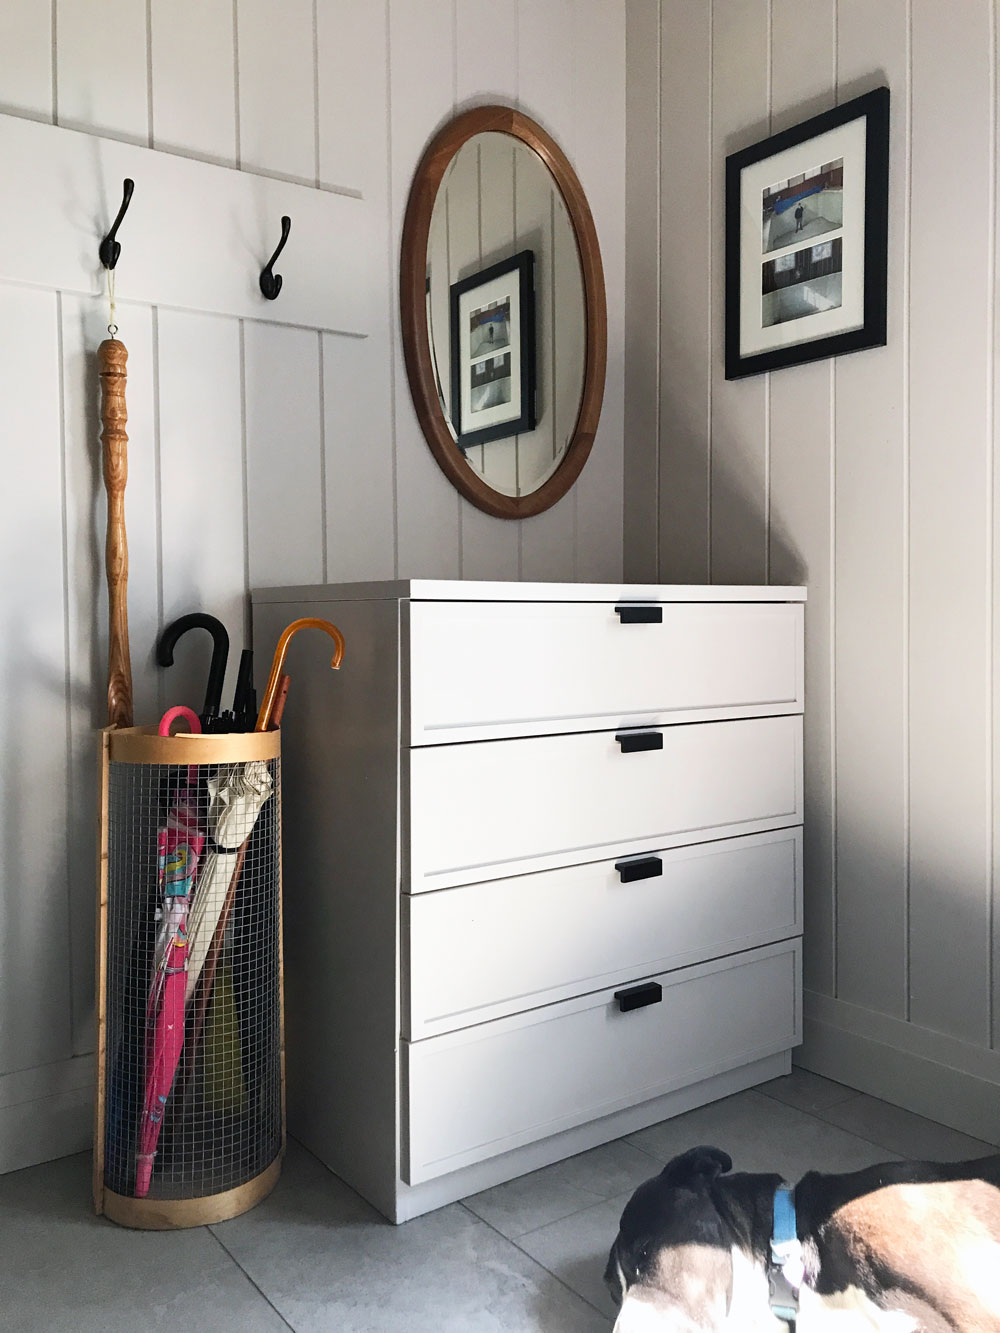
The mirror bounces a bit more light into the room (enhancing Cigo’s sunbeam), and its round shape contrasts with all of the straight lines from the paneling and other elements in the room.

Designed for us

Installing an LED nightlight cover plate on the landing (I was influenced by Young House Love) was probably the easiest task on my to-do list. It gives a perfect glow for the stairs. The location of this plug–and all of the other switches, outlets, light fixtures, heated floor control panel–was very carefully mapped out by me. The electrician and the tiler didn’t completely agree with my choices, but I’m the one that lives here, so I got my way.

The dimension and height of the landing, the way the doors swing, where the openings were located, and the height of the archway into the kitchen were other areas where I pushed for what I wanted. Sometimes I felt guilty asking for a change, but I knew I would regret it if I didn’t make the mudroom exactly the way I wanted.

Now everything is so convenient and it works for how we live.

Make it personal

Like all spaces in our house, the mudroom is personal to us. Matt’s nephew and I made the bench and I made the umbrella stand for our last mudroom. My sister-in-law made the yellow crate for Ellie. My Dad made the wooden shoehorn that’s hanging from the hook and the large wood plate on the dresser that we use for mail. There’s even a box on the stairs to hold stones, sticks, pinecones, feathers and other treasures that Ellie collects.

Matt’s winter coat which I wear to take the dog out hangs beside the door. Having a whole section dedicated for Cigo has been a game-changer. In the old mudroom, towels were draped over the bench, leashes were piled on top of each other. Now we have ample hooks for everything. I even stash his nail clippers and a bottle of dog shampoo in the dresser by the door, for those moments when he smells a bit too farmy to allow in the house.

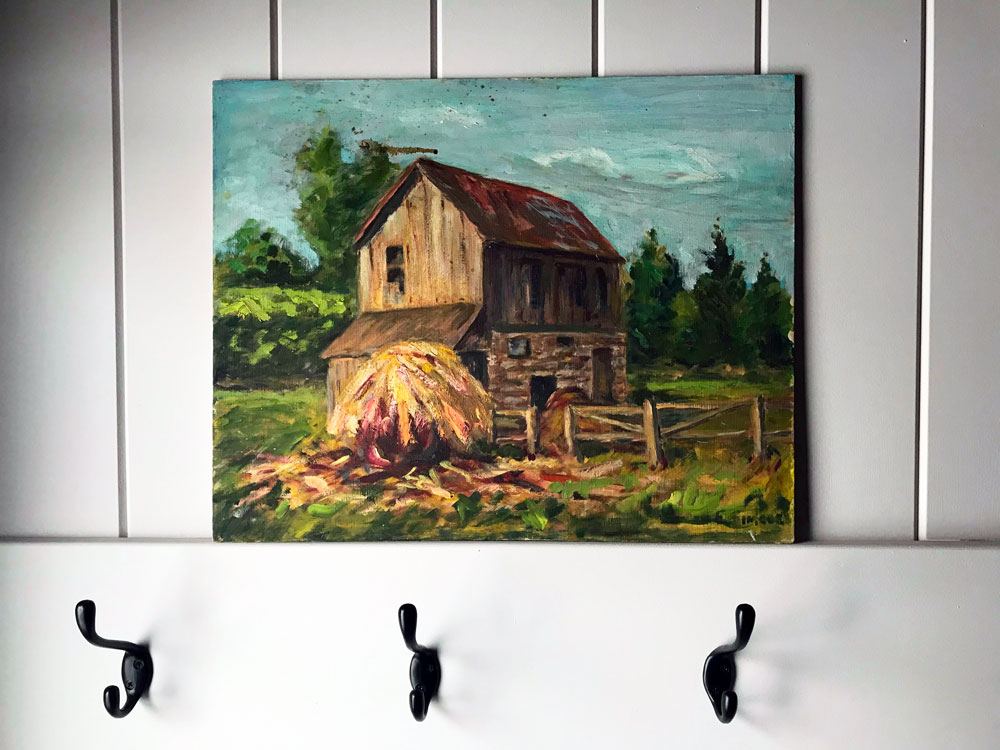
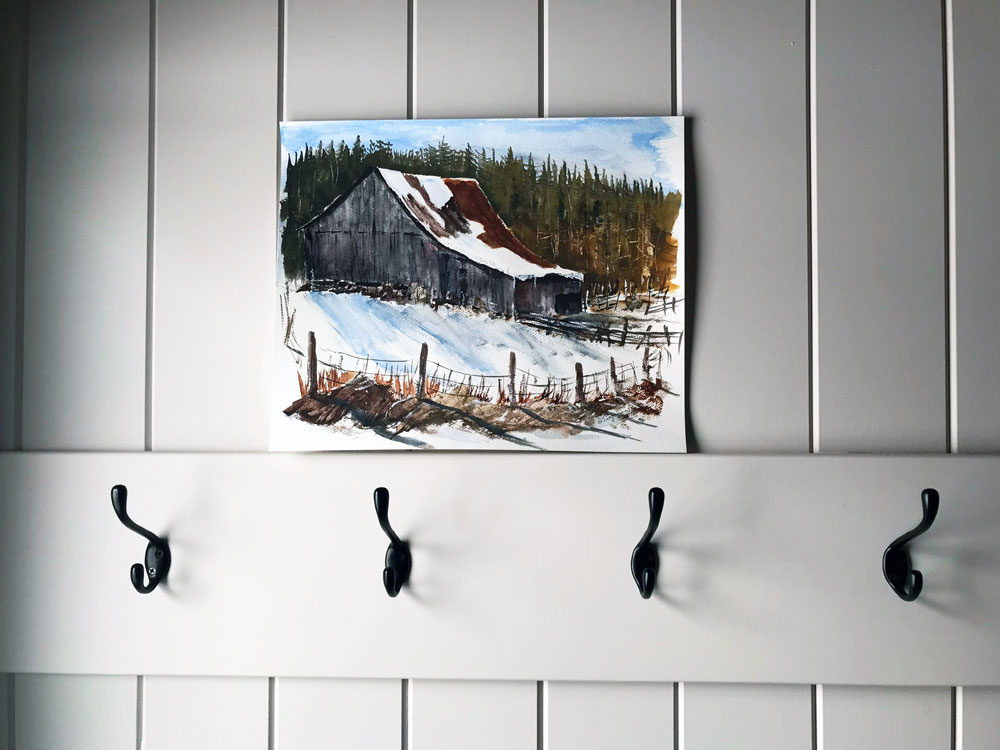
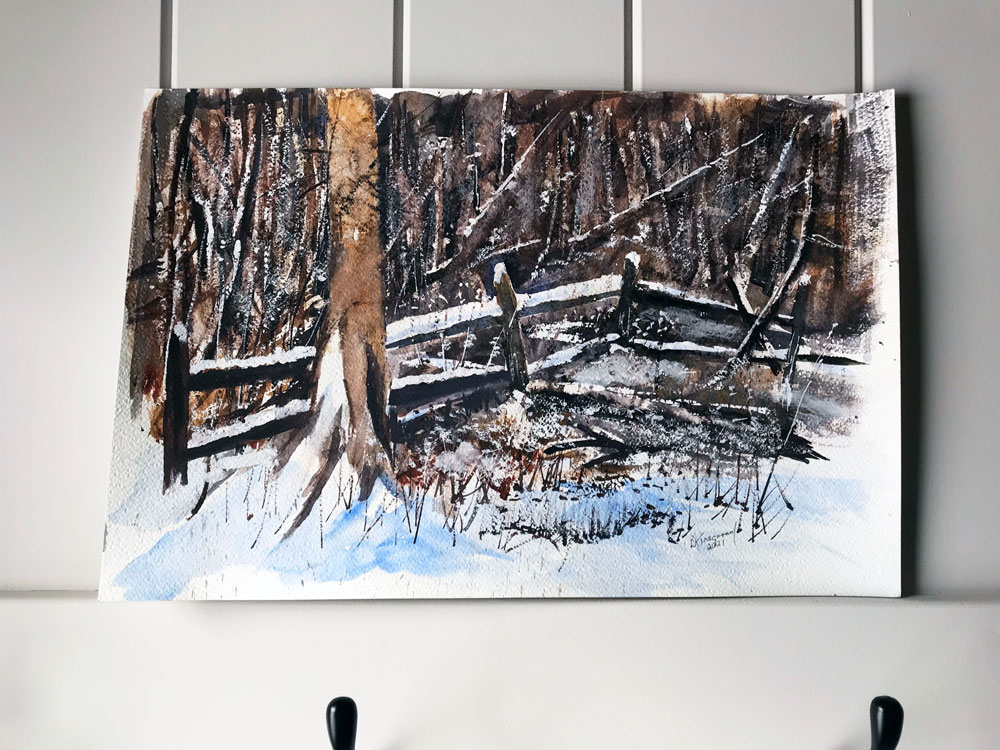
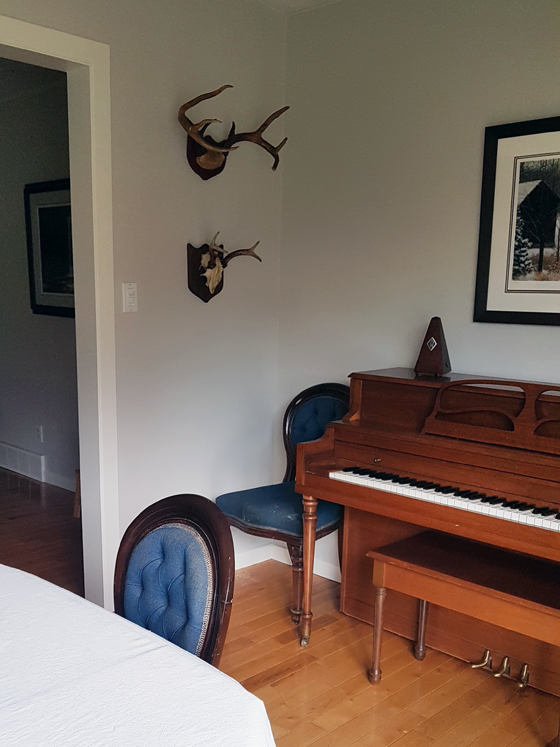
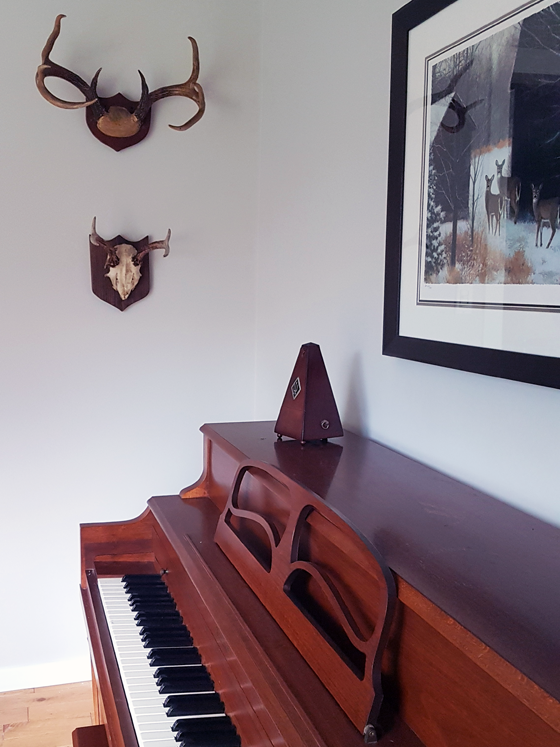
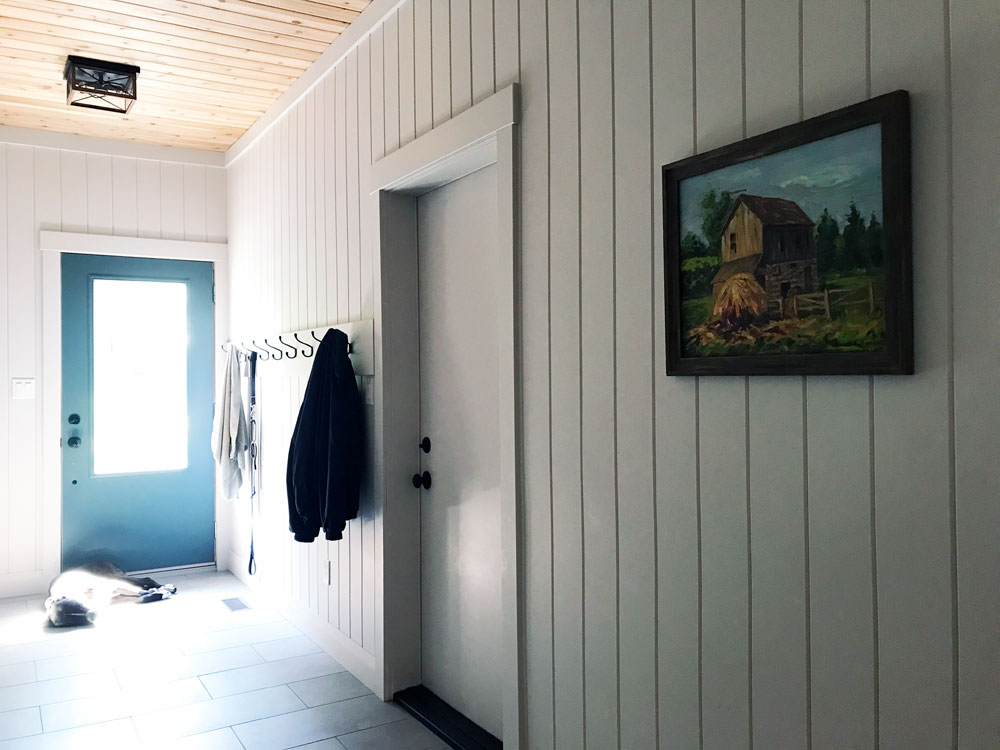
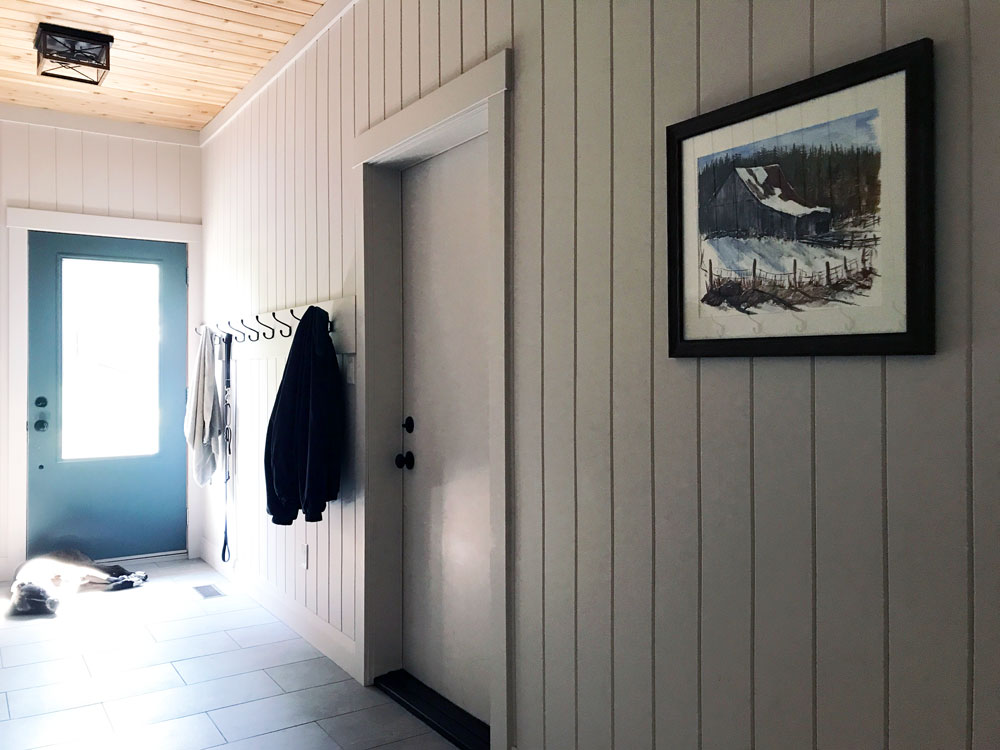
The painting on the wall is another special, personal touch. Like so much of the art in our house, this too was painted by Matt’s grandpa. When I shared art options for the mudroom a long-time reader had a brilliant suggestion: switch between paintings. So I had two framed. One summer scene (by Matt’s grandpa) and one winter (by my Mom’s friend). They’re roughly the same size, so they can hang on the same hook.

The mudroom has been a great addition–literally–to our house. This is a space that we live in every day, and that I enjoy every day. I am very proud that we dreamt it and we built it. It’s much more than a mudroom.

Do you have a room that’s more than a room? What is your must-have for an entry? Do you have any secret storage at your house? Who else switches art seasonally? Anyone else have a sunbathing dog?

Mudroom to do list

The mudroom was top of the list of 2022 Home Goals that I shared last week. My plan is to focus on storage and decor–function and form.

Progress has already been made.

A grand total of 24 hooks have been installed. Excessive? Perhaps. But I subscribe to the philosophy that you can never have too many hooks.

I moved in the bench and umbrella stand that I made for our old mudroom.

We also added two dressers, which I painted last week.

They give us eight big drawers of storage, so I finally have a place to put my hats and mitts. As well as car keys, sunglasses, reusable bags, pens, notepads, phone charger, masks (who thought we’d need mask storage?) and so much more stuff.

One dresser is by the door–keys, outerwear, sunscreen, bug spray, etc. will live here. One dresser is on the landing by the kitchen. My vision is that it will become a kind of command centre for mail, papers, household stuff, and even some of Ellie’s toys.

Part of my goal with not adding built-ins right away is to discover exactly what kind of storage we need.

The dressers aren’t quite the style I’m looking for in our eventual built-ins and they’re not quite the right size for their spots, but they do the job for now. And the price was right. Matt’s Dad picked them up years ago and they lived first in his shed and then in our barn. After some repairs, a cleaning and a coat of paint, they are a great interim solution.

Here are some of the other things I’m planning to do in the mudroom.

Install dresser hardware

The dressers don’t have a lot of space to screw on drawer pulls. The centre recessed panel is actually glass, so I can’t drill through it. I’m likely going to reuse the old pulls, but I’m going to spray paint them black first.

Refinish mirror

I found a big oval mirror at a thrift store this fall. The rounded shape will be a nice contrast to all the straight lines in the room. I’m going to remove the decorative piece on the top and refinish the wood frame, aiming for a rustic finish that will go with our cedar ceiling.

Install nightlight cover plate

I remembered last week that I had one LED cover plate left from a three-pack I bought a few years ago (I was influenced by Young House Love). The mudroom would be a perfect place for a nightlight, so I dug it out. Bonus, the cover plate also has a USB port, so it will be going at my new phone charging station on the landing dresser.

Build key cupboard

During construction I had our contractors insert a little wood box that I made into the wall beside the door. This box is going to become a hidden key cupboard. A few rows of cup hooks will give us plenty of space to hang keys. For the cupboard door, I’m going to use a picture attached to hinges. Storage. ✓ Art. ✓ Function. ✓ Form. ✓

Hang art

We don’t have a lot of wall space for pictures (and I don’t want to put too many holes in the paneling). I’m planning on hanging one painting. Matt’s Mom and my Mom have both sourced art for me. Matt’s Mom gave us a painting by Matt’s Grandpa. My Mom’s friend gave her two water colours that he painted. They’re all great farm scenes, and I really like how the blue and green tones contrast with the beige paneling. (Note that despite the photo differences below they’re all close to the same size.) Which would you pick?

We are definitely at the fun stage of the mudroom. These are pretty quick, inexpensive, easy projects. All of these little details make the room function the way we need it to and personalize the space for us.

What’s your first project of 2022? How do you handle storage at your entry? How many hooks is enough?

Basement games area details

I am back today with another look at the basement games area. Today I’m diving into some of the details of this space, because as I said in the before and after post everything has a story with me.

The dining set is obviously the centrepiece of this spot. This set is something I treasure, but it came our way somewhat accidentally.

I first fell in love with the chairs. You may recall that I have a thing for chairs. These chairs were scattered around Matt’s grandpa’s house, and I would see them in the bedrooms or tucked in corners when we went to visit him (this was way back when we were still in school and dating).

Vintage dining set

When Matt’s grandpa died and we were cleaning out the house, I learned they were part of a set. The set was one of the items that ended up in a family lottery, as multiple people wanted it. Matt’s Dad was not in contention, but then Matt said, “Oh Julia likes those chairs.” Matt’s Dad put his name in the hat, and his name was pulled.

As we were loading the table and chairs to bring them home, I learned there was also a hutch. Okay. We got a whole dining set. (Also, we were still dating and each still living at home with our parents. The set stayed in Matt’s Dad’s shed for awhile.)

When we bought our first house, the table, chairs and hutch came with us. The joints were loose on the chairs, the seat covers were torn, the finish on the table wasn’t great, and it was on the small side for entertaining. But I still loved those circle motifs.

When we moved to the farm, we had the table and chairs refinished (the hutch was fortunately in good shape), and I recovered all of the seats. Eventually, as I found other furniture for the dining room, the set made its way down the stairs. It’s the perfect size for this space, and the warm wood tones are a nice natural touch in the basement.

Games area in the basement

Plus, having a table for games, work, crafts, puzzles, food adds a lot of function to our basement.

The china cabinet houses board games, puzzles, decks of cards and other fun stuff. The drawers give me a spot to tuck away papers or work materials.

China cabinet for boardgame storage
Boardgame storage in a vintage china cabinet

Matt always maintained that the basement was his space, so it was always my intention to style the top of the cabinet for him. I chose a lava lamp that I bought him when we were dating, a few toy cars that he treasured, and his prized trophy from the 1989 bicycle safety rodeo. A fake plant (I can’t keep real ones alive) gives a bit of greenery.

Games area

The tic-tac-toe game is an example of how I like to think outside of paintings and pictures for art. I bought the game at an antique fair ages ago, and always planned to use it here. It fits in with my fun and games theme in the basement.

Also fun and games are the playing card posters. This is another thing that I had always envisioned for the basement, but I couldn’t find exactly what I was looking for. Finally, I decided that it was okay to invest in what I wanted, and I had a local graphic designer make the posters for me.

I kept asking Matt what his favourite card was, and he never answered me, so I picked my favourite: the queen of clubs.

Games area in the basement

The chandelier also used to be in the dining room. I did not like it at all there. But down here I think it’s okay.

I zoomed out for a few photos to show you how the games area fits in with the rest of the main room in the basement. I love how we’ve been able to make different zones, all within this one room.

Games area from the reading nook
Games area from the couch

If you want a recap of the rest of the basement, here are the other spaces:

With the art on the walls, the cabinet styled and the furniture all in place, this games area is done. And even better, it’s used and enjoyed all the time.

Are you a board game and puzzle family? How do you store games and puzzles at your house? What’s your favourite card in the deck? Do you use dining furniture for things other than dining?

Child’s art display in the playroom

I am someone who loves bulletin boards. I fill them with inspirational pictures and sayings, family photos, reminders, notes, calendars–anything and everything.

When Matt and I moved into our first house, one of the bedrooms had a built in desk with upper shelves. I took a roll of cork and pasted it to the wall between the two shelves. When I switched jobs, I covered the utilitarian grey bulletin board in my new office with pretty floral fabric. In Ellie’s room, when it used to be my office, I built a custom tall, narrow cork board (and again covered it in pretty floral fabric) for the weird niche that’s just inside the door.

I had the idea to add a cork board to Ellie’s new basement play area awhile ago. There was a big blank wall above the shelves that was perfect for some art. Or lots of art.

Cork board art display in our toddler's playroom

Our girl loves drawing and painting and making. And when I started putting her creations up on the fridge, she was thrilled. It was so touching to see how proud she was to have her art on display.

I wanted to give her a designated spot to hang her pictures, and adding a bulletin board to her play zone was the perfect solution.

Cork board art display in our toddler's playroom

But I wanted a large bulletin board and every where I looked they were expen$ive.

I finally decided that I spend very, very little on art. I spent very little setting up her play area. I had been thinking about a bulletin board for a few months. Ellie’s art collection is only going to grow.

I could afford to splurge on the bulletin board.

So I found the most affordable source I could and ordered it.

It fills the wall perfectly (I chose a 6 foot by 4 foot board), and it’s a fun addition to her play room.

Cork board art display in our toddler's playroom

I feel like this cork board is an example of how I like to think beyond pictures when it comes to art and wall decor.

Elsewhere in the basement we have our oversize wood scrabble tiles, DIY posters, photo collages of Matt (hung at Ellie’s height), and even some enamel basins in the laundry room. Wall art is all about adding interest to your space and there are so many ways to do that beyond pictures. A bulletin board may not seem artsy, but it soon will be filled with art. And it will be a meaningful, personal display for Ellie’s play area.

Are you a bulletin board person? Do you call it a bulletin board or a cork board? Is there a difference? How do you display your kid’s art? Have you made a decor or organizing splurge? What unconventional “art” do you have at your house?

Deer in the dining room

Hello. It’s been a little while. Thanks for your patience during my blogging holiday. We’ve had a lovely summer, and having this time all together is something I will always treasure.

Our days have been filled with all kinds of fun, including a few little projects. One of the projects was a final decorative touch in the dining room. Hanging two sets of antlers in the corner.

Two sets of antlers hanging in the dining room

This was always part of my original plan during the One Room Challenge this spring, but in the finishing stages it was cut.

The delay was mostly due to one set of antlers not being mounted. It took me some time to figure out how I wanted to mount them and how to do it.

The first set of antlers came from Matt’s Grandpa. We’ve had them for awhile, but haven’t had a good place to put them. They’re mounted and varnished and quite old.

Two sets of antlers hanging in the dining room

I decided to try to make our new antlers match the old ones as much as possible. I traced the mounting plaque, but made it a bit taller, as the skull plate on the new antlers was a bit larger. I know the skull plates are typically trimmed and covered, but I actually like seeing the bone. I’ve written about my (potentially strange) attraction to skulls before. If antlers are considered attractive, why can’t the bone be as well?

Covered skull on mounted antlers

Mounted antlers unvarnished and uncovered skull

I also decided to keep the antlers natural rather than varnishing them. I like the light tone of the antlers and wanted to highlight their natural beauty.

The next step was to try to match the colour of the plaque. I didn’t want to buy new stain for such a small project, so I tried blending a few different stains. I got close, but not exact. Part of that is likely due to a difference in the woods. The grain of the new plaque is much more pronounced than in the old one.

I was nervous about attaching the antlers to the plaque, but it worked out much better than I expected. Online tutorials prescribe bolting the antlers to the plaque. I simply drilled pilot holes in the skull and then screwed through the back of the plaque into the bone using regular screws. The skull seems secure, so I hope that it will hold.

The final touch was adding a picture hanger to the back of the plaque.

Back of mounted antlers

I put both antlers in the corner next to our deer painting. When I first photographed the dining room for the reveal post, this corner looked very empty. Over the last few months, I’ve gotten used to its emptiness–part of my draw to a bit more minimalism. However, since the antlers are a bit hidden in the corner, the room doesn’t feel too busy.

Two sets of antlers hanging in the dining room

I like that the antlers are finally on display. I feel like displaying them honours the animals. While my preference is always to see deer alive walking around outside, these deer in some ways live on as I appreciate their antlers every day.

Are you a fan of antlers in decor? Do you have any antlers at your house?


Nursery DIYs round-up

Thanks for following along as I’ve shared various parts of Ellie’s nursery over the last few months. I love this room so much. Ellie is now four and a half months old, and her nursery continues to be a comforting, happy space for us.

Turquoise gender neutral nursery


As with all of the rooms at our house, Ellie’s is a mix of DIYs, heirlooms (or hand-me-downs) and thrifted pieces.

Given that it’s taken me so long to share all of the tutorials, I thought it would be helpful to round up all of the DIYs in one post.

If you’d like to go back and look at the reveal for Ellie’s nursery, you can find that post here.

Shadow box

After thinking about this project for years, I finally made a shadow box to display Matt’s first pair of sleepers that he wore home from the hospital. This project was easy and affordable–definitely worth the effort when I consider how much it would have cost to have the sleepers professionally framed. I love that the sleepers are protected and preserved and that we can appreciate this extremely personal heirloom. How to make a custom shadow box.

Baby sleepers framed in a homemade shadowbox

DIY Eames Hang-It-All

It’s amazing how helpful simple things like hooks can be. These racks hidden behind the door hold our carriers, the diaper bag, bath towels, Ellie’s hat–things that we access frequently and need at hand. I love knowing where things are and the hooks are so helpful to keep her room is tidy and organized. How to make a knock-off Eames Hang-It-All.

How to make your own Eames Hang-It-All

Cozy flannel crib sheets

I found most crib sheets too tight for our mattress. In fact, the mattress bent, curved and wrinkled when I first made Ellie’s bed. As well, I wasn’t interested in the patterned sheets that are so common. I sewed simple white flannel sheets using this tutorial from House of Menig. I’m hoping to sew some cotton ones for summer now that the weather is warm.

Vintage pedal car tractor in the nursery

Skinny dresser from two nightstands

The nursery has a weird little nook just inside the door. Years ago I made a small narrow dresser to go in the nook. The dresser is still filled with Mama and Daddy things, but the top holds Ellie’s lamp and a few other frequently used items. How to build a tall narrow dresser.

Turquoise gender neutral nursery

Beadboard backing for the bookshelf

I found an Ikea Hemnes bookshelf second hand on kijiji and replaced the backing with a beadboard panel for a country touch and painted the whole thing white. Adding new backing is a super simple project, especially if you have staff at your lumber store cut the panel for you. Note if you’re changing the back, there is a channel on either side of the Hemnes that the panel slides into, so measure accordingly. More about the nursery bookcase, including our favourite books.

Bookcase in the nursery

Sew your own pouf footstool

I’m still super proud of the pouf footstool that I made. It’s Moroccan-inspired, large, leather(ish) and will be soft and sturdy when Ellie starts to pull herself up. I also shared a round-up of a bunch of other footstools that you could make yourself. How to DIY a Moroccan pouf.

DIY Moroccan pouf free sewing pattern

Blackout window treatments + an Ikea hack

Window treatments are obviously very important to keep the nursery dark so that Ellie can sleep. However, I also wanted them to look nice. I hid a blackout blind behind a bamboo blind valance, and then added full length blackout curtains for both function and form. I also shared my tips for pleating Ikea curtains. How to make blackout window treatments for a nursery.

Blackout window treatments in the nursery

Figurines shelf

My collection of nursery rhyme figurines seemed perfect for the nursery. The cutlery tray shelf that I made a couple of years ago is such a clever solution to display small items like figurines. How to make a shelf from a cutlery tray.

Sleepers framed in a shadow box

Patching and repainting a gallery wall

I love the turquoise colour of Ellie’s room and am happy that we didn’t have to repaint when we changed the room from office to nursery. However, we did have to deal with a couple of gallery walls that left a bunch of holes in the walls. I shared my tips for painting over the gallery walls without repainting the whole room. How to repaint a gallery wall.

Turquoise gender neutral nursery

I feel like DIYing so many parts of Ellie’s nursery made it an even more personal space for us. It also, of course, made decorating this room a much more affordable undertaking. I hope that some of these projects inspire you at your home.

How to make a custom shadow box

Baby sleepers framed in a homemade shadowbox

Years ago Matt’s Mom gave us the teeny tiny sleepers Matt wore home from the hospital when he was first born. If you recall our laundry room makeover, I had hung the sleepers on the wall and mentioned that I’d someday like to make a shadow box for them.

Enamel basins and infant sleepers hanging in the laundry room

I decided the sleepers would be super cute in Ellie’s room, and it was officially time to display them properly in a shadow box.

Turquoise gender neutral nursery

Custom shadow boxes tend to be very expen$ive, so I knew this was something I was going to make myself. It ended up being very simple and cost much, much, much less than I expected.

Materials

  • 1×3 (choose lumber that is an appropriate width for the items that you want to frame)
  • Glass
  • Hardboard or thin plywood for backing
  • Cork sheet (optional)
  • Fabric, wall paper or paint (for backing–optional)
  • Construction adhesive (optional)
  • Finishing nails
  • Staples
  • Wood glue
  • Wire

Tools

  • Nail gun
  • Tablesaw
  • Mitre saw
  • Staple gun
  • Hammer

Method

1. Measure the item that you want to frame to determine the dimensions for your shadow box.

I figured out how I wanted the sleepers to look in the frame and then measured them, giving approximately an inch and a half of breathing space around the edge.

How to make a custom shadowbox

2. Have a piece of glass cut to your dimensions.

Our local hardware store cut the glass for me. Total cost for my 14 by 22 1/2 inch piece was an extremely reasonable $9.96. I had never bought glass before and was surprised that it was so cheap.

3. Cut grooves in 1×3 for glass and backing.

I like the depth 1x3s gave me for the sleepers. If you’re framing something bulkier, you may want to choose a wider stock.

I used my Dad’s tablesaw to cut two separate grooves in my 1×3. First was a channel for the glass. A single pass through the tablesaw was the exact width I needed for the glass. Depending on your glass, you may have to do a couple of passes. The groove is about 1/8 inch deep and about 1/4 inch from the edge of the wood.

How to make a custom shadowbox

For the backing, I cut a slightly different type of groove. I made a recess about a 1/4 inch into the depth and width of the 1×3.

How to make a custom shadowbox

4. Cut the 1×3 to length.

Use your mitre saw to cut each piece to length with 45 degree angles.

How to make a custom shadowbox

You want your wood to be ever so slightly shorter than your glass, so that the glass slides into the channels all the way around. Don’t make your frame too tight.

How to make a custom shadowbox

Take your time at this stage and dryfit, dryfit, dryfit as you go to make sure your wood and glass are fitting together perfectly. I purposely cut my pieces a bit long and then trimmed off little tiny slices to ensure a perfect length.

4. Glue and nail your 1x3s together.

Run a thin line of glue over all of your corners and nail together.

How to make a custom shadowbox

How to make a custom shadowbox

A nail gun is absolutely the best way to do this. Once you get three sides together, slide your glass into the frame before adding the fourth side.

How to make a custom shadowbox

If you don’t have a nail gun and are instead using a hammer, there’s a larger possibility of cracking the glass.

5. Cut backing for the frame.

Measure the size of panel that will fit in the recessed area on the back of your frame. Cut your backing just a little bit narrower and shorter than the opening (about an 1/8 inch all the way around). If your backing is too tight, it can loosen the joints of your frame.

How to make a custom shadowbox

6. Adhere cork to backing (optional)

I decided that the best way to attach the sleepers to the backing was going to be with pins, so I put a couple of layers of cork on the backing to give me something soft to pin to. Depending on how you’re mounting your item, this step may not be necessary.

I took a few pieces of leftover cork flooring underlay that we had and cut them to the size of the backing. Then I adhered them with construction adhesive.

7. Wrap the backing in fabric (optional)

The raw wood (or cork) of the backing may not be the most attractive. I found a piece of fabric and wrapped the backing in that for a more attractive base. You could also paint or use a scrap of fancy paper to cover your backing.

How to make a custom shadowbox

8. Mount the item.

For the sleepers, I chose to use little tiny pins to attach it to the backing. I hid the pins inside the sleeves, neck and folds of the fabric.


How to make a custom shadowbox

Depending on what item you’re framing, you could also use glue, tape or other tricks to mount it in your frame. Be careful whatever  you use because it may damage the item. For example, I didn’t love the idea of tape or glue residue on the sleepers.

The weight of your item will also affect how you mount it.

9. Insert the item and backing into the frame.

Carefully set the backing into the recess of the frame. Tap little finishing nails around the edge to hold the backing in place. I did this by hand very, very gently. Don’t set the nails all the way flush. You want them to stick out so they serve as a barrier to keep the backing in place.

How to make a custom shadowbox

For an extra tidy finish, you can cover the entire back side of the frame with a piece of paper. Professional frames often come with simple brown paper glued to the back of the frame. I didn’t bother doing this because I wasn’t worried about what the back looks like.

I did add a note with a marker on the back about what was in the frame.

How to make a custom shadowbox

10. String a wire across your frame for hanging.

I attached a piece of wire to the frame with two staples, one on either side. This gave me a secure line to set over my hook on the wall.

How to make a custom shadowbox

11. Hang your shadow box and admire your handiwork.

The paint stick and screw trick makes hanging anything (but particularly a shadow box) so much easier. Give yourself a break and whip one of these up.

Sleepers framed in a shadow box

I’m very happy that I finally completed this project after thinking about it for so long. A shadow box is a great way to protect these little sleepers, and it’s very special to see them everyday in Ellie’s room.

Do you have any items displayed in shadow boxes at your house? What would you like to frame in a shadow box? Have you ever built a custom frame?

How to make a custom shadow box

Creative, affordable and personal art for a nursery

My approach to art is all about keeping it personal and affordable. When it came to the nursery, I had so many ideas that I couldn’t fit them all on the walls.

I thought it might be helpful to share the ideas here–including some that we did and some that we didn’t. I’d also love your input on what art you’ve incorporated into your babies’ rooms and other ideas you have.

Family mementos – The most sentimental piece of art in the room by far is Matt’s first pair of sleepers. These were what he wore home from the hospital. Can you believe it?

Baby sleepers framed in a homemade shadowbox

I built a simple shadow box, which protects and displays the sleepers and hung them in the little nook just inside the door. (I’ll be sharing more details on this project in an upcoming post.)

Anything can go in a shadow box–and a shadow box makes anything look artsy. Consider displaying a special toy, a small collection or a hospital bracelet. They would all make beautiful art.

Sleepers framed in a shadow box

Baby animals – Is there anything as cute as a baby animal? Before we considered having children, I knew if I was ever decorating a nursery I wanted some prints from the Animal Print Shop–they’re a nursery staple for a reason. The photos are so crisp and full of personality.

Animal portraits in a turquoise gender neutral nursery

I picked three animals that you may find someday on our farm. They make me smile every time I see them–although Matt thinks the duck is scheming something. Paintings, drawings, illustrations or photos, there are lots of options online–or even on your own camera–to get some cute animal art.

Animal busts – While I’m not advocating taxidermy for a baby’s room–not that there’s anything wrong with that if that’s meaningful for you–I love the different options that are available now for displaying animal heads on the wall. Most are really fun and whimsical.

Turquoise gender neutral nursery

Way back, before the third bedroom became my office and before my office became the nursery, I bought a papier mache goose head on Etsy that reminded me of the pet goose I had growing up. Bill has made the transition from office to nursery, and I think he’s a perfect fit for our farm theme.

Paper mache goose head

A favourite story book – There are so many great children’s stories out there. Consider scanning or cutting pages from your favourite story book, framing and displaying them. This isn’t something we’ve done in our nursery, but I know exactly what story I’ll choose if I ever change up the decor.

Children's story Jill's Jack

Children's story Jill's Jack

Growth chart – While it’s not applicable to an infant, I love a growth chart to track Ellie as she grows through the years. I made growth charts for both of my sisters when they had their first children, and I was excited to make one for our own baby.

Ruler growth chart

Alphabet/numbers art – Babies and children are learning so much, and we want to start them off right. So educational art is a natural fit for nurseries. Plus so much of it is pretty cute too. I found these animal alphabet flashcards through The Grit and Polish and knew right away they’d be perfect for the baby’s room.

Alphabet flashcards above the changing table

Like many of the commenters on Cathy’s blog suggested, I had them laminated so if they ever go on to a life as actual flashcards, they hopefully won’t get too tattered. Rather than framing 26 individual cards, I strung a pair of twine clotheslines and clipped the cards up with miniature clothespins. Etsy is a great source for beautiful flashcards (my set are by Susan Windsor).

Alphabet flashcards hung on a twine clothesline

Ultrasound print – Ultrasounds are very special moments in our journey to being parents. For me, the first ultrasound was the moment our baby became real–“holy moly, there’s really something in there.”

Remember that moment you first “met” your baby with a print of an ultrasound picture. If you have a bit of Photoshop or design skills, this is something you can DIY fairly easily. Or there are lots of services that offer ultrasound prints these days. Chris Loves Julia shared one in their daughter Polly’s nursery.

Ultrasound art

Quote – I admit I’m not the biggest fan of typography art. A sign with a word or two just isn’t my thing. But these longer quotes that I first saw on The Painted Hive are absolutely lovely and really speak to me.

Book quote art by the Painted Hive

You could use a quote from a favourite story (this would go great with the storybook art idea above), a song verse, an inspirational wish for your child or something that is particularly meaningful to you. For a different treatment, The Handmade Home does beautifully coloured quotes.

My mama choice would be this poem from Kahlil Gibran On Children:

Your children are not your children.
They are the sons and daughters of Life’s longing for itself.
They come through you but not from you,
And though they are with you yet they belong not to you.

You may give them your love but not your thoughts,
For they have their own thoughts.
You may house their bodies but not their souls,
For their souls dwell in the house of tomorrow,
which you cannot visit, not even in your dreams.
You may strive to be like them,
but seek not to make them like you.
For life goes not backward nor tarries with yesterday.

A talisman – This idea may be a bit abstract, but sometimes there’s something that we associate with our children. At the baby shower Matt’s family hosted for me, his sister-in-law decorated each table with sunflowers and sent every guest home with a packet of sunflower seeds to plant in their gardens. Sunflowers have now become something that I associate with our baby, and I love the idea of incorporating a photo of a sunflower or an artificial sunflower into the room. Nicole at Making it Lovely wears a special piece of jewelry for each of her children, which I think is absolutely… lovely (of course).

Sunflower puckered up for a kiss

Online printables – There is so much beautiful art available online. Minted and Jenny’s Print Shop are popular sources, but there are many more too. Don’t forget free printables as well. This pencil drawing from Shades of Blue Interiors is an extremely moving image for me. I printed and framed this as a gift to Matt’s brother and sister-in-law just before they had their first baby, and I still may find a spot for it in our baby’s nursery too.

Shades of Blue Interiors nativity print

Silhouettes – Anyone remember tracing their profile in silhouette in grade school for art class? A silhouette of your child’s profile is a super easy DIY and super personal. I spotted this silhouette via Shailey Murphy on Instagram, and I love how the artist Kendra of Lilac Paperie incorporated flowers (including Shailey’s daughter’s birth month flower) and other elements to make it even more special.

Child's silhouette by Lilac Paperie

Family tree – I made this fan family tree for our master bedroom, but I think it would be perfect for a baby’s room too. Put her name and birthdate in the centre and then branch out from there. It’s a lovely reminder of the heritage you’re carrying on in your family. (Martha Stewart has a free template).

Fan family tree

There are so many more creative ideas out there for creative, affordable, personal art. You can make a space that perfectly fits your style and is meaningful for your family.

What’s your favourite art idea from this list? What other ideas would you add? Have you tried any of these? What art did you use in your baby’s room?

12 creative, affordable, personal ideas for nursery art

5 ways to decorate with family photos

Today we’re enjoying Family Day here in Ontario, so I thought I’d mark the occasion by sharing some of the ways we feature our family when we’re decorating the house. (Happy President’s Day to my American readers.)

I recently updated the display of family photos on the sofa table in our living room. My brother and sister-in-law gifted us with a new family picture from their fall wedding, so that went in the centre. Then there was a pair of photos of my Mom and me when we were both six years old. I finally printed my favourite photo of our newest nephew. And best of all I dug out this blond cutie in a mini RCMP uniform (Matt was the ring bearer at his uncle’s wedding, who is a Mountie).

How to decorate with family photos

You all know that when it comes to decorating, I’m all about keeping it personal and affordable. One of the best ways to do both of those things is with family photos.

Here are five ways to decorate with family photos, including some favourites from our house.

1. Go for quantity – Don’t limit yourself to just a few pictures. You have lots of memories–and possibly lots of family members. Pick out your favourite photos and print them all. Get a variety of frames–thrift stores, the dollar store or Ikea are good sources–and display all of your photos at once. Display the photos in a gallery wall, on picture ledges, or set them on a table, as I did on the sideboard behind our couch.

Family photo display

2. Go back in time – Family photo displays don’t have to be limited to the current generation. Dig through your family archives to find pictures of your ancestors. In our guestroom, I have two photos that I love: one of my great grandfather driving a team of horses pulling a sleigh full of huge logs, the other of Matt’s great grandfather with his own team of horses in front of a wagon loaded with hay. They fit in perfectly with our farm setting, celebrate our ancestors, and–with scanning at home, printing at Walmart and framing from Ikea–they’re super affordable as well. So dig out those old albums and see what treasures await you.

Vintage family photos displayed in the guest room

3. Go big – The family photo shoot has come a long way since the stiff studio portraits. (Did anyone else get dressed up and pose with their parents and siblings?) How you display your photos should be upgraded as well. Technology means that pretty much any image can be printed on canvas or you can run off a large scale print at your local copy centre. A large picture makes a great statement and celebrates your family at the same time.

4. Go beyond the frame – Just like photo shoots have come a long way, so have albums. Customized, personalized photobooks are the upgraded version of albums . These can be great art on your coffee table, or propped on a bookshelf–like our wedding album–can be a photo display on their own. There’s something really special about flipping through a book of photos, rather than clicking through a hard drive.

Custom photobook

5. Go offline – Instagram has taken off as the place where we “publish” our digital photos. Part of the beauty of those Instagram shots is that they capture everything from special occasions to everyday life (sometimes… let’s not get into perfectly curated feeds that are more about branding than they are about life). Don’t limit those great memories to just online. There are lots of services for printing Instagrams–even Walmart is in the game. Print them as mini-prints and use washi tape to affix them to the wall. Or string a piece of twine between some pushpins and use mini paperclips or clothespins to attach your pics. Or check out one of the many online services that offer cute magnets and stickers (and lots of other options).

Family photos are one of my favourite go-tos when I’m looking for special art. How about you? Do you display family photos around your house? What’s your favourite way to decorate? How do you balance between digital and print?

Looking back at Home Goals 2017

Thanks everyone for your good wishes on our new addition. We’re excited–and I will admit I’m still a bit nervous about this whole baby thing too. We had our pre-natal class this weekend, which was informative and encouraging, and I have (yet another) ultrasound this morning (this baby is going to have supersonic hearing after all of our scans). Overall, we’re feeling pretty good about where we’re at.

As you can see, 2017 was quite a year for us. Today I’m taking a minute to look back at the year that was from a personal, professional and farm point of view.

After thinking and planning for quite awhile, I took a leave of absence from my communications job at the end of August to spend some extra time with family and see if I could build my own communications consulting company. I love working from home and love working for myself. I’m still working on building my client base, but I’m so grateful to have this opportunity.

The timing for my leave turned out to be very fortunate, as at the start of July we found out we were going to have a baby and at the end of September Matt was diagnosed with an ocular melanoma. It’s been so helpful to have a more flexible schedule for appointments and most importantly to have the mental space to process and reflect on all of the changes in our lives.

Along with all of that, we’ve replaced both our cars–my 14-year-old girl finally died and Matt’s year-old car was written off after he was hit by a driver who ran a red light. Matt ended up with a broken arm courtesy of the airbag, which derailed some of my plans for projects around the farm, but was a small hardship when he could have been much more seriously hurt.

Amongst all of these changes and challenges, the farm has been our constant and our refuge. 2017 marked five years at the farm, and I can’t imagine being anywhere else. It gives both of us peace to be here, and also gives us an outlet when we need to distract ourselves with tractor therapy, digging in the dirt, painting something or just walking the property.

I have a feeling we’re going to be saying, “What a year!” for the next while (perhaps the rest of our lives?) as we watch this baby grow, adjust to our new family reality and continue with life on the farm.

As many of us do at the start of the year, I like to take a moment to look back and reflect on the year past. Beyond all of the personal changes in our lives, I also started 2017 with my usual list of Home Goals I wanted to accomplish at the farm over the year.

Looking back, we didn’t do too bad.

My office

Turquoise craft room

I was very happy to finish the final bedroom at the farm and finally unpack all of our moving boxes–only five years after moving in. Reupholstering my grandmother’s vintage slipper chair is a project I’m still very proud of. What I called my office ended up being more of a craft room and it was such a great space for creativity.

I say “was” because my office ended up seeing another makeover just a few months later when I decided to turn it into the baby’s room. I’m finding other spaces to be creative around the house, and I love how the baby’s room is coming together. I’ll be sharing all of those details soon.

Clean up the pond shore

Red sky over the pond at sunset

The pond shore was my one and only outdoor land clearing goal for the year (and we have plenty of spaces that I want to clear). Mid-year, I gave up on it happening, but then an enthusiastic nephew and a generous husband went to work over a few weekends, and we made more progress than I ever expected.

There’s still more to go, which might be difficult as I don’t think the baby will be as helpful as our teenage nephew, but Matt and I may be able to divide and conquer on this one. And regardless, every time I look out the kitchen window or walk past the pond with Baxter (which happens at least once a day), I’m grateful for the improved view and access to the water.

While I had planned to focus just on the pond shore, I did give the area right behind the house a bit of attention, and cleaned up (most of) the jungle that’s been there since we moved in.

New lawn

Vegetable garden

Green tomatoes growing in the garden

At the start of last year, I said I was going to add rhubarb (check), a second row of berries (check–ended up being blackberries) and maybe some more grapes (check). I also put in four blueberry plants to try. As usual, I’m crossing my fingers that everyone survives the winter and bears fruit this year.

My biggest goal was keeping the weeds under control. I can’t say I was successful in that. I tried to find some old hay bales for a deep mulch but didn’t have any success. And in terms of weeding by hand, most of the season, I didn’t feel like weeding, and I gave into that feeling… a lot.

We capped off the year by covering two of the quadrants with tarps, and my tentative plan for the coming year is to leave the tarps in place. This will decrease the garden size by not quite half, which might just be manageable in our new reality.

Flower gardens

Garden in bloom in June

The flower gardens got some half-hearted attention this year. I can’t say I met my goal of keeping them weeded and filled with beautiful flowers, but I did get in them a few times and they didn’t look too scraggly most of the time (I don’t think).

Basement

Uh, yeah. I still have empty picture frames leaning against the basement walls waiting for art. I didn’t get to this in the first half of the year, and, since I left my job, I’ve been careful about spending money on extras, even inexpensive posters. So we go yet another year with some unfinished areas in the basement.

However, I did finally share the transformation of the basement TV area and all of the details on how we decorated it. I love this space so much and am so proud of us for doing it ourselves.

Basement TV area

New barn cat

Our barncat Ralph

After talking to a few people, we decided not to add a new barn cat to our family. Ralph has things under control and she’s content. She doesn’t need company, and I’m not confident that expecting her to train a young cat would work. So Ralphie gets to be mistress of the barn. She can live out her years in peace, and we will take our chances with adopting a new cat when we need it and hope that the newbie lives up to Ralph’s high standard.

Extras

As always, a few extra projects sneak into every year. I can call another room completely finished–the guest room–after refinishing a vintage metal bedframe. Spoiler alert, the guest room has since seen a few more changes as it’s become guest room/sewing room as I’ve given my office over to baby.

Antique brass metal bed frame

The living room also saw a few tweaks with a new mirror on the mantel and new pillows on the couch. I’ll be sharing our new coffee table soon too.

How to mix and match throw pillows

So around the house, 2017 was a mix. Which is okay and pretty normal for us.

We had enough abnormal in the year that I’m grateful that projects and the farm are such a refuge for us.

How was 2017 for you? What was your big accomplishment for the year?