How to make a simple Christmas tree skirt from a tablecloth

After we’d set up the tree, after we’d strung the lights and hung all the ornaments, Ellie asked, “Where’s the cape?”

The “cape,” or the tree skirt, was the final touch to hide the stand and, most important, provide a spot to rest all of the presents.

These days, there are lots of options for the base of your Christmas tree. However, I still like our simple skirt. And simple is the best word for this DIY.

I made our tree skirt from a Christmas tablecloth.

Here’s how:

Find a round tablecloth in a pattern you like. Ours is about 6 feet in diameter.

Slit the tablecloth along the radius. (In other words, cut halfway across your table cloth from the edge to the centre. You can find the centre by folding the tablecloth in half and then in quarters. You’ll have a generous slice of pie. The point of the pie is the centre of your tablecloth.)

Cut a 6 inch diameter circle out of the middle of your tablecloth. This will be where the tree trunk goes. Use a plate or another round object as your pattern.

Sew a zigzag stitch around the edge of the trunk cutout and the slit to prevent your fabric from fraying.

Attach velcro along either side of the slit.

Drape your tablecloth around the bottom of the tree. Use the velcro to close the skirt. Put the velcro at the back of the tree so it isn’t visible.

And voila. Your Christmas tree now has a beautiful cape.

Does your Christmas tree have a cape? How do you style the bottom of your tree? Have you ever used a tablecloth for something other than a table? How many presents are under your tree so far?

Colourful and cozy toddler play area

Thank you everyone for your kind comments on the last few posts. It has felt like a big step to return to blogging and find my voice again, and I appreciate your warm welcome and patience very much.

Keeping busy has helped me get through the last few months, and one of my projects is a new play zone for Ellie. I think I love it just as much as she does.

Colourful toddler playzone

We had already amassed what felt like a large collection of toys. Then Christmas arrived and I felt overwhelmed by all of the new additions every time I walked into the living room.

Baby, you’re movin’ to the basement.

It was time to get organized.

Bring on the bins!

Colourful toddler playzone

Well, before I could get to the bins, I first had to find the shelf to store them. I reused a shelf that I had built for the office in our first house. It had a brief life in the main area of our basement here, but has been tucked away for a few years.

I hauled it out and gave it a fresh coat of white paint. A trip to the dollar store found bins that fit pretty much perfectly (they’re a bit long, but that makes them easier to grab). Initially, I was not in love with their bright green colour and planned to spray paint them, but once they were in place, the colour worked with the our DIY refurbished ding pong table and felt fun and fitting for our basement.

I’ve organized toys by category: cars, stuffed animals, farm, food, lego, balls & blocks, music. I may label the bins with pictures at some point, but for now I do the clean-up most of the time so labels aren’t needed.

Colourful toddler playzone

The top of the shelf holds some of Ellie’s extensive tractor collection and a few books and everything is within Ellie’s reach.

By far Ellie’s favourite thing to play with are books, so I knew I had to have a library of some kind. I’ve loved the idea of book ledges, so off to Ikea we went for some spice racks. I picked a small selection of books from the main bookshelf in her room and tucked in some small stuffed animals for extra fun.

Toddler reading nook with spice rack bookshelves

A collection of pillows under the shelves make a cozy spot to read.

Toddler reading nook with spice rack bookshelves

Purple is the one pop of colour that we’ve not used elsewhere in the basement. I’ve been trying to incorporate it for awhile, but I’ve never found the right spot. When I decided that the pink and purple ape would be a regular resident of Ellie’s play space, I knew it was time for the purple.

This ape was a class mascot that came home from school with Matt years ago. He has been wearing a T-shirt that had a nerdy saying about history on it and sitting in a corner of the basement all this time. When I took off the T-shirt, I was shocked to see that Matt’s students had written “Merry Christmas” and then all signed their names on the ape’s belly. This will be something nice for Ellie to see when she’s a little older and help her understand how special her Dad is.

Colourful toddler playzone

The ape is lounging on some purple pillows. I already had the purple upholstery fabric, pillow forms and even zippers, so these were a quick project. But when I spotted a rare Purple People Eater pelt at a local fabric store, I knew some faux fur was just what this little nook needed.

While the shelf and the nook and the books are the main play area, the rest of this room is also very much about Ellie. Bigger toys line up along the wall, her growth chart hangs in here. There’s even a spot for Baxter, who likes to keep an eye on his little sister.

Colourful toddler playzone


Colourful toddler playzone

And at the far end of the room, I added a special gallery of photos.

Colourful toddler playzone

Matt’s brother made these photo collages for Matt’s memorial. Ellie loves looking at pictures of Daddy, and it’s important to me that he has as much of a presence in her life as possible. So hanging these photos where Ellie can see them easily was an easy decision.

Ellie looking at photos of Daddy

Having a little DIY, organizing, decorating project felt really good. It was a distraction, but also a reconnection to who I am and a reminder of what I like to do.

I also feel really good every time Ellie asks to go downstairs to play, which is often now.

Updating the guest room to make a multi-functional space

Sewing area in the guest room

I’m very glad that we kept the guest room. You may recall it was one of the options when I was thinking about which room was going to become Ellie’s nursery.

Matt and I have each been having some trouble sleeping recently, and we’ve both taken a turn in the guest room. My Mom has stayed with us a few nights too, and I’m grateful that we have a comfortable space ready for her.

It occurred to me during one of my shifts in the guest room that I haven’t shared some of the changes I made prior to Ellie’s arrival. As I dismantled my office to turn it into Ellie’s nursery, the guest room had to do multi-duty as a work space, craft space and guest space.

I replaced my vintage trunk with our filing cabinet. Not as attractive, for sure, but it still works as a night stand, and it also gives a spot for some office supplies.

Filing cabinet night stand

Office supplies on the filing cabinet

I still procrastinate about filing, and our mail sorter helps me corral paper until I’m ready to deal with it. I drilled a couple of holes in the cabinet and mounted the sorter with wire.

Mail sorter

On the other side of the room, the slipper chair that I reupholstered now sits at Matt’s childhood pine desk.

Flowered slipper chair

I sold the wooden chair that I painted and distressed along with the white desk that I refinished. My sewing machine has a new home on Matt’s desk. I figured our guests wouldn’t mind seeing it.

Sewing desk in the guest room

I also transferred the tiny shelf that holds my thimble collection, and affixed it under the window.

Thimble collection

Thimbles on a narrow shelf

We’ve maxed out the closet filling it with fabric, wool, and other items from both Matt and me. The idea of emptying this closet and finding new places for everything was so intimidating that it was a major factor in my decision not to use the guest room as Ellie’s nursery.

I’ve been happy about how we’ve been able to fit everything into the guest room and make it a multi-functional space. Ellie (and Baxter) both enjoy laying and kicking on the bed while I sew or do paperwork. So it’s a good way for us to spend time together too.

Another perk: I made $100 selling the trunk and the desk. And the trunk was pulled out of the garbage and the desk was left behind at the farm by the past owners. Yay for free money.

Do you have a multi-functional space at your house? How do you balance form and function? Has anyone else gotten something for free and then sold it for a profit?

Nursery DIYs round-up

Thanks for following along as I’ve shared various parts of Ellie’s nursery over the last few months. I love this room so much. Ellie is now four and a half months old, and her nursery continues to be a comforting, happy space for us.

Turquoise gender neutral nursery


As with all of the rooms at our house, Ellie’s is a mix of DIYs, heirlooms (or hand-me-downs) and thrifted pieces.

Given that it’s taken me so long to share all of the tutorials, I thought it would be helpful to round up all of the DIYs in one post.

If you’d like to go back and look at the reveal for Ellie’s nursery, you can find that post here.

Shadow box

After thinking about this project for years, I finally made a shadow box to display Matt’s first pair of sleepers that he wore home from the hospital. This project was easy and affordable–definitely worth the effort when I consider how much it would have cost to have the sleepers professionally framed. I love that the sleepers are protected and preserved and that we can appreciate this extremely personal heirloom. How to make a custom shadow box.

Baby sleepers framed in a homemade shadowbox

DIY Eames Hang-It-All

It’s amazing how helpful simple things like hooks can be. These racks hidden behind the door hold our carriers, the diaper bag, bath towels, Ellie’s hat–things that we access frequently and need at hand. I love knowing where things are and the hooks are so helpful to keep her room is tidy and organized. How to make a knock-off Eames Hang-It-All.

How to make your own Eames Hang-It-All

Cozy flannel crib sheets

I found most crib sheets too tight for our mattress. In fact, the mattress bent, curved and wrinkled when I first made Ellie’s bed. As well, I wasn’t interested in the patterned sheets that are so common. I sewed simple white flannel sheets using this tutorial from House of Menig. I’m hoping to sew some cotton ones for summer now that the weather is warm.

Vintage pedal car tractor in the nursery

Skinny dresser from two nightstands

The nursery has a weird little nook just inside the door. Years ago I made a small narrow dresser to go in the nook. The dresser is still filled with Mama and Daddy things, but the top holds Ellie’s lamp and a few other frequently used items. How to build a tall narrow dresser.

Turquoise gender neutral nursery

Beadboard backing for the bookshelf

I found an Ikea Hemnes bookshelf second hand on kijiji and replaced the backing with a beadboard panel for a country touch and painted the whole thing white. Adding new backing is a super simple project, especially if you have staff at your lumber store cut the panel for you. Note if you’re changing the back, there is a channel on either side of the Hemnes that the panel slides into, so measure accordingly. More about the nursery bookcase, including our favourite books.

Bookcase in the nursery

Sew your own pouf footstool

I’m still super proud of the pouf footstool that I made. It’s Moroccan-inspired, large, leather(ish) and will be soft and sturdy when Ellie starts to pull herself up. I also shared a round-up of a bunch of other footstools that you could make yourself. How to DIY a Moroccan pouf.

DIY Moroccan pouf free sewing pattern

Blackout window treatments + an Ikea hack

Window treatments are obviously very important to keep the nursery dark so that Ellie can sleep. However, I also wanted them to look nice. I hid a blackout blind behind a bamboo blind valance, and then added full length blackout curtains for both function and form. I also shared my tips for pleating Ikea curtains. How to make blackout window treatments for a nursery.

Blackout window treatments in the nursery

Figurines shelf

My collection of nursery rhyme figurines seemed perfect for the nursery. The cutlery tray shelf that I made a couple of years ago is such a clever solution to display small items like figurines. How to make a shelf from a cutlery tray.

Sleepers framed in a shadow box

Patching and repainting a gallery wall

I love the turquoise colour of Ellie’s room and am happy that we didn’t have to repaint when we changed the room from office to nursery. However, we did have to deal with a couple of gallery walls that left a bunch of holes in the walls. I shared my tips for painting over the gallery walls without repainting the whole room. How to repaint a gallery wall.

Turquoise gender neutral nursery

I feel like DIYing so many parts of Ellie’s nursery made it an even more personal space for us. It also, of course, made decorating this room a much more affordable undertaking. I hope that some of these projects inspire you at your home.

Blackout window treatments for the nursery and how to pleat Ikea curtains

Blackout window treatments in the nursery

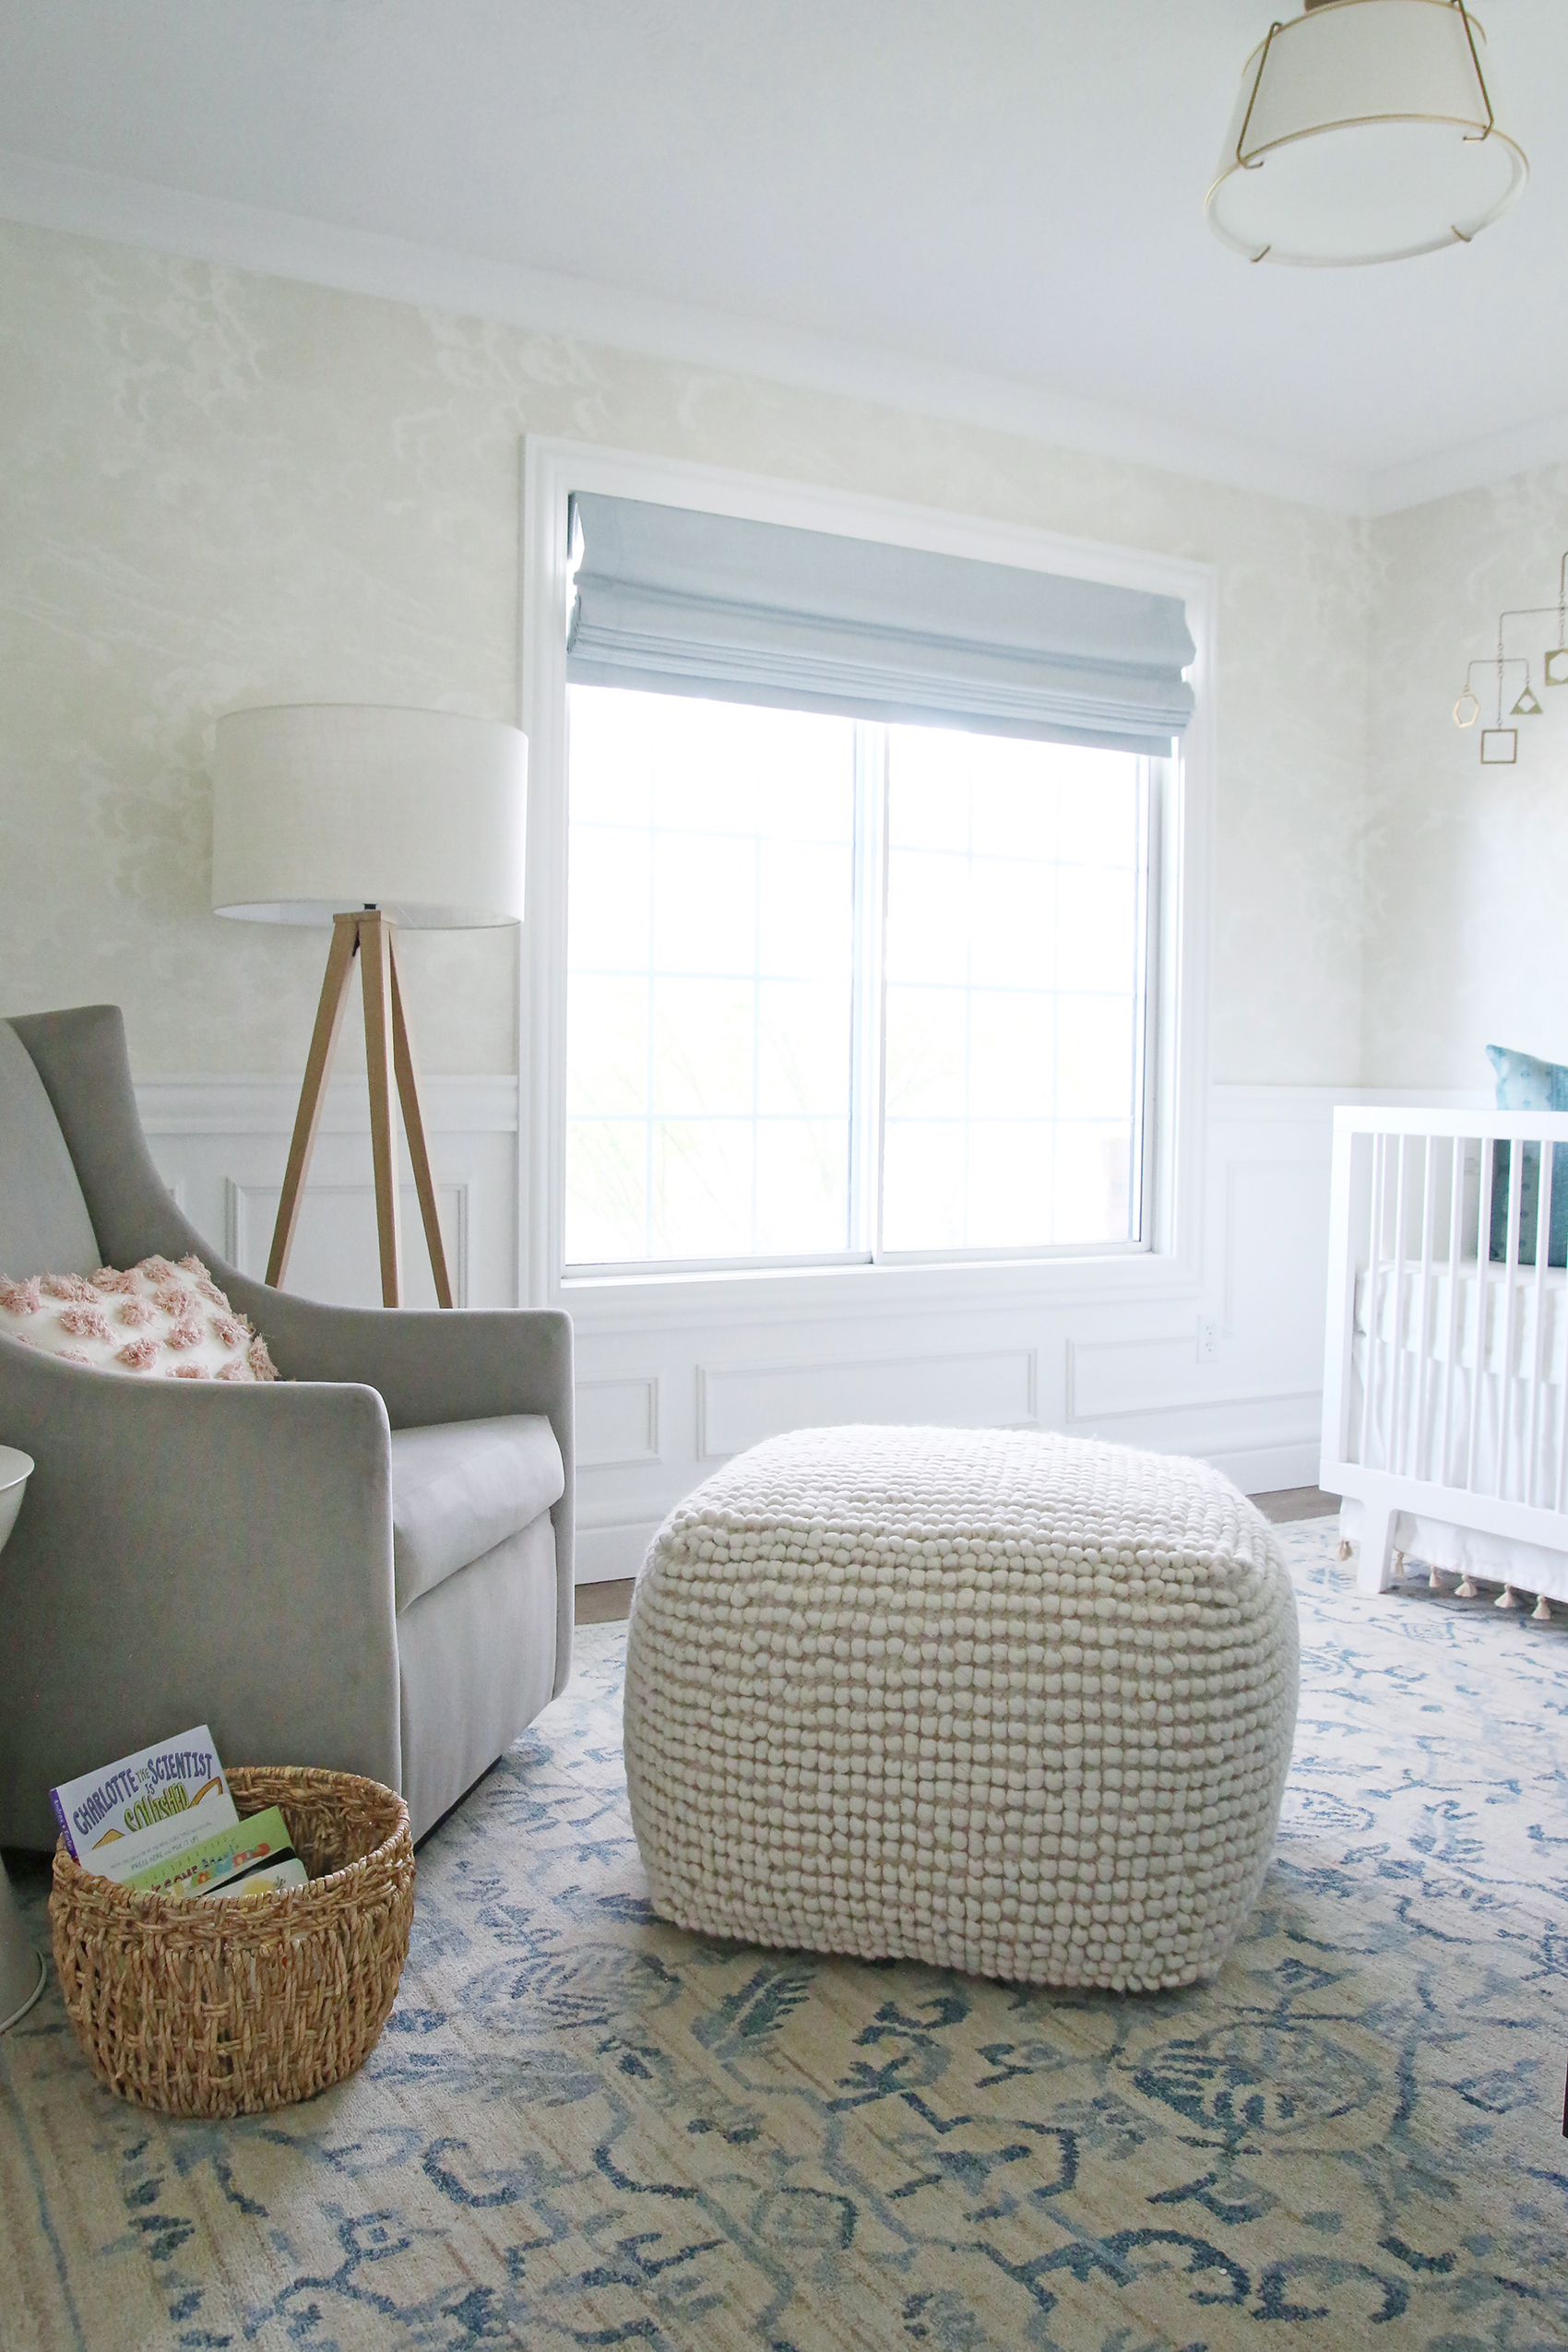
When it came to window treatments for Ellie’s room my first priority was making the room completely dark.

Both of my sisters at various points struggled with getting their babies to sleep and eventually resorted to taping black garbage bags over the windows. For my one nephew, the smallest strip of light was enough to hold his attention and keep him awake.

Fortunately, Ellie has been a really good sleeper so far (and please may it continue for all time), but I have found that a dark quiet room is very helpful to ensure she sleeps as soundly as possible.

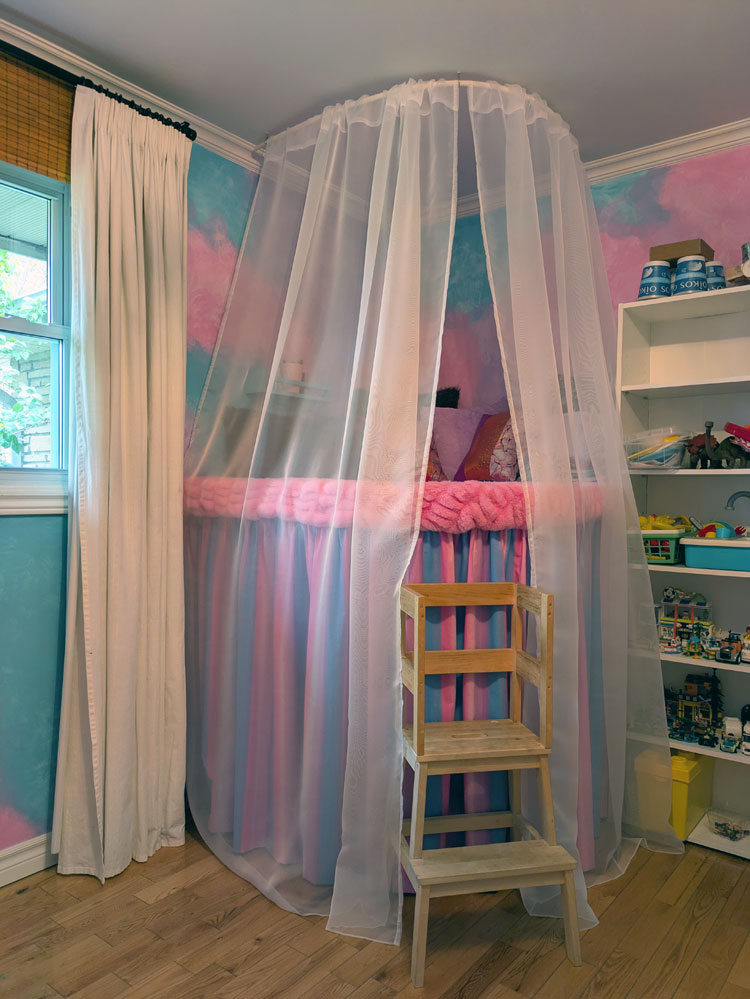
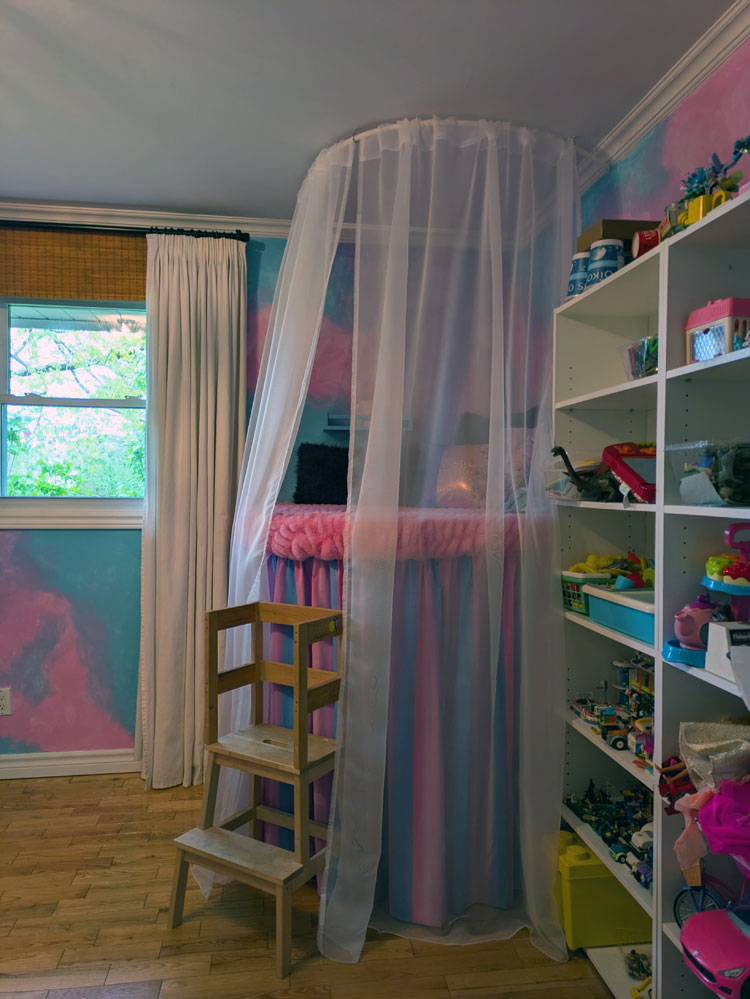
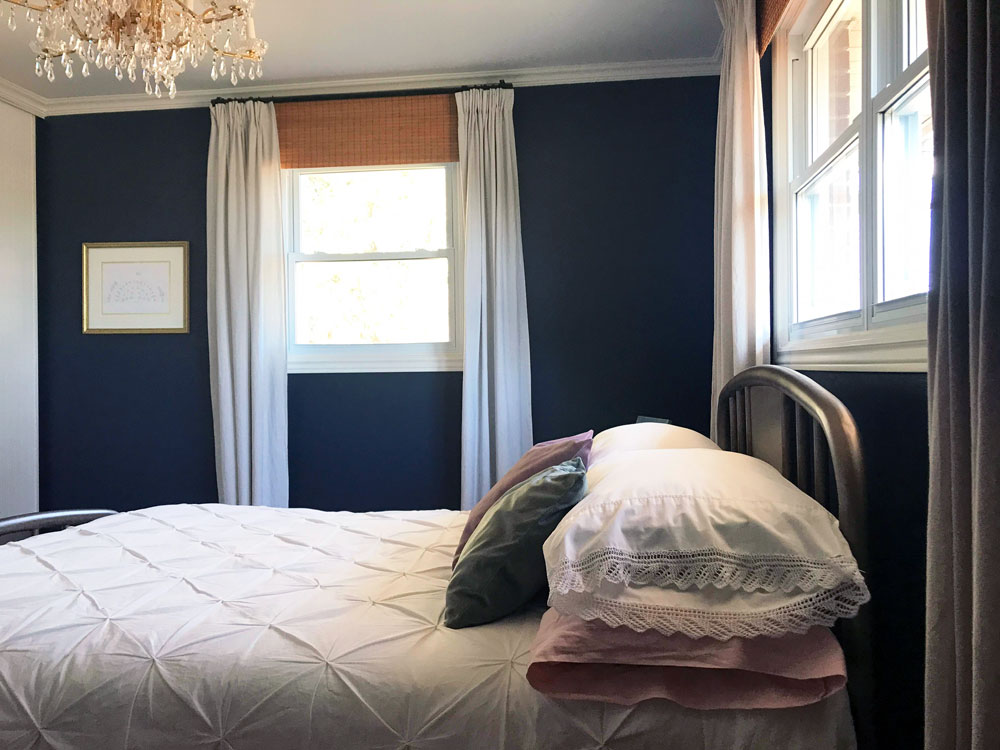
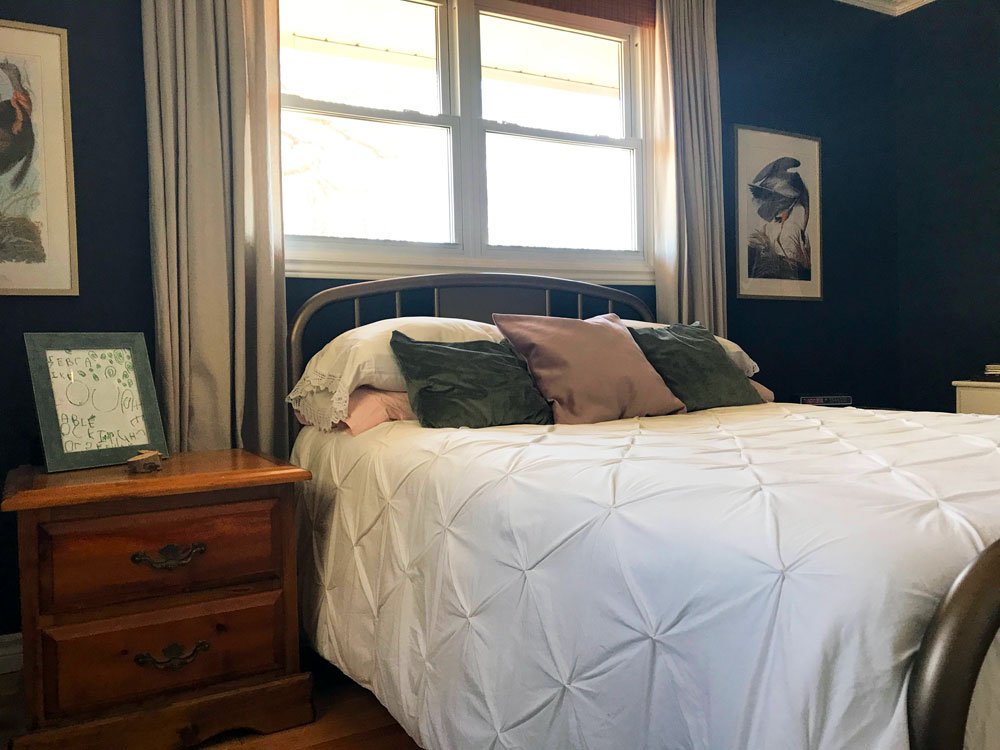
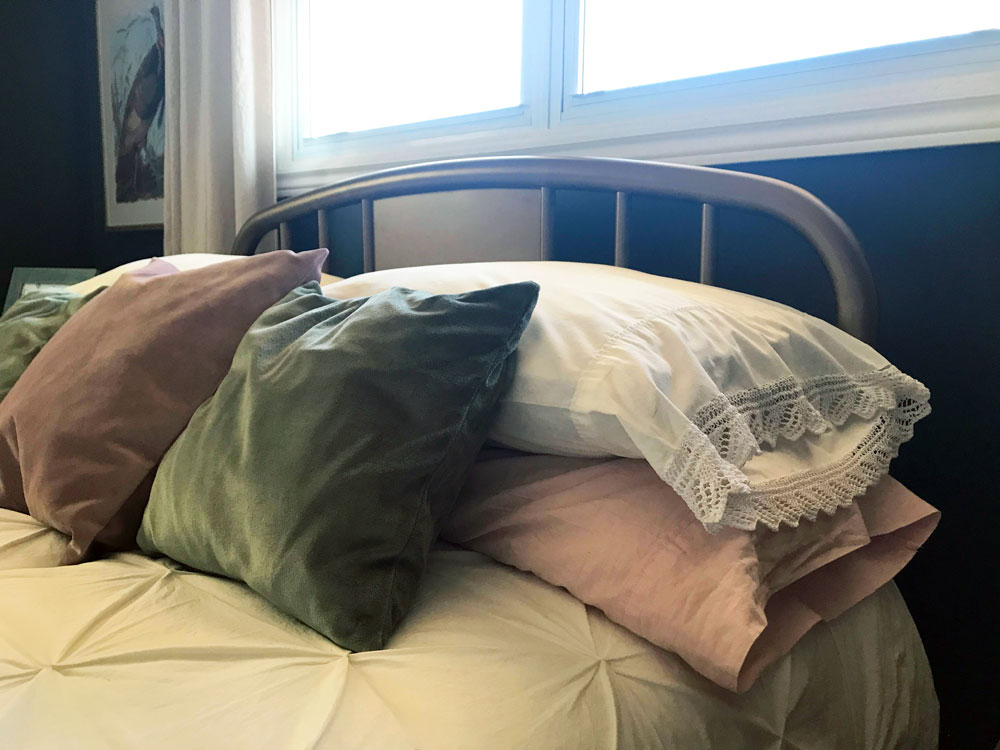
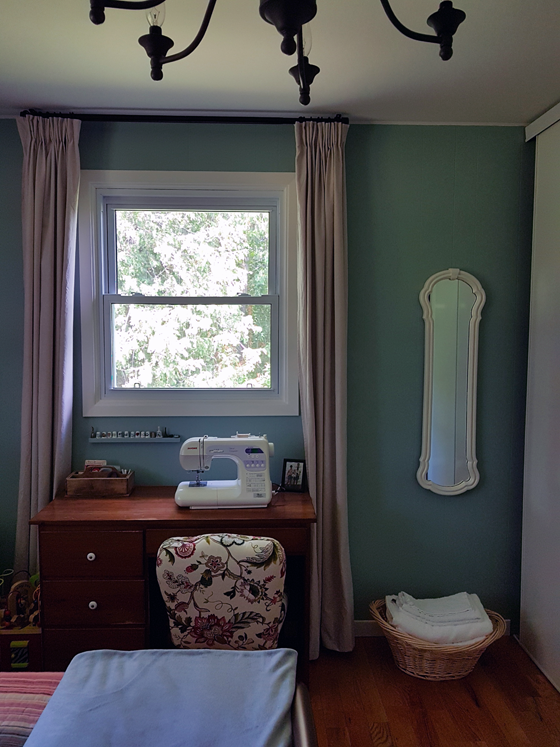
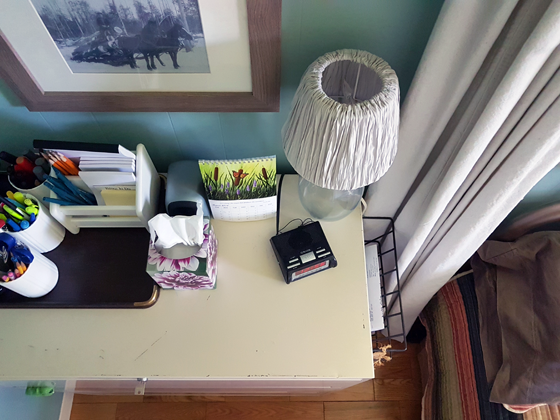
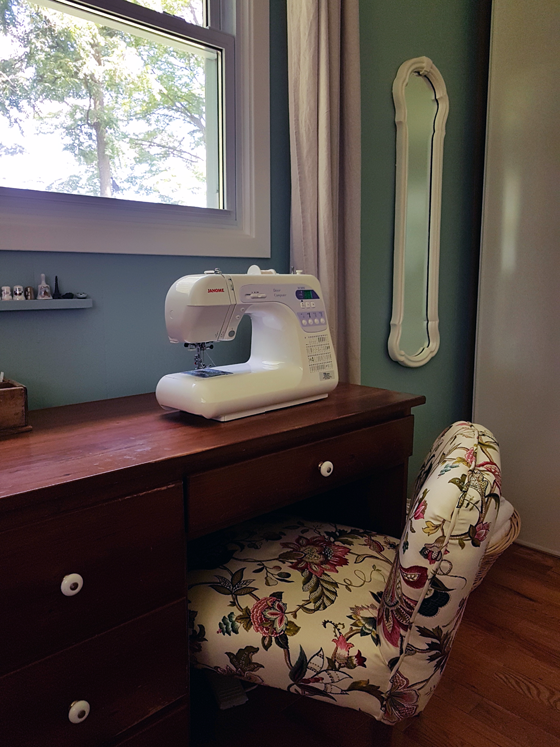
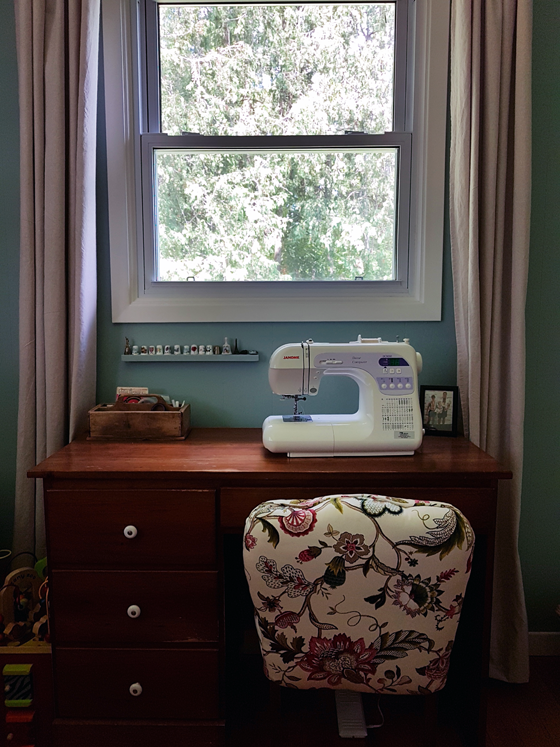
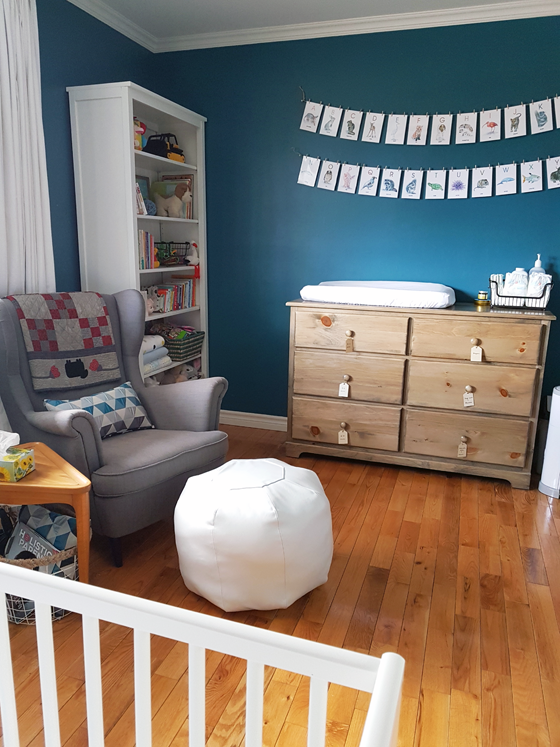
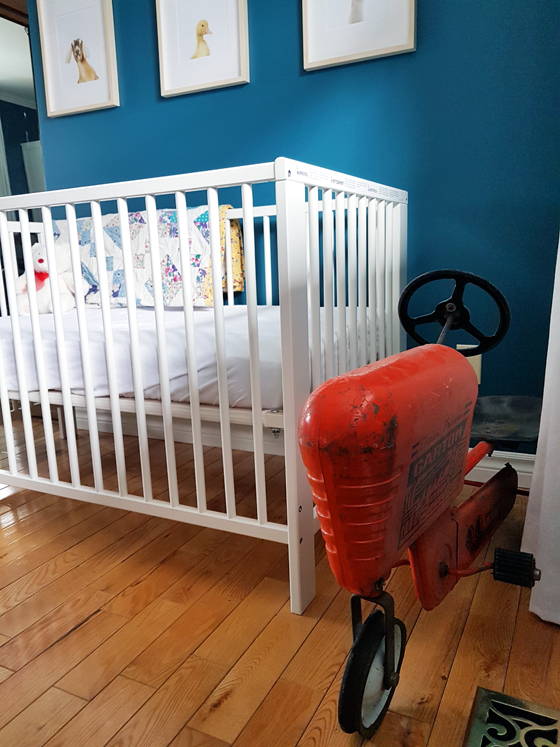
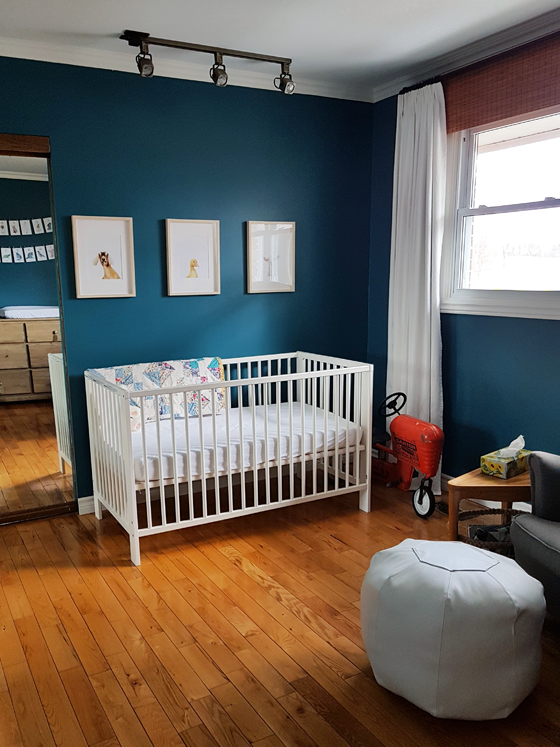
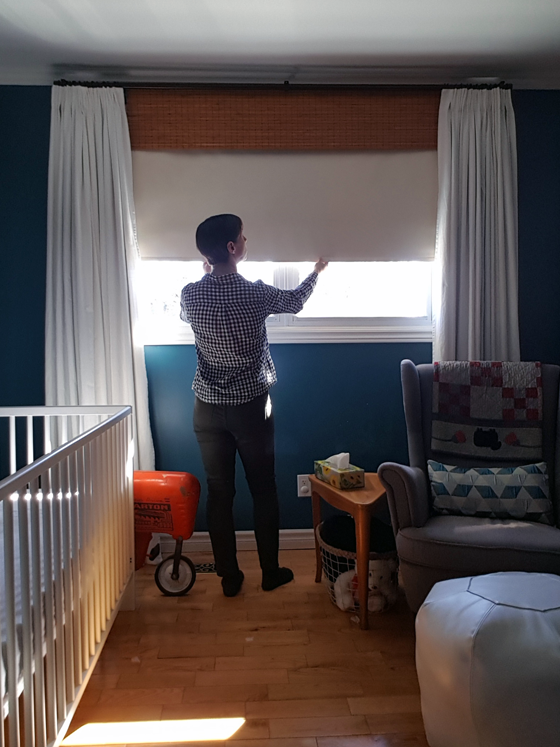
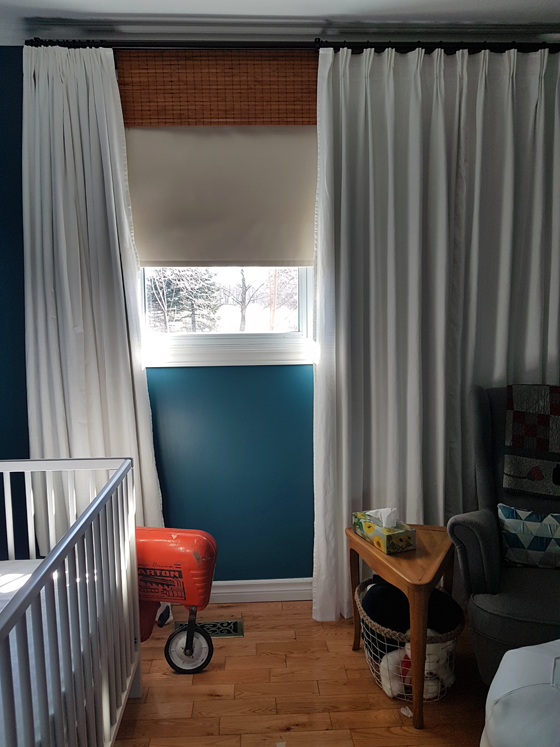
My first step in making sure I could get the room as dark as possible was the layered window treatments that I used in our own bedroom. Blackout blind, hidden behind bamboo blind (which really acts as just a valance) and then full-length curtain panels for the finishing touch and an extra layer of darkness.

Blackout window treatments in the nursery

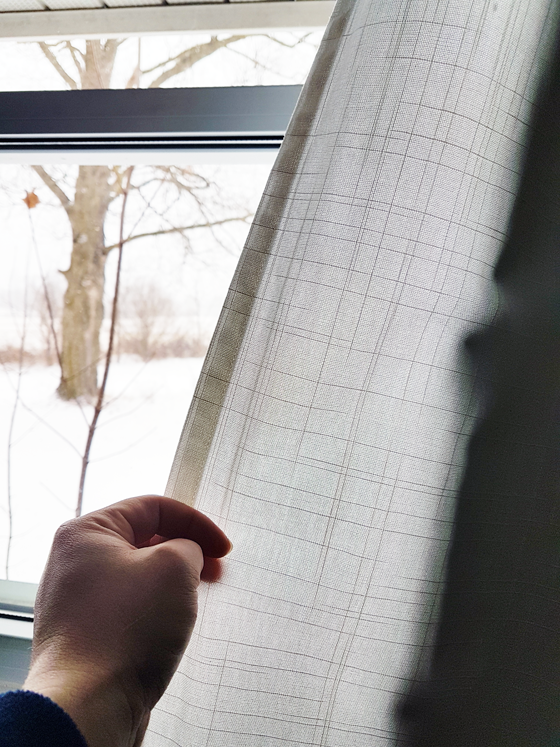
While I still like the dropcloth curtains that I made for the guest room and our room, for Ellie’s room I really wanted white curtains. Some sales around Black Friday netted me four Ritva panels from Ikea. At first when the curtains arrived they looked super creamy to me, but once I tried them in the baby’s room they were white (or white enough for me). They also have a bit of a texture, which I initially wasn’t planning on, but now I like that the fabric isn’t completely flat and boring.

Texture on Ikea Ritva curtains

I elected to get four curtains (two packages), so that I could do two panels per side, ensuring that the fabric covers the full width of the window, and also that the curtains look nice and full whether they’re open or closed.

My first step was to wash all four curtain panels to preshrink them. Then, I sewed two panels together so that my four curtains became two, one for each side.

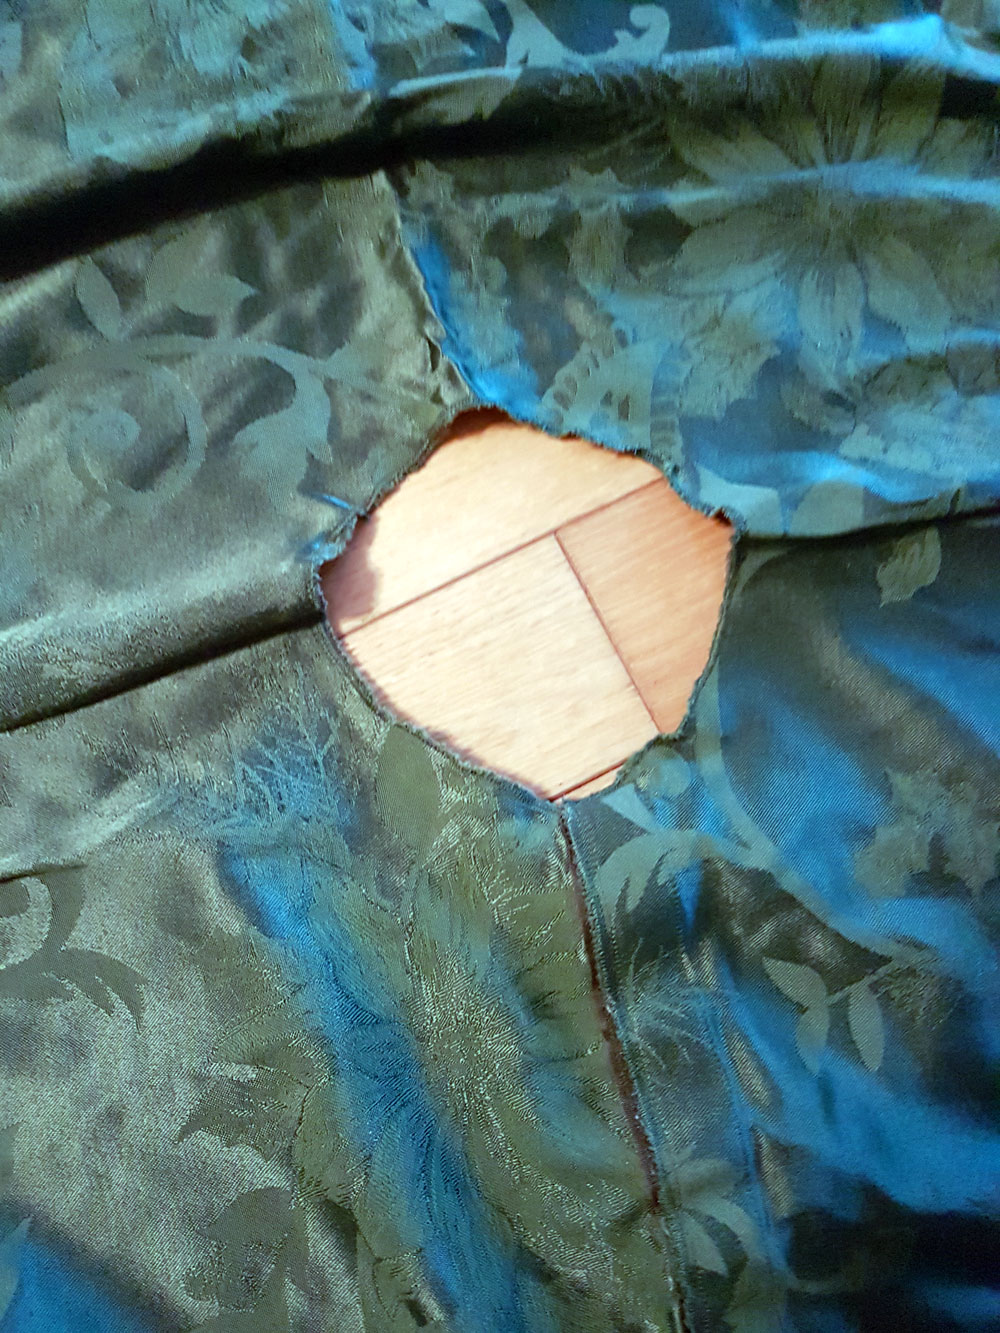
Now, on their own, the Ritva curtains are not blackout–in fact far from it. Since it was important to me that these curtains block the light as well as add style to the room, I added a blackout lining that I bought at the fabric store. Tip: Wait for a sale. The amount of fabric needed is not small, and this lining is not cheap. A discount makes a huge difference.

I cut the lining so that it was just a bit shorter and narrower than my finished curtains were going to be. The fabric didn’t fray or ravel, so I didn’t bother hemming the edges. I sewed the lining to the curtains, just underneath the curtain tape that runs along the top edge of the Ritvas.

I will say that the curtains were absolute beasts to sew. They were huge and I had metres and metres and layers and layers of fabric that I was trying to slide around. It was very awkward, even though I was only sewing straight lines.

But once the curtains and lining were all together, the next step was pleating the curtains.

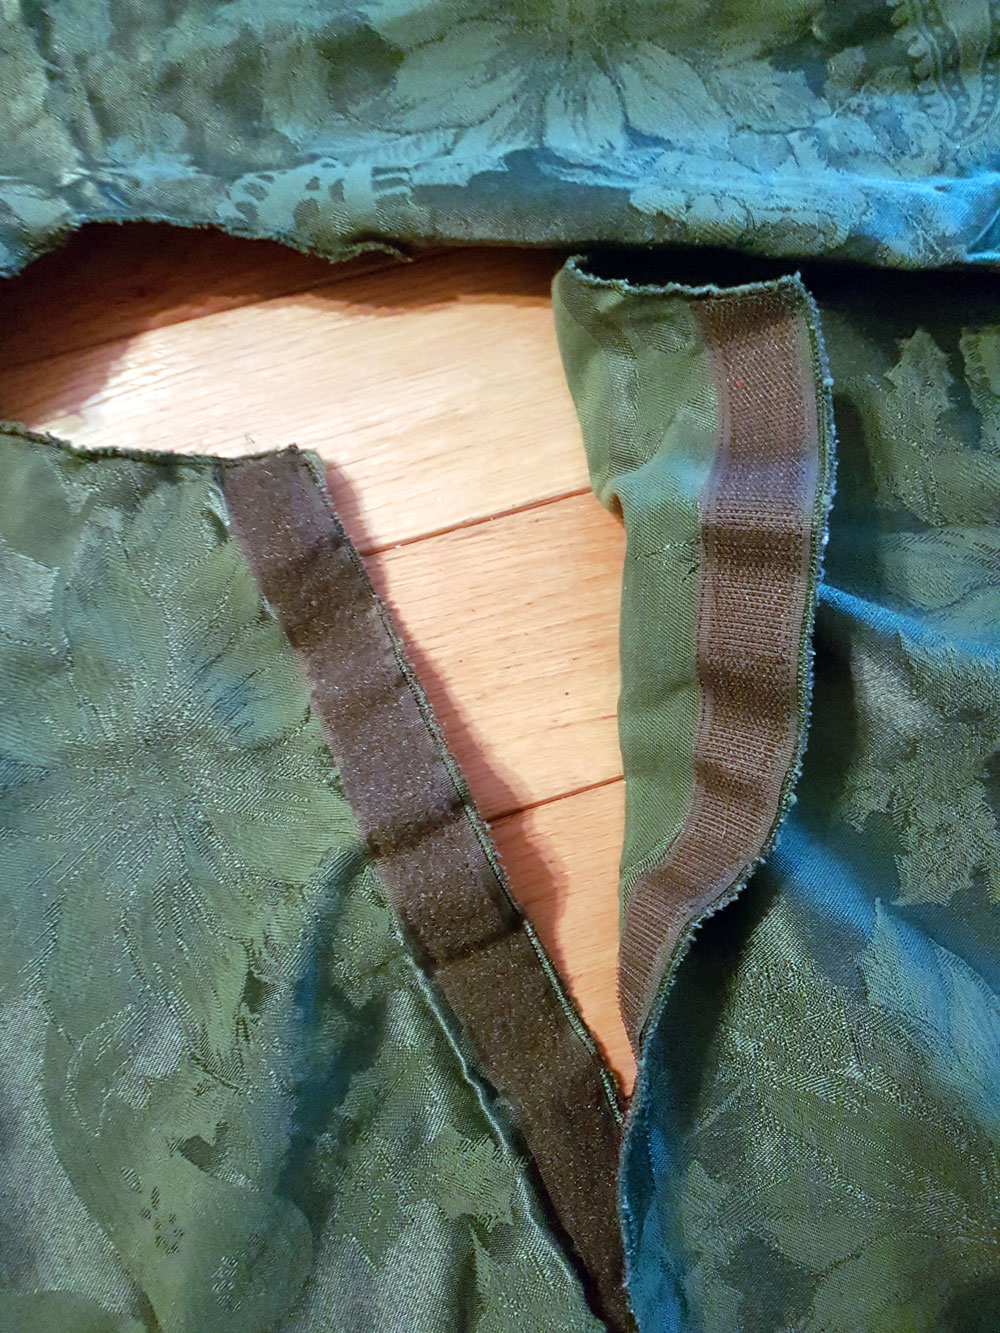
The curtain tape that comes with the Ritvas is the neatest thing for me about these Ikea curtains. This tape has little pockets at regular intervals and allows you to form pleats in the top of your curtain by inserting special hooks. (When I made our dropcloth curtains, the tape was something I had to buy and sew on separately).

How to pinch pleat Ikea curtains

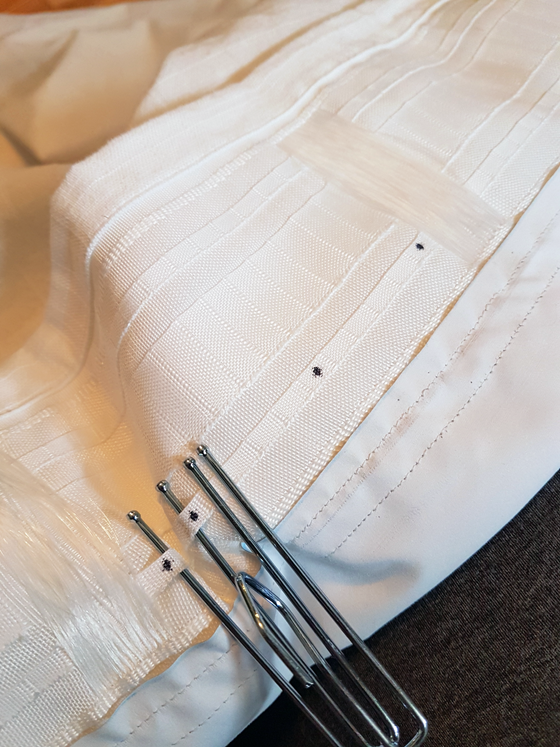
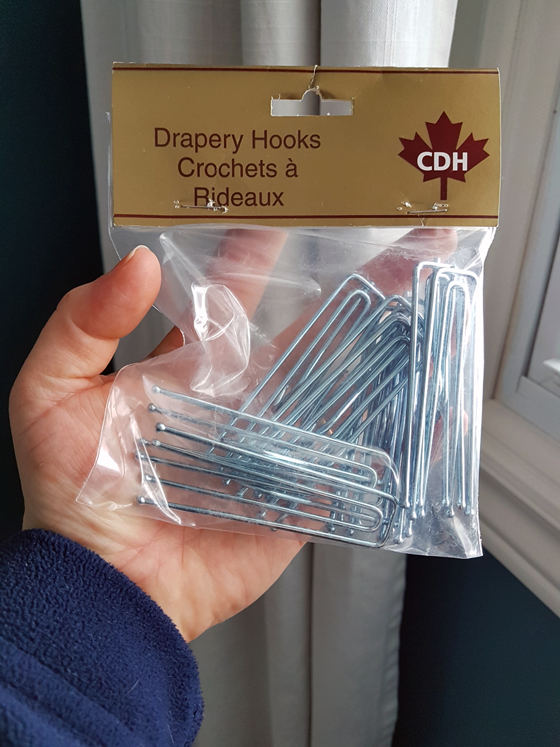
Ikea sells hooks that you can use to pleat your curtains. However, I wanted to replicate the really full, traditional pleats that I made for our other two bedrooms, and the Ikea hooks didn’t do that. I bought four-pronged hooks at my local fabric store (again, on sale) and went to work to figure out how to make my non-Ikea hooks work with my Ikea curtains.

Hooks for pleating curtains

The thing with the curtain tape I’ve used in the past is that each pocket is set up at exactly the right interval to make perfect pleats. The Ikea curtains aren’t quite the same. They’re set up so that you can get as many different looks out of one curtain as possible. There are lots and lots of pockets and then, in the event that you don’t want to pleat your curtains, there are also loops that slide directly over your curtain rod.

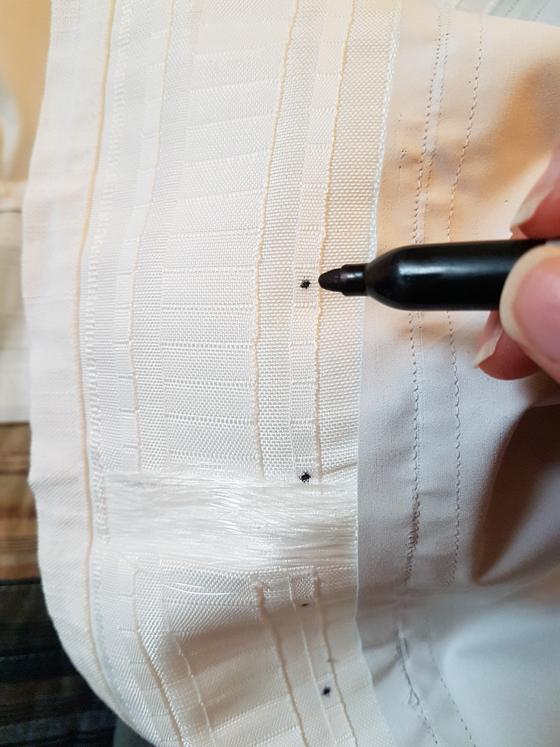
So figuring out how to place my hooks took a bit of time… and trial and error… and measuring… and math. For my pinch pleats, I left about 4 sleeves in between the prong of each hook. The spacing varied ever so slightly because those pesky loops threw off my count every other hook. The joint where I’d sewn the two panels was another spot where I had to fudge the hook placement. Between each hook, I left 12 or 13 sleeves.

Once I was happy with the spacing, I went along the back with a marker and made a little dot on each sleeve that was going to receive a prong. I used a permanent marker so that when I wash the curtains, I can reinsert the hooks without repeating the whole trial and error process.

How to pinch pleat Ikea curtains

The panels for the other side of the window went much quicker, because I was able to use the first curtains as my pattern. However, I made sure to mirror the spacing, so that each panel is symmetrical.

The hooks simply slide into the sleeves, and it can take some smooshing to make sure that one prong stays in place while you’re inserting the others. My fingertips were a bit tender by the time I finished.

How to pinch pleat Ikea curtains

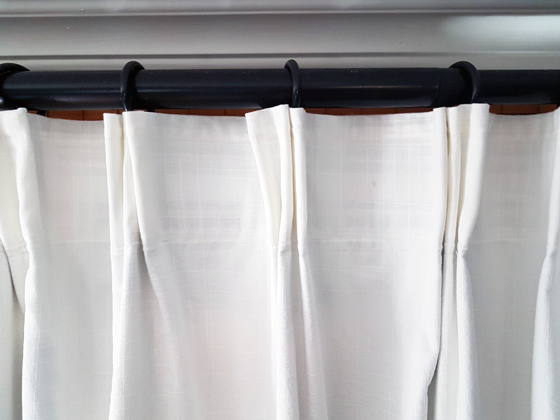
Once the hook is in place, turn over the curtain, and the pleats are nice and even.

How to pleat Ikea curtains

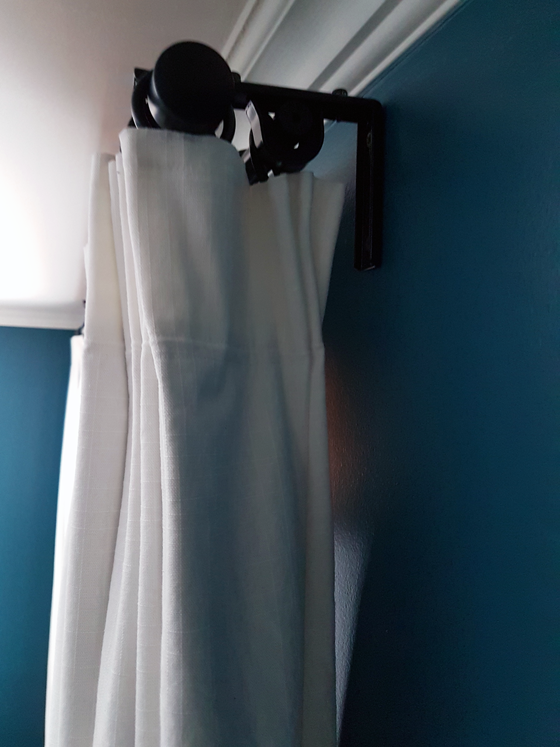
As soon as I hung the curtains, I was super impressed by how effective this blackout lining is. But I took one more step to ensure the room will be as dark as possible. Because we have a double rod with the back rod supporting the bamboo valance, I was able to loop the curtains around and hang a few rings on the back rod. This means that the curtain is right up against the wall, and there is less gap to let light in.

How to make blackout window treatments

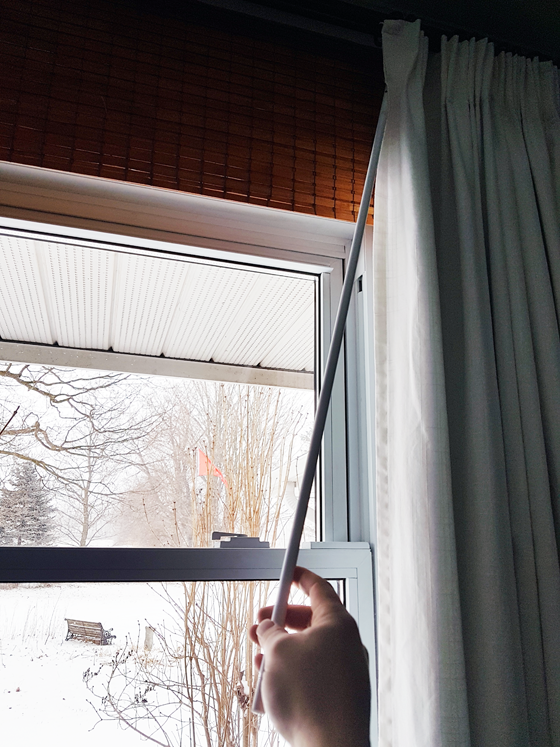
The final touches were hemming the curtains to the right length and adding a wand to the edge of each curtain so that we can pull the curtains open and closed without pulling the fabric–a surefire way to get our white curtains grimy over time.

Wand for pulling curtains closed

My plan for bedtime or nap time was to simply pull down the blind, and let the curtains block the light around the edges of the window and look pretty. But after the time change this spring, I noticed Ellie was waking up earlier and earlier in the mornings. I pulled the curtains shut over the blind, and morning sleep-ins returned–love that blackout lining.

Blackout window treatments in the nursery

If you want to make your own blackout window treatments like these, here are the materials I used.

Materials

What is your go-to window treatment? Do you like the look of traditional pleated curtains or are you more modern? Can you sleep in the light, or are you on the dark side? Any tips to help babies sleep?

DIY Moroccan pouf and other footstools you can make yourself

DIY Moroccan pouf free sewing pattern

One of my must-haves for the nursery was a spot to put up my feet. I knew a footstool of some kind would make nursing, cuddling, storytime and all the rest of baby time much more comfortable.

I love the look of the Moroccan poufs, so I was excited to find a free pattern to sew my own from Better Homes and Gardens.

Free DIY pouf sewing pattern from BHG

I made a few modifications to my pouf. First, I lengthened the pattern just slightly. I extended the side pieces by about an inch to make my pouf a bit taller.

Another change was my fabric. Rather than using the burlap and muslin that the BHG team used in their sample, I went with a white vinyl. Wipeable, durable, good for a nursery. However, I will say that vinyl is not the easiest to sew, and as the pouf got bigger it was much more challenging to manipulate. I’m sure the burlap would be easy-peasy.

I also chose to do my top stitching by machine, rather than going with the decorative hand embroidery BHG showed. Vinyl does not fold and cannot be ironed, so the top stitching helps my seams to lay properly.

DIY Moroccan pouf

The final change was I added a zipper. Even though the vinyl is wipeable, I liked the idea of being able to remove the cover if I ever need to. So at the very bottom of the pouf, I put in a 20-inch zipper. Stitching a zipper in vinyl, especially where all the seams came together, was not my funnest sewing moment. (Again, in another fabric it would be NBD.)

Zipper in the bottom of a homemade Moroccan pouf

To stuff the pillow, BHG recommends towels and fibre fill. I happen to have a large stash of pillows (anyone else find the search for the perfect bed pillow challenging?), so I mined that to stuff the pouf. This thing held seven full size bed pillows. Honestly, I’d love to fit an eighth in there, but I’m afraid the seams might not hold. Getting the pillows to lay smoothly inside, so that the pouf doesn’t look overly lumpy took a bit of effort.

DIY Moroccan pouf free sewing pattern

As soon as the pouf was finished and I set it in the nursery, I was thrilled. It’s the perfect height with the chair, and the white goes well with the other elements in the room. Now that we’ve been using it for more than a month, I also have to say that I’m glad the pouf is light weight enough that I can kick it out of the way when I am trying to oh so carefully put Ellie back in her crib without waking her up.

Turquoise gender neutral nursery

I’m also really proud that I made this myself.

In my experience, poufs, ottomans and footstools are pretty easy to make. Even high-end poufs that I see online get my creative juices flowing as I think how I could make them myself.

Here’s a round-up if you’re looking for inspiration.

DIY Poufs

Ready-made poufs that you could DIY

If you’re looking for a Moroccan pouf similar to the one I made.

I think these buffalo check cubes were originally at Target and seem to now be discontinued, but they’d be super easy to DIY (a cube is really easy to sew). And wouldn’t the check fabric and the leather handles be perfect for a farm?

It might take a bit of searching to find a textural fabric like this, but once you do, it would be a snap to whip up this large ottoman.

Other footstools I considered

I truly love this Ikea cowhide footstool for its fit with our farm theme, but it appears to only be sold at Ikea in the US… and my DIY option was much less expen$ive.

My original nursery plan called for a lot of colourful accessories, like this beanbag ottoman.

A storage ottoman is a favourite for obvious reasons–it’s dual purpose, providing a spot to sit or rest your feet as well as a spot to stash blankets, toys or other nursery stuffs.

In the end, I’m very happy with my pouf. The price was right and so is the style.

What’s your favourite style of footstool? Have you ever made a pouf?

How to mix and match throw pillows

How to mix and match throw pillows

Throw pillows are a great way to add personality to a space. You can easily change them out for the season or your mood. However, mixing fabrics is a skill. It takes practice and sometimes some trial and error.

Join me in a little demonstration.

These are the pillows I chose when we first bought our beloved basement couch. It came with six pillows, and I selected three different fabrics. I wanted colour, pattern and something not too serious. However, it turned out they didn’t all play together as nicely as I wanted.

Observe.

How to mix and match throw pillows

On their own, the patterned pillows each work with the turquoise velvet, but they do not work with each other, despite sharing several colours.

How to mix and match throw pillows

However, let’s look at another equation.

How to mix and match throw pillows

Remember back when I made our big round ottoman? How I searched for the perfect fabric, and the one that ended up working best with the striped pillows was the bird fabric that I already had in my stash? I still love this fabric, and since I ended up buying more to supplement my stash, I still had a good amount of yardage. More than enough to make two pillows.

These ended up being the most professional pillows I’ve ever made. They have zipper closures, piping and even extra liners to help contain the feathers, which always seem to work their way out through the covers. I love them so much.

How to mix and match throw pillows

But what about the poor rejected blue-green geometric? Here’s another equation for you.

How to mix and match throw pillows

The feather is another fabric that I’ve had in my stash for years. I had always planned to use it to make cushions for the couch upstairs, and I finally got around to it. The blue and green bring a bit of summer into the living room.

How to mix and match throw pillows

I love the serendipity of two stash fabrics being perfect mix for pillows that we already had. Along the way, I’ve learned a few lessons about mixing fabrics.

  1. Let’s start with defining our fabrics. For the purpose of this demonstration, I’m going to use the labels “solid” (pretty self-explanatory), “geometric” (could be a stripe or another more linear pattern–the colourful stripe and the blue-green links both fall into this category for me) and “floral” (self-explanatory, but I’ll extend this to include fabrics like my birds or the feather).
  2. Don’t mix like patterns. By this I mean geometric with geometric or floral with floral. Unless the scale is dramatically different similar patterns will compete with each other like my pillows did. This exercise has taught me that the best bet is to mix different types of fabrics, like a geometric with a floral.
  3. Pick fabrics that share similar colours. This is probably the easiest way to mix. Colours don’t have to match exactly (the turquoise piping on the bird pillow isn’t the same as the turquoise velvet, but they still play well together).
  4. When mixing patterns, start with your most dominant pattern first. This is probably my biggest takeaway. My mistake in the family room was using the turquoise velvet as the base. It’s easy to match cushions to a solid. It’s harder to match the bossy stripe. But once I put that at the centre of the equation, I was able to make the mix work.

Pillows are some of the easiest items to sew–and there are also plenty of options to buy. They can add a finishing touch to a room or completely change the feel of a space. I like being able to freshen up the living room for the summer season, and I’m also very glad to have found the right mix for the family room.

Do you enjoy mixing and matching pillows? Do you sew your own or purchase? Do you change your decor with the season? What are your tips for finding a mix that works?

New upholstery for a vintage slipper chair

Slipper chair upholstered in Brissac Jewel by P Kaufmann Fabric

When my Mom was cleaning out my grandmother’s house, I asked if I could have the slipper chair. When my Mom showed up with a pink skirted chair, I was surprised. I actually didn’t remember ever having seen this chair before. The “slipper” chair I had in mind was a parson’s chair that had sat in my grandmother’s front hall. I ended up with that chair too–in fact it turned out to be one of a pair and I got them both in addition to the little pink slipper chair.

Yes, I have a thing for chairs.

I stripped off the pink cover and the old padding way back when we were still living at our first house. And the poor chair has sat naked in the pool room since we moved here to the farm. (I still had the pink cover balled up in a plastic bag. I slipped it back on the chair for a photo op. However, with no stuffing and an extreme number of wrinkles, the chair, which was already pretty sad, looks really, really sad.)

Reupholstering a slipper chair

I’ve always envisioned the slipper chair being part of my office, so now that that makeover is underway, it was finally time to give the slipper chair a new life.

This was a totally start from scratch scenario. I had the wood frame of the chair and that was it.

Wood frame of a slipper chair

This was also a totally make it up as I go scenario. I am not experienced in upholstery and am–like many people–a bit intimidated by it.

So I just dove in. I stained the legs to a dark brown. I covered the seat with some foam, and then put more foam on the back. I covered it all with batting, mashing it around the corners. I stapled, stapled and stapled.

Reupholstering a slipper chair

Then I covered it all with an old sheet, stapling the heck out of every fold.

Reupholstering a slipper chair

Then things got serious. I pulled out my bolt of Brissac Jewel fabric that I’ve had for longer than I’ve had the chair. There was lots of laying things out, turning them around, laying them out again, putting them back to the exact way they were before. And then doing it all over again. Once I finally figured out how to place the fabric, I then spent a lot of time stuffing material around the legs and trying to get the folds just right–or right enough.

Reupholstering a slipper chair

Reupholstering a slipper chair

I made my own piping and used flexible metal tack strip (plygrip) for the first time (this video was very helpful).

Reupholstering a slipper chair

I built my grip strength using my vintage manual staple gun–seriously, I’m almost ready for American Ninja Warrior. My fingertips are still tender. If I take on more upholstery, I would invest in an air powered staple gun. However, a project like this can be done with very basic tools–and very basic skills.

I covered up the messy underside with another piece of the sheet (although the packing crate that was used for the seat is pretty cool–I wonder what went to Montreal via Halifax).

Stamped wood on the underside of the vintage slipper chair

Underside of the slipper chair

My grandmother grew up in her family’s furniture store and reupholstered furniture regularly. She made the pink slip cover that was on the slipper chair originally. All I could think as I was working on this chair was that she would definitely have something to say about my technique if she was around. And I wish she was around to tell me how to do it right.

Right or wrong, though, it turned out pretty well. I can see the few flaws, but overall, I’m really proud.

Slipper chair upholstered in Brissac Jewel by P Kaufmann Fabric

Slipper chair upholstered in Brissac Jewel by P Kaufmann Fabric

Slipper chair upholstered in Brissac Jewel by P Kaufmann Fabric

Slipper chair upholstered in Brissac Jewel by P Kaufmann Fabric

I think my grandmother would be too.

Making DIY dropcloth curtains – 8 lessons learned

In the last post, you saw the easy layered window treatments in the master bedroom. I promised more details on the dropcloth curtains I made.

Blackout blind, bamboo blind and drop cloth curtain window treatments

There are lots of tutorials out there on how to make dropcloth curtains. So I’m not going to write one here. Plus, I totally made these up as I went along, so a tutorial doesn’t really exist. I did want to share some of the things I learned from making my DIY curtains, though.

How to make dropcloth curtains

1. Dropcloths come with seams. I assumed that my 9 by 12 foot dropcloth would be one single piece of fabric. It wasn’t. All of my dropcloths had a seam down the middle. One had a centre seam plus an additional patch along one end.

For my two widest curtain panels, I just left the seam alone. It’s a bit thicker than I would like and a wee bit puckered, but I decided I could live with it if it was hidden in the folds of the curtains.

For the other curtains, my seam ripper and I spent some quality time pulling out the stitching.

Ripping out the seam on a dropcloth

2. Dropcloths come with holes. The canvas fabric of the dropcloths is not perfect. The rustic quality of the weave and the few strands of blue and red that were here and there are some of the elements I like best about using this fabric.

However, in a couple of spots my dropcloths went beyond rustic and veered into unraveled. So if you want to make anything out of dropcloths, check them over carefully. You don’t want to end up with a hole in the middle of your project.

3. Wash and iron before you start. Pre-washing your fabric is a basic tenant of sewing. I didn’t want my curtains shrinking (not that they’re going to be washed often) after I put the effort into making them, so I washed my fabric before I started sewing.

Dropcloth fabric is heavy duty. As a result, it wrinkles easily and the creases are really difficult to remove. I found that ironing the dropcloths when they were still damp from the washer helped to remove the worst of the wrinkles.

4. Use curtain tape. (Britt, this tip’s for you). From what I hear, making pinch pleat curtains is pretty tedious. Lots of measuring and calculating. A much easier solution is to use curtain tape. This is a kind of mesh fabric strip with channels on the back. You pair it with some special multi-pronged hooks, and it basically forms the pleats for you. I bought mine at a local fabric store.

The pleats are softer than they would be if you sewed them without the tape, but that was okay for my rustic fabric and my farm setting.

I sewed the tape along the edge of one of my dropcloths, put in the hooks and voilà, pinch pleat curtains.

Using curtain tape to make pinch pleat curtains

Using curtain tape to make pinch pleat curtains

Using curtain tape to make pinch pleat curtains

Pinch pleat dropcloth curtains

You can space your pleats as far apart or as close together as you want. I left one empty “pocket” for a space of about 6 inches between each pleat.

Pinch pleat dropcloth curtains

5. Use curtain tape to measure your curtains. Before I sewed the curtain tape onto my fabric, I formed all of my pleats until I had a strip that was as wide as I wanted my curtains to be. Then I cut the curtain tape at that length, removed the pleats and used the tape to measure the dropcloth fabric.

6. There are different types of hooks. The magic pleat-making hooks are very handy. They come in two different forms (there may be more, but I tried two). Whatever form you choose, the hooks hook onto the rings that go on your curtain rod. Option 1 has the hooks at the end, so the curtains hang a bit below the rings. Option 2 has the hooks in the middle, so the top of the curtain hangs up against the rings. This is the type of hook I ended up using.

There are also special non-pleating hooks (just plain single hooks) to hold up the ends of the curtains where there are no pleats.

7. Take your time hemming. I wanted my curtains to just brush the floor. For my first set, I hung the curtains, found the spot where they met the floor, and then I used a ruler to measure the rest of my hem from that point. The result was curtains that were the right length at one or two spots, but for the most part they scuffed, not brushed the floor.

Curtains hitting the floor

For my second set of panels and for the bed skirt that I also made out of dropcloths, I skipped the measuring tape. Instead, I used pins to mark the fabric at about 1/4 to 1/2 inch off the floor. I pinned my way across the bottom of the curtains, marking about every six inches. Then I pressed the hem using the pins as a guide. It wasn’t scientific, but it resulted in curtains that just brushed the floor.

8. You can totally do this too. Dropcloth curtains are pretty easy to make. Honestly, I found them a bit tedious. The only sewing is in straight lines. Loooooong straight lines. However, boring they may be, sewing straight lines is not difficult.

Dropcloth curtains in a navy master bedroom

Let me know if you try them yourself.

Have you ever made your own curtains? Any tips to share from your experience?

Linking up with: Happy Housie DIY Challenge Party

How to make simple layered window treatments

When I had the brainwave to move our bedroom across the hall, Matt didn’t understand why we couldn’t just stay in our current room. He went along with my plans, but he had one requirement: he wasn’t moving in until we had curtains.

Blackout blind, bamboo blind and drop cloth curtain window treatments

We haven’t had curtains on any windows in any room since we moved to the farm. With no neighbours, privacy is not a concern.

However, our new bedroom is on the east side of the house. There are fewer trees on that side, so more light comes in the windows. At night, the lights on the barn and the driveshed and even headlights from the cars on the far-away road shine into the room.

Plus, east equals sunrise. If we wanted to sleep past dawn on any summer morning, we needed curtains.

But I wanted more than just curtains. I stumbled over Kristine’s window treatments on the Painted Hive and thought her solution was ingenious. (So I really can’t take credit for this idea).

Kristine’s solution is a great mix of form and function.

Function starts with a basic blackout vinyl roller blind, which I mounted above the window casing.

Vinyl blackout blind hidden behind bamboo blinds and dropcloth curtains

Form comes next.

The blackout blind is hidden behind a bamboo blind. Or what looks like a bamboo blind.

In reality, it’s basically just a valance. I took one bamboo blind and chopped it to pieces. For the main window over the bed, I was able to use the full six foot wide blind, but I only wanted it to be about 16 inches long. To shorten it, I clipped the strings that hold the slats together and knotted the ends so that the blind didn’t fall apart. I’m not going to lie, tying hundreds of tiny strings into tight double knots was pretty tedious.

For the smaller side window, I needed a narrower blind. A set of strong pruning sheers and Matt’s strong hands clipped off the excess width. Then, I again cut the strings to give me a 16 inch length and tied another whole bunch of tiny knots.

Cutting a bamboo blind

To put bamboo blind in place, I installed a double curtain rod just below the crown molding. I chose the Räcka and Hugad from Ikea.

The bamboo panels just drape over the rear rod (I tied them in place) and hang over the top of the window. They hide the blackout blind and, because I hung them so high right under the crown molding, they make the windows look much taller.

Double curtain rod

The front rod supports the dropcloth curtains that I made. The curtains are completely functional, but we don’t need to use them, thanks to the blackout blind, so they’re mostly just for form. They do hide the edges of the two blinds and help to block light from sneaking around the sides of the window though.

I’ll be sharing more about some of the lessons I learned from making dropcloth curtains in my next post.

I used the trick of hanging the curtains so that they fall just outside the window casing. This really does make the window look bigger in my opinion.

Altogether, the blackout blind, bamboo valance, double curtain rod and full length dropcloth curtains make for stylish and functional layered window treatments.

Blackout blind, bamboo blind and drop cloth curtain window treatments

Plus there’s the added benefit of keeping Matt happy.

Happy husband. Stylish master bedroom. I’m all set.

What are your master bedroom must-haves? Are you a blackout blind-er or a up with the sunshine-er? What’s your window treatment style?