It’s been two years since I watched a bunch of bloggers participate in the One Board Challenge. Two years since I haven’t been able to get this round mirror by Jenn at Build Basic out of my mind. The fact that it was built with a single 1×8 made it even cooler.
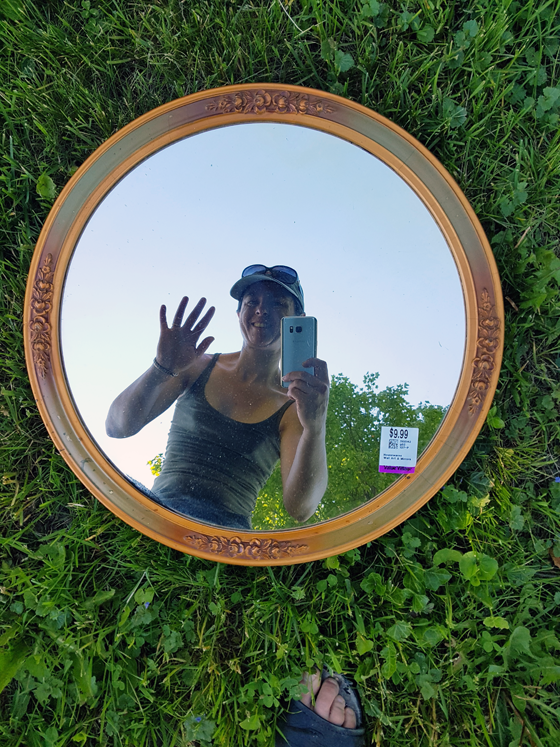
Every time I went to a thrift store, I casually looked for a large round mirror. This spring I finally found one at Value Village (for $9.99), and it was time for my own One Board Challenge.
I’m not going to post a how-to here because, hello, not my project and also Jenn’s instructions are very good.
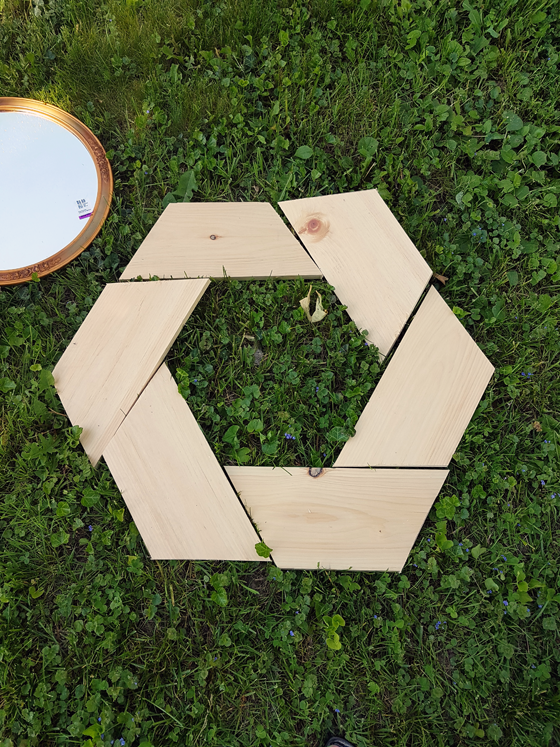
I love the creativity of the One Board Challenge. My brain does not work like this. I would not think to make a round frame out of a straight board. In fact, even with the tutorial, it took me a couple of tries to figure out how to arrange the wood. My first try was fine, but not as interesting as Jenn’s configuration.
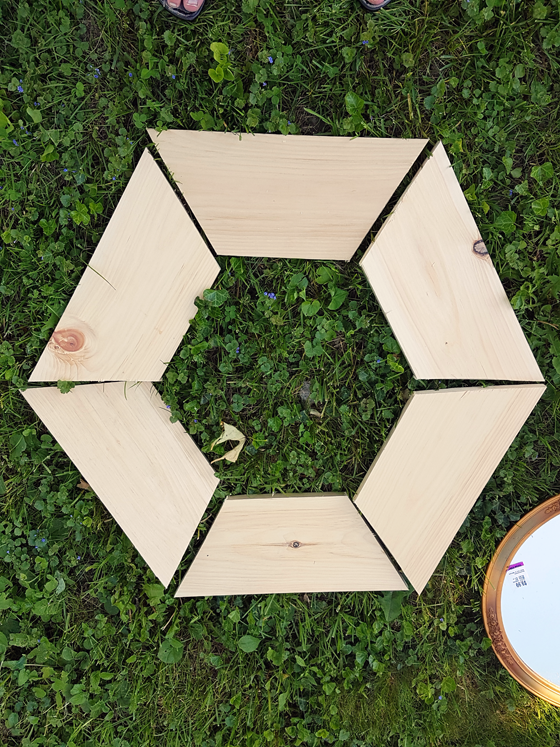
Jenn notes that there are multiple ways to arrange the wood. I feel like her arrangement had more interesting angles, so that was what I went with.
If you’re thinking of trying this mirror yourself, I do have a few notes to share.
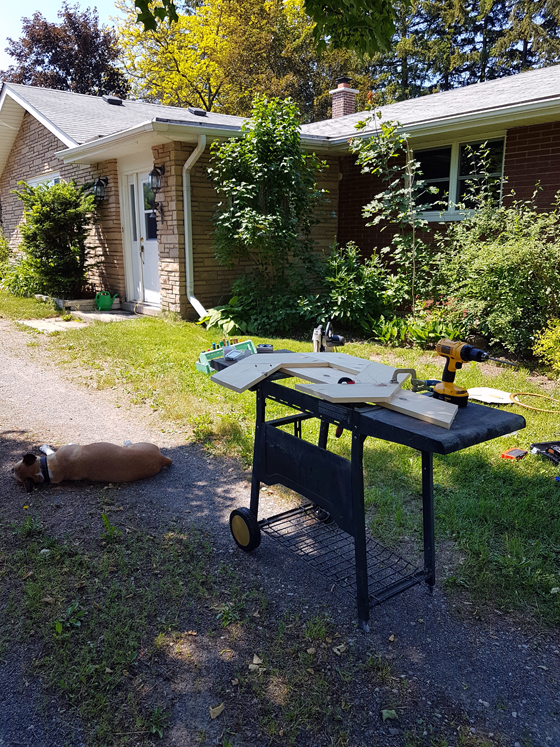
This project is rated moderate. It’s very doable, and none of the skills are particularly difficult. What might make this challenging for a novice DIYer is that building the frame takes a lot of tools. I had my tool box, mitre saw, jig saw, drill, Kreg Jig, sander and clamps all spread out over the front lawn (plus the dog). Then I went to my parents’ house and used my Dad’s nailer and air compressor.
Cutting the curves with the jigsaw–especially the narrow border pieces–takes a certain level of confidence. I think it would be much easier to do the little pieces on a table mounted jigsaw versus freehanding it.
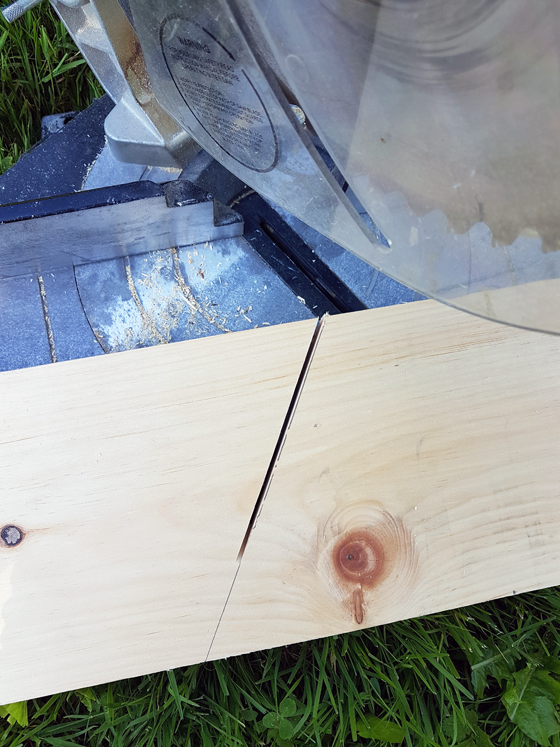
Speaking of tools, my mitre saw wasn’t big enough to handle the major angle cuts in one shot. A 1×8 is not a narrow board. I had to cut partway through, then flip over the board, readjust the angle of the saw, and cut the other half. It wasn’t difficult. Just slow.
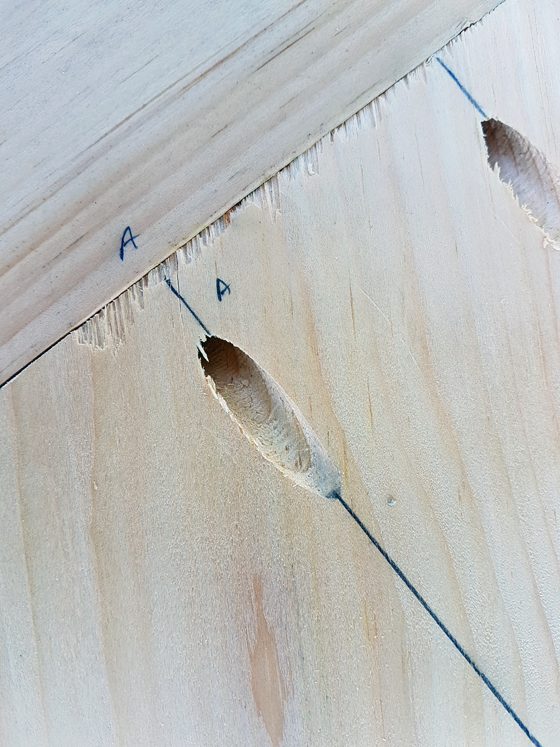
In Step 4, Jenn says “On each joint, mark a unique registration line so that it’s easy to quickly reassemble the pieces later on.” A simple registration mark is letters–you want each to be unique, so a line or slash isn’t distinctive enough. With letters, you can make one joint the A joint, another B and so on. You draw an A on each of the pieces to be joined together, so that you know which piece connects to which, even after dryfitting, sanding and the rest of the steps.
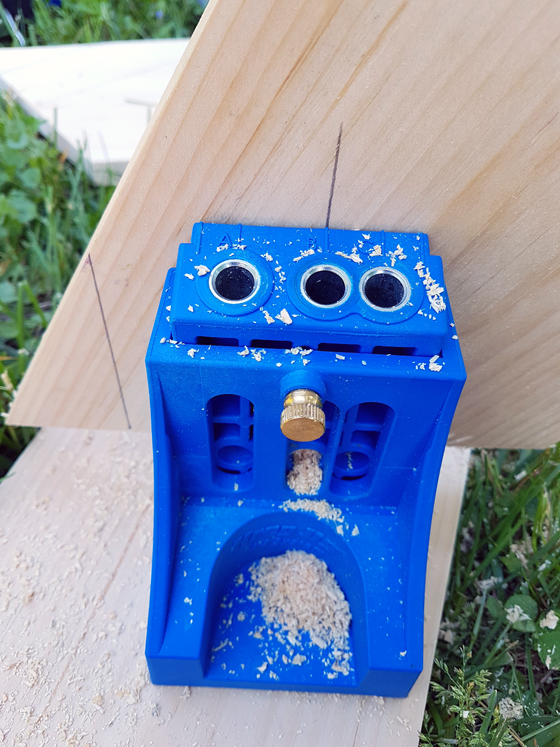
When marking your holes for the Kreg Jig, draw your lines extra long so that the jig doesn’t cover them up.
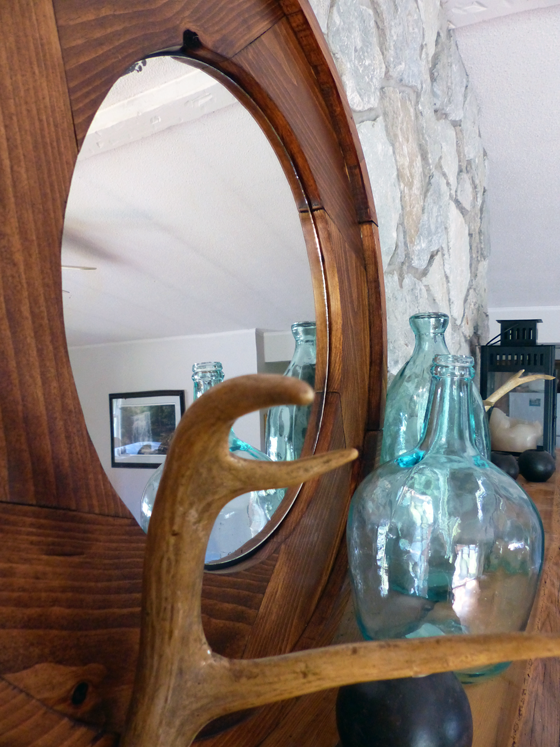
Once the frame was assembled, I stained it my favourite Provincial. Then the final step was attaching the mirror to the frame.
I broke from Jenn’s suggestion to attach the mirror using clips because my mirror ended up being just a wee bit smaller than the finished opening. Instead, I cut a disc from hardboard. I painted it black to camouflage any gaps that might show between the edge of the mirror and the frame, then I used construction adhesive to glue the mirror to the disc.
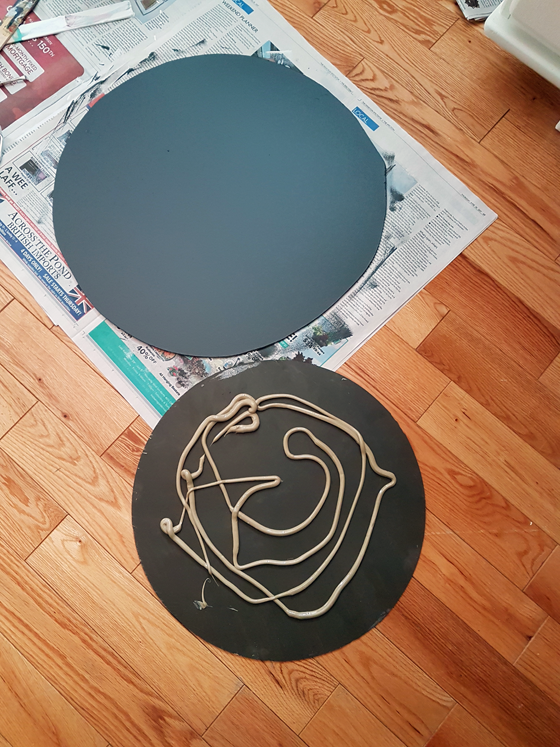
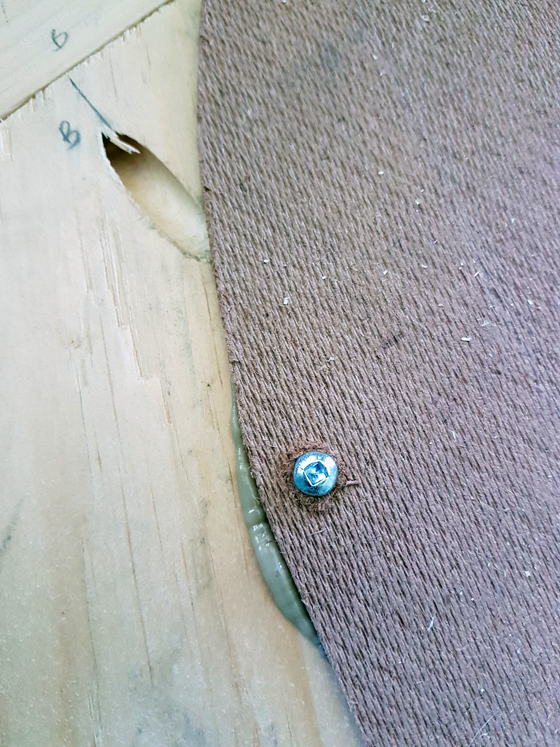
Once the adhesive was set, I then glued the disc to the back of the wood frame. I added a couple of tiny screws for extra insurance.
As soon as I flipped it over, I was ecstatic. I love how this turned out.
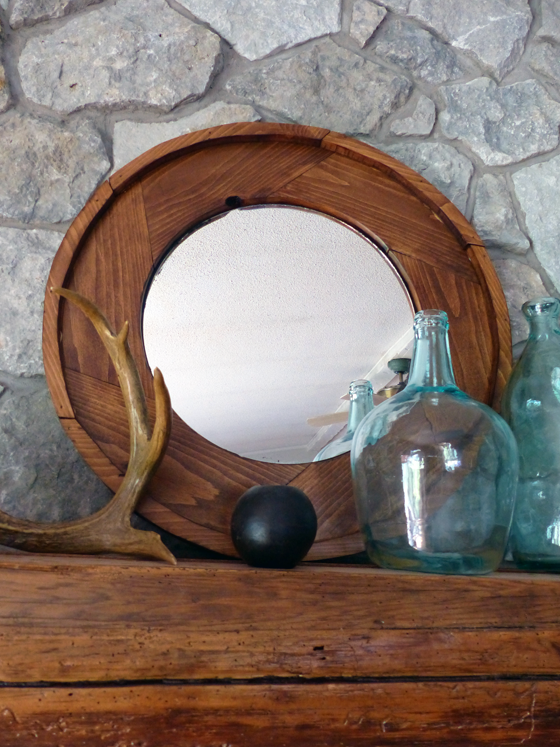
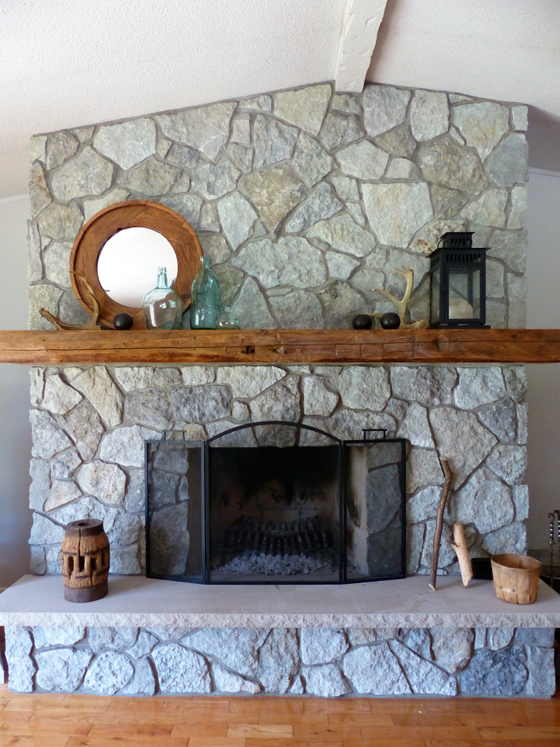
It’s large and bright and a little bit rustic–and a great addition to the summer mantel in the living room. Thanks to Jenn at Build Basic for sharing such a great project.
Do you decorate with mirrors? What would you build in a One Board Challenge?

Very pretty! I love the color too. It looks terrific on the fireplace.
Thanks, Stacy. Minwax Provincial is always my favourite stain.
Very impressive. You must be very gifted. It sounds far too involved for me.
A project like this definitely doesn’t take any special skills. Mostly just patience.
I think you are too modest. How about all these complicated tools, and figuring out angles for screws, etc. I guess I am not handy enough. 😦
Don’t count yourself out. The plans from Build Basic are very step-by-step. Yes, I drew on some experience, but it’s totally doable. If you need a confidence boost, a handy friend or family member or even an inexperienced partner can make a project like this much easier.
That is so pretty and unique! I also never would have thought to use a straight board for a round frame. Yours turned out beautifully!
As I said, I can’t take credit for the idea. My brain does not think that way either!
That project looks so intimidating, but it turned out beautifully! I have a Kreg that I have never learned to use. I need to practice with before I actually need it so I feel more comfortable with it.
It’s a whole lot simpler than it looks. The Kreg took me a little while to get on to, but now I’m pretty used to it, and it’s really neat what it can do.
So pretty! How did you make the rim on the outside of the frame?
They’re made from the off cuts when you trim the outside edge of the frame. They were a bit of a beast to cut because they’re so narrow and the pieces of wood I was starting with were pretty small already. You need a steady hand with the jigsaw.
So they are separate from the flatter part of the wood frame. I bet they were fiddly!