How we cleaned our chimney ourselves

Alternate title for this post “That time Matt’s Dad didn’t suffocate and fall off our roof.”

If you’ve been reading along here for any length of time, you know how much we enjoy our wood-burning fireplace and have fires nightly as soon as the weather turns cold.

It’s been three years since the fireplace was rebuilt and over that time we’ve never cleaned the chimney.

Before we fired anything up this year, I knew I wanted to address that.

Red brick chimney

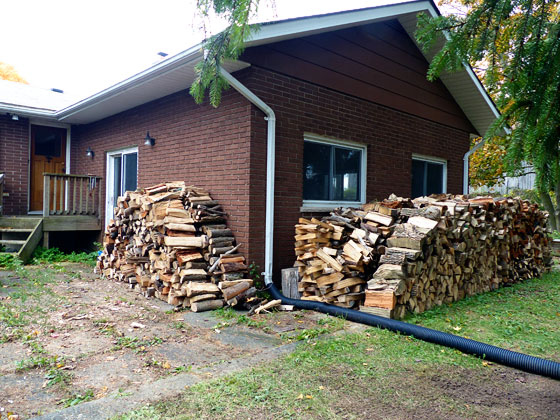
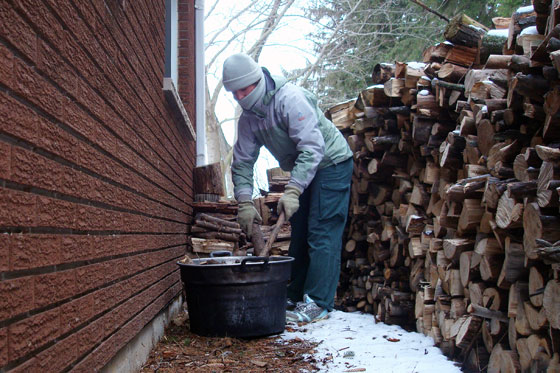
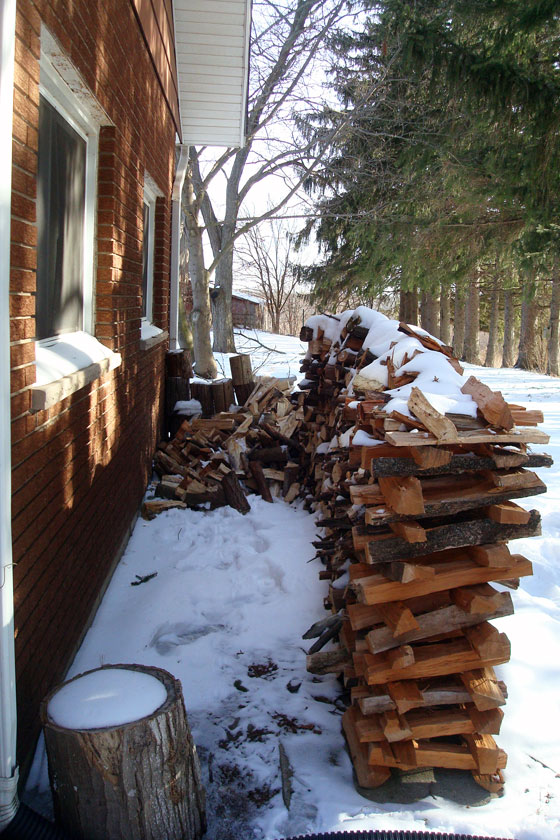
Our go-to was Matt’s Dad. He heats his entire house with wood and cuts and splits all his own firewood. He’s our resource for all things fire.

He initially suggested dropping a heavy chain down the chimney and using it to knock off the soot. I was skeptical, but after a quick online search it seemed like that was a legit method of cleaning a chimney. However, consensus seemed to be that a brush was a more legit method.

Onto my Dad. I was pretty sure I remembered seeing a chimney brush and poles up in the rafters of the garage. After spending some time on a ladder peering around the garage, I found the poles but no brush.

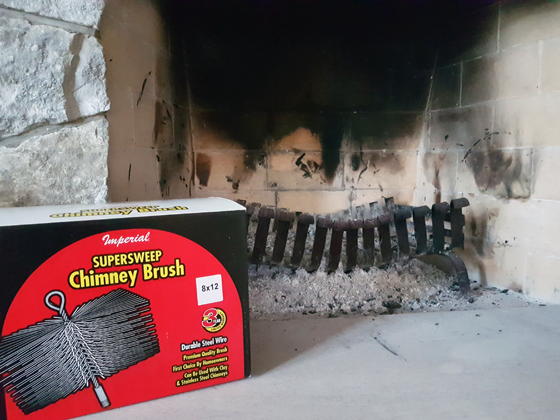
So onto the store. I found a brush that I thought would probably fit our chimney and brought it to my parents’ house to try it on their poles. They didn’t fit together.

Back to the store, where I bought a handful of poles guessing at how many might be needed to reach the full length of the chimney.

Chimney brush in front of the hearth

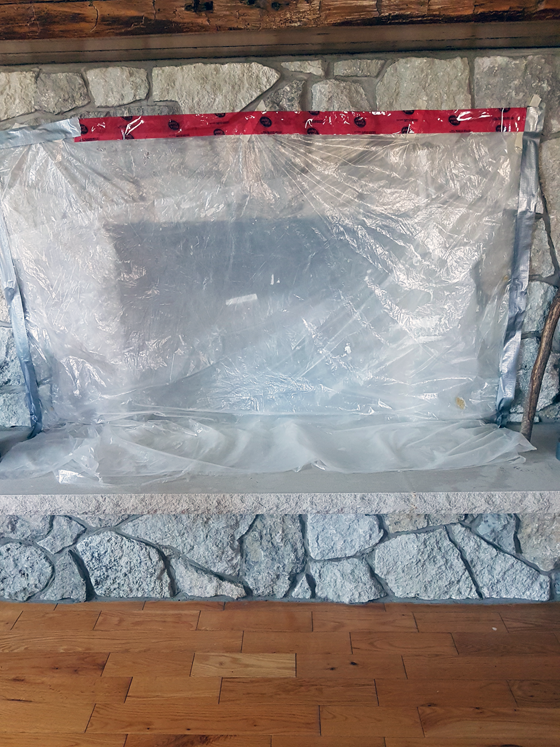
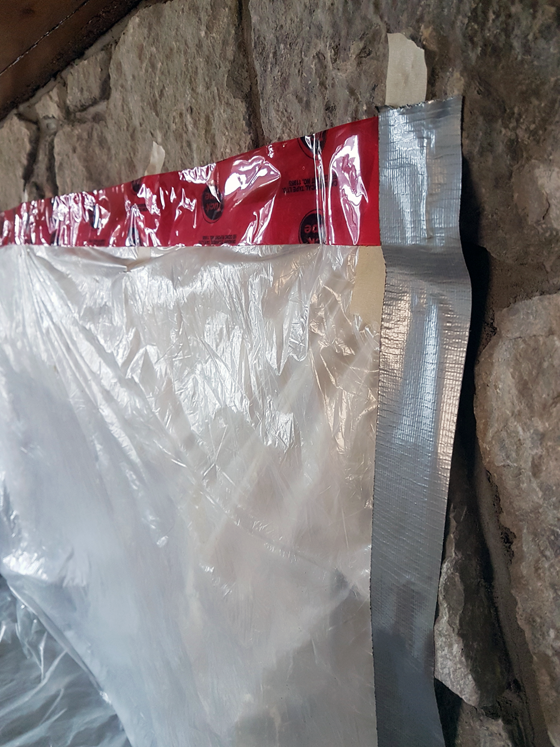
Once we had the equipment, we needed to prep the inside of the house. I cleaned out the hearth, opened the damper and then covered the mouth of the fireplace to prevent dust from coming into the house.

Covering the fireplace to prevent dust during chimney sweeping

Covering the fireplace to prevent dust during chimney sweeping

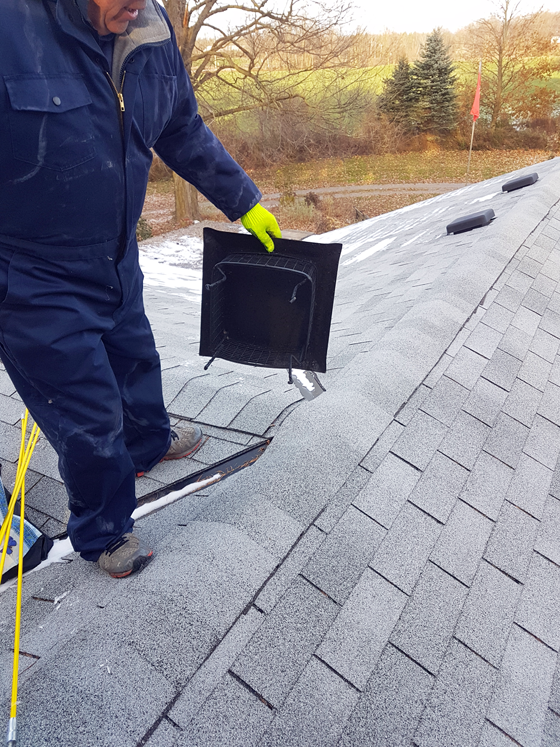
Then it was onto Dick Van Dyke Matt and his Dad. (I asked for a Mary Poppins rooftop routine, but they were not in the mood. Although Matt did give me a strong man demonstration.)

Matt goofing around while cleaning the chimney

They popped the cap off the chimney and took a look.

Taking the cap off the top of the chimney

The chimney wasn’t too dirty. You can see the flakes of soot on the flue.

Soot on the inside of the chimney flue

They screwed the brush onto the first pole and got ready to sweep.

Chimney cleaning brush

Then this is where the suffocation comes in. Before he stuck the brush down the chimney, Matt’s Dad stuck his head in a large plastic bag–probably one that has a suffocation warning printed on it.

Cleaning the chimney

When he cleans his own chimney, my FIL does it from a ladder, which doesn’t give him much maneuverability. Therefore, there have been times where the wind has blown soot back in his face. The plastic helps to protect him from getting entirely dirty. On our roof, they could move around to avoid the wind if necessary.

The next stage was–to quote Matt–“dunk and scrub.” (My husband loves his movie references… although the line is actually “plunge and scrub,” but my darling husband maintains that “dunk” sounds better than “plunge”… or at least it does in his version of an Irish accent.)

My FIL dunked plunged the brush up and down in the chimney until the soot was removed. As he reached the end of one pole, he and Matt screwed on another section.

Attaching chimney sweeping poles together

Once they’d done the full length of the chimney, that was all there was to it. They put the cap back on top, came inside and pulled the plastic off the opening, swept the wee bit of dust out of the hearth, and we were ready for a fire.

Logs burning in the fireplace

Cleaning the chimney turned out to be pretty easy (so says the woman on the ground… but seriously, I know I could do it and you can too). I’m very grateful to Matt and his Dad for their work.

Here are my tips to clean your chimney yourself.

  1. Find a brush that fits your chimney. Our chimney has a 12 inch square flue. Most of the brushes I found in different stores were smaller and round. That works for my FIL’s woodstove, but not for our masonry chimney. Eventually, I found a brush that was an 8-inch by 12-inch rectangle. Even though it wasn’t the 12 by 12 that I originally had in mind, Matt’s Dad said that it worked very well.
  2. Buy extra poles. It turns out that two poles and a long arm (to quote Matt’s Dad) are enough to do our whole chimney. I bought five because I did not want to come up short. I’ll be returning the other three.
  3. Lubricate your poles. The poles screw together so that the handle of your brush gets progressively longer as you proceed down the chimney. Before he went up on the roof, Matt’s Dad gave the threads a shot of WD40 to ensure they’d easily screw and unscrew this year and for the years to come.
  4. Cover up inside. Tape a sheet of plastic over your fireplace opening. If you have doors on your fireplace, this step may not be necessary. With our open hearth, there was a good chance that soot and dust dislodged during cleaning would float into the living room. Covering the opening with plywood or plastic helps to contain the mess in the fireplace, where you can sweep it up later.
  5. Dunk and scrub (or plunge). Jostle your brush up and down inside the chimney. Be relatively vigorous–you want to knock off all the soot–but a bit gentle–you don’t want to damage your chimney.
  6. Watch which way the wind blows. It’s probably not necessary to don a plastic hood and face shield à la Matt’s Dad. However, chimney cleaning is a dirty job (another Mary Poppins clip, anyone?), so wear old clothes or coveralls, gloves and try to choose an angle where you won’t have soot blowing in your face.
  7. Do this yourself. Chimney cleaning is an easy DIY. It took about a half hour start to finish and in total our investment in the brush and the poles is less than $100. We’ll have the equipment for years. We didn’t get a professional quote on cleaning the chimney, but I’m certain that we would have spent more than $100 if we’d hired this out.

Now we can enjoy the fireplace, confident that it’s safe and clean.

How we cleaned our chimney ourselves

First snow and first fire

Snow dusting the split rail fence by the barn

Thursday night the flurries started, and Friday morning we woke up to our first dusting of snow this season.

The puppy was entirely over-excited until his feet got too cold (temperatures also fell incredibly far overnight) and then he was excited run back to the warm house.

Baxter surveying the fields after the first snowfall

Tire tracks across the field after the first snowfall

Baxter surveying the fields after the first snowfall

Snow on the barn roof

After all of the cold and snow, I was very happy to also have our first fire of the season this weekend. (Yes, that means our chimney is clean. One more task crossed off our fall to-do list. How to post to come).

Logs burning in the fireplace

I’m writing this in front of our second fire of the season, enjoying a quiet, cozy wind down to our weekend.

I hope that you all had a good weekend as well. What was the highlight for you? Any weather changes where you are?

Building a round wood framed mirror

Large round wood frame mirror

It’s been two years since I watched a bunch of bloggers participate in the One Board Challenge. Two years since I haven’t been able to get this round mirror by Jenn at Build Basic out of my mind. The fact that it was built with a single 1×8 made it even cooler.

Every time I went to a thrift store, I casually looked for a large round mirror. This spring I finally found one at Value Village (for $9.99), and it was time for my own One Board Challenge.

Round mirror makeover before

I’m not going to post a how-to here because, hello, not my project and also Jenn’s instructions are very good.

I love the creativity of the One Board Challenge. My brain does not work like this. I would not think to make a round frame out of a straight board. In fact, even with the tutorial, it took me a couple of tries to figure out how to arrange the wood. My first try was fine, but not as interesting as Jenn’s configuration.

Building a round wood frame

Jenn notes that there are multiple ways to arrange the wood. I feel like her arrangement had more interesting angles, so that was what I went with.

Building a round wood frame

If you’re thinking of trying this mirror yourself, I do have a few notes to share.

This project is rated moderate. It’s very doable, and none of the skills are particularly difficult. What might make this challenging for a novice DIYer is that building the frame takes a lot of tools. I had my tool box, mitre saw, jig saw, drill, Kreg Jig, sander and clamps all spread out over the front lawn (plus the dog). Then I went to my parents’ house and used my Dad’s nailer and air compressor.

Outdoor workshop

Cutting the curves with the jigsaw–especially the narrow border pieces–takes a certain level of confidence. I think it would be much easier to do the little pieces on a table mounted jigsaw versus freehanding it.

Speaking of tools, my mitre saw wasn’t big enough to handle the major angle cuts in one shot. A 1×8 is not a narrow board. I had to cut partway through, then flip over the board, readjust the angle of the saw, and cut the other half. It wasn’t difficult. Just slow.

Building a round wood frame

In Step 4, Jenn says “On each joint, mark a unique registration line so that it’s easy to quickly reassemble the pieces later on.” A simple registration mark is letters–you want each to be unique, so a line or slash isn’t distinctive enough. With letters, you can make one joint the A joint, another B and so on. You draw an A on each of the pieces to be joined together, so that you know which piece connects to which, even after dryfitting, sanding and the rest of the steps.

Registration marks

When marking your holes for the Kreg Jig, draw your lines extra long so that the jig doesn’t cover them up.

Kreg Jig

Once the frame was assembled, I stained it my favourite Provincial. Then the final step was attaching the mirror to the frame.

I broke from Jenn’s suggestion to attach the mirror using clips because my mirror ended up being just a wee bit smaller than the finished opening. Instead, I cut a disc from hardboard. I painted it black to camouflage any gaps that might show between the edge of the mirror and the frame, then I used construction adhesive to glue the mirror to the disc.

Gluing a mirror with construction adhesive

Once the adhesive was set, I then glued the disc to the back of the wood frame. I added a couple of tiny screws for extra insurance.

Attaching the mirror to the wood frame

As soon as I flipped it over, I was ecstatic. I love how this turned out.

Large round wood frame mirror

Fieldstone fireplace in the summer

It’s large and bright and a little bit rustic–and a great addition to the summer mantel in the living room. Thanks to Jenn at Build Basic for sharing such a great project.

Do you decorate with mirrors? What would you build in a One Board Challenge?

Summer farmhouse mantel

Blue-green glass jugs on the mantel

I typically don’t do a lot of seasonal decorating. But given that the mantel still had snowshoes on it at Easter, I thought it was time for a little refresh in the living room.

These blue-green glass jars are definitely more summery than snowshoes. They go perfectly with the new throw pillows I added to the couch.

Blue-green glass jugs on the mantel

How to mix and match throw pillows

I bought the two bigger bottles last year and even though they looked large in the store, when I put them on the mantel I felt like they were a wee bit small. The fireplace is huge and with the vaulted ceiling in the living room, there’s a lot of space above the mantel to fill.

I made this wood framed mirror to add some height and give the illusion of doubling the bottles. (More on this mirror coming up later this week).

Fieldstone fireplace in the summer

On the rest of the mantel, I used our usual decor that stays no matter the season. The pair of antlers that my FIL found are a beautiful organic accent that complements the wood and the stone. The large lantern and the trio of sphere tealight holders are very welcome hits of black.

Decorating our mantel with a lantern and antler

We are not using the fireplace these days–Easter was the cut off for that as well as the snowshoes. However, the beauty of the fieldstone and barn beam has not diminished. I love how it is the centrepiece of our home.

How do you decorate for summer? What colours do you associate with summer?

First fire of the season

Saturday, I was outside in a chilly wind all afternoon. Unfortunately, I wasn’t at the farm, so I didn’t have physical labour to keep me warm.

Saturday evening, home at the farm, was all about big bowl of soup on the couch in front of the first fire of the season.

View this post on Instagram

A chilly day spent outside means the first fire of the season

A post shared by Julia (@juliaon129acres) on


Sunday, Matt and I rearranged the woodpiles and took delivery of another load of firewood from his Dad.

We have a serious stockpile of firewood this year. It wraps around all three sides of the pool room.

Woodpile

We’ve gotten so much new wood this year that things have gotten a bit jumbled.

The rearrangement on Sunday was about putting the oldest wood in the most accessible spot: stacked on the side patio closest to the kitchen door. Then there is the original woodpile behind the pool room now expanded to four rows–we’ve never had four rows.

Woodpile

The newest wood is on the other side patio where it can dry for awhile–years given the amount of wood we have to burn through before then.

Woodpile

The fireplace is my thing, but the firewood is Matt’s. I gripe a bit about firewood taking over our house, but I appreciate all of the effort he puts into making sure I’m set for a cozy night after a chilly day.

How are you getting ready for winter at your house?

The fireplace gets a German accent

It occurs to me that I haven’t shown you our winter mantel yet.

This year is pretty similar to last year. The snowshoes, the candles, the antlers, the lantern.

But there is one new addition.

Courtesy of Matt.

Autographed Heino album on the mantel

I’m not sure why this has to go on the mantel.

Autographed Heino album

Apparently, back in high school when instant messaging was just getting going (oh Lord, I just did the math and that was 20 years ago… holy moly), Heino was Matt’s avatar.

I don’t think Matt was a particular Heino fan. I’m not sure he’s even heard his music. Don’t ask me to decipher the mind of a teenage boy.

Somehow, his oldest brother remembered this, and when he saw this autographed Heino album in a thrift store the other week, he bought it for Matt.

Autographed Heino album

And now it’s on our mantel.

Fortunately, spring is almost here, so I’ll be redecorating soon and the winter mantel (along with Heino) can move on.

In the meantime, I leave you for the weekend with Heino, a Hit Medley. You’re welcome.

Who else’s partner “helps” with decorating around the house? Do you remember IMing with your friends–way back before texting? Better yet, do you remember your avatar? Do you collect vinyl (despite appearances, we do not)? Is anyone a Heino fan?

Thisclose to a breakthrough

I’ve had this whole “break-on-through” post that I’ve been planning. You see, all winter I’ve been working my way through our woodpile. It’s three rows wide, and I’ve been slowly using up the back two rows. (Matt, the official woodcutter in our relationship, would argue it’s not been slow enough).

Loading firewood into the washtub

Well, I was almost at the end. I had snapped some pictures showing how far I’d come, anticipating the day when I would break through.

Woodpile

Then I would take my final pictures and write a blog post where I talk about how happy I am that we have a fireplace, how nice it’s been to have fires all winter, how it’s almost the end of winter and how neat it is that this breakthrough moment coincides with almost the end of fire season, how we (Matt) will have to restock our firewood in anticipation of next winter.

I had it all worked out in my mind.

But then something happened. Cave in.

Collapsed woodpile

There will be no breakthrough.

There will be restacking, more burning (sorry, Matt). And instead you get this blog post, mourning what could have been, rather than triumphantly celebrating a milestone.

Okay, maybe milestone isn’t the best descriptor, but I’d worked it all out, people!

I blame the turkey.

Her footprints are all around that woodpile.

Turkey tracks around the woodpile

Tough times on the trail

Does anyone watch the Amazing Race? Matt and I have watched every season. If you’ve not seen it, in every episode, as well as having to get from point A to point B, there are specific challenges the teams have to complete.

Sometimes the challenges are ridiculous. As in spend 14 hours doing the most physical, back-breaking, exhausting task possible.

Every so often, Matt and I find ourselves in a situation that could be an Amazing Race challenge.

That was the case about a month ago when Matt came up with the idea to clean up some of the deadfall on the east trail. I’ve mentioned before that our trails are a bit challenging. On the east trail, the challenge comes from downed trees, fallen branches and all kinds of brush.

Deadfall in the back woods

Matt’s done this cleanup before with his Dad. I’ve never experienced this particular version of reality TV come to life. Now that I have, I don’t think I’ll be sending in my Amazing Race audition tape any time soon. Real life is quite enough.

This particular Amazing Race challenge was to

  1. Gather the necessary equipment–trailer, chainsaw, chainsaw oil, gas, chainsaw wrench, safety equipment, wheelbarrow
  2. Take the customary local conveyance (the tractor) from point A (the house) to point B (the back field)
  3. Fill the trailer with firewood.
  4. Race to the finish line (back at the house).

The key to successfully completing an Amazing Race task is smart division of labour. So Matt went to work with his chainsaw, and I had a near death experience pushed the wheelbarrow. I don’t have a picture of this because I was busy dying. Also unlike on the Amazing Race we didn’t have a camera crew following our every move.

This hill may not look like much, but it felt incredibly steep going up (and then down the other side).

Gathering firewood in the forest

The wheelbarrow was not the ideal tool for this operation, given the rocks, mud and sticks buried in the trail. Plus we were pretty far back in the woods, so the push was loooooong. And just when you approached the end, there was the catwalk over the corduroy road at the entrance to the trail.

Pushing the wheelbarrow over the forest catwalk

Between the two of us we managed five loads of firewood and only a small section of trail. But, that worked out to a mostly full trailer, fulfilling our Amazing Race objective. Can’t you tell how thrilled I am?

Trailer loaded with firewood

At the end of an Amazing Race episode, competitors sprint to the finish mat where they are greeted by the host. If they’re first, they get a special prize.

In our case, I drove Wiley back to the house while Matt rode in the trailer. After stacking the wood, unhooking the trailer and putting the tractor away, we staggered to the house. As we were the only team on this leg, I think we came in first. However, our prize of an ATV and a small trailer that fits in the trail were missing.

So we’ll not be doing more clearing any time soon. I’m sure we’ll find another Amazing Race worthy challenge though. They seem to be fairly common around the farm.

Stay tuned for our next episode.

What’s your favourite reality TV show? Have you ever auditioned for a TV show? What Amazing Race-esque challenges do you get into at your house?

Chop chop

This spring, as I tidied up the woodpile after our first winter with a working fireplace, I did a very scientific calculation of how much wood we would need to stockpile for the next season.

We had most of two rows of firewood left after about three months of having fires every night. We planned to have fires every night again, but we’d be starting much earlier this year than last year (given that the fireplace wasn’t finished until Christmas last year).

I figured three complete rows of wood would do.

When a tree came down in the big field, that was our sign that it was firewood time.

Matt’s Dad arrived with his chainsaw, and he and Matt went to work. In an afternoon, they cut the fallen tree into lengths, and trailered it back to the house.

Cutting a fallen tree into firewood

Tractor pulling a trailer full of firewood

After their afternoon of work, it was clear that the downed tree was just one trunk out of four. All of the trunks were dead, so we decided it was best to take them all down.

The following weekend, Matt’s Dad was back. He brought three chainsaws and his splitter this time.

We went with our usual division of labour: Matt and his Dad headed out for the tree, and I started up the splitter.

Firewood waiting to be split

Firewood waiting to be split

After I had split the first two loads, Bax and I headed out to the field to check on the progress. The remaining three trunks were down, and one trailer was full.

Cutting a fallen tree into firewood

We filled it again (and added a puppy) and filled Matt’s Dad’s trailer (he didn’t get a puppy, but his extra deep trailer took basically a double load of wood).

Trailers full of firewood

Back at the house, Matt and I finished splitting and stacking. I got my triple row of firewood.

Firewood pile

And then some.

Firewood piles

Good thing, because fireplace season has started earlier this year. We’ve already had a couple of fires, which are so, so nice… although I’ve not photographed them (#bloggerfail). I am so glad we finally have a fireplace to enjoy this fall.

Have you done any tree clean-up at your house? Who else is enjoying fall fires? Have you put up firewood this season?

Getting my act together

A month ago, I said it was time to get my act together, and I posted my fall to-do list.

I’m most productive when I post regular updates to hold myself accountable, so today is about sharing where I’m at in getting ready for winter.

And I am pleased to report that I’m getting my act together.

The vegetable garden

  • Hang the gate
  • Edge the garden
  • Put in raised beds
  • Spread manure

Okay. Perhaps this isn’t the best way to start. Beyond the harvest and clearing out the dead plants, I haven’t spent much time in the garden. My plan is to make the garden my focus for November.

Harvest 2015

The bird feeder

  • Reattach feeder bracket – My cousin who made the birdfeeder post for us originally very kindly bolted the top bracket back into place.
  • Install a sleeve for the post – I put a section of pipe in the ground so that the post can just slide into place, no hammering required.

I restocked our seed supply last week, and we have a steady stream of blue jays, chickadees, juncos and a whole bunch of other birds I can’t identify visiting the feeder every day.

Chickadee in the birdfeeder

Firewood

  • Tidy up the trees – Matt and his Dad went to town.
  • Put up another row of firewood – As Matt and his Dad cut, I split and stacked, and we are set.

More details about our latest lumberjacking episode will be coming in a future post, but for now gaze upon our woodpiles.

Firewood piles

Get Wiley ready for winter

  • Change the oil – My handy cousin (he of the birdfeeder) changed the oil for us.
  • Check the battery contacts – My handy cousin also made us a little sleeve to tighten up the battery clasp, and Wiley’s starting so smoothly now.
  • Remove the mower deck – Done. There will be no more grass cutting this year.

How to detach a Kioti SM2410 mower

The house

  • Take off the screens
  • Clean the heat pump filter — Done
  • Clean out the gutters — Matt’s done this twice in October, and he’ll probably have to do it at least once more.
  • Turn off the outdoor water
  • Annual service and filter replacement on indoor water system — A new to-do

The house is another area where we’ve not done a whole lot. What does that say about me that I’m putting less time into the roof over my head as opposed to the property around my house? Thankfully, Matt’s on it.

Matt cleaning the gutters

Anyways, three categories out of five are completely done. That’s pretty good. Now to keep the productivity coming before winter comes.

How are you doing on your pre-winter to-do list so far?