
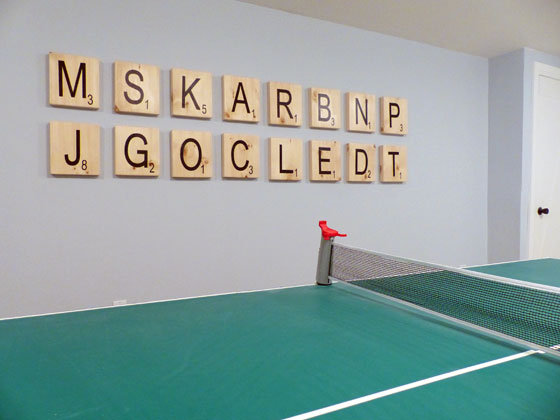
Anyone want to play Scrabble? I’ll bring some letters if you bring the very, very large board.
When it comes to art in this house, I follow two principles: keep it personal and keep it inexpensive. For the basement, I have one more factor: keep it fun.
A wall full of really big Scrabble tiles ticks all the boxes.
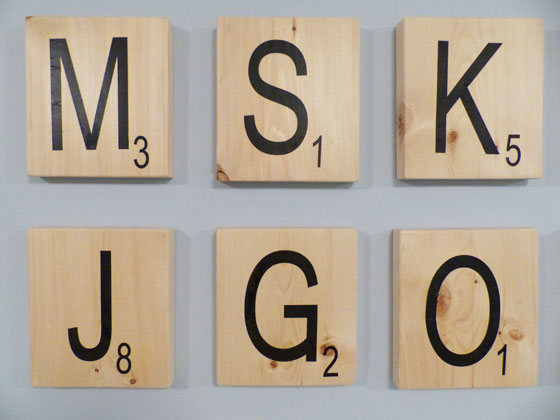
Personal: The letters are the initials for us and everyone in our immediate family. Moms, Dads, brothers, sisters, in-laws, nephews, niece, pets.
A message from Auntie JuJu to the two babies joining our family in the next few months: your names must start with one of these 16 letters. More than half the alphabet is in play. That’s lots of options for you.
Inexpensive: Sanding all of these tiles took a bit of time, but since I’m not paying myself an hourly rate, my only costs were a few 2x10s, some sandpaper, printer paper, Mod Podge and a paint pen.
Fun: We have giant Scrabble tiles hanging on our wall. That’s not typical artwork.
When I was making these, I wanted the letters to hang perfectly flush to the wall. Even the thinnest hanger didn’t appeal to me.

I came up with a simple solution that was also–you guessed it–cheap.
I routed a channel in the back of each tile, which slips over a nail that I hammered into the wall.

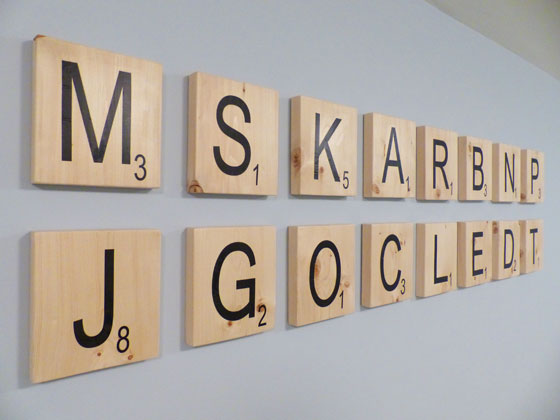
Adding art to the basement was one of my Home Goals for 2016. We call this room the long room, so I wanted some substantial art that could fill the wall. Sixteen large wood slabs work very well.
Do you play Scrabble? Would you ever hang boardgame art on your walls? How do you handle art when you have a big wall?

That’s so cute, Julia! I love it.
Thanks, Stacy.
They came out beautifully!!
I was very happy with how it all worked out.
Routing out the back was definitely the way to go. And this is a cute idea though I don’t have a spot for it. The only things on the walls in my basement are shelves of cleaning products and tools.
As for how to deal with big walls, I thought I was gonna hang things salon style on the big party wall in my living room, but that would require owning a whole lot of pictures. My bookcase broke the wall in half and a big poster that my parents had framed for me when I was a teenager finished it off enough that it doesn’t look blank.
Function is a completely legit use of a basement! And artwork from teenage days also works.
Well it’s a print of a watercolor painting of Paris from an artic window, not something I made in art class. And yeah, function (laundry ajd storage) is it for my basement because I can’t stand up straight down there.
That’s a nice memory to carry with you to your own house.
Yes it was a gift from my host family when I studied abroad in France
Those are fun! I like the routing idea. Our problem in this house is not having enough walls for all our art and photos. But I still love DIY wall art, and have a whole pinterest board devoted to it.
For some reason your last post on growing squash vertically has disappeared. I can read it in my email, but when I try to click over to leave a comment, it says the page can’t be found. Just thought I’d let you know.
Yeah, we’re not at the too much art and not enough walls stage yet. We might get there someday.
Thanks for the heads up about the squash post. I realized last night that I’d mis-scheduled it, so I changed the publishing time on it. That is what probably caused it to disappear for you. It is still there. You’ll probably have to click over to the blog to find it though.
I love it! It looks so fun and fills the wall nicely. That was a very clever way to hang them and makes it easy to rearrange and have fun making words to surprise you…not that I would do something like that.
Fortunately Matt hasn’t thought of doing that… yet. Don’t give him any ideas! I intentionally tried to arrange them so that they wouldn’t spell a recognizable word.
How did you make the letters for the squares? I love the idea and will be stealing it for christmas gifts.
You print the letters backwards, and then cover the wood with mod podge, lay the letters face down, let the mod podge dry, and then rub the paper off with water. It’s a bit amazing how it works. I used this same transfer technique when I made ruler growth charts for two of my nephews (https://homeon129acres.wordpress.com/2015/01/19/diy-ruler-growth-chart/). I see in looking back at that post that it looks like the tutorial I linked to has been removed. If you google transferring type to wood with mod podge, you should find a few tutorials. I also find a paint pen is helpful for touchups.