Looking back at Home Goals 2016

I have to be honest. I’m on the side that is glad to see the end of 2016. It was not my favourite year.

But there were some bright points. And before I look too far ahead into 2017, I want to take a look back at my Home Goals 2016.

I really enjoy laying these goals out at the start of every year. And I find them very helpful throughout the year to keep me on track.

This year was kind of a mix. We accomplished a lot, and I am really happy with what I can cross off the list. However, some little finishing details continue to hang around, and I couldn’t summon the motivation to finish them.

Here’s my review.

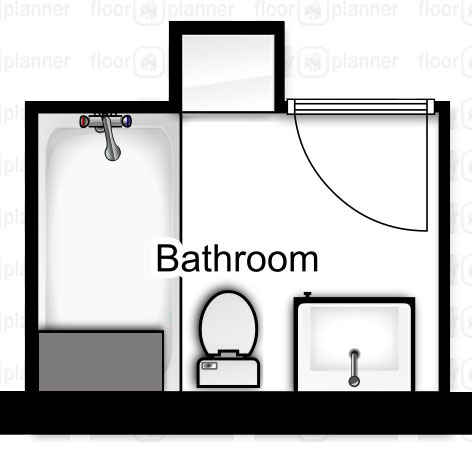
Start to plan for the big reno

I started last year by sharing some of the floorplans that we’ve been playing around with for our long term vision for this house. Through that process, I think we landed on a plan that will work best for us.

We also met with a contractor, got his input on the plans and got some very rough numbers from him about how much things will cost.

We also realized that we can easily break our plans–and our budget–down into several phases. I like knowing that we don’t have to do everything and spend all the money all at once.

The big reno, even just phase one, is likely still a little ways away, but it seems more real now that we have some drawings and numbers.

Guest room

Robin's egg blue country guest room

You know I love crossing a whole room off my list, and the guest room has been one of my favourite projects so far.

A few family members visited us in 2016, and they all liked it too. My one nephew said it was like a bed and breakfast–the kid knows how to make his aunt happy.

This is a project where one niggly finishing detail is still hanging around. I stripped the paint off the old metal bedframe way back in the summer, but I never repainted it. So this will have to go on the list for 2017.
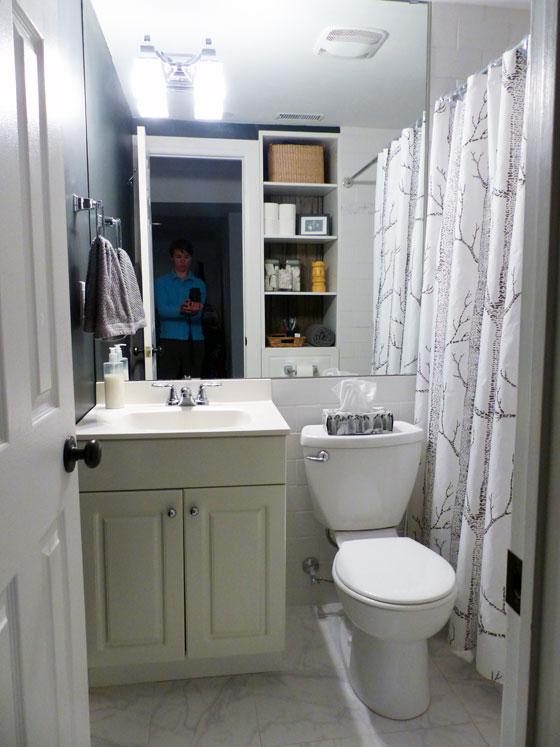
Finish the basement

Built in shelving in a small bathroom

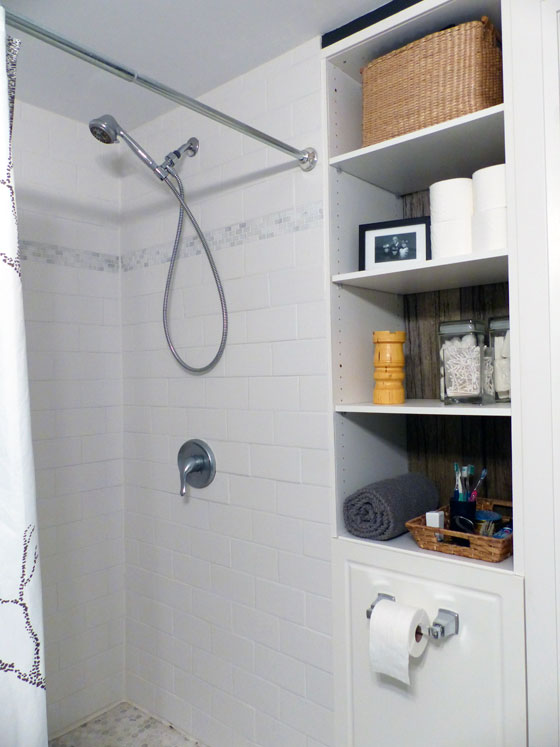
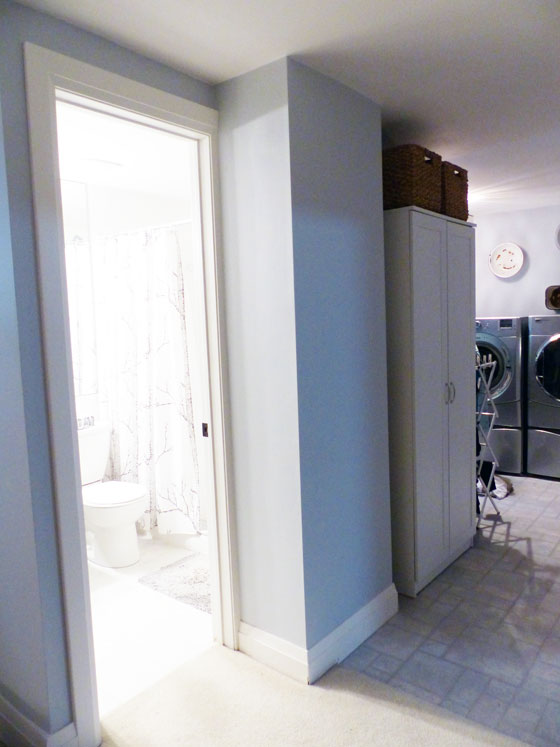
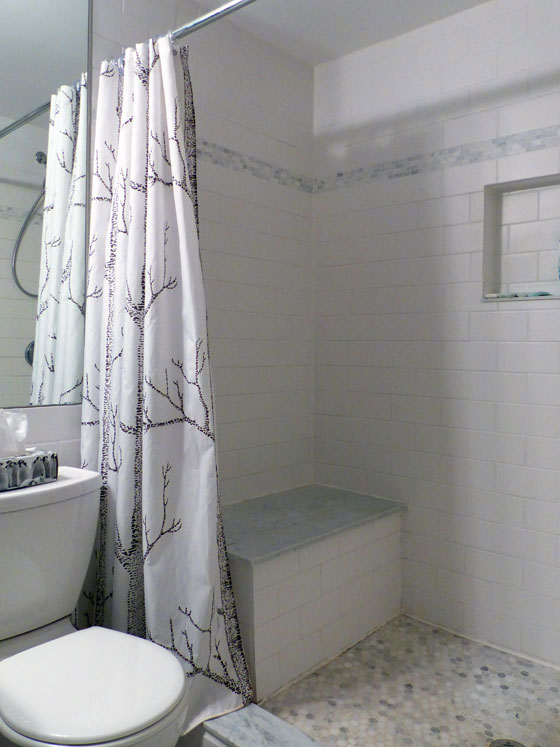
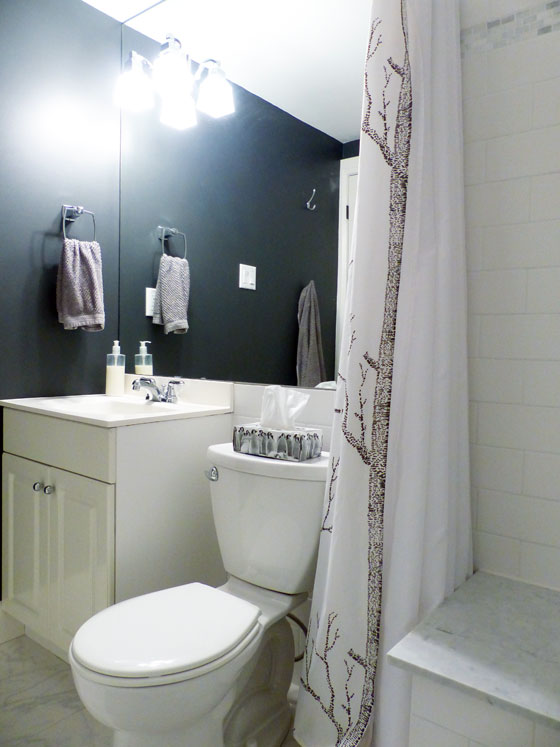
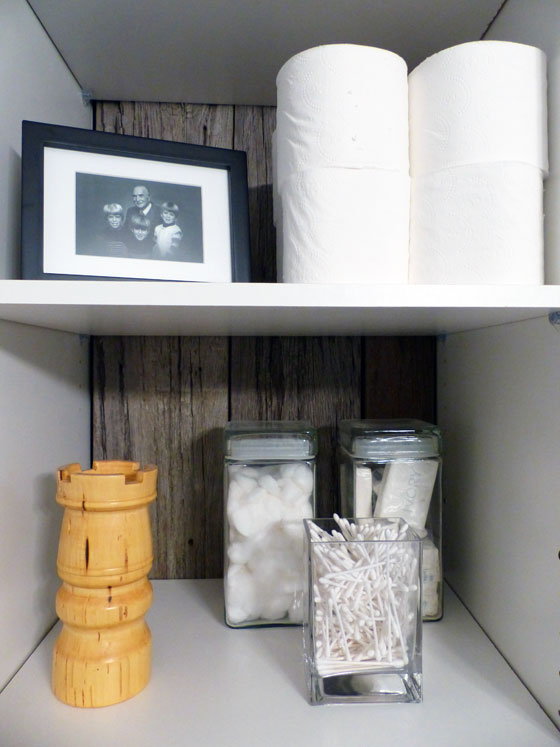
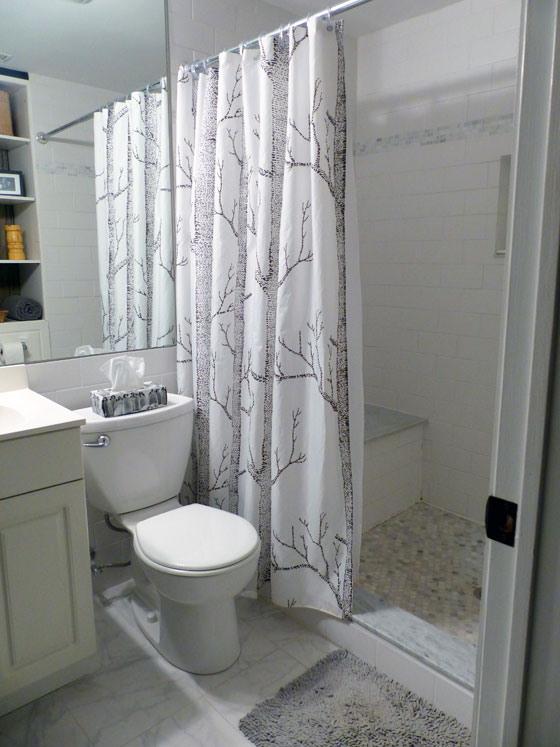
The basement was our very first project when we moved to the farm, but four years later I still had some niggly finishing details hanging around. The biggest detail was Matt’s bathroom, which is alllll done–and so, so pretty.

The basement ended up being the focus of an unexpected reno this year when we had to waterproof the foundation in a few areas. It was tough to redo already redone areas. I’m keeping my fingers crossed we don’t have any water seep in this spring.

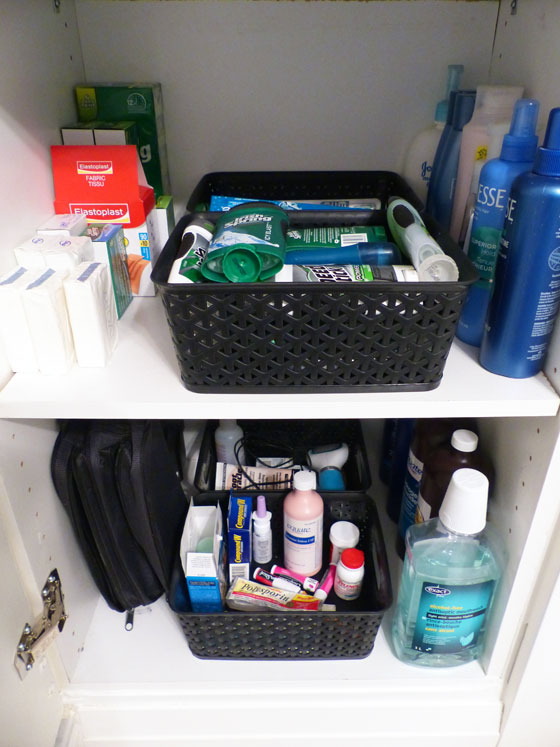
While I had planned to focus on just a few small things, after redrywalling the areas that were waterproofed, I also built a new closet in the laundry room. Closets were a theme of the basement. We added a tonne of new shelves to the cold cellar and built shelves in the closet under the stairs. These areas have given us a lot of extra storage. It was great to dig out the Christmas decorations without digging through a pile of boxes first.

So there was some good productivity.

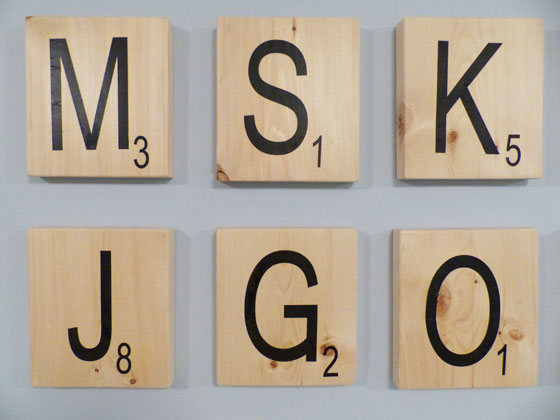
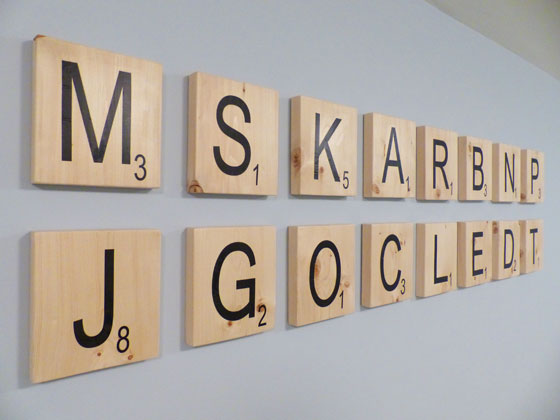
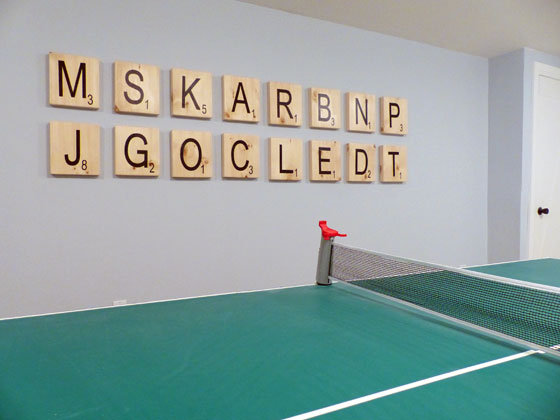
But on the niggly details front, I continue to struggle with art to finish off the basement. I know what I want and I even have frames. I just haven’t taken the time to find the pieces I’m looking for. I did make 16 personalized Scrabble tiles for the pingpong room. Having each of our family member’s initials is a touch that I really like. The rest of the art will come in 2017. I promise!

Furniture

90s bookcases as china cabinet

I didn’t buy a whole lot of new furniture this year, but what I did has been on the list for a loooong time.

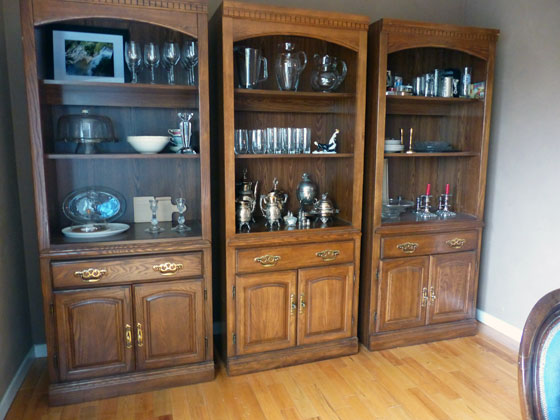
Finding a third matching cabinet for the dining room was definitely the thrifting score of the year. I think it will be hard to top that one.

A close second, though, is finding a china cabinet for my office. I’ve been looking for a pretty specific piece for a long time. This hunt was a lesson in persistence and the importance of carrying furniture measurements with you everywhere.

The two other pieces of furniture on my list for 2016–making a new coffee table for the living room and reupholstering a slipper chair for my office–will carry into 2017.

Vegetable garden

Vegetable garden

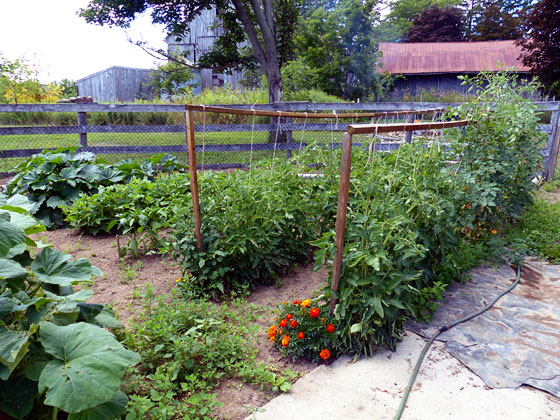
The garden was a huge project this year. We invested a lot of time in it, and we saw the results.

In fact, everything that I wanted to do on my original Home Goals 2016 list, save for planting rhubarb, we did.

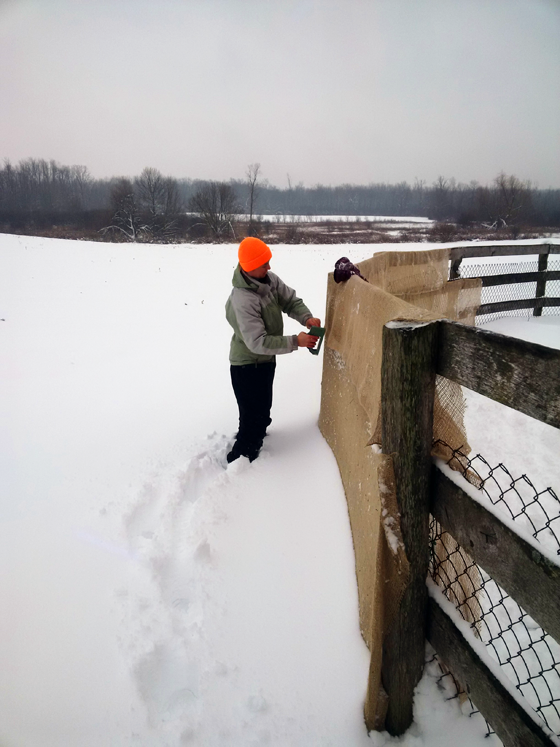
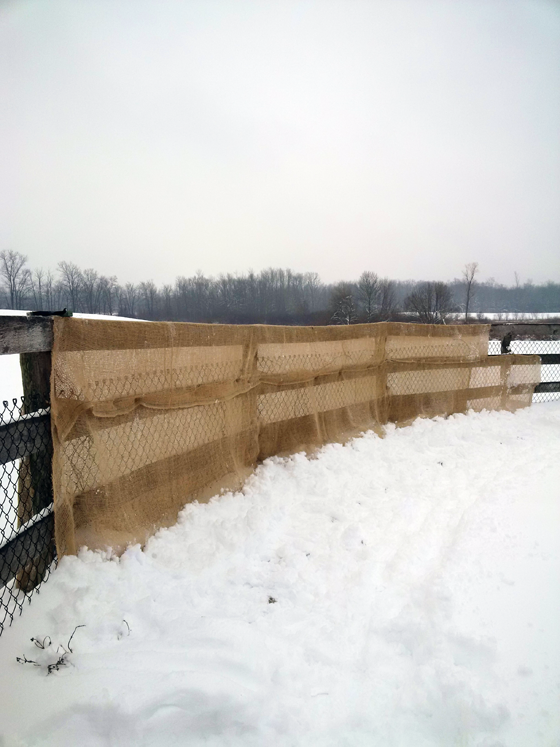
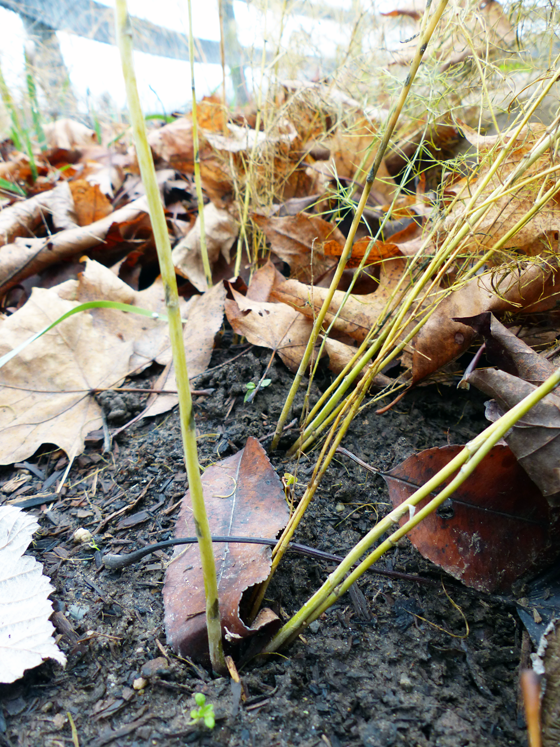
2016 was about a lot of the infrastructure for the garden. We finally hung the gate, put in curbs around the outside edge, built raised beds, built trellises for raspberries, tomatoes and squash, planted some perennials like grapes and asparagus, tried our first cover crop of winter rye, experimented with a deep mulch of straw, and last but absolutely not least ran a waterline out to the garden.

This year’s harvest was again fabulous. I feel like we’re starting to settle into our gardening groove.

And thanks to all of the work that we did in 2016, I feel like 2017 will get off to a much faster start and we can focus on growing, not building, the garden.
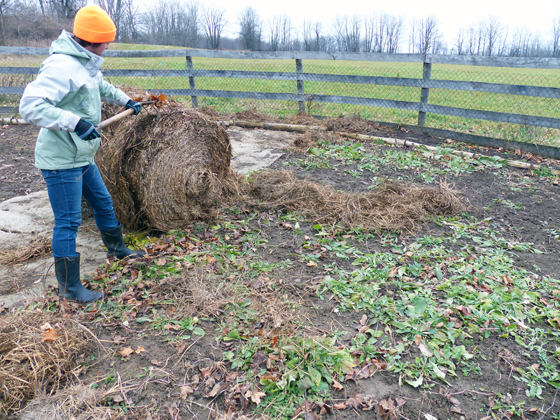
Outdoor clean-up

Burned lawn

When I look at the farm, I feel like there’s so much that needs to be tidied up. In adding outdoor clean-up to my list last year, I knew I was going to have to pick a spot.

However, when I reflect on the last year, I realize that we actually ended up doing better than just one single spot. We cleaned up a scrap lumber pile behind the barn and another big one at the edge of our centre field. We picked up rocks, so I’m able to mow along the north side of the house, although I would still like to add some more topsoil and pick up a couple of patio slabs.

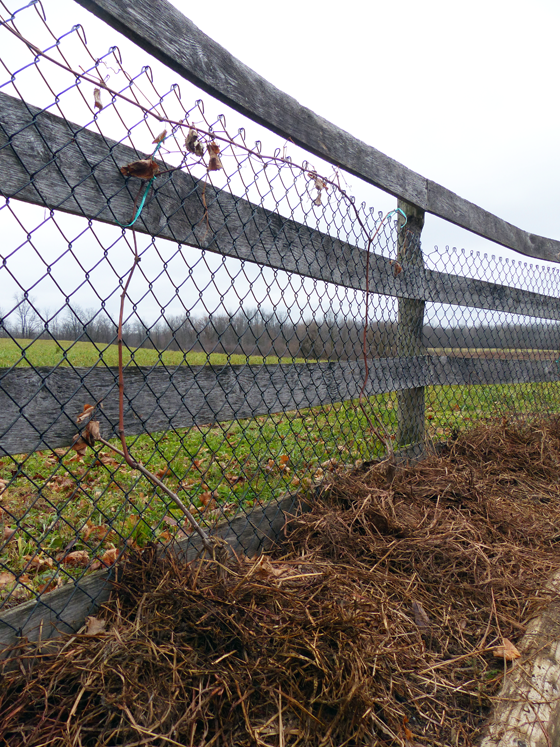
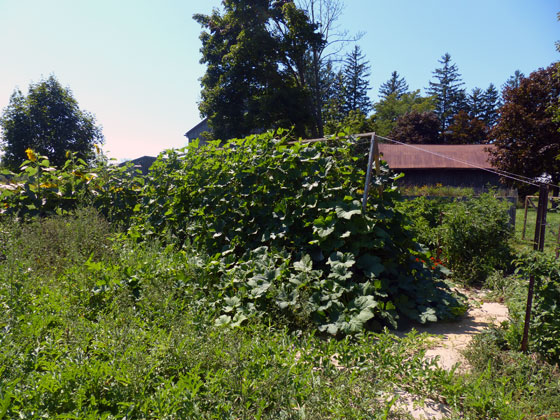
And the biggest area is the one pictured above on the south side of the garden, which was cleared for the first time this year–a controlled burn is the way to go–and then mowed by Matt all year.

There’s still a lot more clean-up to go, but I have to remind myself that we have a 129-acre property and we have made good progress.

And that’s a good word to sum up 2016 as a whole. Progress.

I feel good about what we accomplished, and, even better, I continue to enjoy the process of making the farm and the house ours.

What were your accomplishments in 2016?

That’s a wrap

If you’re looking for Christmas presents, fancy paper and pretty ribbons, you’ve come to the wrong place.

I did do some wrapping this weekend, but it was in the garden (yes, I’m still working in the garden).

I have wrapped our grape vines in burlap. I have no idea if this is the right thing to do or not, but, as I’ve said before, gardening is an experiment.

Wrapping grape vines in burlap

The grapes are brand new and they’re a wee bit exposed on the outer edge of the garden where it meets the field. I felt like a bit of additional protection wouldn’t hurt, and I had some burlap lying around, so a couple of weekends ago, I stapled a length of fabric to the fence.

Wrapping grape vines in burlap

Of course, I ran out and by the time I picked up more burlap, we’d had snow. A lot of snow–at least for us and for this time of year.

Wrapping grape vines in burlap

Since I could no longer open the garden gate–unless I wanted to shovel and I had been shoveling for a couple of hours by the time I had the brainwave to finish the garden–I tossed the burlap, the stapler and the scissors over the fence, and then climbed the fence myself. In case you’re wondering, climbing a fence in bulky snow pants and boots is not the easiest. But the snow makes a soft landing.

I was grateful we have a wood fence, because it was easy to just staple the burlap right to the wood. Where the bottom of the fence was buried in snow, I packed the snow against the fabric to hold it in place.

Wrapping grape vines in burlap

Then I ever so gracefully climbed out of the garden again.

This officially wraps up work on the garden for this year. (And no, I’m not sorry for the pun. That was completely on purpose.)

The last straw in the vegetable garden

My approach with our vegetable garden is to view it as a big experiment. I do a bit of research here and there, but mostly I dive in and cross my fingers.

We added two new crops this year that I view as experiments: asparagus and grapes.

Asparagus isn’t really a huge experiment. I know how it grows. We like to eat it. However, most people grow asparagus from crowns. I started ours from seed. This means it will be probably four years before we harvest any asparagus.

Nurturing our asparagus along is an experiment.

My very basic research on asparagus told me to wait until the ferns turn brown, then cut them down and top them with compost and straw. This weekend, I judged that the ferns were brown enough.

Asparagus ferns in fall

You can see that our asparagus are very spindly. I’m not sure if this is because they’re brand new, or because I planted them in the raised bed, which is filled with what we discovered is very poor triple mix.

Tiny asparagus spears

Either way, they need some coddling. While this bed could probably benefit from some compost, I’ll leave that for the spring. For now, I just covered the asparagus stumps with a healthy layer of straw.

Straw mulch in the vegetable garden

I also applied the straw to our other experiment, the grapes. I fully admit that I have no idea what I’m doing with the grapes. Despite the reading I’ve done, I’m not at all clear on how to prune them, trellis them or just in general care for them. So I’m making it up as I go along based on what I think I’ve read.

Our grapes are new and they’re a little exposed on the outside of the garden on the edge of the field. So I figured some mulch might help to insulate their roots.

Grapes mulched with straw

As often happens with me, once I get started, I got a bit carried away.

After mulching the asparagus and grapes, I thought, “Why don’t I just roll the whole bale into the garden and see how far it goes?”

I wasn’t entirely sure I’d be able to move the bale on my own, as Matt and I have always done it together up to this point.

It turns out I can. Not easily, but I can.

Mulching the garden with straw

Between hacking at it with the pitchfork and unrolling it, I covered about half the garden.

Straw mulch in the vegetable garden

Those big round bales are full of a lot of straw. And this one was quite old, so the layers were very matted together. It always felt like a major victory when a large flake or one full coil peeled off.

So that brings me to my third experiment: seeing if a thick straw mulch helps to control weeds. My fingers are crossed–my default approach to gardening.

Gratuitous Baxter picture: Dude’s ears very rarely stand up. But an afternoon outside and a garden full of sniffy straw are exciting–or at least halfway exciting. He looks so ridiculous that I couldn’t resist sharing a photo.

Baxter with one ear up

Anyone have any tips on growing asparagus or grapes? Do you use straw in your garden? Or a different type of mulch? Anything else I should do this winter to protect my little plants?

Winter rye cover crop in the vegetable garden

Winter rye sprouts in the vegetable garden

Look at our pretty green sprouts.

Fall in Ontario is about brown. Gardening season is done. Leaves, grass, flowers are all pretty drab. But we have one new crop growing.

This is our winter rye cover crop in the vegetable garden. It’s our first time trying a cover crop.

We love our garden and how productive it is. So we’re working hard to maintain the quality of our soil. Last year, I spread straw and manure all over the garden. This year, we’re going with so-called green manure.

In the spring, we’ll cut the rye and turn it into the soil.

Have you ever grown a cover crop? Do you have any green growing at your house?

Basement bathroom details

Small black and white bathroom

Today is about diving in to all of the details on our basement bathroom that you saw on Friday.

This is a small space–5 feet by 7 1/2 feet. But it makes a big statement, if I do say so myself.

As you saw, what we started with was not great. We ripped everything out right back to the concrete. We reframed the walls, our plumber ran all new waterlines, our electrician fixed the unsafe wiring we uncovered, we had sprayfoam insulation added, and then we put up drywall and cement board.

Along the way, Matt broke up the concrete floor so that we could reposition the shower drain and toilet (a lack of insulation in the original walls made them very thin. Once we reframed and reinsulated, we had to bump the toilet out from the wall by a few inches).

We also flipped the plumbing in the shower so that the shower head was on an interior wall rather than the exterior one.

And the other change was a small bump out into the hallway outside the bathroom. We have a very wide hallway leading to the laundry room–7 feet wide. So we borrowed about 2 square feet of it to make a little storage nook in the bathroom.

Here’s the floorplan.

Bathroom floorplan

And here’s how the bumpout looks from outside the bathroom. It’s not obtrusive and gives us a nook perfectly sized for a storage cabinet just outside the laundry room.

Storage bumpout for the basement bathroom

Let’s step inside and take a look at some of the details of our new basement bathroom.

The shower is big (3 feet by 5 feet), beautiful (marble! white! clean!) and has a few special features that I’ve always wanted (the soap niche and bench).

The main tile that we used is a 4 inch by 2 inch white subway tile–a bit bigger than the standard. It runs up half the wall behind the toilet and then floor to ceiling in the shower. Inspired by Lindsay Stephenson and her beautiful DIY shower, I added an accent band of grey marble mosaic tile. The shower floor is also a grey marble mosaic of little hexagon tiles.

The niche and the bench are two things I knew I wanted from the start. The niche is 12 inches wide by 15 inches tall and the bench is 32 inches wide by 16 inches deep by 18 inches high. On every horizontal surface, I used a solid piece of marble to protect against leaks. For the curb and the niche, we were able to find marble at Home Depot. For the bench, it took awhile, but we eventually found a remnant that was big enough for the top.

White subway tile shower with a marble seat

It may sound funny, but the shower curtain is what pulls it all together for me. Early in the bathroom project, I fell in love with Cole & Son Woods wallpaper. It was an organic pattern that would be a bit of a rustic element in the bathroom. Since moving to the farm, I’ve come to want to incorporate something rustic in all of my interiors. However the fabric version–like the paper–is way more $pendy than my budget.

I considered all kinds of alternatives, but nothing panned out. Then this summer Jen at Rambling Renovators posted about a Woods knock-off. And it was from a Canadian company and already made into a shower curtain. Before I finished reading her post, I had already placed my order. It’s perfect.

Someday we might add a glass enclosure (there’s extra blocking in the wall to support glass), but that’s more money than we want to spend, and Matt’s satisfied with the curtain.

As I mentioned in Friday’s post, we reused the original vanity and sink that were in the bathroom. We didn’t have a lot of space, and they fit perfectly, so there was no reason to reinvent the wheel. Looking at these photos, I see the finish of the vanity looks very creamy next to the white toilet and tile. However, in real life, it doesn’t bug me.

Matt selected the faucet, and his choice was driven purely by budget. If it had been up to me, I would have chosen something square, like the towel holder and light fixture, which I picked. However, in hindsight that might have ended up being a bit too many squares. The faucet matches the hooks that we chose and the variety of shapes work well.

Small black and white bathroom

There were two things I wasn’t sure about in this bathroom: the black paint and the huge mirror.

In a small room, I was worried the black would be too much. But it’s only one wall, so the black doesn’t overwhelm the small space (it’s Wrought Iron by Benjamin Moore). The contrast with the white tile and fixtures is dramatic.

In a small room, a big mirror is a no-brainer. But sheet mirrors like this aren’t exactly in style anymore. Running it from the corner right over to the shower and from the vanity up to the ceiling modernizes it a bit. Installing the light fixture on top of the mirror also modernizes it–although the process of measuring and hanging this mirror was nerve-wracking. But the mirror does its job of doubling the light and appearing to double the size of the room.

Small black and white bathroom

With limited wall space, we didn’t have a lot of room for towel bars. Two hooks behind the door–each with three individual hooks–give Matt space for his bath towel and clothes–although pants still end up on the chair in the family room outside the door. Argh.

Built in shelving in a small bathroom

Even if the hooks don’t work quite like I intended for storage, the built-in works very well.

The closed cabinet on the lower part hides the less decorative things in the bathroom. Plus the cabinet door that I found at the Habitat Restore is a perfect match for the doors on the vanity. Originally, I’d planned to build a drawer inside the cabinet, but some dollar store baskets are much simpler and work just as well to organize Matt’s toiletries. The guy’s deodorant collection is ridiculous.

Built in shelving in a small bathroom

The upper part of the shelves gives more storage and a spot to decorate, which makes me happy. The back of the open shelves is lined with barnboard–that I actually went out and cut off the side of the driveshed. It’s another rustic touch that I love so much.

Built in shelving in a small bathroom

This might be a stretch for anyone except me, but I had a loose chess theme in mind when I conceptualized this bathroom. We have kind of a fun and games thing happening in the rest of the basement. Matt’s game–although I’m not sure you can really call it a game the way he plays–is chess.

When I thought about going black and white for the bathroom, I thought of a chess board.

That also led me to incorporate a photo of Matt’s grandpa, who was an avid chess player. And to ask my Dad to make a large rook–Matt’s favourite chess piece–on his wood lathe. (Beware, any time you play with Matt, he will always castle his rook and king).

Built in shelving in a small bathroom

For all of the time that Matt and I have shared a house, we have not shared a bathroom (aside from the short time span when this bath was under construction). So this room is all about him.

Happily, the finished product is something that works for both of us.

Basement bathroom before & after

This post has been a long time coming. Loooooooong.

I first posted befores of the basement bathroom on April 12, 2012. We had owned the farm for a month.

We have now owned the farm for 56 months. That’s four years and eight months.

And we’ve finally finished the bathroom.

It’s been pretty much done for most of those 56 months. Matt’s been using it quite happily.

However, I had three pieces of trim to install, one cabinet door to rehang and I still hadn’t found the perfect shower curtain. Those niggly finishing details that dog you for four years. Ugh.

The perfect shower curtain was found this summer when Jen at Rambling Renovators posted her mood board for a modern farmhouse bathroom. That was the impetus to finally finish the rest of the bathroom.

Are you ready for our most dramatic before and after yet?

Who am I kidding? This isn’t the most dramatic before and after yet. This is the most dramatic before and after we’re going to have at the farm.

Before:

Basement bathroom before

After:

Black and white bathroom

We called this the psycho shower.

Shower in our basement bathroom

It was tiny, orange, and for some reason built up on a platform. Everything was just all around gross.

Psycho shower on a platform

But no more. This is definitely not a psycho shower.

White subway tile shower with a marble seat


Gross was also the theme for the sink and vanity.

Decent sink, but ugly faucets and some spray issues

But with a good cleaning and a new faucet, they were redeemed.

Small bathroom sink and vanity

Above the sink we started with a small mirror, an off centre light and a random vent. If I’m recalling correctly, I think the vent was an access panel for either plumbing or electrical. It was not actually acting as a vent.

Off-centre light

After reframing and reinsulating the whole exterior wall, we held our breath and hung a huge mirror. The light fixture, which is centred over the vanity, sits on top of the mirror.

Small black and white bathroom


Along the way we fixed our exhaust fan issues, including evicting the snake my Dad discovered in the vent.

Broken exhaust fan

Disposed of the old toilet including its cushy illustrated toilet seat.

Cushy toilet seat

And added all kinds of storage by bumping out a small shelving area.

Built in shelving in a small bathroom
Aside from the bumpout, we kept the layout the same. But what a change.

Looking back at those before pictures I can’t believe we bought this house.

I’m so proud of what we were able to do with this bathroom, though. This was a huge DIY for us, and really pushed us–tiling that shower was a daunting task that still has me questioning whether I ever will tile again.

The design was a stretch for me too. Four years ago, dark colours weren’t as popular as they are now. Taking the plunge to paint a small windowless room black was a bit daunting. I love the black and white design so much and how it and all of the other little touches came together.

I’ll be back soon to share all of the details on this little bathroom.

Is there anything you’d like to know more about? Feel free to leave a comment, and I’ll do my best to answer it in the next post.

3/3 of a china cabinet

Want to see the thrifting score of the year?

Last December I wrote about a pair of large bookcases I found at Value  Village and my intention to turn them into a china cabinet in the dining room. I also wrote that I had really hoped to find three bookcases, but the store only had two (hence the 2/3 title of that post).

90s bookcases as china cabinet

More than six months later, in a different Value Village, in a different town, I came face to face with a bookcase.

It looked like it might be the same as the bookcases we already had at home. I actually called up my original blog post on my phone and tried to compare the pictures of the cabinets with the bookcase standing in front of me.

I was pretty sure they were a match.

In another sign that the universe was on my side that day, we were driving my Dad’s truck, so we had a way to transport the bookcase. And Matt had a 30% off coupon.

The bookcase became ours.

When we placed it in the dining room, sure enough, it was a match.

Unbelievable.

90s bookcases as china cabinet

I still have plans to make over this trio, but when that day comes I will no longer have to build the middle section from scratch. For now I’m quite happy to have 3/3 of a china cabinet sitting in the dining room.

Vegetable garden highs and lows

I’m going to go a bit corporate today. Have you heard of a SOAR analysis? It’s a business planning exercise where you look at the strengths, opportunities, aspirations and results for a particular project. It’s a bit friendlier than the old-school SWOT (strengths, weaknesses, opportunities, threats).

Today’s project is the vegetable garden.

Vegetable garden in October 2016

Matt and I officially harvested everything last weekend. We have more clean-up yet to do, but I feel like I’m ready to look at what worked and what didn’t… or, more positively, what opportunities there are for next year.

Strengths

Soil – We have a great garden, and I can’t really take a lot of credit for it. Our soil is fabulous, and I’m doing everything I can to keep it healthy (see opportunities below).

Trellises – I’ve written about growing our raspberries, tomatoes and squash vertically. It totally worked. We got great yields in much less space than we would have without the trellises.

How to grow squash vertically

Watering – This was a very, very, very dry summer. I was very thankful for our well, so that we didn’t have to pay municipal water fees. We watered every other day–more than is recommended by most gardening how-tos–but I think it made the difference between losing most of our plants (which didn’t happen) and harvesting a very impressive crop (which did).

Crops – In terms of impressive, the key successes this year were peppers and beans, which last year did next to nothing. Two new crops–sunflowers and watermelon–were also great successes. The watermelon took forever to ripen, but finally made it thanks to the hot summer weather continuing well into fall.

Watermelon harvest fall 2016

Our potatoes, tomatoes and zucchini were crazy prolific as usual, and the new versions we tried–ridiculously giant Sicilian Saucer tomatoes and Russian Blue potatoes–were fun additions.

Russian blue potato

Opportunities

Raised beds – Argh the raised beds. I love having the perimeter beds in the garden, but the soil we bought for them was not good at all. Weeds didn’t even grow. The asparagus, hollyhocks and some of the herbs eventually got some traction, but it took all season. The carrots, beets and onions were nearly complete failures. Some of the herbs just shriveled up and died.

Pathetic carrots

Dead lavender plant

I’m not sure what we need to do to remedy this next year. The soil was triple mix which is supposed to include compost, peat moss and top soil. However, our triple mix is very sandy and seems to be deficient in nutrients. I’m thinking all kinds of compost and manure might revitalize it.

Black raspberries – My attempts to domesticate the wild black raspberries that grow elsewhere on the farm was also a big fat fail. These plants can only be described as brambles. They’re thorny and floppy–and when they flop over, they root themselves into the ground making a big tangled mess. I channeled Sleeping Beauty’s Prince Phillip and dug them all out last weekend. I’m looking forward to finding a new kind of berry to plant in their place next spring.

Weeds – One of the things I wanted to try this year was using a deep layer of straw as a mulch over the garden to smother the weeds. Matt and I brought an old abandoned bale of straw up to the garden, but I never got around to spreading it over the garden. We didn’t keep up with weeding by hand, so the garden was very, very weedy. The deep mulch method is still on my list for next year.

Weedy garden

Plant the whole garden – Our garden is big. Last year we planted just half, but this year we made it up to three quarters . I ended up mowing the weeds in the empty quadrant all summer. Not the best use of space. I’m hoping that we can use the whole garden next year.

Aspirations

Maintain the soil – I’m learning that gardening is about growing soil, more than growing plants. Last fall I added ash and manure to the whole garden. This year, I’m aiming for more manure and some compost–especially in the raised beds. I’m also trying a cover crop for the first time, seeding one quadrant with winter rye. Crop rotation is another consideration that I’m realizing takes lots of advance thought–as in years in advance.

Slow-growing crops – Asparagus and grapes were two additions to the garden this spring. Both are going to be long-term commitments, and I’m hoping that they make it through the winter and thrive next year.

First year grape vines

New additions – I’m looking forward to adding more herbs to the raised beds and putting more thought into how they’re clumped around the perimeter of the garden. Another consideration is maybe a cutting garden, or at least dressing up the vegetables–and filling some of the vacant spaces–with a selection of flowers.

Results

Infrastructure – There’s another corporate, distinctly non-garden word for you. But I don’t know how else to describe the base structures that form the garden–and that as of this year are all done. Last year our big accomplishment was the fence. This year, we added the curbs, raised beds, trellises, gate and waterline. I’m looking forward to not “building” the garden next year and just planting it.

#Harvest16 – Once again, the garden was super, duper productive. We had more zucchini, tomatoes and watermelon than we could use–to the benefit of our families and co-workers. We’re hoping that our squash and potatoes last well into the winter. Any storage tips?

Garden harvest fall 2016

Preserving – I feel like growing your own garden soon leads to preserving your own food, and this year Matt and I dove in to canning. We pickled about 10 pounds of beans–I was skeptical, but they’re so good I can eat a jar on my own–and made nearly 12 litres of our own ketchup–Matt is a big user of ketchup and is very particular about his preferred brand… although he has now switched allegiances to our homemade version. We’ve also loaded up the freezer with beans, roasted tomatoes, grated zucchini and plan to add peppers.

I’m not quite ready to call this year’s garden completely done, but I am ready to call it a success. In fact, we have also fulfilled every single goal I had for the garden in my original Home Goals 2016 post. That’s an achievement.

How did your garden grow this year? Any tips for storing potatoes and squash? Or favourite recipes to share? Anyone have ideas for the soil in our raised beds?

Fun oversize Scrabble art for the basement

Oversize scrabble tiles as art in the game room

Anyone want to play Scrabble? I’ll bring some letters if you bring the very, very large board.

When it comes to art in this house, I follow two principles: keep it personal and keep it inexpensive. For the basement, I have one more factor: keep it fun.

A wall full of really big Scrabble tiles ticks all the boxes.

Oversize scrabble tiles as art in the game room

Personal: The letters are the initials for us and everyone in our immediate family. Moms, Dads, brothers, sisters, in-laws, nephews, niece, pets.

A message from Auntie JuJu to the two babies joining our family in the next few months: your names must start with one of these 16 letters. More than half the alphabet is in play. That’s lots of options for you.

Inexpensive: Sanding all of these tiles took a bit of time, but since I’m not paying myself an hourly rate, my only costs were a few 2x10s, some sandpaper, printer paper, Mod Podge and a paint pen.

Fun: We have giant Scrabble tiles hanging on our wall. That’s not typical artwork.

Oversize scrabble tiles as art in the game room

When I was making these, I wanted the letters to hang perfectly flush to the wall. Even the thinnest hanger didn’t appeal to me.

Oversize scrabble tiles as art in the game room

I came up with a simple solution that was also–you guessed it–cheap.

I routed a channel in the back of each tile, which slips over a nail that I hammered into the wall.

Oversize scrabble tiles as art in the game room

Adding art to the basement was one of my Home Goals for 2016. We call this room the long room, so I wanted some substantial art that could fill the wall. Sixteen large wood slabs work very well.

Oversize scrabble tiles as art in the game room

Do you play Scrabble? Would you ever hang boardgame art on your walls? How do you handle art when you have a big wall?

Save

Save

Save

Save

How to grow squash vertically

Last year, our squash took over the garden. Fully half of our nearly 2,500 square foot garden was completely covered in squash vines.

We loved the squash that we harvested, and we knew we were definitely growing squash again. However, we knew that we weren’t willing to give up that much of the garden this year.

My plan to corral the squash was first to plant less. No matter how much we like squash, we cannot eat nearly 40 butternuts and about 70 acorns (last year’s harvest).

Wheelbarrow full of acorn squash, butternut squash and pumpkins

The second part of the plan was to coax it up, rather than across. Up was a theme of our garden all this season. I’ve already shared how our raspberries and tomatoes are growing vertically. Now it’s time for the report on our final vertical experiment.

And this truly was an experiment. We were growing acorn and butternut squash. They weren’t small and lightweight. I wasn’t sure whether the vines would be strong enough to support the hanging fruit.

Back in the spring, I built a large A-frame. It was about 8 feet tall and 16 feet long.

A-frame squash trellis

We used 2x3s for the As with plywood at the peaks for extra stability. The top ridge is two 2x2s. Each A is screwed into stakes that are hammered into the ground. We spread wire fencing across each side and attached it to the wood with big staples. Just for extra stability, we tied each end of the trellis to the fence so that it couldn’t fall over.

How to grow squash vertically

With the A frame in place, I planted (half) our squash seeds under the trellis.

Squash seedlings

As the plants grew, I tucked the vines into the mesh. The vines were a bit fragile and bruised or even snapped easily. I learned it was important to not let the plants get away from me. I had to be diligent about training them up the trellis before they grew too big. Fortunately, the squash seemed to recover quickly from any of the damage I inflicted.

Squash growing up an A-frame trellis

Just like last year, though, the squash took over. Thankfully, this year it took over in the right direction–up. Soon, the whole A frame was completely covered.

squashtrellis7

The plants blossomed and set fruit. And I crossed my fingers that the fruit would stay on the vines long enough to ripen.

We’re nearing the end of the season now, and I’m happy to report that things are looking really good. The leaves are starting to die off, so you can see just how good for yourself. Behold, the squash.

How to grow squash vertically

Yup. Once again, we have a whole lotta squash. And they’re big ‘uns. Oy vey.

How to grow squash vertically

The butternuts are phenomenal. The acorns are more iffy. But I’m not sure that I can blame the trellis.

First, we don’t have quite as many acorns as I was expecting. The butternuts definitely have them beat for quantity.

Second, the acorns aren’t exactly all acorns. They come in a few different shapes. Any ideas what would make them grow so differently?

Elongated acorn squash

Mishapen acron squash

Despite some mutants, I’m calling the vertical squash growing experiment a success. It’s definitely a method we’ll be using again.

Have you done any experiments in your garden this year? Have you tried vertical gardening? What’s your favourite type of squash? Any tips for storing the squash or recipes to share?

Save

Save

Save

Save

Save