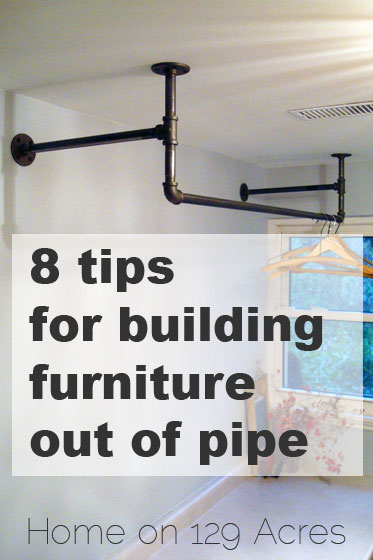
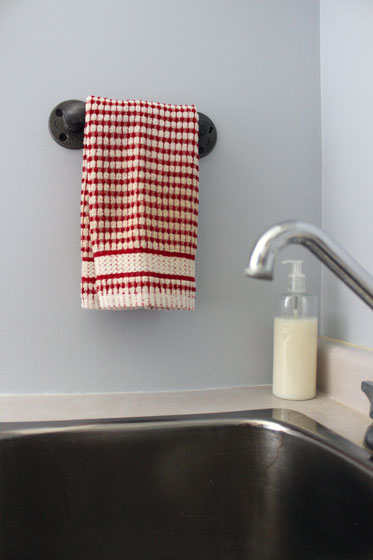
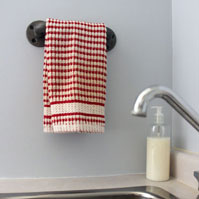
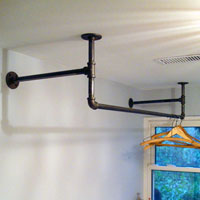
Pipe furniture is really popular these days. In the laundry room, you saw how I used pipe fittings to build the hanging rack and towel bar. Along the way, I learned a few lessons that I’m going to pass on to you.
1. Pipe fittings are really easy to work with. The pieces go together very quickly. Assembling the towel bar probably took all of 10 minutes. I loved lego as a kid (who am I kidding, I still do), and this was like revisiting my childhood.
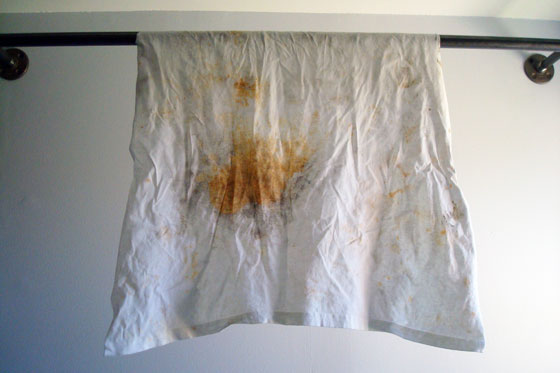
2. Pipe fittings are oily. The fittings come in black or galvanized options. I chose the black because it looks more rustic to me. However, the black coating rubs off really easily.
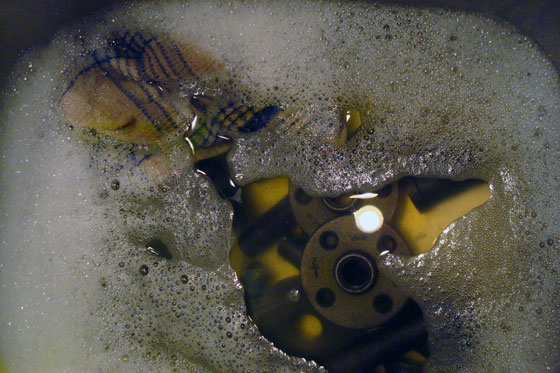
Before I could do anything with the fittings, I had to clean them. Some people online recommended degreaser, which I’m sure would have worked. I didn’t have any so I tried 2 other options: wiping them down with vinegar (didn’t really work) and washing them with dish detergent. The washing worked. I dried the pipes with a rag and let them sit for 24 hours to make sure the threads and interior of the pipes were completely dry before I did anything with them.
3. Pipe fittings come in different diameters. Pay attention to what diameter you choose, because different size pieces won’t screw together without special fittings. I chose the 1/2 inch size because it was a bit cheaper than 3/4.
4. Pipe fittings come in different lengths and connectors. You should be able to find the pieces you need for pretty much any project…
5. … But if you can’t, the store staff can cut the pipe too. The cutting was one of the dirtiest operations I’ve ever seen. I felt bad for making the staff person get so oily from running the cutting machine. The result though was the perfect lengths of pipe. The machine will also put threads onto your pipe.
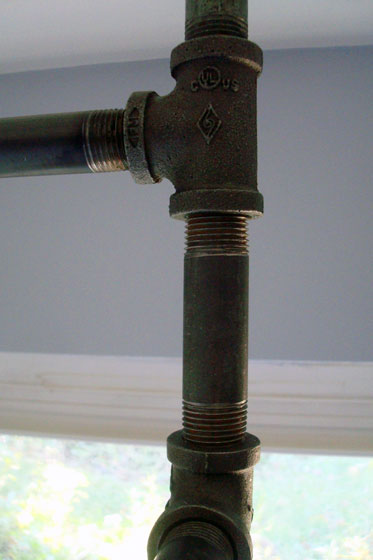
6. Pipe fittings don’t screw together fully. You’ll see the threads at each joint.
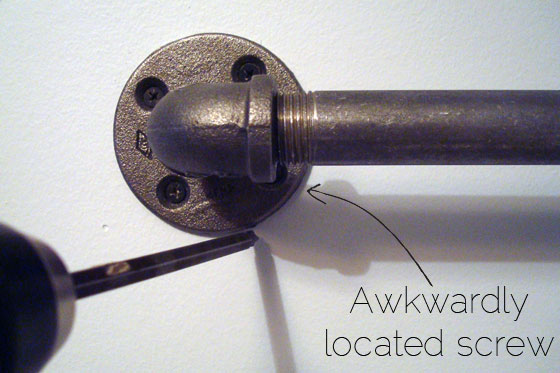
7. Drywall screws are good partners with pipe fittings. The pipe flanges attach to the walls with four screws. Since I chose black pipe, it made sense to use black screws. The coarse threads on the drywall screws dig into the wall and hold the pipe securely.
8. Attach the flanges to the wall first. Once your towel bar or hanging rack or whatever else you’re building is fully assembled, it can be hard to reach the screw holes in the flanges to attach your creation to the wall. However, attaching the flanges on their own is a piece of cake.
I elected not to paint my pipe fittings, although I’ve seen other projects online where people did. The finish isn’t pure black, but it’s a nice industrial dark grey–no sparkle here.
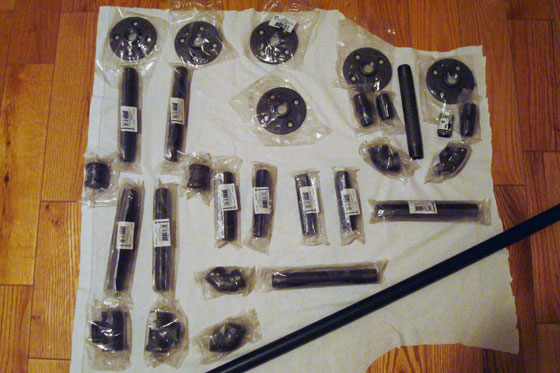
Just in case you’re interested in building your own towel bar or hanging rack, here are the pieces I used. I have to give credit for the hanging rack design to Angie over at Knick of Time. I’m not sure what pieces she used, but I think mine turned out pretty close. I spent a lot of time in the pipe fitting aisle at Home Depot. While my measurements may not be exactly the same as what you need, some of them might work for you and save you at least a bit of time.
 Towel bar

Dimensions: 10 3/4 inches long (from the outer edge of each flange) and projects 3 inches off the wall
- 2 flanges
- 2 elbows
- 2 1 1/2-inch pieces
- 1 6-inch piece
Hanging rack
Dimensions: 50 inches long, hangs down 10 1/2 inches from the ceiling and projects 17 inches off the wall
- 4 flanges
- 2 elbows
- 2 Ts
- 2 3 1/2-inch pieces
- 2 4-inch pieces
- 2 15-inch pieces
- 1 48-inch piece
And just in case laundry isn’t your thing, here are some of my other favourite pipe projects.
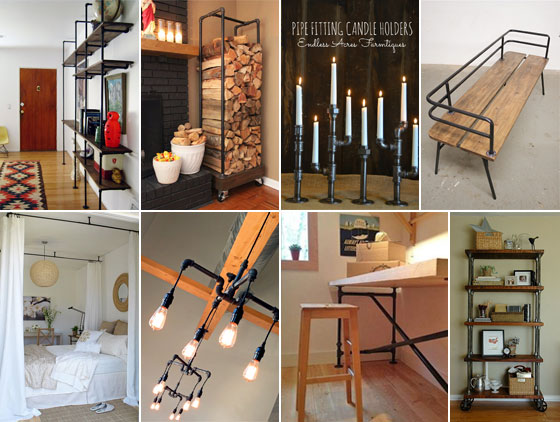
Sources (top row left to right) The Brick House, The Cavender Diary, Endless Acres Farmtiques, FunkTastik (Etsy) (bottom row left to right) Margot Austin via Decor Pad, Zazu Restaurant from Irene Turner, Bob Vila, Vintage Industrial via Miniature Rhino
If you’ve spent any time on Pinterest, you’ve probably seen furniture, lights, shelves and numerous other things made out of pipe fittings. They add a great industrial style for a pretty reasonable price.
Have you ever made anything out of pipe? Do you have any tips to share? Anyone want to make anything out of pipe? Do you like the rustic industrial look?

I would like to make two of that desk up there, for our office. They would be just the ticket! I like the look and style, and the way you can customize shelves to fit your space.
I hope you do!
I did make a desk from an old door with pipe legs. It’s hinged to the wall so the legs can unscrew and we can just flip it up and it’s out of the way. It’s not as pretty as the one above, super simple, but handy!
I remember you mentioning that. It sounds really ingenious. Glad it worked out for you.
Hello! Where do you get your pipes and fittings? A local store or do you order them online somewhere?
I just got them at Home Depot. I think pretty much any hardware or big box store carries them. Look in the plumbing department, but maybe one aisle over. They’re called pipe fittings if you have to ask for them. Good luck!
Thanks so much!
You’re welcome. I hope you find them.
Just an FYI on using drywall screws..the black color may be fitting, but they are only meant to hold lightweight drywall and will easily snap. Almost any other screw will work better.
Thanks for the tip. I don’t tend to find drywall light! Fortunately, the drying rack weighs much less than a sheet of drywall.
Is there a trick to tightening pipes and fittings in a closed square design? I’m making a trash can holder and closing the rectangle with the last fitting is tough. I’d include a pic but I don’t know how. Ty for any help your willing to offer.
Huh. That’s a good one. Could you split one of your sides in two and use a straight fitting to splice it? I’m not sure that it would spin any better, but it might be easier than one of the corner fittings. (Hope this makes sense.) Hope you find a solution. Good luck.
TY I’ll try that. I worked with the size pipes available instead of cutting them. So the long sides are 36 + 12, the short sides are 24 + 2. (Trash cans measure 41 x 22). If all else fails I can apply adhesive to the threads, or tighten one then when I tighten the other end it will only loosen the first end halfway. I wish they turned in opposite directions on each end! At least the fittings. If I can figure out how I’ll send a pic when it’s finished. Ty again!
Reverse threading would be very helpful. If worse comes to worse, your solution of half tightening sounds like a good idea.
If you were Rubber gloves and use Acetone on the pipes wipe it with paper towels cleans the oils right off. Dries quickly. ready to assemble.
Thanks so much for the tip.
Pingback: Building Furniture with Black Pipe: All You Need to Know
I made a shelf under my wall-mounted tv. I also needed a handrail for my stairs, so I used the pipe and fitted it. Very sturdy with wall hangers for the screws to go into. Then I made a shower curtain rod attached to the ceiling in the bathroom. Then I got a toilet paper holder with a shelf. So much you can do!!!
Going to make 2 end tables next with a drawer. Love this.
It’s an awesome material, and those sound like awesome projects. Thanks for sharing.
I used Dawn dish soap to clean the pipes. Let them dry 24 hours. Taped the threads then spray painted the pipes black, and left all the fittings their natural grey color. I was a little concerned about the finish holding up with all the handling during assembly and installation but no touch-up was needed.
Thanks for your input. Glad that the finish held up for you.
I instal fire sprinkler systems here in TX. The power machine ( pipe threader and groover) was my desk for 4 years. All I did was cut and groove pipe all day long. Now 24 years later on Pinterest it blows me away that I really don’t have a creative side well not really. On the side I’ve built BBQ pits with pipe and that’s about it . Pinterest noer is pipew has me making more than I could have imagined 24 years ago
Yes my paper towel roll holder is pipe etc. My wife loves it.
Thanks Pinterest!
Haha. Glad you’ve been inspired!