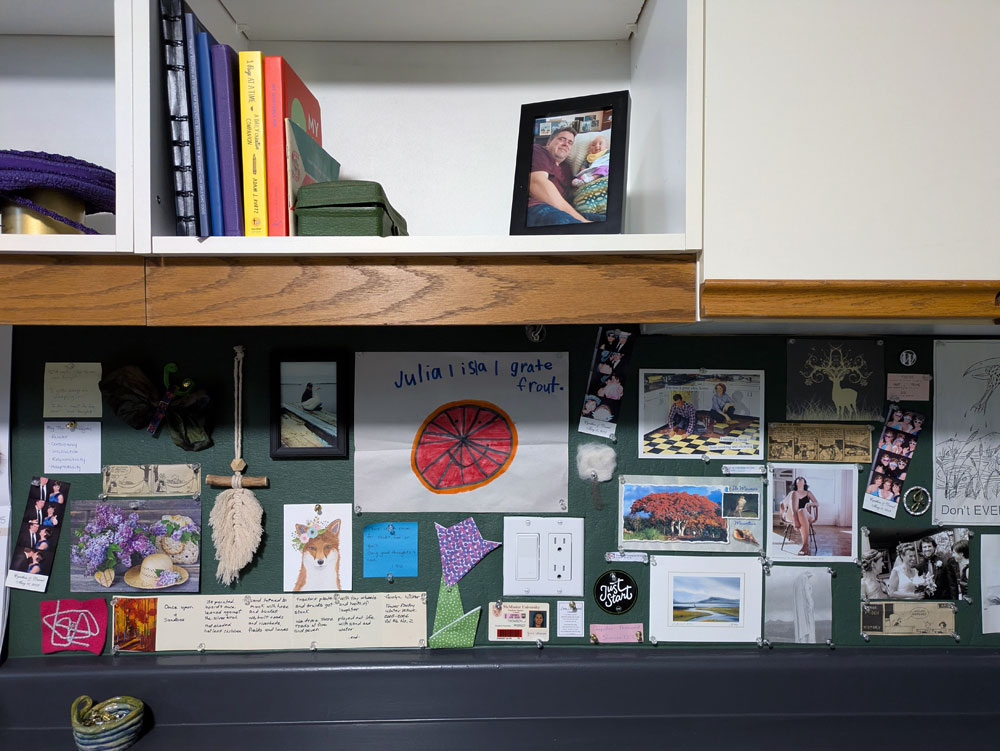
I love a bulletin board. I collect pictures, sayings, mementos–things that inspire me. There are also reminders that I jot down and Ellie’s many art creations. They all need a place to live, and my preferred home is a bulletin board.
In my new office, I debated where that bulletin board should go. Matt had one on the wall above his computer. I could do the same and even reuse the same board. But I really liked the idea of hanging some nice art above my computer instead.
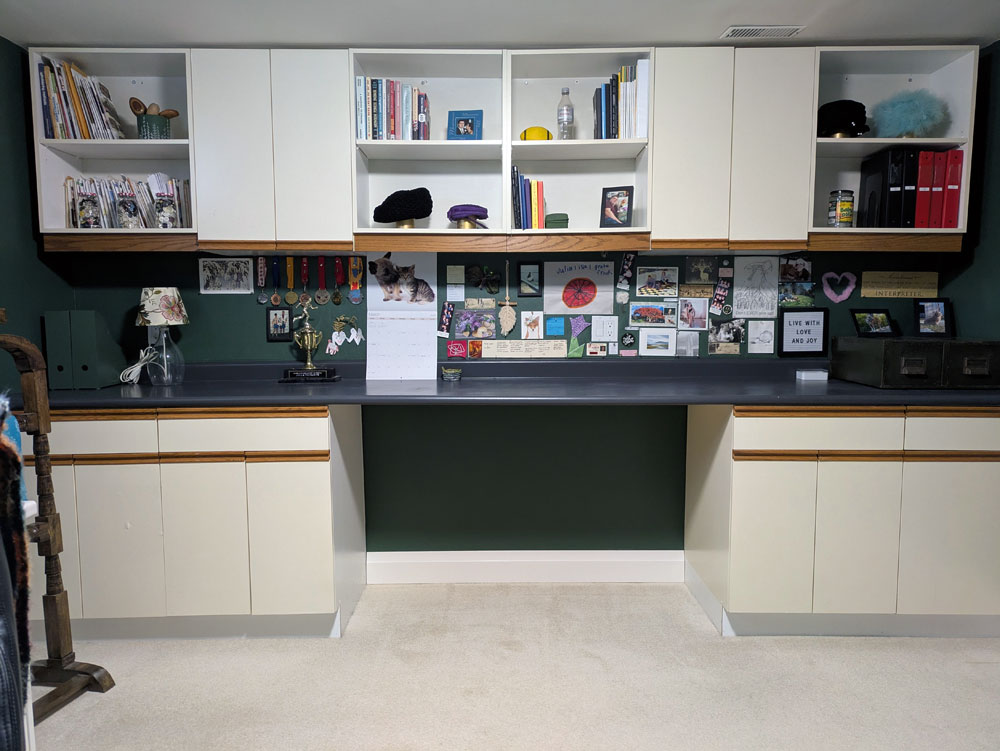
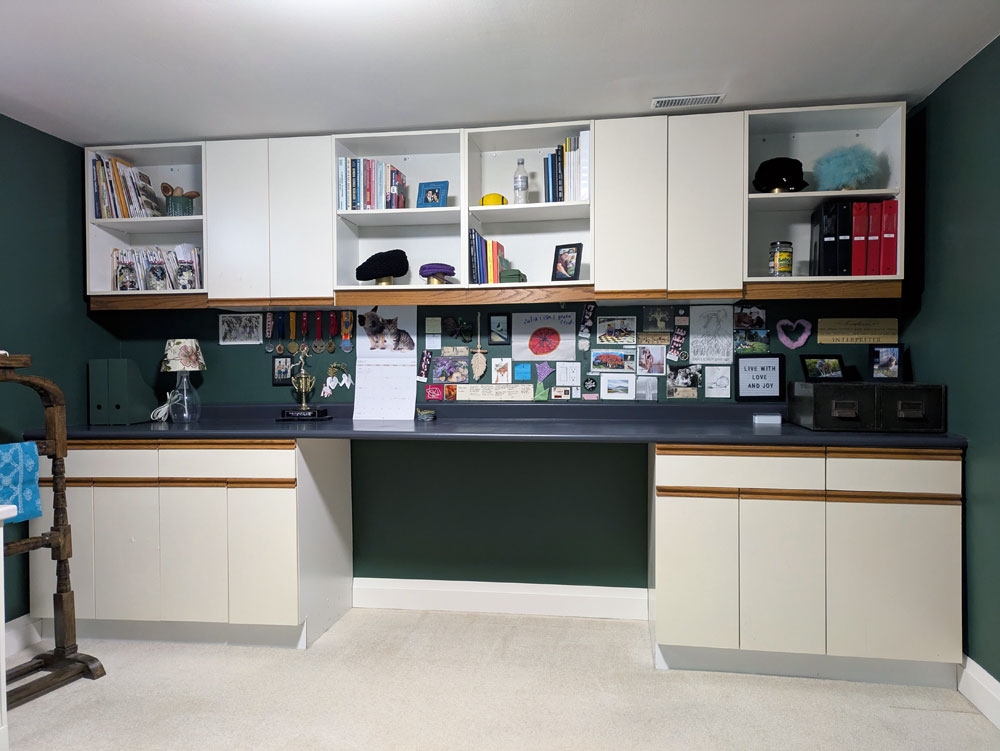
Then I thought of the cabinets on the other side of the room. What if I made the “backsplash” a giant, long bulletin board?
I had used cork shelf liner at our first house to make a bulletin board over my desk and it worked pretty well (a couple of layers were needed as this cork is very, very thin).
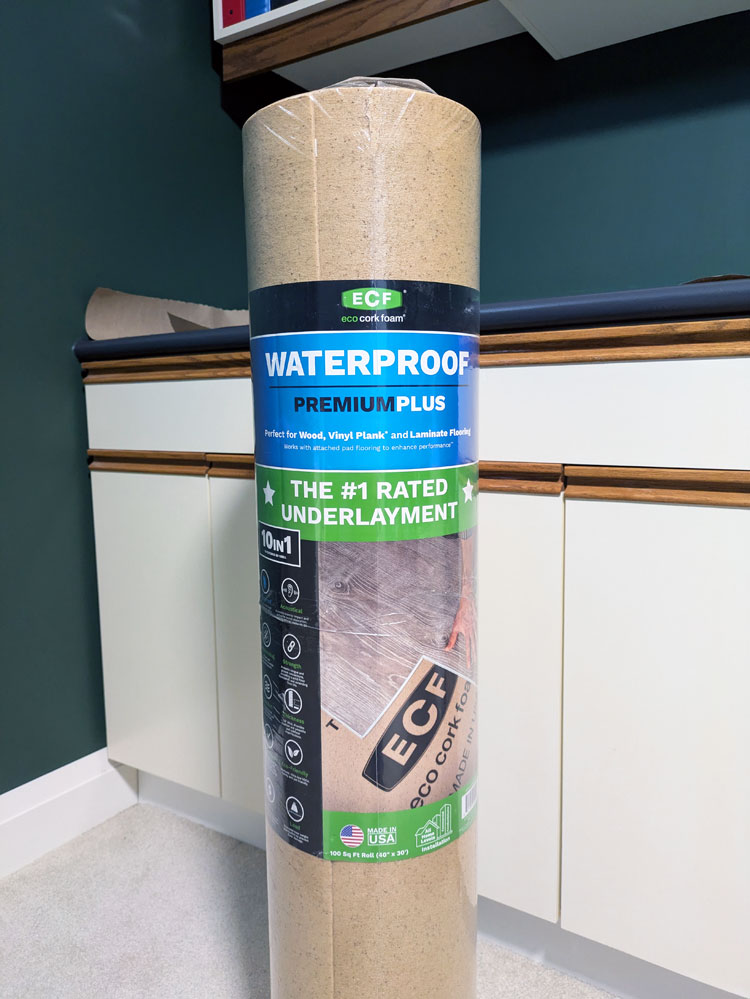
A quick tour of Home Depot showed me that I would need many, many packages of cork and it wasn’t the dimensions I needed. Then I thought about cork flooring underlayment. I had put a strip on the cold cellar door where we have our dart board. Maybe it would work for the office?
I decided to give it a try.
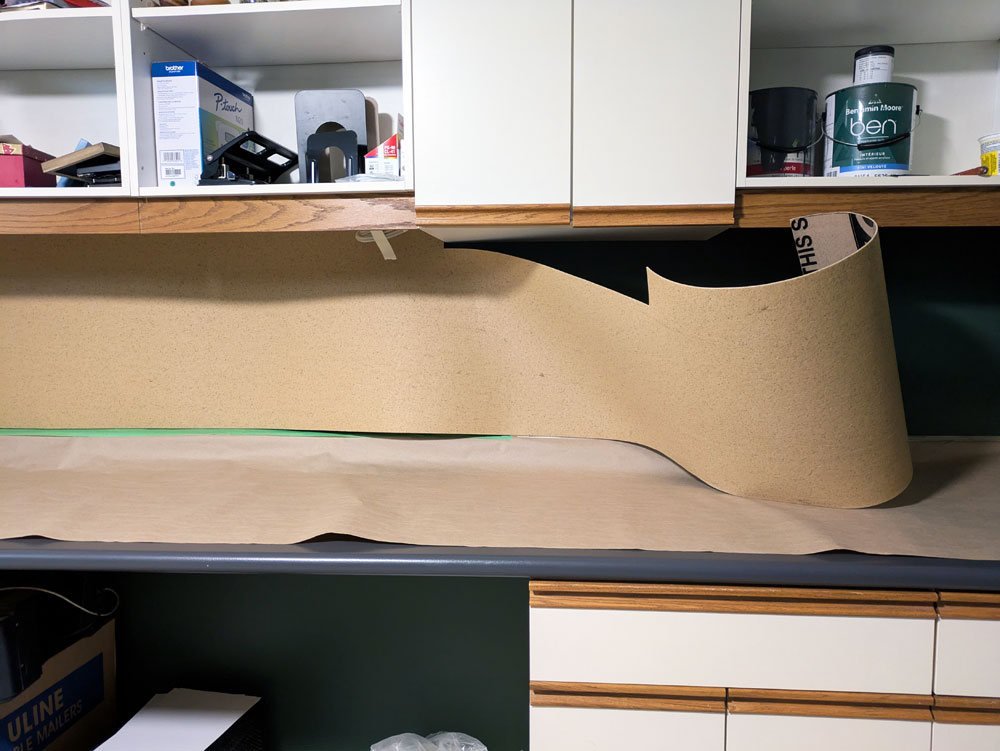
The underlayment comes in a roll 40 inches wide by 30 feet long. Plenty for what I needed.
I did a quick test. I put a couple of layers together and stuck a pin in it. It was nice and squishy and seemed to hold well.
I decided to go for it.
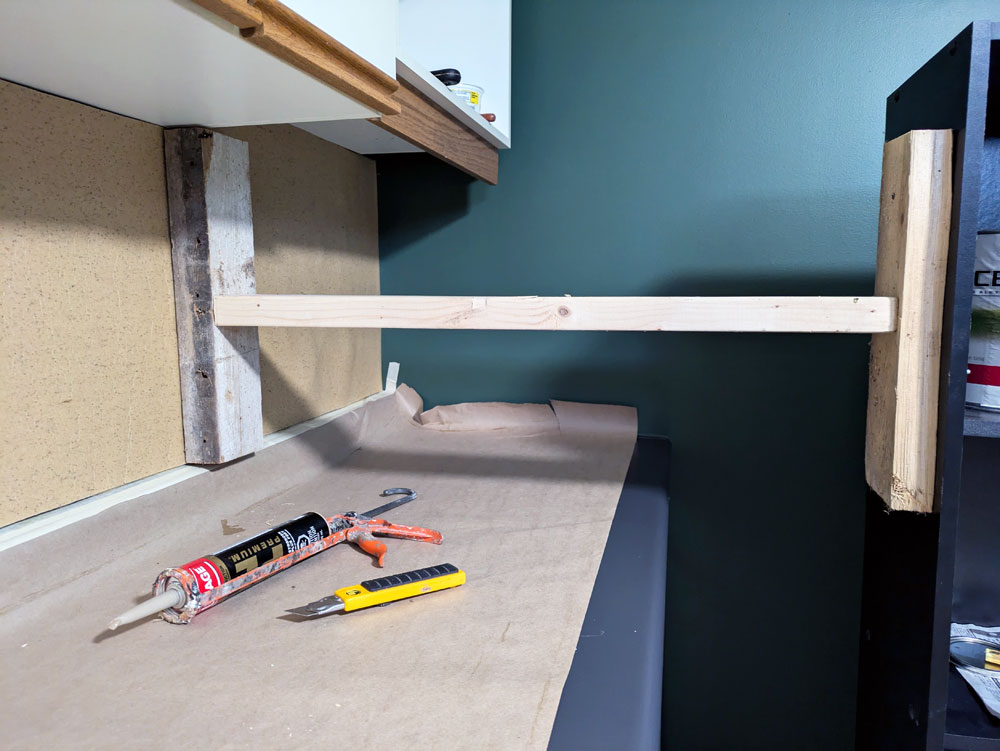
I rolled out the cork. My first step was to cut off the plastic “fringe” that’s along the one edge. Then I measured the space between my cabinets. There were a few ups and downs as a couple of the cupboards are fitted for under cabinet lights. I very carefully plotted everything out with a marker and cut along the lines with my scissors. The cork cut super cleanly and easily.
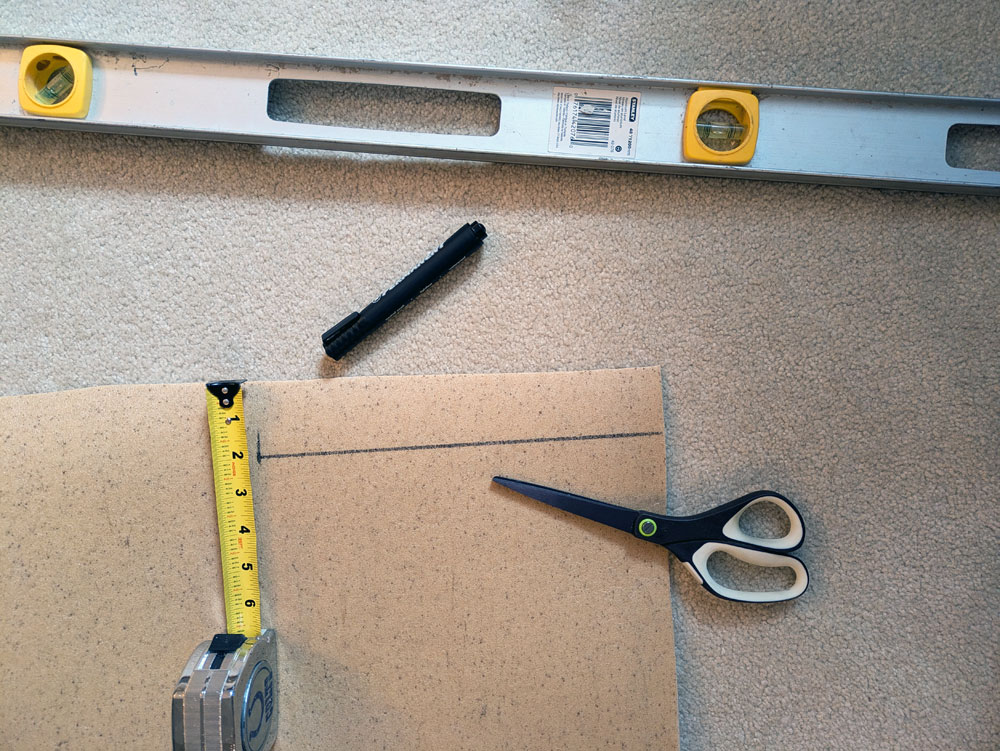
Then I took my first layer for a test fit. I had a few gaps that were bigger than I wanted, but overall it was a pretty good fit. I was ready to put it on the wall.
I removed cover plates from the outlets and covered the plugs with tape. I taped off the edge of my counter and covered the whole surface with paper to protect it from the adhesive. Then I laid the cork facedown on the counter and coated the back of it with Contact Cement. I also put a layer of CC on the wall. (Cheap chip brushes are good for this, as you will be throwing them out after gluing.)
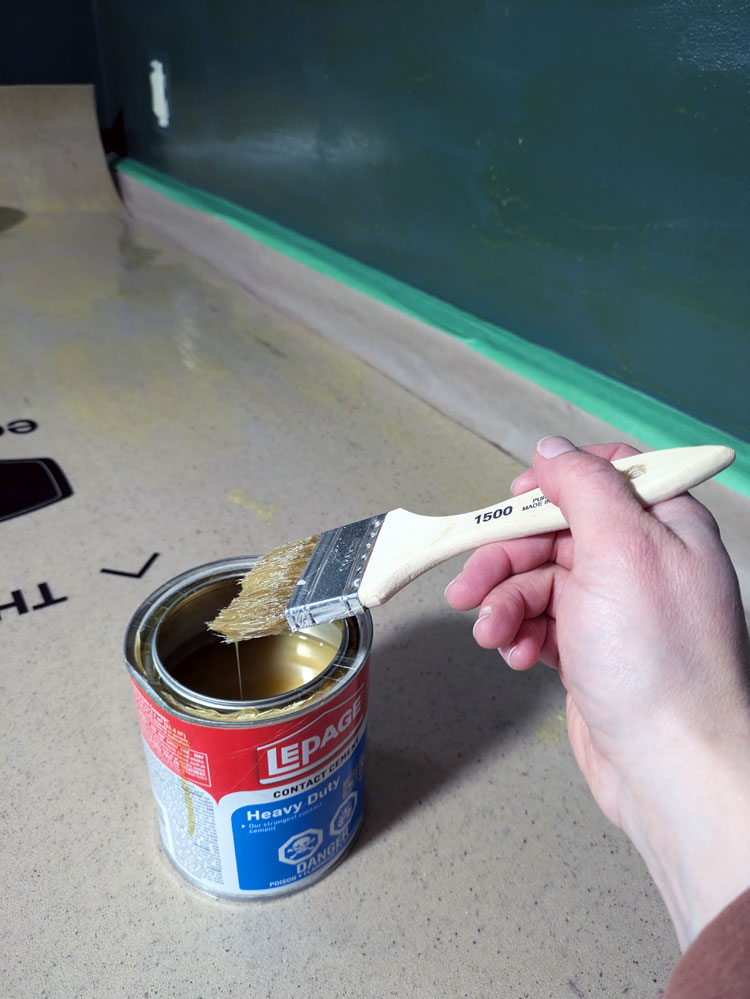
Warning about Contact Cement. The fumes are super strong. I had the window wide open (in January) and the door closed.
I recommend following the application directions for CC exactly. Put on a generous, even layer. Let it dry for 30 minutes. Have an extra can of CC to make sure you can fully cover your wall and cork.
The issue I ran into in this project (more on that in a moment) was all because of the Contact Cement. I went through CC much faster than I expected, so some areas didn’t get that “generous” coating. (A 946mL can covers 25-33 square feet. My backsplash was about 20 square feet, so ideally I would have had two cans for each layer of cork.) I also was impatient (and it felt wrong to let glue dry), so I only let it set for about 20 minutes before putting the cork on the wall (still within the guidelines, but on the low side).
So after that foreshadowing, let’s proceed with the install.
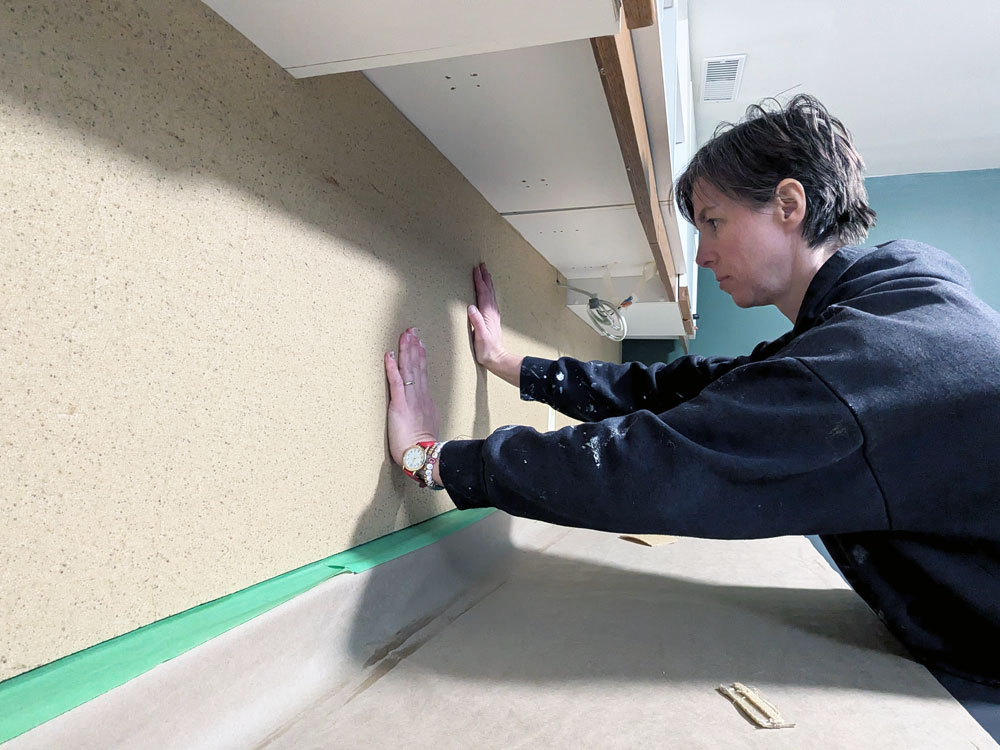
Once the Contact Cement had dried (kind of), it was time to put up the underlayment. I started at one end, got everything lined up as best I could and worked my way down to the other end. Depending on the size of your bulletin board, having an extra person would be helpful for this step. The Contact Cement on the cork sticks as soon as it touches the CC on the wall. You don’t have any wiggle room. With a long, floppy piece of cork, getting it smooth and aligned on my own was a bit awkward.
Once the underlayment was in place, I went over the whole length of cork and pushed it firmly into the wall. I went back and forth, up and down several times.
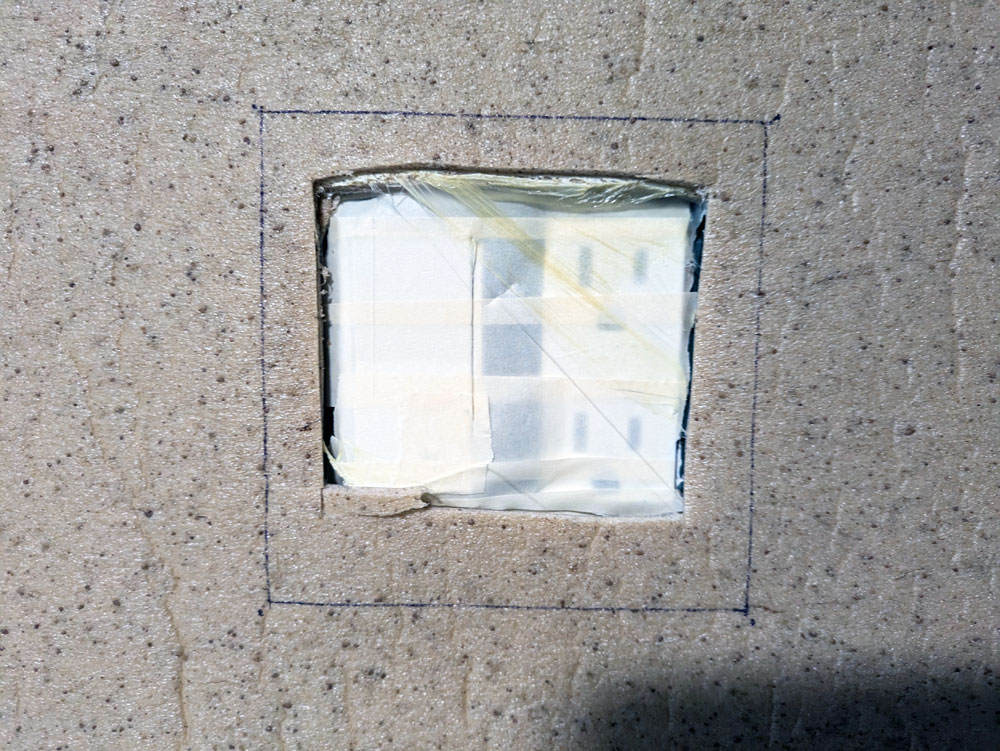
Then, I did it all again for a second layer. I was able to make some adjustments to my measurements to compensate for the little gaps I had in the first layer. I also cut out the plugs between each layer, just a rough cut around the outlets for now.
Two layers likely would have been enough, but I could still feel the wall when I pushed in a pin, so I decided to add a third layer of cork. However, I was out of Contact Cement, so the third layer had to wait until a trip to the hardware store.
When I came back the next day, I was dismayed to discover a huge bubble at the end of the bulletin board where I’d done a thinner coat of CC. This was also the spot that had cured for the shortest amount of time. The other end was smooth, flat and securely adhered.
I decided to slit the cork with my utility knife, peel it back and repaste it on the wall with my fresh Contact Cement. Then I proceeded with my third layer of cork, which I knew would cover the repair.
The next day, though, was deja vu. There was another bubble at the same end, and this one seemed even larger. My initial reaction was, “Well, I guess I know where I’m hanging the calendar.” But as I looked at the bubble, it seemed too large to leave. It was a significant bulge and would have been noticeable even behind a calendar.
So I came up with a plan. I would cut a small slit in the cork. Then I would fill the bubble with construction adhesive. I would brace a 2×4 against the cork to push it into the wall while the adhesive set.
So I went to work. My small slit became quite large, as I cut open the whole bubble. But I was able to squirt construction adhesive into the whole area. Then I put my brace in place and not so patiently waited the prescribed 24 hours.
When I took the brace out, the bubble was gone. The cork was perfectly flat and securely stuck to the wall. The cut wasn’t super noticeable, and I hoped it would disappear even more with a coat of paint. Worst case, it was still a spot to hang my calendar. (Spoiler alert: the calendar ended up elsewhere.)
I decided to paint the bulletin board because I didn’t love the colour of the underlayment. It’s a bit yellow and not a true brown cork. Plus I liked the idea of the bulletin board blending in with the rest of the walls a bit more.
Before painting, I did my final cut around the two outlets. I traced the coverplates and very carefully cut the cork back. The outlets are recessed now into bulletin board.
I primed the cork with my go-to Stix primer and then did two coats of green paint. The cork took the paint really well, and I really like how it matches the walls.
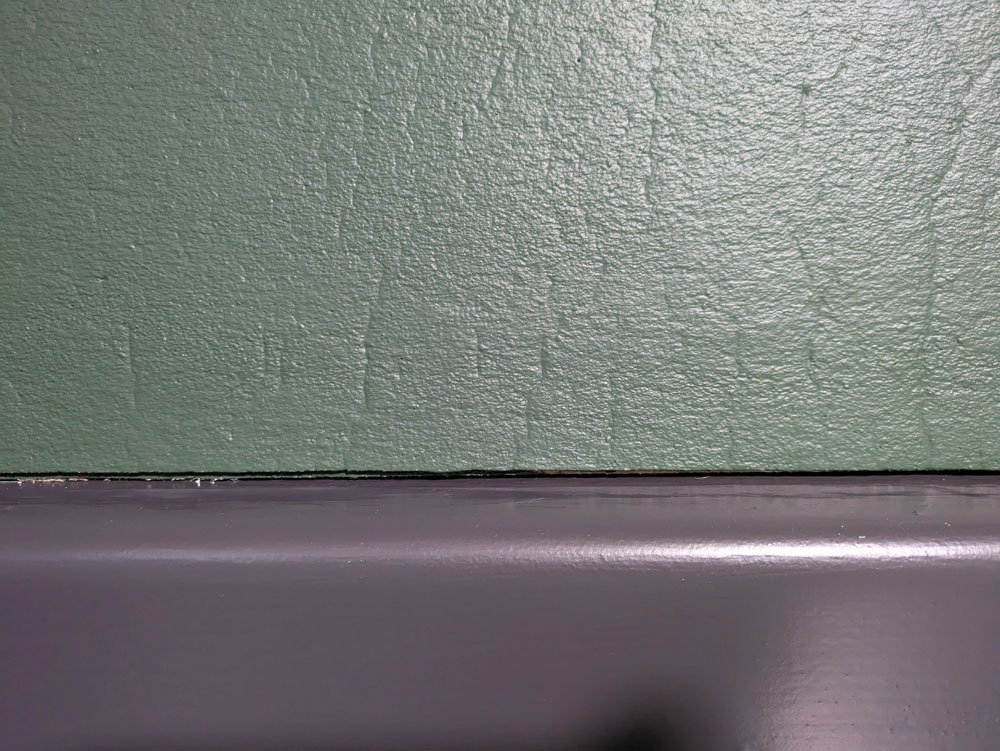
After painting, I took all the masking off the outlets and countertop. That’s when I found the gap between the bulletin board and the counter was more noticeable than I liked. I decided to caulk the edge of the cork where it meets the counter. Then I went over the caulk with another coat of paint. This made a really clean edge.
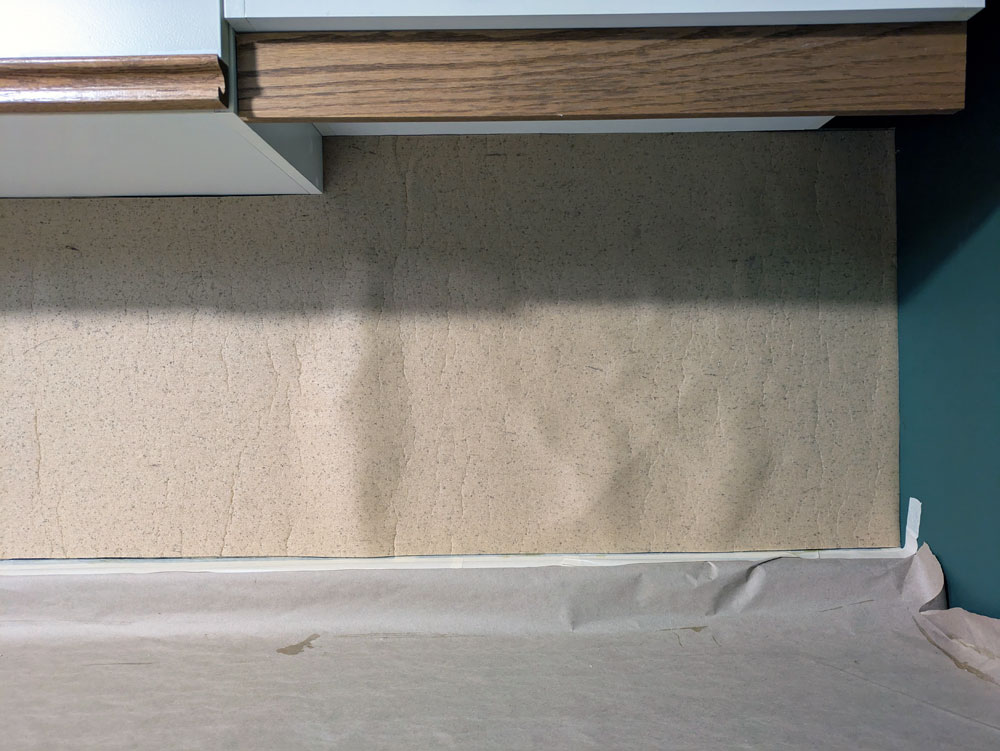
My third layer of cork was a bit more “wrinkly” than the earlier layers. This layer was closer to the centre of the roll of underlayment, so it was wrapped more tightly and had some creases in it. The creases were a bit visible on the wall, but they mostly smoothed out as the cork relaxed.
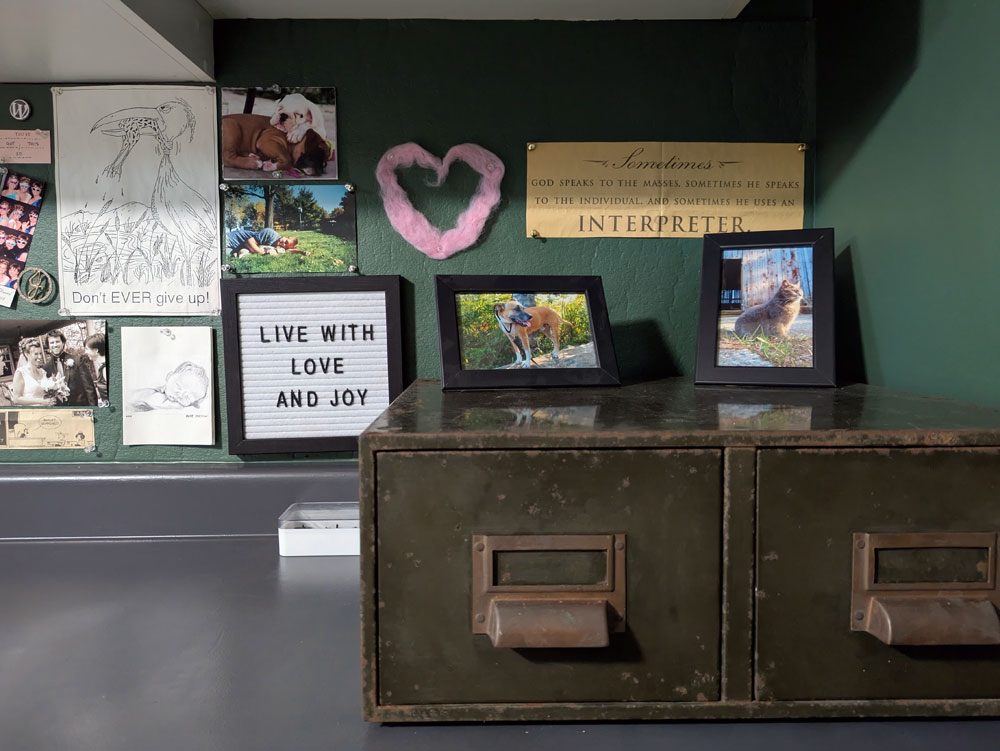
Once I started to load up the bulletin board, all of the flaws disappeared. I love how this project turned out. The wall is full of things that make me feel inspired, happy and loved. And I have plenty of room to grow.
I also love the trial and error–and ultimate success–with this project. I felt like I was returning to some of my old DIY days. I’m still that scrappy, creative, hard-working, cheap, make-it-happen person, and I like tapping into that.

Great story and congratulations on your DIY cork bulletin board. It looks fantastic !
Sometimes when things don’t go smoothly and according to plan overcoming those obstacles to ultimate success is especially gratifying. I’m glad this happened for you in this project.
I recovered our six dining room chairs, which in itself was daunting as I’m not particularly handy. I was encouraged by a friend who had recovered her chairs and proceeded to find upholstery fabric I liked that tied in with our decor, foam batting and borrowed my friend’s staple gun. I was surprised how much I actually enjoyed the process and loved the updated look of our chairs.
You never know until you try, right?
Congratulations on your nice new bulletin board !
Pam
You absolutely never know until you try. Congratulations on your chairs and pillow!