Going geothermal – The installation

As I mentioned in previous entries of “Going Geothermal” (see Part 1: The decision and Part 2: Picking a contractor), we were on a tight timeline for the geothermal system, and on the third day that we owned the farm installation began.

Geothermal excavation

Waterloo Energy Products crew laying the geothermal loop.

Coincidentally, the day before installation began the oil tank also ran dry. We topped it up with diesel, and then our geo contractors spent more than an hour getting the old furnace running. They never did get the hot water tank working again.

This timing just confirmed for us that we made the right decision in going for the geo right away.

Here’s the schedule of how our installation played out.

Day 1:

Remove old pool room furnace. Move new heat pump and hot water tanks into the basement. Prep work.

Day 2:

Directional drilling. The geo system is made up of two main components: the loop field where the pipes are laid and the heat pump in the house. Somehow, the two systems have to be connected.

Option 1 for doing this is digging a trench between the loop field and the house and popping the pipes horizontally through the foundation wall, hopefully right into the utility room. In this scenario, the pipes will be about mid-way between the floor and ceiling, so if you can’t get access directly into the utility room, the pipes will have to run along the wall until they can get into the utility space. Outside you need clean access to the foundation, which means no patios or other obstructions between the loop field and the spot that you want to go through the foundation.

Option 2 is directional drilling (also known as horizontal boring) where a special drill rig tunnels in from the field under the foundation (and in our case under a patio and under a sun room) and pops up through the floor of the utility room. It’s a very clean installation, but you pay extra for the convenience of not having a big trench running up to your foundation.

Geothermal pipes

The geothermal lines entering and exiting the utility room.

Also on day 2 our contractors removed the (non-functioning) hot water tank and the house furnace.

Day 3:

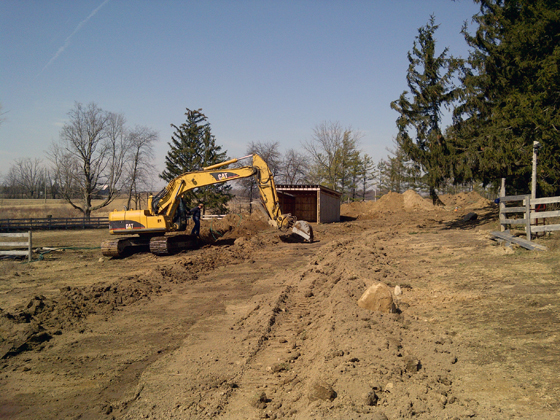
The Dig. This was the part I was most excited about. For our 6 tonne loop system, our contractor dug three trenches 300 feet long, 5 feet deep and 5 feet wide. It was a huge excavation. Fortunately, we have a lot of property and our contractor had a big excavator.

For some context picture me driving up to the farm at 7:45 in the morning (we weren’t living there yet) and seeing a giant machine toddling through the field behind the barn. It actually looked like it was picking its way delicately along. Of course, that illusion did not last as 15 minutes later the shovel was in the ground and digging had begun. One scoop of his shovel was a full 5 feet across.
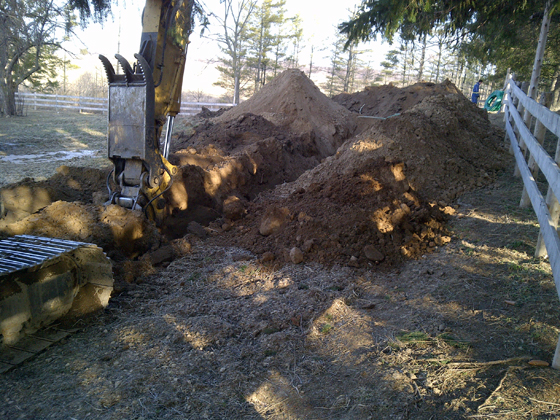
Geothermal excavation

The progress after just 15 minutes of digging.

He started digging at 8 a.m. and by 3 p.m. the loop was fully installed, the trenches were back-filled and the machine was on its trailer heading away down the driveway.
Geothermal excavation

Two-thirds of the loop down, one-third to go. The mounds of earth you see in the centre and at the left of the picture are the two completed trenches which run for 300′ long. The third trench is coming around behind the run-in shelter. If you look closely, you might be able to see the green pipes ready to be laid in the open trench.

While the Waterloo Energy Products crew was working out in the loop field, another contractor finished all of the duct work inside, including tying the new system in to the pool room. Our system also includes a 10kw electrical back-up unit (in case anything goes wrong with the heat pump) and by the end of day 3 it was chugging away and we had heat and hot water in the house again.

Day 4:

Inside installation, including connecting the heat pump into the loop. By the end of the day, I had my favourite email from my WEP crew: “You are running on geo as of now!” Throughout the installation the crew was great at keeping me updated on their progress, letting me know what time they were coming the next day and what was next on the schedule.

Climate master heat pump

Look how shiny! Our 5 tonne heat pump by ClimateMaster. (Ignore the old, decidedly not shiny water softener in the corner.)

Day 5:

Finishing touches and tweaks. Final hook-ups of hot water tanks (we have a desuperheater unit that captures excess heat from the heat pump and uses it to supplement hot water generated by our main electric hot water heater, hence the two tanks).

Hot water tanks

Day 5 also saw removal of our old air conditioner. One nice thing about the geothermal system is that there is no equipment outside. The loop is buried in the ground and the heat pump and hot water tanks are tucked away in the utility room.

And for a utility room, it looks pretty good. Everything is neat and tidy and very well placed. Every tour of the house now includes a stop to admire the geothermal system.

Coming up next in “Going Geothermal,” the question everyone most wants to know: the cost.

For previous posts in the Going Geothermal series, click on one of the links below:

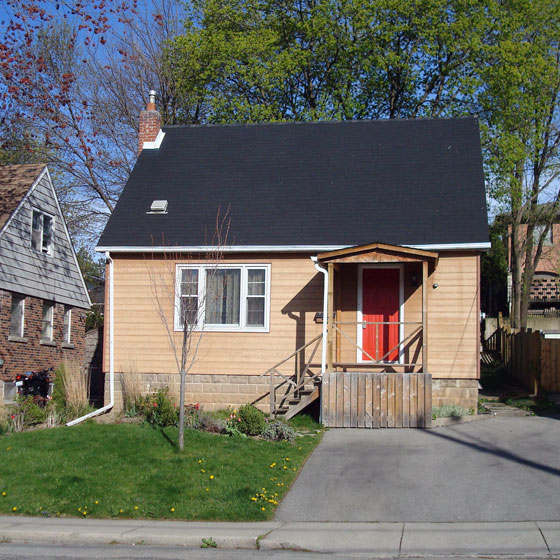
Farewell first house

Our first homeThe sale on our first house officially closes today.

We listed the house for sale right after our offer was accepted on the farm, and it sold within three weeks. But due to a long closing date, we’ve technically owned two houses for the past two months.

This house was a great starter home for us. It was the perfect size for two people, and we had plenty of opportunities to practice renovating and fixing up a home.

On my last visit to the house, Matt’s tulips were just beginning to bloom in the front garden that we put in together.

Tulips

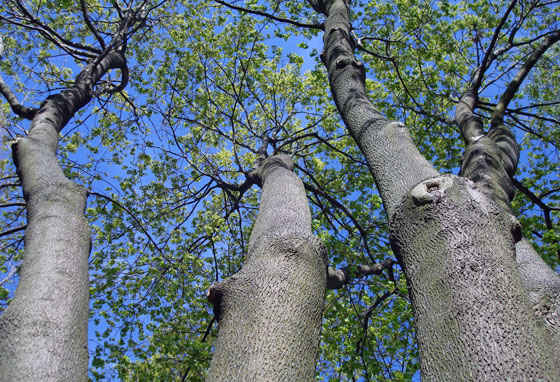
The trees were starting to come into leaf.

Maple tree

When we first saw the house, we were attracted by the mature trees in the backyard and were so excited by the fact that we owned them. Now we own hundreds of trees, and we value them just as much.

We knew all along that this house was just the start for us. Our time there made it possible for us to be at the farm now. It was a wonderful five and a half years.

Laundry day

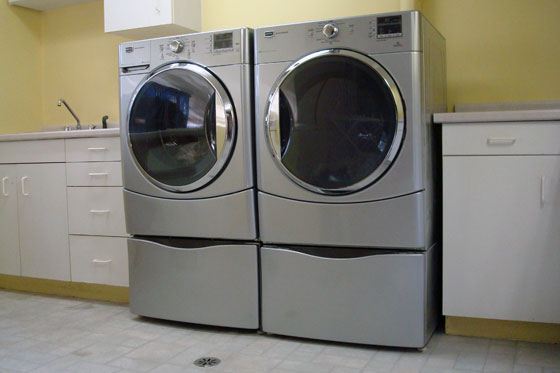
The “Going Geothermal” series will continue later this week, but first I have to share an exciting update from this weekend, which involved installation of the latest in modern conveniences, a washing machine!

Laundry drying on a clothesline

The first laundry day at the farm

As I mentioned before, we’ve had some issues with our water, one of which is high iron content (remember Psycho Shower?). We didn’t want to hook up our new washing machine only to have it turn orange, so it’s been sitting in the basement for the past month.

As of Friday, our new treatment and filter systems are in place, so first thing Saturday morning we connected the washer and started laundry.

Our new Maytag 2000 Series washer and dryer

Sheets and towels, socks and underwear, pyjamas and work clothes, reno clothes and rags. Everything went through. By Sunday night, I’d done six loads in all.

We have a new dryer too, but I decided to take advantage of a nice day and hung the wet clothes on the line outside. Plus, I think a clothesline is just more farm-y. Don’t you?

Going geothermal – Questionnaire

Here is the list of questions I asked all of our geothermal contractors. Click here for the post on how we picked our geothermal contractor.

  1. How many geothermal systems have you installed?
  2. What types of systems do you install most (horizontal, vertical, closed, open)?
  3. What are the most common problems you encounter?
  4. Do you subcontract any of the work?
  5. How do you calculate heating/cooling load?
  6. What should we consider in planning for an addition to the house?
  7. Will you do locates for all of the utilities?
  8. What heat pump do you use?
  9. How much area do you need to dig?
  10. How far from the house can the system go?
  11. Are you able to install the loop on unlevel ground? (The answer to this one is yes)
  12. What are the electrical requirements for the system? Can you upgrade the electrical if it’s required?
  13. What changes to the duct work will be required?
  14. What hot water system do you use? How does the hot water system work?
  15. How long does installation take?
  16. When are you able to book the installation?
  17. How many people will be on site for the install?
  18. How does service and maintenance work?
  19. What warranties are on the system?
  20. Will you remove the existing furnace, air conditioner, hot water heater, oil tank?
  21. Do we need to have the ducts cleaned? Do you take care of this?
  22. Where will the thermostat be? How does the thermostat work?
  23. Does the weather affect the system?
  24. Does the type of soil affect the performance of the system? (The answer to this one is no, but the wetter the soil the more efficient the system)
  25. Do you take care of CGC certification? Is there a cost for this? (Certification from the Canadian GeoExchange Coalition is a requirement of the ecoEnergy program)
  26. What forms of payment do you accept?
  27. References?

I found these questions were a good way to learn about our system and understand geothermal technology. I tried to integrate the questions into our conversation during the site visits, rather than quizzing the contractors one question after another. Seeing how the contractors responded to all of my questions gave me an idea of their overall approach to customer service as well.

I guess you can call me a demanding client, but I believe when I’m making an investment, especially when it’s as big as a geothermal system, I want to know exactly what to expect and what I’m getting.

For previous posts in the Going Geothermal series, click on one of the links below:

Going geothermal – Picking a contractor

I’ve already talked about making the decision to install a geothermal system at our farm. Now I’ll talk about how we selected our contractor.

We started getting our quotes before we took possession of the farm. We knew the furnace upgrades were somewhat urgent, and the ecoEnergy rebate program expired at the end of the month that we took possession. Our goal was to have the contractor selected and the work scheduled so that we could have our new geothermal system installed the first week we owned the farm.

We didn’t really know anyone who had geothermal, so we couldn’t get a referral. There were a couple of houses along our concession that had geothermal, and the contractors had posted signs at the edge of the road, so I got one number that way. Through the Canadian GeoExchange Coalition, I was also able to get a list of CGC qualified companies in our area. We made our short list, and I started calling people.

I called five companies to start. I asked each of them the same basic questions about how geothermal works and what would work best for our situation. Based on the initial phone interviews, I then chose three contractors to come out to the farm and quote on the job. The decision of who made the short list depended on how they answered my questions and the overall feel I got from our conversation.

The site visits involved looking at locations for the loop field, inspecting the duct system within the house and checking out the utility room to figure out how to lay out the new system.

I was also up front with all of the contractors about two things that could dramatically affect our system. First, I knew I wanted to eliminate the two furnace set up and include the pool room on the same system as the rest of the house.

However, having one system was contingent on using the pool room as just a room and not having an indoor pool. A pool causes issues with temperature and humidity that can challenge a geo system.

The second issue was that we know that we hope to add on to the house eventually, so we wanted a system that was sized to handle the larger square footage.

During the site visits, I had detailed questionnaires that I asked each contractor. I’ve posted the questionnaire here in case anyone wants to check it out or copy it for themselves.

This post from 3 acres & 3000 square feet was helpful in giving me an idea of what to look for in a contractor and what questions to ask.

Based on just the questionnaires, the three contractors were pretty evenly matched. Two out of three used the same brand of highly rated heat pumps. They all did heat loss calculations to determine what size of system we needed (although it was a bit of a guess as to how big our house would be eventually). They were all very experienced and had worked on lots of residential and commercial projects. They could all do the work within the time frame that we needed. And I liked all of them.

In the end it came down to the quotes. I was surprised with the amount of variation in both the systems that were recommended and the prices that were quoted.

  • Contractor #1 quoted us a 5 tonne heat pump with a 6 tonne loop.
  • Contractor #2 quoted us a 4 tonne heat pump with a 4 tonne loop for $3,650 more than #1.
  • Contractor #3 quoted us a 6 tonne heat pump with a 6 tonne loop for $4,200 more than #1.

From what I can tell, most of the variation in the systems came from how each contractor accounted for future expansion. In the end, we felt like the 5 tonne heat pump with the 6 tonne loop would best meet our needs today and down the road. And I can’t deny that the lower price was a key part of the decision too. Reference calls yielded very positive reviews and confirmed the good vibes we had felt in meeting with the reps from the company.

So, we said, “You’re hired!” to Waterloo Energy Products and sent off our deposit cheque. Installation was quickly scheduled to begin the Monday after we took possession. And that’s next in the series. Stay tuned.

Click here for part one of the “going geothermal” series: The decision to go geothermal.

Going geothermal – The decision

A rural area presents certain limitations when it comes to city services. Most likely, you don’t have natural gas available at the road. That means, when it comes to heating and air conditioning, you have a choice of oil or propane. However, large rural properties open up a third option: geothermal.

When we first saw the farm, we recognized quickly that the furnace was pretty old and would have to be replaced. During the home inspection, our suspicions were confirmed.

Furnace

One of our old furnaces. Notice all of the soot.

There were two oil furnaces in the house: one for the house itself and the other for the indoor pool area. The pool furnace didn’t seem to be working. The house furnace, in addition to being ancient (probably original to the house), had been modified and jury-rigged over time so that it actually wasn’t in that great of shape.

Air conditioner

The old air conditioner

The air conditioner also appeared to be original to the house (remember we’re talking 30-40 years old here), the hot water heater was also running on oil and the oil tank itself was 20 years old.

When we were talking options with our home inspector, we were focused on a new high efficiency oil or propane furnace. My brother who had tagged along during the inspection said, “Or you could do geothermal.”

We scoffed because the only thing we knew about geothermal was that it was expensive.

However, after talking things through, doing a little bit of research and starting to run the numbers, we decided very quickly to go geothermal.

Why we chose to go geo:

  1. Since we had to upgrade the furnace, air conditioner and oil tank, we’d have to put out a significant amount of money just for up front capital costs.
  2. Given that oil was our most likely option for our location, we’d have to continue to put out a significant amount of money for ongoing operating costs.
  3. We plan to be in this house for a long time (notice the “forever house” tagline above), so the geothermal would eventually pay for itself, and we’d actually be able to save money over the long term.
  4. Through the Government of Canada ecoEnergy program, we could get a rebate for installing a geothermal system.
  5. We had the space to do a horizontal loop, the least expensive layout for geothermal.
  6. It’s a green option that’s a lot more environmentally friendly than burning fossil fuels.

Click here if you’re interested in more on how geothermal works.

Once we made the decision to go geo, we had to find a contractor, which I’ll talk about in the next installment of “Going geothermal.”

Putting down roots

We inherited many, many things from previous owners when we took possession of the farm (I haven’t shown you pictures of our personal Hoarders episode yet, but I may some day).

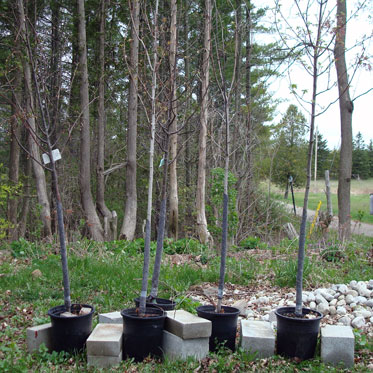
A number of those things were plants. Sometime last year, the people we bought the farm from went out and got many, many plants, but they never planted them! Bushes, flowers, trees, shrubs, all of them were still in their plastic pots sitting on the ground in and around the areas where the front flower gardens would be if they weren’t completely overgrown with weeds.

The stockpile included 5 trees.

Our inherited trees

Our inherited trees

I have no idea how long they’d been there, but when we saw the property for the first time at the beginning of January, they were all laying on their sides, frozen into a kiddie pool (I guess an attempt to keep them alive?), and they were still there, just like that, when we took possession in March.

When the ice in the pool melted enough, Matt and I stood them upright, but they were so curvy and bent from laying down that they easily tipped over again. We propped them up with concrete blocks and checked them frequently searching for any signs of life.

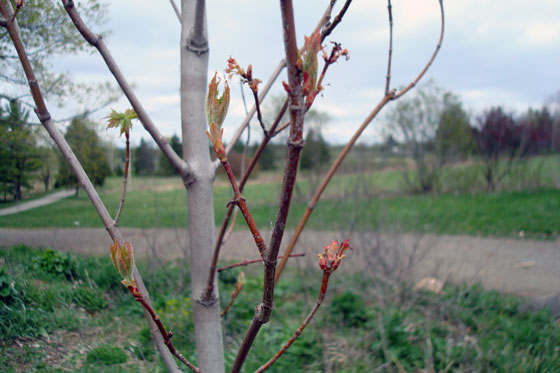
A few weeks ago, we noticed buds. Finally on Sunday (fittingly, Earth Day), we made some time to plant them.

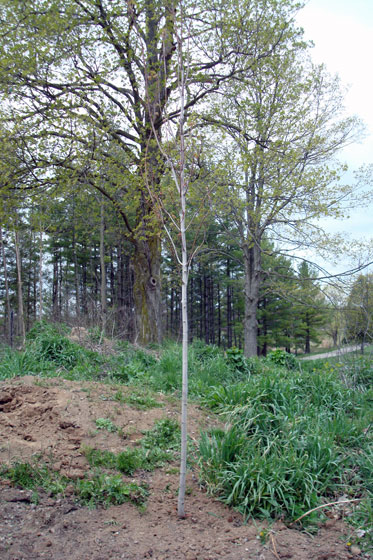
I love a tree-lined driveway, and we’re already in pretty good shape, but there are a few blank spots, so that’s where we focused our plantings.

One of our new trees

One of our new trees. He's a little spindly right now, but the inspiration of what he can become is right behind him.

According to the tags that were tied to the trees, we have an Autumn Radiance Maple, two Unique Littleleaf Lindens, and an Autumn Blaze Maple. The fifth tree wasn’t labelled, but it looks like some kind of maple.

Close up of buds on our new maple tree

It's alive!

The trees make a nice addition to the farm, and planting was a very nice way to acknowledge Earth Day.

What about you? Did you do anything for Earth Day?

Evening at the pond

The other night after work, I walked down to the pond. The sun was low in the sky, the shadows were long.

I saw a mallard, a fish (an honest to goodness fish, 6-8 inches long) and a red winged blackbird.

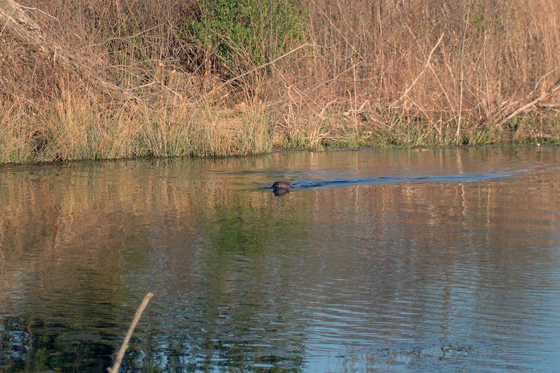
And then I saw this, and I was so excited I nearly fell into the pond.

Maybe a muskrat

Do you see what I see?

I managed to recover my balance and only ended up with a wet boot, which was fortunate because 1) I’m pretty sure me falling into the pond would have spooked this guy and caused him to move to another watershed, and 2) the camera would have gotten wet and then I wouldn’t have been able to take the dozen other pictures I shot.

Maybe a muskrat

Hello there!

My new friend was a little suspicious of the statue (once I found my stability, I wasn’t moving!) that had turned up on the shore of his pond, and he swam big ‘S’ patterns across the water as he eyed me. Eventually he decided I wasn’t that interesting and he went back to paddling and diving. I was able to track him swimming under the water by following his bubbles. At one point he climbed out of the water onto the opposite shore and I got a better look at him.

He’s a big guy! Almost 3 feet long, nice and round and very, very sleek.

I’m not sure exactly what species he is. My best guess is some kind of muskrat, although I guess beaver or otter could be a possibility. I never saw his tail clearly, so that doesn’t give me a clue.

Over the course of our farm search, the pond came on and off the must-have list. I really, really wanted a pond, but at times I was ready to sacrifice it in order to just get a farm. Now, I’m so glad we have the pond. It’s one of my favourite spots on the property. I love walking down to the water and just watching the sun glisten over the ripples, the reeds waft in the breeze and the bugs dance across the surface. Seeing this guy enjoying the pond was a complete bonus–a really special moment for me.

For the weekend, I leave you with this video of our new pond paddler.

All of you naturalists out there let me know in the comments what you think he is.

Psycho shower

In previous posts I mentioned that our basement bathroom is deserving of its own feature. Well, here it is. The promised post on our basement bathroom.

Let’s take a look, shall we?

Basement bathroom before

Hey, that looks pretty good. Shower, toilet, vanity, sink, mirror, light. All of the parts seem to there.

Let’s look a bit closer, shall we?

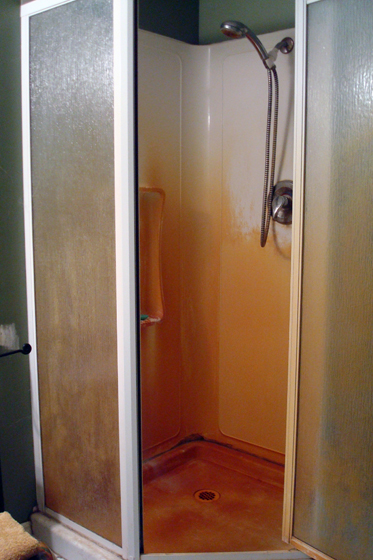
Shower in our basement bathroom

Psycho shower! No, this is not a crime scene. We have some issues with iron in our water.

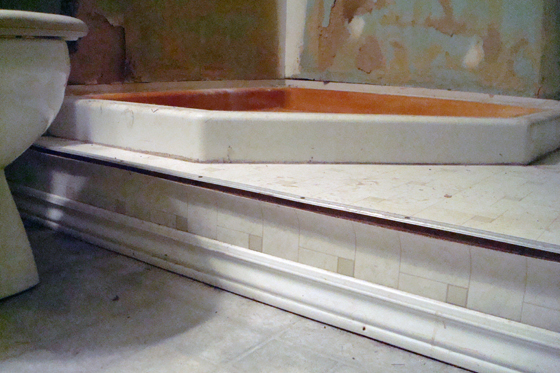
Psycho shower on a platform

Psycho shower on a grody platform (and yes, some demo has taken place between the first two photos and this photo)

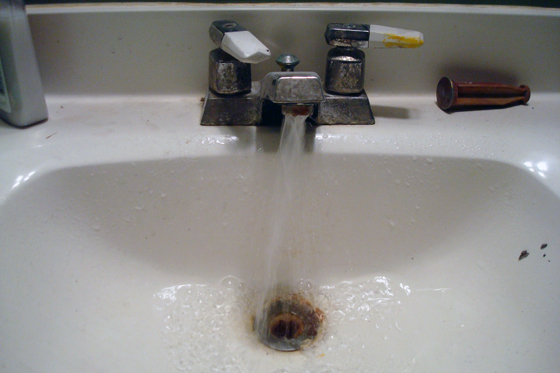
Decent sink, but ugly faucets and some spray issues

Decent sink, but ugly faucet and some spray issues

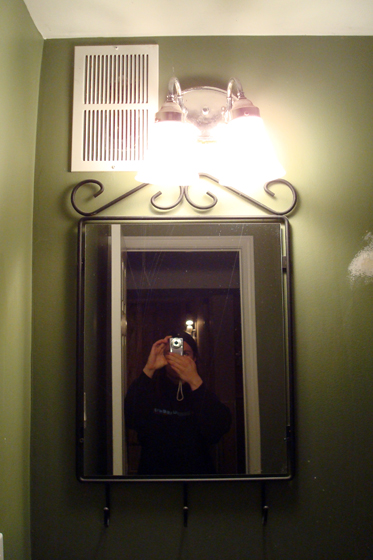
Off-centre light

Off-centre light (and random vent… don’t know what it’s covering yet)

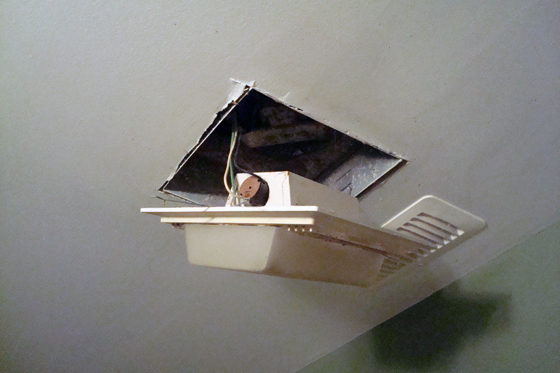
Exhause fan

Exhaust fan issues (we haven’t touched this yet. This is actually how it was when we bought it.)

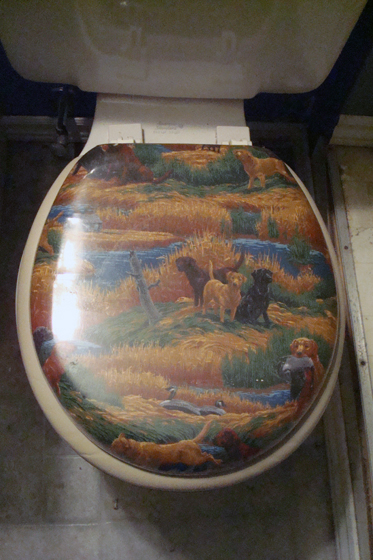
Cushy toilet seat

Cushy toilet seat with colourful hunting scene on the lid

Lovely, isn’t it?

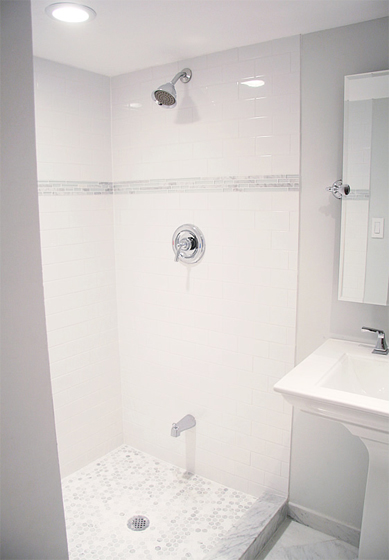
We knew from the first time we saw it that we would be tearing out the basement bathroom entirely. Here’s the vision for what it will be.

Not at all psycho shower

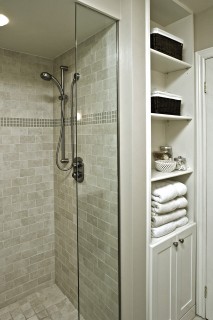
Decidedly not psycho shower. Source: Aubrey + Lindsay’s Blog

While most of the key features of the bathroom are in place, the one thing that we’re missing is storage, so the reno will have to include space for extra soap, toilet paper, towels and all of the other stuff that is part of a bathroom. Something like this will be perfect.

Built-in storage

Source: Houzz

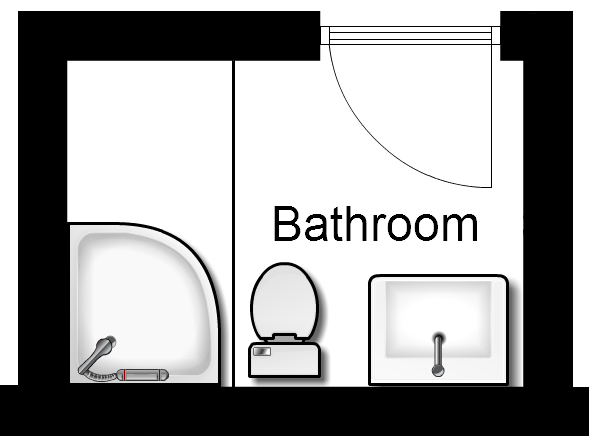
Here’s the floor plan before.

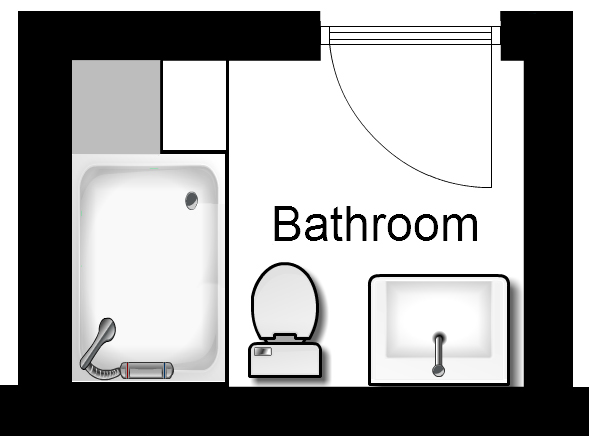
And after.

Basement bathroom floor plan after

Much larger shower (hopefully not on a platform), with a ledge at the one end for shampoo and soap. The other side of the ledge will be floor to ceiling storage. Source: floorplanner.com

Like in the rest of the basement, we’re not making major changes to the layout, but everything will be coming out and the walls will be opened up and the insulation will be upgraded. We’re probably going to reuse the vanity, albeit with a new faucet. There will be a new toilet, new floor, new lighting and lots of nice, clean, new tile.

After growing up in a house with only one bathroom, Matt now requires his own bathroom. So I will be the main user of the upstairs bath, and this one will be all his. Somehow it doesn’t seem entirely fair that he gets the nice new bathroom all to himself. Don’t you think?

For more inspiration images, including ideas for fixtures, see my basement bathroom board on Pinterest.