Trompe l’oeil barn board

If that title isn’t a contradiction in terms, I don’t know what is.

I associate trompe l’oeil with fancy murals and beautiful chateaus. Not with farmhouses, and certainly not with mudrooms. However, in my recent mudroom makeover, I created the look of barnboard in an attempt to dress up basic boring slab bi-fold closet doors.

The closet doors are one of those projects that were added on to the makeover because I had to. The doors were coated with an anaglytpa wallpaper that had been painted. It did not match up to the rustic feel I was going for, so I decided to strip it off the doors. Doing that revealed why the doors had been wallpapered in the first place: layers of badly chipped paint that I couldn’t simply paint over.

Chipped paint on bifold closet doors

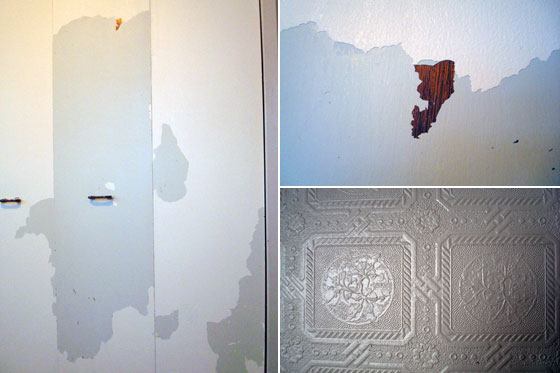
I briefly considered covering the doors right back up with another textured wallpaper–bead board this time–but then I had another brainwave and decided to strip them back to the bare wood. The thought process went something like this: “Bead board… paneling… planks… vertical planks… like siding on a barn… like barn board… hey, barn board!”

I had seen Minwax Classic Grey stain on the dollhouse Jessica made over at Running With Scissors and was impressed by how she was able to replicate weathered wood, so I decided that was the way to go.

However, just like when I was painting trim in the mudroom, the motivation to strip the closet doors was hard to find. After a few months of procrastinating followed by many, many coats of stripper and lots and lots of sanding, my closet doors were finally naked. Perhaps because of all of the stripper I had to use, I found it difficult to get an even coat with the stain, but I think that works in my favour, as barn board is made up of varied tones.

Minwax grey stained bifold closet doors

Then to make my flat bi-fold closet doors look a little bit more like weathered grey boards, I took a black marker and drew vertical lines down the middle of each door to make trompe l’oiel planks. If I’d really been serious, I could have routed a very shallow gouge down the middle of each door, but I was just going for the feel of barn board and not trying to replicate it too closely.

Draw barn planks with a marker

I reused the black metal pulls that were on the doors originally, turning them vertical to look a little more barndoor-ish. Remember, this makeover was all about cheap and cheerful and working with what we had.

So there you have it. Magic marker barn board planks. Or if you want to be fancy, trompe l’oeil barn board planks. Not a bad way to dress up basic flat panel bi-fold doors.

And there you have the last project of the mudroom makeover. Thanks for all of your great comments and suggestions throughout these posts. It’s so great to finally have one room done.

There are lots more ideas on how to make flat doors more interesting on Pinterest and all over the blogosphere. What are some of your favourites? Do you have barn board (real or fake) in your house? Anyone have any suggestions of the best paint strippers to use? I’m not sure the brand I chose was the most effective, because I felt like these doors took an awful lot of stripper. Any stripping horror or success stories to share? Have you ever “faked it” and made your own trompe l’oeil?

Monday night football

360 feet: the length of an American football field (including end zones)

384 feet: the length of trim currently in our basement–all of which required two coats of paint

Painting trim

Matt and a portion of our 23 pieces of casing

We’re at the two minute warning on this basement renovation. Walls are painted, carpet is scheduled for next week. The next play is to install the trim.

We bought pre-primed MDF casings and baseboards, but they still needed two coats of paint–Benjamin Moore Cloud White in a pearl finish. So I strapped on my knee pads and got to work.

Didn’t you know painting trim is a full contact sport?

Painting baseboard

Me and a portion of our 18 pieces of baseboard

The task for this week is to install all of the trim. It’s team MJ versus seven doorways and five rooms.

Cheer us on as we head for the end zone!

Saturday night love letters

For our Saturday night date, Matt and I primed his office–it’s an exciting life we lead, I know.

Given that we were on a date, I tried to inject some romance into the evening and left a note for him while I was cutting.

I love you

He wrote back.

I love you bacon

It’s clear where his heart lies. He even framed his message.

Painting green walls

Ultimately, the love letters, the bacon and even the retina searing green primer were all covered by two coats of Benjamin Moore’s Manor Green–Matt’s choice of colour. Helping your husband paint his office forest green? That’s true love in my opinion.

Anyone else have a hot date this weekend? How did you spend your Saturday night?

Shades of grey

Blame it on being away at a course for two days and missing husband and home. While driving back to the farm, I decided that the best colour to paint the basement is the one that Matt liked the most. After all, the basement was his main priority when house hunting, and I’ve said that my priority is to make it nice for him.

There were six finalists in the running: two off-whites, two creams and two greys. When I asked you what you’d choose, one of the off-whites, White Dove (my favourite), came out on top with Misty Gray (Matt’s favourite) in second.

Poll results

We decided to make it Misty. However, it turned out not to be that simple.

I went and bought a 5 gallon pail of Misty Gray. We put the first coat on the long room. And I didn’t like it.

The grey was so subtle that it looked to me like we’d painted the room white. As much as I liked White Dove, now that we’d chosen to go grey, I wanted the colour to be noticeable.

So we returned to Benjamin Moore with the pail and asked them to adjust the colour. The next tint on the fan deck was Bunny Gray, and that’s what we aimed for–keeping in mind that the colour wouldn’t be exact given that we’d already used more than a gallon from the pail.

There were two things I was unsure about though: I thought that Bunny might still be too light, and I was also concerned that we wouldn’t have enough paint in our pail to cover the whole basement. And with our custom mixed colour, we likely would have trouble matching it exactly if we came up short.

So I decided to order a single gallon of Thundercloud, the next shade darker after Bunny. When we got home, we dumped the remains of our Misty sample pail along with the gallon of Thundercloud into our pail of Bunny.

Grey paints in a pail

Misty is the light blob at the top, Thundercloud is the swirl in the middle.

Matt mixed it all together, and I crossed my fingers as I picked up my paint brush. Fortunately, I was happy with our Franken-colour, and we went to town.

Grey painted basement

Sorry for the picture quality here. It was dark by the time we finished painting, and lighting in the basement isn’t the greatest. This is the future ping-pong area in the main room of the basement.

Running to the store for the retint and being away from home for a couple of days cost us a bit of painting time, so we still have a little more to do yet. But with the colour finalized and a few free evenings this week, we’re expecting to make good progress this week.

Have you ever mixed your own paint colour? How did it work out for you? What do you think of our custom shade of grey? Given my subject matter and the title of this post, I feel like I have to ask if there are any Shades of Grey fans out there? I haven’t read it myself. Do you recommend it?

The greatest dilemma of all time

The title of this post may be a little over dramatic. I am not the first to face this conundrum or to wrestle with this question. However, the angst, the uncertainty, the pressure of this choice is well known by many.

What paint colour do I choose?

With the conclusion of the drywall phase of the basement, we progress to the painting stage. We (optimistically, as it turned out) bought primer months ago, so last week Matt and I started priming the basement.

Matt priming the long room with the roller

Matt rolls on the primer in the long room

You would think with 5 1/2 months of drywalling (still can’t get over how long it took us), 7 1/2 months of farm ownership, and 9 1/2 months of knowing we were going to be painting the basement, I’d have figured this out by now. But I haven’t.

Most of the time in this project, I was planning on going grey. However, we’re planning on buying a charcoal grey sectional and the carpet will likely have grey tones in it. Painting the walls grey too was starting to seem like a lot. So over the last little while, I started thinking about other options.

The criteria for the colour are

  1. Light – I want the basement to be fairly bright, but, with only one window, pale paint is my best bet.
  2. Neutral – I really don’t want to repaint any time soon, but I may want to redecorate every so often. A neutral colour gives me the option to switch up the other colours in the basement when the mood hits.
  3. Works for the whole area – We have a fairly large basement, and the main room, long room, laundry room, stairwell and hallway are all going to painted the same colour (click here if you need a floor plan refresher).

I ended up buying samples of six different colours. Originally, I bought four, but then I didn’t like any of them, so I went back and bought two more.

Off white paint samples

Clockwise from top left: Cloud White, Distant Gray, Misty Gray, Mayonnaise, Linen White, White Dove. (All colours from Benjamin Moore).

This is my first time sampling colours on the actual wall. Usually I just trust my gut and go with a paint chip that I think will work. However, this is also my first time painting my forever house (bathroom aside), so I feel like it matters more that I get this right.

So, in addition to sampling the colours, I am appealing to you for help. What do you think?

Have a favourite colour that’s not covered in my samples? Let me know in the comments what you recommend.

The dark side

I may be getting ahead of myself, but the other night I did this.

Paint brush and can of paint

Work continues on the drywall in the basement, but we’re all done in the bathroom. So before I put the tile on the walls, I decided to put on some paint.

Yes, I should be sanding and pasting, but it’s so much easier to open a can of paint and brush it around a small room. Never underestimate the power of instant gratification when it comes to renovations.

In fact, I was so pleased, I may not have stopped with just the prime.

Benjamin Moore Wrought Iron

I decided to go really dark with Matt’s bathroom. It’s a pretty small room, and there are no windows, so my first instinct was to choose a really light paint. However, between the built-in shelving, tile and a big mirror, only one wall is going to be painted. Therefore, there’s room for some drama. Plus, everything else is going to be white or mirrored, so there will likely be enough lightness that the room doesn’t feel like it’s closing in on you.

The colour I chose is Wrought Iron from Benjamin Moore. It’s a really dark grey that reads as black at times.

I’m hoping that it will play well with the grey tones in the tile.

And that’s another benefit of painting at this point in the project: no spatters or drips on our beautiful new tile.

This is my first time choosing a paint colour this dark, and so far I’m loving how it looks. If it turns out that I don’t love it later on, it’s simple enough to repaint one little wall.

Anyone else a fan of the dark side? What are your tricks for dealing with a small window-less room?