I’ve posted an addition to this tutorial: How to apply pre-glued veneer on curved edges
Our new TV cabinet that you saw at the beginning of this week is a thing of beauty in my (admittedly biased) opinion. However, this wasn’t always the case.
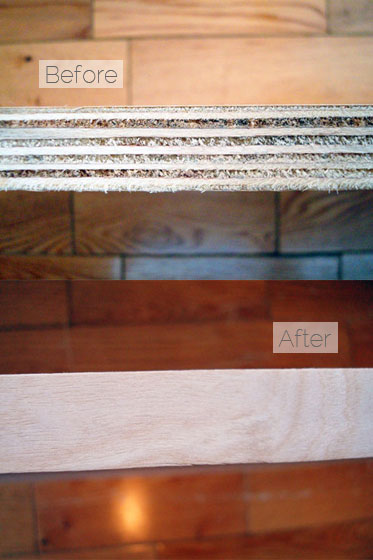
The cabinet is made of 3/4″ pine plywood. It’s paint grade, so the surfaces have a nice smooth finish. However, the raw edges are just that… raw. They’re rough and the layers of plywood are clearly visible. To finish off the edges, I used preglued veneer edging. This edging is very easy to use. Here’s what you do.
1. Gather your tools and materials.

This is a simple job that doesn’t require a lot of technical tools. Clockwise from bottom left, I have my roll of preglued veneer edging, my iron, a scrap 2×4 block, a file and scissors.
2. Set your iron to the cotton setting.
3. Prepare the edging. Use your scissors to cut a section of veneer that’s roughly half an inch longer than the edge you’re going to cover. You don’t have to be precise in your measurements. I just hold the veneer against the cabinet edge to figure out how long the section should be. You can work directly from the coil, but it’s easy for the veneer to get twisted, so I recommend cutting it into lengths first.
4. Starting at one end, carefully position the veneer against the edge that you want to cover.

The veneer will be slightly wider than the edge that you’re covering. Keep it flush on one end and one side and let it overhang the other.
5. With your edging in position, apply the iron to melt the glue.

I’ve found a “pressing” technique rather than an “ironing” technique works best. Just hold your iron in one spot for about 20 seconds. When you remove the iron, make sure the veneer is still aligned along the edge of the plywood. The glue will stay soft for only a couple of seconds so adjustments have to be made quickly.
6. Using your block of scrap wood, firmly press the edging onto the plywood.

Press hard and slide the block back and forth over the section that you ironed making sure that the veneer fully adheres to the plywood.
Repeat steps 5 and 6 until the raw edge is completely covered with veneer.
7. Once the veneer has cooled, trim the excess that’s overhanging the one side with a file.
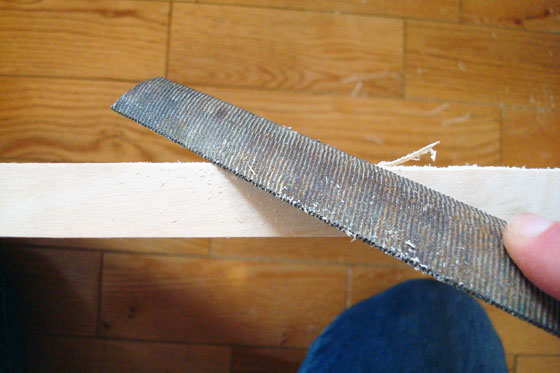
File towards the face of your plywood keeping the file at roughly a 45 degree angle. There are tools that will trim the veneer as well, but the file has always worked well for me.
Your edge should now be nice and smooth and ready for stain or paint.
Some tips for using preglued veneer edging:
1. When cutting the veneer with your scissors, try to get a nice 90 degree cut. This will give you a good starting point for your next piece.
2. Check for joints in the veneer before you glue it to your plywood.
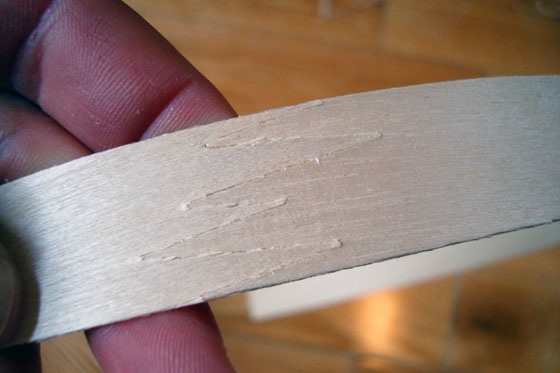
The veneer is connected by finger joints that aren’t the most attractive and wreck the illusion of a solid piece of wood.
3. Don’t skimp on pressing the veneer with your block. You don’t want your veneer to peel off once your cabinet is done. Pay special attention to the edges of the tape to make sure it’s firmly stuck.
4. If you use the file to trim the veneer, clean the file every so often. The sawdust will fill the grooves and make it more difficult to get a clean edge. I just tap the file to knock out the dust.
5. Watch out for splinters.
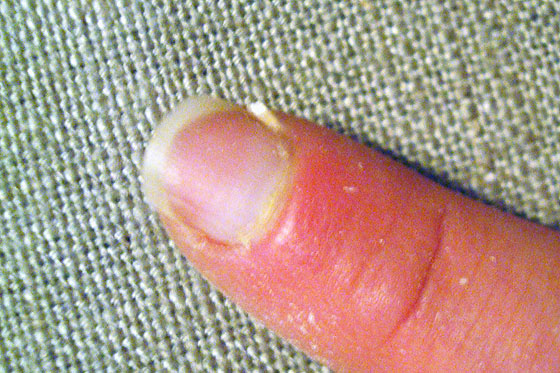
Ouch!
Although iron-on preglued veneer edging can be slightly dangerous for klutzes like me, it is very easy to use. Ironing is one of my least favourite tasks, but for some reason ironing wood is less tedious than ironing clothes for me. Just a little bit of effort results in a very nice polished finished for furniture, shelves or other creations.
Have you used veneer edging before? Who else is not a fan of ironing? Is anyone else susceptible to splinters? I seem to get a few a week. I’m sure a few are in my future this weekend. How about you? Any special projects on tap for the weekend?
I’ve posted an addition to this tutorial: How to apply pre-glued veneer on curved edges

I’d been wondering about the edge veneer since I’ve never used it, so thanks a lot for writing this. I’ve been going back and forth between this and using a face frame, and this gives me a clearer idea. Enjoyed this.
Glad to hear it was helpful to you, June. Thanks for stopping by!
A nice way of trimming your edge veneer is with a sharp chisel. Just start at one end and push down on an angle. You get a nice crisp edge and you don’t have to worry about lining up an edge of the veneer with the edge of the plywood. I have used the tool to trim veneer but I prefer my chisel.
Good tip, Janet. Thanks so much!
That’s good info. I’ve wondered about how to use veneer. It would definitely be a lot more affordable to make things with plywood than with solid wood.
It’s really easy to use too. Definitely give it a try.
Thanks for the post. I am wondering, if the plywood edge requires sanding prior to application?
I’m glad you found it useful. A light sanding is helpful. You don’t want to round the edges at all, but taking off any rough spots is a good idea.
Hi. I have a tall mahogany dresser that is in excellent condition except for the veneer inlay on the front sides of the drawers, which has chipped in a number of spots. I would like to remove the broken strip and replace it with pre glued veneer. Can you please walk me through the process? Thanks, Larry
I would suggest starting by removing the whole strip. You might need to scrape a bit with a sharp chisel to make sure you get it completely off–including any glue residue. Then I would follow the steps in this post. I would suggest aligning the edge of the veneer strip with the front of the drawer. That way any cutting or trimming happens on the backside. You will have to stain the veneer after to match the finish on the dresser. You can test colours on some leftover pieces of veneer to find the best match. Good luck!