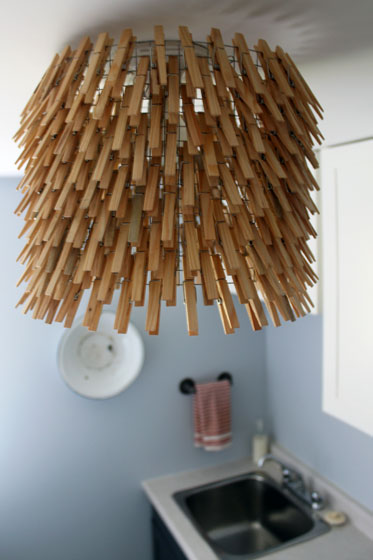
A lot of people had compliments for the clothespin light fixture in the laundry room.
I can’t take credit for the idea or even the execution. I was inspired by this light from Young House Love.
I followed their tutorial pretty closely, and it was super easy. However, I did one thing differently and learned a couple of lessons along the way. I thought it might be helpful to share.
First the lessons.
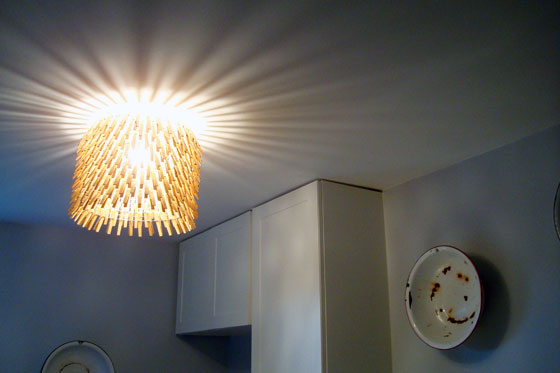
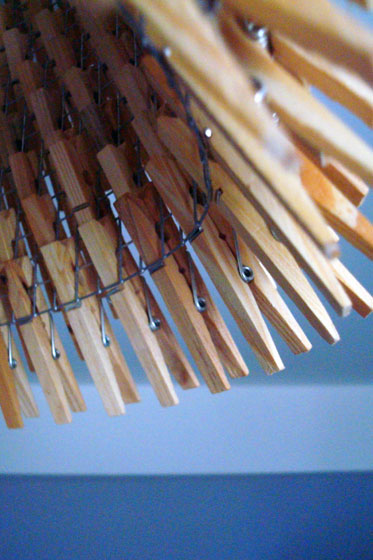
I chose to do the same zigzag pattern that John and Sherry did. In their tutorial, they mention alternating squares. However, what they didn’t say is that they also skipped a row of wire between each row of pins. If you look closely at the pictures in the YHL post, you’ll be able to see the pattern. Skipping every other row gives a comfortable amount of space between the pins so that they lay at a nice angle all the way down the shade. And this makes the great pattern on the ceiling when it’s lit up.
And talking about laying at an angle, in the YHL post, Sherry emphasized that it’s important to have an even number of squares around the top to maintain the pattern all the way around the shade. However, she didn’t talk about how many squares there should be from top to bottom. I nearly trimmed the bottom row of mesh off my shade because I had an empty row of squares. However, if I’d done that, my bottom row of clothespins would have hung straight down while all the other ones sat at an angle. Having an extra row of wire at the bottom holds the pins on the angle. So, while you want an even number around the shade, you want an odd number from top to bottom.
And now for what I did differently.
My light is closer to a flush mount than the YHL pendant. I used an old single socket lamp holder that I had lying around as the actual light. You can’t get more basic than that. Or cheaper. (Or, let’s be honest, uglier).
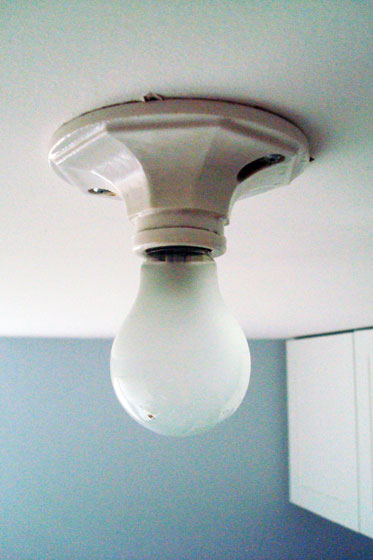
It took me a little while to figure out how to attach the shade to the light. I didn’t love the cup hooks on the YHL fixture. My solution was to run two pieces of wire loosely across the top of the shade. I then looped each wire around the screws in the lamp holder. It’s pretty much invisible, unless you’re standing directly underneath the fixture looking up.
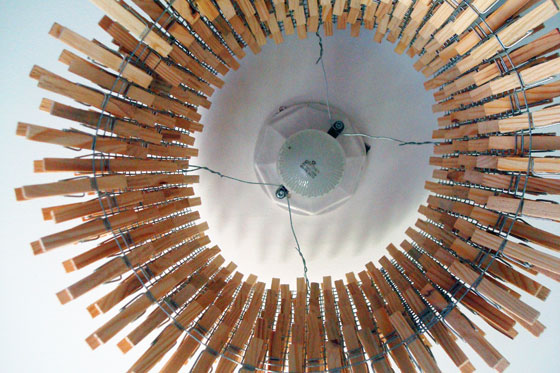
The YHL light used 320 pins. Mine has 288. The final dimensions are 64 squares around and 17 from top to bottom. The overall dimensions of the drum shade are 11 inches high by 14 inches in diameter.
I love that I have a light fixture made out of clothespins in the laundry room. Even better, I love how it looks. Thanks John and Sherry for the inspiration.
Have you ever made anything out of clothespins? Have you made your own light fixture?
Linking up to #DIYLightingChallenge

Love it!!!
I do too. I cannot get over the amount of affection I feel for something made out of clothespins and wire.
So great. I love handmade light fixtures! I can’t get over the whole idea of that. I have a whole pinboard of them. 🙂
I have a price threshold with light fixtures, and I find DIYing them is a good way to manage my budget.
Totally. They are so expensive to buy, but you can make awesome ones for way less!
Interesting rread
Thank you for reading.