Fresh country air is one of the best parts of summer living on the farm. But summer on the farm also means bugs, so screens are an absolute necessity. Sarah in Illinois is here today to share how she fixed her screen door after it had a few too many encounters with a puppy who was enthusiastic to enjoy the country air in person dog.
I don’t think you can live in the country without a screen door. Unfortunately screen doors and young energetic dogs don’t mix. Blitz gets so excited to head outside that he pushes the door open with his big paws.
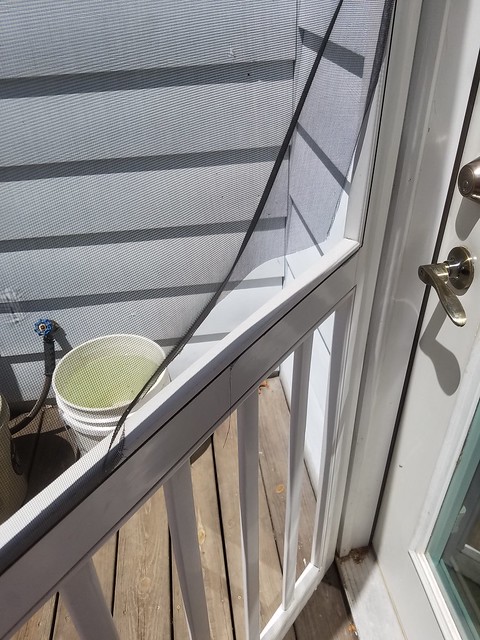
The screen became damaged enough that I decided that it was time to try my hand at re-screening a door.
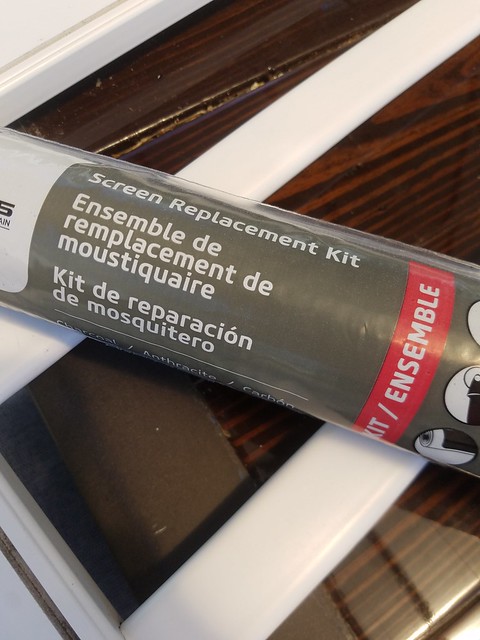
I started with buying a screen replacement kit at our closest home improvement store. It comes with a large roll of screen, a roll of spline and a spline tool. The only other tools that I needed were a utility knife and pick.
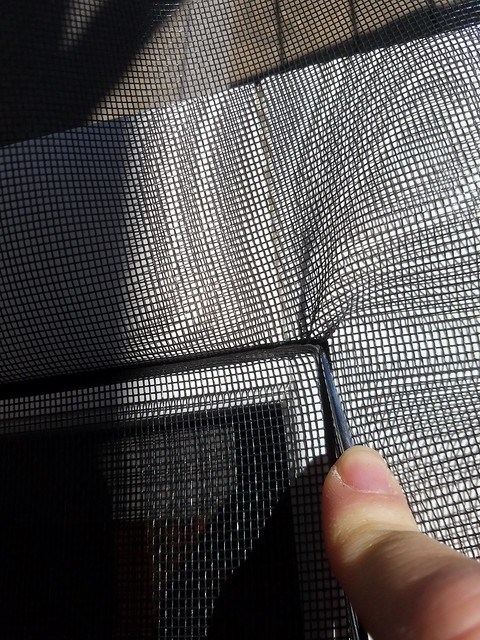
I started by removing the damaged screen and using the pick I pried all of the old spline out of the grooves.

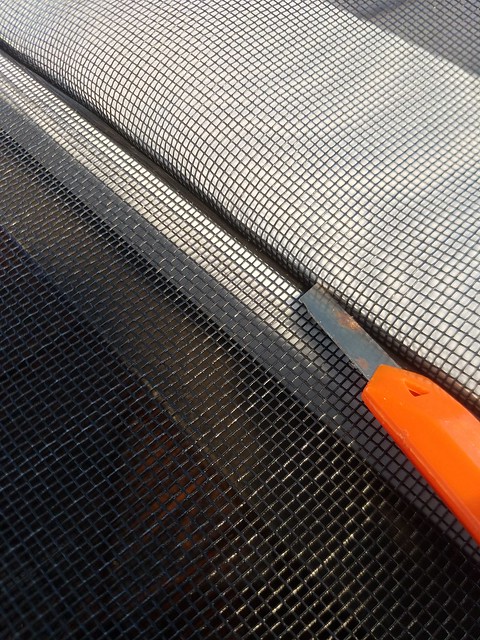
I compared my old spline to the new spline. My only concern was making sure that they were the same diameter. If the newer spline was too large it wouldn’t fit in the groove, if it was too small, it wouldn’t stay in place. Thankfully, it was close enough to work well.

After all of the spline was removed and I cleaned the door, I was ready to start putting the new screen in place.
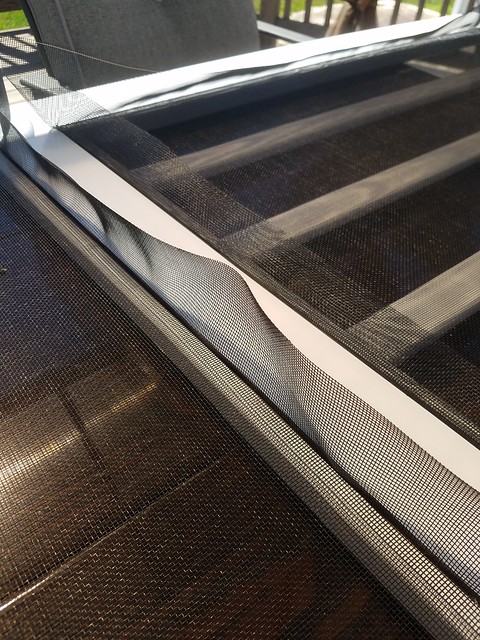
I carefully centered the screen over the opening and laid the spline over the groove. Working with just one side I used the spline tool, which is basically a handle and a roller, and pushed the spline down into the groove. It was a tight fit, but not too tight, just enough that I knew that it wasn’t coming out.

I worked my way around all four sides pulling slightly on the screen to keep it taut.
At the corners I had to use the pick again to squish the spline down tight where the spline tool couldn’t reach.
Once I felt that the screen was in securely and pulled tight, I trimmed the excess screen off with a razor blade.
In the case of our door, there were two separate screen areas so I repeated everything on the second half of the door.
I was then ready to rehang the door.

I was nervous tackling this project because I was worried that it would never look like it did when the door was new. But honestly, this was such an easy project and cost me less than $10 for the kit.

Now we’re ready for this guy’s next adventure.

Well done, Sarah. It looks really professional. We love having the windows open in the summer, but I’m realizing a few of our screens are in need of repairs. We’ve found ourselves chasing moths or even the occasional mosquito in the house. In the past, I’ve patched a hole. Rescreening sounds pretty easy and straightforward. Plus I’m ensured of not missing any holes.

Good job! We have some windows in need of screens here, but I don’t know how to create the frames that the screens are supposed to go in.
Hopefully your new screens will stand up to Blitz’s excitement!
Ha! Thanks! He gets pretty rambunctious.
In my last house someone had improvised screens by making a wood frame that fit the window and stretching screen over it and stapling it. It wasn’t pretty at all but it worked I guess.
That’s exactly what we’ve been thinking of doing.