When I first asked everyone’s advice on what we should do in our mudroom makeover, the most frequent suggestion was to pull off the closet doors and make built-in storage with a bench, cubbies, shelves and hooks. While I love that look, I knew I needed places to put things more than I needed to be able to sit down. The biggest improvement I could make to how the mudroom functioned was to build more storage in the closet.
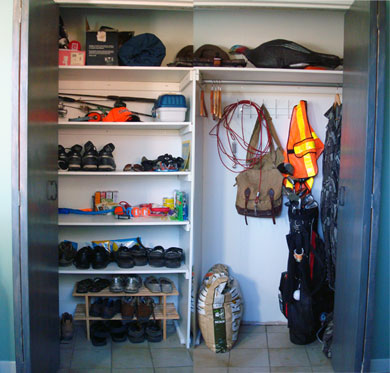
As you saw in the reveal, I split the closet in half, putting floor to ceiling shelves at one end and a single shelf over top of a hanging rod at the other.
To build these simple shelves, I went with my go-to shelving material: white melamine. It may not be the fanciest, but this stuff is easy. It comes in 12-inch or 16-inch widths (I chose the 16) and 8 foot lengths. One long edge is pre-finished. There is no painting (although you can), no sanding, no special tools.
To support the shelves, I screwed 1x2s (which I did paint) into the wall studs with 3 inch screws. The shelves simply sit on top.

For the top shelf, I used 1×3 as I wanted a wider board to attach the rod.

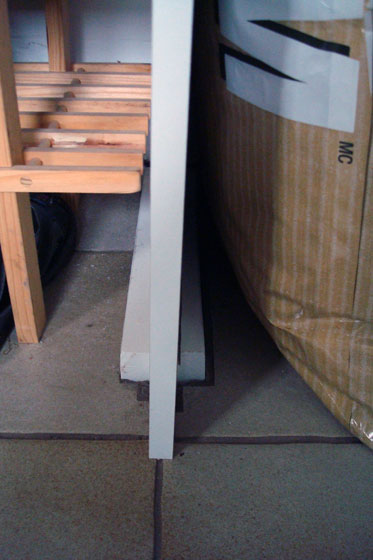
The divider in the middle is a piece of melamine run vertically. There was a cut-out in the ceramic tile floor for some long-ago shelving system, so I filled that with a 2×4 and cut a channel to hold the melamine in place.
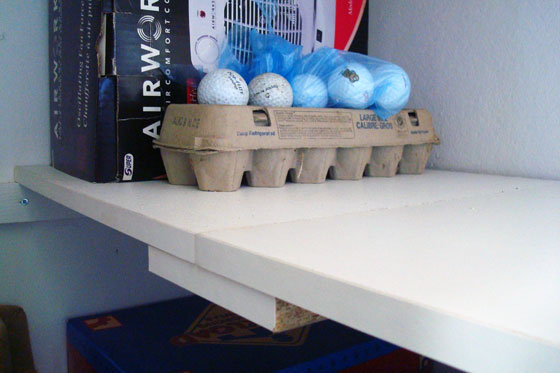
The melamine comes in 8 foot lengths, so for my 9 1/2 foot closet, I had to splice a few of the shelves. My technique was to tack a piece of melamine underneath. It’s perhaps not the most attractive solution, but tucked inside the mudroom closet I wasn’t super concerned about appearances. It’s sturdy and will easily hold a golf ball collection or anything else you want to put on it.
The sturdiness of melamine is its best feature in my opinion. As long as it’s properly supported, it can hold a decent amount of weight and won’t sag. To prevent any droopiness, it’s important to put the 1×2 supports along all three sides of the shelf, not just at either end.
I know there are much more attractive storage systems out there, but, for a behind closed doors solution, this simple set up of melamine and 1x2s works for us. Even better, it’s completely custom and accommodates exactly what we need.
How do you handle closet organization? Has anyone else built a custom storage system? Any other melamine fans out there?

This is one of the elements of your blog that I love. Thank you for explaining these projects in a clear and sensible way. You are empowering other women with your confidence, and skill.
I second that!! Yay for simplicity, functionality and frugality over appearances-at-all-costs thinking. Not that the closet doesn’t look absolutely fine, it totally does. And you haven’t had to remortgage the house to put it in, or hire a special contractor/cabinet builder. Nice job and awesome explanation.
Thanks so much for these comments. This is a big boost. I actually debated whether to write this post because it seemed too basic and wasn’t a true how-to. I’m glad to hear you found it useful.
It looks really great. I really have no skills when it comes to that type of stuff. My mother in law is very talented though and always helps us out with these types of projects. My husband and I have shelves in our bedroom closet for our clothes rather than a dresser. It takes up less space and encourages us not to hold onto tons of clothes we never wear.
I like the idea of keeping clothes in the closet rather than adding more furniture to my bedroom. It’s all about finding what storage solutions work for you.
Hi Julia,
We’ve been following your mud-room saga. The closet shelves are cool, and simple. We live in a “historic” house and can’t make permanent changes to it, so when we needed shelving in one closet, we just “inset” four 2 x 4s vertically in the corners, without fastening them to the walls, and nailed 2 x 4 cross-pieces to them, then put in shelves exactly as wide as the space between the verticals, so it all holds together by itself.
Jan Elizabeth was asking us about the purpose our “Miss Piggy” Winter Stick Table – as we told her, it’s meant to be a mud room table, with its unfinished solid teak top. As I’m sure you know, teak is a very oily wood, which is why it’s used so much on boats. It can take salt water, grime, rain, snow, and mud, and be happy as can be!
So, for your mud room, think teak!
Regards,
Dave & Sharynne
That sounds like a great solution to your shelving requirements. And thanks for the lessons about teak. It didn`t know it was naturally oily.