When I reorganized the tiny nook in my office, I knew that I had to add some kind of storage. A dresser was the ideal solution. Drawers would allow me to tuck things away, and the surface would give me a spot to write notes and set my purse and keys.
So I had some pretty specific requirements: drawers, about counter top height, oh, and it had to fit in the nook, which was 16 inches deep by 24 inches wide. Of course, it also had to be cheap.
Well, I had no luck finding a piece of furniture that met those standards. However, I soon realized that nightstands often have drawers and are usually small enough to fit this little space. While nightstands are much shorter than countertop height, they usually come in pairs. Couldn’t I just stack them one on top of another?
It turns out, yep, I can.
Here’s what I started with. Two little nightstands I found at the Salvation Army thrift store for $12 each.
First step of any furniture makeover: remove the drawers and the hardware. It turned out that one of the drawers contained a plastic hardhat, so I got distracted by that for a little while. Consider this your PSA to always wear safety equipment (hardhat, safety glasses and ear protection) while DIYing.
Anyways, back to work. I started taking apart the dressers. I popped the backs off of each of them. Then I took the top off one and the bottom off another. The nightstands came apart really easily. The backs were just stapled in place. The top was attached to corner blocks that were screwed in place. The decorative trim at the bottom was tacked with some little nails. I needed a few different tools, and I was thankful for my stubby screwdrivers that fit in some of the tighter nooks and crannies, but dismantling these pieces of furniture was not a taxing task.
Once they were apart, it was time for something that was a little more taxing: cutting. The nightstand that was going on the bottom had to be trimmed along the top, and the one that was becoming the top half had to be cut down along the bottom. Clear? I measured the spacing between the drawers to figure out exactly where to make my cut and marked the line with painters tape.
Four quick slices with my circular saw, and the dressers were the right height. I set them on top of each other and was super excited. It was looking like I envisioned.
Now I just had to figure out how to actually attach the two halves. When I’d taken apart the dressers, I’d removed some side braces. I was able to reuse those pieces on the inside of the dresser. I ran them half on the bottom and half on the top and screwed right through the side into the brace. My dresser was now all one piece and it was solid, but it was ugly. No amount of wood filler was going to fix that joint.
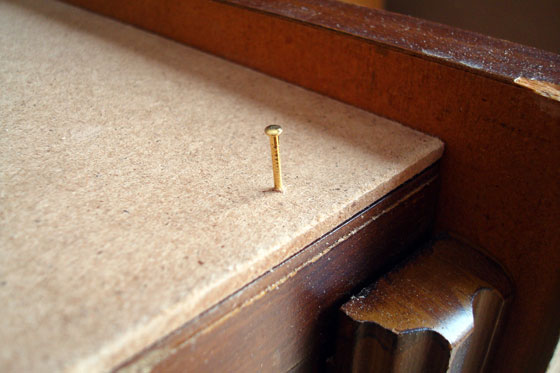
The solution was overlaying a very thin panel along the whole side. I had 1/8 inch MDF, which I cut down to the exact dimensions of the side of the dresser. I tacked it in place with small finishing nails, and it covered up the gap completely.
A bit of wood filler camouflaged the joint on the front of the dresser. While I had the wood filler out, I filled the holes on the drawers where the original pulls had been and a few other spots on the dresser where the veneer was chipped.
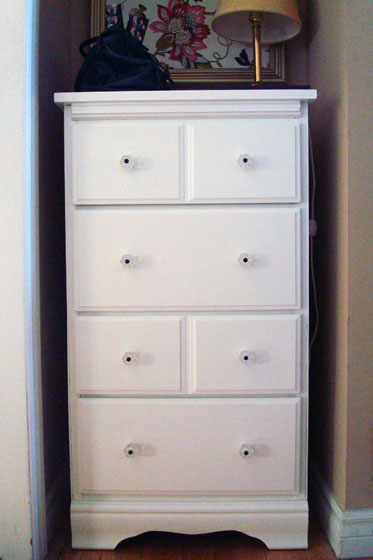
After a light sanding all over, I primed the dresser and drawers, and then they all got a coat of creamy white paint–Cloud White in Benjamin Moore’s Advance formula. This was my first time using Advance, and I really like it. The finish is nice and smooth (I used a foam roller), it has none of the stickiness that you sometimes get with latex after it dries, and it has been very durable. In the past, I’ve used heavy duty oil paints on furniture or cabinets. The clean up is a pain and the stench is noxious. None of that is an issue with Advance, and in my opinion it’s held up just as well as an oil finish.
The finishing touch for the dresser was new crystal (plastic) nobs. This is one area where I got a bit neurotic. The nobs that I chose had a metal post that went through the middle. The posts were brushed nickel. I’m not a fan. Plus, I already had oil-rubbed bronze and gold/brass elsewhere in the office. I’m not good with mixing metals, so I spray painted all of the metal pins with oil-rubbed bronze spray paint. It was easy, but probably not entirely necessary.
As you saw last week, the dresser fits perfectly in the nook. It ended up being the exact right height, and I’m loving having all of the drawers to keep me organized.
What second hand furniture have you made over? Have you ever made two pieces into one? How do you handle hard-to-furnish spots with specific dimensions?


Totally brilliant. Love the nook. I have the same fabric as livingroom drapes.
This fabric would look awesome as drapes.
Wow! I would have never guessed that that was two end tables! You did a great job! I LOVE making over furniture. My BF would rather buy new, he sometimes forgets that money doesn’t grow on trees!
Furniture makeovers come with the great satisfaction of saying, “I made that, and it cost next to no money!”
I don’t know if this will work but I am going to try to link to my photos of the dresser that I redid last month. I am very happy with the results!
https://plus.google.com/photos/101815735074207123913/albums/6012526571600072705#photos/101815735074207123913/albums/6012526571600072705
It worked! I love the dark wood top with the white base. I actually considered doing it for this dresser, but the top wasn’t in good enough condition.
Your dresser looks awesome, Sarah! 🙂
Really fantastic. Your best work yet.
//blush\\ It was surprisingly easy. I highly recommend this technique.
There is nothing you can’t do!!!! This is amazing, and I never would have guessed you put together two nightstands for this! So good. Love the knobs, too!
The best type of makeover is when it looks like it was always meant to be this way… I know a certain kitchen hutch that gets the same reaction. 🙂
Genius!
Thank you!
I can not believe you made this!!!! When I saw it in person I loved it and just assumed you bought it this way. You are soo impressive.
Thank you very much! I’m glad you got the chance to see it (and the rest of the farm) in person finally.
This came out great! That size and shape of a dresser would have cost a pretty penny, I bet. What a good idea!
It’s funny how smaller things can sometimes be more expensive.