It’s time for the first official update on the fireplace project. You got little tidbits last week, but today you get details and photos.
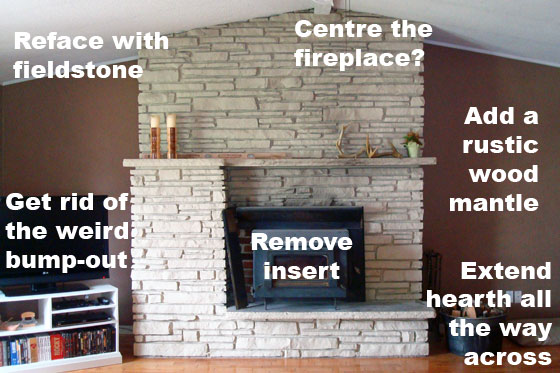
For a reminder, here’s what the fireplace looked like originally.

And here was the plan.
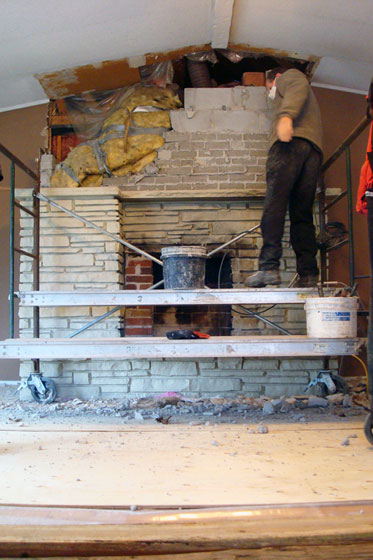
To make this plan happen, we had to start over.
There was no liner or flue in the chimney, so if I wanted a true–and safe–wood burning open hearth, we had to build a proper chimney. That meant starting on the roof and taking everything down.

Wiley was very helpful during demo. I pulled him up to the edge of the roof and raised the front-end loader so that I could throw the bricks into the bucket and then drive them around to our rock pile.

Of course, even tractors get tired. All was going well until Wiley decided that one load was too heavy. No tractors or drivers were harmed, but it was definitely an anxious moment.

Once we made it inside, it was more of the same: jackhammer, rubble and dust… lots and lots of dust. I’ve concluded that masonry dust is the worst kind of dust. Worse even than drywall dust. My hair has never been as stiff as it was on Monday night (no picture of that, sorry).
It turns out there’s a reason for everything. The fireplace is where it is and is the size it is because it’s a chase for pretty much everything you could think of. There were two chimneys to vent the old furnaces that we used to have. There was the fireplace insert and its wonky chimney. And then on the far left, there was a heating duct and cold air return for the pool room.
The bump-out that I hated so much was actually there for a reason. It wasn’t just decorative. It was concealing the heat run to the pool room. Since we’re not using the pool room yet and don’t need to heat it, we just capped off the duct. When it comes time to redo the pool room, we’ll run heat some other way.

After demo came rebuilding, which started a bit slowly. The wall behind the fireplace had to be insulated and then drywalled for fire protection, the duct had to be capped, the hearth had to be expanded, the base had to be laid. But by the end of the week some really good progress had been made. This fireplace is huge, so it takes a lot of time to put it all together.

Here’s how the fireplace progressed day by day.

We made some really good progress on the mantel yesterday, and we should be able to mount it by the middle of the week likely. I’m not sure that we’ll have everything finished this week, but we’re still on track to have fires by Christmas.

What a project! That sure is a big one. I am looking forward to seeing the end result.
The scale is a bit alarming, actually. It’s a huge concrete monolith in my living room!
Really interesting, Julia. (‘Especially love the photos of the tipping bobcat!). Thanks for sharing.
Thanks for commenting Ruth. I had to get a photo of the wheelie, but I can’t say I loved the experience!
Wow, what a huge job. What will the finish be after the cinder block? I think it’s going to be amazing when it’s done – it will transform the whole space!
The cinder block are going to be faced with a stone veneer that looks like field stone. It’s definitely going to be the focal point in the room.
Lovely! And very fitting for a farmhouse. 🙂
That’s the idea!