
We’ve lived with our homemade wood countertop for more than a year now. To see my report on how it has worked for us, click here.
See the update after four years with our counters here.
Since we’d splurged on having our new kitchen island professionally made, I had to balance the scales and DIY the wood countertop.
There are some tutorials online and lots of inspiring photos, but in the end we pretty much winged it. Here’s what we did.
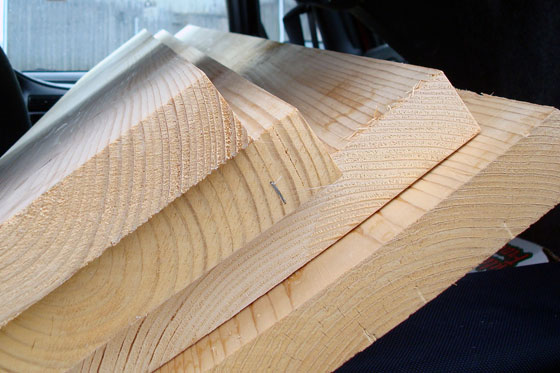
For our island’s 80 inch by 42 inch top, I decided that four 2x12s were the way to go. I chose spruce–the cheapest option at my local lumber mill. My first tip is to be very careful in selecting your lumber. I went through nearly the whole pile looking for the straightest, cleanest boards possible. Watch for chips, knots, bends and warps.
Once you’ve selected your boards, the first step is to trim them so that their edges are square rather than rounded. This will help you to get a smooth even surface when you join your boards together. I took a half inch off each side of my boards–or the staff at the lumber mill did for me.
We let our boards acclimatize inside the house for a day or so–especially important as the lumber had spent the winter outside and was completely frozen. We could hear them snapping as they adjusted to the temperature.
Once we were ready to start constructing the countertop, we laid out our boards and decided the best configuration.
Making sure we kept everything in order, we marked the backside of the boards for screw holes.
We spaced the screws 8 inches apart.
Then, I set up my newest toy and drilled holes using my Kreg Jig–yup, I got one!

I was pretty confident that the Kreg Jig would give us really tight joints, but we glued each board as well with carpenter’s glue just to make certain. Be careful not to use too much glue, as you don’t want drips or seepage on the good side of your top.

Holes drilled and glue spread, it was time to put it all together. Matt held the boards even and kept the joints tight while I went along with the drill and set each screw.
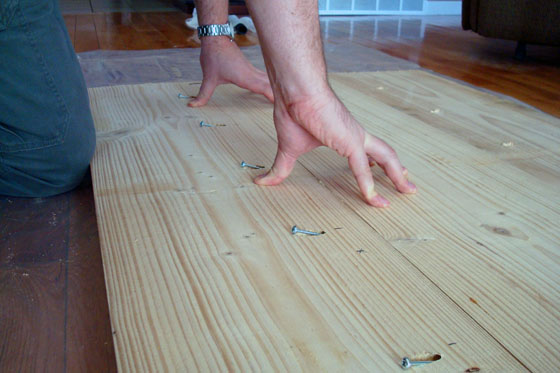
Soon enough, we had a large slab of wood. Don’t be confused by the stamps and the holes from the Kreg Jig. This is the underside.

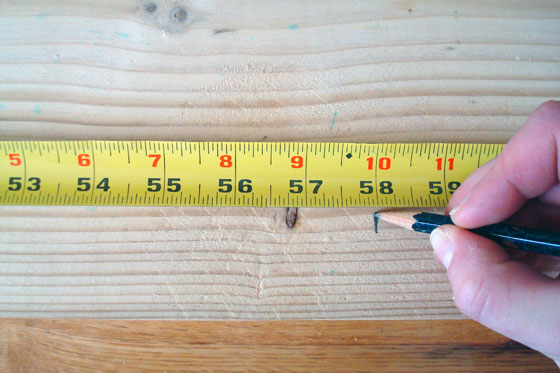
We took our incredibly heavy countertop and flipped it over. I trimmed one end with my circular saw to get a nice flush edge. I left the other end ragged, because I wanted to wait until we had the island, just to make sure I got the length exactly right.
While the joints were really tight and pretty smooth, I still filled everything–every joint, every knot, every divot–with wood filler just to even out any imperfections.
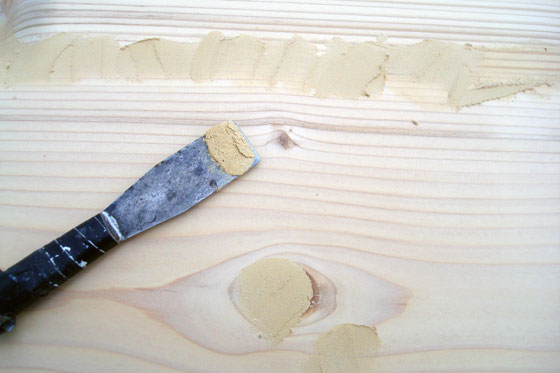
Then, it was on to sanding stage. Using my little orbital sander and lots and lots of sanding pads, I went over the countertop time and time again. I started with a 60 grit and slowly worked my way up to finer and finer grits (80, 120, 240 and 400).
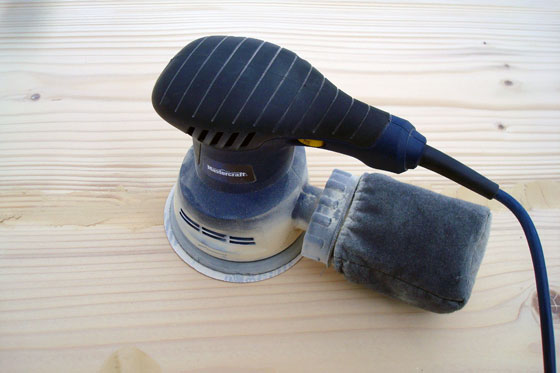
Despite choosing a very cheap grade of lumber, it came up beautifully smooth and even with the sanding. Take your time with your sander and don’t skimp on this step.
We did have one issue arise with our DIY wood countertop. Once the boards were all together and the top spent more time acclimatizing inside the house, it started to warp a bit. I attribute this to the frozen state of our lumber before we started construction. By the time the island was installed and we set the counter on top, we had a pretty good wave going on.

Aaaah! A wonky wavy countertop was not at all what I envisioned. Our cabinet maker diplomatically limited his comments to “I dunno about that countertop.” My Dad suggested shimming under the one edge, where the gap between the underside of the countertop and the top of the cabinet was about 1/4 inch.
To everyone’s surprise–including mine–trimming the length of the countertop helped immensely. I don’t know whether most of the warp was happening at one end of the boards, but it was laying nearly flat after we cut off the extra length. Screwing the countertop into place on the cabinets leveled it out a bit more–even though we were very gentle and didn’t overly tighten the screws for fear of opening the joints between the boards.
My enthusiasm for my DIY wood countertop was rekindled. However, it was basically a large hunk of raw wood sitting in the middle of our kitchen–an attractive hunk of wood, but not the most useable surface.
The next step was to finish and waterproof the wood–which I’ll talk about on Wednesday. Stay tuned.
See my review on how our wood countertop held up over its first year.

Selecting wood——-taking a long time——rejecting lots—-
You are your grandfathers’s and your father’s true begat.
I saw Grandpa smiling as I read it.
Once again. Well done!!
Auntie A
Thanks, Auntie Anne. I learned from the best.
It’s gorgeous! I thought you had to get special “butcher block wood” (don’t laugh, I’m still pretty new at this) to make countertops. Maybe I’ll get my rolling chest of drawers done sooner than I thought!
I’m sure it’s not official butcher block countertop, but it’s a nice wooden countertop and works well for us. The one thing I will say is that wood is definitely soft and dents easily, so you have to be prepared to live with “character” if you choose wood counters.
I am definitely okay with character.
Was the wood warp to begin with… I would have run it through a joiner first. To ensure it is prefect to begin with or mill it to ensure all surface are prefect
But either way spruce is softwood.. so it will usually warp if it sit like that… To avoid warping I would try to run a router bit and cut a full 1/4 slot and put in a metal or thick aluminum bar on it’s short edge or even a concrete rebar to help prevent it from warping
Thanks for the tips, Eric. Fortunately, the countertop leveled out pretty well when we screwed it to the cabinets, and it’s not warped more since then.
I want a book on building wood slab counter-tops.
I’m sure there are some out there, but I don’t know one to suggest. I found the online tutorials were most helpful for me.
Excellent project with equal results. Thanks for introducing me to Waterlox. Tung-oil is an excellent product and adding resin only improves. To minimize warping use narrower boards. Also, try alternating the direction of the end grain from board to board.
I’ve heard good things about tung oil. I believe it’s one of the ingredients in Waterlox too.
I think the tradeoff of narrower boards is more joints in between them. I feel like the joints are the weakest points. By using the larger boards, we have just three joints.
Next time use a biscuit jointer. Then you just slide them in 1 at a time into place. Also make sure you shave about 1/4 off on sides to make them completely flat which helps butt them up to each other perfectly. When you join them the way you did for something that large they hardly ever stay flat. Also the up and down temperature in your house over time can some times cause them to warp. Pine wood is good for that.
Thanks for the tip. I did the 1/4 off the sides, but not the biscuits (obviously). Eight years in, and the counter is still working well for us, so I can’t complain.
Pingback: 17 plans de comptoir en bois faits maison faciles - Sampic Apparel
Pingback: 25 DIY Wood Countertop Ideas