More than two years ago, I wrote a tutorial on how to apply preglued veneer edging. Veneer edging covers up the raw edges of plywood and makes your piece of furniture or whatever it is you’ve made look like one solid piece of wood.
When I made the headboard for the master bedroom, I had a scenario that I’ve never dealt with before: applying the veneer to a curved edge. So today I’m posting an addition to my previous tutorial.
The same tools, techniques and principles still apply (mostly):
- Cut a piece of veneer slightly longer than the section of plywood that you’re covering.
- Line it up along one edge and apply heat and steady pressure to melt the glue.
- Firmly press the veneer down with a wood block (it will be too hot to touch with your hands) until the glue sets.
- Trim the overhang with a file.
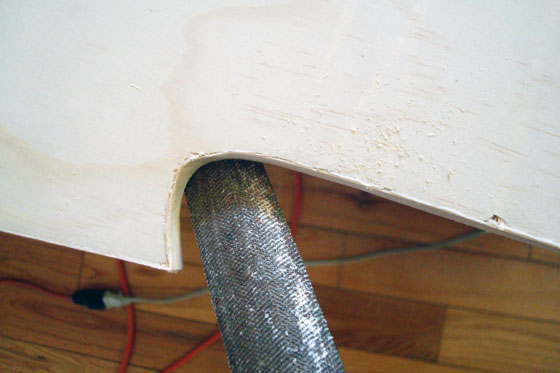
For a convex edge (think the outside of a U), I didn’t have to do anything special. For a concave edge (think the inside of the U), I had to make a few more adjustments. On the more gentle curve, I found the very tip of my iron worked to soften the glue. I just had to work slowly, about an inch at a time.

Pressing the veneer into place as the glue dries is really, really important. On a curve, it’s particularly easy for the veneer to pull away from the plywood. A narrow pressing block or your fingers (protected with a glove or a rag)–along with patience–are essential.
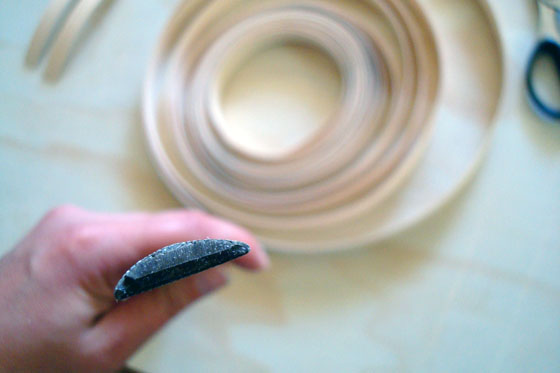
For the tighter curves, I discovered why I still have a curling iron in my bathroom cupboard. The barrel was just the right size to fit into the curve at the top of the headboard. Once the adhesive was soft, I firmly pressed the veneer onto the plywood and held it in place until the glue set.

To trim the veneer, I always rely on a file. For the curved edges, I used the curved side of the file.
A couple of swipes over the edge with fine sandpaper further smoothed veneer, and then it was ready for staining along with the rest of the headboard.
(And yes, the veneer takes stain and urethane and paint just like real wood).
Here’s the final product–in its impossible to photograph location in front of the window.

Anyone else have any tips for working with veneer edging? Who else has an old curling iron kicking around? Have you ever used beauty tools for DIY?

You “discovered why you still have a curling iron” – lol! I am in that boat, too. This veneer information is great, I will be trying it at some point.
I have used my blow dryer for crayon-melting. Does that count? 🙂
That totally counts! Matt’s used our hairdryer to warm up the tractor on some of the really cold winter days!