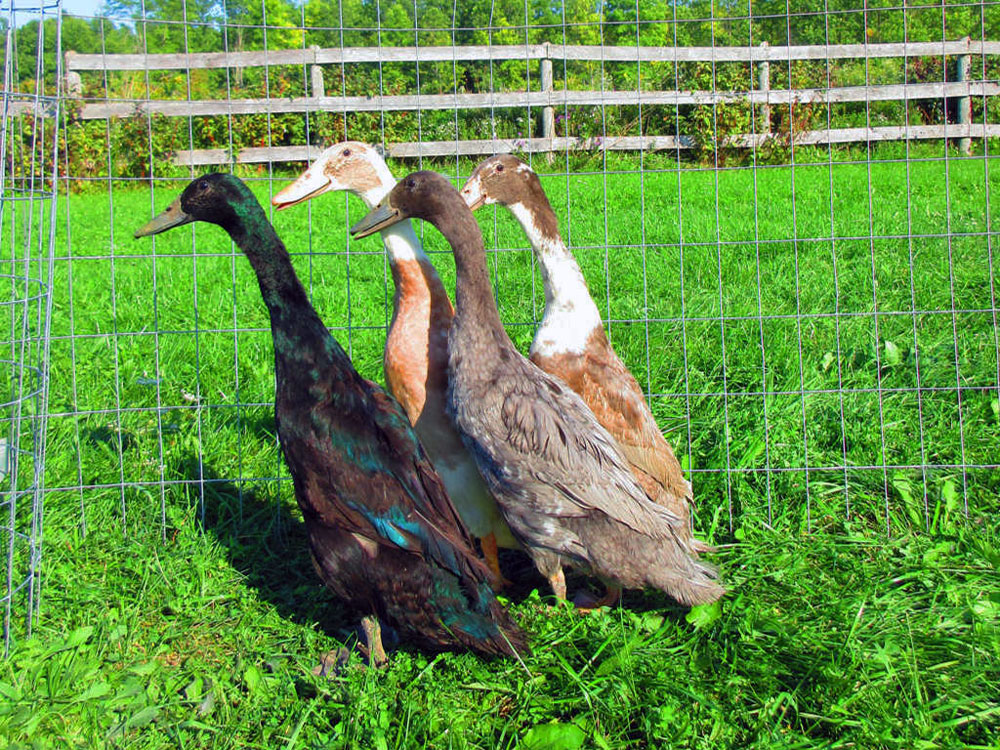
I tackled the biggest projects we’ve done in a while here at the farm–maybe ever when I think of the birds who are now a fixture of the farm.
When I laid out my home goals a year ago, I was very excited by what was ahead. As I look back, I’m very excited and proud of what I accomplished.
Here’s my look back at Home Goals 2025.
Coop
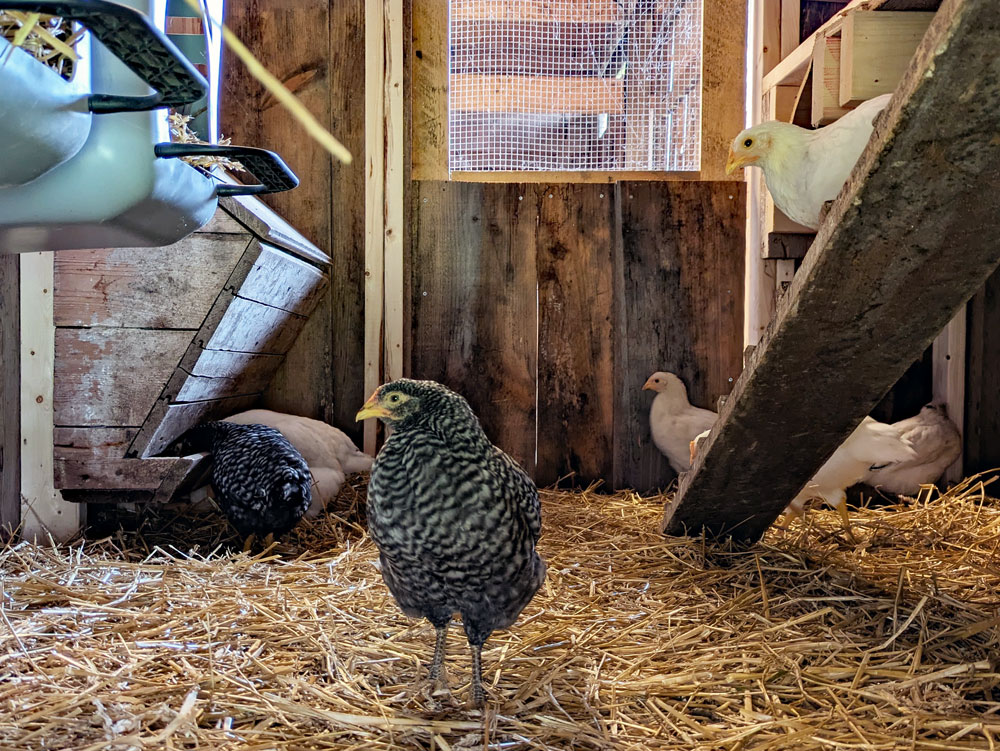
The coop was a big construction project and it turned out so well. The barn, pens, storage, and runs all work very well and have kept our birds comfortable and safe. Adding birds to our family has been a very special, fun experience–even the turkeys.
While it’s not directly for the coop, there was another big barn task I completed last year: eavestrough. I’ll be sharing more details about this project in an upcoming post.
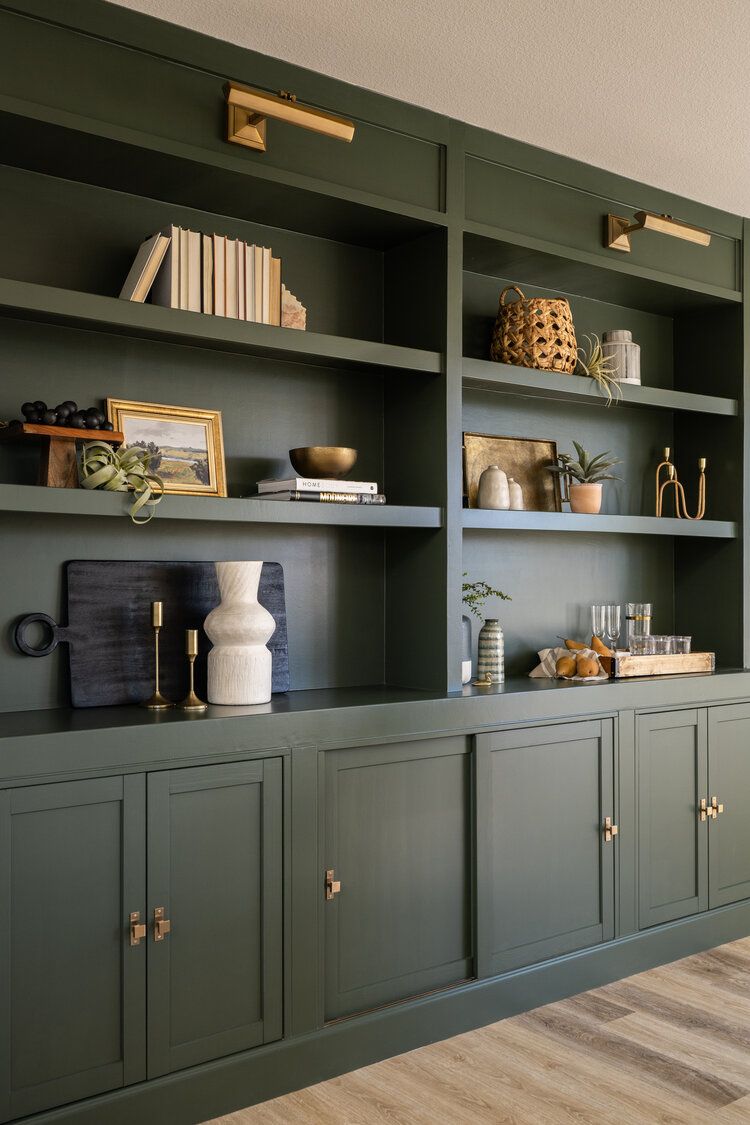
My office
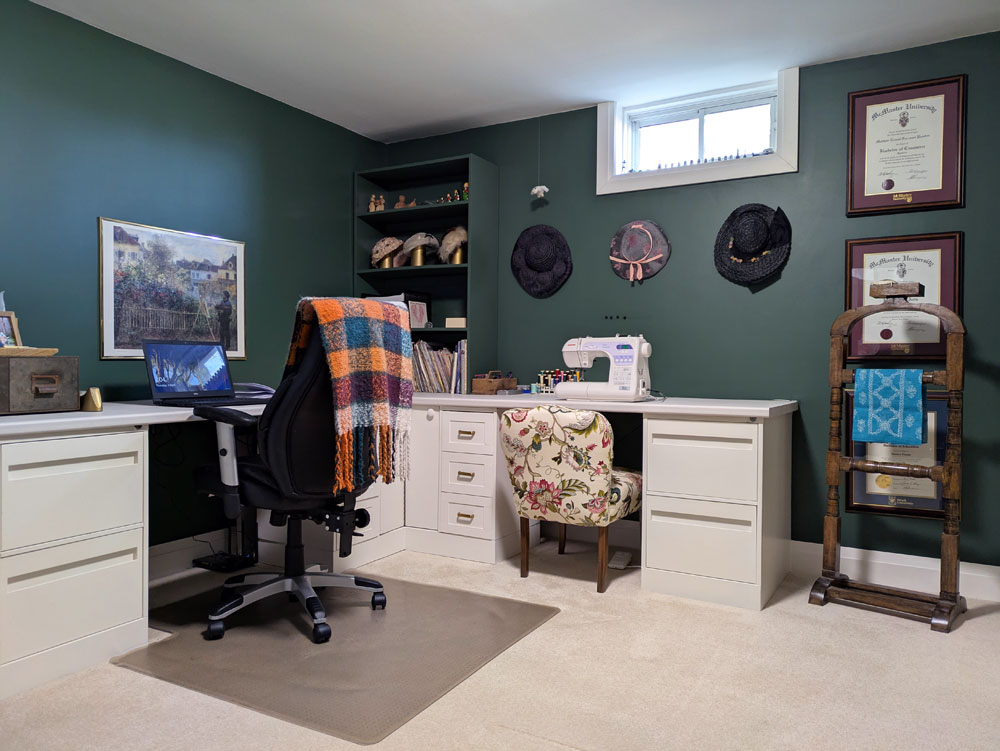
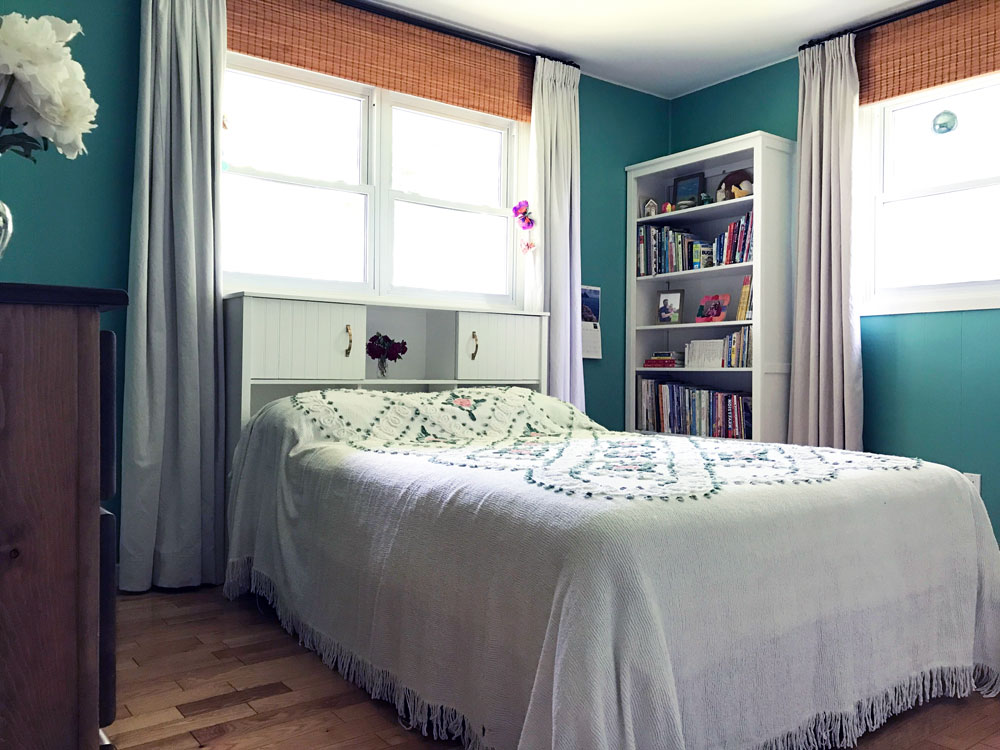
My office was the first project of the year. It is a comfortable, personal room. Having this space for working, writing, crafting, sewing, whatevering has been so nice.
It’s also helped me to be more focused with my worktime. I still bring my computer to the couch occasionally, but having the desk, a place for my laptop and a dedicated spot for work has helped me leave work on my desk a bit more.
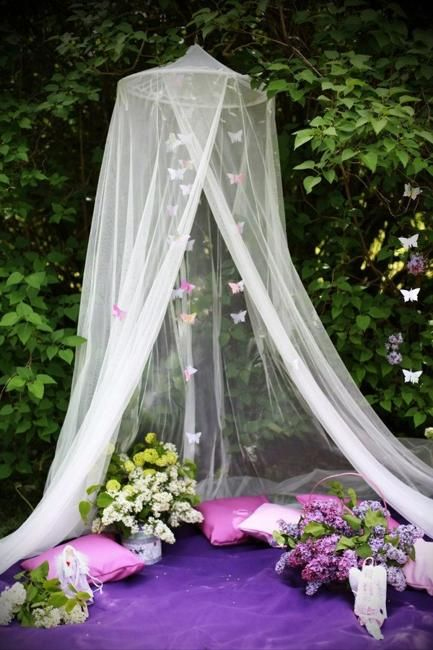
Ellie’s playroom
Ellie’s playroom makeover did not happen. As fall arrived, I really wanted to tackle it, but the reality of everything I was already doing and the number of hours in a day meant that another project would have been too much. I’m glad I decided to postpone the makeover, and I’m eager to start this room this year.
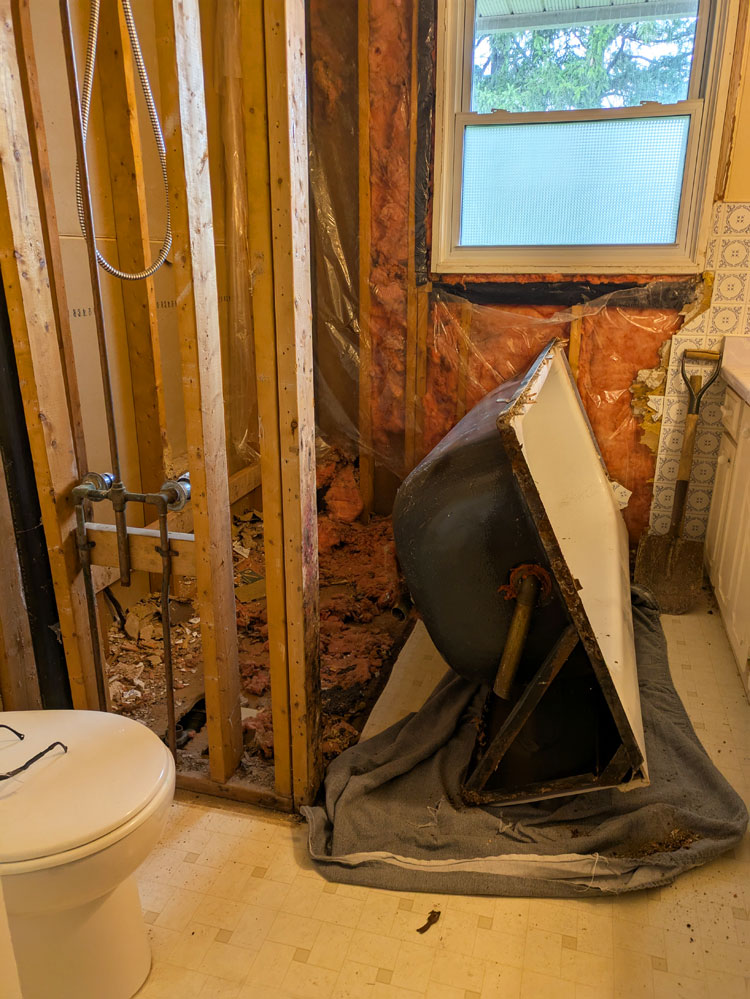
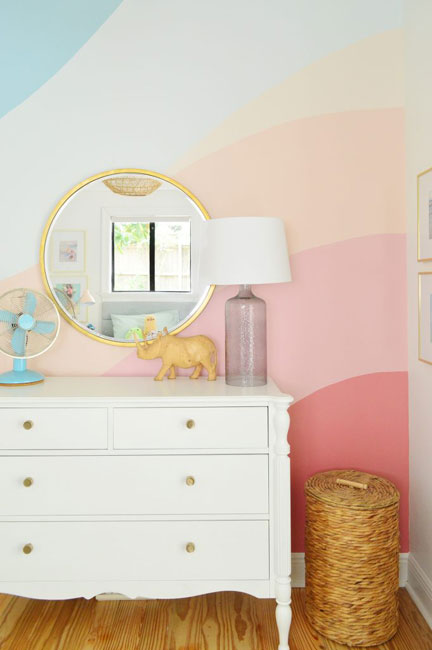
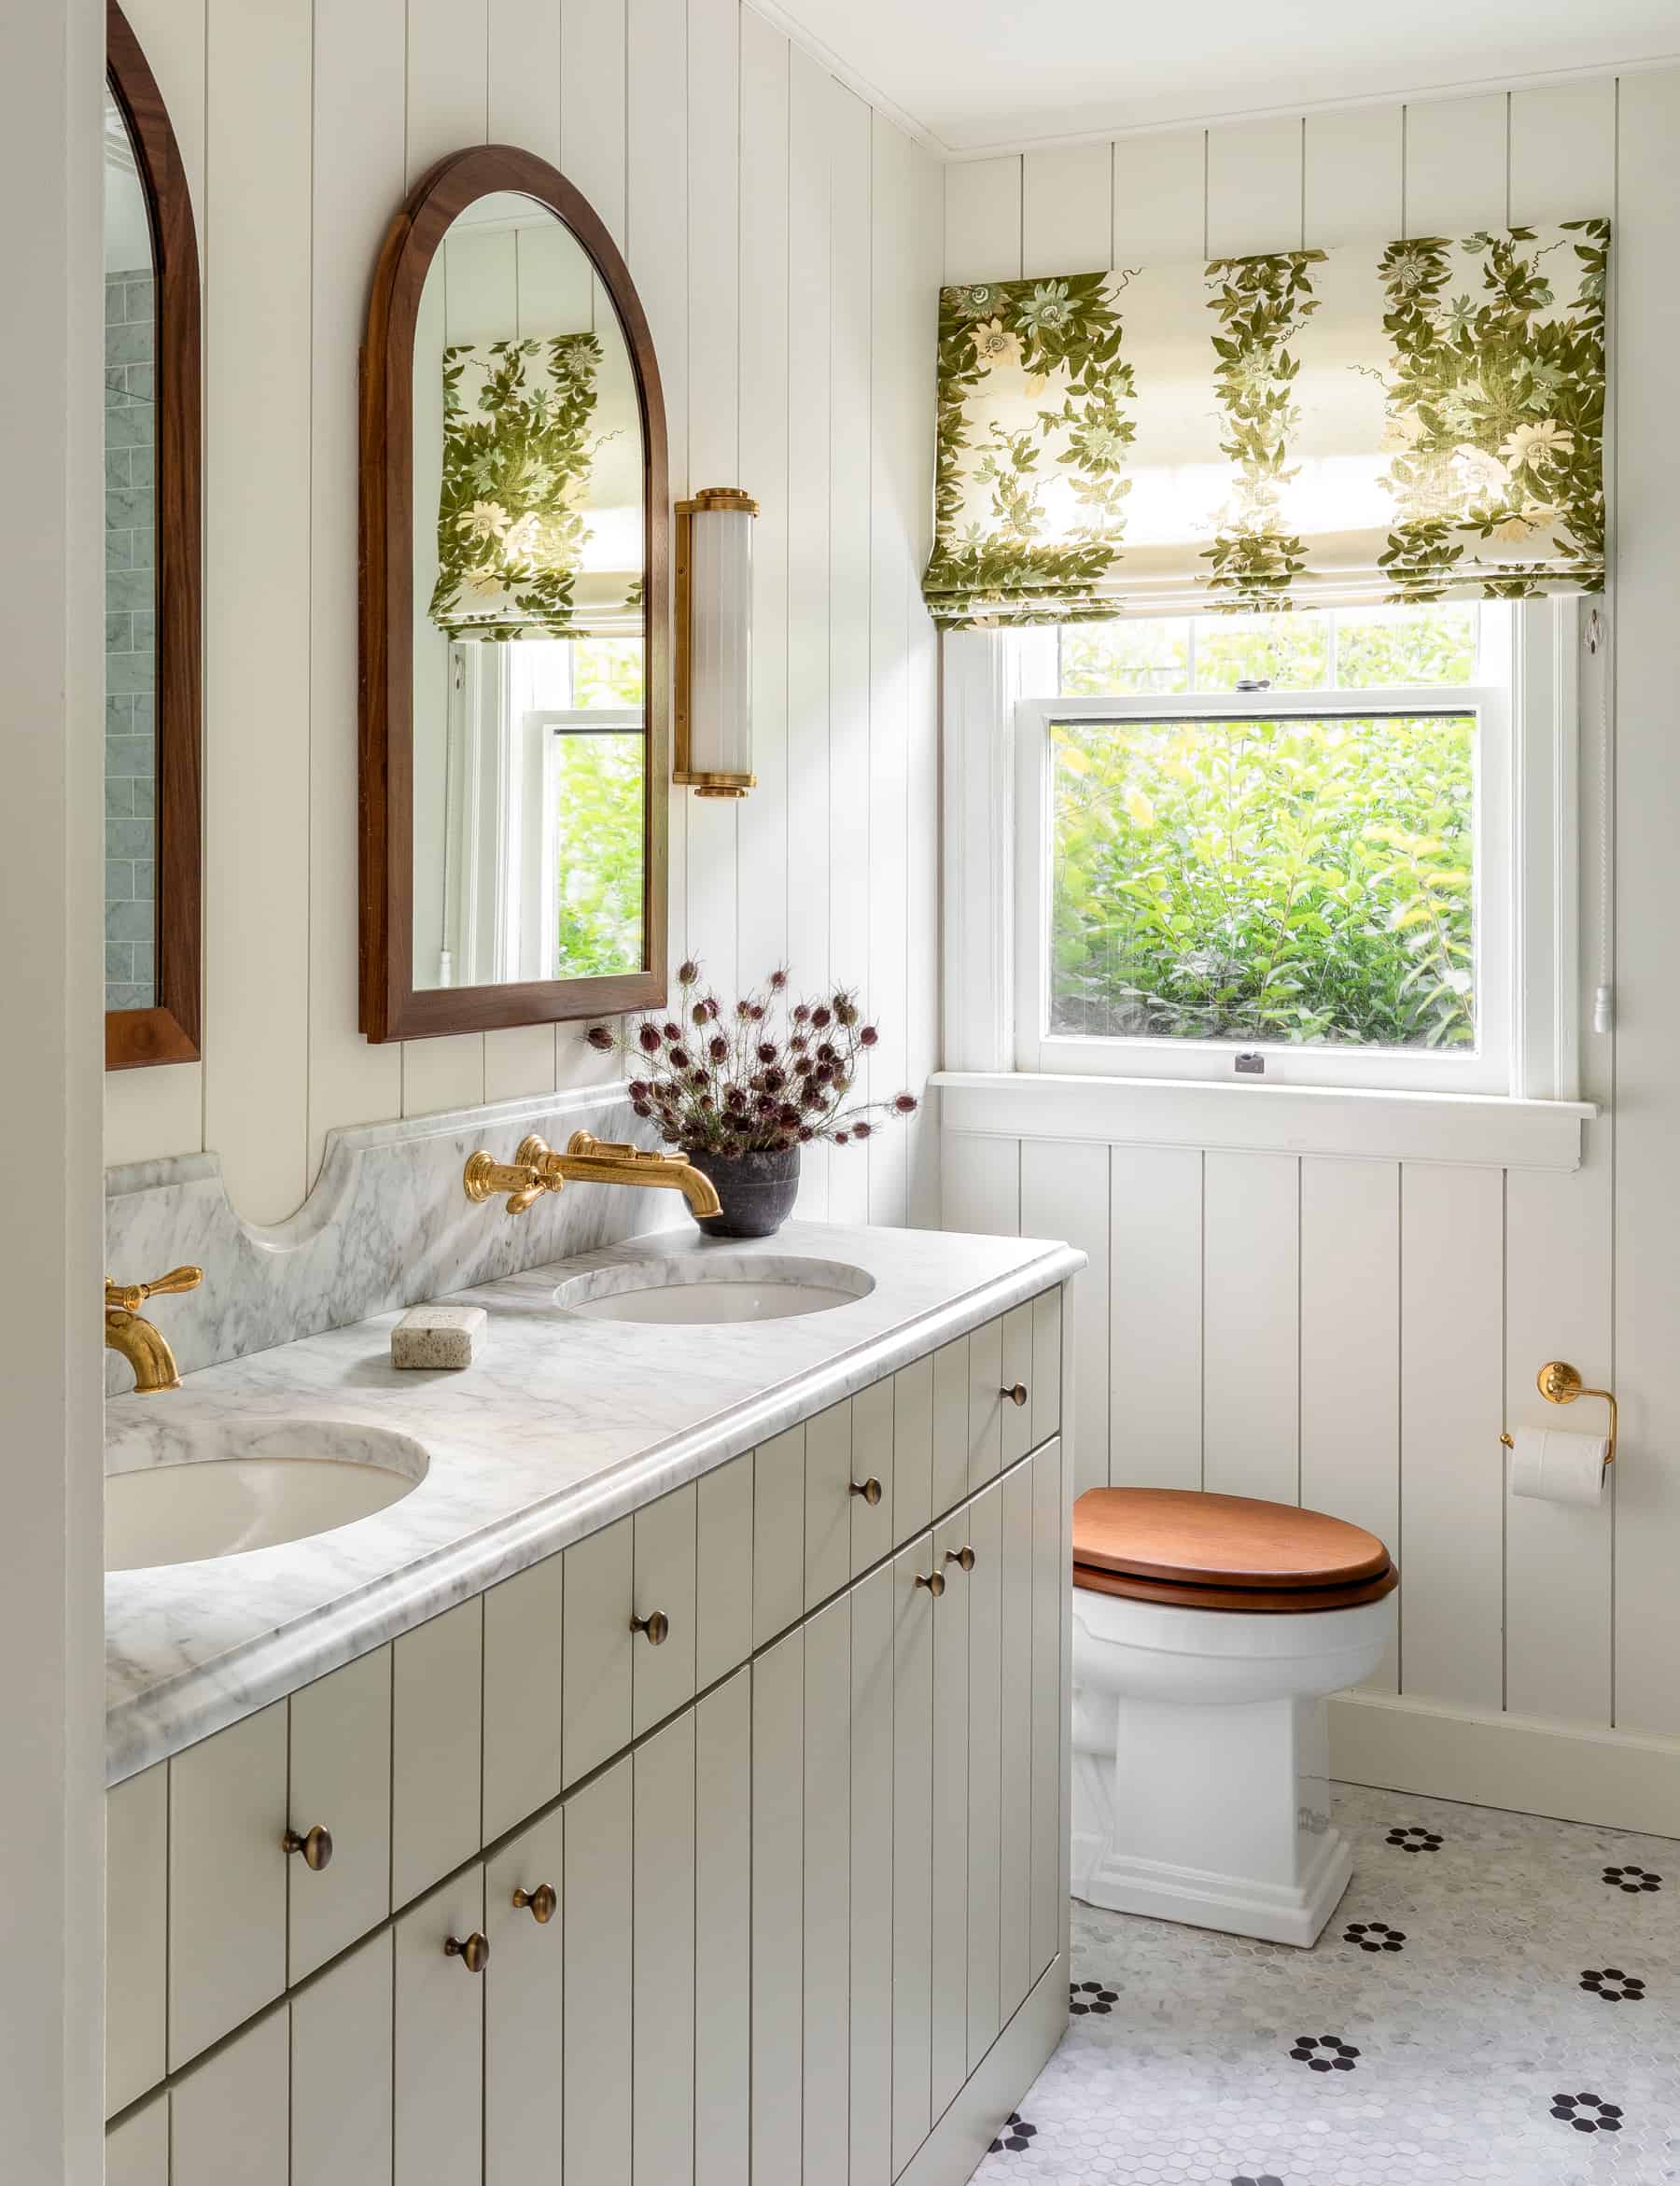
Main bathroom
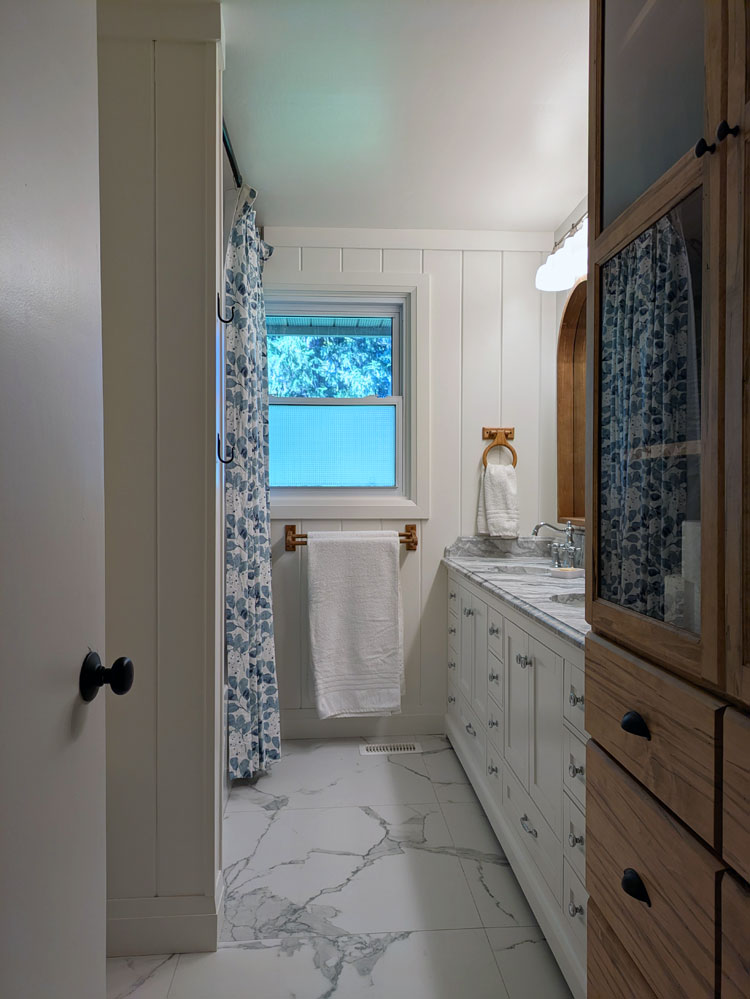
The novelty of our renovated bathroom has not worn off. Every day I am grateful for how beautiful it is, how well it works, that I did so much of the work myself and that after living here for 13 years it is finally done.
Checking off three out of four home goals feels pretty good, especially since these were big projects for us. And, I need to say it one more time, they all turned out so well. I love the changes we’ve made to the house and the farm, and I’m really proud of what we accomplished.
Did you have any big home accomplishments in 2025?
I introduced this year’s home goals by saying, “I am really, really excited by the projects I have planned.” Mid-way through the year, I am still excited about these projects. I’m also really, really excited by how much progress I’ve made.
What a year it’s been so far!
Coop
The coop is finished. The birds are in residence. It is awesome. I love having birds again. Seeing them walking around makes me happy. I am so proud of the coop and how well everything has worked out. I will likely continue to make tweaks depending on what the birds need (like repairing the turkeys’ door after they take it apart–again), but I am comfortable saying that for now, this project is done.
My office
Another project that’s done? My office. Transforming, decorating and organizing this space was fun, and I love having my own working, writing, crafting, sewing, creating, whatevering space.
Ellie’s playroom
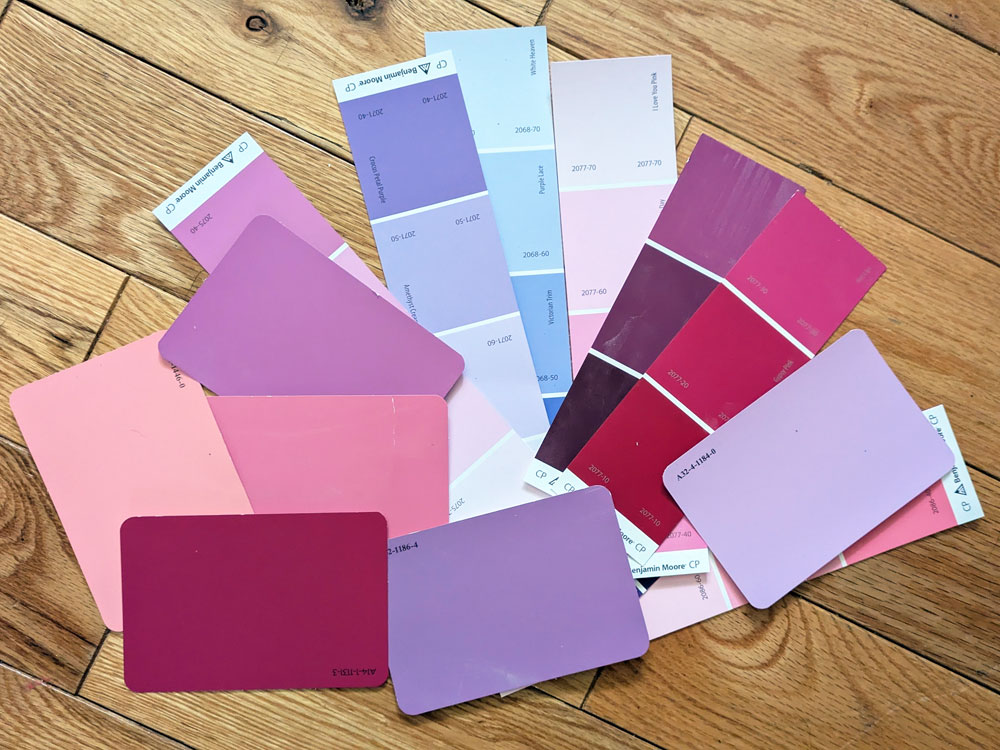
A dedicated play, crafting, creating space for Ellie is still on the list for this year. She’s been collecting paint chips in anticipation. Can you guess what her current favourite colours are? This room will likely be our fall project.
Main bathroom
The bathroom renovation is well underway, and what a transformation. I’ve been able to do a lot of the work myself, which feels really good. My vision for the design and function of this space is turning out beautifully. I am really happy. More updates to come.
2025 is a big year. I don’t think I’ve had this many projects on the go since early days (perhaps years) or moving to the farm. It’s been tiring, fulfilling, challenging. But mostly it’s been fun. I love working on the house and the property, making it ours and making it beautiful.
I hope I can keep up the momentum for the rest of the year.
Have you tackled any project around your house so far this year? What’s on your list for the rest of 2025?Anyone else having a big house year? What’s exciting you about your house right now?
The birds moved into the coop about a week ago, and I am proud to say this project is done.
Today I’m going to share all the finishing touches that went into completing this space.
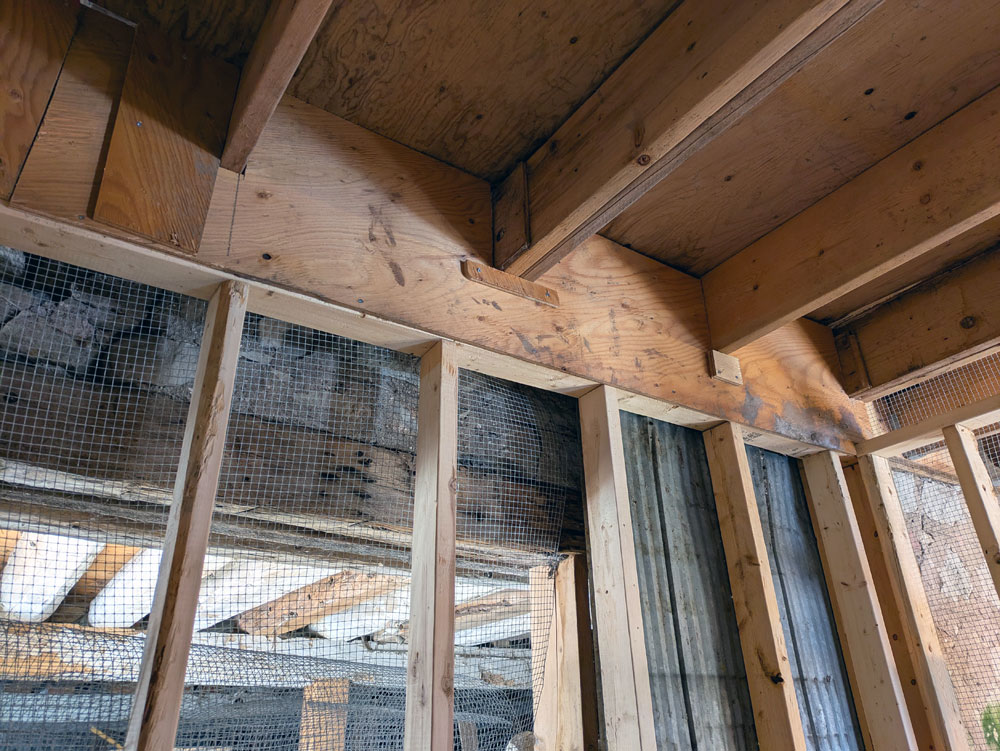
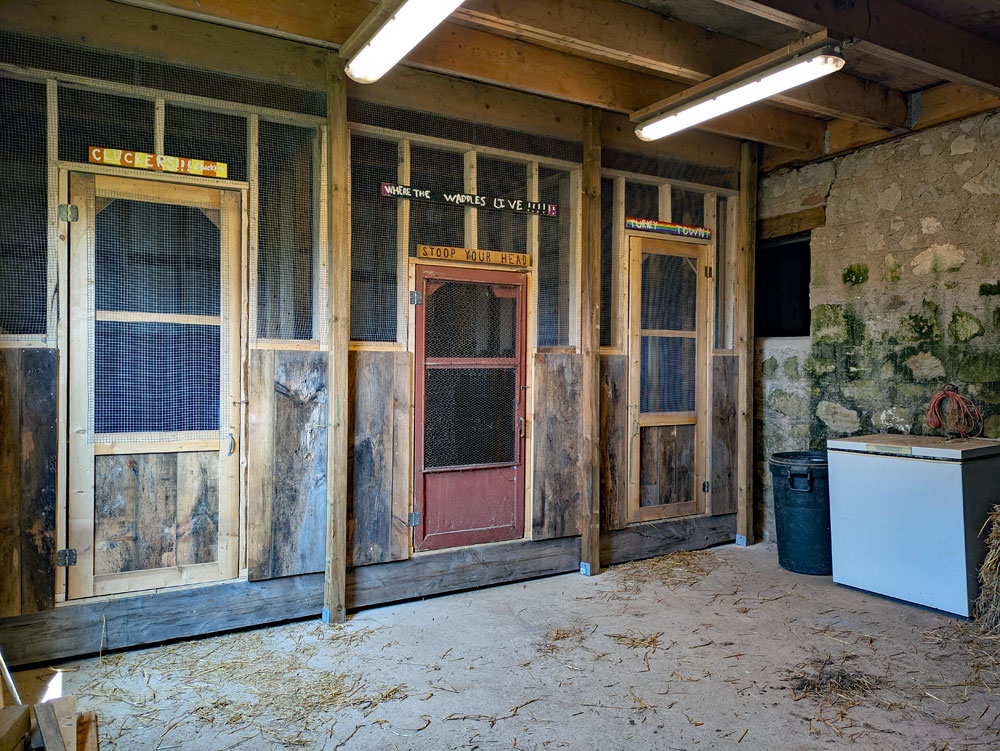
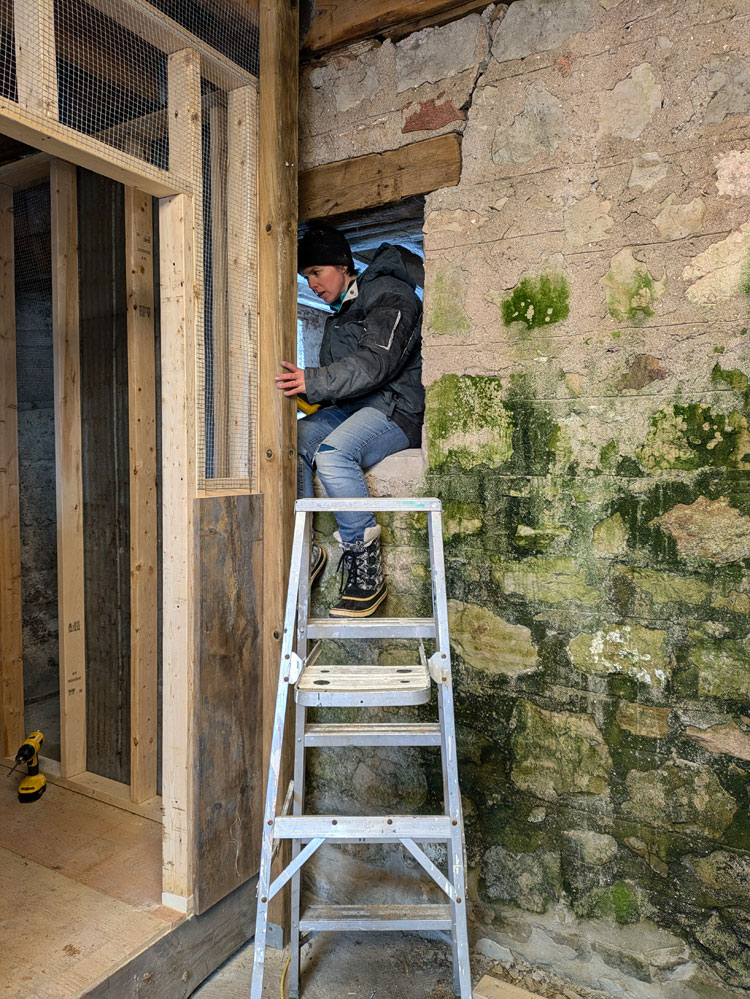
When we last visited the inside, the walls and doors were done, but the pens were not fully secure. I added mesh, boards, whatever worked around the perimeter of the coop along the ceiling. This will hopefully ensure that no climbing crawling predators can sneak over the top of a wall. It was fiddly work to make everything fit.
I also added a motion activated solar light on the back of the barn as an extra deterrent to anyone who comes creeping up through the field.
Then I needed to fit out the interior of the pens.
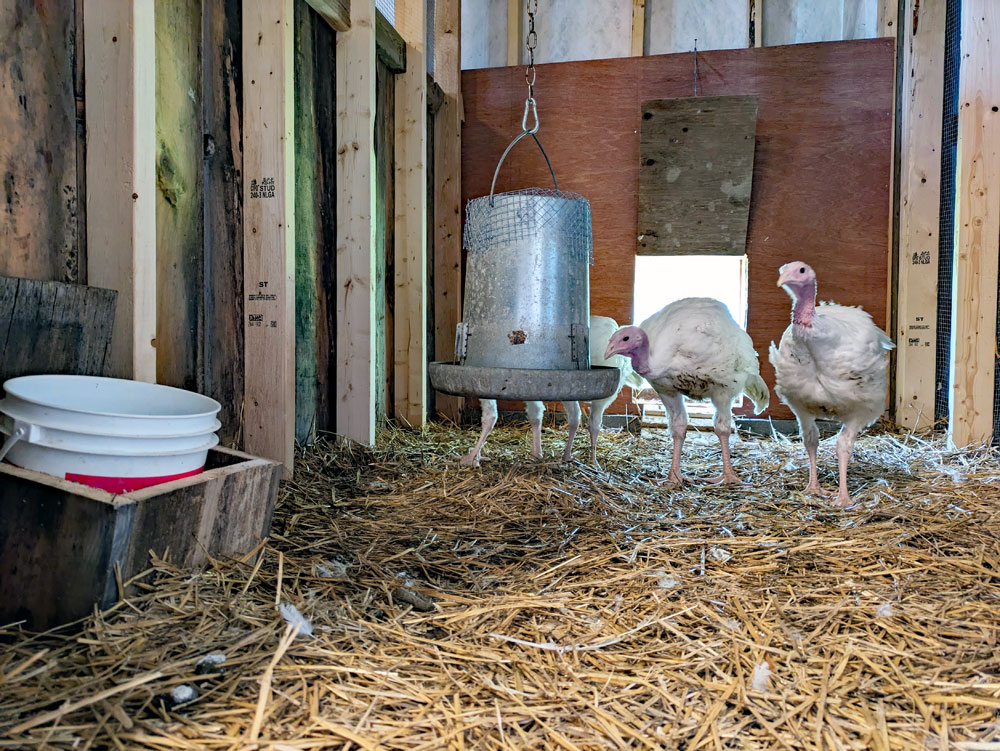
For the turkeys, this was simple: a feeder and a waterer. I found an old metal hopper feeder in the barn, so we washed it out, covered the top with mesh (to hopefully dissuade rodents) and hung it from the ceiling. It’s working very well for the turkeys. For their water, I went with a simple bucket. I built a little box to hold the bucket so the turkeys can’t tip it over (something they loved to do in the brooder). Right now the box is sitting on the floor, but I can attach it to the wall if I want to raise it up.
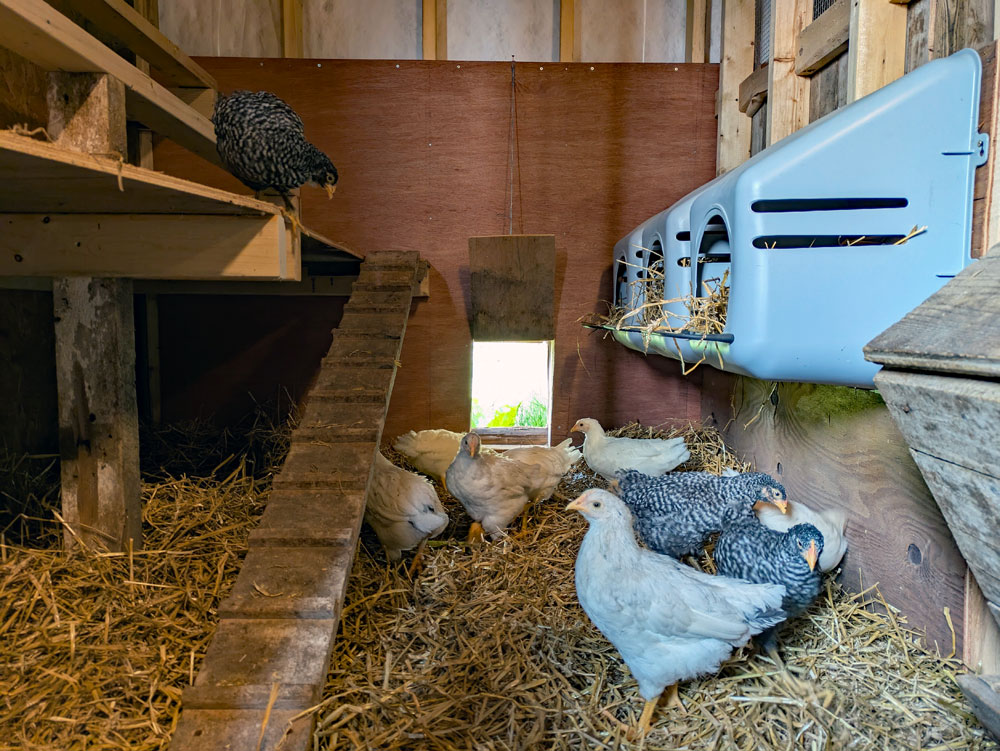
The chicken fit out took a little more work… and a relocation. The hens needed a few more things in their stall. Water and food, of course. But also nesting boxes and roosts. As I was planning the roosts, I realized everything wasn’t going to fit in the centre stall, which I had assigned to the chicks. But the end stall was a few inches bigger… just big enough for everything they needed. So they moved next door.
The nesting boxes are simple plastic bins that screw to the wall. They lift off the screws easily so I can dump out the straw or even rinse them out if I need to.
For the roost, I spent some time researching to figure out the best approach. Here’s what I found. Build your roost as the highest option in the pen. Chickens like to be high to sleep, so if your nesting boxes are the highest thing, that’s where they’ll sleep. Since I want them to sleep on the roost, I made sure the roosts were higher than the nesting boxes.
I also found that chickens like a sturdier perch. They are not songbirds who will wrap their toes around a branch (although watching them walk along the edge of the brooder box, I think they do pretty well). So I went with 2x4s laid flat for a nice wide perch.
The other topic was optimal spacing. The recommendation was 12 inches per bird. Since our order was for 15 birds, that meant 15 feet of roost. Our pens are 8 feet long, so this worked out easily to 2 roosts along one side of the pen.
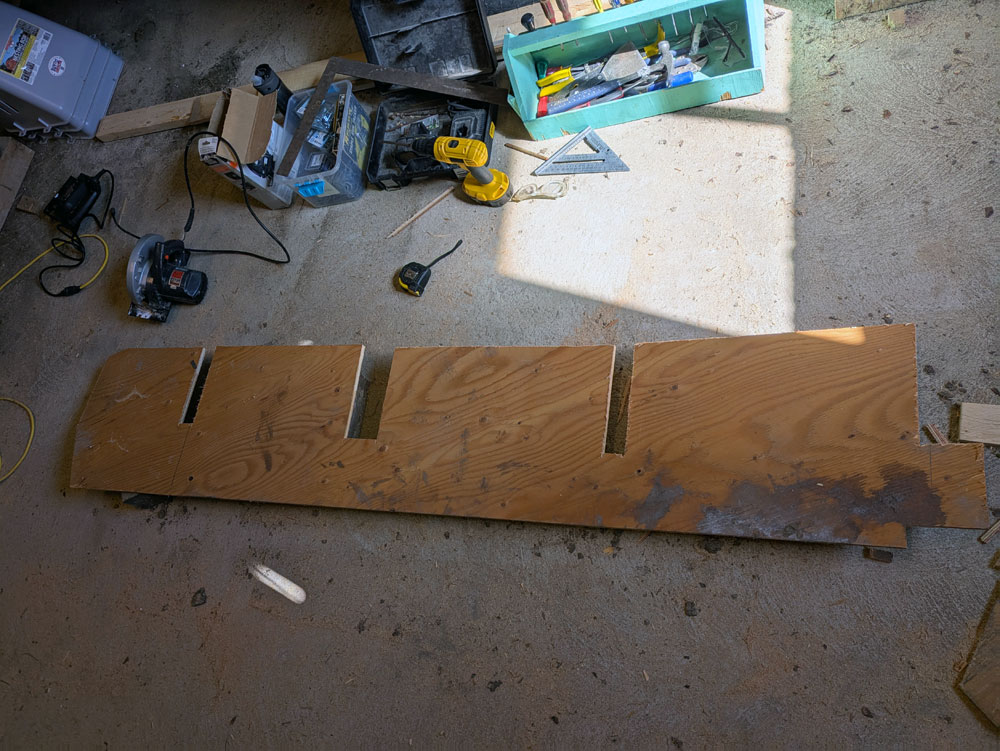
A feature I added courtesy of my Dad is a poop board under the roosts. Roosts tend to be a messy area. Chickens poop in their sleep and sometimes even lay an egg. The board under the roosts will hopefully catch the mess and then I can easily scrape it off, rather than changing all of their bedding.
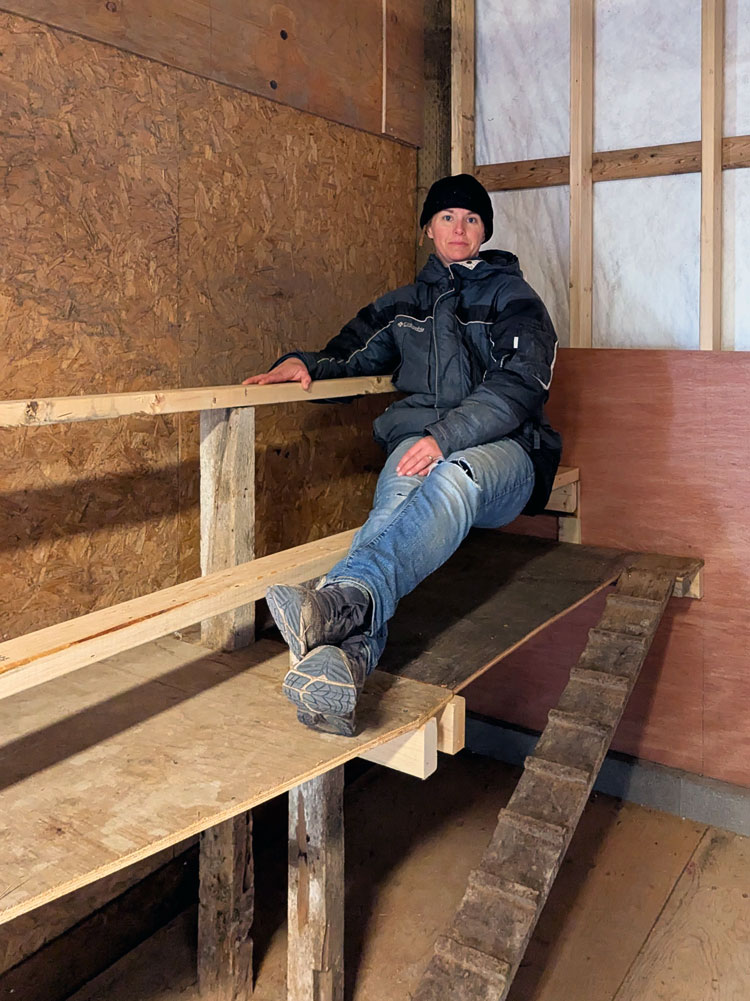
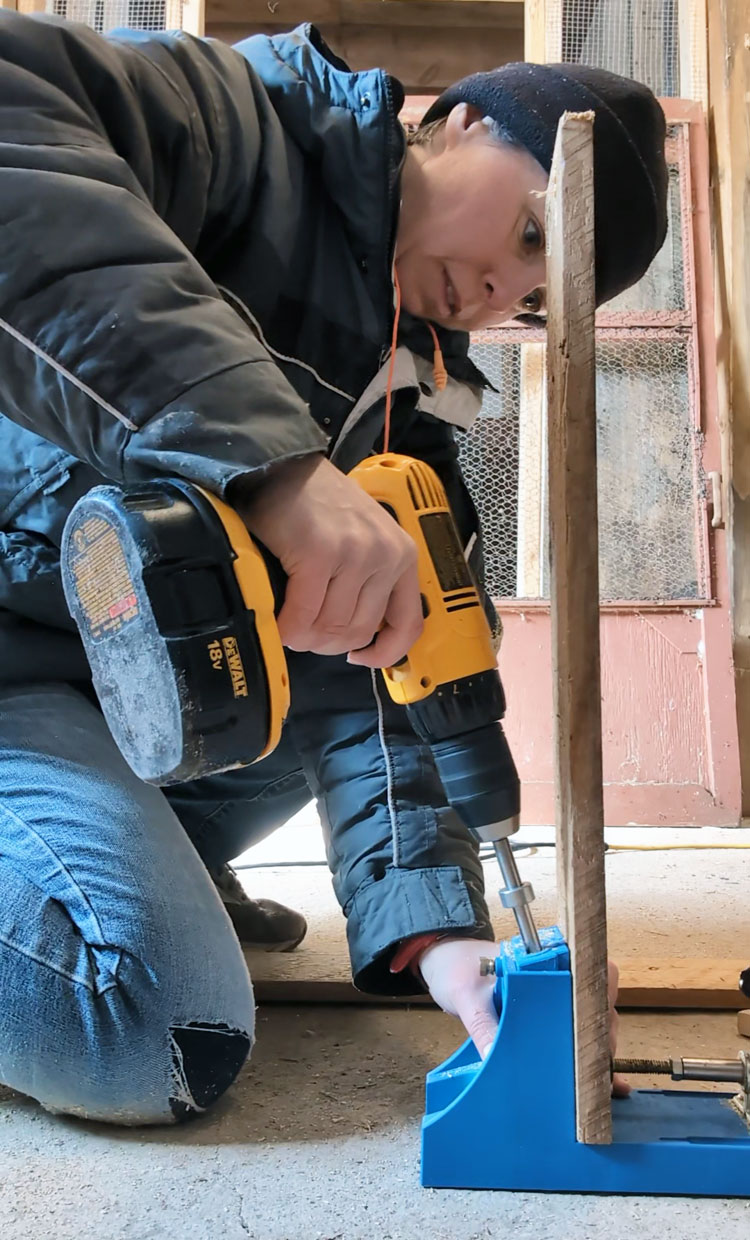
All of my research and planning complete, I went to work and built the roost. Along the way I also decreased our chicken order. The pen was starting to look a bit tight, and I was worried the birds would be too crowded. So I dropped our order to 9 birds. We ended up with 10, as the hatchery seems to have a practice of giving 1 extra chick. We have lots of room for everyone to be comfortable… and we’ll still have lots of eggs.
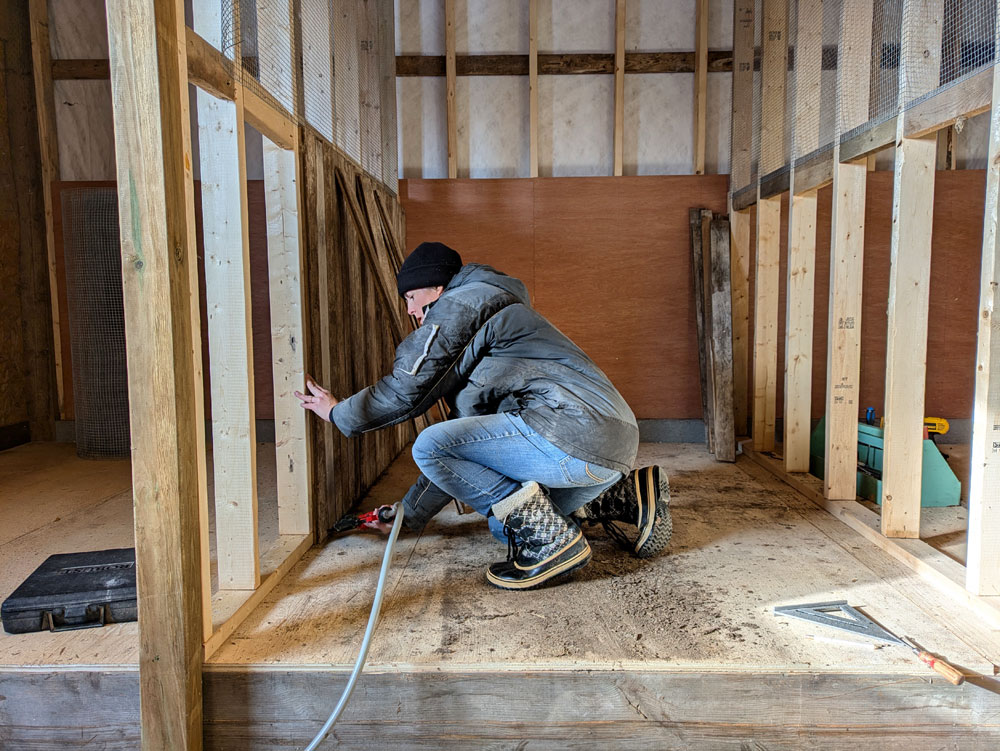
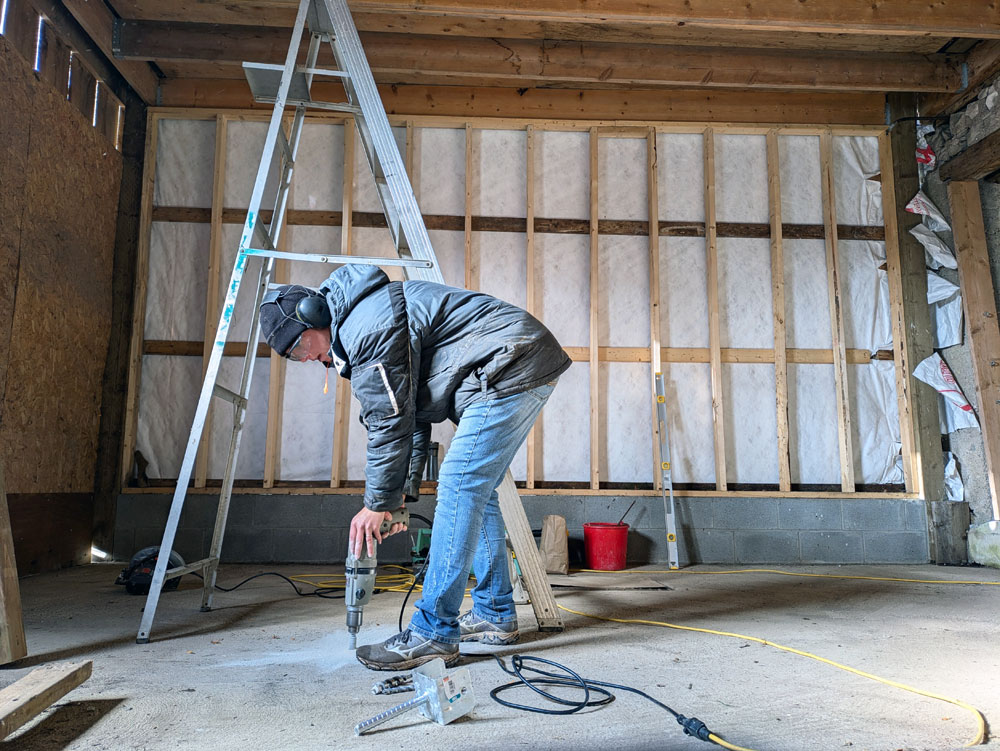
The roost turned out well… nice and sturdy. (From my attire, you can tell when I was working on this.)
Then I added a little ramp that we had from the old coop in case any birds needed help getting up. It’s on a hinge so we can easily lift it out of the way when we need to clean out the stall.
The final touch was, once again, feed and water. The chicks have another bucket in a box, just like the turkeys for their water. For their feeder, I went with a wall mounted version to save space. This was another souvenir from the old coop that happened to fit perfectly in the remaining wall space.
After the first week, I made a couple of adjustments to decrease the size of the opening where the food comes out, because the chicks were spilling a lot of food, but otherwise it seems to be working well.
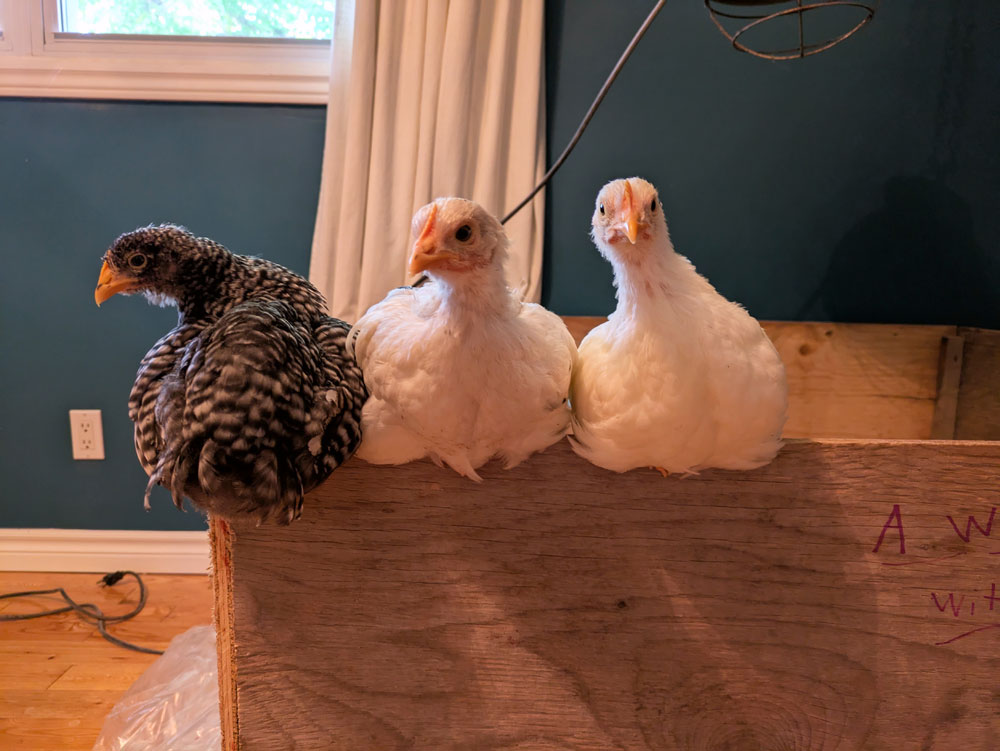
Each flock also has water in the run with two large metal waterers that we had stashed in the barn. (Yes, that is 2 chicks standing on top of the waterer.)
Ellie made some signs for each pen. The turkeys live in Turkey Town. The centre stall is Where the Waddles (will) Live. The hens are The Cluckers.
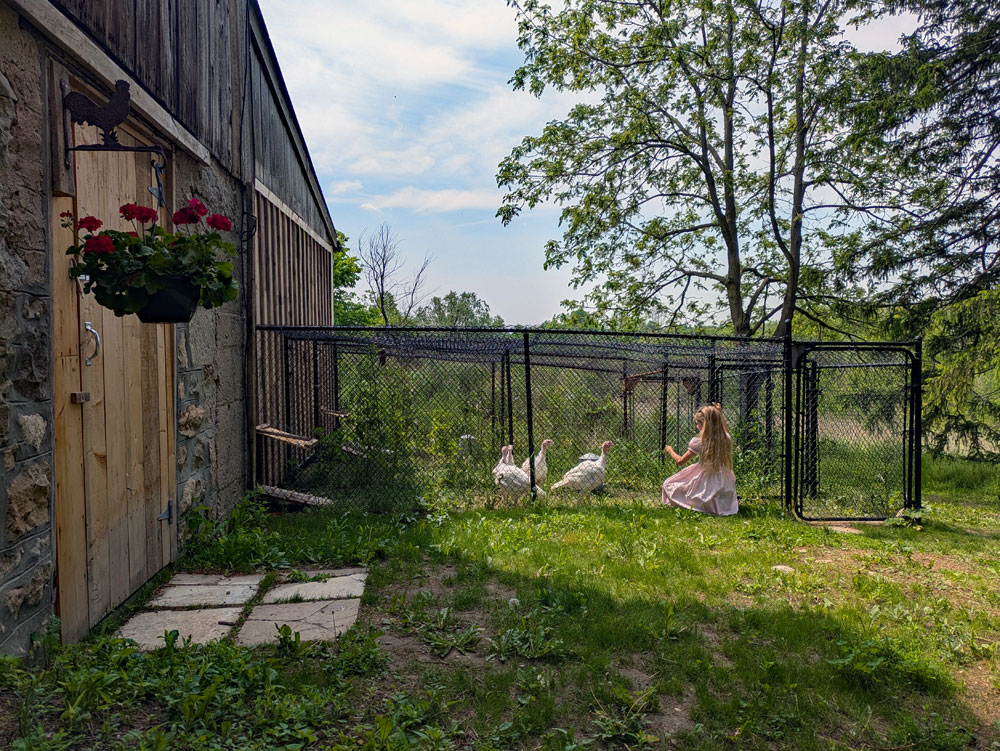
The final detail came from my Mom who bought me a coop warming present of a happy red geranium. This hangs by the door on a chicken plant hanger that used to be on the side of the house. I kept it during the garage demo and have been saving it for exactly this spot.
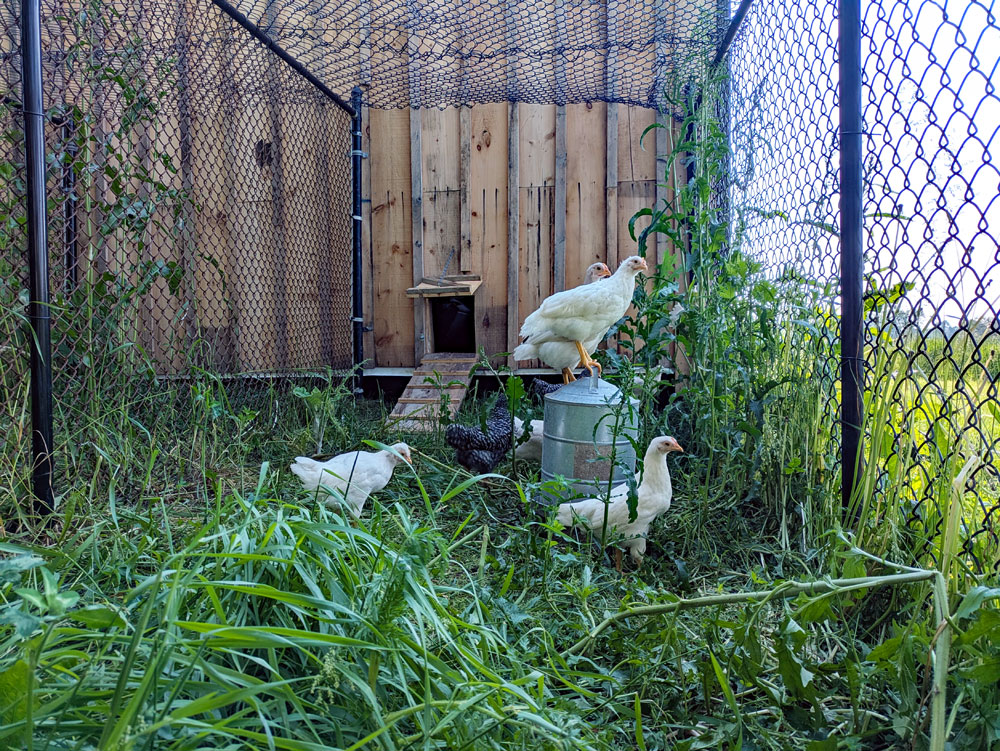
Since the turkeys and chicks moved in everything has been working really well. They seem comfortable in their pens and in the runs. We lock them in every evening, and it’s an easy task to move through the run, herd them inside, drop their little doors and latch them shut.
In the morning we open the little doors and they pop right out flapping and stretching. They’re eating down the grass and weeds that had grown pretty high in the runs.
I opened the gate between the Waddles and the Cluckers runs, so the chickens have double outdoor space. I had wanted this option during the run construction, which is why I had our contractor add extra gates. I’m pleased that it’s working as I envisioned. It’s nice to give the chickens some extra space and this way the grass doesn’t get overgrown. Win-win.
As a whole, the coop is working as I planned. I’m so proud of this project. It was a big build for me. I had help along the way on demo with my cousins, clean up with our landscapers, fencing with our contractors, walls and more fencing with Matt’s Dad, which I’m very grateful for. But the design and most of the work is mine.
It took figuring and muscle and time and energy and skill. I had what it took and I made it happen. It’s a really good feeling to see the birds in there, chirping (no clucks or gobbles yet), scratching, eating, drinking, snoozing, flapping… birding as they’re supposed to.
Thanks so much for following along with this project and cheering me on throughout it.
I shared the final video updates of the coop construction on Instagram. Follow me at juliaon129acres. If you want to relive the whole construction process, check out the coop highlights (part 1, part 2, part 3).
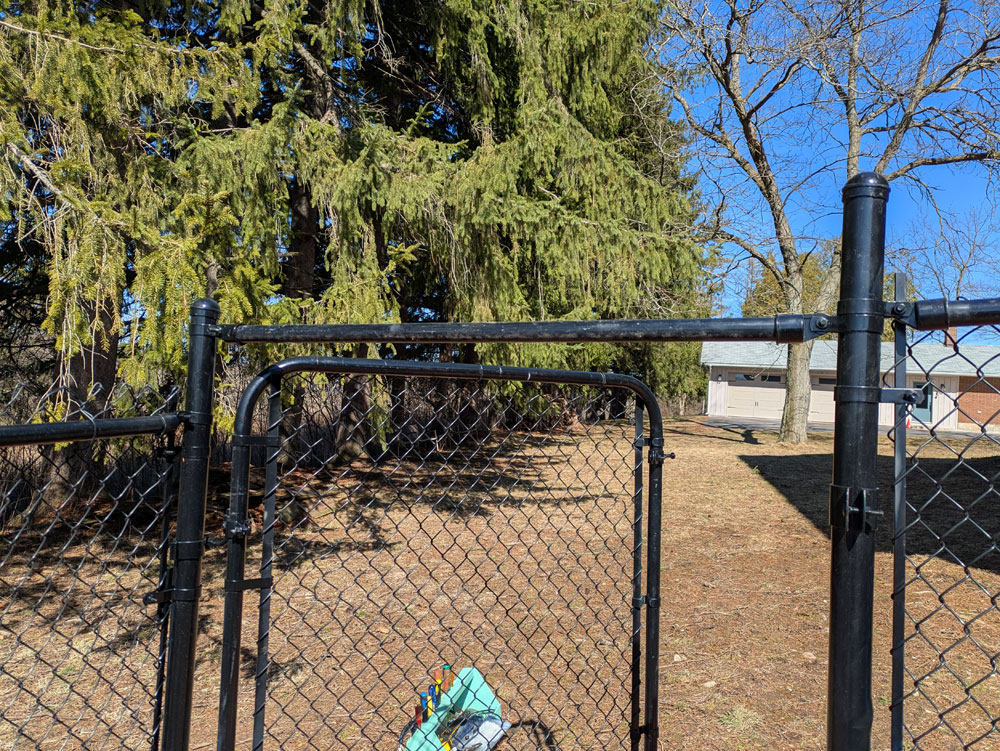
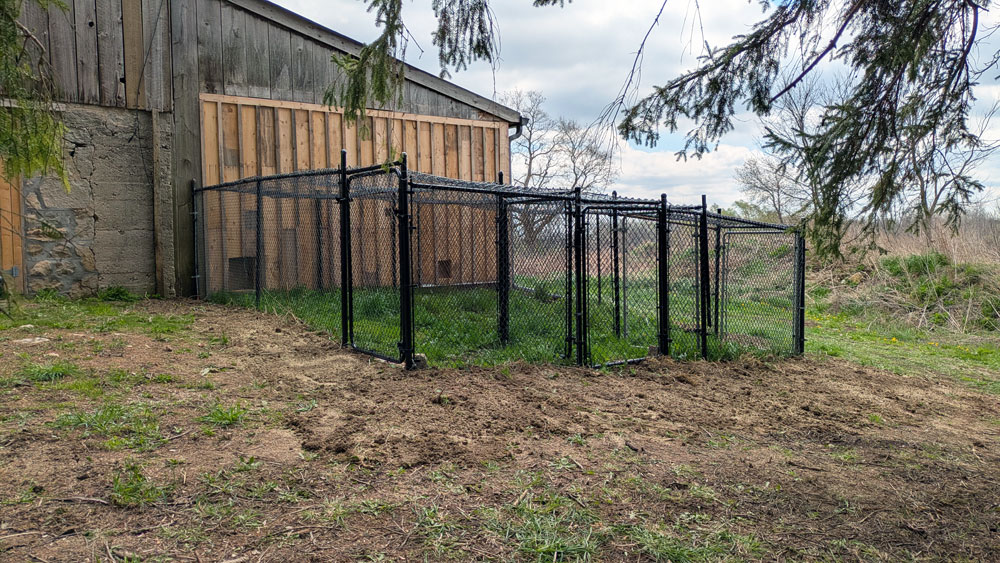
When we last visited the coop, the interior was in good shape. As the weather warmed this spring, I shifted my attention back outside to finish the run. You may recall I had a contractor install fencing for three outdoor pens back in the fall. I was very glad to hire that job out. But there were still things for me to do.
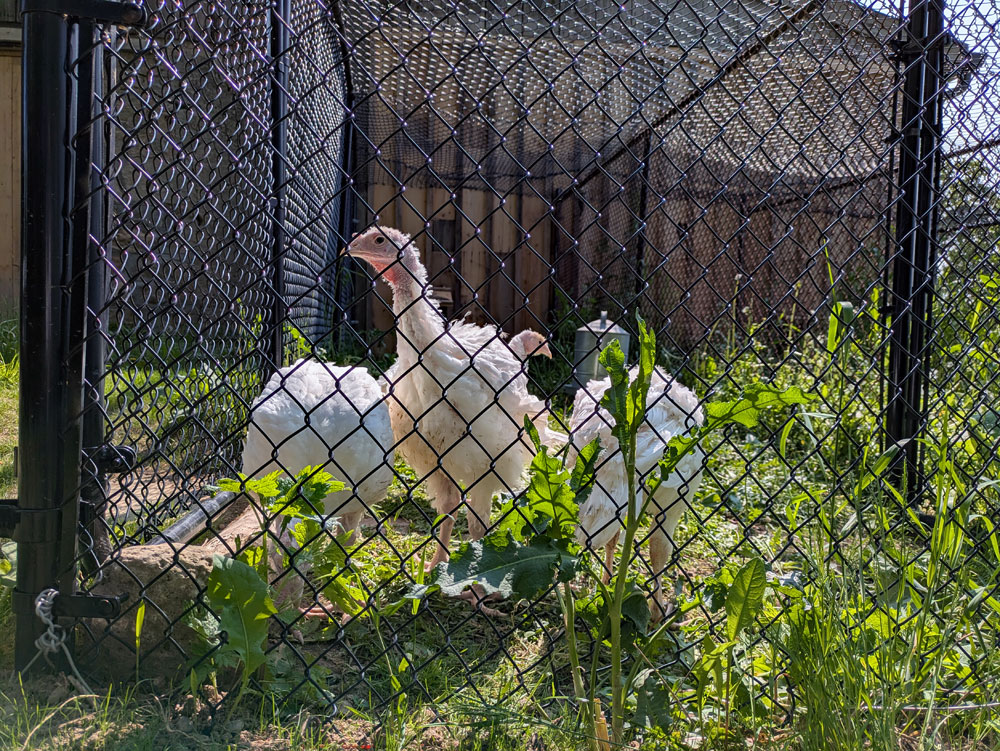
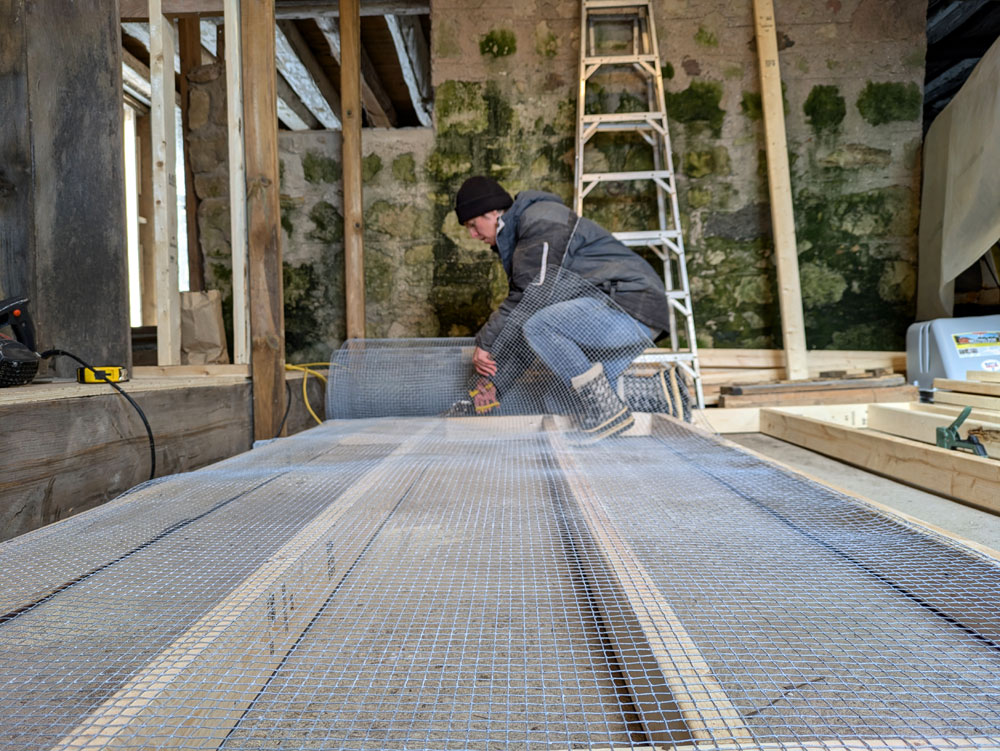
In my quest to make the coop as secure as possible, I wanted to cover the top of the run so no hawks, possums or other predators can get in.
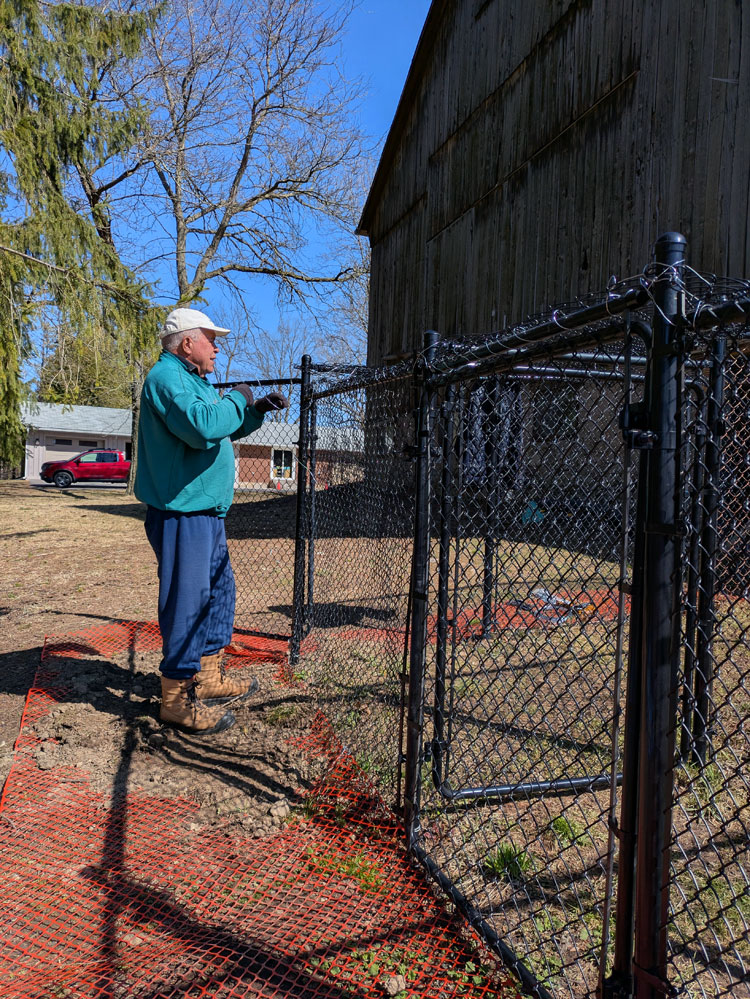
I still had chainlink left over from the pen construction, so I planned to stretch that over the top. I added top rails over each of the gates to attach the fencing to and then I started to lay out the roof.
I quickly discovered it was not a one-woman job. Attaching the roof to the barn or the existing fence while pulling it tight was not fun. So I called Matt’s Dad, and he came and helped.
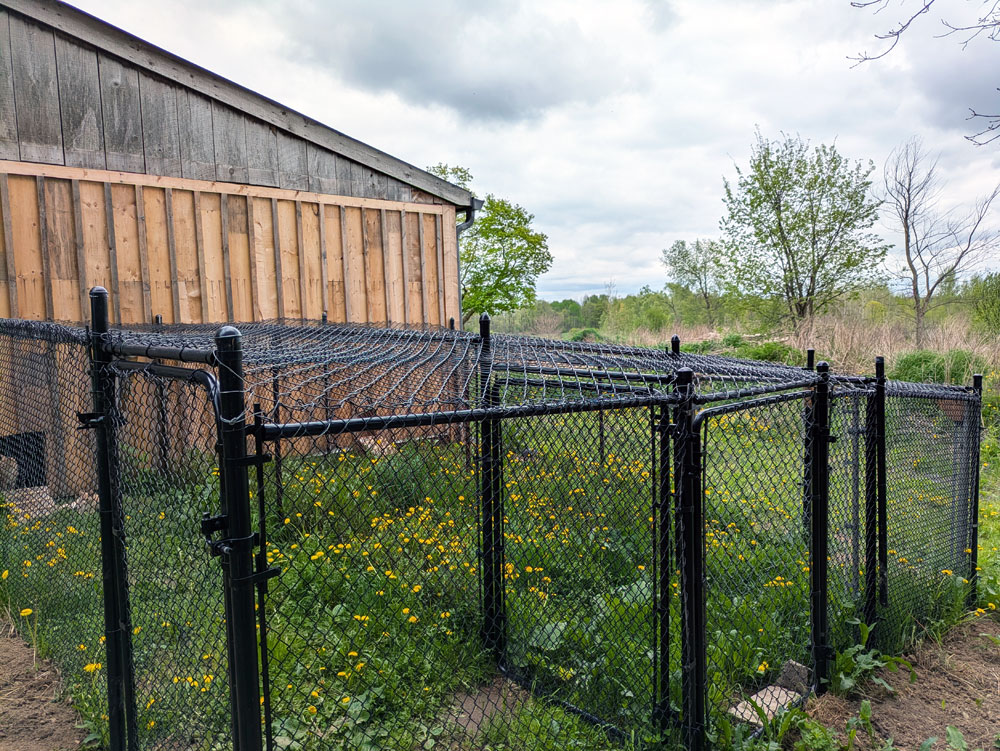
We laid strips of fencing over the top of the runs, stapling it to the barn wall, attaching it to each vertical section and then wiring each strip to the one beside it. Unless a predator brings plyers I don’t think they’re getting in.
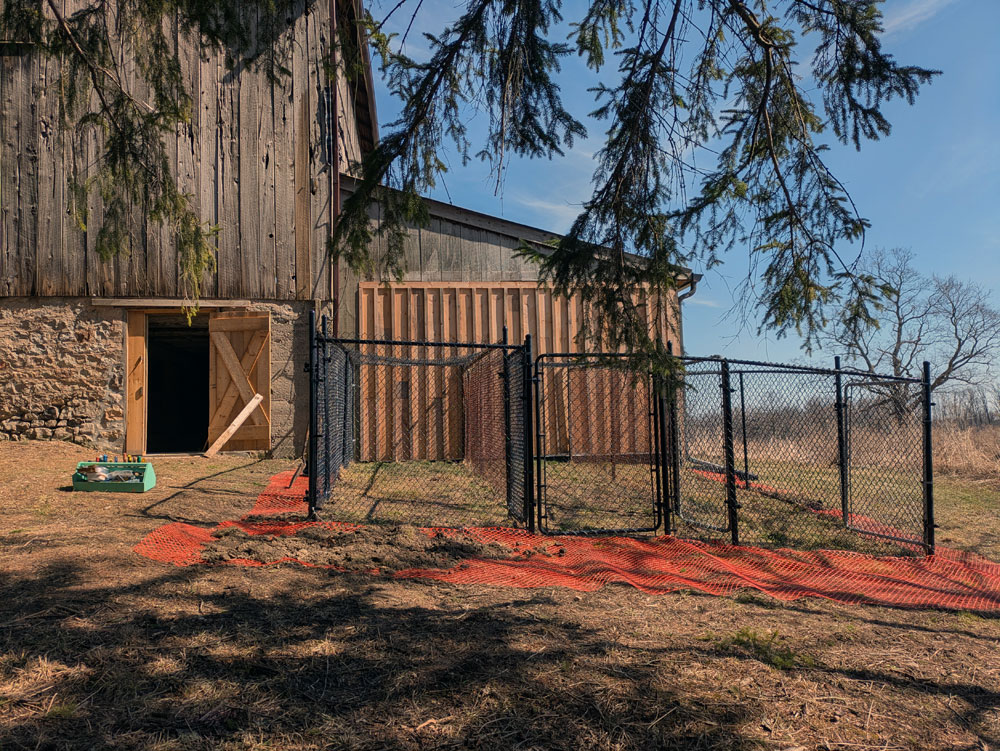
We also laid more mesh around the ground. This will hopefully stop anyone from digging in. All of the mesh is wired to the fence along the bottom and then buried in dirt.
I adjusted all of the gates to make sure they swung easily and latched securely. Between installing the roof and frost this winter, some of the posts had shifted slightly.
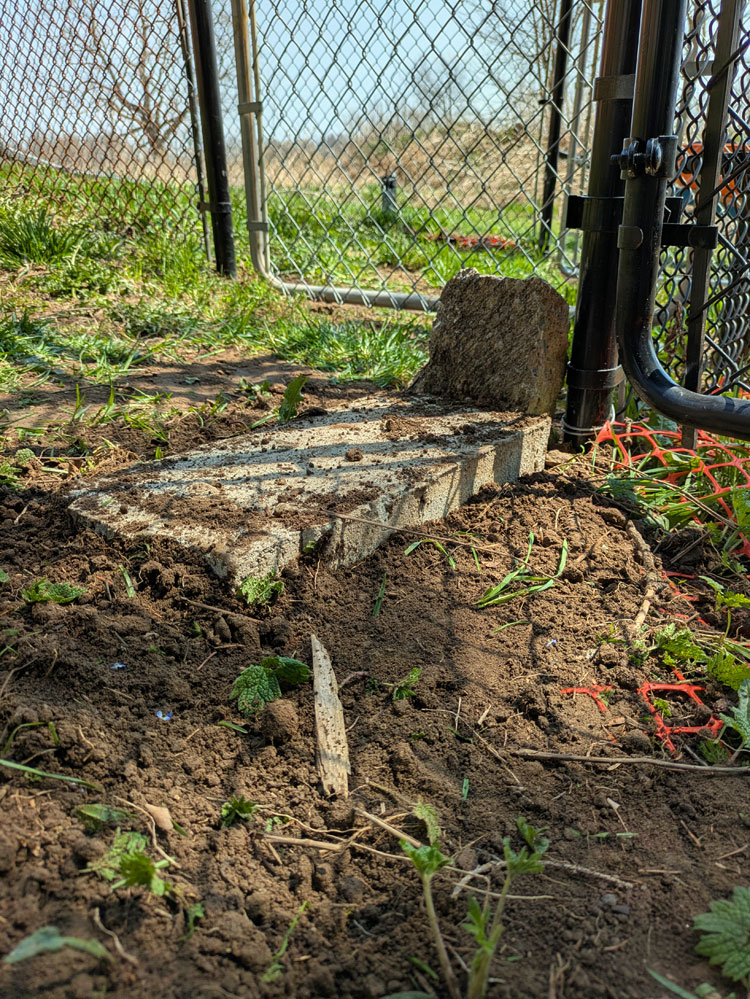
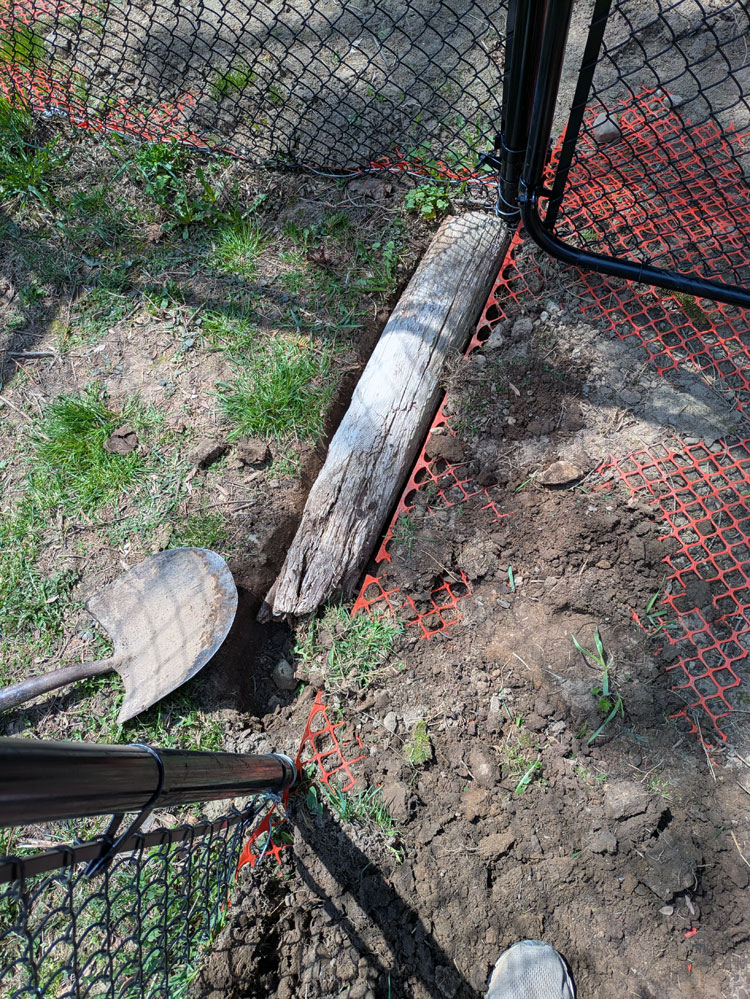
Then I blocked any little gaps around gates or corners that looked big enough for a creature to crawl through. This involved an old fence post and stepping stones as thresholds, metal posts, rocks, wood corner blocks… whatever worked.
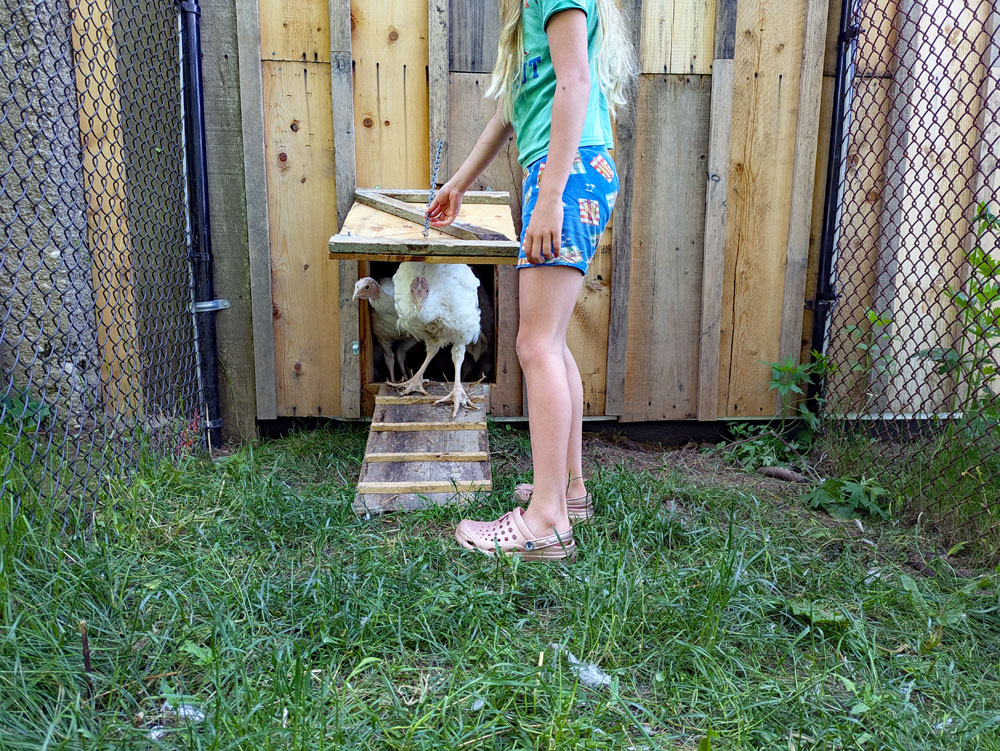
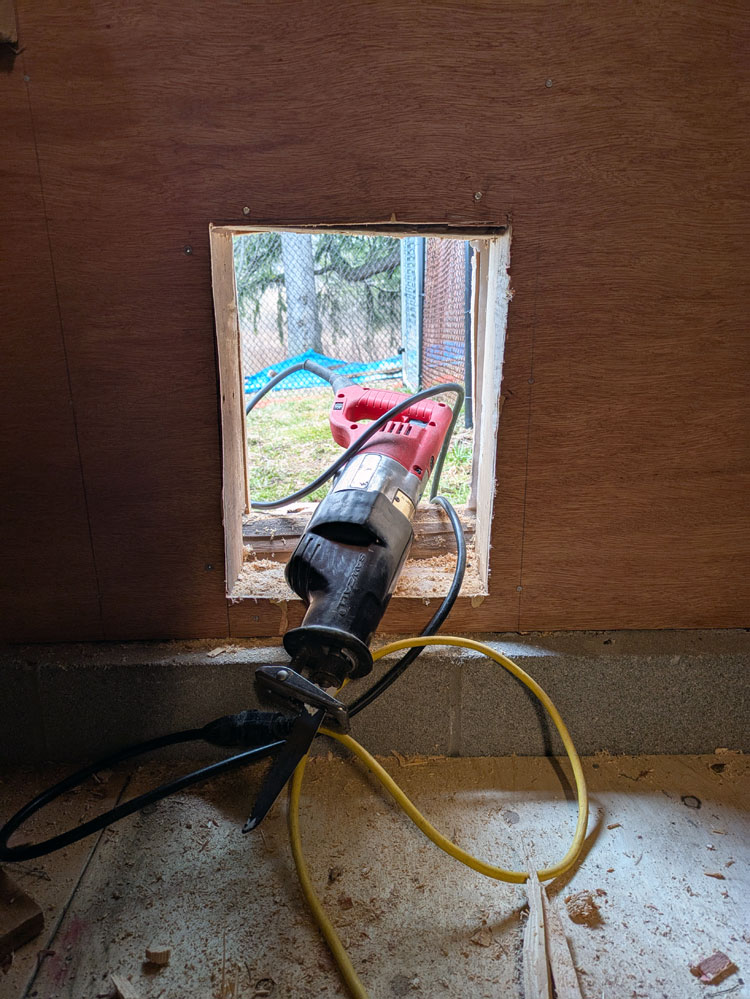
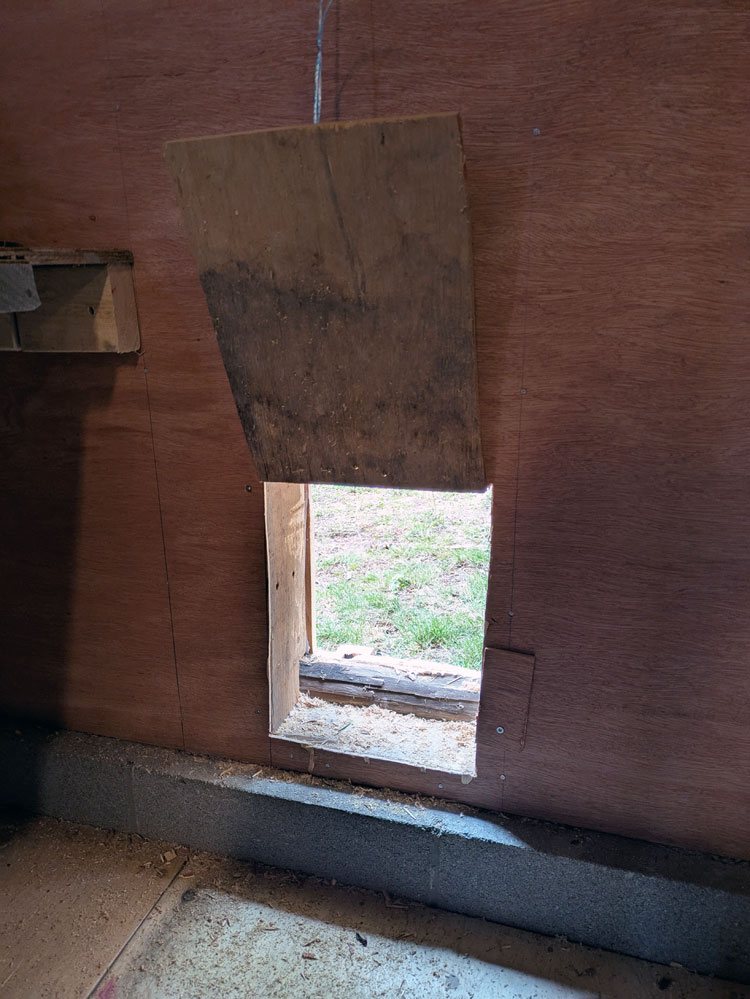
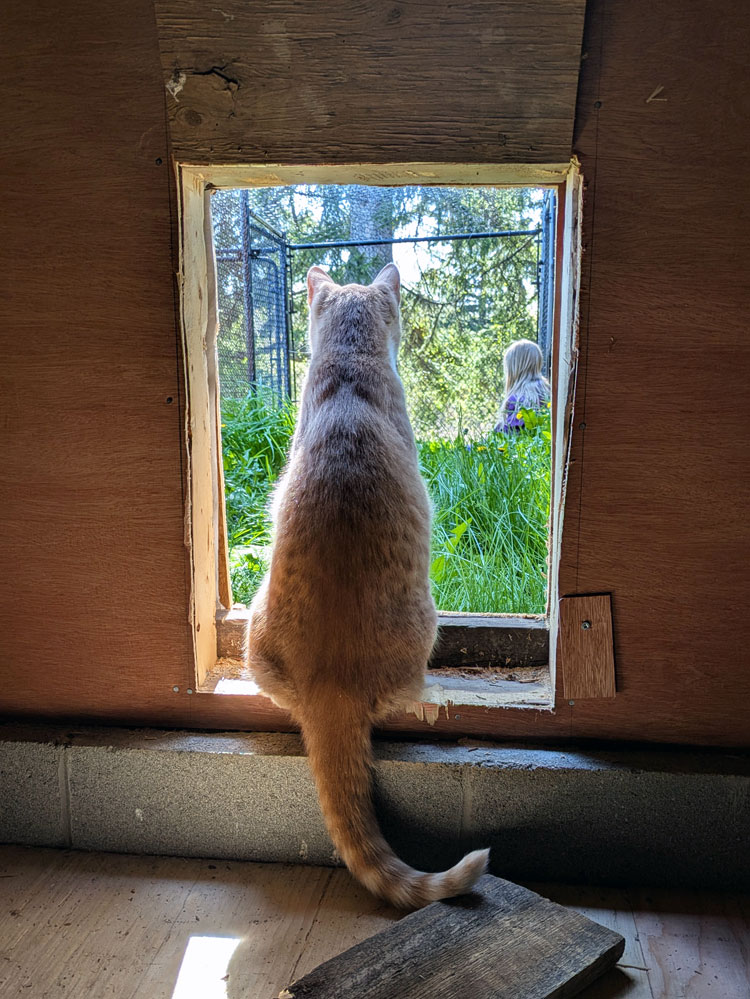
I also cut little doors in the wall of the barn. This will allow the birds (and currently the cats) access to the runs. Hatches can swing down to close the doors.
(Cedar figured out how to unlock the little button that kept the door closed, so for now the cats are enjoying going outside whenever they want. I’m hoping the birds aren’t quite as dexterous.)
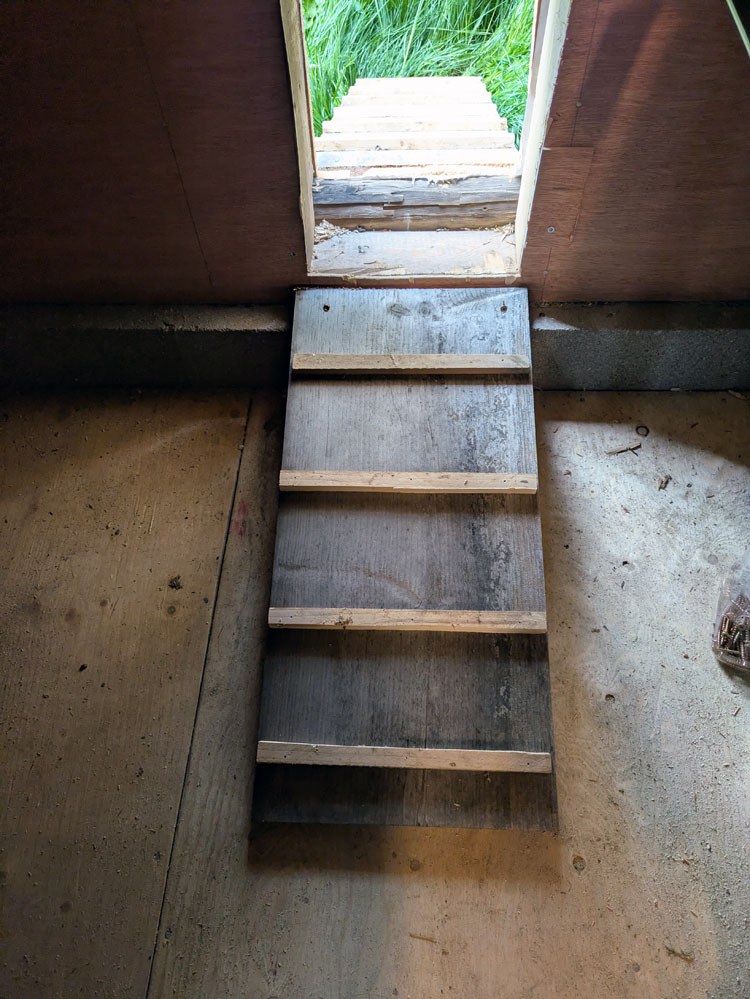
Then I built ramps to make it easy for everyone to get in and out. I expect the hens will be able to hop or flap, but a full grown turkey may not be so acrobatic.
And with that, the runs are done.
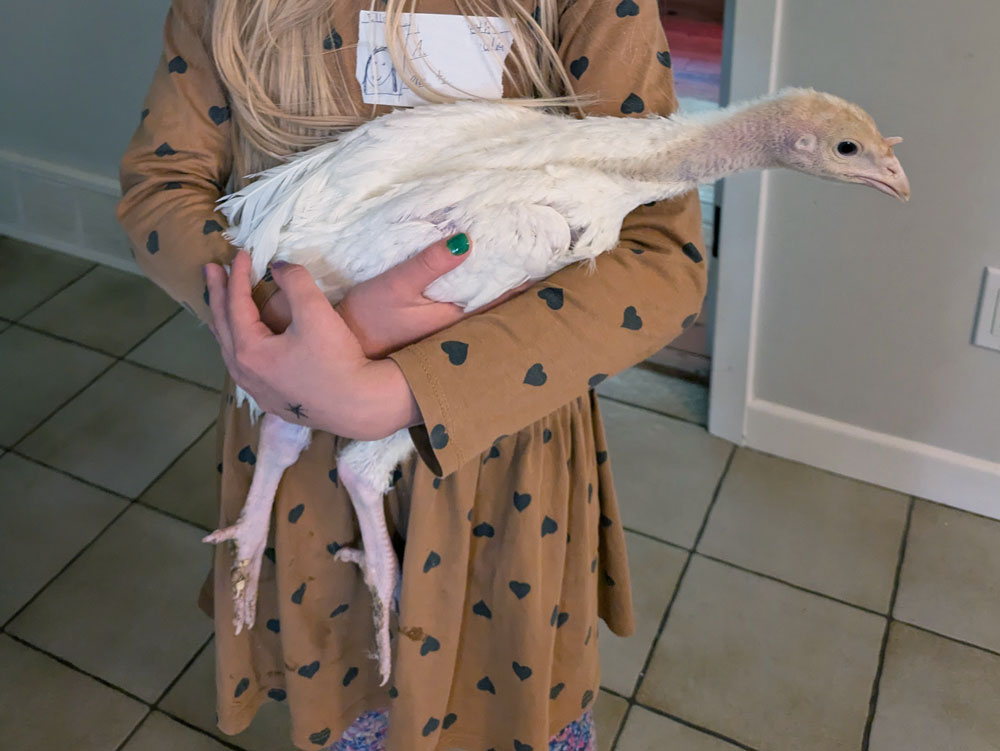
The birds are hopping and flapping in their brooders. While they’re not full grown, they are definitely growing.
It is time for them to move out. As soon as the temperatures are consistently warm (and they have all their feathers), they will be moving into the coop.
Yay!
It’s exciting to be so close to having birds in the barn, as I’ve dreamed of and been working towards for so long.
I’ve still been sharing video updates of the coop construction on Instagram. Follow me at juliaon129acres, and catch up on all the construction in the coop highlights (part 1, part 2, part 3).
Our little family of 3 has grown a lot recently. As you saw last week, we added 4 turkeys and 10 chicks. We also added 2 cats. Yep. We are now a family of 19.
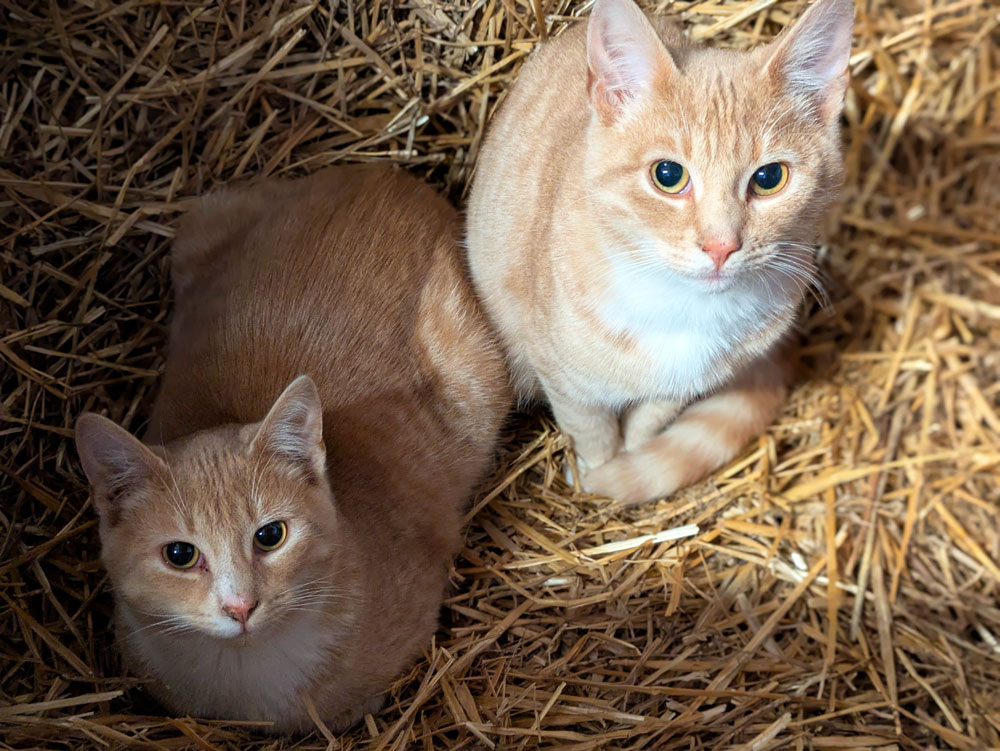
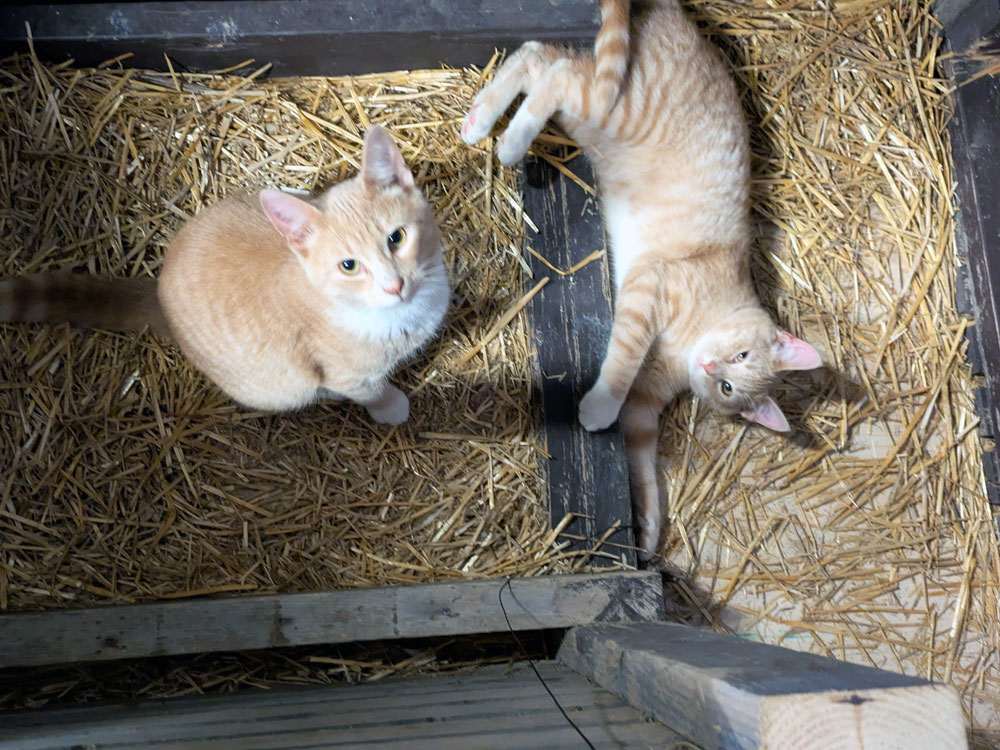
Meet Maple and Cedar, our new barn cats.
I knew we’d have another barn cat someday. While I’m not a cat person, I do like a barn cat. We had fun with Ralph and I’ve missed having a cat at the farm. Plus, with the birds, I knew we’d need some help with rodents and pests.
So I mentioned to a few people I was looking for a barn cat. One person knew of a litter at her brothers’ dairy farm that had been born in September. She had brought 3 of the kittens to her barn and there were 2 left. Did I want them?
I said yes and quickly began planning how we would handle them.
Another friend recently adopted a barn cat from the SPCA. They had recommended she keep the cat contained in a section of the barn for a few weeks until it got used to her and her farm. That sounded like a good strategy to me, but our barn is pretty open. Where could I keep the cats?
Then I had a brainwave. Cedar and Maple could stay in the coop. I’ve worked very hard to make it secure. They would be contained and safe. The birds would be in the house for a few weeks, so the cats could acclimatize in the meantime.
So Ellie and I got kibble and litter, we set up one of the pens in the coop with beds and food dishes, we dug out the cat carrier and made an appointment with the vet. And the kittens came home with us.
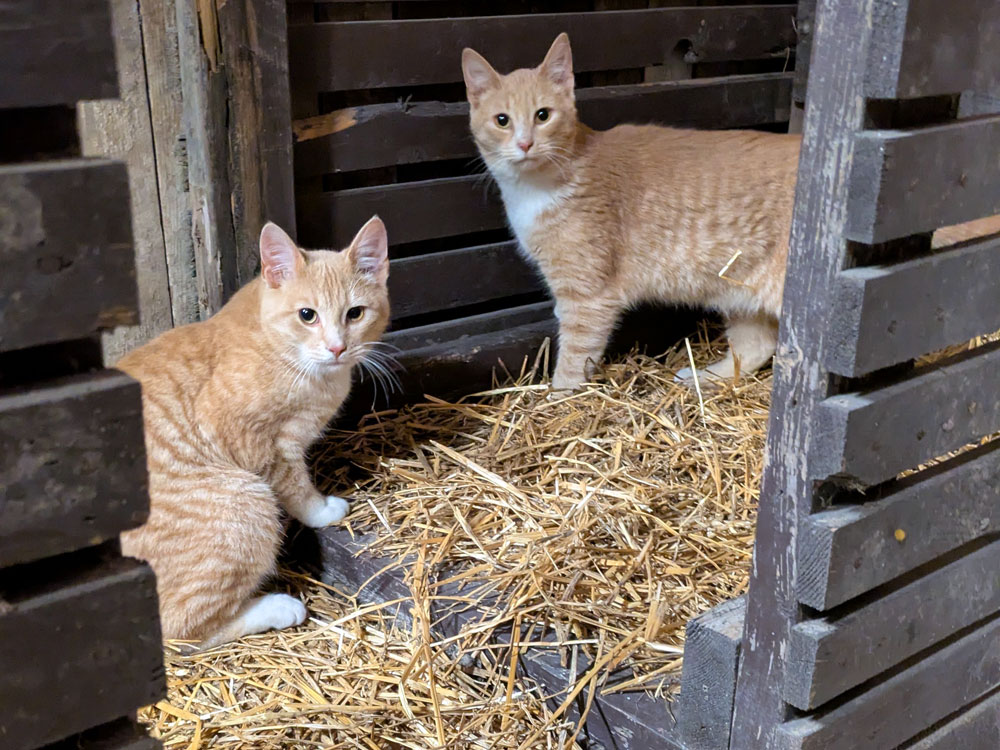
At first Cedar and Maple were pretty shy. We gave them time to settle in, visited with them every day, fed them lots (and lots) of treats.
Now they’re super affectionate. They come running when we come into the barn, looking for pets and treats. For now, they are still in the coop. They go to be neutered this week, so we’re keeping them contained for the next while. Once they’re recovered they’ll move into the rest of the barn and the birds will take over the coop.
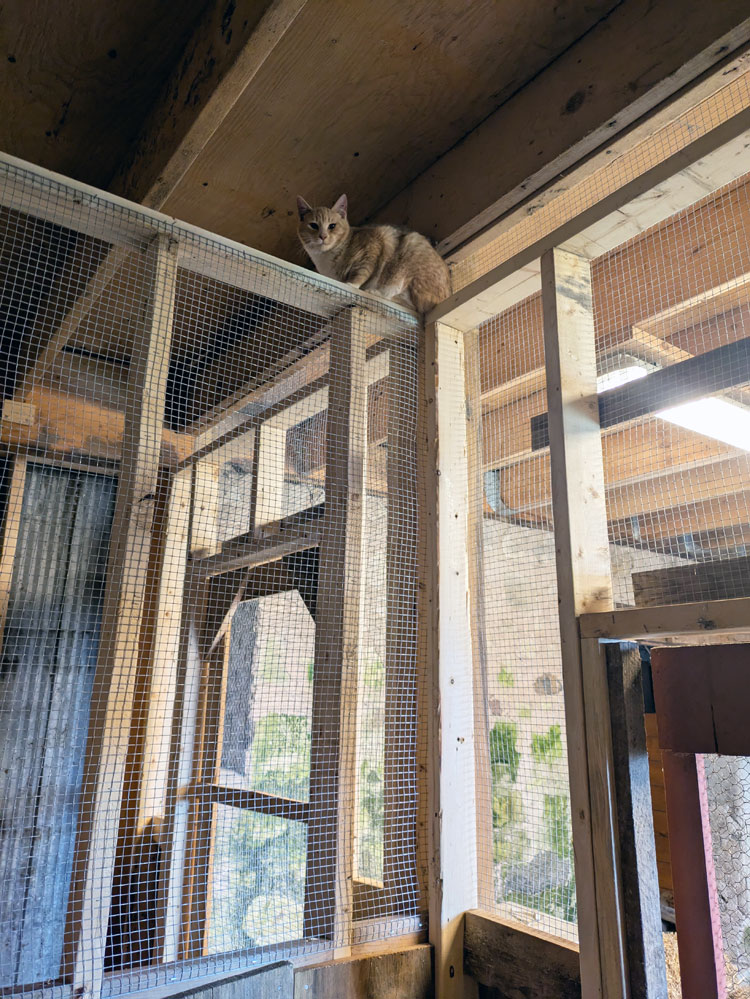
This time has actually been a good test of the security of the coop. The cats have climbed all over, so if there was a way to escape, they would have found it. I’m hoping that means predators won’t be able to find a way in.
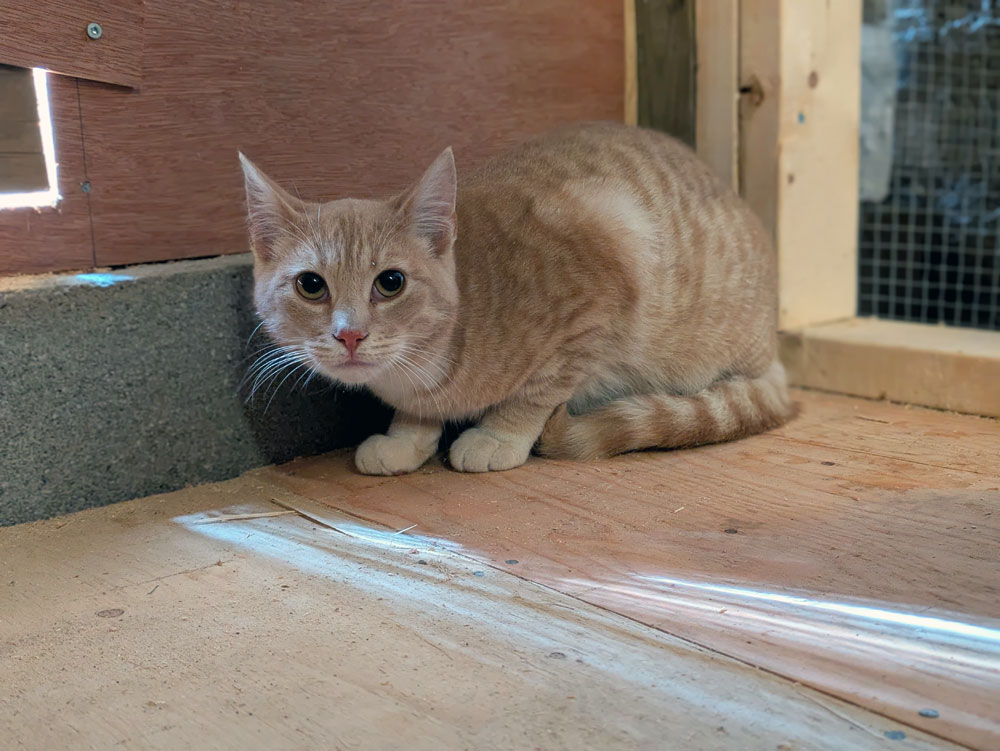
Cedar is the brave one (also a bit of the pushy one) who is always exploring and loves treats and toys. Maple is more cautious, though he’s better at catching the toy, so he may be the better hunter of the pair. They’ve both become super affectionate and love to be pet.
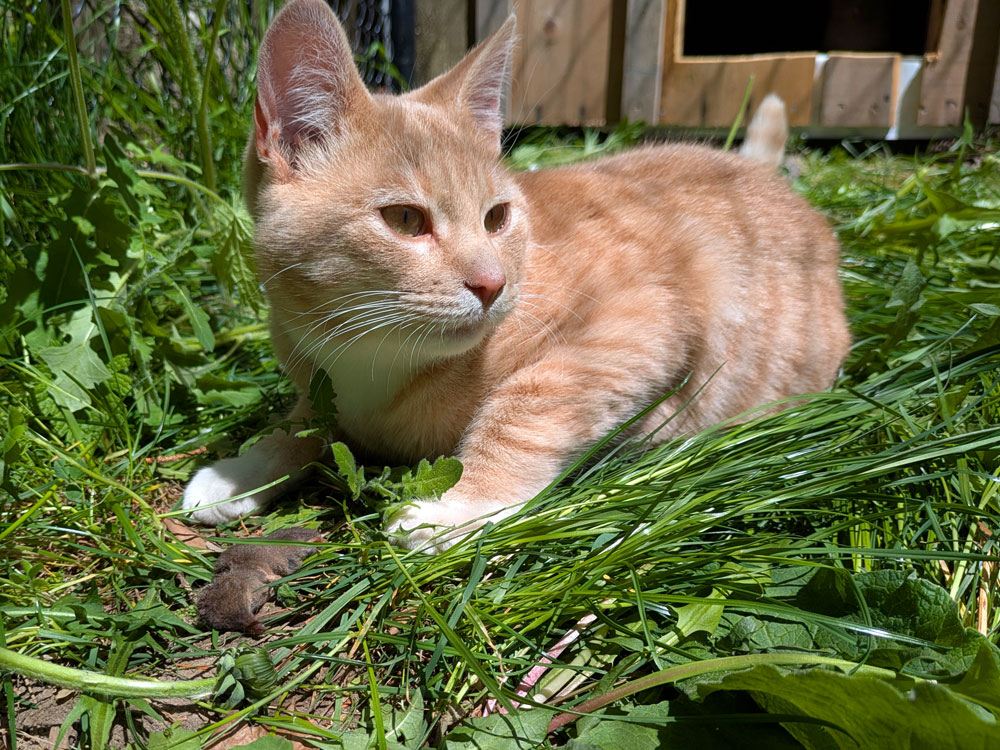
They already caught their first mouse. I’m not sure who gets the credit. (This is Cedar with it after I threw it outside.)
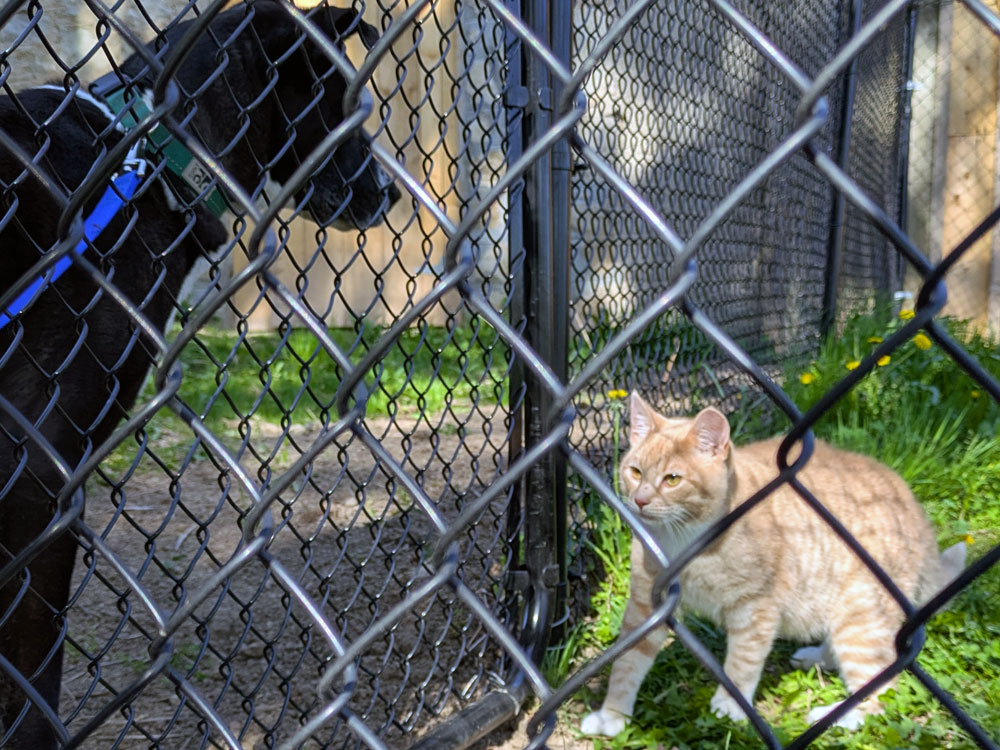
Cigo has been extremely excited that there are cats in the barn. He’s been sniffing around the coop everyday since Cedar and Maple arrived. We finally introduced everyone this weekend, using the run to separate dog and cats. Cedar is pretty unconcerned. Maple is, as expected, more hesitant. Cigo did very well, but he was very excited. We’re going to keep working on making cats boring, and we’ve made inside the barn a dog-free zone.
This getting to know you time has been really fun. It’s been neat to learn Cedar’s and Maple’s personalities and see their trust in us grow. It’s been special to add them to our family.
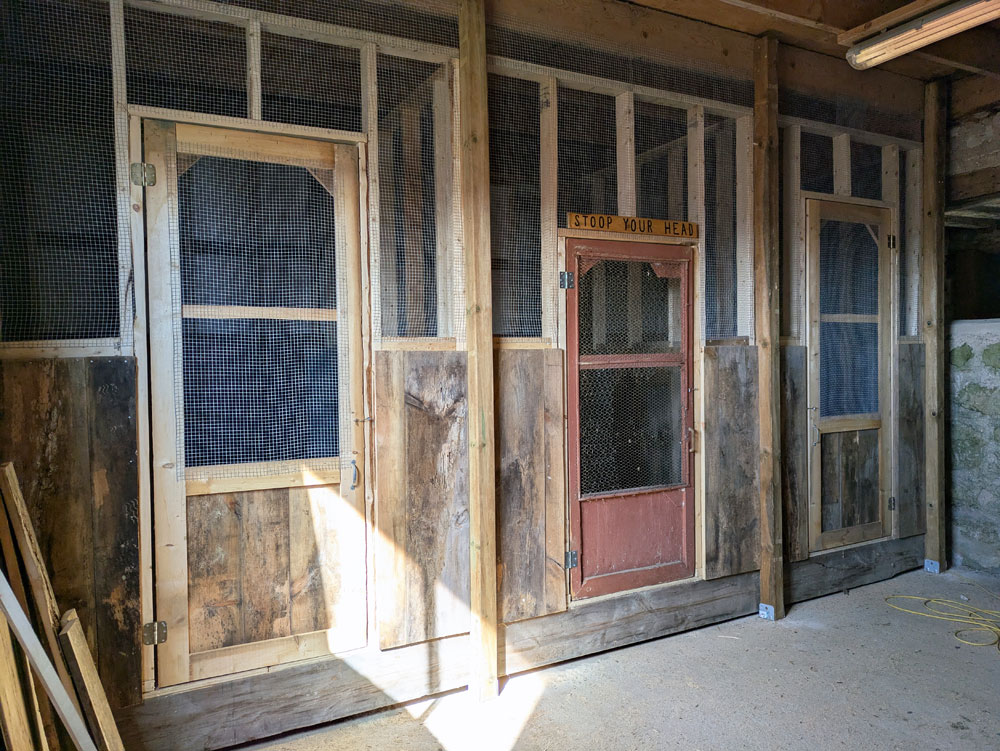
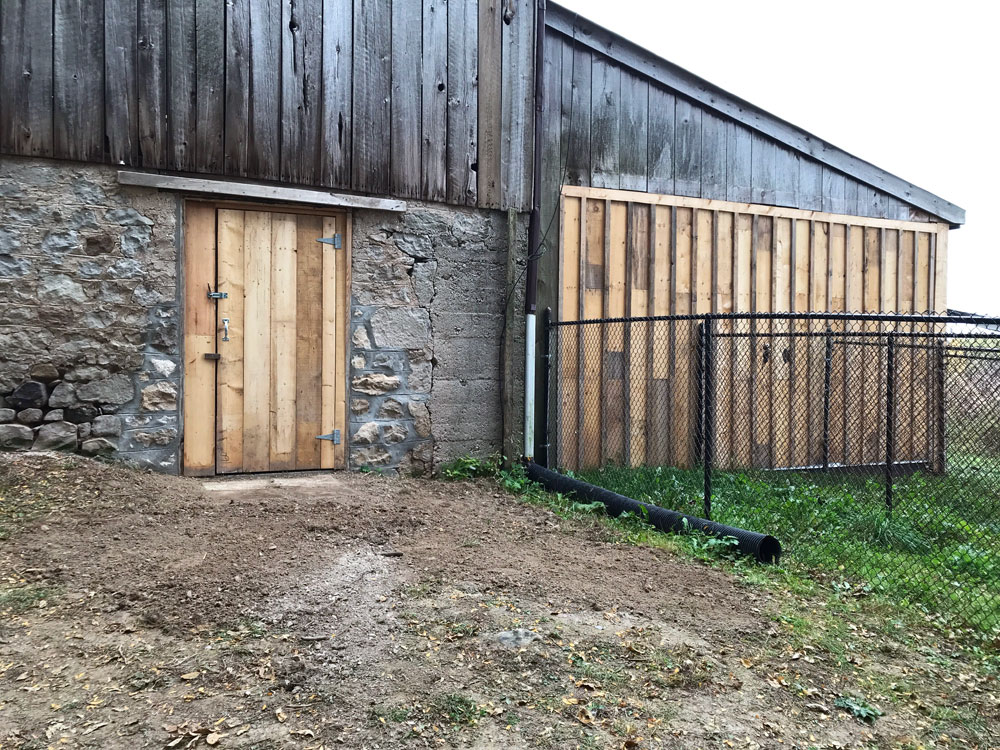
In my last coop update, I had found one door (a sentimental memory that my Dad made for our childhood coop) and resigned myself to making two more.
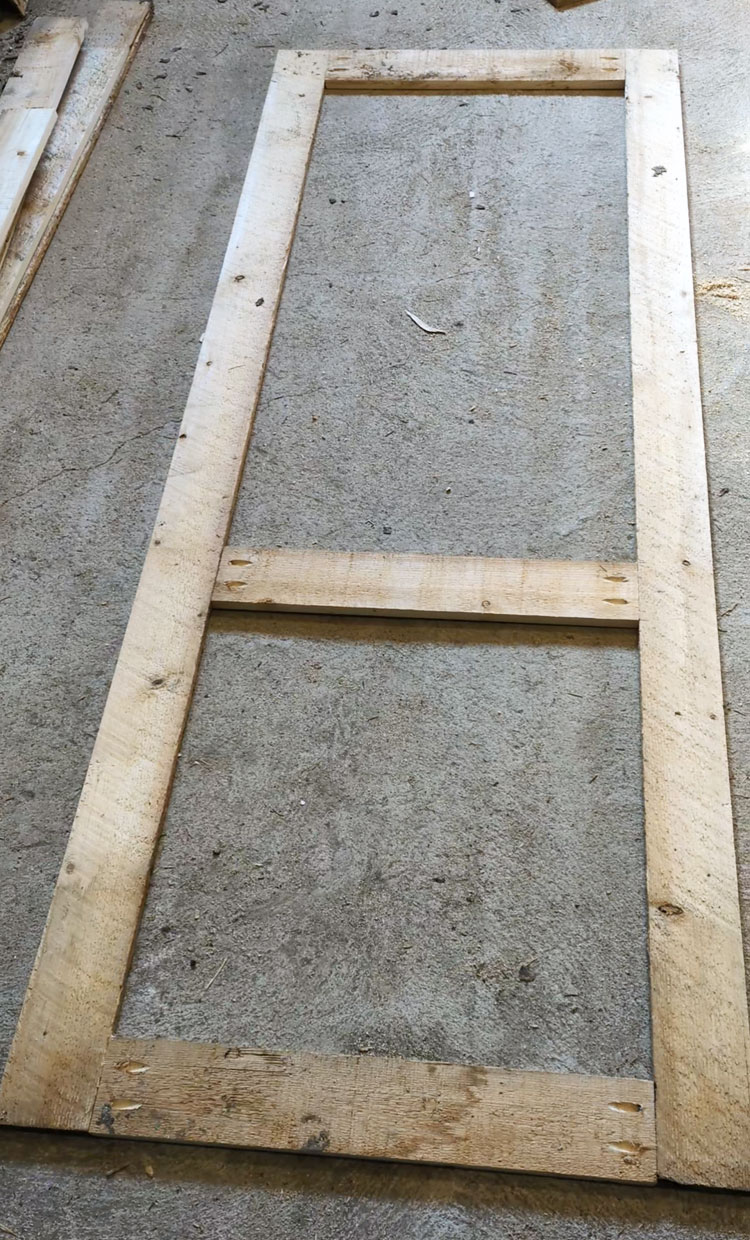
Making the doors turned out to be a much bigger deal in my mind than in real life. They went so smoothly. I’m still really proud of them.
I was able to use some of the leftover siding. I ripped a few pieces in half on my Dad’s table saw for the outer frame and then used my Kreg jig to drill pocket holes and screwed them together. The jig is a super easy way to do joinery, though it took me a minute to remember how to use it (it’s been awhile).
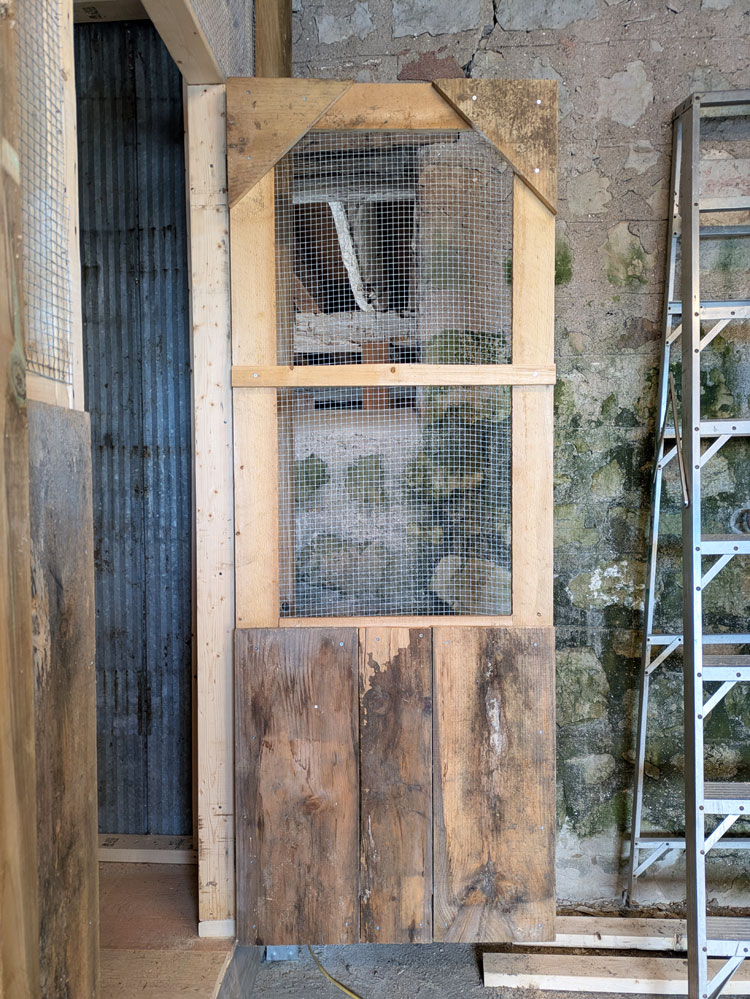
I reinforced all the corners for extra stability. Then I stapled mesh on the top section so that we can peek in at the birds.
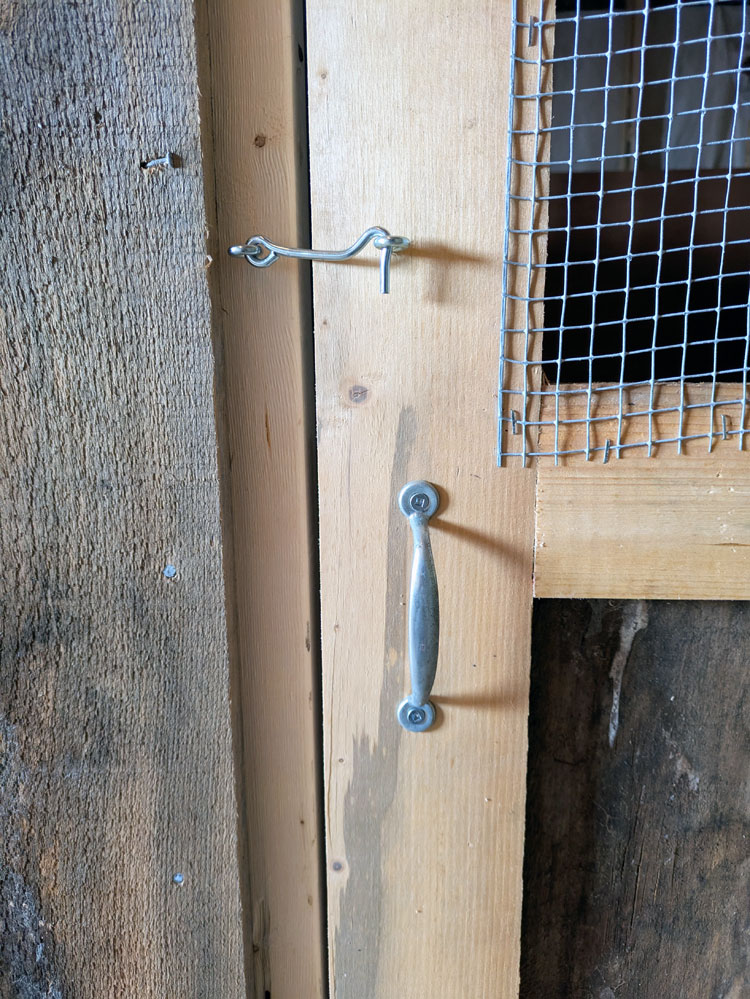
My Mom raided my Dad’s hardware stash for hinges. She also found hooks and eyes to keep the doors closed. I found handles in my hardware stash.
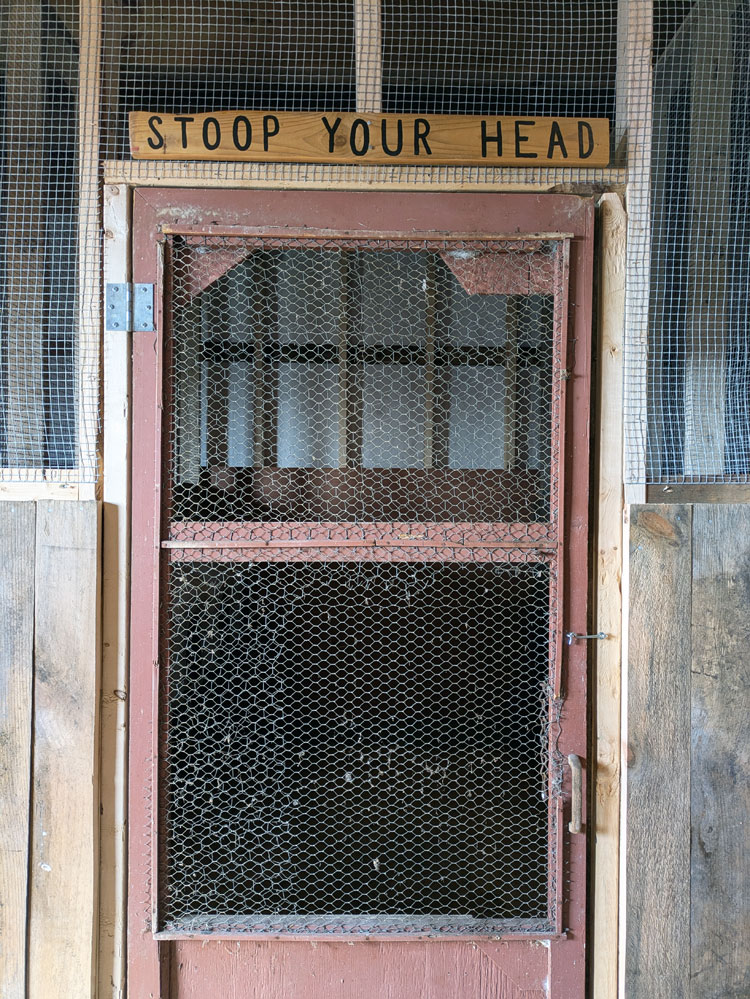
The finishing touch was a fun one. Above my Dad’s door (which is a bit short), I made a sign that says “stoop your head.” This is another sentimental memory. On the last night of our Ireland trip, we went to a restaurant called Stoop Your Head. Inside the restaurant was a low doorway with a sign above. I copied the sign and hung it above my Dad’s door. Seeing the sign in our coop is a fun–and helpful–reminder.
We are so close to finishing the coop. We are so close to birds! In fact, they’re on order. ETA April 22!
To see the doors in action, check out the videos I’ve been sharing on Instagram. Follow me at juliaon129acres, and catch up on all the construction in the coop highlights (part 1 and part 2).
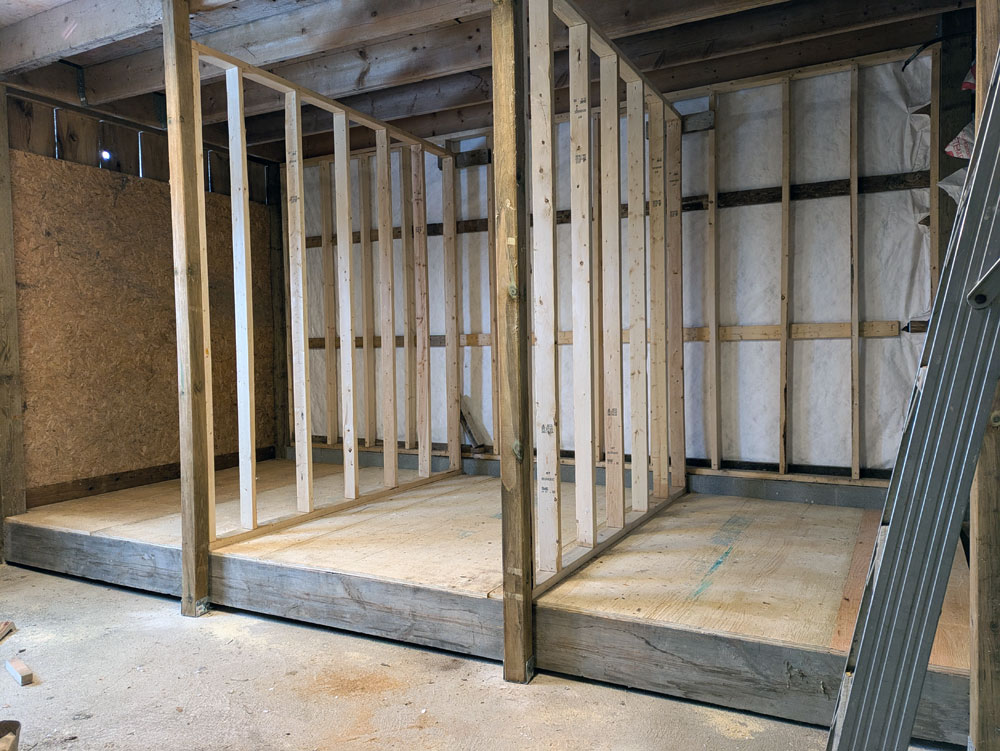
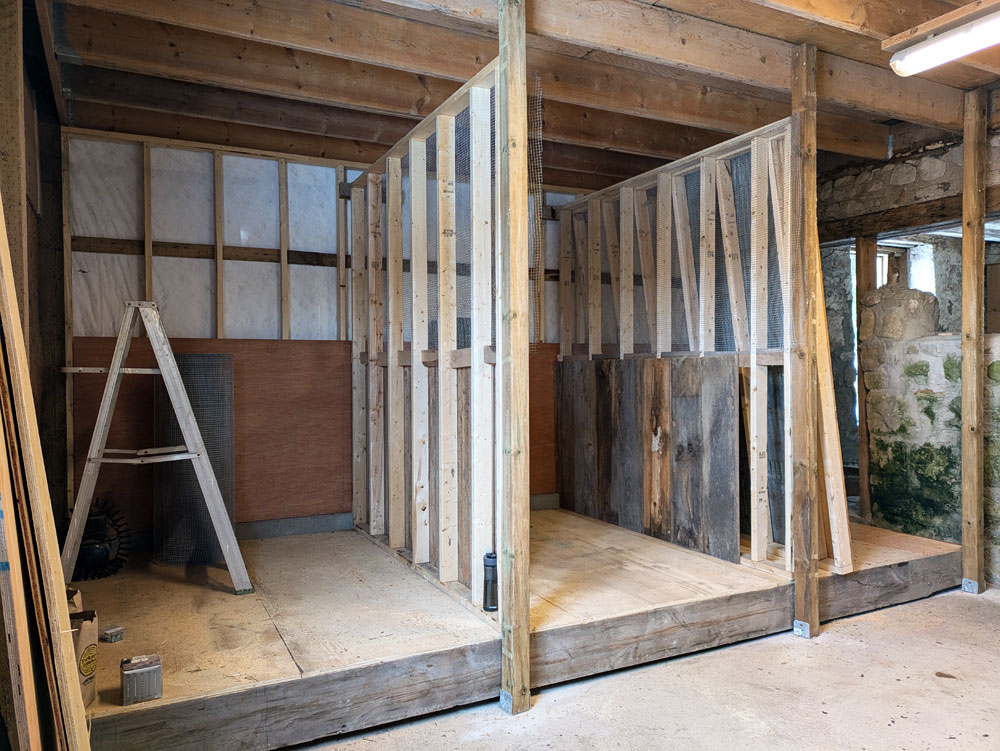
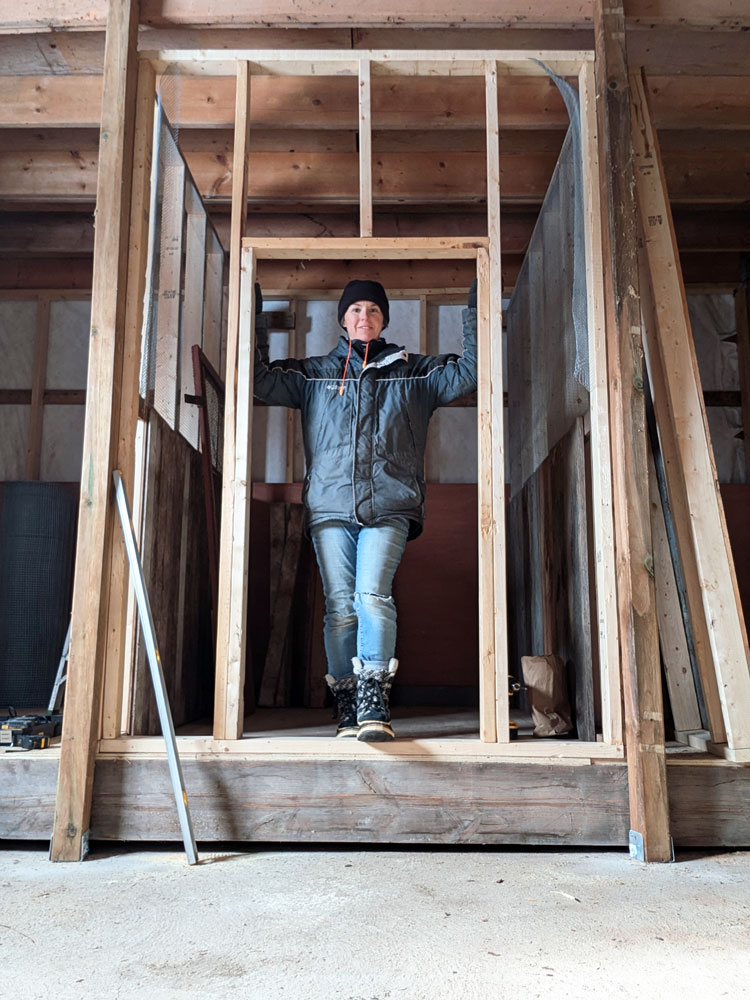
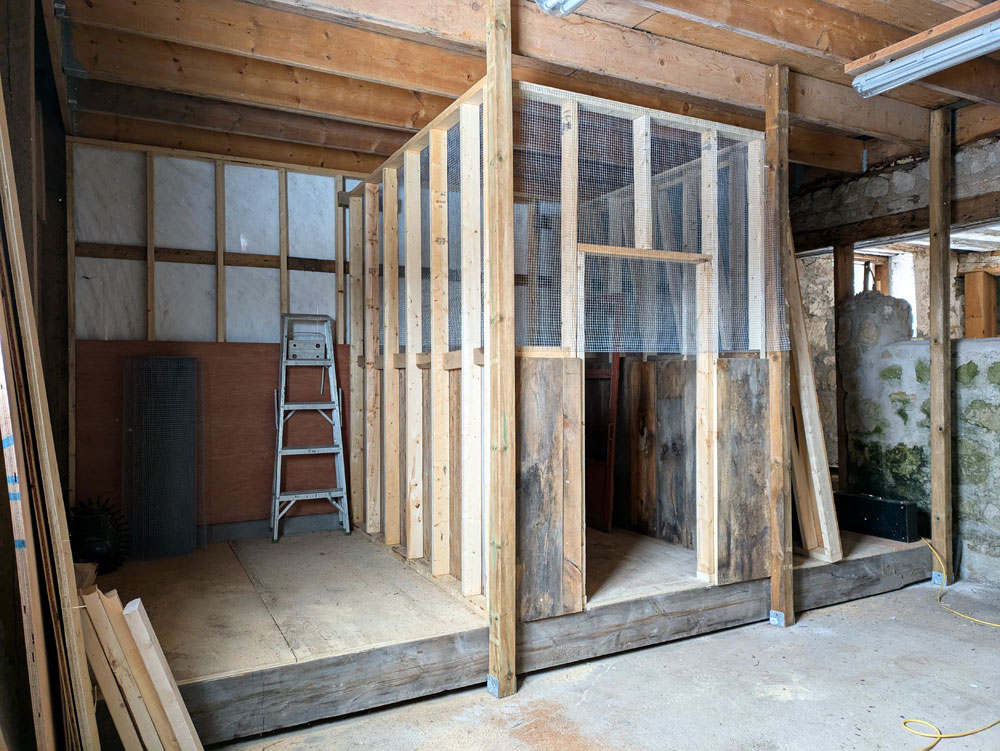
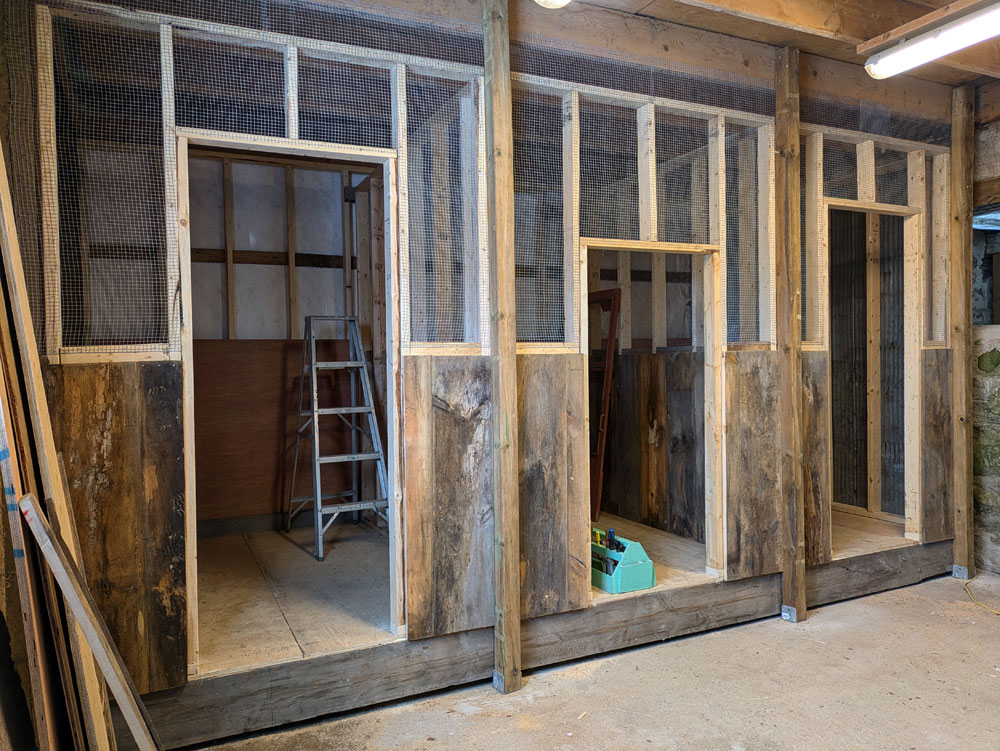
There has been major progress in the coop. All the walls are in place.
I actually built the two interior partition walls on the last day before Christmas holidays (when I finished the floor). Then, when I returned to construction in January, I put up the cladding and built the rest of the walls.
Of course, there’s more to the story. Let me back up a bit. As always, I have details.
Reminder, the coop is going to have three pens. Each partition sits on the new floor I built and lines up with posts I put in. (This post shows the plans for the coop.)
The interior walls between the pens were easy. Studs 16 inches on centre. Wood cladding on the bottom half (including some fancy tongue and groove salvaged from the old coop). Mesh on the top.
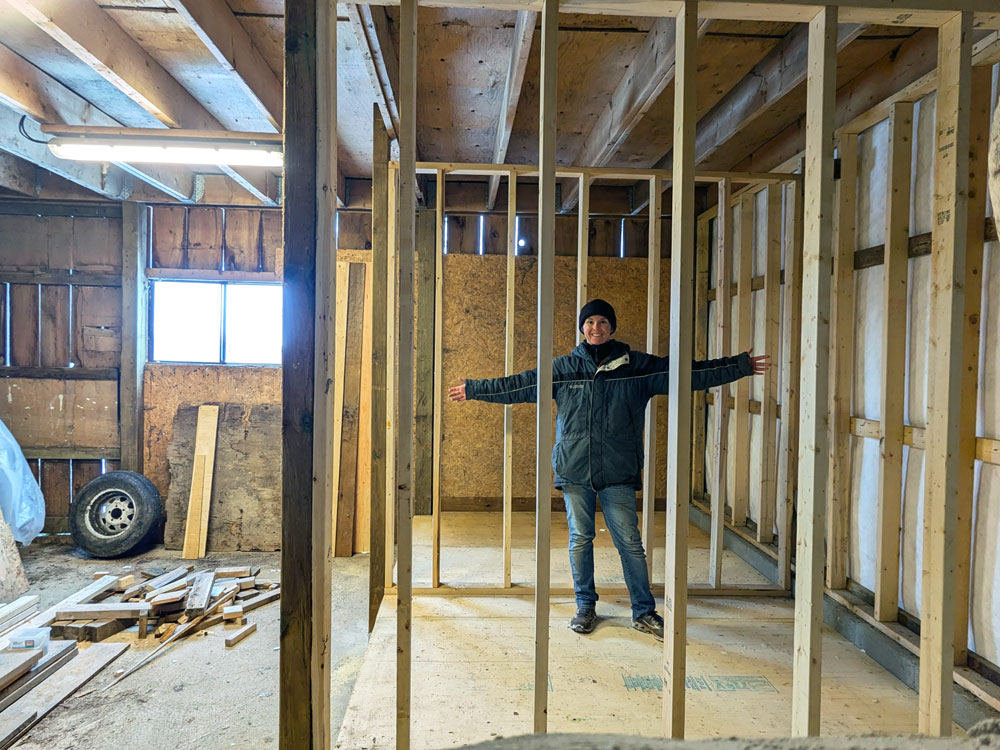
At one end, I decided I could use the exterior wall of the barn as the wall for the coop. At the other end, I needed to build a new wall to achieve my room-within-a-room plan. This wall gave me a bit of trouble.
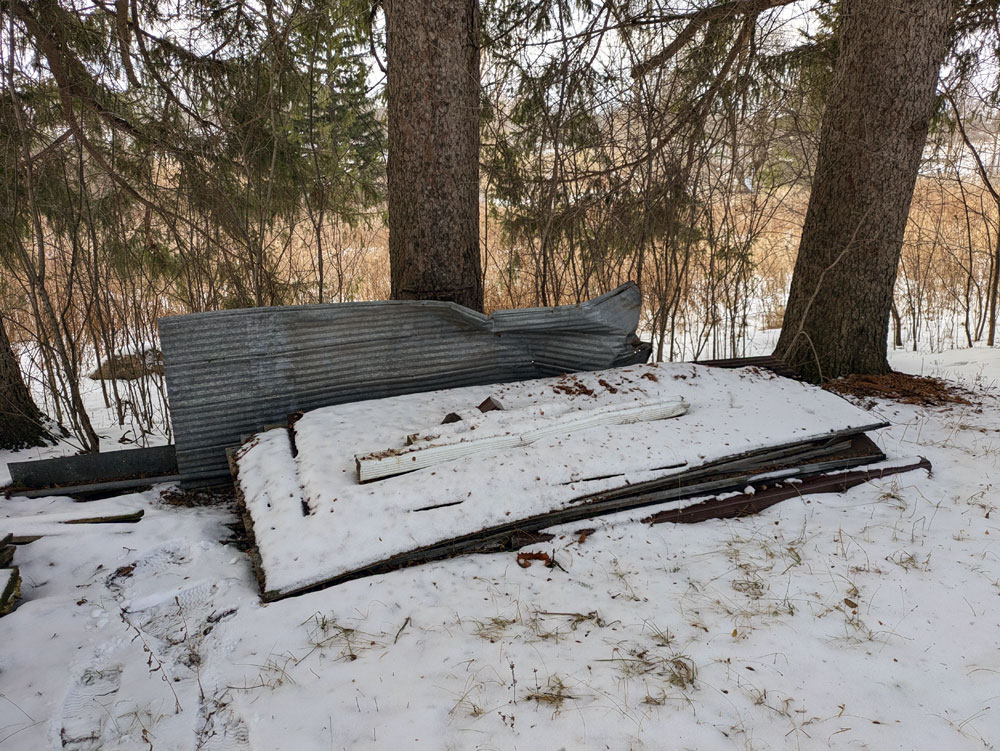
Like the other walls, I built it flat on the floor and then lifted it into place. Given that this wall was going to be against part of the stone of the barn, I thought it would be helpful to put the cladding on before it was installed. I stapled my mesh, then I decided to use a piece of metal roofing from the old coop to cover the other half.
As I lifted it onto the platform, I realized I’d missed a crucial step. I forgot to square up the wall before putting on my cladding. When I tried to slide the wall into place, sure enough, it didn’t go. The wall was a parallelogram. The opening was a rectangle.
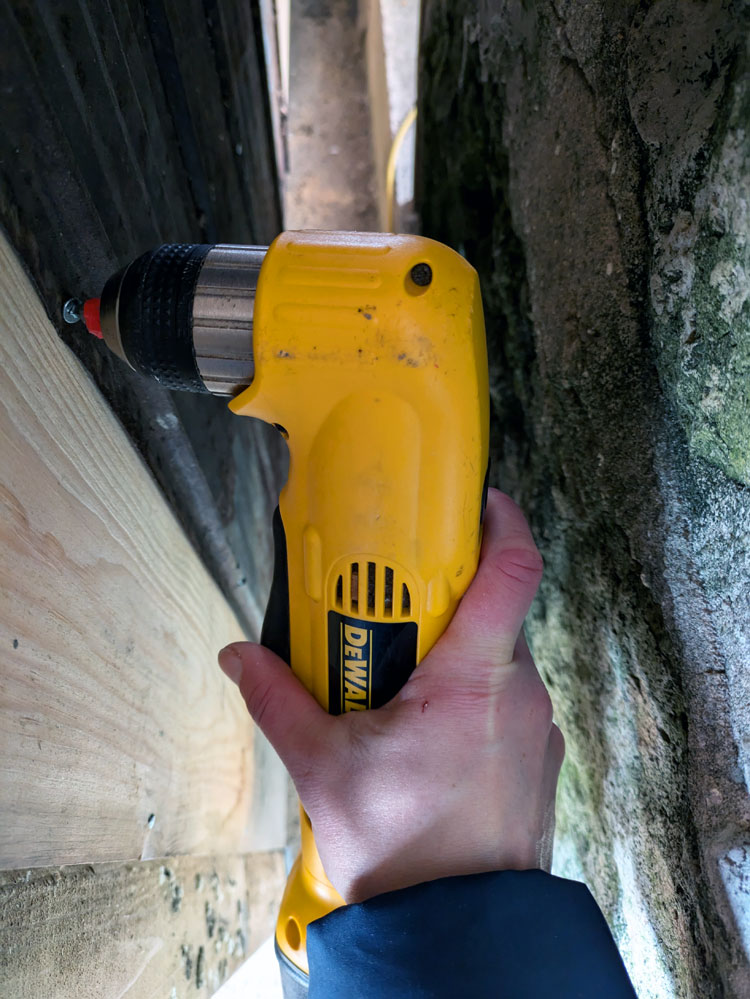
I took off all the cladding then Matt’s Dad (who came to help me out) and I lifted it out, laid it back down on the floor and tried to square it up. We couldn’t line it up, so we put it back in the opening, where it straightened itself out perfectly. Only problem, the cladding wasn’t attached, and I had very limited space up against the stone of the barn. After borrowing my Dad’s right angle drill and testing my limits in stretching and contortion, I managed to get the metal back on.
The front walls of the coop were much more straightforward. I had been holding off building these ones, as I wanted to have my doors so I knew what size openings to build. I had a plan to use old screen doors, but it turned out secondhand screen doors are very expensive. Once I accepted that I was going to be building doors, I realized I could make the openings any size I wanted.
The first wall I built was the middle one because I was able to find one door. This is a very special door because my Dad built it for my childhood coop. The coop is now a storage shed in my Mom’s backyard, and she, knowing I was looking for doors, suggested I could take the one off the old coop.
I love having a door from our family’s coop built by my Dad as part of our coop. My Dad set me on this path of birds when I was younger than Ellie. I remember him building the coop in my grandfather’s garage. Now I’m building our own coop and continuing something that he really enjoyed.
Like the partition walls, the front wall has wood cladding on the bottom and mesh on the top, then the doorway is centred.
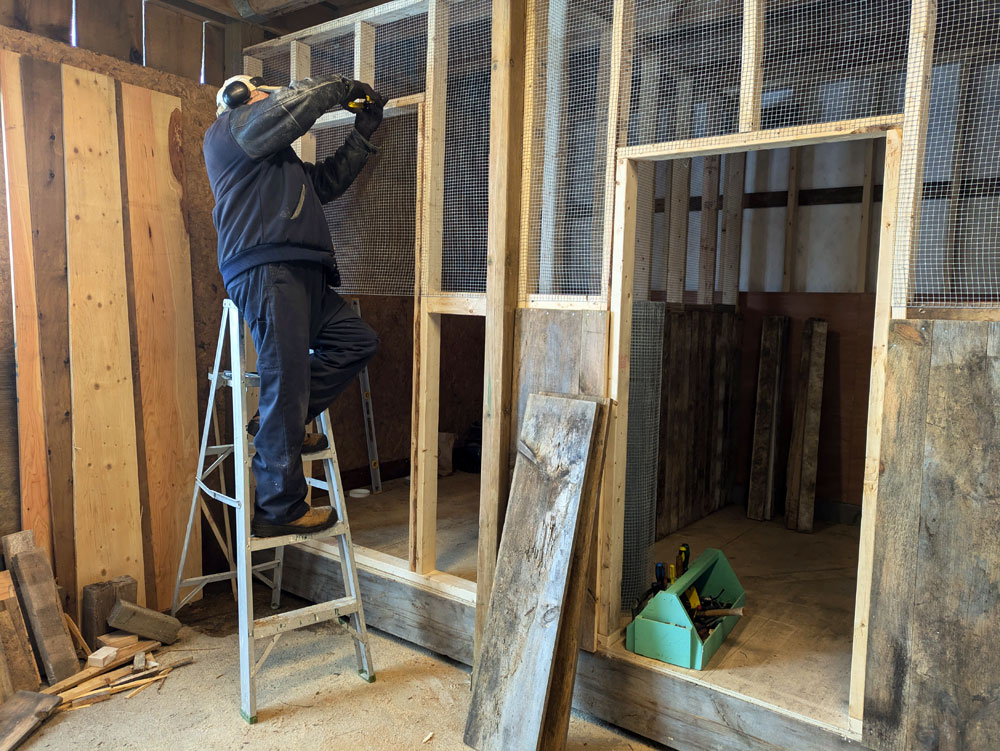
The last two front walls, Matt’s Dad and I knocked out in one very productive day. I built these doorways a bit taller to accommodate the doors that I planned to make.
Having the walls in place is another major milestone. It actually looks like a coop!
As I mentioned in my last update, I’ve been documenting the coop construction on video and sharing on Instagram. If you want to see more about the coop, follow me at juliaon129acres, and catch up on all the videos in the coop highlights (part 1 and part 2).
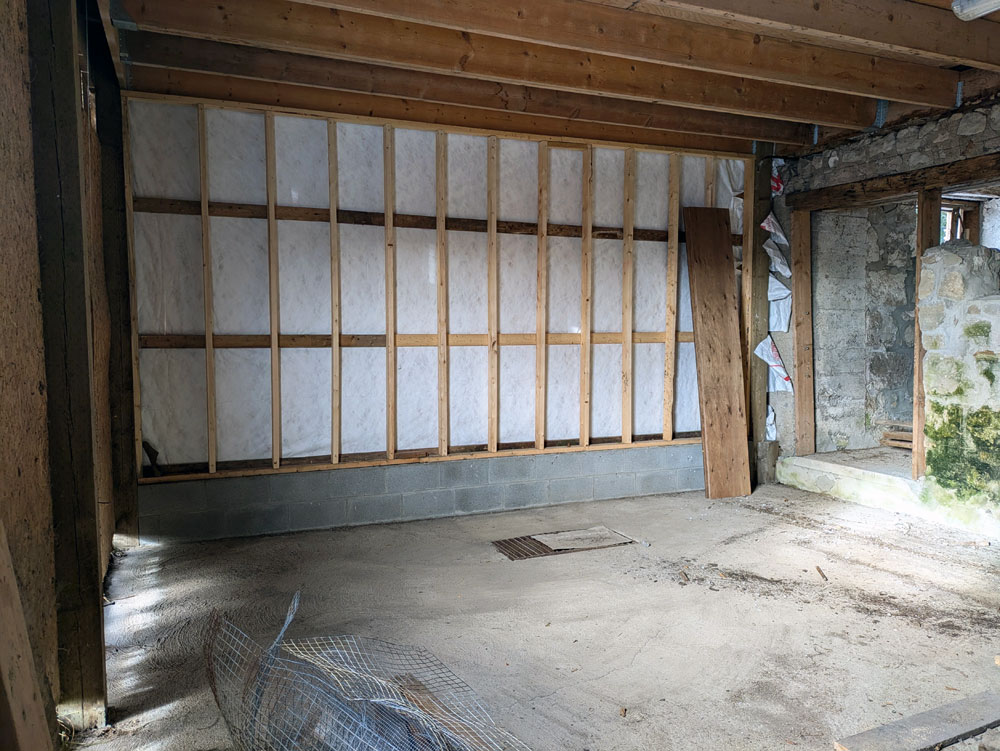
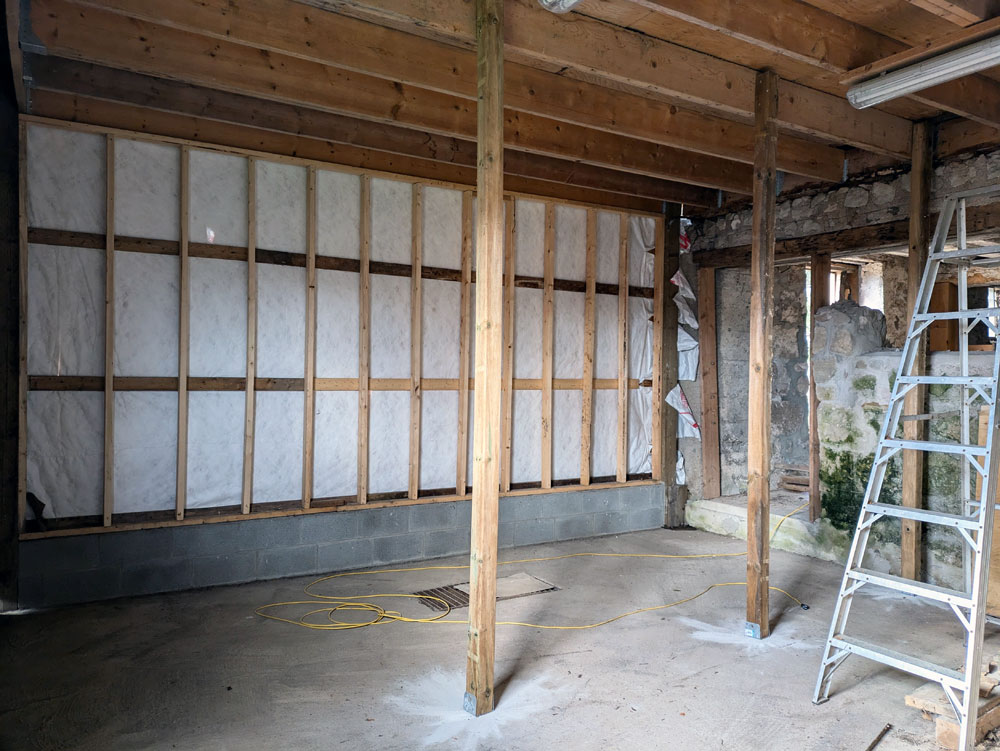
A lot has happened in the coop since my last update. Key word, in the coop. Over the last two months, I’ve been working inside the barn to build the actual coop.
The plan is to make the coop a kind of room within a room. I feel like this is best way to make it secure from predators. It’s also easier to construct a standalone space, rather than trying to tie into the existing barn, which may or may not be square and level.
So this means I’ve been building a floor, walls and ceiling.
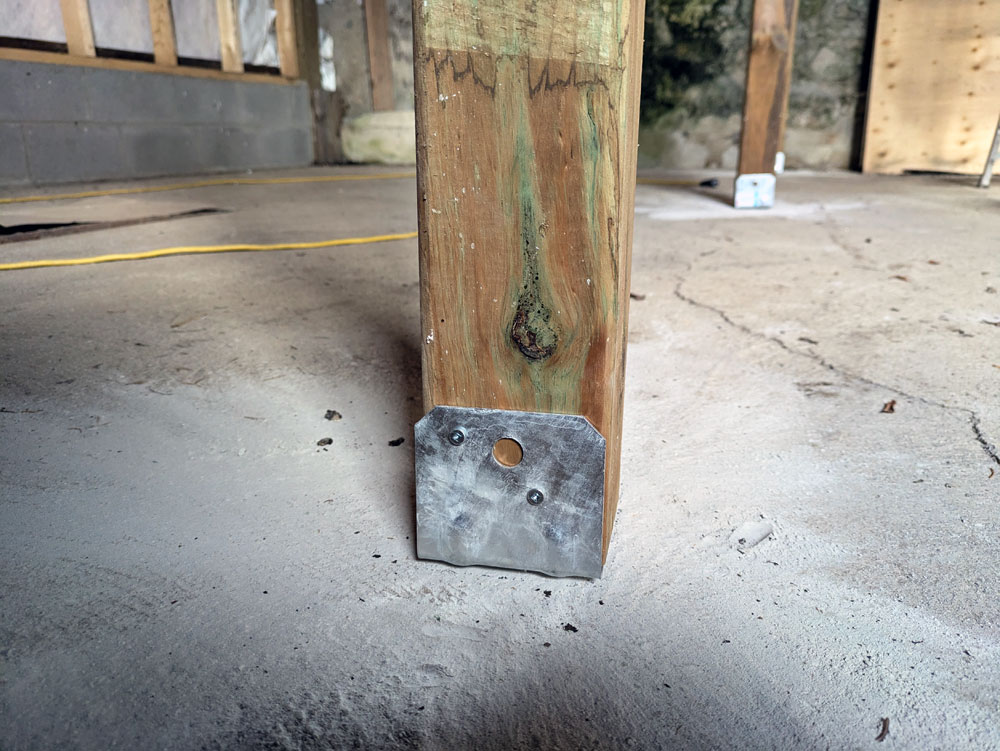
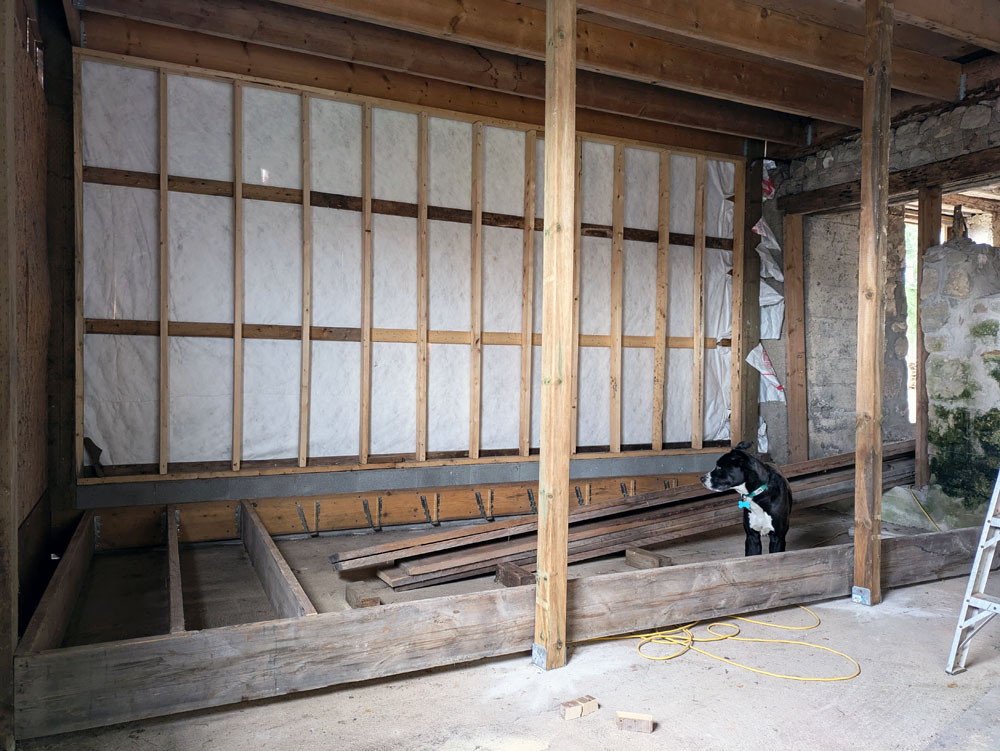
First step was setting three new posts. These support the floor, walls and ceiling. I drilled into the concrete floor, put in three saddles and then put up 4×4 posts that are screwed into the ceiling beam at the top.
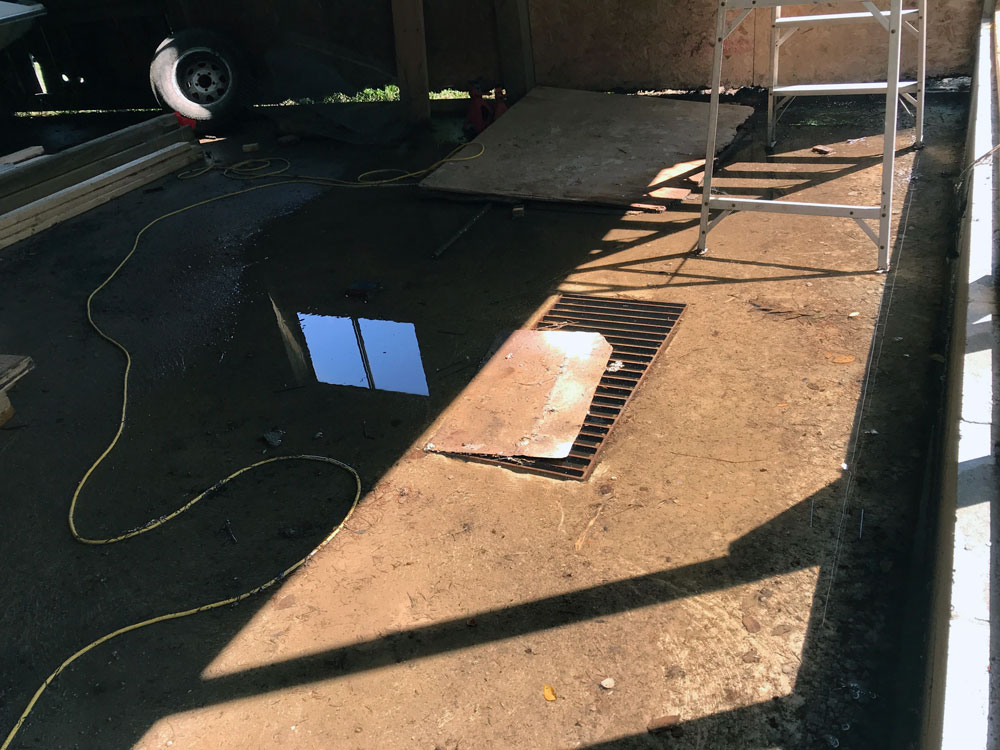
Then I could move onto the floor. I wanted a subfloor elevated above the existing concrete floor because this corner of the barn is sometimes a little wet. There’s a grate in the floor that appears to be connected to some kind of drain. But I have no idea where the drain goes and I suspect that it may be plugged, as every so often the grate overflows. We also a have a problem downspout and missing eavestroughs at the coop corner.
I’m hoping that new eavestrough and our new block wall will help to keep most of the water out, but to make sure our chickens don’t get wet feet (and our ducks don’t go swimming inside), a raised floor seemed like a good idea.
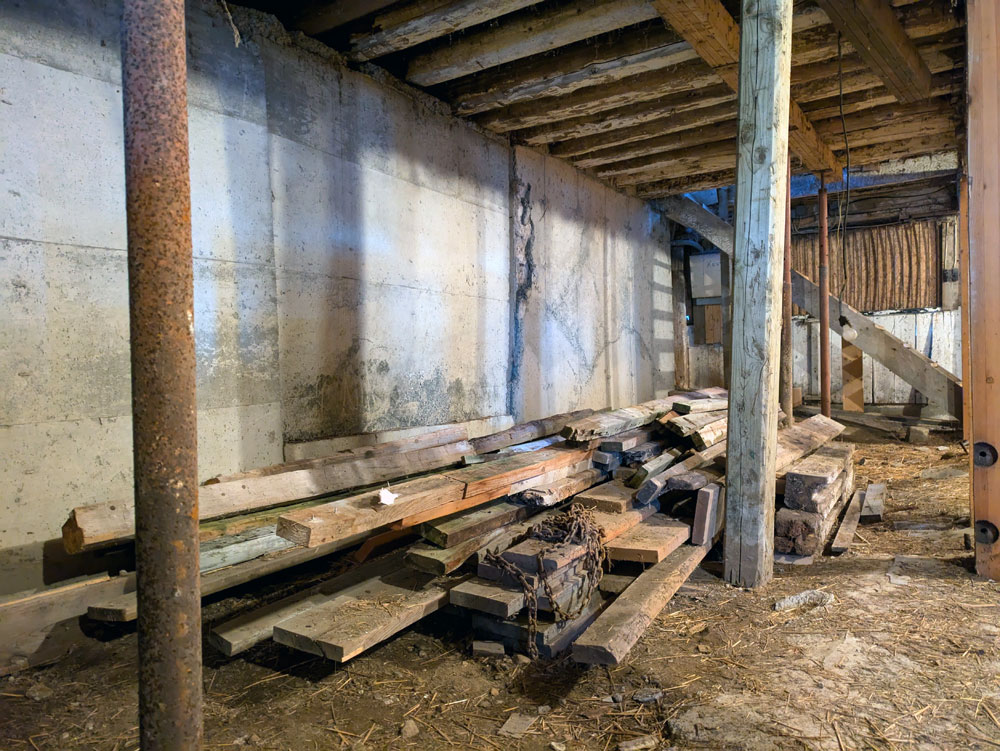
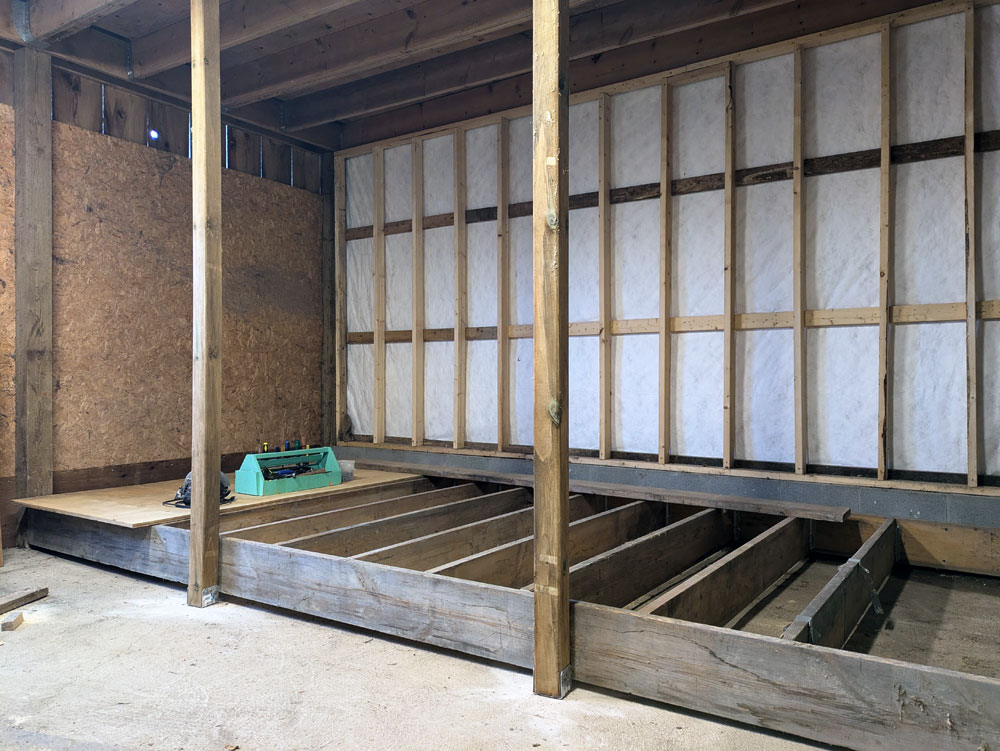
My mission with the floor was to not buy new lumber. We have a large amount of wood left by previous owners, so I raided that for joists. I found a lot of very long 2x10s (I was hoping for 2x8s), so we have a very strong floor.
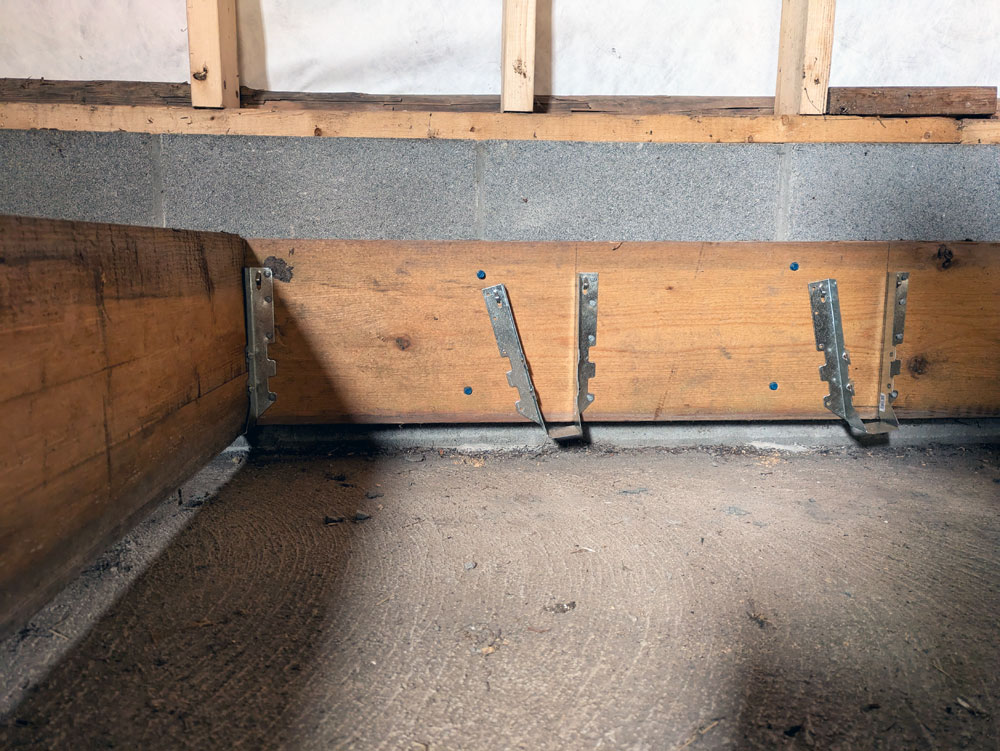
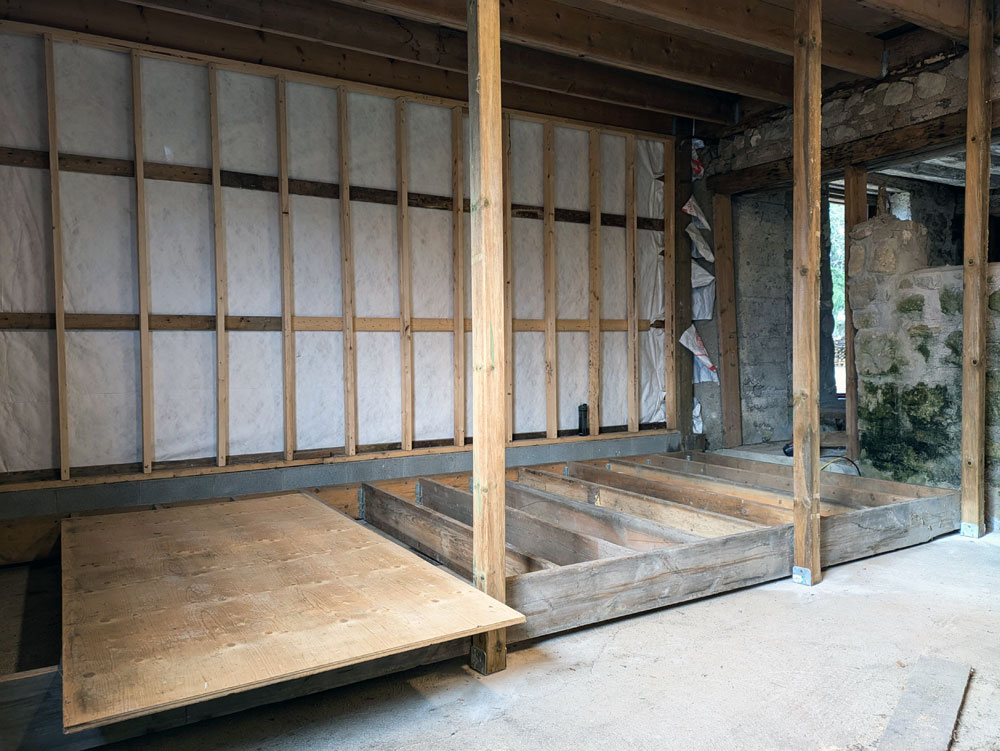
I put a rim joist on the new block wall, and then worked my way around to my new posts, keeping everything level. Then I installed hangers and set my joists in place. I do not enjoy nailing joist hangers, but they definitely made setting the joists much faster and easier to do on my own.
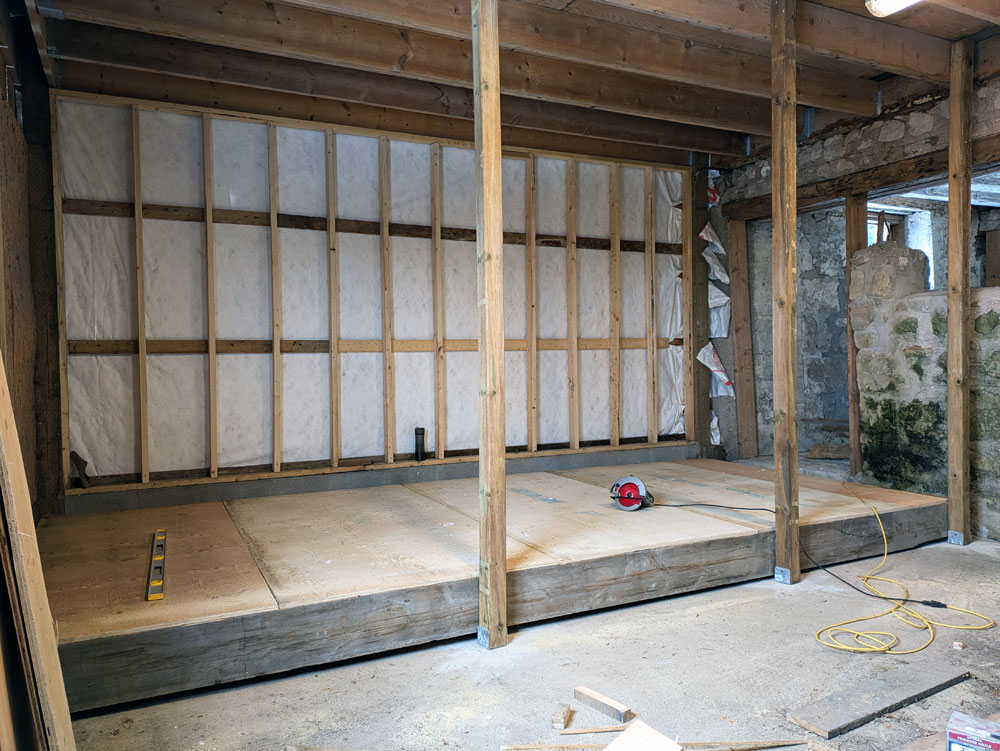
Once the joists were finished, it was simple (though heavy) to lay down some sheets of plywood and the floor was done on the last day before Christmas holidays.
I’ve done more since then, but I’ll save that for my next coop update. In the meantime, if you want to see more about the coop, I’ve been documenting the construction on video and sharing on Instagram. Follow me at juliaon129acres, and catch up on all the videos in the Coop highlight.
I am really, really excited by the projects I have planned for this year. This year will bring a lot of new and big things for us and the farm. They’re all centred around how we live, how we use the house and what we want for our lives here.
Having birds has been a goal since Matt and I were thinking of buying a farm. I made really good progress on the coop last year (updates are coming), and I’m aiming to finish it soon so we’re ready to welcome some new feathered friends this spring.
Following our big cleanout last year, Matt’s office is ready to become my office. I am excited to have my own space for working, writing, crafting, sewing, whatevering. This will be the first project of the year. (In fact, it might already be underway.)
A dedicated play, crafting, creating space for Ellie is the second step in the game of dominoes that is our whole home reorganization. After I move into my new office (and remove all of my things from Ellie’s old bedroom), setting up this room just for Ellie is next on the list.
Last year was a “get back on track” year in terms of home projects, and I feel like I did pretty well. It wasn’t always easy. It wasn’t always fun. It wasn’t always the most “bloggable” content. But I feel like I made progress, which for me is very satisfying.
Also satisfying? This annual look back at how I did on home goals 2024.
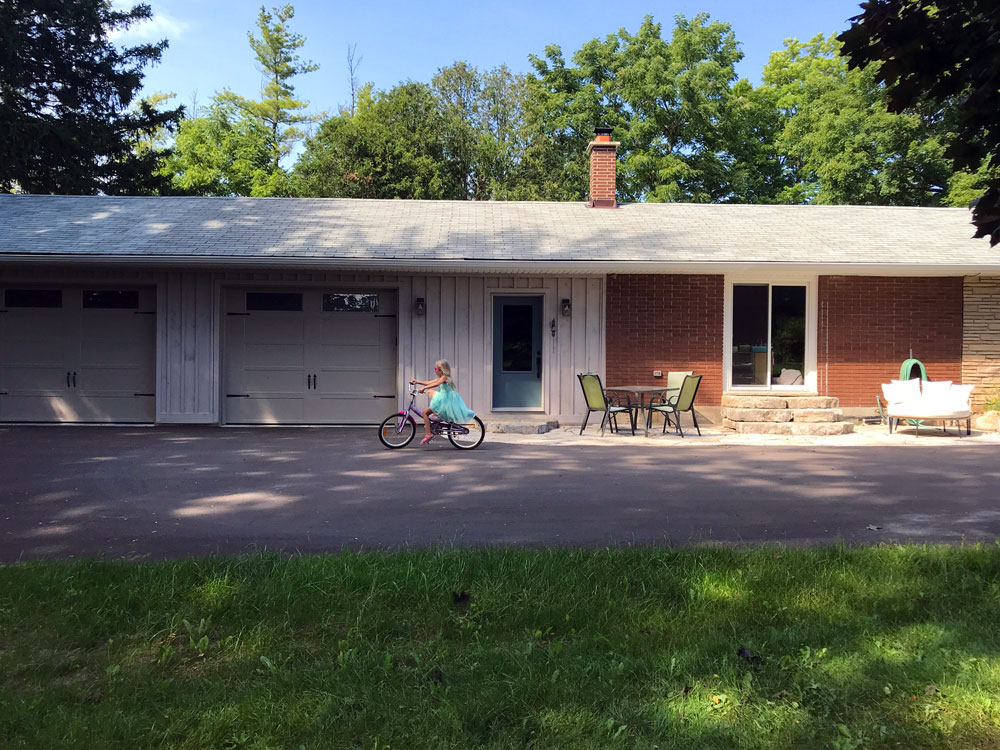
Driveway
Paving the driveway was the final step in our garage/mudroom/patio makeover. It feels like a big accomplishment to have this project completely done. The south side of our house has had a huge transformation, and I love the result. Plus, clearing the snow this winter has been much easier.
Coop
The coop ended last year in pretty good shape (I have updates to share). It’s not done, but we’re closer and getting birds this spring seems possible. I’m very proud of how my plans are coming together and that I’ve done most of the work myself.
Vegetable garden
As you saw in my Home Goals 2024 mid-year report, I decided to let the vegetable garden go last year. It was the right choice for me at the time, and looking back I don’t regret crossing it off the list.
Clean-up inside
Last year I wrote that “anything will be progress.” So, on the goal of tweaking, organizing, purging our house, I can say that I made progress. Fully finishing Ellie’s room was a big step. There’s still a lot more to do, so I feel like I’m still in the middle of a game of dominoes. Fixing one space will fix another which will lead to the space after that (which will lead us to Home Goals 2025, so stay tuned).
Clean-up outside
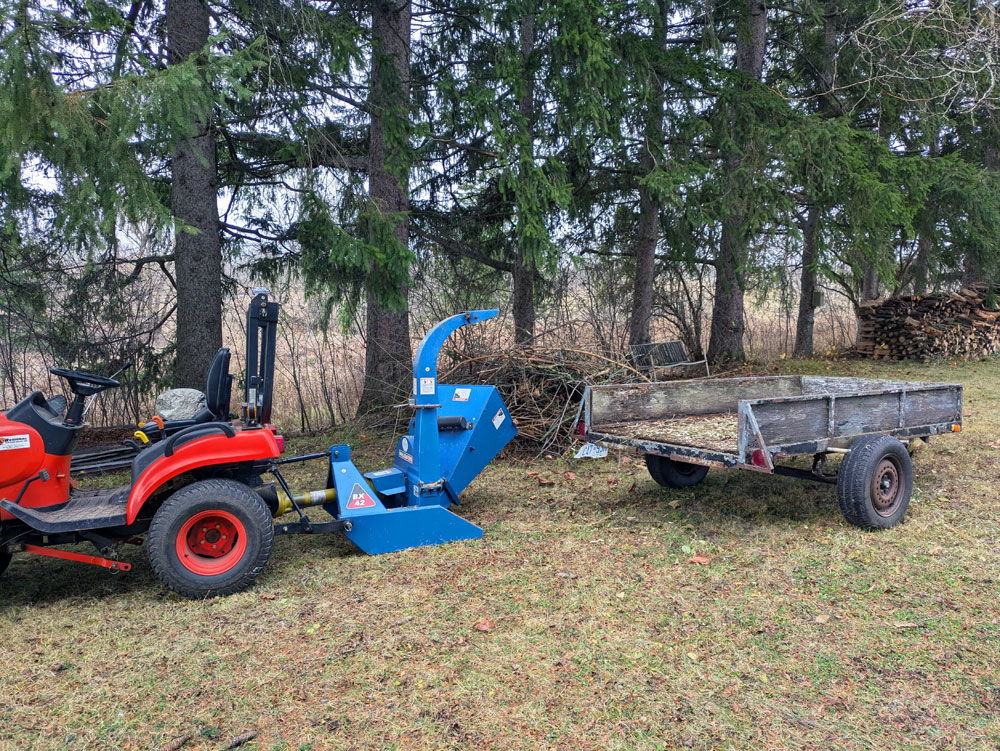
Our chipper and rotary cutter were both in action last year, and I was able to maintain all of the areas I had cleaned up previously. I also cleaned up a few new areas around the coop, so we are mowing all the way around the barn for the first time since we moved to the farm. My other big clean up, both inside and out, was a large quantity of Matt’s stuff. This project fell into the not easy, not fun and not bloggable category. But now it also falls into the done category.
Personal goals
I also had some personal goals last year that were about some of the other things that are important in my life.
Walking: 469.5km (39km per month. The same as last year and a bit shy of this year’s goal of 42km per month–though I still don’t track on-farm field walks, which I do at least once a day with Cigo)
Monkey bars: I still do them every week.
Reading: 37 books (didn’t hit my goal of 50 books)
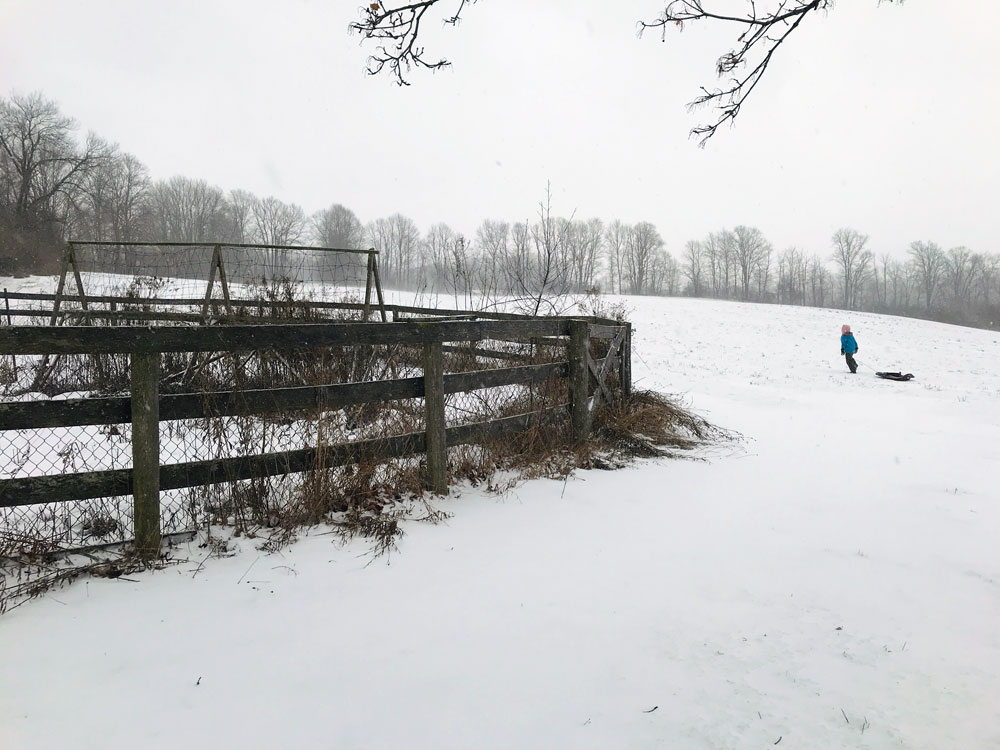
1,000 Hours Outside: 939.5 (close, but this is a challenge that even if you lose you win)
Family albums: I completed 2020 and 2024, so that leaves 2021 and 2022 to catch up on.
Rest: Still my hardest challenge. I’m more conscious of my need to rest and I feel like I’m doing a better job of listening to my body. Though I still need to go to bed earlier.
Looking back at 2024, I’m proud of what I accomplished. Everything I did set us up for what I want to do this year, and I’m really excited for what’s ahead for 2025. Stay tuned for Home Goals 2025 coming up.
Did you have any home goals last year? How did you do on projects around your house? What was your big accomplishment for the year?