One Room Challenge Week 5

We’re in the homestretch now on the One Room Challenge. Today is the second last post. Next week is reveal time. Make sure to visit Calling it Home to check out all of the great progress everyone’s made.

Fortunately, the laundry room makeover is in the homestretch too. My original project plan was to have all of the “work” done as of last weekend so that this week could be devoted to decorating.  Guess what? I’m pretty much on schedule (aside from my back-ordered cabinet hardware).
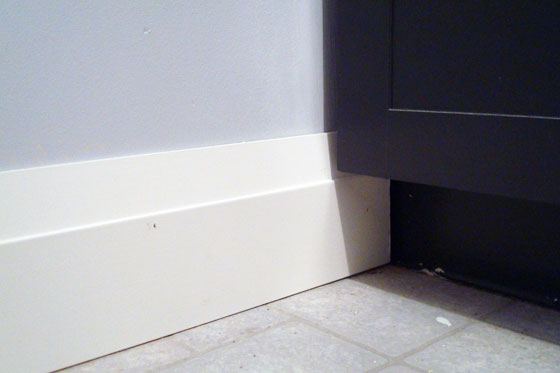
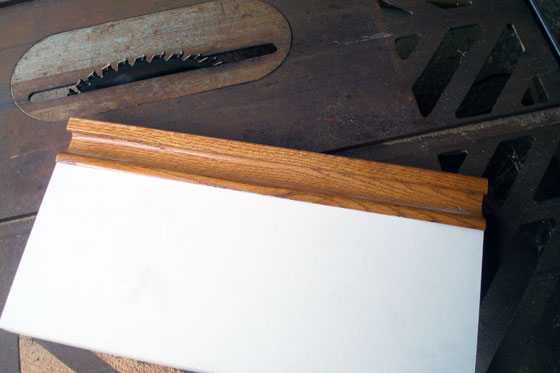
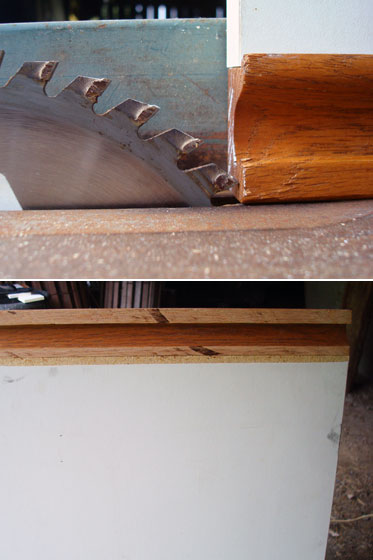
  1. Add shaker style trim to the cabinets
  2. Paint the cabinets
  3. Install doors and drawers
  4. Remove ceiling rack – By Oct. 3
  5. Patch ceiling and walls – By Oct. 3
  6. Paint ceiling – By Oct. 10
  7. Paint and install baseboard and paint window trim – By Oct. 10 Done Oct. 13
  8. Deep clean (sink, counter, floor, machines) – Oct. 13 Rescheduled to Oct. 19 26 Done Oct. 26
  9. Paint walls – By Oct. 17 Done Oct. 18
  10. Replace ivory washer outlet with white one – By Oct. 19 Done Oct. 18
  11. Level washing machine – By Oct. 19 Done Oct. 18
  12. Build and install ceiling rack – By Oct. 24
  13. Build and install towel bar – By Oct. 24 Done Oct. 25
  14. Install cabinet hardware – By Oct. 24 Rescheduled to Nov. 11
  15. Build and install light fixture – By Oct. 26 Done Oct. 25
  16. Remove non-working sprayer from the sink and plug the hole – By Oct. 26 Done Oct. 27
  17. Decorate – By Oct. 31

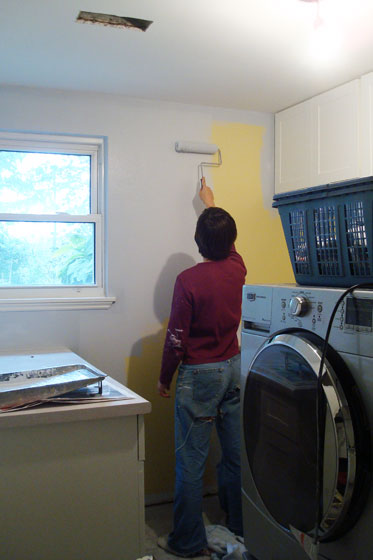
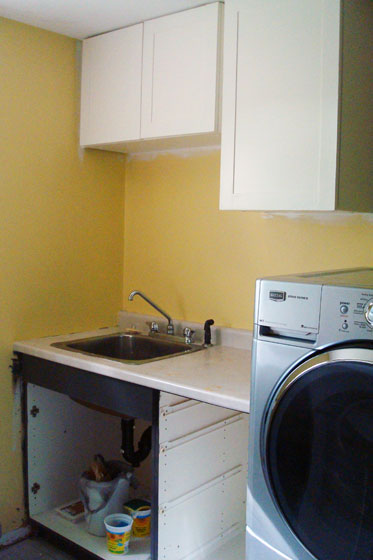
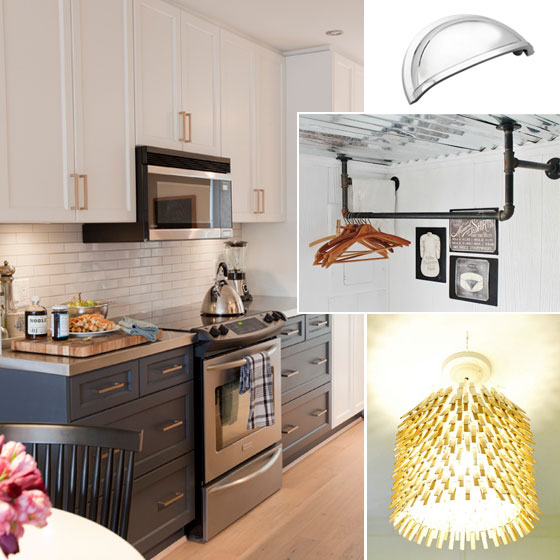
The laundry room is currently a mix of projects to be finished and styling that has started.

Laundry room mid-makeover

I know you can’t see very much here (I have to save some suspense for next week’s reveal), but it’s looking so good. I’m super excited.

The suggestion for this post is to talk about if our plans have changed. Mine haven’t really. In fact, I realized over the weekend how close I am to my original plans.

I’ve been thinking about this laundry room for a long time. I love Pinterest, and I’ve been pinning laundry room ideas nearly since we first moved to the farm (see my board). I knew I wanted to make a clothespin light like this one from Young House Love. I knew I wanted to replicate the rustic drying rack from Knick of Time. I made both of these, and they turned out pretty much just like my inspiration.

Although I can’t truly say “made.” The rustic drying rack is being a bit cantankerous. Today will be sixth–that’s right, 6–trip to Home Depot for pipe. The main hanging part is working, but the horizontal braces are a total Goldilocks situation–either too short or too long. I keep buying new sections of pipe, but so far I haven’t found the right fit. The plan for this afternoon is to have the staff cut me the exact length I need (fingers crossed I’ve figured out what that is).

Hanging rack made out of pipe fittings

Although I had most of the laundry room worked out in advance, I did add a few things mid-project (changing the ivory plugs for white ones and removing the sprayer from the sink). Those can’t really be called a change in plans, though.

Now I just have to stay focused on the finishing details. That means I need to stop thinking about replacing the faucet and remember that I don’t have time to sew a new cover for the ironing board. The finish line is in sight. Now is not the time for detours and add-ons.

Do yDo yDo your projects usually turn out like you envision? Are there any other Pinterest fans? Do you like last minute add-ons too? Does anyone else start styling before the reno is completely finished?

One Room Challenge Week 4

We’re heading into week 4 on the One Room Challenge. I feel like the laundry room has turned the corner. By that I mean, I’m seeing some serious progress.

One Room Challenge Linking Participant

The transformation isn’t limited to the laundry room, either. In the spare bedroom (aka the painting area), I folded up all the drop cloths, put the paint cans away and swept the floor. It’s almost ready to go back to being a bedroom. In the basement, I broke out of the laundry room and vacuumed the carpet. This may seem like a more regular chore, but it represent serious progress because vacuuming has been on hold (as if I need an excuse) until the “messy” stuff in the laundry room is all done.

In the laundry room itself, the walls are all painted and the machines are back in place. Shall we sing praises to the power of paint? There’s no decoration or accessories, but I already feel like things are starting to come together.

Laundry room in progress

Let’s take a minute and talk about laundry pedestals, okay? When we bought our new machines and chose front loaders, I knew I wanted pedestals. I hate bending over to just a few inches above the floor to do laundry. The pedestals solve that problem easily.

They do remove the ability to put a counter over the top of the machines (unless I was 10 feet tall, which I’m definitely not). I didn’t need more counter space, though, so it wasn’t a big sacrifice. The pedestals also give a lot of storage in the drawers (although to be honest I haven’t used that either).

I probably could have simply built a platform and saved us the expense of the pedestals (and they were expensive for what they are). However, I do like that we have the option of using the drawers if we want to, and I also like that they match our machines.

You might recall that I mentioned in my update two weeks ago that the washer vibrates crazily (and noisily) when it goes into the spin cycle. While we had it pulled out of the way for painting, I took the opportunity to check it over. It turns out that the bolts holding the pedestal to the machine were all loose. A few quick turns with the socket wrench tightened everything up. Now that the washer’s back in place, it’s operating much smoother and quieter. Task #11 done.

Here’s the rest of the updated to-do list. In total I was able to cross three things off this week. Let’s hear it for progress!

  1. Add shaker style trim to the cabinets
  2. Paint the cabinets
  3. Install doors and drawers
  4. Remove ceiling rack – By Oct. 3
  5. Patch ceiling and walls – By Oct. 3
  6. Paint ceiling – By Oct. 10
  7. Paint and install baseboard and paint window trim – By Oct. 10 Done Oct. 13
  8. Deep clean (sink, counter, floor, machines) – Oct. 13 Rescheduled to Oct. 19 26
  9. Paint walls – By Oct. 17 Done Oct. 18
  10. Replace ivory washer outlet with white one – By Oct. 19 Done Oct. 18
  11. Level washing machine – By Oct. 19 Done Oct. 18
  12. Build and install ceiling rack – By Oct. 24
  13. Build and install towel bar – By Oct. 24
  14. Install cabinet hardware – By Oct. 24 Rescheduled to Nov. 11
  15. Build and install light fixture – By Oct. 26
  16. Remove non-working sprayer from the sink and plug the hole – By Oct. 26
  17. Decorate – By Oct. 31

Still on tap for this week? Paint touch-ups, some minor electrical work, and starting on the ceiling rack, towel bar and light fixture.

Laundry room in progress

I like the small projects stage of the makeover. Hopefully they go smoothly and progress happens quickly.

If you’re curious to see the progress that other ORC participants have made, make sure to head over to Calling it Home.

How do you feel about laundry pedestals? Do you have a front loader or a top loader? What’s your favourite stage of a project? Painting? Small bits? Electrical?

Challenges in the One Room Challenge

The recommended theme for today’s One Room Challenge update is setbacks. It turns out that this is actually a fitting topic for this point in the laundry room makeover.

Setback 1: The times in between

I’m not sure if anyone else has this problem, but this one’s a common challenge for me in DIYing. In between each stage of a project, I sometimes find it hard to change gears.

I finished painting the cabinets, but then the idea of getting the ceiling ready for painting–never mind actually painting it–was extremely challenging.

A great thing about the One Room Challenge is it helps keep me moving.

Baseboard in the laundry room

Baseboards installed. Yay!

As I posted on Friday, work kicked my butt last week. I fought back, putting in extra time and staying late at the office. Of course, this meant that I had less time at home to work on the laundry room. Which meant that I finally started painting the ceiling at 9pm the night before my scheduled deadline.

I’m sure time will be a common challenge among ORC participants. Heck, finding time is a common challenge of DIYers everywhere, I think.

However, I am very pleased to report that I’m nearly on schedule. Here’s the original plan with adjusted deadlines and a few new tasks.

  1. Add shaker style trim to the cabinets
  2. Paint the cabinets
  3. Install doors and drawers
  4. Remove ceiling rack – By Oct. 3
  5. Patch ceiling and walls – By Oct. 3
  6. Prime walls (pshaw, who needs prime?) and paint ceiling – By Oct. 10
  7. Paint and install baseboard and paint window trim – By Oct. 10 I was a bit behind schedule on install, but it’s done as of Oct. 13
  8. Deep clean (sink, counter, floor, machines) – Oct. 13 (Happy Thanksgiving Monday!) Rescheduled to Oct.19
  9. Paint walls (first coat is on, one more to go) – By Oct. 17
  10. New Replace ivory washer outlet with white one – By Oct. 19
  11. Level washing machine – By Oct. 19
  12. Build and install ceiling rack – By Oct. 24
  13. Build and install towel bar – By Oct. 24
  14. Install cabinet hardware – By Oct. 24 Rescheduled to Nov. 11 due to setback #3 (see below)
  15. Build and install light fixture – By Oct. 26
  16. New Remove non-working sprayer from the sink and plug the hole – By Oct. 26
  17. Decorate – By Oct. 31

So it might be a problem that I keep remembering new tasks to add to the list. It seems like I’m adding things as fast as I’m crossing them off. However, the progress is continuing despite a couple more setbacks.

Setback 2: Paint

The second setback isn’t really serious enough to be classified as a setback. It’s more of a lesson learned.

Painting the laundry room

When it comes to painting ceilings, I just use white primer. We had a bit of primer left in the giant pail that we used for the rest of the basement reno. To make sure the colour was absolutely consistent, I wanted to use this primer. Well, it turns out that this paint has been sitting a little too long. There were all kinds of hardened bits in it. It made painting the laundry room ceiling incredibly frustrating. I got a mostly smooth finish, but I only did one coat. I think it looks good enough. If I have to, I will strain the paint and go again.

The other lesson learned (or confirmed) when it comes to paint is that BM Wrought Iron definitely has blue undertones. I first used Wrought Iron in Matt’s windowless bathroom. There it looks pretty pure, super dark grey. In the laundry room, where there’s lots of natural light from the window, the cabinets look a bit navy blue sometimes.

For the wall colour, we walked up the paint strip and chose a much lighter tone of grey from the same slip as Wrought Iron. It’s close to Bunny Gray (read the story of our Frankencolour). We already knew that this one was slightly blue as we used it on all of the other walls throughout the basement. I had intended that the walls and the cabinets would be a purer grey, but I don’t care enough to repaint.

Plus, anything’s better than that yellow. Sing it with me people in the tune of Elton John, “Goodbye yellow gross paint.”

Setback 3: The hardware

The final setback I’ve had is the cabinet hardware. I wanted cup pulls for the drawers. I wanted them to be pretty simple without a flange or other details, and I wanted a chrome finish. I had ordered these pulls from Home Depot.

Chrome cup pull

A week or so after I placed the order, I got a call from HD that they couldn’t get anyone at the manufacturer to answer email or the phone.

I looked at other big box stores and couldn’t find what I was looking for. HD had offered me a refund, but it took me awhile to make it into the store. By the time I was standing in front of the customer service desk, the associate let me know they’d started receiving orders again from the company. If you read my post on Friday, this is when I heard, “I’ll give you the refund, but let’s try and place the order again. I won’t charge you even if it goes through.”

How awesome is that?

A few days later I came home to a message from HD. My order went through (yay!), but the pulls are on back order (boo!). They should be here by Nov. 10. That’s just nearing the end of the One Room Challenge. I think I should be able to get them on in time for the final reveal.

The moral of the story

So, setbacks aside, the challenge rolls on. The best thing about this challenge is how encouraging everyone is. It’s been amazing to connect with other bloggers and have so many new people stop by my blog and offer their comments. Seeing everyone else’s projects is also super inspiring.

Make sure you get a chance to visit Calling it Home and see all of the works in progress.

How to build your own shaker cabinets

It’s time for the first progress report in my One Room Challenge laundry room makeover.

One Room Challenge

Today’s update focuses on the most striking transformation in the laundry room: the cabinets.

You saw in the first post that the laundry room cabinets are basic flat doors. You also saw that my inspiration was a shaker style.

Laundry room before and inspiration

Fortunately, transforming flat doors into shaker doors is a pretty easy process. However, there was one door and one drawer that weren’t basic flat panels. I don’t know what this style is called officially, but I believe it was popular in the nineties. The distinctive feature of these cabinets was a built in wood stained “handle” along the edge of the white melamine flat door or drawer. Look familiar?

90s style cabinet

Before I could shaker-fy these cabinets, I needed to get rid of the ridge part of the handle. I enlisted my new-to-me, but extremely old table saw. I set the fence and the blade at the precise width and height I needed to slice off the handle, and then I very carefully ran the door and the drawer through the saw.

Trimming the edge off a cabinet door

Once the handle was removed, I could work with these cabinets exactly like the rest of the ones in the laundry room.

Using my table saw again, my Dad and I cut 2 inch wide strips out of a sheet of hardboard that I had left over from my bookshelf project. I then affixed the strips to the cabinets to make the raised shaker detail.

Easy peasy.

Adding shaker trim to cabinet doors

I used a smear of carpenters glue on the back of the strips and then I tacked them in place with my Dad’s nail gun. A bit of wood filler evened out the joints and an all over sanding smoothed everything out. I chose to have the vertical pieces run edge to edge on the drawers and doors, and then the horizontals ran between the two vertical strips.

For the drawer and the door that I’d trimmed earlier, the shaker strips covered most of the original handle. At the edges a good daub of wood filler took care of the hole. Here’s a sneak peek of how they look after painting. Not perfect, but good enough for me.

Adding shake style trim to cabinets

Anyways, before I get too far ahead of myself, how about a few more details on the painting? After I painted the kitchen cabinets at our first house, I swore I’d never do it again. Maybe my tolerance for DIY has improved because painting these cabinets was much less torturous.

A few things were different this time around.

  1. After priming I used the Advance paint formula from Benjamin Moore as opposed to a stinky heavy duty oil paint. I’ve been super impressed by the finish I get from Advance, and clean up is a breeze.
  2. I painted just the fronts of the doors. Sure it’s a shortcut, but I didn’t feel the need to flip them over and paint the insides too.
  3. I split the painting into two stages because I chose two different colours. The uppers and two blocks of lower cabinets are all BM Cloud White (the same colour as we’ve used on the trim elsewhere in the house). The lowers on the sink section are BM Wrought Iron (the same colour as Matt’s bathroom). One coat of one colour took just 30-45 minutes–much better than the week of 16 hour days I spent in our last kitchen.

As soon as the drawers and doors were dry, I put them all back in place.

Laundry room cabinet makeover

The room may still need to be painted, cleaned and decorated, but it’s already looking 100 times better. Since installing the doors and drawers, I’ve found myself making special trips downstairs to the laundry room just to admire the cabinets.

That’s not weird, is it?

This is a super cheap, easy way to makeover basic cabinets. I highly recommend it.

And because this is a progress report, here’s where the rest of the makeover stands:

  1. Add shaker style trim to the cabinets
  2. Paint the cabinets
  3. Install doors and drawers
  4. Remove ceiling rack – By Oct. 3
  5. Patch ceiling and walls – By Oct. 3
  6. Prime walls and paint ceiling – By Oct. 10
  7. Paint and install baseboard and paint window trim – By Oct. 10
  8. Deep clean (sink, counter, floor, machines) – Oct. 13 (Happy Thanksgiving Monday!)
  9. Paint walls – By Oct. 17
  10. Level washing machine – By Oct. 19
  11. Build and install ceiling rack – By Oct. 24
  12. Build and install towel bar – By Oct. 24
  13. Install cabinet hardware – By Oct. 24
  14. Build and install light fixture – By Oct. 26
  15. Decorate – By Oct. 31

I knocked off steps 4 and 5 in the past week, but added one new step (#10). I don’t know how I forgot that the washing machine shakes like it’s going to take flight every time it goes into the spin cycle. We have to fix that.

So week one of the One Room Challenge is over. Five (or hopefully less) to go. If you haven’t had a chance, I highly recommend checking out the link-ups on Calling it Home. The 20 participating bloggers post on Wednesday and then the linking participants (like me) share our progress on Thursday. There’s an impressive range of projects and lots of inspiration. Exactly what this challenge is all about.

Have you ever made over cabinets with trim or another add-on? How about painting cabinets? Have you ever taken on that fun task? What’s your favourite cabinet style? Anyone know what that nineties built-in handle style is called?

One room challenge – Laundry room makeover

I am so excited for October’s project. Remember back in September when I didn’t have a project on my to-do list and I took apart the laundry room? Well now it’s time to put it back together.

I’m even more excited for this makeover because I’m going to make the laundry room my part of the One Room Challenge.

One Room Challenge

Linda at Calling it Home created the ORC three years ago as a way to help people stay on track and finish a room. Over the next six weeks, a group of bloggers and a whole bunch of joiners like me will be making over one room. We’ll be posting weekly updates on our blogs. So it’s not all that different from how I’ve handled my other projects so far this year.

Now, I will admit that I’ve gotten a little bit of a head start on this challenge. I trimmed out the cabinet doors and painted them last month.

I wanted to complete the makeover in October, but I knew two weekends this month were booked for non-DIY activities. As a DIYer with a day job, I absolutely need my weekends if I’m going to finish this in one month.

Well, it turns out that the ORC gives me six weeks. So I’ll have a bit of a cushion.

The purpose of today’s post is to introduce my room and tell you my plan.

Everyone, meet the laundry room. Laundry room, meet everyone.

Laundry room before

Here’s the part where the laundry room tells you a little bit about himself. We are very fortunate that we have a great space to start from (and yes, I took these photos after the makeover had already started–bad blogger). There is lots of counter space and built-in cabinets. We have a utility sink and our new (okay two-year-old) front loading washer and dryer. Even though we’re in the basement, we have a nice large window.

Laundry room before

before19

Now we redid the basement when we first moved to the farm. However, the makeover pretty much stopped at the edge of the laundry room. I scraped the stipple ceiling, took down the fluorescent light fixture, removed some posters that had been tacked to the front of the cabinets (why?) and that was it. Oh, except for our new washer and dryer (love you babies).

Since the room is open to the rest of the basement, I’d really like it to be as pretty as the rest of the basement. And right now, it’s not.

Laundry room before

So this makeover is purely aesthetic, and I’m working with what is there in the laundry room already.

Here’s the vision:

And here’s the plan:

  1. Add shaker style trim to the cabinets
  2. Paint the cabinets
  3. Install doors and drawers
  4. Remove ceiling rack – By Oct. 3
  5. Patch ceiling and walls – By Oct. 3
  6. Prime walls and paint ceiling – By Oct. 10
  7. Paint and install baseboard and paint window trim – By Oct. 10
  8. Deep clean (sink, counter, floor, machines) – Oct. 13 (Happy Thanksgiving Monday!)
  9. Paint walls – By Oct. 17
  10. Build and install ceiling rack – By Oct. 24
  11. Build and install towel bar – By Oct. 24
  12. Install cabinet hardware – By Oct. 24
  13. Build and install light fixture – By Oct. 26
  14. Decorate – By Oct. 31

Fourteen easy steps to laundry room bliss. Simple right?

Is anyone else doing the One Room Challenge? Do you find pretty laundry rooms as exciting as I do?