The Porch Jacking: Chad’s Crooked House

I’m happy to welcome Chad of Chad’s Crooked House to the blog today for the third installment in the “My Favourite Tool” series. If you’re just joining us, this series came about when I was thinking about what I should put on my tool wishlist. To help me make up my mind, I reached out to a few bloggers and asked them to share their favourite tools.

I’ve been following Chad’s adventures in restoring and updating his Philadelphia row house for awhile now. It seems like he might be finally heading into the homestretch on his reno (or at least, Phase 1). I’m glad he could take some time away from painting, lighting, closets, kitchen cabinets (!) and other work to share a project from the past here today.

Julia asked me to write about my favorite tool. Usually picking favorites is the hardest thing in the world for me, but this time I have one with a perfect combination of weirdness and a good back story. We’re going back about 8 years to when I was in college for this project.

My parents have a screen porch on the side of their house. It was always a favorite spot even though it was kind of in sorry shape. The columns were wrapped in finished wood that was visibly rotting away and the screen frames were patched up with corner braces that were rusted all over. It was time to give it a face lift. My dad called me to get my approval to use aluminum capping. He’s not dumb, so he had to have known he would never get it. Especially for a spot where people would be sitting 2 feet away and really see the fakeness. I told him that capping over rotting would be flirting with disaster (see how practical I am?), and that we should re-wrap the columns with new wood. And then I took my final.

Fast forward a week or two, and I was home to investigate. The screens were down, and I started hammering a crowbar into the most rotten column, at one of the corners. The first thing I saw was bad – like 6 million bugs scurrying out and tunnels all through the wood. But the second was even worse – nothing inside! I was ripping apart a column that was holding up the porch roof!

I called my dad in a panic. He said no big deal, we’ll just put in new pressure treated 6×6 posts. I was half crying. “What about the temporary bracing? It’ll be so much work!”

He replied in a high pitched mocking tone pretending he thought I was crazy. Not that he actually thought this, but he likes to mess with us.

“What? We’ll just use the railroad jack!”

“The what?”

“Come on, Chad. You know we have a 30 ton jack in the garage.”

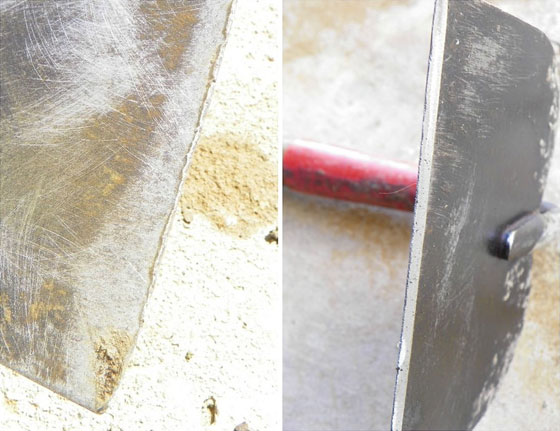
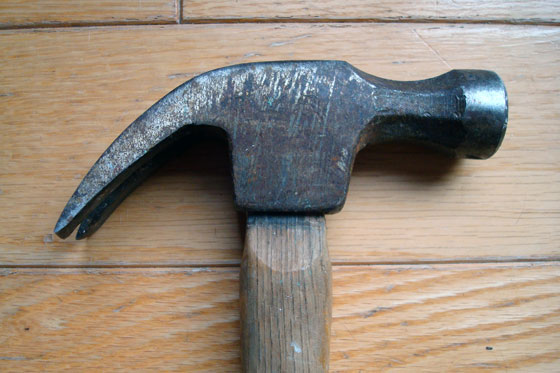
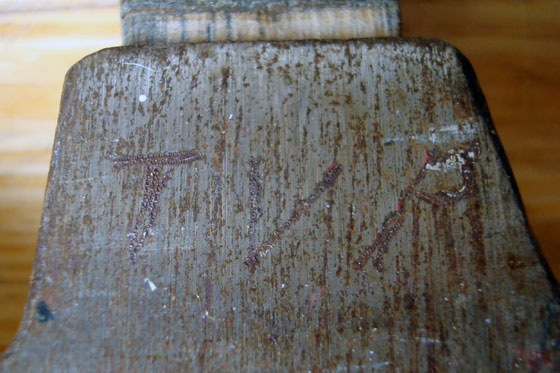
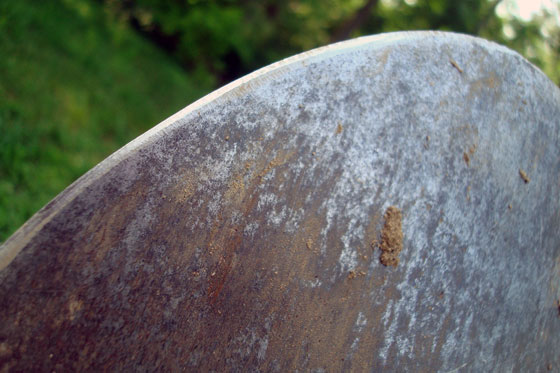
I never did know that, but it sure was good news. Here it is. I always thought this giant bar was for heavy digging in the garden, but actually it’s the lever for the jack. The whole thing is cast iron and weighs 67 pounds.

30 ton railroad jack

So he found a 4×6 in his hoard, cut it down to fit on the jack, and set it up next to the first column. Up went the porch roof and out came the column. We cut the new 6×6 to match the height of the old column, stuck it in place, let the porch down and moved on to the next one. All 7 new columns were in place in a day! Here it is 7 years later.

Screened porch

Good job, Chad (and Chad’s Dad). That porch looks like a beautiful spot to spend time in the nice weather. Thanks so much for sharing your favourite tool, Chad. If you’re interested in reading more about Chad’s adventures in Philadelphia, check him out at Chad’s Crooked House.

Yard tool maintenance tips

Sarah in Illinois is back today with another post. She has some very helpful tips for taking care of our yard tools–timely as we wrap up outdoors season and prepare to tuck our tools away for winter. (Yes, I did say the “w” word.)

One thing I am trying to do more of is take better care of things around my house so that they last longer. I know that should be an obvious habit, but we seem to live in such a disposable world that it often gets overlooked. Instead of just throwing away and buying new, we should be extending the life of items we already have.

Not long ago I noticed that my wheelbarrow looked terrible. It was getting such a thick coat of rust, and it wouldn’t be long before it rusted right through.

Rusty wheelbarrow

Flakes of rust in the bottom of the wheelbarrow

The first thing I did was to remove as much rust as I could. This could have been done by hand with a wire brush, but I had this handy attachment for my drill, so I tried it out. It worked like a charm!

Drill attachment for removing rust

After I had all of the loose rust removed, I sprayed it off with the hose and let it thoroughly dry in the sun. And I was correct; I already had two pin holes in the metal.

The next thing I did was to try to prevent any further rust.

I used a rust treatment that we sell at work, but I am sure is available at any home improvement store. I made one mistake though. I did not read all of the directions.

I knew from selling the product that when it reacted with the rust it was supposed to turn black. I waited an hour with it sitting in the sun, and it never turned black. I went on with the next step of painting with spray paint in a color close to the original. And it really does look great.

The mistake I found later was that the can clearly says to wait 24 hours to paint. During those 24 hours, it turns black.

In the long run, I don’t know that I will have any issue with not following the directions completely. Since it is just a wheelbarrow, I am not too worried, but in the future I will be better prepared.

I also put a coat of deck sealant on the handles. We had some sitting around, and it took me just minutes to do. It will help protect the handles from rot.

Green painted wheelbarrow

I also decided to do something similar to our garden tools. I started by spraying them off with the hose and using a nylon brush to remove any caked on dirt, and then let them dry. I used the same method as I did with the wheelbarrow to remove the rust.

Garden tools before cleaning and sharpening

Using a hoe in the garden is not my favorite chore but I have learned that having a sharp edge makes it so much easier. My dad is very skilled at putting a sharp edge on with a hand file, but when I need to do it myself I use our electric grinder and this grinding wheel.

Sharpening a hoe with a hand grinder

Just a couple of passes and it is sharp as a razor blade!

Sharp hoe

I didn’t see the need for rust treatment or paint for the tools, so I just finished by spraying a light coat of WD40. Any type of oil based spray would have worked. I have even heard of using motor oil. The goal is to coat the bare metal to keep it from moisture.

Oiling and sharpening garden tools

It took me just a couple hours one afternoon to finish the wheelbarrow and only about 30 minutes to prepare the tools. Hopefully in that short time I have considerably lengthened the life of my garden tools.

Thanks so much for the helpful tips, Sarah. The transformation of that wheelbarrow is amazing! And I love that it’s already dirty and in use. My fingers are crossed that the finish lasts for you.

How do you put your tools away for winter? Any tips for dealing with rust? Have you ever painted a wheelbarrow?

Linking up to Think and Make Thursday at the Heathered Nest.

My favourite tool: white dog vintage

It’s time for another installment in the “My Favourite Tool” series. If you’re just joining us, this series came about when I was thinking about what I should put on my tool wishlist. To help me make up my mind, I reached out to a few bloggers and asked them to share their favourite tools.

Today’s post comes from Brittany at white dog vintage. Brittany and I connected during last fall’s One Room Challenge. She made over her kitchen–so ambitious and such a great result. I really like her style–her makeovers are colourful, full of DIY and  super personal. And I was thrilled when she said she’d be happy to share her favourite tool with all of you. Over to you, Brittany.

Hello Home on 129 Acres readers, and thank you so much to Julia for inviting me to be part of this series! Just a few words about myself: I’m Brittany from white dog vintage. I live in Springfield, Missouri (plumb in the middle of the US) with my husband, Justin, and three chihuahuas. Justin and I love old homes and especially love working on them. In January of this year, we moved into a 1921 bungalow, and we’ve been spending our nights and weekends fixin’ her up ever since.

When it come to Number 1 All-Time Favorite tool, in truth, I have to go with a caulk gun. There’s very little in the world of home improvement as simple and satisfying as applying a bead of caulk. However, that’s all I really have to say about a caulk gun, and one sentence seems like a pretty lazy contribution to this series. So I decided to go with some a little louder. A little flashier. Something that requires electricity. A POWER TOOL. And in that vein, I chose the thing that powers some of my favorite tools to work with–an air compressor.

I love my air compressor (white dog vintage)

An air compressor is a support tool. On its own, it generates compressed air in a little tank, which sounds nice but isn’t too helpful until you connect it with the tool that’s doing the actual work. There are a variety of air-powered guns of different sizes and purposes. Over the course of different jobs, we’ve ended up with four.

Air compressor attachments (white dog vintage)

Staple gun – I use this for upholstering furniture, primarily with 3/8″ heavy duty staples, though occasionally I use up to 9/16″ staples if several layers of fabric need to be attached.

Pin, Brad, and Finish Nailers – These are all used for attaching trim and molding, but each is generally designed to handle a different length of weight of nail. Pin nailers shoot extremely skinny nails and are used for small, light-weight trim, brad nailers have a similar purpose but shoot slightly heavier nails (depending on the gun, they may also be able to shoot staples), and finish nailers shoot larger nails necessary for applying heavier duty trim like baseboards or crown molding.

I first started using an air compressor when I decided to try my hand at upholstery. A staple gun is a necessary upholstery tool, and when it comes to staple guns, pneumatic is the only way to go. I remember once, before I had done much upholstery, helping a friend recover her dining chairs with about a $7 manual staple gun I bought at some generic hardware store. I believe our strategy was for her to pull and hold the fabric while I put a knee on the seat bottom to hold it in place and, at the same time, used all the strength I could muster in two hands to squeeze the trigger of the staple gun. If only I’d have known how easy the whole thing is with a little air behind it. Here’s a little action shot from an ottoman I made recently.

Upholstering with white dog vintage

We’ve also been replacing all the trim in our new house, so I think you can imagine how handy the air compressor has been for attaching baseboards and molding. Justin recently started constructing capital style moldings for the tops of our doors and windows, and he reports he used all three nail guns to put them together. I got into the action a bit when it came to attaching the baseboards to the wall.

Installing trim with white dog vintage

The truth of the matter is that using a pneumatic gun or nailer is just plain fun. There’s a little bit of a thrill in the pop of the nail hitting the wood, and it’s a really easy and safe tool to use (the tip of basically any nailer must be compressed before the gun is capable of firing–eg, it’s impossible to shoot a nail into the air). I can be kind of absent minded, so I tend to stay away from saws and other potentially dangerous instruments, but thanks to my trusty air compressor, I don’t have to miss out on all the fun. 🙂

Thanks again for reading!

Thanks for sharing, Brittany. An air compressor (and its various attachments) moved up my wishlist as I was reading. Be sure to check out white dog vintage to see more of Brittany’s and Justin’s projects.

My favourite tool: Sarah in Illinois

To kick off the “My Favourite Tool” series, I’m pleased to welcome Sarah in Illinois back to the blog.

When I tried to think of my favorite tool, my first thought was my cordless drill/driver. But that is not necessarily my favorite, it is really just the one I use the most. So I thought of our wood shop and what tool I really enjoy, and I decided it would be the compound miter saw.

Compound mitre saw

A few years ago Steve and I decided we could use a compound miter to install some baseboard. So we went to one of those discount tool stores that buys by the pallet and is known for low prices but also low quality. We bought a very cheap saw, and it got us by for a while.

But Steve started dabbling in cabinet making, and we discovered that you truly get what you pay for. Steve was so frustrated with trying to make precise cuts for the corners on the cabinet and announced that we were buying a nice saw. In fact, I am surprised I didn’t find our old saw out in the driveway when I got home! Ha!

We did a little research and decided on this one:

Hitachi compound mitre saw

We are very happy with our decision. The quality of our cuts improved greatly. We have used it to cut baseboard, crown molding, door and window trim and laminate flooring. Steve has been so happy with it when making cabinets. I feel so comfortable using it for almost every cut I need.

Compound mitre saw

Homemade cabinets

We are still debating the design we want to use for the doors so that is why they are all open right now. I am so proud of his craftsmanship.

We have a long list of tools that we want to add to our line up (a Kreg Jig is the first one that comes to mind), but the compound miter saw has to be our best purchase so far.

I think I am supposed to say that I am in no way sponsored for this post, which I am not. But if Hitachi wants to contact us, Steve will volunteer to sing its praises! He loves that brand of tools! 😉

Thanks, Sarah. I’m feeling very justified in including a quality compound mitre saw on my wish list! If you want to keep up with what Sarah and Steve–and their saw–are up to, follow Sarah on Instagram. And if you missed Sarah’s last post, here’s her introduction.

Stay tuned later this month. More “My Favourite Tools” entries are coming up.

Tool wishlist

Last year, I finally bought myself an official carpenter’s square (also known as a speed square). Now to most people, I’m sure this doesn’t seem like a big deal. Once I had it in my toolbox, though, I felt so much more official. Marking right angles and 45 degree angles is a piece of cake. I can even do more official carpenter-y things if I am so inclined.

Swanson speed square

I’ve had an informal tool wishlist bumping around in my head for awhile. It was time to finally write it down (especially since September is my birthday month–ahem, family). I thought the blog would be a good place to share it–and get input from all of you.

In fact, I’ve also reached out to a few other bloggers and asked them to share their favourite tools. So over the next few weeks, you’re going to get to hear from some other people, see some inspiring projects and maybe even find some tools to add to your own wishlist.

Some of the items on my list are like the carpenter’s square–relatively minor and decently attainable. Other things are a little more–shall we say–involved (as in I’ll need to save up for a little while).

I’d really love to hear your suggestions and feedback. What are your favourite tools? Any can’t live without gadgets? What should I add to my list?

Simple tools

  • Heavy duty extension cord
  • Heavy duty, long handle clippers (for trimming trees and shrubs)
  • Dremil (is this useful?)
  • Small, basic electric weedeater (our big gas powered version is overkill for me, and it rarely works well)

Power tools

  • Router
  • Upgraded compound mitre saw (I have one thanks to my Dad, but it only does so many angles)
  • Soldering iron (since my hand-me-down iron from my Grandpa popped–literally–and died)
  • Paint sprayer
  • Sawzall (since our hand-me-down saw from my Dad recently also died)

Heavy duty tools (and tractor attachments)

  • Air compressor
  • Bush hog
  • Auger

Matt and I are fortunate that most times that we need a tool, we’re usually able to borrow it from one of our Dads (wood splitter, air compressor, nailer, hammer drill, tile saw, sturdy extension ladder).

Over the years, our Dads have also passed along a lot of their tools to us (skillsaw, table saw, socket set, drywall tools). Of course, we’ve also bought some of our own equipment too (sander, Kreg jig, quality drill, favourite hammer, chainsaw, tractor–and all of its attachment$). It would just be a bit handier to have some of our own tools on hand.

What’s on your tool wishlist? Any tools that you’ve bought, but wish you hadn’t? For those tractor owners out there, I’m really interested to hear what’s your favourite attachment?

And be sure to tune in for more inspiration from other bloggers coming up.

Guess what

I used to do guess what posts every so often. Always on Fridays. And I always revealed the answer on Monday.

It’s been awhile since I’ve done one of these posts. In fact, it’s been more than a year. I’m doing one today, but it’s a bit different.

You see, I don’t know what this is.

Rusted spike

We uncovered it in the garden.

Rusted spike

It’s metal (obviously heavily rusted). It has a hole in the rounded end.

Rusted spike

Anyone know what this might have been used for?

Hammer time

I realize I’ve neglected to introduce two very important sidekicks that are always on hand to help us with our projects: Matt’s and my hammers.

Hammers comparison: Estwing versus basic wood handled hammer

Don’t they look like they’re kissing?

Ahem… tough DIY blogger here. Note to self: Do not let people know that you anthropomorphize your tools.

Anyways, these are not just any tools. They are our right hands–literally. And we’re each pretty particular about our hammers (insert “u can’t touch this” joke here).

Mine is on the left. It’s a 16 oz Estwing straight claw that my Dad gave me. It’s the hammer that he’s always used, and when I started working with him, it’s the one I used too.

Matt’s is on the right. It too is a family heirloom from his grandfather.

Now, I’m not trying to knock Matt’s grandfather (and you’ll see later why his is a very special hammer), but I do want to explain why my Estwing is superior. (I’m sure most guys appreciate it when their wives explain how they’re superior).

Take a look at the head on Matt’s hammer. Notice the gap below the head where it joins the wooden handle? You can see that the head has slid off the shaft just a little bit. Over time, the wood shrinks and the head shifts, and eventually the hammer can come apart.

Hammer head

The other drawback of this hammer, in my opinion, is the curved claw.

Let’s take a look at my hammer for comparison. Obviously, the hammer and the handle are all one solid piece of steel. They’re not going to come apart any time soon. (Please note that the duct tape is not structural. It’s simply my Dad’s labeling method so that we can tell whose hammer is whose). The handle is wrapped in a rubber sleeve that helps with grip as well as shock absorption.

Estwing hammer

My favourite part of this hammer is the straight claw. Yeah, a curved claw gives you more leverage, but you’re severely limited on where you can use it. Hammering in a tight corner and bend the nail? You can contort that hammer many different ways, but you may not be able to get the claw on the nail to pull it out. Trying to pry two pieces of wood apart? The straight claw will slide in, just like a wrecking bar. Good luck doing that with the curved claw.

Wooden handle and curved claw aside, Matt’s hammer does have one very special feature. His grandfather’s initials are carved into the head. In fact, Matt doesn’t even call this a hammer. He says instead, “I need TVP.”

Initials carved into a hammer head

And now we’re back to anthropomorphizing our tools.

Let’s draw this post to a close, shall we?

I’ll leave the final sign off to MC. (I know dude is known for his pants, but holy bicycle shorts, hammer man! I’d forgotten about those.) Break it down.

I guess I should add the usual blogger disclaimer here. Estwing has no idea who I am. This post is just my opinion. I was not compensated in anyway for this post.

Vacuum verdict

It’s been nine months since our new carpet was installed. And it’s been nearly seven months since I posted about our need to buy a vacuum.

It’s been two months since we got Baxter, and it turns out that Matt’s sock fluff has nothing on dog fur.

The vacuum situation had become critical.

So, in the category of better late than never, I’m pleased to introduce Sebo.

Sebo vacuum and attachments

Sebo, you ask? Who’s Sebo?

Sebo didn’t even figure in my original vacuum research, but after seeing it at the vacuum shop, it edged out the other brands. The salesman described it as comparable to Miele, which is also made in Germany. The Sebo has similar filters and attachments. However, I found the Sebo power head easier to maneuver than the Miele. Plus the power head is a little easier to take apart myself if something gets sucked up by mistake or wrapped around the beater bar.

The Sebo is about the same price point as the Miele, which is expensive. I may have spent more than I needed to on a vacuum, but I wanted something that worked really, really well and I didn’t want to have to buy another one any time soon.

So what’s the verdict?

Ladies and gentlemen, I am thrilled to tell you that my carpet looks brand new. It’s like I’ve gone back in time nine months. The beater bar is really effective at picking up all of the fluff and fur and bits. A dial on top of the power head sets the height, and a light glows green when the height is set correctly, so it’s really easy to figure out. I ended up lowering the power head by one notch. When I did, the drag on the wand increased noticeably, so it felt a little heavier to push and pull.

However, the vacuum is much, much lighter weight than any of the other uprights that I looked at, especially the Dyson. Weight was one of my biggest requirements because I wanted to easily vacuum the stairs. I pride myself on being a muscly (say it with a hard ‘c’ “mus-klee”) woman, but if I had to muscle (say it like a regular person) an upright vacuum up and down the basement stairs, I feared I would approach body builder proportions.

Doing the stairs still isn’t super straight forward.

The hose only stretches so far, so I have to carry the canister with me to reach the steps in the middle of the staircase. The canister will balance on the steps, which makes it slightly easier, but I’m still juggling equipment in both hands. If any manufacturer wants to make a canister vacuum with a twenty foot hose, I am on board.

Vacuuming stairs with a canister vacuum

The other wrinkle on stair cleaning is that the power head is a little floppy. The wand will lock in an upright position only, and when it’s locked the power head doesn’t run. Moving from stair to stair is a little awkward, but not overly so.

On a flat surface, the vacuum is super maneuverable. The power head pivots smoothly, and the canister rolls easily on its three wheels, tugged around by the hose. On the hard floor, the parquet head did a good job of picking up dust and fur. A lot of fur got trapped in the bristles on the bottom of the brush rather than being sucked right up, so I had to vacuum the attachment. The other attachments worked well too, although it did take a bit of figuring to work out that the furniture attachment had to connect the crevice tool and not directly to the vacuum.

Overall, I’m happy with Sebo, even though it wasn’t on my radar at first. The original vacuum post still ranks as my most commented post ever. Thanks everyone for your input. If you have any questions about Sebo, I’ll do my best to answer them.

How to sharpen a shovel

In case you haven’t noticed, I’ve been spending a lot of my time outside landscaping. What you definitely haven’t noticed… probably because I haven’t shared this with you before… is that much of my landscaping time is spent hopping up and down on my shovels trying to convince them to sink into the dirt. Or hacking away at defenseless plants trying to cut through tough roots.

Obviously, it was time to sharpen my shovels. Past time, rather.

Round mouth shovels with dried dirt stuck to them

The solution? Call my Dad.

Unfortunately for me, the solution is never that easy. Fortunately for you, I now have another how-to to share.

As soon as I pulled into the driveway at my parents’ house, shovels in tow, I realized that I was not going to be able to simply hand them over to my Dad. A whole sharpening station was set up in the driveway with a grinder, visor and safety glasses–multiple pairs.

There was going to be a lesson.

But first there was going to be a lecture.

“You know, back when I was on the construction site” (my Dad was a construction superintendent before he became a general contractor) “I had a labourer who would have taken those shovels away from you if he’d seen how you left them all covered in dirt. That’s not how you take care of your tools, Jules.”

Fortunately–or unfortunately depending on how you look at it–my Dad did not take away my shovels. He did brush them off, but then he gave me a demonstration with one of his smaller shovels of how to sharpen them on the grinder. Most important lesson: keep your fingers out of the way of the grindstone.

Sharpening a small shovel on a grinder

Keeping my fingers away was easier on my big scoop shovels when I could hold them by the handle. However, they were a little more unwieldy because of their larger size. Also unwieldy: my Dad’s visor which was not sized to my head at all, but did provide complete eye protection.

Sharpening a shovel on a grinder

To sharpen the shovel, hold the back side of the blade at a very shallow angle against the grindstone. Start about halfway down the edge of the blade and curve around to the tip. Do a couple of passes on one side and then on the other.

Direction to sharpen a shovel

After running the shovels through the grinder a few times, I had a nice shiny, sharp edge.

Sharpened shovel

The shovels don’t magically become fillet knives, but they are much sharper and much easier to work with. Since sharpening, I have transplanted trees, bushes and flowers. Holes have been dug. Plants have been split, roots humanely cut with minimal trauma.

Oh, and the shovels have also had a shower.

Washing a muddy shovel

In addition to learning how to sharpen a shovel and remember to take care of my tools, I also learned why we used a standalone sharpening station set up in the driveway, rather than my Dad’s stable grinder that’s bolted to the bench in his work room. When the sharpening lesson was finished, he picked up the grinder and loaded it into my trunk.

I guess this means I have to do it myself from now on. My Dad’s wanted to give me this grinder for awhile now, and it will definitely come in handy for us. Although it is yet another tool to take care of. Thanks, Dad, for the lessons and the tools.

The Dyson dilemma

I love the new carpet in the basement. It’s cozy and warm and soft. Its light colour is nice and neutral.

What I don’t love is cleaning it.

Fluff on a light carpet

Don’t judge

The fluff. Oh the fluff!

I blame Matt and his black socks. The fact that the basement stairs start at the front door, a major traffic point for the house and source of many “bits” and dirt, doesn’t help.

My parents loaned us their old vacuum (old as in purchased in the 1970s before they moved to a house with central vacuum), but its suction kind of sucks–not in the good way a vacuum should. Our shop vac does a slightly better job, but it’s not really skilled at cleaning carpet and doing the whole basement with it is a pain.

If I’d been thinking ahead, perhaps I would have put in a central vacuum system when we had the walls open in the basement. However, I didn’t think of it, so we didn’t do it.

So now, I’m dealing with a fully carpeted basement and the weekly sock fluff invasion. And all I keep thinking is “Dyson.”

Dyson vacuum brochure

I really know nothing about them aside from the marketing hype. In the informal polls I’ve done so far with people at work, Dyson comes highly recommended. We’ve looked at them in stores, where, of course, the price tag makes me blanch.

So now I’m turning to you. Is a Dyson worth it? What version do I buy? Is there another brand that works just as well?

We have a cut pile carpet in the whole basement (1100 square feet). The stairs are carpeted too, so the vacuum can’t weigh a ton, or it needs to have an attachment that lets me easily go up the steps. The biggest requirement is that it easily and cleanly picks up the sock fluff and all of the little bits that accumulate every week. Someday, it will likely have to pick up dog hair too. Oh, and I need a vacuum that lasts. I don’t want to have to buy a new one–especially if I invest in a Dyson–anytime soon.

Please weigh-in in the comments. Do you have a Dyson? How does it work for you? Is there another vacuum that you recommend?