My Mother’s Day present to myself (plus a tool wishlist)

When it comes to gifts, I like to tell people what I want. For the past few years, I’ve taken it a step further when it comes to Mother’s Day, and I’ve bought myself a present.

The first time I did it, I bought Bluetooth earmuffs. They felt like a bit of a nice-to-have, but I knew I’d enjoy listening to podcasts when I was driving the tractor. The “nice-to-have” factor is hard for me. I try to be pretty practical and frugal most of the time. (I did buy used ones, so I felt better about having a bit of a discount.)

This year I bought a new-to-me cordless reciprocating saw (secondhand on kijiji). This has been on my wishlist for a while. We have so much scrub and brush around the farm. I thought a reciprocating saw was my best bet for pruning and trimming. It can get down in the dirt easier than a chainsaw (and is much lighter), so that I can mow right over the stump. Plus, not being limited by an extension cord was key. The pond shore needed more clean-up, and I was not stringing extension cords together until I could reach.

Note that I said “needed” more clean-up. The saw has been put to work, and I am loving it. I have cleared the pond shore, the septic bed (and then Matt’s Dad came and helped with a few bigger trees), one side of the pond trail and along the treeline at the edge of the front field.

The piles of brush are enormous, which leads to the next thing on my tool wishlist: a wood chipper. (For now I’m borrowing our farmer’s.)

Also on the list, a box trailer (so I don’t have to borrow Matt’s Dad’s) and a battery powered nailer (I am converted to battery tools).

Working around the farm makes me happy. Having the tools to do it is like a gift that keeps on giving.

Do you buy presents for yourself? How to you justify nice-to-have versus need-to-have? What’s on your tool wishlist?

Looking for battery powered weed eater recommendations

I love how the farm looks after the grass is freshly mowed. Tidy. Cared for. Green.

Until you look closely.

We have never, in all of the years we’ve lived here, edged the lawn.

So we’re a bit ragged around the edges. (Maybe that’s appropriate as that’s how I feel some days, too. Something the farm and I have in common.)

Untrimmed grass around the flowerbed

We have a big heavy-duty gas-powered weed eater that’s been hanging in the driveshed since we moved. But it’s heavy. It’s finicky. I cannot be bothered to fight with it.

But I would like to tidy things up a bit more. And especially with the vegetable garden, the pond shore and Ellie’s playground, some trimming is required. (Matt’s Dad has been coming over with his weed eater to keep the grass cut around Ellie’s playground.)

So I’m on the hunt for a new weed eater. Or non-brand name, string trimmer.

I want it to be battery powered. Light weight. Not huge. Easy to use.

I don’t need a super long-lasting battery, because although we have a large property, my trimming is going to be pretty limited. I do not have more time to spend cutting the grass.

I’ve spent some time watching reviews on YouTube and EGO is coming out on top. I may have been sold as soon as I saw its self-winding string loader (another trauma from our old weed eater). But I’m not familiar with EGO. One of my brothers-in-law has Ryobi battery-powered lawn tools. Matt’s Dad’s weed eater is an ECHO. I’m most familiar with Stihl. So I’m still shopping around.

And as part of my shopping around, I want to ask, anyone out there have any recommendations for a battery powered weed eater? Any favourite brands? Any recommendations for features that I should be looking for? Thank you in advance for your input.


How to make a shovel scraper

It may still be winter outside, but Sarah in Illinois is already looking ahead to gardening season–or at least her Mom is. Today, Sarah’s sharing how to make a simple tool that can help keep your other gardening tools in good shape.

It’s been two weeks since I posted that we were having such low temperatures and, as I write this, it is the first day that we have made it above freezing. My wood shop is not heated but thankfully I had a super easy, super fast project that I could finish before my fingers got frostbite.

The idea for this project came from the magazine Mary Jane’s Farm. I highly recommend this magazine if you have any interest in farm life, recipes and simple living. My mom showed me this picture from the October-November 2014 issue and said that she would really like a shovel scraper.

It’s a simple concept. Just a pointed block of wood used to scrape the bulk of mud off of your shovel before you put it away. I will give the dimensions that I used, but every single measurement is adaptable to your own needs. Feel free to adjust them as you see fit.

I started with a scrap piece of 2×4 lumber. After taking out old staples I cut the board to 12 inches in length.

I set my miter saw to cut the end of the board at 22.5 degrees. Again, this is just the angle I chose based on what looked appropriate for my use.

I then drew a guideline of where I would cut my handle. Note my crudely drawn measurements.

I then cut along these lines with my jigsaw.

I drilled a hole at the end of the handle to make it easy to hang up and all I had left to do was sand down the corners to make the handle more comfortable and to prevent my mom from getting splinters.

Remember my post back in October where I was longing for a new sander? Well, when my dad told me that he didn’t know what to get me for Christmas I had the perfect suggestion!

I’ve only used it this one time so far, but I am very happy with it. I don’t know if my old sander was really worn out or this Hitachi is that much stronger, but it feels like it has twice the power of my old sander. You can see we went with the hook and loop attachment. I just have to get used to the fact that this is pretty much what the industry is going to.

Back to the project, it didn’t take long to sand down the edges and make the scraper quite comfortable to hold.

I decided this morning after looking at it again, that I am going to coat it with a light coat of linseed oil to protect it just a bit, but other than that, it is ready for my mom.

Have you ever used a shovel scraper? Do you have a quick and easy wood project to try? More importantly, is your project area heated?

Thanks for this tutorial, Sarah. I’ve never heard of a shovel scraper. I think my Dad would appreciate me making one of these for myself. When he taught me how to sharpen my shovels, he grimaced as he looked at the dried mud on my shovels and began the lesson with a lecture on taking care of my tools.

How to build a simple toolbox from scrap wood – Free plan

When I was working with my contractor father, every job, big or small, would inevitably start the same way. “You might as well go get the toolbox. Otherwise we’ll spend all our time running back and forth for tools.”

Within a few months of Matt and I moving into our first house, my Dad gifted me with a toolbox of my own.

How to build a simple toolbox

Like most DIYers, our tools are in a variety of places, and we endeavour to have hammers, wrenches, tape measures and whatever else we might need wherever we might need them. However, no matter where we’re working and how I try to spread tools around, we usually end up needing the toolbox as well.

(I might think a screwdriver and a pair of pliers will be sufficient, but the universe usually laughs at my overconfidence.)

After Sarah in Illinois got a glimpse of my toolbox in a post a few weeks ago, I thought I should share it here. It’s an indispensable part of my DIY life.

How to build a simple toolbox

The idea of this toolbox is not to hold every single one of our tools. The idea is to hold the basic tools needed for most jobs. Limiting the number means that the toolbox stays relatively light, so I can easily carry it to wherever I’m working. (When I once complained that the box was too heavy, my Dad’s helpful response was, “You’ve got too much in it, honey. You don’t need all that stuff.”)

There’s a main area that holds the bulk of the tools. (And yes, there are two hammers here, because Matt and I each have our own.)

How to build a simple toolbox

My Dad added a partition on the one side that makes a spot for blades–a couple of utility knives and a large and small hacksaw.

How to build a simple toolbox

On one end, a “pocket” holds a chisel, pencils, crayons and earplugs. How many times have you found yourself pencil-less in the middle of a job? Just me?

How to build a simple toolbox

And finally a bar on one side of the box holds screwdrivers. This bar is one of my favourite features. It keeps the screwdrivers out of the jumble of the rest of the tools in the bottom of the box and makes it easy to find the one I need.

How to build a simple toolbox

I like that this toolbox is open. I don’t have to deal with latches or trays. I can simply reach in and grab what I need. Plus, if I know I’m going to need more wrenches or sockets or another tool that doesn’t normally live in the toolbox, I can easily toss in the case, and carry it to the worksite.

Here’s what I have in my basic toolbox:

  • Hammer
  • Tape measure
  • Speed square
  • Pliers (regular, needle-nosed, side cutters, adjustable)
  • Vicegrips
  • Adjustable wrench
  • Electrical tape
  • Stubby screwdrivers (slotted, Robertson red and green, Phillips)
  • Nailsets
  • Awl
  • Screwdrivers (Robertson, Phillips and slotted in various sizes–12 in total)
  • Trowels (medium and small)
  • Chisel
  • Pencils
  • Crayons
  • Earplugs
  • Hacksaws (large and small with spare blades)
  • Utility knives (two with spare blades)

If you’re interested in a building a toolbox like this for yourself, I’ve sketched a plan that you can download. Since this is built using scrap wood, adjust it for what best meets your needs.

How do you store your tools? Anyone else have a DIY toolbox? What are your indispensable tools?

Looking for sander suggestions

Attention. Vicarious tool shopping opportunity ahead. Sarah in Illinois needs your help selecting her new sander. Our sander is one of the few tools that I’ve bought for myself, rather than getting a hand-me-down. Like Sarah’s last sander, I bought it quickly without much research. But it’s also one of my most used tools, so I’m very interested to hear your suggestions of what sander or brand you recommend.

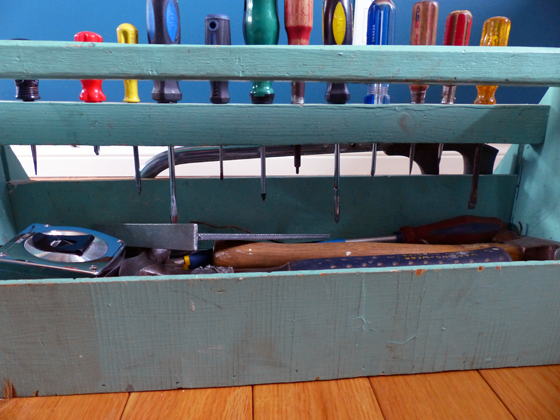
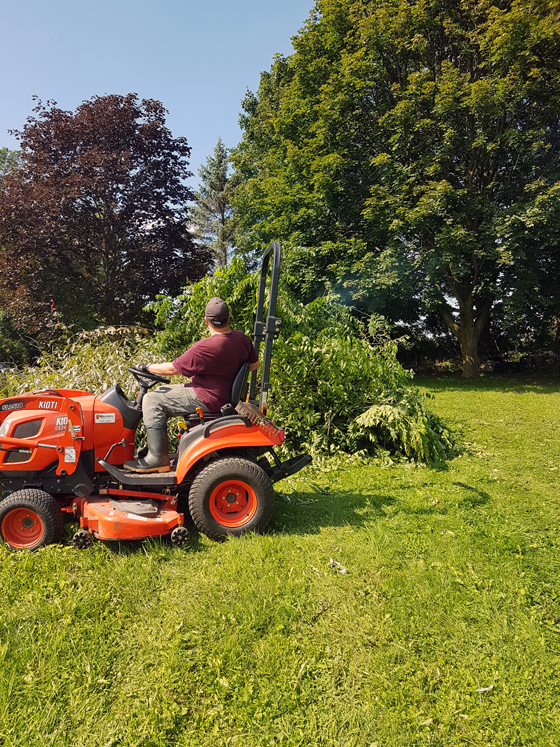
Since most of my summer has been spent out in the yard and garden, I was really excited the other day to have a chance to spend a few minutes on a project in the wood shop. I actually have to admit I am looking forward to cold winter months because I will have more time to spend out there.

However, when I grabbed one of my most used tools and found it had finally died, I decided it was time to do a little research and add a replacement to my Christmas wish list.

I need a new electric hand sander.

(Honesty here: I am not being sponsored by anyone to write this. The following is my opinion on my experiences. And a note from Julia: Links are not affiliate links.)

For years I had a DeWalt hand sander. Actually I had two: a 1/4 sheet palm sander and a random orbit sander. I used them and used them until they literally fell apart in my hands. I found this picture from years ago when I was sanding wood siding on my old house.

At some point, I needed a sander and ran to town and found something inexpensive to use to get me by. That’s how I ended up with a Skil.

This sander lasted much longer than I ever expected, but I was never happy with the hook and loop attachment for the sandpaper. Many times it flung the paper off in the middle of use. I know that hook and loop attachment seems to common with most sanders, but I actually prefer using adhesive backed paper.

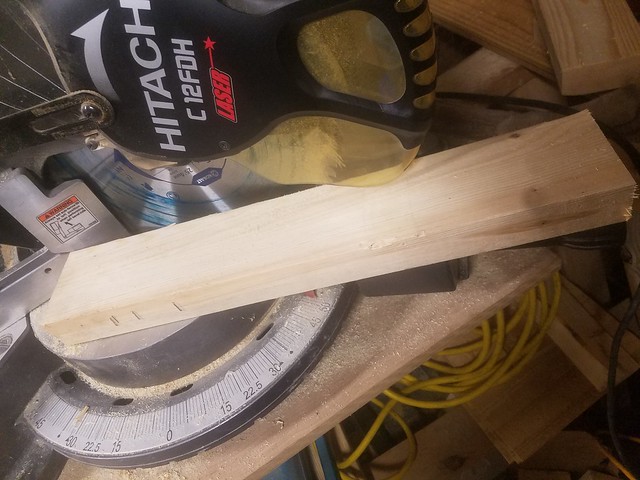
Steve and I have had very good luck with Hitachi brand tools. We now have a compound miter saw, portable chop saw, cordless drill and 9 inch grinder all Hitachi brand, and we couldn’t be happier with the longevity and strength of these tools. So naturally I looked first at Hitachi. I was thrilled to see they still make a 1/4 sheet hand sander. They also have two options for orbital sanders that both have hook and loop attachment. DeWalt has a similar option.

So here is the reason for this post: I want to hear from other people with actual experience. What hand sander do you use? What brands have you had luck with? Which ones would you not recommend? How do you feel about hook and loop attachment versus adhesive back versus 1/4 sheet that is held on with clamps?

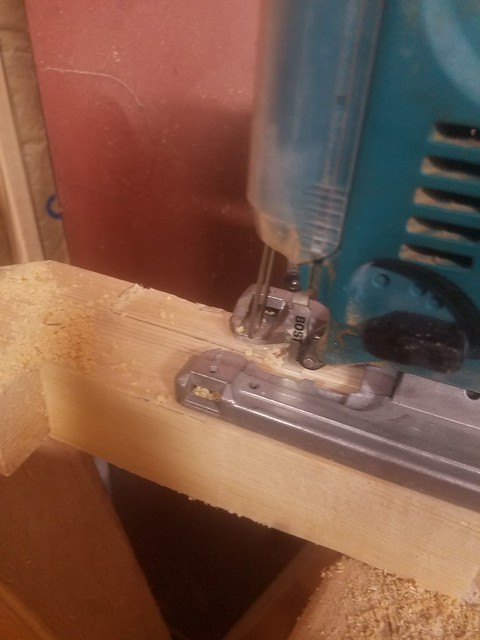
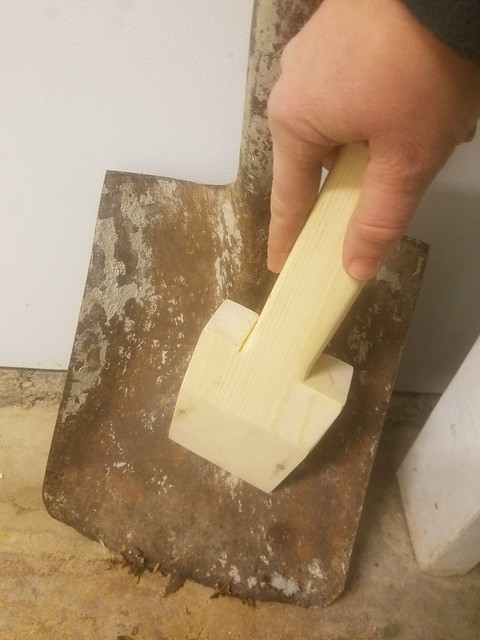
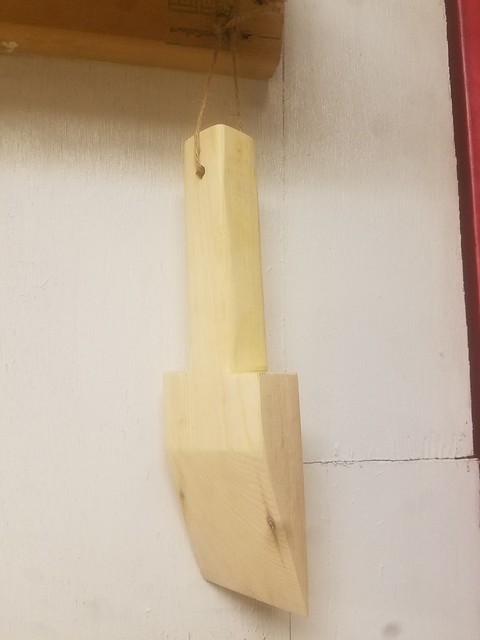
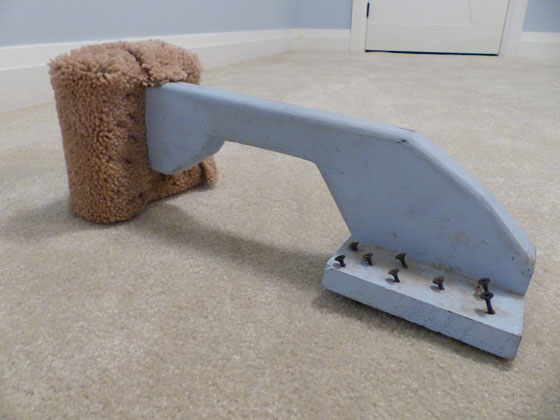
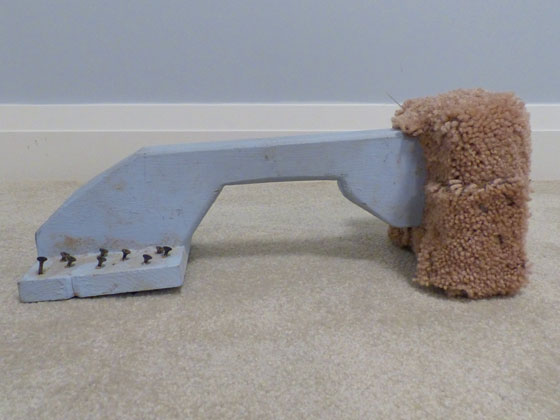
Finally, the reason I was out in the wood shop the other day: Our small town is having a scarecrow contest. There are many scarecrows all over town and I decided to add one at work. (The sander was needed for that mega-wrench he is holding!)

I was late getting him ready, so I didn’t get to enter the contest, but it is still fun to decorate and join the fall spirit around town. Here is the link to the contest entries if you would like to see the fantastic scarecrows.

I am so glad to live in a town that is so friendly and has such great community spirit.

What a great community building project, Sarah. I love seeing people’s creativity with their scarecrows.

We have a random orbit sander made by Mastercraft (I think it’s Canadian Tire’s brand). I bought it very much like you bought your Skil–quickly and cheaply. But I’ve been pretty happy with it. It is hook and loop, and I’ve had no issues with the pads staying attached. The sawdust bag sometimes slips off, which can be a bit annoying, but usually I just leave it off and accept the dust. It’s a bit big for my hands–usually I’m for gender equality, but tools made for smaller hands would be a very good thing. Just don’t make them pink.

Now over to everyone else. What sander(s) do you recommend?

Sawing through the honey-do list

Since moving to the farm, I’ve discovered a few new favourite tools. One of these is the chainsaw. However, in our house the chainsaw is Matt’s and he’s the one who wields it. Due first to Matt’s broken arm and then to a hole in the oil tank on the saw, we’ve been chainsaw-less so far this year.

Matt’s arm is healed and almost back to full strength. He and his Dad fibreglassed the oil tank back together. And over the weekend he finally fired up the saw.

Low hanging branches, small trees that sprouted up in unwanted spots, dead wood have all been trimmed. Best of all, Matt went through the meadow and down to the pond.


Matt cutting suckers from an old stump

My view to the pond is continuing to clear. It seems like as soon as I abandoned hope of clearing the pond shore this year, that’s when we finally started this project.

Baxter looking down through the meadow to the pond

The pond

A few hours of work netted us the biggest burn/brush pile I think we’ve ever had. A tractor-size one. We also left a bunch of brush down at the pond to burn there.

Matt on the tractor in front of our burn pile

Collecting the brush was Mr. B’s favourite part. Or the trailer ride to get the brush was.

Baxter and I having a trailer ride

How was your weekend?

How to make a DIY carpet kick – Free plans

Early in your life as a DIYer, you learn that having the right tool can make the job much easier. However, sometimes you don’t want to go buy a new tool for a project that you’re only going to do once, maybe twice.

Laying carpet is one such job in my opinion. Likely–hopefully–you’re not laying carpet every year. However, if you do want to tackle installing carpet yourself, there are a few things that can help you get a nice finish on your floor and make the end product look more professional. One of those things is a carpet kick.

How to make a DIY carpet kick

Unless you’re a professional carpet installer, a carpet kick is not likely a tool that you’ll use very often. If you’re a professional carpet installer, I expect that you will go buy your own professionally made kick. However, for a DIYer you can easily make your own carpet kick out of scrap wood.

How to make a DIY carpet kick

Download the plans to make your own carpet kick

Materials:

  • 2×4 approximately 14 inches long
  • 2×6 5 inches long (you’ll cut it to a 5×5-inch square)
  • 3/4-inch plywood (also cut to a 5×5-inch square)
  • Two 3-inch screws
  • Two 1 1/2-inch screws
  • Eighteen 1 5/8-inch drywall screws (or other screws with a coarse thread)
  • Scrap piece of carpet (about 12×12 inches)

Cut each piece of wood according to the plan. Screw the wood together using the 3 inch and 1 1/2 inch screws.

If desired, paint your kick–I recommend a stylish baby blue.

How to make a DIY carpet kick

Once paint is dry, wrap the butt end of the kick in the scrap carpet and staple in place. You’ll likely have to trim the carpet to make it fit. This is like wrapping a really awkward present.

How to make a DIY carpet kick

Screw the drywall screws part-way through the kick plate so that they poke out the bottom. These “teeth” are what will grip the carpet and stretch it over the tackstrip.

How to make a DIY carpet kick

And that’s all there is to it. Now you’re ready to install your carpet.

How to reuse old carpet

Save

Save

Save

Save

Looking for sawzall suggestions

One of the major perks of being a daughter of a contractor is the tools. Not only do I have access to all of my Dad’s tools, he also gives me tools when he upgrades.

That is the case with my hand-me-down vintage Sawzall.

Vintage Milwaukee Sawzall

Now I appreciate this saw. It’s come in very handy. But I think it’s time that I upgraded for myself.

My biggest complaint with this saw is the cord.

Cord and plug

I would love to have a cordless sawzall. But I have no experience with cordless sawzalls. Even the one that my Dad uses currently has a cord. So I’m looking for advice. Any suggestions of what to look for when I go shopping? What do you think is the best brand? Is a battery powered sawzall actually powerful enough to saw all?

My favourite tool: Heather in Heels

Today, I’m thrilled to welcome Heather of Heather in Heels to the blog for the final installment in the “My Favourite Tool” series. If you’re just joining us, this series came about when I was thinking about what I should put on my tool wishlist. To help me make up my mind, I reached out to a few bloggers and asked them to share their favourite tools.

I was thrilled when Heather said yes to my email. Heather is a woman after my own heart–she’s all about all kinds of DIY, good food, lots of love for her pups, oh, and she’s Canadian too. She blogs at Heather in Heels. I especially love that her favourite tool is one that I love as well. Take it away Heather.

When it comes to my DIY habit, nothing helps me feed the monster like having the right tools for the job. I realized many moons ago the one critical tool for all the painting and refinishing projects I wanted to tackle was a sander. So I stole one from my mom and step dad’s basement. It took my step dad 20 years to realize it was missing. (I won’t the list the other items I’ve taken yet – they still don’t know they’re missing… he he).

It was old and made your whole body vibrate when using it, but it did the job. It did the job until it didn’t any more. I almost had a funeral for it. That sander and I did many wonderful things together.

We’ve transformed doors and we’ve taken a super-drab-free-on-the-side-of-the-road find and made it beyond fabulous. But I had to say goodbye to it.

Interior door painted blue

White credenza

And then I promptly got over my loss when my new sander arrived. And together we’re already busy making new memories! I’ve just finished refinishing a bar cart and while the paint dries I’m already busy with my biggest furniture project yet – a huge dining room buffet server. (Spoiler alert. Since writing this post, Heather’s finished the buffet. No surprise, it’s fabulous).

Ryobi sander

Why a power sander? Well, for one thing it saves your manicure. (This is an essential in my books). It also greatly increases the speed of any project requiring sanding. I’m not sure I would even contemplate some of the projects I’ve done (or am in the process of doing) if I had to sand by hand. I don’t even pumice my own feet for goodness sake!

The power sander, followed closely by my trusty staple gun, is definitely my favourite tool in my tool box. It saves me time, increases my productivity, saves my manicures, and it’s the best way to remove old and ugly to make room for new and fabulous.

Removing old and ugly to make way for new and fabulous. That definitely sums up Heather’s approach to home reno and decor–and life in general. Thanks for being part of the “My Favourite Tool” series, Heather. Be sure to check out Heather in Heels to see more of Heather’s quest to add more fabulous to daily life.

The Porch Jacking: Chad’s Crooked House

I’m happy to welcome Chad of Chad’s Crooked House to the blog today for the third installment in the “My Favourite Tool” series. If you’re just joining us, this series came about when I was thinking about what I should put on my tool wishlist. To help me make up my mind, I reached out to a few bloggers and asked them to share their favourite tools.

I’ve been following Chad’s adventures in restoring and updating his Philadelphia row house for awhile now. It seems like he might be finally heading into the homestretch on his reno (or at least, Phase 1). I’m glad he could take some time away from painting, lighting, closets, kitchen cabinets (!) and other work to share a project from the past here today.

Julia asked me to write about my favorite tool. Usually picking favorites is the hardest thing in the world for me, but this time I have one with a perfect combination of weirdness and a good back story. We’re going back about 8 years to when I was in college for this project.

My parents have a screen porch on the side of their house. It was always a favorite spot even though it was kind of in sorry shape. The columns were wrapped in finished wood that was visibly rotting away and the screen frames were patched up with corner braces that were rusted all over. It was time to give it a face lift. My dad called me to get my approval to use aluminum capping. He’s not dumb, so he had to have known he would never get it. Especially for a spot where people would be sitting 2 feet away and really see the fakeness. I told him that capping over rotting would be flirting with disaster (see how practical I am?), and that we should re-wrap the columns with new wood. And then I took my final.

Fast forward a week or two, and I was home to investigate. The screens were down, and I started hammering a crowbar into the most rotten column, at one of the corners. The first thing I saw was bad – like 6 million bugs scurrying out and tunnels all through the wood. But the second was even worse – nothing inside! I was ripping apart a column that was holding up the porch roof!

I called my dad in a panic. He said no big deal, we’ll just put in new pressure treated 6×6 posts. I was half crying. “What about the temporary bracing? It’ll be so much work!”

He replied in a high pitched mocking tone pretending he thought I was crazy. Not that he actually thought this, but he likes to mess with us.

“What? We’ll just use the railroad jack!”

“The what?”

“Come on, Chad. You know we have a 30 ton jack in the garage.”

I never did know that, but it sure was good news. Here it is. I always thought this giant bar was for heavy digging in the garden, but actually it’s the lever for the jack. The whole thing is cast iron and weighs 67 pounds.

30 ton railroad jack

So he found a 4×6 in his hoard, cut it down to fit on the jack, and set it up next to the first column. Up went the porch roof and out came the column. We cut the new 6×6 to match the height of the old column, stuck it in place, let the porch down and moved on to the next one. All 7 new columns were in place in a day! Here it is 7 years later.

Screened porch

Good job, Chad (and Chad’s Dad). That porch looks like a beautiful spot to spend time in the nice weather. Thanks so much for sharing your favourite tool, Chad. If you’re interested in reading more about Chad’s adventures in Philadelphia, check him out at Chad’s Crooked House.