It may still be winter outside, but Sarah in Illinois is already looking ahead to gardening season–or at least her Mom is. Today, Sarah’s sharing how to make a simple tool that can help keep your other gardening tools in good shape.
It’s been two weeks since I posted that we were having such low temperatures and, as I write this, it is the first day that we have made it above freezing. My wood shop is not heated but thankfully I had a super easy, super fast project that I could finish before my fingers got frostbite.
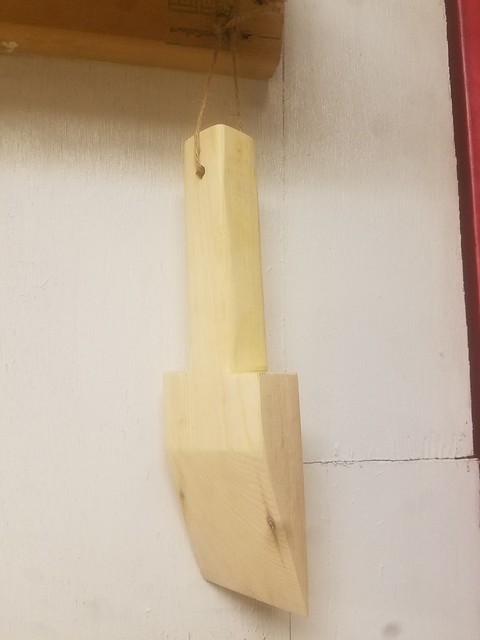
The idea for this project came from the magazine Mary Jane’s Farm. I highly recommend this magazine if you have any interest in farm life, recipes and simple living. My mom showed me this picture from the October-November 2014 issue and said that she would really like a shovel scraper.
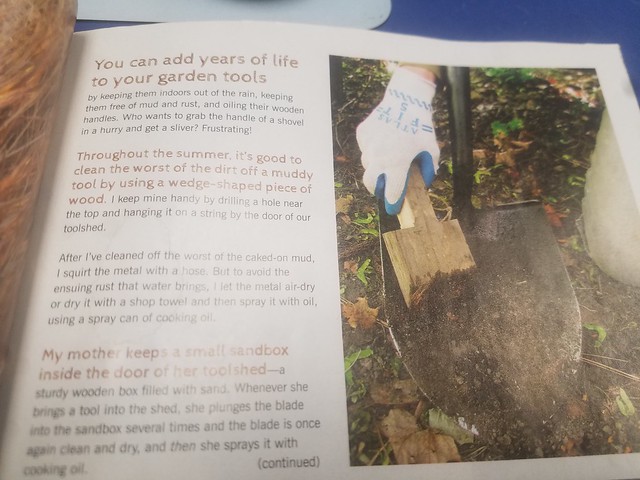
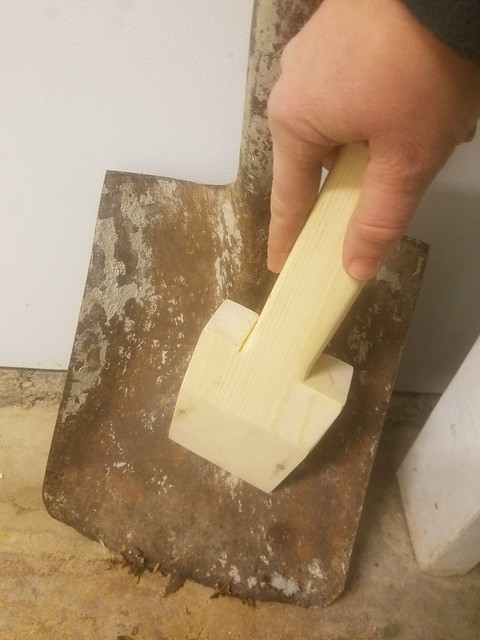
It’s a simple concept. Just a pointed block of wood used to scrape the bulk of mud off of your shovel before you put it away. I will give the dimensions that I used, but every single measurement is adaptable to your own needs. Feel free to adjust them as you see fit.
I started with a scrap piece of 2×4 lumber. After taking out old staples I cut the board to 12 inches in length.
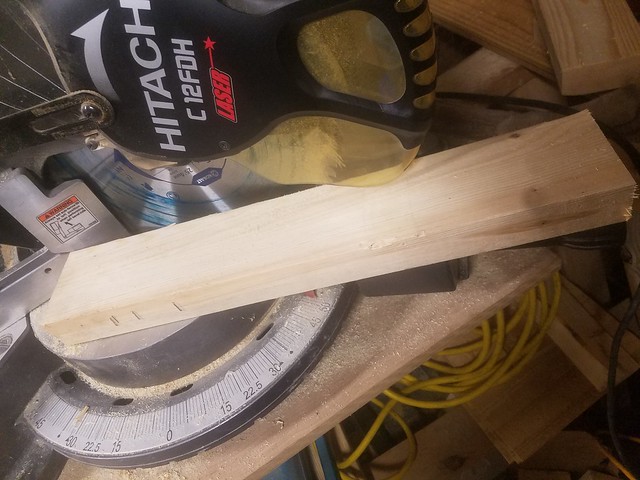
I set my miter saw to cut the end of the board at 22.5 degrees. Again, this is just the angle I chose based on what looked appropriate for my use.

I then drew a guideline of where I would cut my handle. Note my crudely drawn measurements.

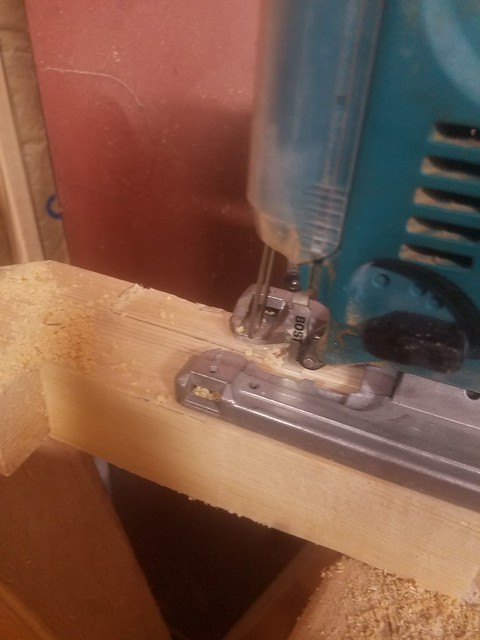
I then cut along these lines with my jigsaw.
I drilled a hole at the end of the handle to make it easy to hang up and all I had left to do was sand down the corners to make the handle more comfortable and to prevent my mom from getting splinters.
Remember my post back in October where I was longing for a new sander? Well, when my dad told me that he didn’t know what to get me for Christmas I had the perfect suggestion!

I’ve only used it this one time so far, but I am very happy with it. I don’t know if my old sander was really worn out or this Hitachi is that much stronger, but it feels like it has twice the power of my old sander. You can see we went with the hook and loop attachment. I just have to get used to the fact that this is pretty much what the industry is going to.
Back to the project, it didn’t take long to sand down the edges and make the scraper quite comfortable to hold.
I decided this morning after looking at it again, that I am going to coat it with a light coat of linseed oil to protect it just a bit, but other than that, it is ready for my mom.
Have you ever used a shovel scraper? Do you have a quick and easy wood project to try? More importantly, is your project area heated?
Thanks for this tutorial, Sarah. I’ve never heard of a shovel scraper. I think my Dad would appreciate me making one of these for myself. When he taught me how to sharpen my shovels, he grimaced as he looked at the dried mud on my shovels and began the lesson with a lecture on taking care of my tools.

I have not used the scraper yet, but plan to do so soon! I am also thinking of using a bucket of sand, possible with oil added, to do the next step in keeping my tools maintained. (Just dip the tool into the bucket to keep things rust free.) You have seen the light box that Sarah made for me last year. She has many talents!
It’s so nice that she enjoys making things for you, and that you appreciate them so much.
Well, I forgot to remind you take it with you when you were over Sunday, so that is part of the reason you haven’t been able to use it!
Thanks mom!
What a nifty little tool! Great job!
Hey! I fixed my comment problem – it was WordPress that was causing it.
Thank you! I am going to have to make one for myself now.
For sure! It really does look handy.