Financing the farm

It’s been a year since we bought the farm, and this month I’m revisiting some of our experiences from the purchase.

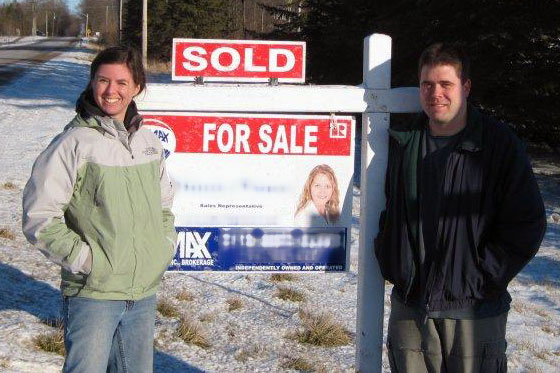
When we last left our heroes, they were standing in the snow next to a sold sign smiling giddily because they had just bought a farm.

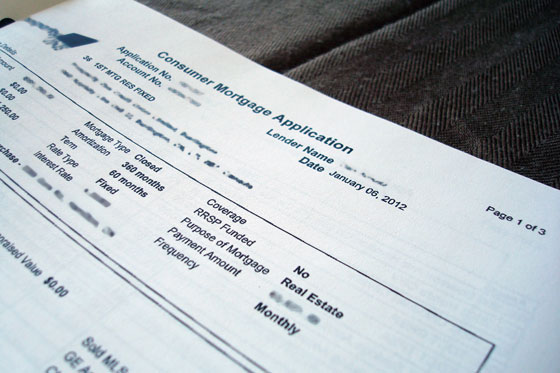
In reality, they had a conditional sales agreement on a farm. In order to actually close the deal, they had to pay for the farm, which meant a mortgage.

Consumer mortgage application

Finding a lender for the farm was a bit like finding the perfect property–frustrating, trying, drawn out, complicated… although [spoiler alert] ultimately successful.

Matt and I had gone to our bank and been pre-approved before we ever started looking at farms. However, now that we had found our farm, we had to convert our pre-approval into an actual approval. And according to our conditional offer, we had eight days to firm up financing.

What we discovered was that in the case of a rural property a pre-approval is mostly hypothetical. Turning it into reality is another matter entirely.

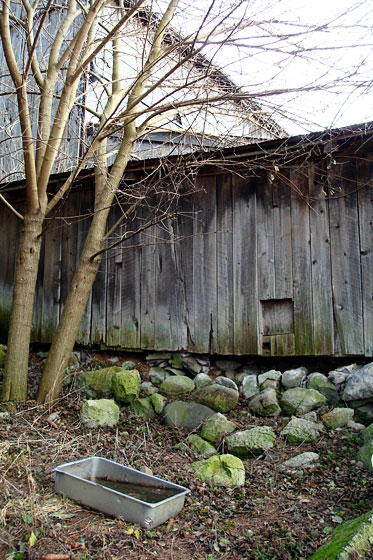
Banks, and really most lenders, like cookie cutter. They have forms and check boxes and mathematical formulas. A 129-acre farm with a modest house, a massive barn, a semi-rickety driveshed, a bunch of hay fields and a few acres of forest doesn’t fit their molds.

Posted interest rates don’t apply. Nor do minimum down payments. Hoops and hurdles are placed in your path. Acrobatics–and lots and lots of paperwork–are required.

Signed offer in hand, we headed to our bank. To cover all of our bases, we also visited a credit union where Matt’s Dad is a member and connected with a mortgage broker recommended by our real estate agent.

Here’s what our options were:

  • The bank: Throughout our dealings with our bank, we felt like they were trying to make things as difficult as possible so that Matt and I would just go away. Even though we weren’t planning on working the farm, they wouldn’t give us a residential mortgage. Everything had to go through their small business line of products. And the interest rate was a full percent higher than what other residential customers were getting.
  • The credit union: Service was great, and we really felt like our staff person was working with us to make the mortgage happen. They would do a residential mortgage, but the interest rate wasn’t any better than at the bank.
  • The mortgage broker: For the most part the broker struck out. Even though Matt and I were a good credit risk and the farm had no big issues, lenders didn’t want to step outside of their little boxes. He did manage to find one major bank willing to give us a residential mortgage. The snag was that the bank saw the “needs TLC” description in the real estate listing and wanted to hold back a portion of our loan conditional on us installing a new heating system and new roof within 120 days of taking possession.

So there was no clear front runner among our three options.

The biggest hurdle in securing financing was that every single lender wanted an appraisal. A real live person had to visit the farm, walk around and say how much it was worth. Except he’d only look at the house plus 5 acres. Maybe 10 if we were lucky.

A big part of the appraisal was looking online for comparable properties, which meant that since the appraiser was only evaluating 5-10 acres, he was looking for anything in the 1 and 15 acre range. Now maybe I place more value on land than other people do, but somehow in my mind 5 acres doesn’t compare to 129 acres.

It was important to us that the whole property be valued properly. All of the lenders would only give us a mortgage for up to 80% of the appraised amount, so if the appraisal came back too low, we could be in the situation where we might not be able to afford the farm.

Aside: The 80% loan speaks to my earlier comment about minimum down payments not applying to farm purchases. While in Canada people are able to purchase houses with as little as 5% down, if you buy a farm, your lender is going to want 20% minimum.

Anyways, the other huge frustration with the whole appraisal process is that the lender ordered it, required us to do it, kept the report and wouldn’t show us a copy, but required us to pay for it. I managed to speak with the appraiser our bank wanted to send out to the property and when I asked him how much the appraisal was going to cost he refused to tell me!

The appraisal ended up being the tipping point for us.

I managed to get the credit union to agree to appraise the full 129 acres–at a cost to us of $762.75. Given the urgent deadline of firming up our financing within a week, we gave their appraiser the green light to head out to the property.

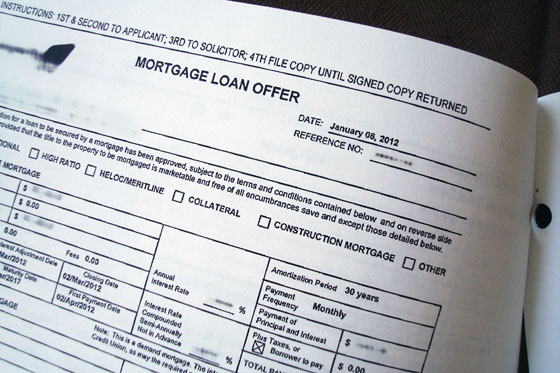
The day our conditions expired, the appraiser’s report showed up at the credit union. Even though we hadn’t signed the final paperwork, we went ahead and waived the conditions on our offer. And by the way, the appraisal came out more than $60,000 higher than we had paid for the farm. Phew!

The day after we waived the conditions, a bank contacted by our mortgage broker came forward with a firm commitment for a residential mortgage at a half percent less than the credit union was offering.
Mortgage Loan Offer paperwork

Though he had no obligation to do so, our broker gave us the paperwork from the bank, so that we were able to take it to the credit union and use it to negotiate a better interest rate. The great service from our broker and our mortgage specialist at the credit union made what was an extremely frustrating process slightly less painful.

Some lessons learned for securing a mortgage for a rural property:

  1. Give yourself as much time as you can to finalize your financing. We had had lots of conversations with the bank throughout our property search, well before we ever placed our offer on the farm. We had some idea of what would be required to secure the mortgage. However, the financing was much more complicated than we could have ever dreamed. We squeaked in just under the deadline to waive our conditions.
  2. Have all of your financial information documented in detail and carry it with you at all times–extra hard copies as well as electronic files you can email. All of the lenders required three years of tax statements for both of us. In addition, we each supplied pay stubs and personal statements detailing our assets and income. Having all of our numbers on hand ensured we didn’t add any extra delays to the process.
  3. Consider working with a mortgage broker. Our broker’s contacts and experience were invaluable. He was a fabulous advocate for us and it was very helpful to have someone who was willing to explain the intricacies of mortgage conditions and vet any documents we received.
  4. Shop around. Don’t settle for the first offer you receive and consider alternatives to traditional banks. Even when you receive an offer, go back to the lender and ask for exactly what you want. You might not get everything, but you may be able to do a little better. Ask lots of questions and make sure you understand exactly what you’re getting.
  5. Be prepared for some extra expenses just because you want a rural property: you’ll likely face a bigger down payment, higher interest rate and appraisal fees.

For Matt and me, the extra expenses were worth it because we got the farm of our dreams. I can’t say the frustration was necessary, but we made it through.

Home Goals 2013

I’ve never been big on new year’s resolutions, but there is a list that’s been building in my head for some time now. It is the Home Goals 2013 list.

After having most of last year sucked up by the basement-renovation-that-never-ends, my plan for this year is to avoid any other massive all-consuming projects. However, as you can probably imagine, there are a few to-dos I’d like to accomplish.

1. Landscaping. This is going to be the big one this year. As I’ve noted, we didn’t do any landscaping in 2012, so there is a huge need to get on top of the situation outside. However, with 129 acres of property, we will have to prioritize where we spend our energy.

  • Reestablish the flowerbeds around the house. Some will have to be rebuilt. Some will be extended. Everything will have to be weeded.
  • Level old fire pits at the top of the driveway and plant grass seed.
  • Build new fire pit close to the pond.
  • Tidy the east shore of the pond. The brush grew so thick over the past year that I can only access about ten feet of shoreline. Chainsaws and perhaps a bush hog will be required.
  • Put in a garden on the turnaround. This pile of dirt and rubble and weeds is approximately the size of a suburban backyard. A big lush flowerbed sounds like a better plan than mowing any additional grass.
A lush garden with a brick path winding through it

I’m going with inspirational photos for this post, rather than reality. A lush garden with a brick path winding through it would be perfect for the turnaround. Source.

2. Painting.

  • Living room
  • Dining room
  • Kitchen
  • Main floor hallway

3. Living room fireplace. A wood burning fireplace was high on my wish list when we bought the house. We have one, but it needs a little work to make it exactly what I want.

  • Replace the woodstove-esque insert with an open hearth one.
  • Reface with fieldstone.
  • Put up a new rustic wood mantle.
Stone fireplace with wood mantle

4. Laundry room. The final section of the basement needs to be brought up to our new and improved standard.

  • Fix the leaky foundation wall.
  • Paint.
  • DIY a fun light fixture.
  • Build a drying rack.

A few other things will sneak in there, I’m sure, but here’s hoping 2013 brings slightly more time for enjoying rather than always working the farm.

How do you feel about resolutions? Do you have any home goals for 2013? The nester, the champion of annual home goals, published her list last week. It’s a bit more philosophical than mine. I think I’m still at the stage of working on the underlying form for our house and property. Once I have that established, I’ll build in a bit more philosophy.

One year ago

A year ago today we saw the farm for the first time.

We’d been searching for our dream rural property for nearly a year and a half. After a very frustrating fall with nothing new coming on market, it had been more than a month since we’d actually visited a property.

Then on Jan. 2 sitting in the living room in our little house in the city, Matt hopped on MLS.

A new farm had been listed.

It was in our preferred area. It wasn’t the type of house we usually looked at, but it had a barn and was a good acreage. It was also over our price range. Matt called our agent, and he made an appointment for us to see it the next day.

Our viewing at the farm was different than the viewings when we first started. The rose coloured glasses had come off.

Which was unfortunate, because we really could have used them the first time we stepped into the house.

Clutter in a messy basement

The good news is the garbage bags turned out to not actually be full of garbage. The bad news was that we ended up buying everything you see when we bought the farm.

No one had lived in the house for a few months, but it was far from empty. Previous owners had left stuff and lots of it. Beyond all of the detritus it was obvious that the house met one of my major criteria. It had potential. Buckets of it.

We toured the barn and fell in love with the historic post and beam construction. We peaked into the driveshed. And that was about all we saw of the 129 acres… because I was so freezing cold.

It was an absolutely frigid day, and standing outside chatting with our agent all I wanted to do was get in the car and turn on the heat. Our agent’s final words as we turned on the ignition were, “I think you could get it for about $100,000 less [than they’re asking].”

And that became the topic of the afternoon. A hundred thousand less than list put it into our price range, but still at the top.

During our frustrating fall we’d had conversations about how we were likely going to have to compromise on something: location, property (meaning acreage, outbuildings, ponds and forests) or price. If we chose to buy this property–which had everything we wanted and was close to where we grew up and where our families still lived–it was clear that our compromise point was going to be the budget.

Matt was ready to go for it. The farm ticked all our boxes… except for price. That night was a sleepless one for me.

The morning of Jan. 4, we called our agent and to his surprise told him to put together an offer. At his office later that day we found out that the buyers had already received other offers. Bad news, we were about to enter our third bidding war. Good news, the buyers were waiting for our offer.

We signed the offer and crossed our fingers. Our agent said he expected we’d hear something back that evening. That night we sat up until midnight, but the phone was silent.

When we finally headed to bed, I slept with no trouble. We’d made our decision and it felt right. We’d done all we could, and it was up to other people now.

First thing the next morning, the phone finally rang. It was our agent. Our offer had been accepted.

Sold real estate sign

Finally farm owners.

As I hung up the phone and told Matt the good news, I burst into tears–happy tears. After a year and a half of searching, we had found our perfect place and it felt exactly right.

Now a year later having owned the farm for ten months, it feels even more right.

Ready for hibernation… pretty much

Nearly three months ago I published the list of fall chores that we needed to complete to be ready for winter. Well, winter officially arrives today. Are we ready?

  1. Winterize exterior waterlines. Done.
  2. Take off the window screens for cleaning and patching. — I have no excuse why this, one of the simplest tasks on the list, isn’t done. Maybe this weekend?
    Update: Done! Closing early at work for the holidays meant I was home in the daylight. Popping off all of the screens, labeling them and carrying them down to the basement took all of 15 minutes.
  3. Fix up some winter beds for the cats. Done.
  4. Fix leak in basement foundation. — Matt adjusted the downspouts and put a sheet of plywood under the window to run water away from foundation, which seem to be working for now, but we will have to give this job some proper attention next year.
Overgrown flowerbed

From the light above the window and the retaining wall half buried in the garden, you can see that this used to be a door, so we’re pretty sure this is the source of the water we see once in awhile in the laundry room.

  1. Get rid of scrap metal. Done.
  2. Organize driveshed so that we can find the snow shovels and park at least one car inside. — Matt has dug out the shovels, but the driveshed is still mostly in shambles.
  3. Get rid of the woodstove and old chimney, which are also in the driveshed. — We thought we had a buyer, but he never showed to pick up the stove. Anyone want it?
Woodstove and stainless steel chimney

This beauty is still for sale. Send offers to homeon129acres@hotmail.com.

  1. Fit out the mudroom and front hall closet. — Halfway done. The front hall closet is super functional now, but the only progress we made in the mudroom so far is adding two boot trays and moving the coats to the inside closet. I’m hoping to finish off this project over the Christmas break and will of course share posts in the new year.
  2. Remove stakes from established trees and stake the new trees that we planted this spring. — Halfway done.
  3. Install the flag pole. Done.
  4. Pull the fallen tree out of the pond. — A project for next year. If the pond does freeze this winter, we’ll still have plenty of room for skating and hockey. I guess a good thing about putting this job off for a few months is that I didn’t have to go swimming in November.
  5. Buy snow tires for my car. Done.
Snow tires without hub caps

Wiley got bling, and my poor little car lost hers. 😦

  1. Put away the lawn furniture. Done.

Something else I should have put on the original list was learn how to count. I thought I had 14 tasks when I actually had only 13. Oops.

I also had two bonus “nice-to-dos,” one of which got some attention.

  1. Install a bird feeder on the driveway turnaround. — Didn’t even try to do this.
  2. Trim up some trees around the property. — We trimmed two trees, but we didn’t take down our sickly blue spruce or trim the very twisted willow tree at the pond.
Pruning a willow tree

Our other twisted willow before and after its haircut

Anyways, out of the original 13 and the two bonus, we can officially cross off 7 8… or 8 9 if you count the jobs that are half done. Not a great completion rate, I guess. But hey, the basement’s looking really good, and it will be a nice and cozy hang-out space this winter!

In addition, we did do a few extra tasks specifically for winter.

  1. Winterize Wiley. Done.
  2. Put the blanket on the bed. (Not really post or picture worthy.)
  3. Get the outside lights working. Done.
  4. Dig out the snow fence, although we haven’t decided if we actually need to put it up yet.
Roll of snow fence

A few rolls of snow fence were buried in the long grass of the field behind the barn, and Wiley helped us dig them out.

I met our local councilor a few weeks ago, and he told me that I’m not a true rural resident until I’ve made it through a winter. I like winter, so I’m actually looking forward to a snowy season of hiking and skating and staying cozy in the house. My fingers are crossed that we’re prepared enough to be able to enjoy it without too much hardship.

My Christmas cold may have knocked me out, but at least my tile are grouted

For the second year in a row I have been struck down by a doozy of a Christmas cold.

The fatigue, fever, headache and muscle aches are not conducive to writing… or thought, so for today’s post, all I have for you is a low quality picture of our grouted tile.

Tiled shower stall with bench and niche

You’re not tired of hearing about tile, are you?

The tile are grouted, the bench top is in place, the fixtures are all installed, and we even have running water.

Germs aside, it’s a merry Christmas in the basement.

No chandeliers here

Last week on the Art of Doing Stuff, Karen professed her love of chicken coops and shared images readers had submitted of their coops.

Her post inspired me to get out and investigate our chicken coop. I confess, this is a spot that I usually prefer to avoid.

Karen wrote, “some of the most dilapidated coops are among my favourites.”

Well, dilapidated is a good descriptor of our coop. If you’re feeling charitable, you might call it rustic. Usually, I tend to just call it gross.

Chicken coop lean to on the side of the barn

Abandoned chicken run

Rustic chicken coop

Broken concrete in a chicken coop

Perhaps a chicken laid a very heavy egg and broke the concrete floor?

I’ve seen some coops with chandeliers and artwork. The leaky roof in ours has started to form stalactites, which I guess could be considered sculpture.

Leaky chicken coop

And in case you’re starting to wonder, you are in fact correct. The coop has not been cleaned out. Likely not for several years. (Warning: The next photo may spoil your appetite).

Manure under chicken roosts

The coop is cozily tucked into the west side of the barn under the pines. The worn barn boards, old mullioned windows and generous size are appealing. The abandoned water and food dishes in the run, the layers and layers of manure inside and the overall dilapidated state both inside and out are decidedly not appealing.

I’m planning on adding geese, ducks and chickens to the farm someday, and they will need a home–a better home than this coop. My Dad (the general contractor) upon seeing the coop for the first time suggested that dynamite might be the best solution. We probably will end up starting over, but we’ll likely still end up more on the rustic side of coop design–I can’t see myself putting a chandelier in a chicken coop.

If you’re looking for some slightly more inspiring coops than ours (albeit no chandeliers), check out what Art of Doing Stuff readers submitted. And while you’re there, make sure to check out Karen’s own coop which completely puts ours to shame. Even though she says her hens don’t care how their coop looks, I don’t think Walnut and the ladies would be too happy if their home was anything like ours.

Christmas comes early

Merry Christmas to us!

Decor-Rest sectional couch with chaise

Sorry for the lighting. Winter hours plus being underground make for challenging photography.

The sectional we bought for the basement–Matt’s and my Christmas present to each other–wasn’t slated to arrive until maybe Dec. 22. However, the Christmas elves were obviously working overtime, because the couch showed up early.

Unloading couch from delivery truck

Despite the fresh snow, the couch arrived by truck rather than sleigh

There may have been a happy dance when I heard it was on its way… Okay, and a fist pump too.

Sectional pieces prior to assembly

The sections of the sectional as our delivery team elves set it up

We went with what I would term a semi custom sectional. It’s made by Decor-Rest, a Canadian company, and we ordered it through Smitty’s Fine Furniture, another Canadian company.

Semi-custom means we got to pick the configuration and the fabric from a selection of options. We went with a pretty neutral grey-black-white tweed fabric, and then I picked a few brightly coloured cushions to pep up the fun factor.

Retro striped cushion

It’s probably not everyone’s taste, but I love the bright colours and retro look of the striped cushion

Ever since I first saw the basement, I knew I wanted a big corner sectional with a chaise. With this couch I definitely got my Christmas wish. The couch fits perfectly in the corner and has lots of space for Matt, me and anyone who comes to visit.

Chaise extension on a sectional

Although please do not sit in my seat

It’s incredibly comfortable too. In fact, there may have been an hour-long nap one evening when we were supposed to be working on finishing touches in Matt’s office.

I’m looking forward to a lot more of those soon! Maybe over Christmas vacation?

How tiling is like reality TV

I should have known. It was like a scene out of reality TV where someone says, “I completely trust my alliance. That million dollars is mine.” You just know that they’re going to be the next person voted off.

A month after  I naively wrote “I actually enjoy [tiling]. It’s not hard work.” the reno gods were still chuckling at me as I glowered at the untiled walls of the basement shower.

I decided I really do mind tiling, and I did everything I could think of to avoid it. I delayed, I procrastinated, I spent my time on other things (important things like baseboards and tractors and carpet, and less important things like parties and first snowfalls). However, none of these were tiling and none were enough to distract me from the ugly cement board, the cartons of tile and the need to bring the two together.

So I appealed to my alliance.

I negotiated with the reno gods: “I don’t need the whole Lotto Max jackpot. Just a little bit will be enough to finish the tile!” I bargained with Matt: “I don’t think I’ll do a good enough job. What if it ends up crooked and we hate it?” I pleaded with my Dad: “Please call your tile guy!”

The reno gods were silent. Matt was supportive: “You’ll do a great job. I have confidence in you.” My Dad was befuddled: “You, the woman who drywalled her own basement, are now intimidated by a shower stall?” But because he’s my Dad, he called his tile guy.

The tile guy said it would be $900.

$900? Just for tiling? With materials I already own?

$900 for professionals versus $0 for me. Ummm… “I guess I’m tiling a shower.”

So I booked a day off work. I booked my Dad. Just like the challenge part of the episode, I threw myself into the mud pit (mortar bucket?), and we got to work.

The first step was to figure out our starting point. Between the bench, the niche, the accent band and the vanity, there were lots of spots that I wanted to line up. However, the most critical was the top of the vanity, so we drew our level line from there.

Level line for tiling

Despite any appearances, the line is actually in line with the top of the vanity, and it is level.

Once we got going with our tile, the most important objective was keeping everything level and even. For me the solution was using spacers. I wanted fairly narrow joints, and every single one had to be the same. I may have gone a bit overboard.

Tile spacers

Too many spacers?

I had two bags of spacers, but those were quickly emptied. As I progressed around the shower, I kept going back to areas that had already set up and removing the spacers so that I could reuse them.

The other spacing issue I ran into was with the accent band. I’d chosen a marble mosaic tile that was slightly thicker than the white subway tile I was using the rest of the shower. I could have camouflaged the difference with a chair rail or another type of tile, but I really wanted a flat, clean, simple look. My tile supplier suggested putting a little extra mortar on the subway tiles to build them out to the same depth as the mosaic.

Back buttering the subway tile

Back buttering the subway tile

I back buttered for two rows on either side of the accent band. Because I only did it in this one spot, the walls have a very slight curve. I’m hoping it’s imperceptible unless you know it’s there (obviously, all of you will be diplomatic enough to not point it out when you come to visit, please).

Carrera marble tile accent band

Everything looks pretty even between the carrera marble accent tile and the subway tile. Doesn’t it?

The back buttering was tedious, but not particularly difficult. The trickiest area–and the point that I started to go slightly insane–was the niche.

When we were building the shower, I thought the niche was a great idea. No bars of soap and bottles of shampoo set on the bench or the floor. No caddy hanging from the shower head. Just a convenient built-in shelf.

It turns out niche functionality, good. Niche tiling, bad.

Because I’m a glutton for punishment, I wanted the pattern to continue from the walls right through the niche. That meant dozens and dozens of cuts. In the whole niche, there is only one full tile. Ugh. But, I have to say, the result was worth all of the extra figuring and cutting. And yes, the next photo is completely bragging.

Tiled shower niche

Look at that brick pattern marching right along!

We used a small piece of marble we picked up at Home Depot for the base of the niche, as I wanted a single solid piece on any horizontal surface. It’s slightly sloped so that the water, but hopefully not the soap, will run off.

In the end, tiling the shower is not as fun as sitting on the couch all weekend watching a reality TV marathon, but my early fears proved unfounded. I did do a good enough job, I think. Everything is nice and straight–and it will look even better when it’s grouted.

I may not have won the million dollars, but I didn’t get voted off the island.

Comatose

No post today. I’m in a tile coma.

Tiled shower

The result of three days of labour

Obviously, I still have to put the seat on the bench and the top on the threshold, take out all of the spacers and grout everything, but the hard part is done.

Finally.

Thank goodness.

Sorry for the brevity today. Full breakdown… project breakdown, not personal sanity (already had my “I’m going crazy” moment at the end of my 12-hour second day)… will come later.

How did you spend your weekend?