Wee-wee-wee all the way home

You might think from the title of this post that we are adding some little piggies to the farm. However, the opposite is actually the case. We are getting rid of some pigs… pigtails that is.

Pigtail light fixture

Most of our lighting in the basement is still pigtails—much to Matt’s annoyance. The conversations go something like this. “You can’t say the basement’s done until it’s all done. Including light fixtures.” Finding the right light takes time though, so rather than choose the wrong fixture, I’m fine to live with pigtails.

Matt, not so much.

However, in my defense, I bought the lights for the long room nearly six months ago. They’ve been sitting in their boxes stacked in the corner beside the shop vac for just that long. Yes, I could install them myself, but under the division of labour in our marriage, Matt is the electrician.

Well, the electrician finally got fed up with the pigtails and decided to send those little oinkers packing.

Replacing pigtails with flush mount ceiling light fixtures

Better, right?

Obviously, it’s still not “done” (the absence of furniture and art, the unpainted closet door, and the shop vac still in the corner kind of give it away), but baby steps, people. Or maybe piglet steps.

How to install pot light trim

The end stage of a renovation involves a lot of little tasks: put on the cover plates, caulk the trim, touch up the paint, clean and dust everything. One of the little to-dos on our list was to put the trim on the pot lights.

My post on how to install pot lights is one of the most frequently accessed posts on the blog. But it’s unfinished. The housing for the pot light is just one part of the fixture. The other part is the trim, which goes on after the ceiling is finished.

Without the trim, the pot light looks a bit rough.

Pot light without trim

Our trim-less pot light

The first step in installing the trim is to wash a summer’s worth of drywall dust off of them.

Pot light trim in the sink

This step may be optional for some installations.

The trim should be made up of three pieces: the baffle, trim ring and spring or hook.

Pot light trim spring

This spring connects the trim to the housing

Step one is to attach the hook to the baffle. There should be little holes in the narrow end of the baffle specifically for this purpose.

Spring attached to pot light baffle

The end of the spring without the loop should be hooked to the baffle.

The next step is to connect your baffle and trim ring.

Putting trim on the baffle

This is probably the simplest step. Just slide the the trim ring over the baffle.

Remove the light bulb, so that you can reach into the housing. If necessary, adjust the height of the socket so that your bulb is recessed as much or as little as you want.

Adjusting the socket in a pot light

Loosen the wing nut, and the metal socket will slide up and down. Tighten it back up when the socket is positioned where you want.

To connect the trim, insert the baffle into the housing, stretch the spring and hook it into the cut out on the pot light.

Pot light trim hooked in place

On our pot lights, the cut out looks like a candy cane

I found I was able to reach into the housing and hook the spring by hand. If your hands aren’t as small as mine, needle nosed pliers may come in handy.

Screw the light bulb back in and admire your trimmed pot light.

Pot light

All done!

The trim reduces the brightness of the light somewhat and directs it downwards. I may adjust the height of the bulbs if we feel we need more light once we’re using the basement.

However, for now the pot lights are bright enough for me to admire our nearly finished basement. Is it weird that I stood there for nearly five whole minutes on the weekend just looking at the rooms and remembering how far we’ve come?

Friday night lights

I’ve mentioned before that the farm is a wee bit dark once the sun sets. Well, since the time change a few weeks ago, things have been extremely dark out here in the country.

The farm at night

This is not just a black square. I actually went outside and took a picture for you to show how dark it is.

Arriving home had gotten a bit hazardous between stepping on cats and randomly jamming the key in the general direction of the lock on the front door.

The time had come for a call to the electrician.

After a quick rewiring of the driveshed, an installation on the barn, relocation of a timer and a new circuit panel–also in the driveshed, the top of our driveway now looks like this when we arrive home at night.

Exterior lights on the barn and driveshed

Let there be light! This image was taken from roughly the same angle as the one above.

We had lights on the driveshed and barn already, but neither of them were working. In the driveshed, we’d killed the power because of sketchy wiring and an obviously unsafe fuse box. On the barn, the old light had a blown transformer, and ultimately the whole light had to be replaced.

Thanks to a timer we already had in the basement of the house that the electrician was able to repurpose outside, the lights come on automatically before we get home and then go off before we go to bed. The new barn light also has a photocell that senses darkness, but we decided we don’t need to see what’s going on outside all night long, so we let the timer shut everything down around 9 o’clock. We may adjust that, but for now it’s working well for us.

The lights are also working well for the cats who no longer have to worry about being stepped on or run over. Up until now, our only way of seeing them when we come home was watching for the glow of their eyes in our headlights.

As much as I’m thrilled with our new exterior lights, I do have to admit that I’m looking forward to being home during daylight this weekend. I’m starting to forget what my property looks like outside of the lighted sphere of the barn, driveshed and house.

Lighting love

If you’ve been following along for a little while with our renovation saga, you’re familiar with some of the lighting that we started with in the basement: ceiling fixtures mounted on the walls, a ceiling fan recessed up into the joists. As you can probably imagine, I have a bit of a need for new lighting.

With the Barn Light Electric giveaway making the rounds of the blogosphere, I saw an opportunity.

Once I was browsing the web site, however, I was seduced. I was sidetracked. I decided I can live with bare bulbs and pigtails in the basement.

But I absolutely positively cannot any longer live with this.

Green and faux wood ceiling fan

The green and brass and faux wood ceiling fan in the living room.

Wouldn’t this be a fun replacement?

We have a beautiful big living room with lots of natural light, wonderful vaulted ceiling, great rustic beams and a stone fireplace (that admittedly could use a bit of work). In the middle of all that, we have a huge, horrific green ceiling fan.

Living room with fireplace

This is never appropriate.

Barn Lighting has tonnes of great options that will satisfy my need for a pretty, polished, traditional aesthetic that’s in keeping with our rustic country setting. We have an actual barn on this property. We should choose a company with “barn” in its name.

Once I was focused on the main floor, it was easy to line up other lighting options.

Barn Light Electric Mystic Seaport Chandelier

Mystic Seaport Chandelier (in dark brass) to replace a distinctly non-country chandelier in the dining room.

Barn Light Electric Mayfield Semi-Flush Ceiling Light

Two Mayfield Semi-Flush Ceiling Lights (in old bronze) to replace a pair of  unfortunate boob lights in the hallway

Barn Light Electric School House Pendant "The Brevard"

School House Pendant “The Brevard” (also in a bronze finish) to replace a flush mount fixture over the island in the kitchen–a pendant is much more appropriate and will balance the space nicely.

While I need the Outer Banks Chandelier for the living room, I just want the Halstead Semi-Flush Ceiling Light. I’d put it in my sewing room to replace yet another boob light.

Barn Light Electric Halstead Semi-Flush Ceiling Light

Or I’d put it in the bathroom to replace a weirdly located globe that’s straight out of 1989.

Halstead is not really country and it’s definitely not rustic, but oh it’s pretty.

Do you have some lighting needs of your own? There’s still time to enter the Barn Light Electric giveaway.

  1. Look around online at Barn Light Electric and pick lights you’d love to own.
  2. Feature your lighting picks on your personal blog, and link to the lights if you can!
  3. Copy/paste these rules at the bottom of your blog article so others can enter.
  4. Once your personal article is up, you must email your blog link to: marketing@barnlightelectric.com to be qualified to win.

The contest ends Monday, July 2, 2012. If you don’t have a blog, but do have need of beautiful lighting you can still enter. Find out how by reading the Official Rules.

Wiring woes

As you saw yesterday, work on the basement continues. In the meantime, I’m going back a few weeks to talk about some of the problems we encountered with the electrical.

Burnt junction box

Fried junction box in the basement ceiling. In case you were wondering, no, the inside should not be black like that.

We ended up discovering a total of 10 junction boxes in the basement ceiling, hidden behind the drywall. This is a big no-no. Junction boxes themselves are okay. But covering them over with drywall is not. You’re supposed to put a cover on them so that they are accessible.

The conversation during demo went something like this:

“I found another one.”
“Seriously? Crap!”
“Do you want to just pull the whole ceiling down?”
“We probably should. Who knows how many there are up there.”

One of my goals in hiring a professional electrician was to eliminate as many junction boxes as possible, because I didn’t want the covers polka-dotting our nice new ceiling. In the end, our electrician was able to get rid of all but two–much better than I’d hoped for.

The other unsettling moment during demo was when we’d open a wall or part of the ceiling and find a loose wire. The ends were usually cut. They weren’t capped or taped at all, and we had no idea where they went and whether or not they were live.

This was the moment when Matt would reach for his tester and point it at the offending wire. If the tester chirped, that meant the wire was live. It turned out that most of the wires were dead, completely disconnected at both ends. No one had ever bothered to remove them, so they just sat there behind the drywall waiting to scare future renovators.

Matt made it his mission to eliminate all of this useless wiring, and he spent a lot of time tracing wires through the ceiling and along the walls so that he could pull them out.

Pile of old electrical wires

Pile of some of the old wires Matt pulled out in the basement.

We did as much of the wiring work ourselves as we could, but having the help of a skilled professional was absolutely necessary for fixing all of the problems. Electrical is not always straight-forward, and it can be dangerous if it’s not right.

I’m all about DIY, but only if I know what I’m doing. Thanks to our electrician, all of the problems have been fixed, the panel is organized and labelled, circuits have been tidied up and new outlets and lights have been added where we wanted them. Most important of all it’s done right and it’s safe.

How to install a pot light

The original lighting in what will be the TV area of the basement consisted of four pot lights, two ceiling fixtures mounted on the walls and one ceiling fan recessed into the ceiling so that it didn’t decapitate anyone. These three different sets of lights were controlled by three different switches in two different locations.

The main room before

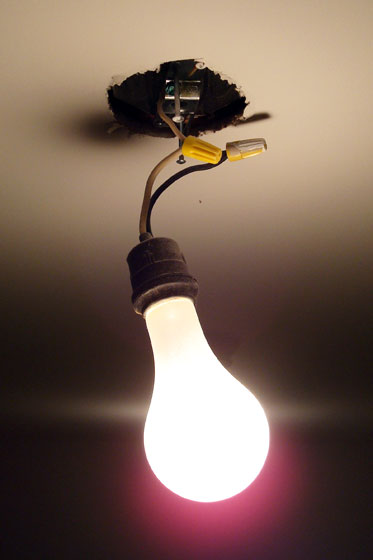
The original lighting in the basement.

We decided to keep just the pot lights, so Matt took apart the ceiling fan, and my Dad pulled out one of the wall-mounted ceiling fixtures while I dealt with the other one. We removed the boxes and wires running to each of the lights as well as the switches that controlled the ceiling fan and the pot lights. Then we reconnected the pot lights into the switch that originally controlled the ceiling fixtures.

Everything was working well, but we felt we needed a little more light, so we decided to add an extra pot light in the middle of the ceiling.

Apologies for the quality of the following photos. So many circuits are off in the basement due to the electrical work that we don’t have very many lights. We have construction lights set up, but they’re a little harsh. I played around with some new actions in Photoshop, but I can’t tell whether they made things better or worse.

Potlights in the open ceiling

Our original four pot lights

Electrical work can be intimidating, but installing a pot light is a very straight forward job that can be completed in about a half an hour, even by those of us that are not licensed electricians. We did have a lot of other issues with the electrical in the basement, and for those we hired a professional electrician.

Here’s my pot light installation method, complete with lots of photos (of varying quality). Note that in the tutorial I’ve assumed that the wire that is going to be feeding your new pot light is already in place.

1) Turn off the electricity to your light. In this house, none of the circuits are labelled, so our usual method of finding the right one is to turn on the light (or plug something in) and have one of us watch it while the other person flips the breakers until we find the right one. Then we label it!

2) Determine where you want your new light. I used the oh so scientific method of tying a piece of twine to each of the existing pot lights. Where it crossed was the centre.

Using twine to find the centre

3) Now onto your light.

Pot light

Some pot lights can be installed in a finished (drywalled) ceiling. However, this type of pot light has to be installed where the ceiling is open.

4) Pop the cover off the wiring box to reveal the wires.

Preparing your pot light for installation.

Cover on (left). Cover off (right). I also cut off the push-in connectors because I’m used to twisting the wires together instead.

5) Now attach the pot light to the joist. For my light, this meant adjusting the brackets, or bar hangers, so that they were the right length to span between the joists and then nailing the bracket into the joist.

Installing a pot light bracket onto the joist.

For reference, holding the light in place while taking a picture is not the easiest. A third hand, or better yet a second pair, would be helpful.

6) Take a break because your husband has arrived home, and he brought dinner.

Pot light housing installed

Pot light housing installed. Time for dinner.

7) If necessary, trim your feed wire to the required length and strip back the casing to reveal the individual wires. The easiest way to do this is to use your side cutters to snip a little split in the casing, just enough so that you can access the ground wire (the copper one). Grab the ground wire with your pliers and pull to rip the casing. You want to remove the casing for about 6 inches so that you can access the black, white and copper wire. Once your casing is ripped back far enough, clip it off with your side cutters. Strip about a 1/2 inch or so of the plastic coating off of the tips of the black and the white wires. I usually do this with a knife, as though I’m peeling a vegetable.

Removing the casing from wiring

Remove the casing from the wires by pulling on the ground wire. For reference, the ground wire is pointing up to the right, the black and white wires are pointing down to the left and the empty casing is pointing down in the centre.

8) Knock out one of the round metal covers (coincidentally called knock-outs) on the pot light housing. I used my awl to bend it up and then wiggled it back and forth until it snapped out. The wire isn’t supposed to float loose in the hole, but the pot light didn’t come with any clamps or conduit, so I pulled one off of an old electrical box and put it in the hole.

From left to right, removing the knock-out, the clamp that will hold the wire in place and the clamp installed.

9) Insert your feed wire into the pot light and clamp it in place.

Feed wire inserted into the pot light

Sorry for the slightly blurry photo. The plastic casing should be just inside the pot light housing.

10) Connect your feed wire to the wire in the pot light: black to black, white to white, ground to ground. Twist them together with your pliers and cap them with marretts.

Connected wires in pot light housing

You don’t have to get fancy with different coloured marretts. These are simply the two I had on hand that fit the wires properly.

11) Once everything is securely connected, tuck your wires back into the housing, put in a light bulb and flip the circuit back on to test your light.

New pot light

It works!

12) Put the cover back over the wiring area. Make sure the light is positioned where you want it on the hanger bars. There’s a screw that you tighten into the bar to lock the light in place. Stand back and admire your handiwork.

Five potlights

Let there be light!

The five pot lights look great, and throw a sufficient amount of light. I initially thought we might need some wall sconces or extra lamps, but I think the pot lights will work well for us.

Oh and you might want to take down your measuring twine, unless you really like it as a decorative element.

ETA: The final, final step in installing pot lights is installing the trim, which I did after our ceiling was drywalled. I’ve posted my instructions of how to install pot light trim.