H2-O-kay

As I mentioned yesterday, the more we looked at the water system at the farm, the more problems we found.

Just a basic fix would have involved:

  • Repair or replace the pressure tank
  • Service the iron filter
  • Hook up the softener
  • Install a UV filter to deal with any potential bacteria contamination

We would use the existing well and the pump system would stay in the barn.
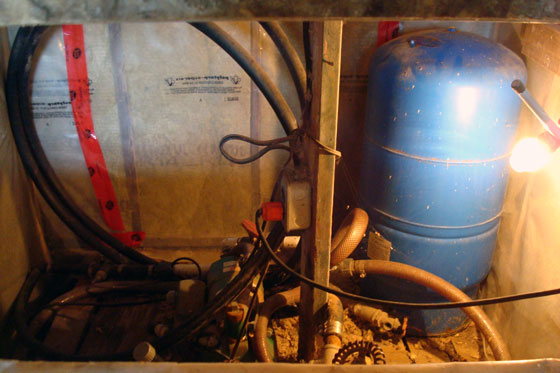
Old pressure tank and jet pump

A view inside the old “pump house” in the barn

The whole system would still not be up to standard, either for the Ministry of the Environment or for us.

We quickly came to the decision that fixing the problems was not good enough. We chose to start from scratch.

The first step was a new well.
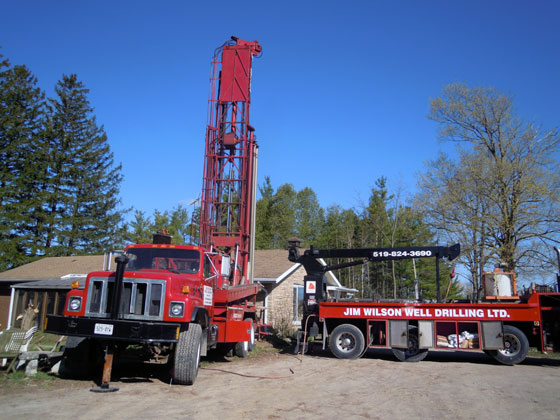
Drilling a new well

The drill rig in place beside the house

Our new drilled well is 75 feet deep with a production level of 25 gallons per minute–a really good depth and a really good rate (as opposed to our old 25 foot deep “non-standard homemade” well). It’s right next to the house meaning we have much better water pressure and most important of all it’s up to Ministry of the Environment standards.

My Dad, who was supervising the well drilling, left a note to update us on what had happened while we were at work.  After listing all of the specifications, he concluded with “Drinks is on me. Love Dad.”
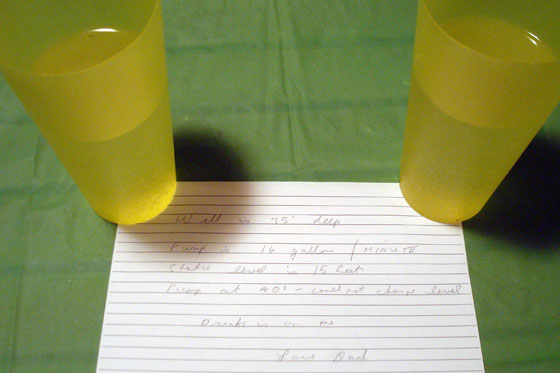
Note from Dad

He’d filled the glasses with water directly from the new well. I took a sip, but Matt refused the sample until we had the treatment systems installed inside the house.

Inside the well, we have a new high-efficiency submersible pump, which is much better than the old jet pump that was in the barn. The pump feeds into a constant pressure system in the house. This means that our water pressure is steady no matter how many taps or appliances are running, and the pressure is comparable to what we had when we were on city water.

Constant pressure system and air injector tank

The constant pressure system includes an electronic controller (the black box above) and a cushion tank (blue) with a brass pressure log manifold assembly.

Next up in Operation H2O were the treatment systems.

As soon as the new well was drilled and the water was clean, our contractor took a raw water sample to determine exactly what treatment we needed. High iron content was a major issue with the old well, but no one knew whether that would continue with the new well.

It turns out that it did, so we installed a high efficiency, high capacity, chemical free air injected iron removal system. The air that’s injected oxidizes the iron (basically turning it to a solid particle–rust), and then the filter traps the rust and removes it from our water. In addition, we got a new softener–this one is actually connected!–and an ultraviolet sterilizer system.

The UV system is for bacteria, which is not likely to be an issue given our new well. However, it’s possible that the water table could become contaminated from another well in the area or some other source, and now we’re protected.
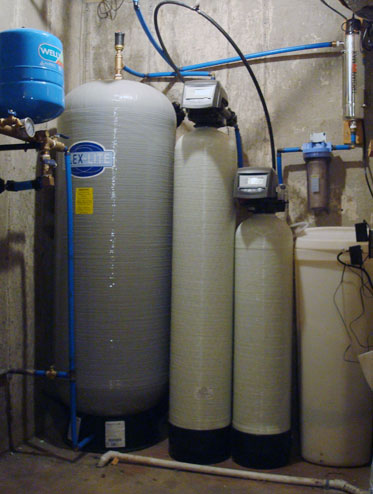
Water treatment system

From left to right, we have the blue cushion tank, a big retention tank for the iron, the iron filter, the water softener mineral tank and the brine tank which we fill with salt for the softener. The UV filter is mounted on the wall above the brine tank.

The final piece of the new water system was a reverse osmosis drinking water system. This is not a necessary piece of equipment, but Matt and I decided to go for it. Between the two of us, we drink a lot of water. Because of the salt used in our softener, the water in the house has higher levels of sodium. It’s safe to drink, but we definitely don’t need more sodium in our diets.

The reverse osmosis system is made up of a series of filters and a 14.4 litre tank that all sit in the cabinet under the kitchen sink. Our treated, softened water runs through these filters and then is pushed through a fine membrane that removes all of the salt and any other particles or impurities that might be in the water.

Reverse osmosis filter systems under the kitchen sink

The reverse osmosis filters are in the three canisters on the left and the holding tank is in the centre of the picture

The storage tank is connected to a small faucet on the back of the sink where we have drinking water on demand.
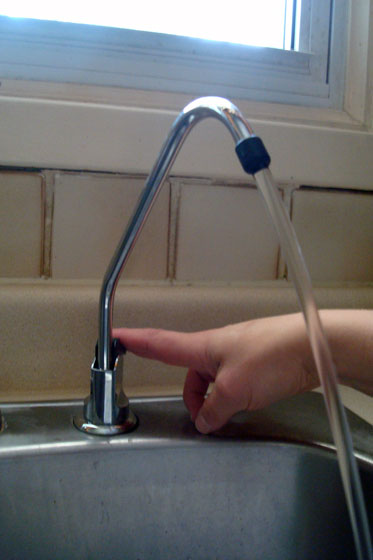
Reverse osmosis tap

Nice clean water. Yum!

While all of this work on the water system inside the house was happening, we took advantage of having the contractors on site to make a few upgrades to the outside system as well. The old water line that brought water from the barn into the house was reversed so that we can run water from the new well to the barn. As well, we added an exterior hose at the drive shed by connecting a new line from the house and trenching it across the driveway.
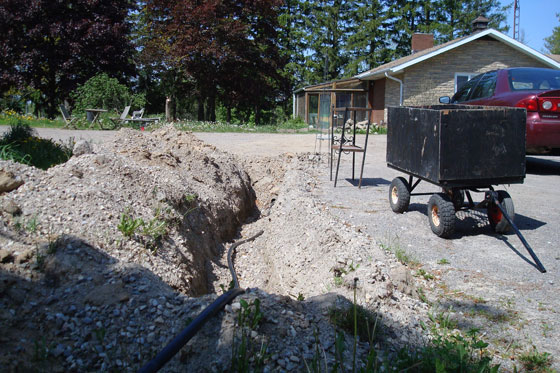
Water pipe in a trench

We’ll backfill the rest of the trench once we finish connecting the hose. How do you like our barriers so that no one drives into the trench?

Redoing the whole water system for the farm is a big project, and it was not in our original plans. However, the results make it worthwhile. With all of the equipment in the house, we don’t have to rely on a light bulb to keep the pump from freezing. We have good water pressure, no more iron or hardness and great peace of mind from knowing that everything is clean and safe.
H2-uh-O

Living in the country, we are not on city water. Like natural gas for heating, cable for television and internet, water and sewers are just not an option here. We have to rely on our own well.

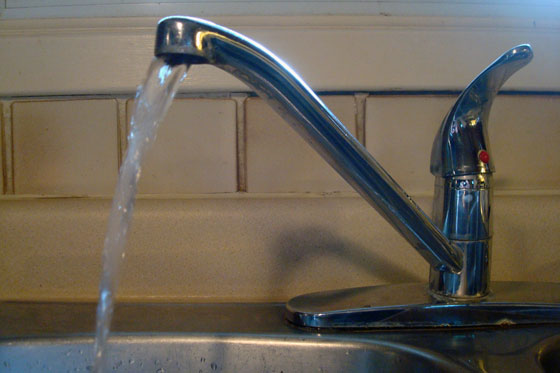
Water running from a kitchen faucet

In previous posts, I alluded to some of the issues we’ve had with our water at the farm (these issues are separate from our stinky hot water, which is now fixed). Today I’m going to go into a bit more detail.

Most people when they buy a house these days do a home inspection. We did that, and we also hired a special inspector just for the well. The inspection included looking at the well itself along with the pumping and treatment systems, performing a flow test to see the rate that water flows into the well and testing the water for bacteria contamination.

The reviews came back mixed.

The good:

  • The flow was continuous and steady, with an average of 5.08 gallons per minute–adequate for the size of our house and our needs.
  • Zero coliform and zero e. coli–no bacterial contamination
Water bacteria test form

The official form from the public health lab

The bad:

  • The pressure tank (which makes sure that you have water pressure even when the pump isn’t running) had a torn bladder. The exact wording from the inspection report was “it is in bad condition… The tank is the heart of the system and needs replacing as soon as possible.”
  • The filter in the house that was supposed to be removing iron from the water was “exhausted and needs replacement.”
  • There was a water softener in the house, but it was not hooked up to anything.

The ugly:

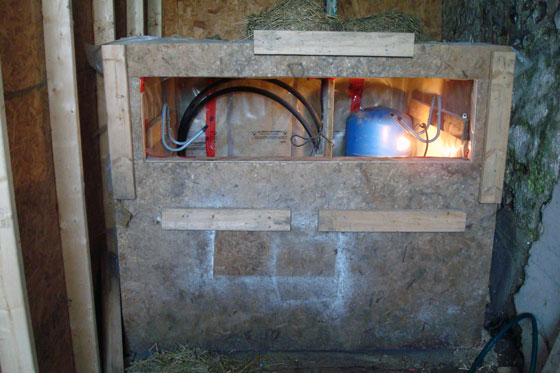
  • The pump and pressure tank were in the barn. This is a problem for several reasons. First, the barn is about 100 feet from the house. Therefore, by the time the water gets to the house, the water pressure was not very strong. The second issue is that the barn isn’t heated. The “pump house” was an insulated plywood box heated by a light bulb–okay until the bulb burns out or the power goes off. The city girl in me just couldn’t handle relying on that light bulb for a warm bath in the winter.
  • The well itself was “a homemade construction… modified as the water table dropped.” But it was still only 25 feet deep, which means that the source was surface water, not ground water, and therefore it was much more susceptible to contamination. The penultimate sentence in the inspection report was probably the most impactful: “There is no provision for sanitary protection and/or sealing of the well.” Lovely.
The plywood box that housed our pump and pressure tank

The plywood box in the barn that housed our pump and pressure tank. Note the light bulb.

We went ahead with our offer on the farm knowing we’d have to do a lot of fixes. As soon as we moved in all of the issues with the water quickly became apparent.

The first time I showered, the water pressure was very… shall we say… gentle. The first time Matt showered, he came out of the bathroom and said, “We’re fixing that.”

Over the course of a week, the tub and toilet slowly turned orange. At first, I thought it was just dirt. This is the first time Matt and I have shared a bathroom, so, of course, I blamed it on the boy. But I soon realized it was the iron.

Toilet

This is not actually a photo of a dirty toilet. The water in the toilet is clean, but all of the iron in the water and the staining on the porcelain makes it look yellow. (Sorry, but this is the best illustration I have of the iron in our water, aside from psycho shower.)

Boiling eggs for our weekend breakfast left the pot with a scale of hard water stains.

We did another water test to check for bacteria, and it again came back zero coliform and zero e. coli.

Despite this good news, the issues were piling up.

We started to look critically at the existing water infrastructure at the farm and investigating solutions. Coming up I’ll share what we did to fix our water woes.

Pee-eww

We’ve had a bit of an odor recently over at 129 acres, and it’s not from the manure wafting from neighbouring farms. No, this smell was coming from inside the house.

At first it was just a slight malodorous scent of sulfur. It quickly became a rank rotten eggs with a side of green onion disgusting reeking stench.

This fetid fragrance materialized every single time we ran any hot water. The two days last week when I wore my hair in a ponytail? Yep, that was because I couldn’t bear to stand in the shower long enough to wash my hair.

Thanks to Katy at Turtle House for sharing her experience with this issue, I was able to take a guess as to the reason behind the stink:

Katy’s explanation: Turns out that hot water heaters contain an element called a sacrificial anode, which is typically made of magnesium or aluminum and keeps the hot water heater from rusting (and is also a terrific name for a rock band). However, it also somehow provides excellent breeding conditions for a harmless but stank-producing species of bacteria that releases hydrogen sulfide gas as a waste product.

Stank-producing indeed.

Hot water tanks

The perpetrators

I called our geothermal folks, as they installed the hot water tanks in the first place, and pleaded for help. They gave us a few options.

  1. Wait to see if the “unpleasant odour” dissipates on its own (not happening)
  2. Insert a filtration system ahead of the hot water tank to remove sulphur, iron etc. (already did this as part of the upgrades we did to the water system)
  3. Remove the anode from the tank (making the tank more susceptible to rust and therefore shortening the life of the tank)
  4. Replace existing anode with an aluminum anode usually eliminating the oxidization and smell ($150 for new anode)
  5. Install a new fibreglass tank that has no anode ($1,000 to supply & install tank)

We chose to go with option #3. We’ll take the risk of the tank rusting over replacing our three-month-old hot water tanks or installing a new anode that might be just as attractive to these stinky little bacteria.

Removing the anodes took about an hour.

Hot water tank anode

The weapons

Given that our tanks are pretty new, I was surprised by the amount of build-up on the anodes. I’m not sure whether it’s just minerals from the water, salt from the softener or actual corrosion. The one anode is coated in a grainy white sand. The other is actually pitted pretty substantially. I’m not sure what this means for the future of our anode-less hot water tanks.

Corrosion on a hot water tank anode

On the positive side of things, our water is now odor free. We turned on the tap in the bathroom to drain the tank and went for a walk outside to avoid the stench. After giving the tank some time to refill and reheat (and lighting a vanilla candle to cover the rest of the smell), I took a wonderful, warm, unscented shower. And yes, I even washed my hair.

Laundry day

The “Going Geothermal” series will continue later this week, but first I have to share an exciting update from this weekend, which involved installation of the latest in modern conveniences, a washing machine!

Laundry drying on a clothesline

The first laundry day at the farm

As I mentioned before, we’ve had some issues with our water, one of which is high iron content (remember Psycho Shower?). We didn’t want to hook up our new washing machine only to have it turn orange, so it’s been sitting in the basement for the past month.

As of Friday, our new treatment and filter systems are in place, so first thing Saturday morning we connected the washer and started laundry.

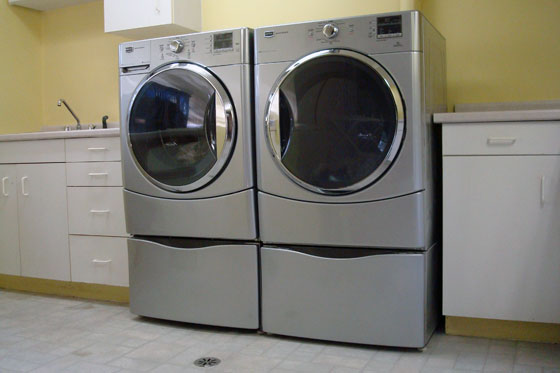
Our new Maytag 2000 Series washer and dryer

Sheets and towels, socks and underwear, pyjamas and work clothes, reno clothes and rags. Everything went through. By Sunday night, I’d done six loads in all.

We have a new dryer too, but I decided to take advantage of a nice day and hung the wet clothes on the line outside. Plus, I think a clothesline is just more farm-y. Don’t you?