A big to-do on the garden task list is now done. We finally have a hose at the garden… and I’m so happy to cross this one off the list.
With the lack of rain we had this summer, we watered the garden a lot. However, the closest hose was at the driveshed. That was three hose-lengths away. I had screwed the hoses together back in the spring, and most of the time we kept them laid out across the yard. But any time I had to wind them up (like every time we cut the grass) it was a heavy haul.
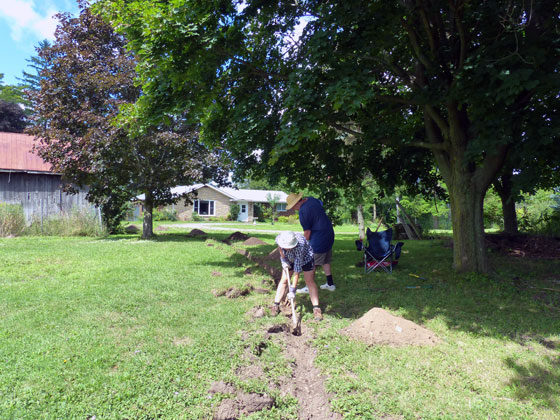
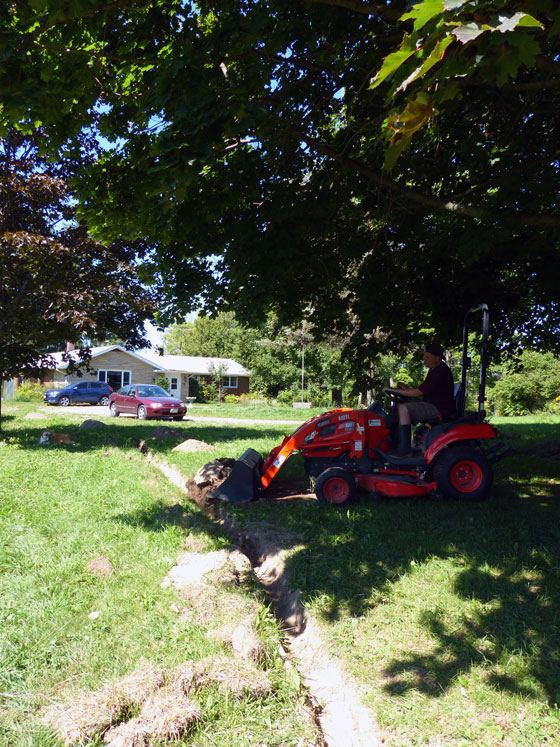
Adding a tap at the garden was one of my Home Goals 2016. I already shared a bit of the misery that was digging the trench from the driveshed to the garden (ground so hard, summer so hot, rocks and roots so many, garden so, so, so far away).
When I measured the trench, it came out a bit more than 100 feet. I spent a week visiting various home improvement stores and then specialty plumbing suppliers trying to find someone who would sell me 110 feet of irrigation pipe. All I could find was 100-foot or 400-foot coils. Ugh.
I bought 100 feet and crossed my fingers that we could splice on a small extra piece we had at the farm already and still make it to the garden.
But it turned out I was worried for nothing. When Matt and I unrolled the pipe and laid it in the trench, it easily reached the garden. Thank goodness for small wins.
The other thing I was worried about was our plumbing abilities. I had a plan, but I wasn’t sure if it was actually going to work.
We dug down to the waterline that ran to the hose at the driveshed. After turning off the water, I took a deep breath and cut through the waterline with the hacksaw. So much for my brand new work gloves.
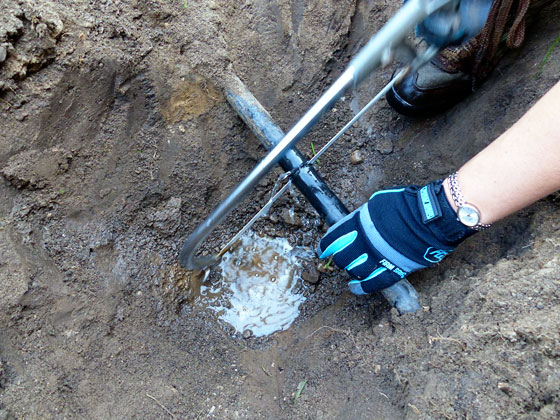
Then we inserted a T. A note about these connections. They fit super, super tightly. We boiled the kettle and then Matt poured the hot water over the pipe and that softened the plastic enough that I was able to wedge the fitting into place. The clamps on either side provide extra insurance to hold everything together and prevent leaks
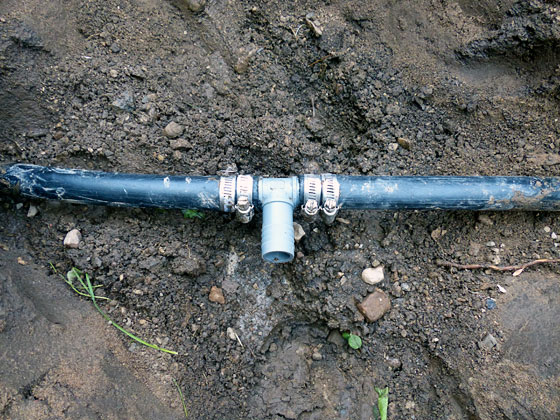
From there, it was easy to connect our new 100 feet of pipe.

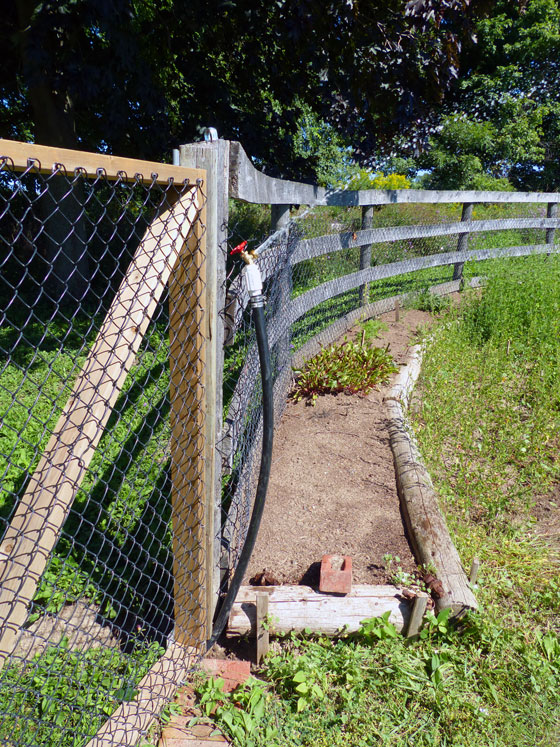
At the garden, the pipe sneaks under the brick threshold at the gate and up the post. Look how much pipe we had. Exactly the perfect length. And look at the water flowing. We did it! And there are no leaks! Big wins all around!
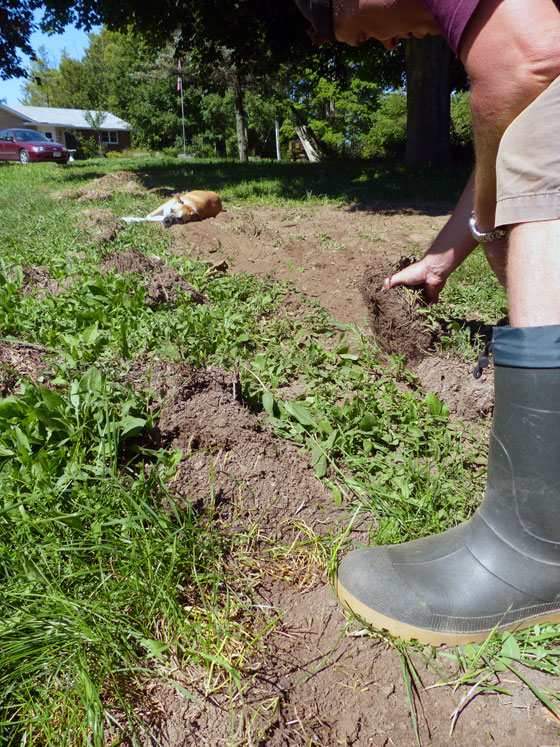
Backfilling the trench was much easier than digging it out. Wiley helped which was huge.
Baxter did not help. In fact he staged a sit-in (lie-in) to protest when Matt started to put the sod back down. “Dirt is good, dude.”
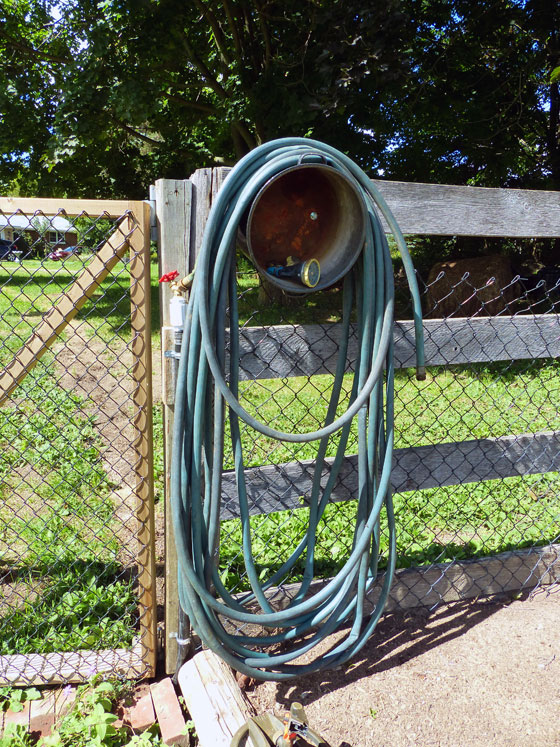
The finishing touches were clamping the waterline to the fence post and then installing a hose hanger.
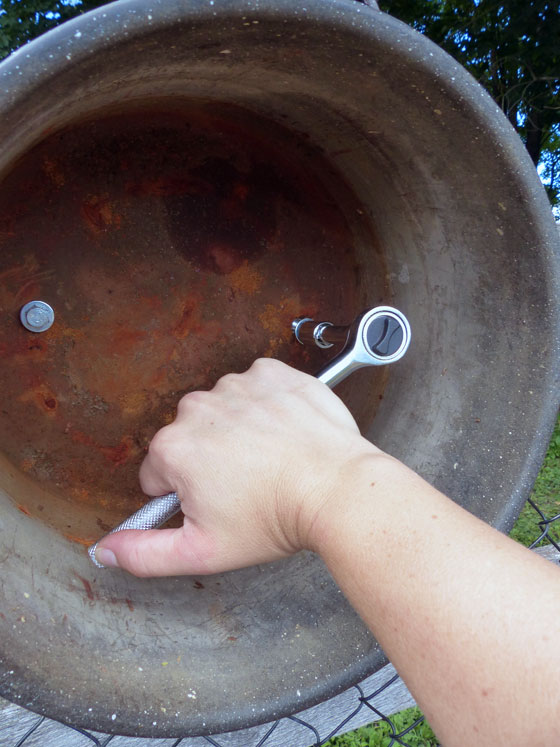
Rather than a typical hanger, I wanted to try a metal bucket. I’ve seen a few other people do this, and I figured it would give us a place to stash nozzles or maybe even some garden tools.
Again, I spent some time running around to various stores trying to find the perfect bucket. Then I remembered a rusty old canning pot–one of our many gifts from previous owners. I knew there was a reason I didn’t throw that out.
I drilled a couple of holes in the bottom and then bolted it to the fence.
Then I dragged the hose out to the garden one final time (except for seasonal shutdown, but don’t burst my bubble, okay?) and coiled it up.
Such a great addition to the garden. And this is actually our final to-do on our garden to-do list. This year has been all about adding the structure (raised beds, trellises, perennials) and functionality (gate, trellises, hose) to the garden. I think all of this is going to make a huuuuge difference next year.
The other thing that is going to make a huge difference–and that we have yet to do–is clean up. We have a whooooole bunch of weeds that I want out of there before winter sets in. That’s still a few weeks away though, as harvest is still going strong.
How is your garden growing? Does plumbing make anyone else anxious? How do you handle irrigation in your garden?

It looks great! will you insulate it over the winter?
We won’t, Stacy. The trench is only about a foot deep, and our frost line is far below that. We turn off all our exterior taps in the fall and drain the lines, so we’ll be doing the same with this one.
Thanks for the input. This climate is still new to me. 🙂
With water and winter, it’s not worth it to take a chance. Just shut it down.
That’s fantastic! A job well done which you’ll appreciate forever. We are in the three-hoses-hooked-together stage. At our last house we helped install an automatic sprinkler system, and I would love to do that here as it is so convenient plus it is absolutely the most economical use of water. However, I won’t be going to that expense when it’s not my house! We’ll just keep dragging the hose around. C’est la vie!
Argh. At least you build some muscles dragging three hoses around.
Awesome guys, keep best things on
Thanks.
We don’t have plans to do this at our house (although, that would really nice to have), but we have plans to do that exact thing at my mom and dad’s. In fact, that is what dad asked for for his birthday this year: help with tapping into the water line and running it to the garden. We better hurry before it gets too cold here!
That’s very good of you to do that for your dad. It will make a big difference next spring for him and your mom.
Is your water pipe under constant pressure? I’ve been wanting to do the same thing but haven’t been able to find hosing that can withstand constant pressure (or at least no one can confirm that it can). Do you mind sharing the exact name of the irrigation pipe you used and where you ended up purchasing it from? I’m also in Southern Ontario. Thanks 🙂
I’m going to show the limits of my knowledge here. For most of your questions, I’m not sure. I’ll try to answer as best I can. The water pipe is under a certain amount of pressure (the water is right there when we turn it on, as with any of our outdoor hoses), but it’s not significant. The hose that we picked was a standard outdoor pipe. I think it’s about 1″. I’m sure we got it at Home Depot or some mainstream store. It was nothing special. It matched the existing hose that ran to the driveshed that was our feed to the garden. I’ll try to take a look at the exposed hose next time I’m out and see if there are any markings on it and report back. It might be worthwhile to consult with a plumber to get their advice on what would be the best pipe to use.
Thanks so much for the reply – I’m also on a well so the pressure would probably be the same as what you have. I did speak to someone at Peavey and they referenced hoses with different coloured lines on them which indicated how much pressure it could sustain. I think our pressure pump is at around 50psi so he suggested going with 75psi – not sure which colour line that is but I’ll probably go with that. Just to double check, though, have you had issues with leaks over the years? That’s my main concern overall as I really do want a more permanent solution that I can leave in place and simply blow out at the end of the season instead of setting up hoses every year (which always end up leaking after only a year or two as well). Every spring there always seems to be an “ugh” moment when it comes to setting up the water!
I’ve not noticed any problems with leaks. The T junction is buried, but I’ve not seen any puddles or soft spots there. The other fittings for the tap at the garden do not leak. As I mentioned in the post, the fittings fit super tight–they’re made for this after all. Rereading the post gave me flashbacks of how much effort it took to fit them into the pipe. Our pressure is set at 60. In terms of blowing out at year end, absolutely. Our trench was only about a foot deep, so not below the frost line. It works great for the season, and then we make sure to drain it in the fall. But a waterline like this is definitely permanent as opposed to hoses. Opening the valve in the spring is much simpler!
I took a look when we were outside today. The line at the garden has a white stripe on it, but no writing. The line at the driveshed (which feeds the garden) has some writing, including noting it is rated to 75PSI. I have emailed you some pictures of the pipe in case they are helpful to you.