Welcome to the last week of April. Ellie’s room makeover is almost done. She is so excited to start sleeping in her new room, and I am excited to share the finished product here soon.
A highlight of April for me was Easter. Easter is my favourite holiday, usually because it’s a bit quieter than Christmas or Thanksgiving. I think having a child changes that, and this year was definitely not quiet, but we still had a great time. We hosted dinners, including one with Matt’s aunts who have not been to the farm in several years. We celebrated my nephew’s second birthday. We had two egg hunts. And of course, Ellie soaked up every second and every sweet.
April is also my Dad’s birthday and my parent’s wedding anniversary. We got together and acknowledged those occasions as well.
I’ve learned over the years that it’s important to me to take every opportunity to be together. It’s worth it to invite everyone, cook all the food, share all the candy, remember those who aren’t with us and sometimes even cry a few tears. Sharing time with those around us–whoever can be there–means a lot to me.
Here are some other occasions and reminders from this month.
Speaking of occasions, our forsythia is blooming. When we first moved to the farm, the forsythia bloomed on April 2. It hasn’t been that early since–and some years it hasn’t flowered at all. This year, the branches are covered in blossoms by mid-April.
My friends and I did a Half Baked Harvest dinner several weeks ago. I made this salad and it was a huge hit. (Everything everyone made was delicious.)
“Life can be cruel, as you know. But it can also be kind. Filled with wonders. You need to remember that. You have your own choice to make. What’re you going to focus on? What’s unfair, or all the wonderful things that happen? Both are true, both are real. Both need to be accepted. But which carries more weight with you? The terrible or the wonderful? The goodness or the cruelty? Your life will be decided by that choice.”
I’m finishing off the month by putting the finishing touches on Ellie’s room. Pictures on the walls, sheets on the bed, clothes in the closet. In amongst some work and hopefully some outside time too, of course.
How was April for you? Did you celebrate Easter? What’s blooming where you are? Any favourite recipes to share? What are you doing to wrap up the month?
The part we all wait for in DIY is “look at the beautiful room/garden/furniture/shelfie/whatever I made!” The middle while you’re waiting is less beautiful, less photogenic, less interesting.
I’m in the middle.
I feel like I have little to report. But I like the regularity of writing a blog post for every Monday, so here I am. Schedules and deadlines–even when self-imposed–work well for me. In both blogs and renovations.
Ellie’s room makeover is on track. We’ve had paint week. Last week was window week (curtains are tedious, so I’m not giving you a whole blog post about the HALF A DAY I spent ironing or the wait at Ikea to return a too short curtain rod).
This week is bed week. I’ve washed the dusty bedframe, added beadboard to the headboard, bought a new can of primer and am ready to begin painting the headboard. The mattress is being delivered on Thursday.
We’re on track. In fact, we’re on track for lots of projects. As with Ellie’s room, there’s not much to share yet, but I’m going to mention them anyway.
Coop
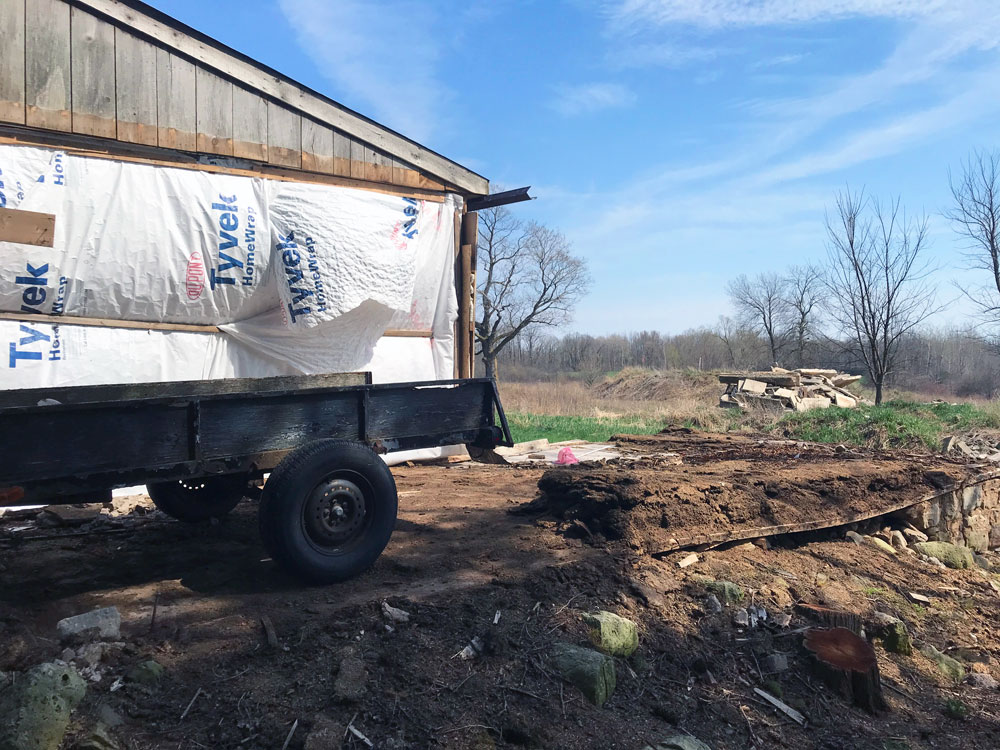
I’m halfway through clearing the manure off the old coop foundation. Getting to this point involved detaching the the snowblower from the tractor and recharging the tractor battery, so there was progress on several fronts.
Patio
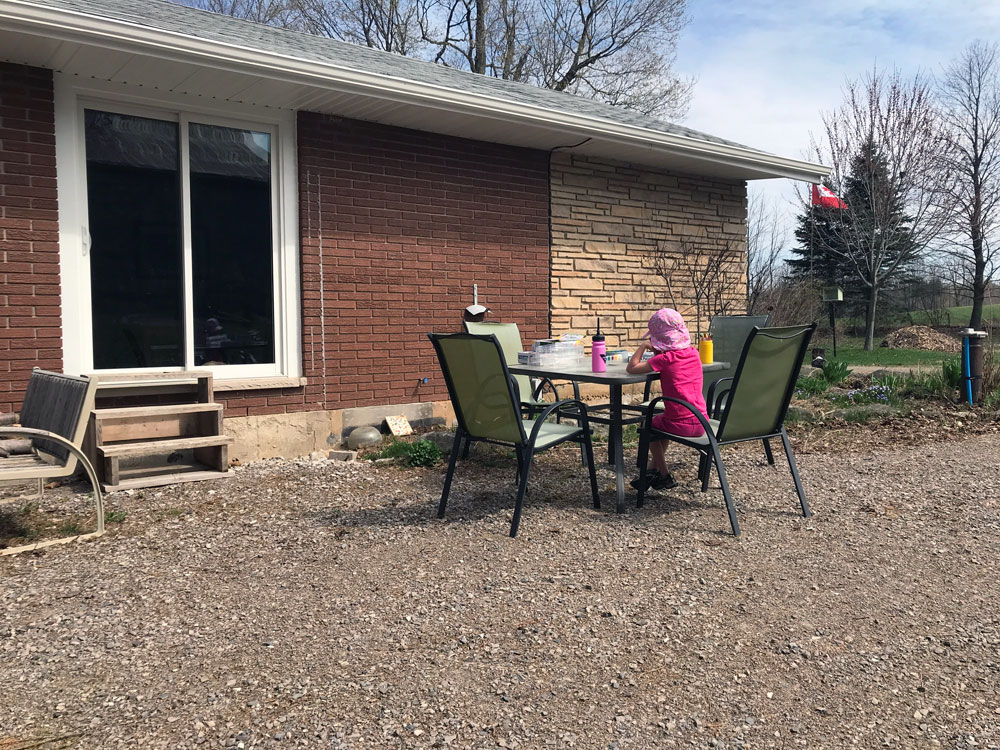
We had some lovely weather last week, so Ellie and I enjoyed breakfast and lunch on our currently-imaginary-but-hopefully-soon-to-be patio and confirmed that, yes, we would like a proper place to eat and sit. Cigo sprawled in the sun. We set up a small table and chairs and confirmed that they should fit on the new patio. Construction should start sometime in May (fingers crossed).
Gardens
Garlic is up in the vegetable garden. Transplants to the new turnaround garden seem to have survived. I have bales of cardboard and piles of mulch (and a brand new pile of very old manure) ready to be spread around. May may be garden month.
We keep moving ahead. Progress may not always be as quick as I want (I still can’t believe it took me a whole morning to iron curtains), but I know I’m getting closer to that beautiful, photogenic, interesting moment.
What projects are you in the middle of? How do you schedule projects? What tips do you have for persevering through the middle?
Welcome to week 2 of Ellie’s room makeover. Last week was paint week, and Ellie was involved in every part.
I see blogs occasionally talk about how to DIY with kids or the challenges of home reno with children. So I thought I’d join the conversation and share how Ellie (5 years old) and I painted her room together. Fittingly, I have 5 tips.
Start small
Painting a whole room should not be a child’s first project, in my opinion. Ellie’s first real build was just before she turned one when we put together her play table and chairs. Simple tools. Quick project. Since then, she’s been part of all different kinds of DIY (and she no longer tries to eat the tools).
For painting (beyond her craft paints and paper), she’s practiced on a bird feeder and shelves. We’ve built up her knowledge and comfort level over the years, so that she is interested in and capable of being involved in painting a whole room.
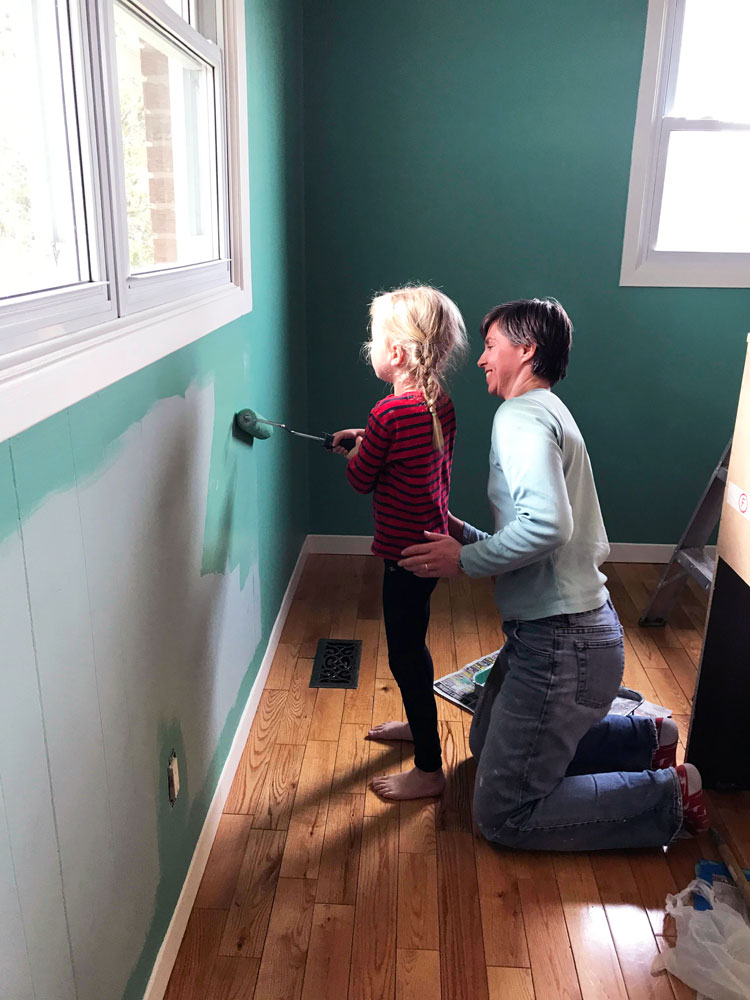
When it came to painting that room, we broke it up into smaller tasks. The first day, we worked for about an hour doing the edging. The second day, I finished the edging and started the rolling while she was at school, but left a section for her to roll. The third day, I did the second coat solo.
Step by step
There are multiple steps to painting a room, and Ellie was part of all of them. This is a good way to get your child involved and excited (and have them participate without actually painting, if you prefer).
Planning what colour to paint. Going to look at paint chips. Buying the paint (we got to watch the colours being added to the can and then the can being mixed in the shaker). Clearing the room. Patching any holes in the walls (spying holes is a good task for a child). Sanding and priming the patches.
For the actual painting, there is both the cutting in and the rolling. Cutting is great for children as it’s done with a brush. Just make sure to pick a spot where precision isn’t required (more on this below). Rolling is a bit more challenging. Ellie tried the roller all by herself, but decided she preferred when we held the roller together, so we did.
Gear up
As with any DIY project, the right equipment is key to success.
Ellie prides herself on having “work clothes”–pants and a shirt that got paint on them when she was working on an earlier project. Having clothes that you don’t mind getting dirty is one less thing to worry about.
Choose a small paint brush and pour some paint into a smaller cup. These will be easier for your child to handle and minimize the mess.
Tape off trim or anything that you don’t want painted, lay out newspaper or dropcloths to protect the floor, and have some rags handy. (The dog and his bed are optional, though not in our house.)
Talk it through
Painting is like any other skill. You have to teach your child how to do it. Take a bit of time at the start to demonstrate the proper technique. Be detailed: how deep to dip the brush in the paint, how to wipe it off on the rim, how wide to make their strokes.
I had instructed Ellie to paint as wide as her hand. That was not a concrete measurement for her, and I noticed her edges were growing wider and wider. I ended up swiping a line on the wall with my brush so that she knew how wide to go.
Pick your spot
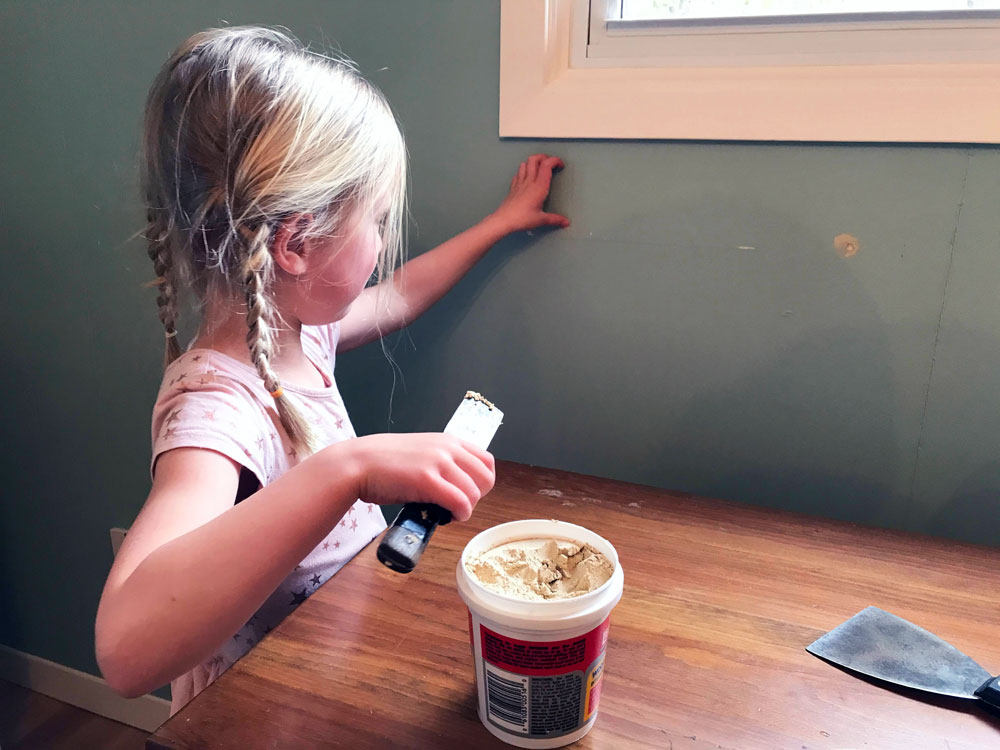
Ellie is careful and responsible. But she’s also 5, and this was her first time painting a room. I didn’t expect her technique to be perfect, so I thought about where she could do the least damage. We started with edging around the outlets. They’re low to the floor so they’re easy to reach. They’re small, so she can finish one off quickly and feel a sense of accomplishment. If she gets any paint on them, I can easily scrape it off once it’s dry. For the most part, they’ll be behind furniture so an imperfect finish won’t be an issue. I also assigned her each of the corners, starting behind the door.
Ellie strayed from her assigned spots once and started working her way across the wall. I explained that we were rolling that section and didn’t want to see brushstrokes there. She understood and went back to her corner.
No matter how careful you are, how well you prepare, or how skilled your child is, it’s also absolutely fine to smooth out your child’s brushstrokes while the paint is still wet. Touch-ups are also fine. We had a few spots on the trim that needed to be covered, which was no big deal.
The result of our teamwork is a fully painted room, and a great feeling of pride for us both. I love seeing her grow and learn. I know that I’m teaching her so many valuable lessons. Ellie, who was once reluctant about moving rooms, is now excited. Everyone who visited us this weekend for Easter got a tour of her new room.
Ellie has been around DIY her whole life. She’s comfortable around tools and knows how to be safe. She knows projects take time and she has to be patient. DIYing together is not always perfect. I’m not always as productive as I want to be. But I know the skills she is learning are important. And the experiences of doing these projects together is priceless.
Up next, window week. Blinds and curtains here I come.
Do you DIY with kids? What are your tips for helping kids learn to be handy? Any painting disasters or triumphs to share?
Ellie’s room makeover was the first project of the year. We got started in January, clearing out the old guest room and coming up with a plan for the space. And then we stalled.
This is a relatively simple project that could be done in a week. A different kind of blog would even do it as a weekend makeover. We are now at the beginning of April, which means Ellie’s room has been going on for three months.
It’s time to get moving.
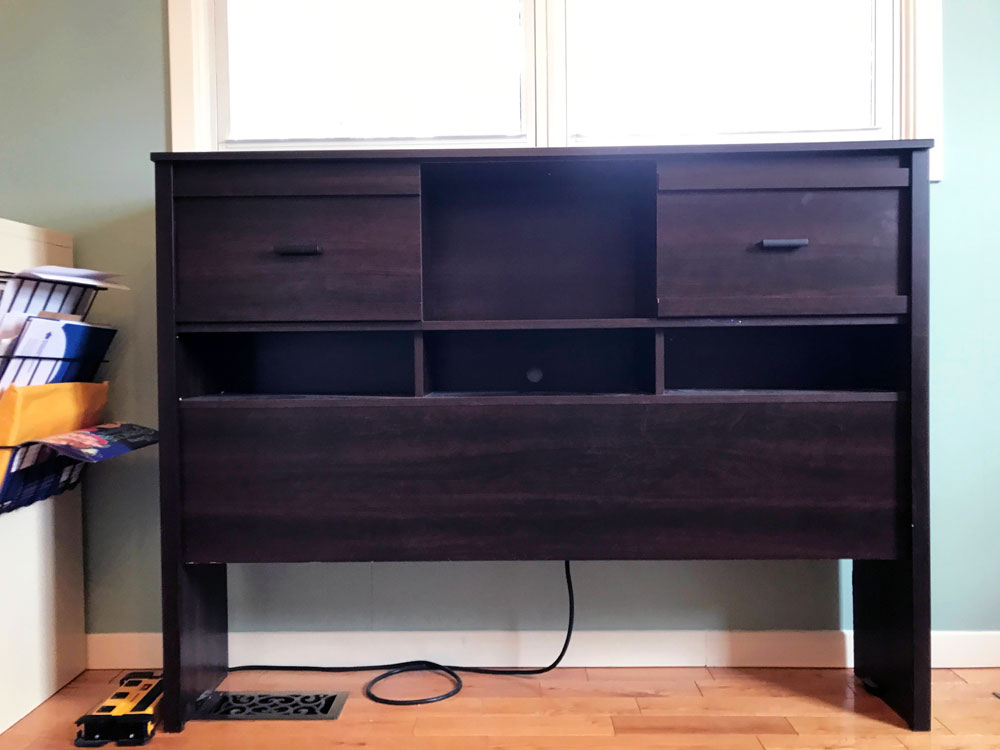
Fortunately, something happened a few weeks ago that brought my motivation back. I found a headboard.
Ellie’s directive was that she wanted the same bed that she had, just bigger. I had planned to construct a headboard with a built-in shelf. But while browsing a thrift store, I found a double headboard that had shelves and sliding door cubbies, just like her current bed. I’m going to give it a coat of paint, attach it to a metal bedframe that we already have, buy a new mattress and cross this task off my list.
Speaking of the list, here it is.
Empty room – We finally got (pretty much) everything out this weekend. The big furniture was dragged into the middle of the room.
Paint walls – We patched the holes, primed the patches and picked up the paint. Hopefully it goes on the walls this week.
Window treatments – I ordered new curtain rods which have already arrived. Blinds are on order. I need to sew a blackout lining for the existing dropcloth curtains. Then install my layered window treatments.
Bed – The doors to the headboard’s cubbies are going to get a little makeover, then I will paint everything white. I need to buy a new mattress and box spring. I dug the metal bedframe out of the driveshed. It needs a good cleaning and then I can attach it to the headboard.
Decorate – We’ll need some pictures on the walls, some accessories, a mirror.
Move in – We’ll make the bed, hang her clothes in the closet, bring in her books, and hopefully our girl will like her new room.
My plan is to tackle one thing a week (painting week, window week, bed week, etc.) until we’re done. Painting is up first.
The One Room Challenge, which kicks off this week, is providing a little extra motivation. While I’m not officially joining up, I love the ORC for how it helps me focus and gives me a deadline. So I’m making Ellie’s room my own personal One Room Challenge.
Stick with me. We’ll get this done… eventually.
Anyone else have a stalled home improvement in progress? How do you stay motivated during projects? Have you made any good thrifting scores recently?