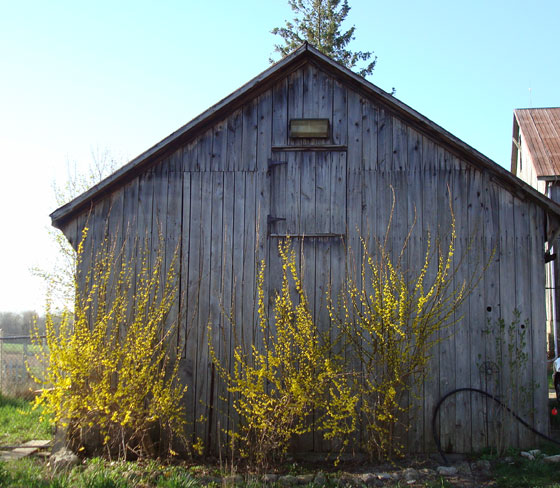
Our forsythia is finally in bloom. It’s more than a month later than last year, which shows just how long spring has taken to arrive. I think with the appearance of the bright yellow blossoms we can safely say that spring has finally arrived.
Our forsythia is finally in bloom. It’s more than a month later than last year, which shows just how long spring has taken to arrive. I think with the appearance of the bright yellow blossoms we can safely say that spring has finally arrived.
Outside the front door, what looks like a regular maple tree is not. It is a doughnut tree.

Doughnut trees are sneaky. Under the canopy of leaves in the spring and summer, you forget that they bear a remarkable fruit. However, as the tree sheds its leaves in the fall, the doughnuts become visible again.

The question is though, how does one pick a doughnut?

Any suggestions?
I’ve never been big on new year’s resolutions, but there is a list that’s been building in my head for some time now. It is the Home Goals 2013 list.
After having most of last year sucked up by the basement-renovation-that-never-ends, my plan for this year is to avoid any other massive all-consuming projects. However, as you can probably imagine, there are a few to-dos I’d like to accomplish.
1. Landscaping. This is going to be the big one this year. As I’ve noted, we didn’t do any landscaping in 2012, so there is a huge need to get on top of the situation outside. However, with 129 acres of property, we will have to prioritize where we spend our energy.

I’m going with inspirational photos for this post, rather than reality. A lush garden with a brick path winding through it would be perfect for the turnaround. Source.
2. Painting.
3. Living room fireplace. A wood burning fireplace was high on my wish list when we bought the house. We have one, but it needs a little work to make it exactly what I want.

4. Laundry room. The final section of the basement needs to be brought up to our new and improved standard.
A few other things will sneak in there, I’m sure, but here’s hoping 2013 brings slightly more time for enjoying rather than always working the farm.
How do you feel about resolutions? Do you have any home goals for 2013? The nester, the champion of annual home goals, published her list last week. It’s a bit more philosophical than mine. I think I’m still at the stage of working on the underlying form for our house and property. Once I have that established, I’ll build in a bit more philosophy.
When we had the nephews at the farm two weeks ago, the tall one and I went to work on task #10 on the fall to-do list: remove stakes from established trees and stake the new trees that we planted this spring. The first step was to unshackle the trees from the cuffs that were wrapped around them. Some were tied with rope, some had sections of garden hose, some had wire. All were snug. Some were strangling. It was quite an arboreal torture chamber we were running here.
No tree emerged unscathed. Some are simply scarred.

Others are permanently deformed.

We cut the wires and hoses and ropes out of the trees as best we could. Where we ran into trouble was the stakes. The nephew and I did fairly well on the first few trees rocking the stakes back and forth to loosen them up and then pulling them out in a coordinated effort. However, after he left and it was up to Matt and me, the rest of the stakes held strong.
We must have been missing the magic touch, because no matter how much we wiggled the stakes we couldn’t get them to budge.
In desperation, Matt went and got Wiley, and I found a rope. We tied the rope to the stake and attached the other end to Wiley’s loader. Then Matt raised the bucket, the rope snapped, and the stake stayed where it was.
I went and got a chain. We hooked everything together, and Matt raised the bucket again. And the front wheels of the tractor lifted off the ground.
We spent a while adjusting the chain, adjusting the tractor, tugging on the stake and only succeeded in bending it.

The conclusion I came to is that the stakes have been in the ground so long that the tree roots must have grown around the metal. I don’t think we’re going to get them out. Above ground, the trees are free. I can only hope they survive their ordeal and continue to grow. Matt, however, is a bit traumatized from his wheelie on the tractor, so we’re calling this job good enough for now. The rest of the stakes–removing them from the older trees and adding them to the new trees–can wait until spring.
When European explorers first landed in the new world (including Canada), it was customary for them to plant their flag as a symbol of ownership.
I think this latest development means the farm is officially ours.

Please ignore the overgrown mess that is the turnaround. Past owners dumped heaps of dirt and rubble here that made mowing impossible. Landscaping is next year’s project.
This project also means that Matt and I have officially started in on the fall to-do list. Planting the flag pole was #11.
I had bought the pole second hand on kijiji back at the end of June with the idea that we might be able to install it for Canada Day (July 1). That didn’t happen.
We drilled a hole for the pole back in August when we had the auger, and I tried to convince Matt that installing the flag pole would be a good birthday present for me at the end of September. That didn’t happen.
Finally on Sunday morning, we dragged out the wheelbarrow and a bag of concrete and made it happen. It took all of a half hour to mix the concrete, place the pole in the hole and pack the cement around it.
The hardest part was making sure the pole was plumb and holding it in place with ropes and stakes.

Our mini-circus tent… or the bottom third of the flag pole braced in place while the concrete sets.
Our flag pole came in three pieces, so it was very easy to wrangle one 7 foot piece into place, rather than a long 20 foot pole.
By Monday (I love long weekends by the way–we get so much accomplished) the concrete was set.

Set, secure and straight!
While Matt and his dad were working in the back bush clearing the trails, I went to work wrangling the rest of the pole into place. If you’re ever looking for a laugh, watch a 5’4″ woman staggering around with a 12 foot flag pole–to which she has already attached the halyard (or rope)–trying to keep it perfectly vertical so she can set it in place on top of another pole that’s as tall as she is. It took two tries, and the cats were absolutely no help.
Once the pole was fully assembled, it was a simple matter of attaching the clips to my rope and hoisting the flag.
Matt’s comment when he returned from the bush and saw the flag was, “I think we just improved this property more than any other owners. Except for maybe the guy who built the barn.”
So yes, we are both ridiculously happy to be flying the flag at the farm. Sometimes it’s the simple things.
You know when you see those large machines working away, effortlessly moving large piles of dirt, easily scooping massive rocks, bopping along over the roughest terrain? I’ve discovered there’s a lot of skill that goes into this mechanical ballet.
Skills I apparently don’t have.
Wiley’s been getting a workout over the last little while, cutting, hauling, scooping and carrying. He’s a great partner when it comes to managing the property. Me, however? I’m not such a good teammate.
My specific issue is with the front-end loader.
I just do not find the front-end loader intuitive.
I raise when I want to scoop, I dump when I want to raise. It’s all kinds of awkward.

Please ignore the long grass and the basketball net. Landscaping is next year’s project.
The front end loader is controlled by a joystick. Move it up to raise the bucket, down to lower the bucket. Move it to the left and the bucket curls up. Move it right and the bucket tips to dump.
Maybe it’s because I never played video games growing up, but I just can’t master the joystick. I’m forever moving it the wrong way and end up digging the blade into the ground or prematurely dumping my bucket.
We finally got the new waterline trenched into the driveshed last week, and I decided to backfill the trench. While the job did go quicker with Wiley than it would have with a shovel, I was not efficient by any means. Poor Wiley must have been so confused. “Why is she dumping the dirt here when the hole is over there?”
Yeah. It wasn’t pretty.
Every so often I’d hop off the tractor and grab the shovel or the rake to deal with a random pile by hand.
Matt, Mr. I-love-video-games, has no such issues with the loader. Allow him to demonstrate.

This is how you position the bucket to carry a load. This one happens to be one of the many piles of rocks that exist around the property.

This is how you dump a load out of the bucket.
So is my lack of front-end loader ability an actual genetic deficiency? Or do you think front-end loader manipulation can be learned? Should I hook up Matt’s old Jump Man game for some joystick practice?
It’s a very exclusive enclave we have here in the country.
Population: 2 (plus 1 cat and 1 kitten)
With our new gate in place at the bottom of the driveway, farm living has become quite chi-chi.

Open sesame
Actually, setting aside my new pretensions, we installed the gate for security. We’re far enough from civilization that neighbours or police really wouldn’t be much help to us in the event of a break in. If we’re home we can keep an eye on things, but when we’re not the gate may just be enough of a deterrent to people who are thinking about trespassing.
I’ll admit that I was initially pretty resistant to having a gate. I don’t like the way they look, and I didn’t want the inconvenience of opening and closing it when I was coming and going.
However, I actually like the way our gate ended up looking. It’s still a bit of a pain to stop, open the gate, drive through, park and close the gate when you’re leaving or arriving, but it’s a small price to pay for feeling secure about our house.
It’s a simple set up: just a chain and a padlock

If you want in, you have to have the key
My Dad and Matt made some metal hooks to support the gate when it’s closed and when it’s propped open.

The hook supports the gate to ease the weight on the hinges and also secures the gate in place.
We do like having visitors at the farm–at least from people we know. So if you’re planning on dropping by, let us know, and we’ll open the gate for you!

Welcome to the farm
Anyone out there live in an actual gated community? How do you deal with security at your house?
See my earlier post for the story of setting the posts for the gate.
Remember on Friday when I said that I was hoping Matt and I would do nothing this weekend? Yeah, well, that plan didn’t work out at all.
Instead of sleeping in and sitting outside in lawn chairs for two days straight, we went and rented an auger.
We’ve had a number of people turn in the driveway and come all the way up to the house. Once they get to the top and realize our cars are parked there (i.e. we’re home), they make their way around the turnaround and go back down the driveway. Usually by this point I’ve come out of the front door to glare at them as they drive away.
We have a long driveway, so if people are lost and need to just turn around, we wouldn’t even know they were there. For people to end up at the house, they’re trespassing.
We decided we need a gate at the bottom of the driveway.
A gate needs posts, and posts need holes, so we needed an auger.

Matt and my Dad drill a post hole with the auger
Matt and my Dad ran the auger while I came behind and cleaned out the holes.

Why does the person with the shortest arms have to clean out the hole?
We do own shovels, but a hands-on approach worked better for me sometimes given what we found in the holes.

Lots and lots of stones
The auger did not like the stones.

It particularly disliked this stone.
This boulder became the bane of my existence for about an hour. We all took our turns working around it with the shovel, the prybar, even a pick. It was massive, and it wasn’t moving.
The post that was to go in this hole was supposed to be our hinge, so we needed it to be really solid. But with the rock in the way, we couldn’t get the hole deep enough. So, we decided to swing the gate the other way and drilled a new nice and deep hole on the other side of the driveway.
Then, it was a matter of mixing up our concrete and setting our posts in place.

I take a turn mixing while Matt adds the water
By the end of the day, we had four new posts in place: two at either end of the gate, one to hook the gate to when it’s open and a new post for the mailbox.

We braced the posts to hold them plumb while the concrete sets
Oh, and we also had more sore muscles and a few new calluses.
Have we reached the end of the to-do list yet? Has anyone spotted the end? Can you please tell me is it far away?
And please tell me someone out there got to sleep in and sit in a lawn chair this weekend.
Continuing with this week’s theme of manpower, Matt would like for me to formally retract the statement I made last week that trenching the satellite line was “no sweat.”
As the person who spent six hours burying the wire, Matt would like it made known that this job was no small task.
The distance from the satellite dish to the house was about 150 feet. Given that length, it didn’t matter that the trench was only six inches deep; this was a tough job.

The satellite wire is to the left of the trench
In addition to the length of the trench, the other challenge was the trench’s position through and alongside a stand of trees. Matt had to contend with a lot of roots while he was digging.

A particularly large root that Matt encountered on his excavation
Once he had the trench done, it was a simple matter (hope I don’t get in trouble for downplaying this part of the job) of laying the wire in the bottom.

The wire in the trench
As I mentioned last week, the wire runs under our patio for a short distance. While we’d already worked together to trench this section, once the wire was in place Matt had to backfill, level and reset the patio slabs.

Patio slabs back in place
He also had to cut an extra few inches of plastic conduit and slit it to go around the wire. This protects the wire where it comes out of the ground so that it doesn’t get pinched or cut.

He used just a basic plastic pipe for the conduit and slit it to go around the wire
When Matt was digging, he kept sod on one side of the trench and top soil on the other, so that everything could be neatly put back in place. This made for a very tidy lawn at the end of the day.

You can’t even tell Matt was there
And what does manpower look like after six hours of sweaty work? Matt documented that for me as well:

Note the staging with the feet on the table, the shovel in the shot and the satellite in the distance. Note as well the angle of the setting sun showing how long Matt was working at this job.
There you go, Matt. I hope that this post makes up for any downplaying of your efforts and skills. Thank you for all of your work on this job and all of the others you take on to make our home all that we want it to be.

In a true blend of the rustic and the fine, a big hedge of bright red roses has grown up at the front of the barn.

The big bushes edge the whole side of the bank, spilling over the old timbers stacked on the ramp.

Anyone have any tips on caring for roses? These seem to be doing just fine on their own, but I’d like to make sure their gorgeousness continues.
