The fruits of our labour

For the first time ever, Matt and I have grown food for our own consumption. Sure we’ve eaten food from the farm before, but we’ve never actually grown something ourselves.

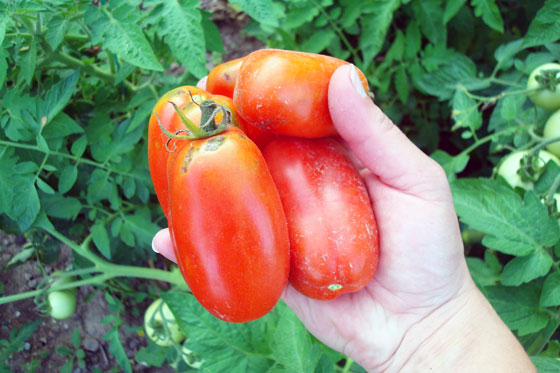
Ladies and gentlemen, gaze upon these beautiful tomatoes.

A handful of red roma tomatoes

We worked for these tomatoes. There was watering and weeding, suckering and staking. Sweat and dirt was involved. Alright, not all that much sweat and dirt, but, still, we worked!

And the results are oh so tasty. In the words of Matt, “I’m not the biggest fan of tomatoes, but we grew these ourselves. I’m going to eat them forever.”

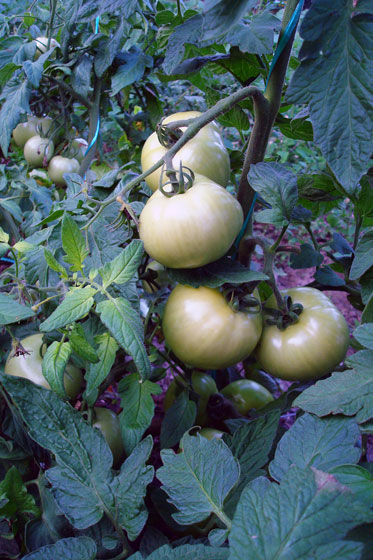
I think he meant that figuratively, but given the number of green tomatoes we have yet to ripen, we may literally be eating tomatoes forever.

Green tomatoes growing on a vine

Some other words of wisdom from Matt, “Bring on the canker sores.”

You won’t hear me complaining. Matt may not be the biggest fan, but I love tomatoes. Caprese salads, homemade soup, burgers, sandwiches… I see lots of tomato goodness in my future.

What about you? Are you a yay or nay for tomatoes? Any tips for avoiding canker sores? Anyone have any favourite recipes to share? Have you grown anything to eat this year? Do you feel pride in eating the fruits of your labour?

Guest post: Flying high

This week Matt and I are taking a little holiday. While we’re relaxing, I have some great guest posts lined up for the blog.

Often it’s the little things that make a home. You all know how happy Matt and I are to finally have a flag pole at the farm. There was the satisfaction when we finally installed the pole. Then there was the history lesson on Flag Day. And of course the maple leaf on Canada Day.

Well, Diane at West Lake Musings shares our appreciation for flags. In fact, she and her husband Warren recently made a new addition to their country property, and she generously agreed to share it here today with all of you.

____________________

Happiness is infectious. When you love someone and you see them grinning and having fun, you catch the feeling too. Those good vibes just fly across the room and seep into your heart.   That’s what has been happening around here this month.  My husband feels good and consequently I do too.  The reason for all of this good cheer was Warren’s current project.   He has been on a quest and totally absorbed in getting a flag made up for the property.

Our new flag is not just any old flag.  Oh, you don’t know Warren well do you?  No, Warren’s new flag is a custom designed unique-only-to us flag.  It will fly high and mark his territory.

It is exactly one year since Warren had a personal design created and 30 custom baseball caps manufactured with that logo on the brow.

Ordering a personal flag using that same design was just the natural progression.

I personally find Warren really endearing when he is caught up in the excitement of a project.  God love him.  He is cute. He has been running around all month. First he had to go back to the hat manufacturer and ask them to email the flag people a copy of his design. Then there were colour swatches to select and proofs to approve. There was a choice of fabrics to select. Did we want the flag in satin, nylon, polyester, duraknit or duramax?  Do we want the grommets on the right or the left side? We decided on a 3′ x 5′ size flag and an 18 foot tall aluminum flagpole. For Warren it was all very important stuff.

The flag manufacturer has been great and very patient. Flags Unlimited are located several hundred miles away yet they were able to manufacture and deliver our new flag within a day and a half from placing our final order. Oh, and the flag pole was delivered too. It came in five sections, each four feet long, neatly packed in a cardboard box.  How cool is that?

Armed with a neon spray can and measuring tape we then went looking for the perfect location for our new flag pole. It couldn’t be too close to the trees and we had some over head wires to contend with. Some areas of our property are rather sheltered and don’t get much wind. The last deciding factor was that we wanted to see the flag from the house and whenever we walked out the back door.

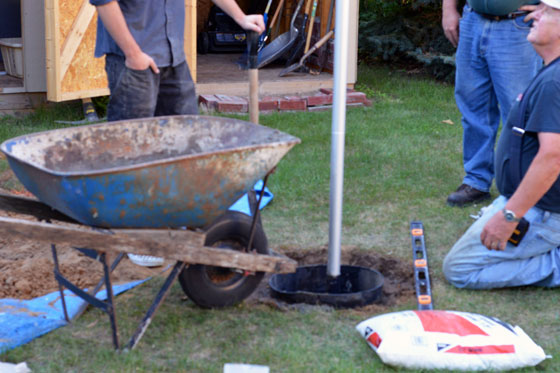
The final stage in the project was the installation of the flag pole. It was a real team effort. Out came the wheelbarrow, the shovels, a tarp, gravel and concrete. The instructions called for a 16 inches x 48 inches hole. Two inches of gravel was placed into the bottom of the hole and then the whole thing was filled with concrete. “Quick get the level!” We don’t want a crooked pole.

Setting a flag pole in concrete

Today the project was completed. Not since the marines raised the flag during the battle for Iwo Jima has there been this much anticipation. The pole is firmly in place and the beautiful new flag is snapping in the wind. Magnificent. We love it. For the man who has everything it makes a truly unique stand-out symbol of his territory.

Custom made West Lake Musings Flag

____________________

Isn’t that a great commemoration of their new life in the country? I love the idea of a custom made flag for the farm. Diane’s and Warren’s love of their new home is obvious. Thanks, Diane for sharing your story today.

One of my favourite parts of blogging is finding kindred spirits. In the case of Diane–who was actually the one that found me–our transformation into country living has followed a very similar path (almost to the month)!

Breeze over to West Lake Musings to check out more of her and Warren’s adventures.

Guest post: Landscaping revamp

This week Matt and I are taking a little holiday. While we’re relaxing, I have some great guest posts lined up for the blog.

Landscaping a large property is a challenging prospect that takes a special kind of person. It usually starts with “what a beautiful vista. I can’t believe this is all mine.” But then it often becomes a question of “where do I stop cutting the grass?” Other times it’s “how do I keep my arms and legs going to move all of these bushes/dirt/plants/logs/rocks?”

Danica from Country Chic Renovator and her husband Branko have their own slice of paradise: 49 stunning country acres. Of course, like our acres, theirs are a wee bit wild in spots. Fortunately, Danica also has a hard work ethic–just what she needs to domesticate at least part of her property. I’m pleased to welcome her to the blog today to share some of her progress with you.

____________________

Hi Guys! Danica here from Country Chic Renovator. Julia and I have so much in common especially when it comes to landscaping and renovating our homes.

We have several projects on the go at our “Forever Home” and the one thing we have been working really hard on is the landscaping at the front of the house. The previous owners planted small bushes and never maintained them so over the years the bushes just kept on growing to a point where they were dead underneath and everything that was overgrown on top was alive.

Initially we had hoped we could save a few of them and just trim them down but once we stared cutting the overgrown areas we realized we would have to remove everything.

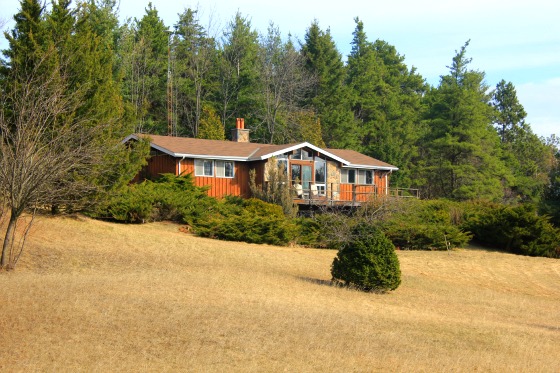
Here is a preview of how it had looked when we first purchased the place

Country Chic Renovator's forever house before

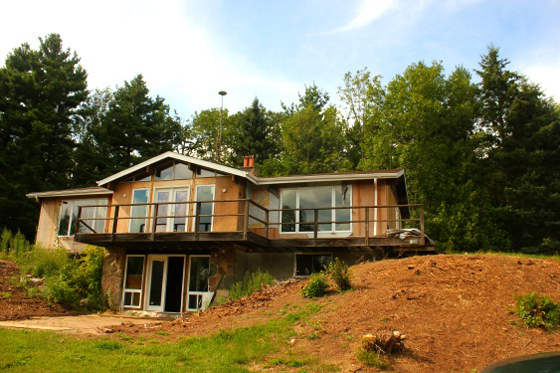
After many hours days, we finally saw some real progress. The next step would be to create a new landscape layout and a new deck. We need a sitting area where we can set a large outdoor table and umbrella so when we have guests over we can sit outside in the summer. We are thinking of creating a lower deck level by adding stairs to the right of balcony and removing the wrap around. For the landscaping we would like use the large boulder stones in some way. Once we level off the hills we will start on a landscape plan…

Country Chic Renovator's forever home landscaping progress

So much has changed on this home already including installing new windows, doors, and now the landscaping and removal of the bushes!

Hope you enjoyed my guest blogging for Julia while she is relaxing on her vacation! Feel free to visit my blog for further updates our “Forever Home”.

____________________

Thanks so much, Danica! Head over to Country Chic Renovator to see more examples of Danica’s and Branko’s work. They are what I call hardcore DIYers. Be sure to check out the complete renovation of their first home (including massive addition and complete interior reconfiguration) that they did by themselves last winter.

Now that they’re onto their forever home, I’m excited to see their progress (and perhaps a little jealous that Danica is going to have my dream master bathroom a few years before I do).

Fuzzy buzzy

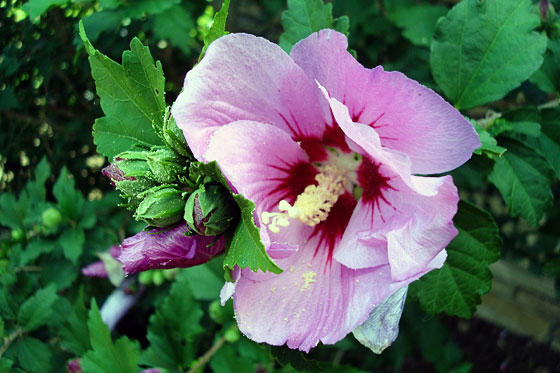
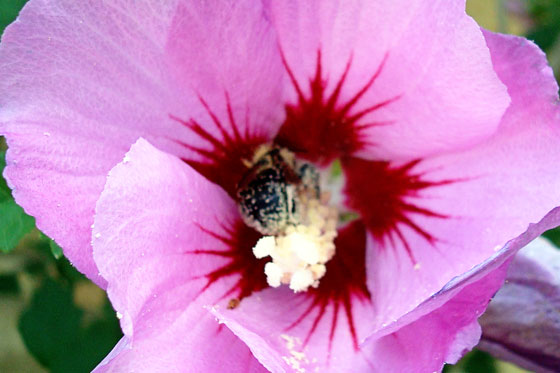
Our huge Rose of Sharon bush outside the dining room window is in bloom. Honestly, as beautiful as it is, I wasn’t going to do a post about it because, really, it’s just another picture of a pretty flower.

Rose of Sharon blossom

But then I saw a fuzzy bumble bee pollinating the blossoms. He was completely dusted in pollen, so I of course had to take his picture.

Bee pollinating Rose of Sharon flower

It may seem sappy, but seeing this industrious fellow–and the hummingbrids which also love the Rose of Sharon–reminds me that mother nature is pretty cool.

Ralph’s raspberry patches

The rainy spring and the hot summer have conspired to produce a bumper crop of raspberries this year at the farm.

Black and red raspberries

Black raspberries grow wild on the bank outside of the barn.

Black raspberries

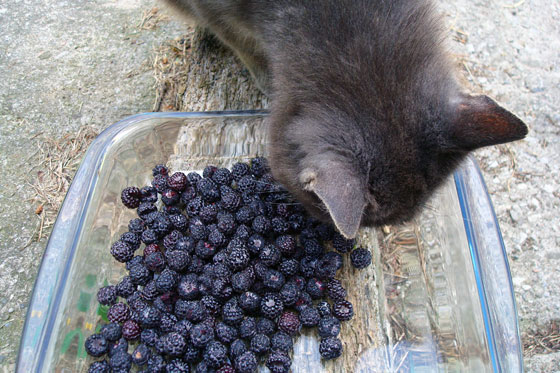
Ralph keeps a careful eye on them and performs quality control inspections during picking.

Ralph the barn cat looking over the harvest of black raspberries

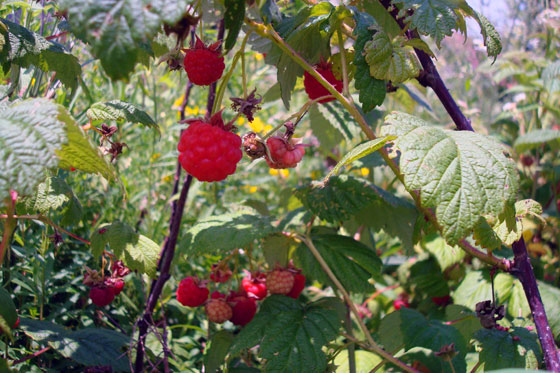
Just to the east of the barn–in the spot where I want to put the vegetable garden–is a patch of red raspberries.

Red raspberries

I’m going to try and preserve some of these canes when we dig out the garden, so we can continue with our raspberry bounty each summer.

I’d love to transplant the black ones into the garden as well. Does anyone have any idea if they would survive a move? Any tips for transplanting? The black ones are smaller, seedier and sourer than the red ones. Do you think if I watered them or fertilized them they’d plump up?

Landscaping: Phase 2

I said at the beginning of the week that I’m declaring the start of July as the end of phase 1 of landscaping. We all know that the end of one thing is the start of something else, so it is also the beginning of… you guessed it… phase 2.

Yes, I still have things to finish up from phase 1, but let’s not get technical here.

For phase 2, I’m going to use the same technique that I did in phase 1. Walk out the front door and start with the first thing I see. Except this time instead of turning right, I’m going to turn left. Earth-shattering strategy, I know.

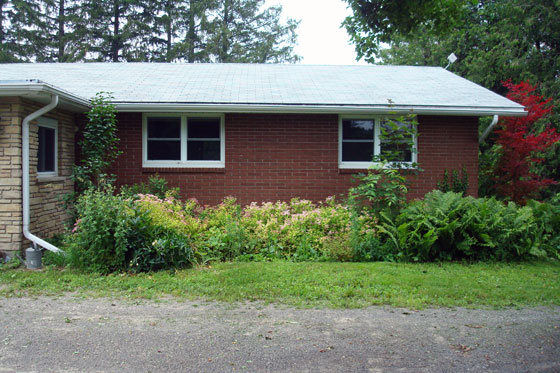
So what will I find when I turn left? Something that looks a little like this. (Our roof is not as green IRL as it appears in this photo).

Garden of spirea and ferns

From a distance it may not look that bad, but in reality it’s an overgrown jungle of spirea and ferns. I’m a variety is the spice of life kind of woman, so I need a little more diversity in my garden. I’ll be digging out a decent number of the plants. They will not go to waste though. (Remember the massive turnaround garden that needs plants?)

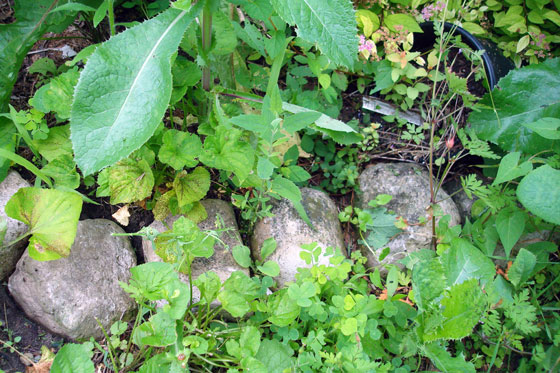
However, gardening here is never as simple as just weeding, pruning and transplanting. Take these rocks for example (and yet another plastic plant pot that escaped the earlier purge).

Rocks edging a weedy garden

Every single existing flower garden on the property is edged in rocks like this. I’m sure it looked lovely at one point. However, over the years, the rocks have sunk just far enough into the ground to become a complete hazard for the lawnmower. Plus, they’re not doing anything to keep the weeds or grass out of the garden. I would rather edge the garden every year with a spade and be able to get the lawnmower right up to the edge of the plants than deal with these rocks.

Rocks–specifically moving rocks–has been the major theme of landscaping this year. Wiley and I will spend some more quality time, moving loads and loads of rocks back to the pile behind the barn.

Let’s see. What else is there about this garden? Follow me down this garden path and let’s find out.

Broken patio slab path in a weedy garden

Note to self: Add weeding and remove broken patio slabs to the to-do list. Oh, and fill in the pit at the end of the path.

Square pit with wood retaining walls

Oh look. Another plastic plant pot.

This pit is the spot where the wood stove chimney came out of the basement. We’ve removed the wood stove, patched the hole in the wall and tarred the foundation. Now I need to deal with the pit. It’s about 3 feet deep and is usually home to frogs or, when I was taking the picture above, a camera shy garter snake. Perhaps this is a place to dispose of some of the rocks. Provided of course I rescue any creatures first.

If I follow this garden around the corner of the house to the north side, I’ll find more rocks (what else?) and more patio slabs from where the old oil tank used to be. If I follow it around to the back side, things get really wild.

The back gardens will likely be phase 3. No ETA for that yet, though.

Do you have any advice for plants that will add some diversity to my spirea and ferns? Or tips for transplanting? I tend to stick them in the ground and water the heck out of them. What’s edging your gardens? Anyone else have any “special” features in your gardens, like a pit?

Landscaping: Phase 1

Friday morning at work, a colleague who reads my blog regularly marveled at how much Matt and I have accomplished at the farm so far. I didn’t totally agree. Sometimes I see the difference that we’re making. Sometimes I just see the things left undone and the rest of the to-do list.

July does feel like a bit of a milestone to me, though. A turning point. Or a halfway mark. So I have decided to declare it the end of phase 1 of this year’s major project–landscaping–and I have decided to take a look at what we’ve done so far. If you’re interested in a refresher, here’s my previous progress report or the to-do list.

My focus has been the immediate area around the house. I used the very thoughtful technique of walk out the front door, turn right and start there. I slowly worked my way around to the side of the house. So the smaller of our two front gardens has been weeded and a new border of grass has been established.

Evolution of the front garden

Still to do: Put those poor plants that have been living in plastic pots for at least a year and a half in the ground. Transplant some other plants to fill in some of the gaps in this garden, and maybe give the yew and the Rose of Sharon a hair cut.

Around the corner from the front garden, we come to a creation I’m particularly proud of, the well garden. At the beginning of the spring, this area was a heap of hard-packed dirt strewn with rocks and overgrown with weeds. After digging everything out (including two window wells last year which were unnecessary after we bricked over the broken basement windows), leveling off the dirt, edging it with rocks (some really, really big rocks that required the help of Matt and his Dad to position), transplanting some plants, repositioning the downspout, installing a hose hanger and seeding the grass, it is starting to look like an actual garden.

Flower garden edged with rocks around a well head

Still to do: Convince the plants to grow. It’s a little hard to see, but I’ve actually planted quite a lot in this garden. I may do a bit more, but I’m trying to restrain myself, because I’m pretty sure once these plants take off, this garden is going to be pretty lush–just what I want.

Let’s go away from the house for a moment across the driveway to the fire pit. This really wasn’t a fire pit. It was more of an area where previous owners burned things. Matt and I have used it a lot as we’ve been cleaning up brush and lumber from the property. However, heaps of ash and brush wasn’t the nicest visual to see when I opened the front door or drove up the driveway. The brush I was able to relocate to a new burn area I’ve established behind the drive shed. The ash got spread around and leveled–and then I went back and forth over it with a big magnet to pick up all of the nails and screws (and hinges, door knobs and other metal) that were mixed in. The rock pile that I discovered buried in ash was picked up and dumped in the main rock pile behind the barn–talk about a dirty job.

Cleaning up an old firepit

Still to do: Make sure all of the metal has been picked out of the ash. Mix some manure and soil in with the ash so that grass might actually grow and seed it. Relocate the lawn chair and bench that were plopped beside the fire pit. Relocate the remaining large logs and lumber that were stacked waiting to be burned. Get rid of the dirt pile.

Between the fire pit and the house is the biggest undertaking of the year, the turnaround. This former mountain goat territory has been leveled, fertilized with loads and loads of manure and rototilled. I built a brick pathway across the middle of the garden and planted some bushes, hostas, trees, tomatoes and lettuce.

Evolution of the garden on the turnaround

Still to do: Finish the pathway–I need 60-80 more bricks and sand to fill the joints in between. Put a bench beside the path. Pull the weeds that have sprung up. Plant a whole lot of plants. Seriously. This thing is going to eat plants.

So it’s probably obvious from this post that I can’t just focus on what we’ve done so far. Although looking at the photos above, I am able to see the transformation happening. Slowly, ever so slowly, it’s starting to look a little more like the picture in my head (or on my Pinterest board).

How are you doing on your summer to-do list? Are you looking ahead at what’s yet to do? Anyone have any tips for living in the moment and appreciating what I’ve done so far?

How to sharpen a shovel

In case you haven’t noticed, I’ve been spending a lot of my time outside landscaping. What you definitely haven’t noticed… probably because I haven’t shared this with you before… is that much of my landscaping time is spent hopping up and down on my shovels trying to convince them to sink into the dirt. Or hacking away at defenseless plants trying to cut through tough roots.

Obviously, it was time to sharpen my shovels. Past time, rather.

Round mouth shovels with dried dirt stuck to them

The solution? Call my Dad.

Unfortunately for me, the solution is never that easy. Fortunately for you, I now have another how-to to share.

As soon as I pulled into the driveway at my parents’ house, shovels in tow, I realized that I was not going to be able to simply hand them over to my Dad. A whole sharpening station was set up in the driveway with a grinder, visor and safety glasses–multiple pairs.

There was going to be a lesson.

But first there was going to be a lecture.

“You know, back when I was on the construction site” (my Dad was a construction superintendent before he became a general contractor) “I had a labourer who would have taken those shovels away from you if he’d seen how you left them all covered in dirt. That’s not how you take care of your tools, Jules.”

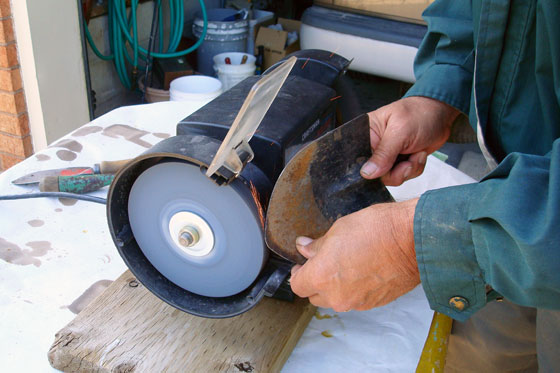
Fortunately–or unfortunately depending on how you look at it–my Dad did not take away my shovels. He did brush them off, but then he gave me a demonstration with one of his smaller shovels of how to sharpen them on the grinder. Most important lesson: keep your fingers out of the way of the grindstone.

Sharpening a small shovel on a grinder

Keeping my fingers away was easier on my big scoop shovels when I could hold them by the handle. However, they were a little more unwieldy because of their larger size. Also unwieldy: my Dad’s visor which was not sized to my head at all, but did provide complete eye protection.
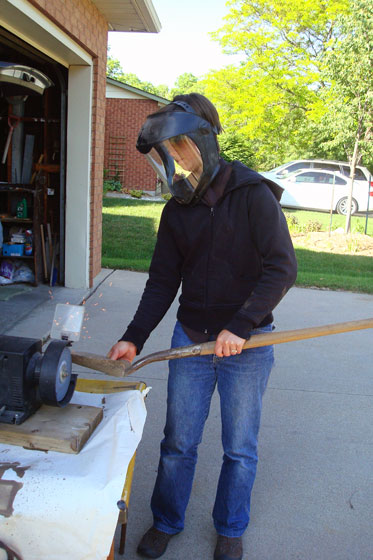
Sharpening a shovel on a grinder

To sharpen the shovel, hold the back side of the blade at a very shallow angle against the grindstone. Start about halfway down the edge of the blade and curve around to the tip. Do a couple of passes on one side and then on the other.

Direction to sharpen a shovel

After running the shovels through the grinder a few times, I had a nice shiny, sharp edge.
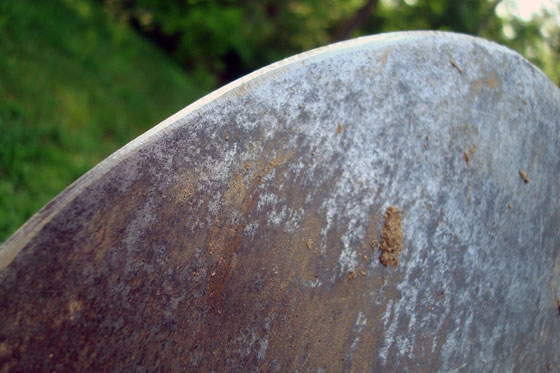
Sharpened shovel

The shovels don’t magically become fillet knives, but they are much sharper and much easier to work with. Since sharpening, I have transplanted trees, bushes and flowers. Holes have been dug. Plants have been split, roots humanely cut with minimal trauma.

Oh, and the shovels have also had a shower.

Washing a muddy shovel

In addition to learning how to sharpen a shovel and remember to take care of my tools, I also learned why we used a standalone sharpening station set up in the driveway, rather than my Dad’s stable grinder that’s bolted to the bench in his work room. When the sharpening lesson was finished, he picked up the grinder and loaded it into my trunk.

I guess this means I have to do it myself from now on. My Dad’s wanted to give me this grinder for awhile now, and it will definitely come in handy for us. Although it is yet another tool to take care of. Thanks, Dad, for the lessons and the tools.
Path preview

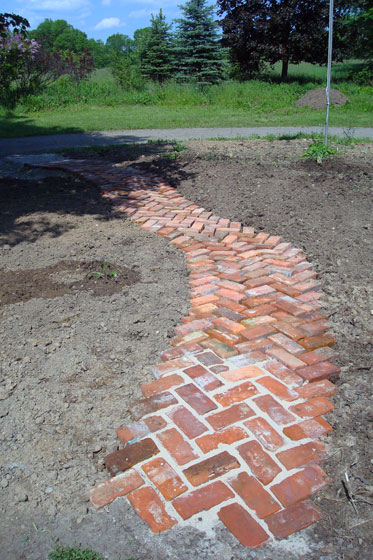
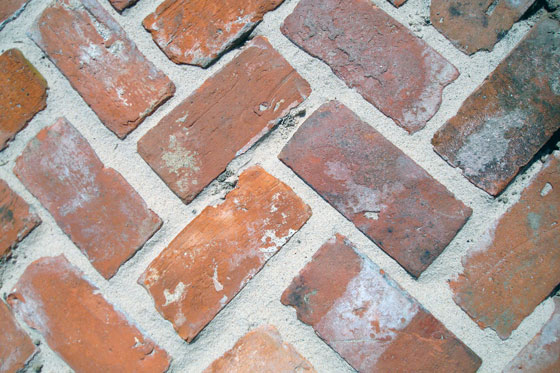
Please gaze upon my bliss.

Herring bone brick pathway

Yes, that’s right. My definition of bliss is a brick pathway. So what?

But isn’t it so pretty? I realize some of you who voted for the traditional brick pattern–or “running bond” as I learned from a commenter–may not agree that this looks lovely. The vote came out very close, which really surprised me: 63% herring bone to 38% brick. I honestly thought herring bone would be the clear favourite.

I chose to go with the herring bone after spending a few days looking at the layouts that I’d mocked up last weekend. I just decided that I really, really liked the way it looked.

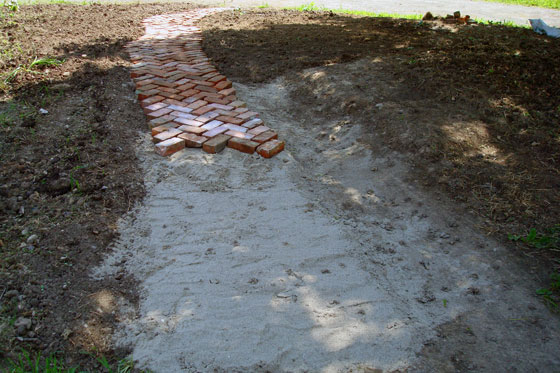
Bricks laid in a herring bone pattern

Laying the brick in the herring bone pattern and getting the bricks to bend smoothly around the curve was a bit more challenging than it would have been if I’d chosen another pattern, I’m sure, but I just fudged the spacing between the bricks as I needed to.

I still have to fill all of those spaces with sand. I found two bags of something called “magic sand” in one of our junk piles. The description said that it was a polymer infused sand made to fill the joints between paving stones. That sounded like just what I needed so I dumped the bags onto the bricks and managed to fill the joints for the first three feet of pathway. I’ll pick up the rest of the sand this week and hopefully finish off the path next weekend.

I say hopefully because along with needing more sand, I also need a few more bricks. What might be a little hard to see in the top photo is that as the path heads into the shade, about six feet from the end, I ran out of brick.

Brick pathway laid in a herring bone pattern on a bed of sand

I knew I was going to be short, and I actually made it much farther across the turnaround than I expected to. Apparently 362 bricks are just not enough. They are enough to make me blissfully happy though.