Six-month performance review

Not to alarm anyone, but we’re halfway through the year. (Sorry. Tempus fugit.)

It’s been nearly six months since I posted my home goals for 2014. Time for a mid-year performance review.

I had six projects on my list. Here’s how I’ve done so far.

1. Paint the main floor hallway and kitchen.

Big fat done on task number one. Matt and I knocked this one out in February.
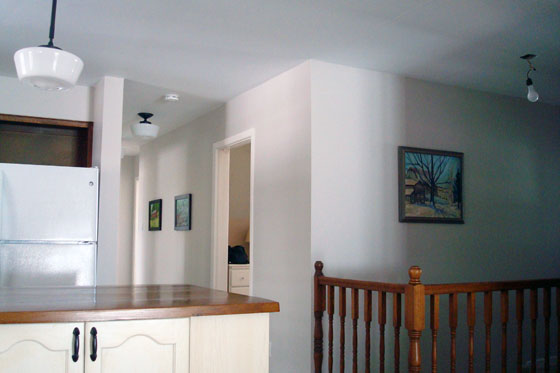
Hallway painted Benjamin Moore Abalone

2. Laundry room.

I haven’t started this one yet. I figure it will be a good fall project when I don’t want to/can’t work outside anymore. Besides, I can’t start anything until Matt digs out the foundation wall and fixes the basement leak. Hello summer honey-do list.

3. Master bedroom.

For the most part, this is another fall project. However, prep starts this month with removing the popcorn ceiling.

4. Furniture.

I’ve done fairly well in this department.

  • Sofa table for the living room. Found this one in an empty office at work (I asked permission before I took it).
  • Narrow dresser for my office. DIYed this one out of two nightstands.

Tall and narrow DIY dresser

  • Cabinet for the laundry room. Bought this one from Canadian Tire. (There was some DIY, since we had to assemble it ourselves).
  • Ottoman for the basement reading nook. Made this one out of a plastic barrel.
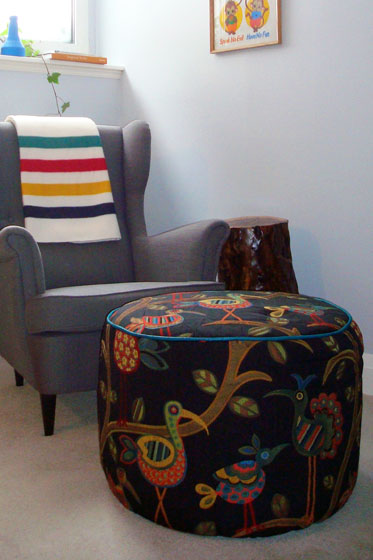
How to make a round footstool

I have a few more pieces that I’m still on the lookout to buy or make. Top on the list is refreshing my bookshelves and the living room TV stand. My books have been packed away for more than two years. I want them back.

5. Living room fireplace.

Hope still springs eternal. The fireplace will be redone some day. Whether that day is this year depends solely on how much we’re able to rebuild our post-solar bank accounts.

6. Landscaping.

  • Reestablish the flowerbeds around the house. I’m slowly, ever so slowly, working my way around the house.
  • Continue to plant the turnaround. The turnaround is looking awesome, albeit a bit weedy.
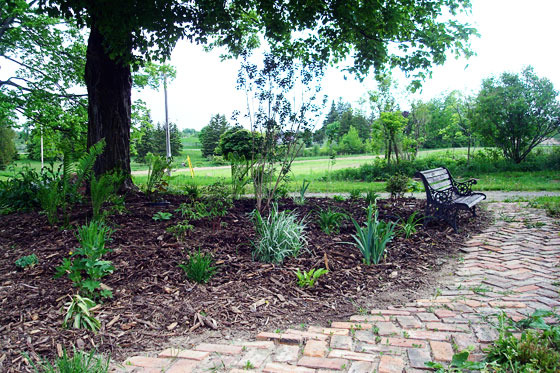
Garden with a brick path and park bench under a big tree

The pond shore is even more overgrown than last year and is pretty much inaccessible. Since this is my favourite part of the property, that is a bit of a downer. I’m willing to cut my losses on the pond this year, but I’m still hoping I’ll be able to clear and fence the vegetable garden before the end of the year.

And that brings us to the bottom of this year’s original goals.

However, there are a few things we’ve done beyond this list.

Obviously, the solar panels are a pretty massive project.

Solar panel array

We’re also revisiting the basement, finishing off the reading nook, adding the ping pong table and making over the doors (in progress).

I’ve had a bit more success this year staying on task thanks to the monthly projects. Thanks as well to all of you for your encouragement along the way. It’s nice to look back and see that I’ve actually made some progress. We have half a year to go, and I have a bit more work to do yet, but I think I’m on the right track.

Have you ever given yourself a mid-year performance review? Who else feels like time is flying by? Is there anything you’d like to accomplish over the rest of the year?
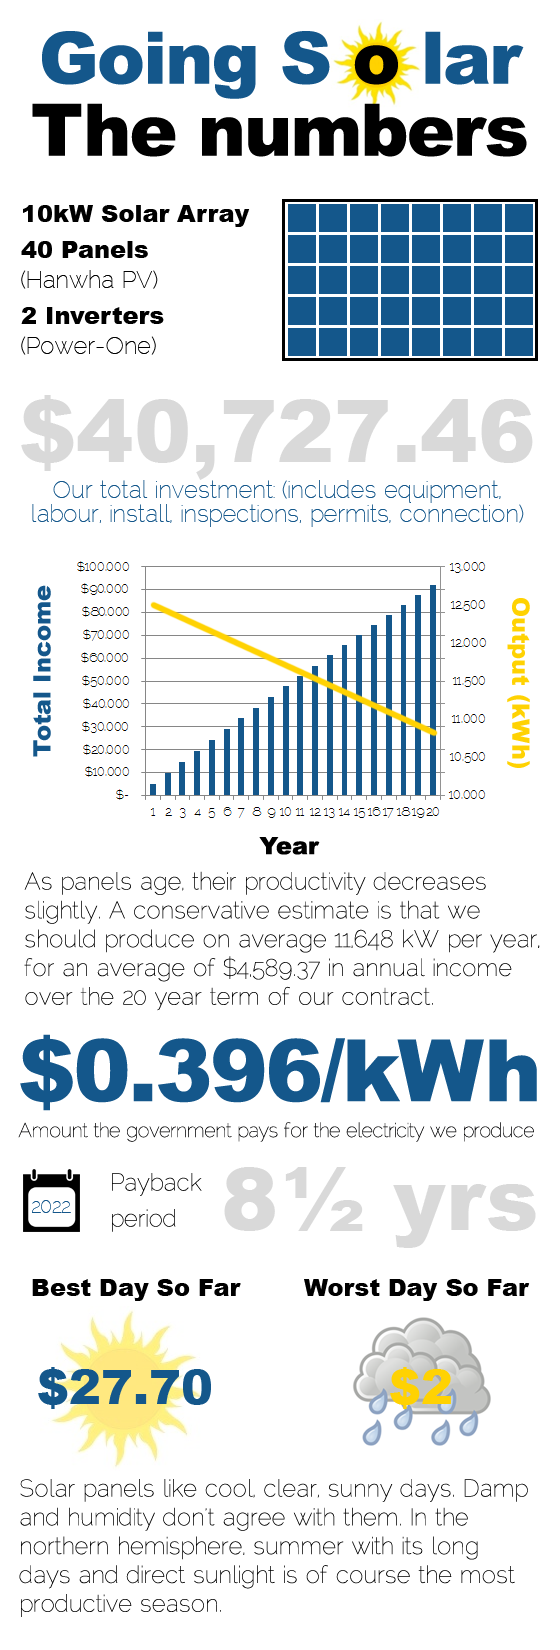
Going solar – Show me the money

It’s time for the final post in our solar panel saga. As we all know, going green costs green. Today, I’m going into the numbers (in a slightly artistic fashion).

Read on to find out how much our solar panels cost, how many kilowatts they produce and all of the other details for our solar system.

Solar panels cost and output

Obviously, our solar array and its associated dollars and cents are specific to the Ontario microFIT program. I expect some of our numbers will translate, though, for others who are setting up their own systems.

The last outstanding part of our solar project is to receive our first payment from the hydro company. I have to say I’m looking forward to moving on to the payback stage of this project.

Going solar – I’ve got the power

This week, I’m sharing all of the details on our solar panel project. For the first post, click here.

When we last left off, we finally had an approved application, and we’d made it through a wicked winter. But we were running out of time to complete our panels by the end of our contract.

Preparation

The first step to get ready for the install was an engineering assessment. We had to make sure that the barn was strong enough to hold the weight of the solar panels. Even though the barn is (at best guess) more than a hundred years old, it’s rock solid, so there was no concern there.

The second step was the building permit. Again, there were a couple wrinkles in the application paperwork, but our contractor was able to straighten them out

Installation

The actual solar install finally started at the end of March. First step was the inverters. These “convert the DC (Direct Current) power from your panels to AC (Alternating Current) before feeding it back into the hydro grid.” Our contractor’s web site calls the inverters “the brains” of the system.

Solar panel inverters

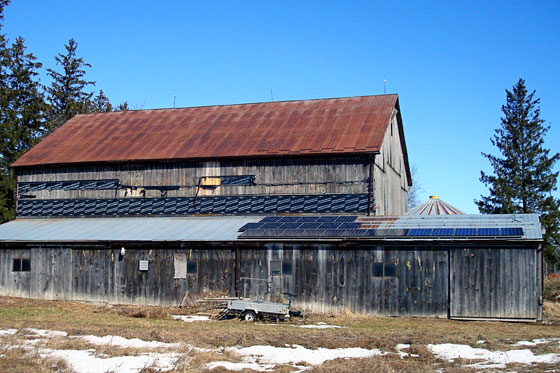
Then came the panels. Solar panels work best if they face south. The sun is strongest and hits them most directly from this direction. Fortunately, the back roof of the barn faces exactly south. Given the long delay in our application process, we had lots of time to observe the barn, calculate sun and shadow patterns and determine the optimum position for our panels. We have a long row of very tall pines along the west side of the barn. They’re so tall that in the late afternoon they cast a shadow on the upper barn roof, so we decided to install the panels on the lower lean-to roof as far away from the pines as possible.

Solar panel install on the barn roof

Three rows of racks went up on the lean-to, and then came the panels. We have a total of 40 panels, the maximum we’re allowed under the microFIT program. Panel install took about three days.

Connection

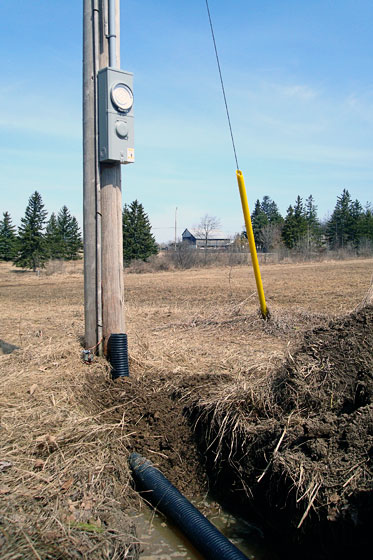
After the last panel was installed, it took another two weeks before the snow had melted enough for the trench to be dug between the barn and the hydro pole. Remember we’re feeding all of the power we generate back into the grid, so connecting into the hydro pole was essential.

Of course, it wasn’t simply a matter of waiting for the snow and frost to melt so that the trench could be dug. The trench was more than 300 feet long. Over that distance, we needed a special heavy-duty type of wire, so that we didn’t lose power. Pulling the wire through the trench was another bit of fun. When the trench was dug, the excavator laid a conduit in the bottom. It looks a bit like weeping tile.

Trenching for solar panels

There’s a rope running through the pipe. The trench is back-filled and the conduit is completely buried. To get the wire from the panels to the pole, our contractor had to pull it using the rope in the conduit–a heavy, 3-person job.

April 23 was connection day. Inspections had to happen. Power had to be shut off. Wires had to be hooked up. And everything had to be turned back on again. There were two or three different groups involved, along with our contractor. This was another instance where I was very glad for professional help. I would not have wanted to coordinate everyone.

But it turned out all of the scheduling didn’t matter.

Meter connection for solar panels

Connection was a no-go. The hydro inspector wanted to see the wire and conduit laying in the trench, but the trench was back-filled. The excavator had installed a T with a small section of conduit that looked down to the bottom of the trench and the wire, but that wasn’t enough. A section of the trench had to be dug out down to the wire so that the inspector could see it. Fortunately, the trench was re-excavated April 23, and by April 24 we were connected.

April 25, our contractor came out and walked us through all of the equipment and how it worked. He flipped the breakers and we were live.

In the infamous words of Snap, I’ve got the power!

Going solar – If at first you don’t suceed…

This post has been a long time coming. I don’t know why it’s taken me so long to write this, but it’s finally here. Everything you wanted to know (and more) about our solar system.

… I mean, our solar panel system… the one on the barn… not the one in the sky.

Solar panel array

In fact, now that I’ve started writing, I have so much to say that I’m breaking it up into several posts. In today’s post, we start at the very beginning.

How solar works in Ontario

The provincial government operates a program through the Ontario Power Authority to encourage people to install solar panels. The program is called microFIT. It’s micro because it gives people “the opportunity to develop a small or “micro” renewable electricity generation project (10 kilowatts or less in size) on their property.”

Under this program, we enter into a 20-year contract with the government. We produce and deliver electricity to the province’s grid, and we’re paid a guaranteed rate per kilowatt for the term of our contract.

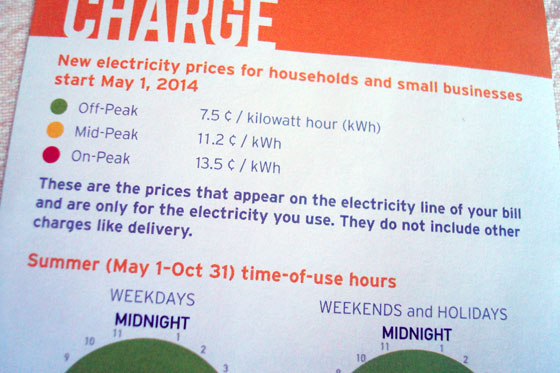
So we’re not “off the grid.” All of the power we generate goes directly back to the grid. We still buy the electricity that powers our house from the grid. This might seem weird to people. I’ll go into the numbers more later this week, but here’s the basic explanation: the government is paying us $0.396 cents per kW for what we generate. We’re paying the government $0.075 cents per kW (off-peak) for what we consume.

Hydro rates in Ontario

Our solar contractor

Once we made the decision that we wanted to go solar, we started meeting with contractors. Given how the microFIT program works in Ontario, lots of companies are full-service when it comes to solar installs. They take care of all of the applications to the government, they install the system, they monitor your system, they fill out all the paperwork along the way, they arrange for all of the inspections, they even help you apply for financing if you need it.

We found companies to contact through road side signs (there are lots of solar installations in our area). The company that we chose is called Hayter. Hayter had great service, had been around for a long time, offered a decent price, and the people we met with were very knowledgeable and down to earth.

Hayter solar

Application process

This was not a quick project. We met with Hayter for the first time in July 2013, liked them and decided to go with them. They submitted our application to the government. Our application was rejected about three times due to minor clerical errors. The microFIT forms are very complicated and missing even the smallest check box causes your whole application to be thrown out. We were very glad to have an experienced company working with us and taking care of all of the paperwork. I cannot imagine having to figure that out on my own.

Finally, our application went through. But that wasn’t the end of the bad news. In September, the government suspended the program. They were going to re-evaluate the rate that they paid per kW. When the microFIT program first started, the government paid about $0.80 per kW. When we applied, the rate was $0.55. The suspension meant that our application was dead, again. After re-evaluation in September, the new rate was $0.396. The decrease was very disappointing for us, but we decided to proceed anyways. We’d still be earning more for what we generated than we were spending on buying electricity from the grid.

We resubmitted our application. By mid-October, we got the good news that we were in. October 31, we made our first payment to our contractor, and they paid all of the fees with the government. And then came five months of nothing. Our solar company had said that they could work through the winter and complete our install before spring. However, the winter of 2013-14 wasn’t a normal winter. Between polar vortexes, ice storms and snow, nothing could happen.

Weathered picket fence in winter snow

Under the terms of our agreement with the government, we had six months to complete our install. That gave us until April 30. As spring slowly rolled around, we anxiously waited for work to begin.

Ooooh. Such a cliff hanger ending. Tune in next time to find out if installation begins and whether we meet the deadline.

If you have any questions, please feel free to ask in the comments, and I’ll do my best to answer them in upcoming posts.

Looking to hook-up

Today is connection day.

We have a very long, very expensive wire running from the solar panels on the barn, into the inverters affixed to the wall, through metres of conduit, along the 300+ foot trench and up into the box on the pole.

Solar panel wire route

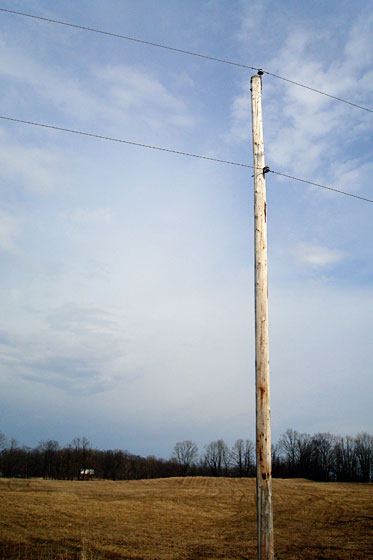
Today is the day our feed makes it to the top of the pole, into the power lines and back into the grid.

Hydro pole

That is, as long as everyone shows up when they’re supposed to, the work passes all of the inspections and the right wires get plugged into the right spots.

Keep your fingers crossed for us. Tomorrow when the sun comes up, we should finally be generating electricity.

(And yes, I will do a post with all of the details on our solar project once we’re up and running).

What exciting happenings do you have going on this Wednesday?

Update: Connection was a no-go. The hydro inspector wanted to see the wire and conduit laying in the trench, but the trench was back-filled. The excavator is back sitting in the driveway and the trench has been dug out. We have a conditional pass, but we can’t connect until he inspects the trench. We’re still crossing our fingers.

DIY wood countertops one year later

See an update on our counters after four years.

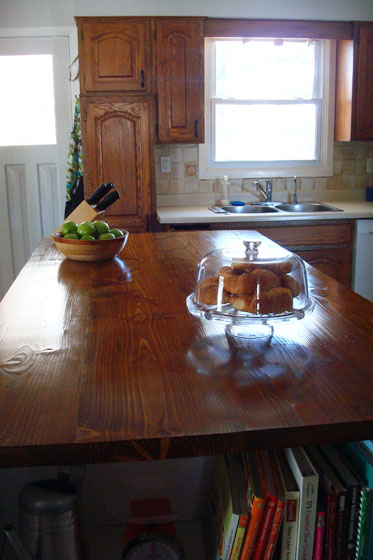
A year ago, I wrote about how we DIYed our own wood countertop. Since then, this post has become far and away the most popular on the blog. Given that we’ve been living with our homemade counter for a year now, I thought a good topic for today’s post would be an update on how our DIY counter has worked for us.

The simple answer is the counter has worked great. Here’s what it looks like today.

DIY wood countertop 1 year later

Just a reminder, here’s how the counter looked a year ago.

How to make a wood countertop

Here are a few more details on how the counter performed.

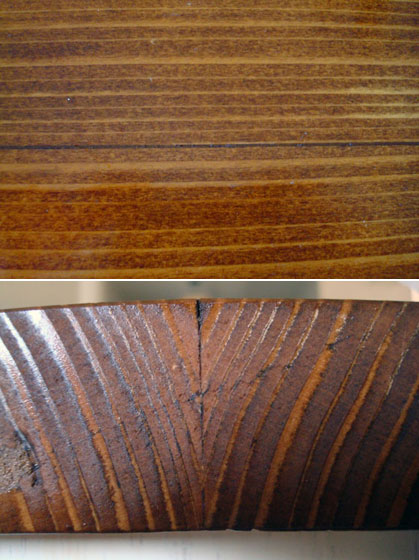
The biggest measure of this counter’s success is the joints. After a year of use, they’re still nice and tight. Squaring off the edges of the boards, gluing the seams before screwing them together with my Kreg Jig, cramming every joint full of wood filler and sanding everything perfectly smooth have ensured that the counter has held up really well for us.

Joints in a homemade wood countertop

The finish has held up as well. The tone of the wood has stayed constant, and the Waterlox sealer has been a great protector. Originally, the finish was pretty shiny. It has dulled a little bit over the past year. We’re not the best at wiping down the counter religiously, but no matter what we spill or how long something sits on the counter (ahem), it wipes up easily.

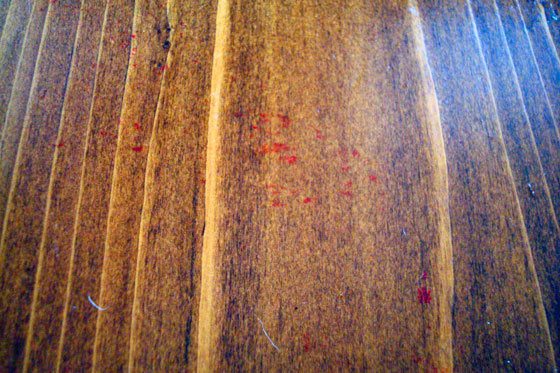
We have one spot that has stained, but it wasn’t from food. Of all things, it was from a plastic bag. We had set a regular grocery store bag on the counter. The bag had some red writing on the outside, and that dye somehow transferred onto the counter. No matter how much I scrub, this dye will not come out.

Red dye on wood counter

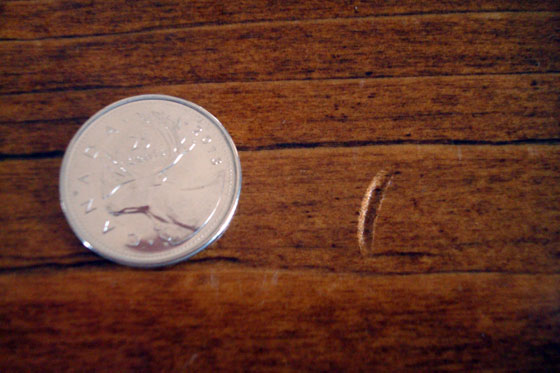
It’s well known that wood is softer than the other countertop materials that are out there. It dents pretty easily. After a year of use, there are some imperfections in our counter. Most are the size of a quarter or smaller, and this one’s about the deepest.

Dent in a wood countertop

The dents don’t worry me at all. We use a cutting board when we’re chopping, but if something leaves a mark, I don’t get upset.

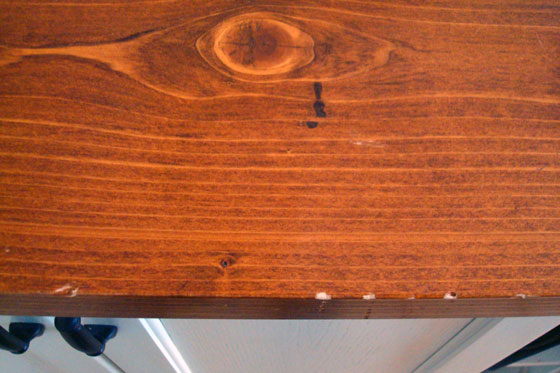
Along one edge of the counter, we have some small chips. These were from a unique incident that had absolutely nothing to do with cooking. The night that we picked up our dining room table, Baxter got a little upset at being left alone in the house. To make himself feel better, he ate the pan of brownies that had been left on the counter. When he reached for the pan, his toenails left some marks on the edge of the counter. These marks are particularly noticeable because they go down below the stained surface. (The dark marks near the middle of the image are features of the board and aren’t a stain or damage that we’ve inflicted).

Chips in the edge of a wood counter

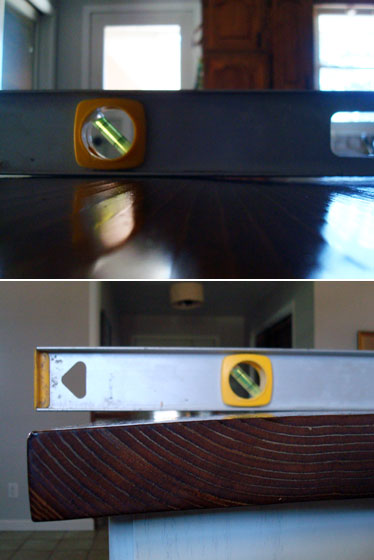
In my post a year ago, I talked about how the counter had warped a little bit and how we were able to flatten it by trimming the end and carefully screwing it to the cabinets. The boards have warped a little bit more over the past year. If you run your hand over the surface, you can feel a bit of a wave. The middles have curved up and the edges have curved down. The warp isn’t severe enough to impact the usability of the countertop and it’s not noticeable to the eye, unless I pull out the level to show you the gaps.

Warp in a DIY wood countertop

We don’t coddle the counter, and a year later it’s obvious that it’s had some use. I am really pleased with all of the choices we’ve made a year ago: going with wood, the colour of the stain, the Waterlox sealer, and especially making it ourselves. Everything has worked out really well.

The counters are still going strong four years later–although there are a few provisos.

Let the sun shine

A few people guessed that last week’s Guess What? post had something to do with solar. They are absolutely right. As of Friday night, we had 24 shiny new solar panels installed on the barn roof.

Solar panels on the barn roof

We have 14 more to go before our array is complete. I’ll be posting a full project breakdown once everything is installed and wired, but I’m too excited not to share the news with you now. We’ve been waiting a long time for this day, and I’m so excited that it’s finally here.

The equipment that you saw on Friday is the inverters. The company that’s managing our install calls the inverters “the brains” of the system. Their web site explains, “Inverters… convert the DC (Direct Current) power from your panels to AC (Alternating Current) before feeding it back into the hydro grid.”

What are these?

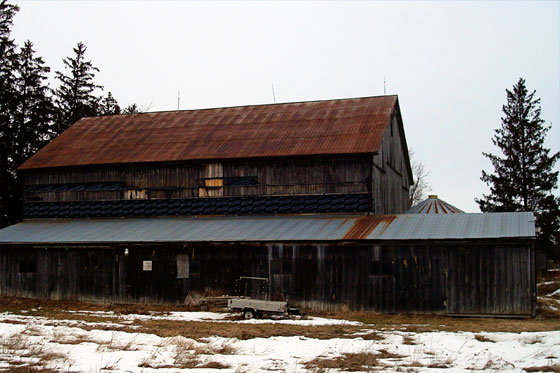
The panel install started on Thursday. Here’s our empty barn roof on a dim grey morning.

Barn roof before solar panel install

And here’s how it looks currently, mid-way through install on a much nicer day.

Solar panel install on the barn roof

We need that sun to keep on shining. The power generation aspect is obvious, but we have a more immediate need. The panels have to be connected to a hydro pole so that our power can be sent back to the grid. The pole is 300+ feet away from the barn. We need a lot of snow and ice to melt so that the trench can be dug from the barn to the pole and we can be wired up.

Hydro pole for solar panel installation

Say it with me people. Let the sun shine!

Are there any exciting projects happening at your place this spring? Do you have any solar experience to share?

Car trouble, cold snaps and wishing for a garage

Consider this my “I’m tired of winter” post.

People, I really need a garage. Between snow, wind, cold snaps, extreme cold snaps and even colder cold snaps brought on by polar vortexes, this has been a tough winter for our cars.

Most nights, we’ve been pulling our cars close together and tucking them in tight to the yew bush by the front door. A couple of times, Matt even wrapped the hoods in tarps, trying to keep out the wind so that we could be sure the engines would start the next morning. We’ve brushed snow, scraped windshields and chipped ice.

Covering cars with tarps on a cold winter night

Saturday afternoon my car finally said enough is enough. Driving along, I suddenly lost power. Thankfully, I was five minutes from home, so Matt was able to come pick me up. Even more thankfully, my sister-in-law was in the car, and she used her CAA membership to call a tow truck.

As I wait to hear from the mechanic and cross my fingers that this isn’t going to be an expensive fix (and try to figure out how I’m going to get to work on Tuesday, since the repair shop is closed Sunday and holiday Monday), I’m distracting myself with planning my garage addition.

This renovation is at the top of Matt’s and my list.

Yes, I want a luxurious master bedroom with a walk-in closet and ensuite bathroom. However, more than that I want a garage.

It has to be attached to the house. We could pull our cars into the driveshed, but it’s 50 metres from the house. Bringing in groceries, dealing with a rainy day or even just taking out the recycling is not convenient when you have to walk this far.

I really like the pedestrian door next to the vehicle doors. We’ll probably add the garage on the south side of the house. With the addition of a new window in the living room, the add-on will look something like this (although less ornate).

Colonial-Style house from Better Homes and Gardens

Source: BHG

While this picture may be a bit too decorative, I do want the garage to have some personality. It just has to be a bit more country than colonial. Something like these doors is what I have in mind for our farm setting.

Barn style garage doors

I couldn’t find the original source for this image, but the doors look like Haas 940 pictured here.

For now, our garage dreams are just dreams. Goodness knows I can’t spend any real money. It’s all tied up fixing my car. However, we’ll keep saving our pennies and hope to move up the timelines. I’m sure my car is hoping she can eventually spend a winter inside.

Do you have a garage? Or are you garage-less as well? Anyone else dealing with car troubles?

Reading nook before and after

While our basement is mainly about the TV and bringing together groups of people, there is a cozy little corner that I’ve set aside for more quiet, solitary pursuits.

Colourful reading nook featuring Ikea Strandmon wing chair

This little nook is perfect for reading or knitting or sewing… or blogging. It’s bright and colourful and fun and comfortable. But it wasn’t always this way.

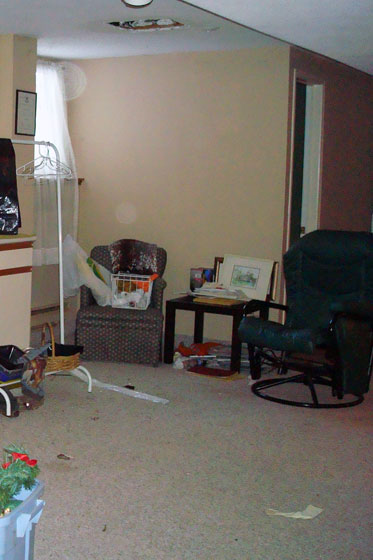
Here’s a photo of where we started when we first took possession of the house.

Reading nook before

Ah, the memories. Ah, the mess.

Most of what was here went to the dump in our day one clean out. Then the window wall was opened and reinsulated with spray foam. The adjacent wall, which backs onto the bathroom, was also opened and moldy drywall was removed. The ceiling was opened so that we could deal with electrical issues, which made it easy to install an outlet, switch, overhead light and patch the hole from an old plumbing leak (did you notice the lovely hole in the ceiling?) Everything was redrywalled, patched and painted. The old stained carpet was pulled up, the floor was leveled and plush new carpet went down.

Cutting in for the first coat of paint

My initial plan was to put the games table in this corner, but as we moved along in the renovation, the space seemed a little tight for the table. Plus, I decided that having a secondary seating area slightly removed from the main TV area appealed to me. Now that it’s done, I could not be more pleased with how everything turned out.

The details of how I finished the space–all of the comfortable furnishings and the fun decorating–are coming up next. But first, one more after picture.

Colourful reading nook with a stump table and Ikea Strandmon

Ahhhhh. So much better.

Do you have a favourite nook at your house?