Home Goals 2014

Thanks everyone for all of your encouraging comments on my last post. Despite the epic failure that was Home Goals 2013, I still have plans floating around in my head and ambitions for 2014, so I’ve decided to get them out of my brain and onto paper screen.

Of course, I still want to accomplish everything that was on my list for Home Goals 2013, so I have to include them. However, I’m going to reorder the list. (Like that’ll make a difference.)

I considered including “current state” photos to shame motivate me to action, but then I didn’t think that was very encouraging, so I’m going with inspirational shots as I did last year.

1. Painting.

Hallway painted Benjamin Moore Abalone

I’m not usually a fan of frame collages, but they sort of work for me in a hallway. Source: Houzz

  • Main floor hallway
  • Kitchen

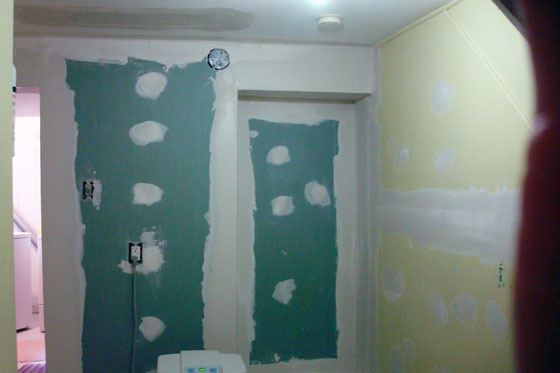
As I mentioned in my last post, prep for painting the hallway and kitchen has already been completed. I just have to choose a colour and pick up a brush. I’m leaning towards Benjamin Moore’s popular Abalone pictured above.

I’m not putting the living room on this list even though it was there last year because, really, what’s the point in painting if we’re only going to mess it all up when we redo the fireplace? The dining room is adjacent/attached to the living room, so it can wait too.
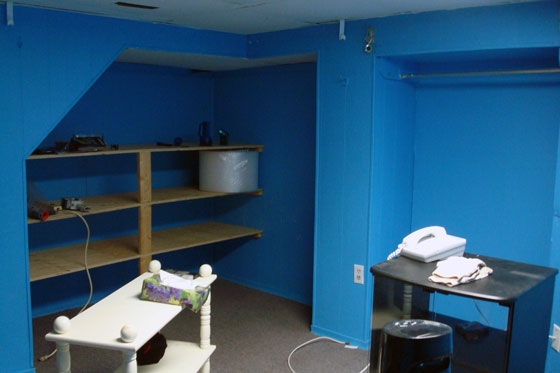
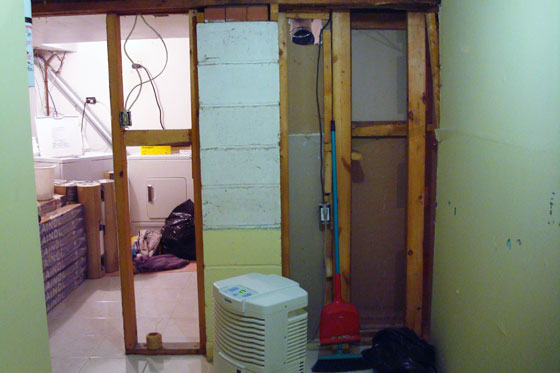
2. Laundry room.

Laundry room from Knick of Time

I love pretty much everything about this laundry room from Knick of Time.

Same to-do list as last year:

  • Fix the leaky foundation wall
  • Paint
  • DIY a fun light fixture
  • Build a drying rack

With a few additions:

  • Level the washing machine
  • Freshen up the cabinets
  • Build a new hanging rack
  • Find/build a free-standing cabinet for the hallway to the laundry room.

Yeah, that’s smart. Make the project that I couldn’t accomplish last year even more complicated for this year.

3. Master bedroom. Ooh, look! A new to-do!

Master bedroom by Tommy Smythe

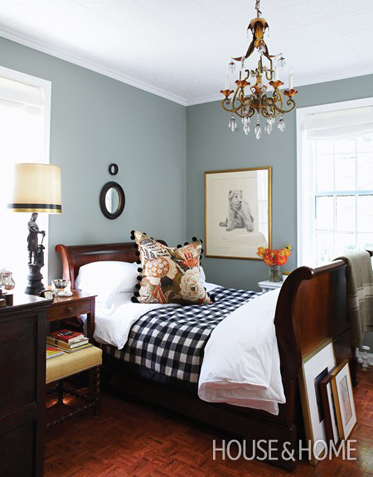
I don’t know about you, but I love Tommy Smythe’s rooms. Hey Tommy, wanna come decorate my bedroom (on my budget)? Source: House & Home

  • Remove popcorn ceiling
  • Paint
  • Buy a queen size bed
  • DIY a headboard
  • Relocate light switch
  • Replace light fixture
  • Make/find window treatments
  • Paint dresser and replace hardware
  • Refresh dinged up closet doors
  • Decorate and personalize a little bit

4. Furniture. Another new to-do.

Pottery Barn Benchwright inspired coffee table from Ana White

Source: Ana White

I’d like to make/find a few pieces of furniture:

  • Refresh bookshelves and living room TV stand with new trim and paint
  • Coffee table for the living room
  • Sofa table for the living room
  • Hutch/cabinetry/built-ins for dining room
  • Narrow dresser for my office
  • Hutch for my office
  • Cabinet for the laundry room.

5. Living room fireplace.  Yes, hope springs eternal.

Stone fireplace from Country Living

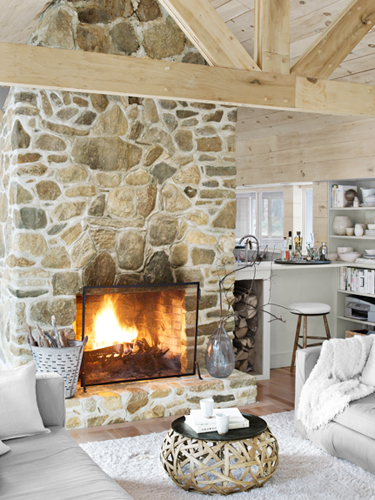
Add a mantel and drop this fireplace, screen and all, in my living room, please. Source: Country Living

  • Replace the woodstove-esque insert with an open hearth one
  • Reface with fieldstone
  • Put up a new rustic wood mantle

Please? Can this happen this year?
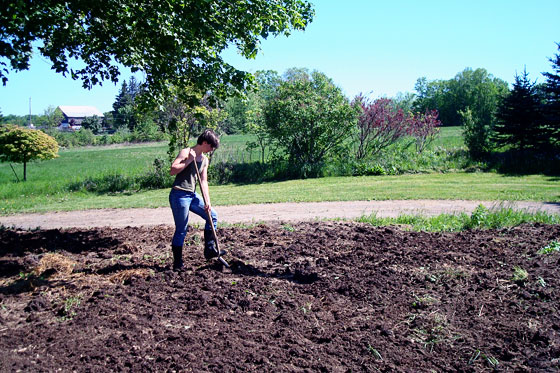
6. Landscaping.

A beautiful country vegetable garden from Country Living

My dream, dream, dream vegetable garden. Source: Country Living

I don’t think this to-do is ever going to go away. Perhaps I’ll get some professional help this spring.

  • Reestablish the flowerbeds around the house
  • Plant grass seed where old firepits were and clean up the detritus that’s still hanging around
  • Tidy the east shore of the pond and build a new firepit near the water
  • Continue to plant the turnaround
  • Put in a vegetable garden (yup, that’s a new one)
  • Continue with the landscaping master list

Aaaand I think that’s enough. Here’s hoping I do better at crossing a few of these things off this year than I did last year.

Looking back at home goals 2013

The subtitle for this post is “On goals, to-do lists, excuses, guilt and mojo.”

A year ago, I was the annoying perky pixie brightly declaring the projects I was going to accomplish over the coming 12 months. Today, I’m the dour, scowling troll who depressingly growls that I’ve done nothing. I suuuuuuuuuck.

I had four goals for 2013:

  1. Landscaping
  2. Painting
  3. Living room fireplace
  4. Laundry room

I can cross not a single item off the list.

On landscaping, I can say that I did something. I built a new garden around the well, weeded one of the front gardens and planted a new border of grass, leveled the old fire pit at the top of the driveway, established a new fire pit behind the driveshed, graded the turnaround, laid a brick pathway across it and planted a few flowers. It was somewhere in the massive tear drop shaped expanse of dirt that is the turnaround that my work ethic abandoned me.

Mixing manure into a garden

The garden was just too big. There weren’t enough plants in the world to fill it. We had just gotten a dog, and I’d rather spend my time with him. I have a week’s vacation, but we’re having record high temperatures, and I can’t really be expected to be outside gardening.

By mid-summer the weeds were taller than me and so thick that Matt–aka “he who does not garden”–took matters into his own hands and waded in with a shovel. It was clear that I had given up.

And that, ladies and gentlemen, is that last we saw of my mojo. People ask us often what we’re working on around the house. They usually find it funny when my response is, “Not much. I’ve lost my mojo.”

But it isn’t funny. Sure I was relaxed in the air conditioned comfort of my freshly renovated basement. Yes, I was bonding with my dog. But I was wracked with guilt.

When we hosted our annual month-before-Christmas party at the end of November, I realized that the walls upstairs looked exactly the same as they had a year previously–right down to the drywall patches. Ummmm, yes, welcome to my home. Can’t you just see what pride of ownership I take in it?

And now, a month and a half later, the walls are still not painted. In fact, I’ve added a few more drywall patches. I’ve sanded all of the walls (which previously were somehow the texture of sandpaper). I’ve mopped the ceiling (yes, mopped) and bought fresh white paint. I’ve slapped up a few colour samples. If anything, the walls are looking worse than they were before.

Mopping the ceiling to prepare for painting

And what about the fireplace? Well, we got a quote. And then I threw up. Then I fainted. I said, “There’s no way.” Then we talked ourselves into it because “we’re going to have to do it sometime.” Then our solar panels application regenerated (I’ll share more soon), and we realized we needed every single penny, nickle, dime, quarter and dollar we possessed and then some. So all other projects, especially expensive projects like fireplaces, were put on hold. Although a warm roaring fire would have come in really handy during the ice storm.

And then there’s the last holdout from the basement reno, the laundry room. This one I’ll pin on Matt. See, the first thing that needs to happen is to fix the leaky foundation. Matt kind of fixed it by putting a piece of plywood against the wall to funnel water away from the house. We hadn’t had a leak in the house since then, up until this weekend when a mid-winter thaw resulted in a puddle on the laundry room floor. The wall really needs to be dug out and waterproofed. This task was on Matt’s honey-do list for the summer, but he was so burnt out by the time summer started that I delayed giving him the list until we were well into August. By that point, his mojo was in no better shape than mine, so outside the wall still sits with its plywood water guard and inside the laundry room is still in its original ugly state.

So that is the saga of my very unproductive 2013. I did say last year that my plan was to avoid any other massive all-consuming projects and spend slightly more time enjoying rather than working the farm. I guess I was successful at those two goals. I’m not sure that makes me feel any better.

However, it is a new year, and you can be assured that my lack of success last year is not going to stop me from setting more goals for 2014. Stay tuned for that next.

What about you? Did you set any goals for 2013? How did you do at accomplishing things around the house?

Hammer time

I realize I’ve neglected to introduce two very important sidekicks that are always on hand to help us with our projects: Matt’s and my hammers.

Hammers comparison: Estwing versus basic wood handled hammer

Don’t they look like they’re kissing?

Ahem… tough DIY blogger here. Note to self: Do not let people know that you anthropomorphize your tools.

Anyways, these are not just any tools. They are our right hands–literally. And we’re each pretty particular about our hammers (insert “u can’t touch this” joke here).

Mine is on the left. It’s a 16 oz Estwing straight claw that my Dad gave me. It’s the hammer that he’s always used, and when I started working with him, it’s the one I used too.

Matt’s is on the right. It too is a family heirloom from his grandfather.

Now, I’m not trying to knock Matt’s grandfather (and you’ll see later why his is a very special hammer), but I do want to explain why my Estwing is superior. (I’m sure most guys appreciate it when their wives explain how they’re superior).

Take a look at the head on Matt’s hammer. Notice the gap below the head where it joins the wooden handle? You can see that the head has slid off the shaft just a little bit. Over time, the wood shrinks and the head shifts, and eventually the hammer can come apart.

Hammer head

The other drawback of this hammer, in my opinion, is the curved claw.

Let’s take a look at my hammer for comparison. Obviously, the hammer and the handle are all one solid piece of steel. They’re not going to come apart any time soon. (Please note that the duct tape is not structural. It’s simply my Dad’s labeling method so that we can tell whose hammer is whose). The handle is wrapped in a rubber sleeve that helps with grip as well as shock absorption.

Estwing hammer

My favourite part of this hammer is the straight claw. Yeah, a curved claw gives you more leverage, but you’re severely limited on where you can use it. Hammering in a tight corner and bend the nail? You can contort that hammer many different ways, but you may not be able to get the claw on the nail to pull it out. Trying to pry two pieces of wood apart? The straight claw will slide in, just like a wrecking bar. Good luck doing that with the curved claw.

Wooden handle and curved claw aside, Matt’s hammer does have one very special feature. His grandfather’s initials are carved into the head. In fact, Matt doesn’t even call this a hammer. He says instead, “I need TVP.”

Initials carved into a hammer head

And now we’re back to anthropomorphizing our tools.

Let’s draw this post to a close, shall we?

I’ll leave the final sign off to MC. (I know dude is known for his pants, but holy bicycle shorts, hammer man! I’d forgotten about those.) Break it down.

I guess I should add the usual blogger disclaimer here. Estwing has no idea who I am. This post is just my opinion. I was not compensated in anyway for this post.

Abandonment

Do you ever see those formerly grand old houses, neglected, abandoned, abused and imagine repairing them? Rebuilding them? Restoring their beauty? Appreciating them?

Every fall, Matt and I spend a weekend at his aunt’s and uncle’s cottage. We follow a two lane road north, driving past large farms that stretch between small towns. The leaves are changing and the trees on either side of the road are shades of gold, red and green.

Coming into the last town before we reach the cottage, the speed limit drops and on our left is an old brick house. It sits on the crest of the hill, plywood squares covering its lower windows. The red brick is solid, while the porch sags. The paint is chipped, the shingles are flaking, the weather vane is bent. However, the charm is still evident.

Abandoned house

The beauty and the character and the potential and the tragedy of this house attract me every single time I see it.

Details on a historic brick house

But I know a project like this is beyond me. To restore a house like this takes more effort, more money, more time, more energy and more passion than I have.

However, someone else has felt the same attraction, and they have decided that they have the means to truly appreciate this house.

Restoration of an old brick house

This weekend as we crested the hill, I gasped in delight and surprise as I realized the house was being renovated. The joy I felt in seeing it finally being cared for is hard to explain. I live three hours away from this town. I don’t know anything about this house. I’ve never been in it. I have not met the owners. I have not seen the floor plans. But seeing the new third story, the fresh cedar shakes on the roof, the stripped wood on the turret, the scaffolding stretching up every side, I was very happy.

I find great meaning in houses–even houses that aren’t mine. Caring for my house and its property, creating a home is a special experience for me. And I don’t think I’m the only one that feels this way.

What about you? Do you ever dream of fixing up an old house? Or have you jumped in and done it (or doing it) already? Do you have an abandoned house that you admire?

Vanquishing the dungeon

This week, we have been reviewing Matt’s and my first basement renovation. Now it’s time for everyone’s favourite part: the befores and afters.

Here’s a reminder of where we started. The blue room before:

Ugly basement

And here’s the no longer blue room after. The hot water tank is now accessible through louvered (vented) closet doors. The clothes closet to the left is now deep enough for a hanger.

Renovated basement bedroom

The other side of the blue room before:

Basement room painted blue

And after (slightly crooked complete with a Matt photo bomb). This nook under the stairs may look a bit tight, but a desk tucked in there perfectly and made a good study space.

Renovated basement nook under the stairs

The yellow room before:

Ugly basement painted yellow

The transformation in the yellow room was limited mostly to new flooring, paint and trim. Can I have a “so-long, see-ya” for that mustard paint? I did eventually say sayonara to the flourescent light fixture too, although I apparently don’t have a picture of that.

Renovated basement bedroom

Another thing I don’t have a picture of that I really wish I did was an after of the hallway shelving area. Can you take my word for it that it looked better than this?

Ugly basement

A few months after finishing the basement, we found the farm and listed our house for sale. By that point we had renovated it top to bottom. Within three weeks, our the house was sold.

Our first house was a good testing ground for Matt and me and prepared us for our forever house. Where, as always, the renovations continue.

Battling the dungeon

On the quest to renovate the basement at our first house, Matt and I dove in with our characteristic “go big” approach.

Everything that was in the basement came upstairs and was stacked in the dining, living and bed rooms making for a lovely “Hoarders” atmosphere.

Items from the basement stacked in the dining room

Downstairs, just like we would do a year later at the farm, we went back to the concrete. Buh-bye blue room.

Gutted basement
And farewell weird shelving area.

Gutted basement

We reframed. We rewired. We reinsulated.

Basement renovation

We drywalled. Lots of drywall, although not as much as last summer. Lots of taping. Lots of pasting.

Basement renovation

We laid new flooring, and we painted. We installed new trim, new shelving, new closet rods and doors.

Curious how it all turned out? Were we able to banish the dungeon?

Tune in next for the reveal.

Return to the dungeon

I mentioned last week how grateful I am not to be renovating a basement this summer for the first time in three years. You’re all familiar with last year’s long running reno. I thought some of you might be interested in seeing the first basement that Matt and I tackled together. This was at our first house about six months before we sold it.

Our first house was a little one and half story. It was a former rental property and hadn’t been very well maintained (are you sensing a pattern here?). Before we even moved in, we had done a lot of work to make it a home for us, and we continued to work on it for the next five years that we lived there. However, all of our renovations had stopped at the top of the basement staircase.

We didn’t usually let people go down there. It was not a very good reflection of our style.

At the bottom of the stairs, there was a makeshift built-in shelving area complete with a heat register and electrical outlet. Please note how the trim is falling off and the drywall (and shelving) stops halfway down the concrete pillar.

Ugly basement

There were two bedrooms where people actually slept before we moved in. One we called the blue room. It was covered in fake wood paneling that had been painted an eye searing shade of blue. We had added the shelving under the stairs to give us some temporary storage. The “closet” on the right wasn’t deep enough to hang a hanger.

Basement room painted blue

A view of the other side of the blue room. The hot water tank is behind this wall. Accessing it required unscrewing a section of the patchwork paneling. Note the uneven ceiling tiles, the ugly fluorescent light and the bath towels used as curtains (okay, those were our special touch).

Ugly basement

The other bedroom we termed the yellow room. This one was actually drywalled, but then painted an even worse shade than the blue room. Special features to note in this room, aside from the colour and the actual curtains, are the two heat registers within one foot of each other and the half carpet-half concrete floor.

Ugly basement painted yellow

Homey, no? Don’t you want to just move right in?

We were actively looking for our forever farm at this point, so we knew we had to do something about the basement before we could even think about listing our house for sale.

In the next post, I’ll show you exactly what we did.

Let us give thanks

Can you please join me in a moment of thanksgiving?

I am so exceedingly thankful that for the first summer in three years, we are not renovating a basement (ditto for the roof, not that we’ve done that more than once).

Instead, as temperatures soar outside (last week felt like mid-40s with the humidity), we are camped out in the coolness of our freshly renovated basement.

Relaxing in a cool basement

Now obviously, my reading nook could use a side table, an actual light fixture and some reupholstery. But you see, that would require getting up. And no one’s in the mood for that right now.

Wishing everyone a good weekend. The forecast here calls for… what else… some relaxing.

How to mend a torn window screen

In the category of better late than never, I’ve finally fixed our torn window screens.

Torn window screen

You may remember that one of the last jobs I completed on my fall to-do list (on the first day of winter, no less) was to remove all of the window screens so that I could clean and patch them over the winter.

So yeah. That didn’t happen.

Now June is here and I’d really like to open a window without inviting the local mosquito population inside. It was time to get on with mending the tears.

First I trimmed the ripped screen so that I had a regular shaped hole.

Square hole in a window screen

Then I cut a patch from my replacement screening. The patch should be about 1/4 inch bigger than the hole all the way around.

Patching a torn screen

Next I lined the patch up over the hole and sewed it in place. I used regular black polyester sewing thread and tacked the screening about every three holes.

Stitching a patch on ripped window screen

I stitched my way around the patch and when I got to the end I simply knotted the thread a couple of times.

The patch is not invisible, but it’s not very noticeable. Most important, it does the job of keeping the skeeters and other flying critters on the outside while letting the fresh air come through to the inside.

Patched window screen

I will take an open window over air conditioning whenever possible, so with the weather getting steadily warmer, the repaired screens are a cause for celebration for me.

How about you? Are you a fresh air lover or an air conditioning aficionado? Does anyone else have experience patching screens? I’m sure my method isn’t the only solution. What’s the mosquito population like where you are? We seem to have had a baby boom this year, so the screens are absolutely essential.

Why I love the local lumber mill

Maybe it’s because shopping carts and I don’t get along, and I like being able to pull my car right up to the aisle. Maybe it’s because I prefer shopping in the open air to under fluorescents. Maybe it’s because I always have questions and like it when someone has the answers. Whatever the reason, I love our local lumber mill.

Lumber yard

When I was buying the wood for our island countertop, I said in my first post that I went through nearly the whole pile looking for the straightest, cleanest boards possible. What I really should have said was that two guys from the yard crew at the lumber mill went through nearly the whole pile for me, letting me look at each individual board until I found the ones that I liked.

Then, they ran each of the boards through their big saw–twice–trimming the edges to my exact measurements. Oh and there was no charge for any of the cuts.

They loaded all of the lumber into my car, making sure that I had enough space to shift gears and see at least some of the traffic around me.

Lumber loaded into a small car

This is the experience every time I got to the lumber mill. Their staff is super knowledgeable and provides outstanding service.

Because they cater to contractors and not just DIYers, they have the answers and the materials that I need.

Have questions about what’s the best material for a particular project? They can talk me through it. Looking for enough baseboard in the profile I’ve chosen to trim the whole basement? They have job lot quantities in stock. Want shelving with the pre-finished square edge that matches my existing shelving? They carry it. Along with all of the nails, screws, tools, hardware and whatever else I might need.

There’s no wandering aisles trying to figure things out myself. I walk up to the counter, ask my questions, place my order and drive out to the yard. There someone finds exactly what I need, answers more of my questions and loads it into my car.

My one quibble with the local lumber mill is that often this loading happens first thing in the morning as, since they cater to contractors, they’re open 7:30 a.m. to 5 p.m. Most of my shopping tends to happen on my way to work, and I end up driving around all day with a pile of lumber stretching from the dashboard, across the passenger seat, through the back seat and into the trunk. Of course, this small inconvenience is outweighed by the convenience of getting exactly what I need, whatever the project.