Vegetable garden additions – Blackberries and more grapes

Vegetable garden covered in snow

I don’t know as gardening season ever really stops on the farm. Sure we’re not out in the garden every day like during the warmer weather (hello, -20 degree windchill and ice storm). But we’re thinking about the next season, monitoring our stores of vegetables and preserves, and enjoying the produce (curried butternut squash soup, yum).

But come February, I feel like it’s more socially acceptable to discuss gardening. I mean, we’re just 40 days away from spring, people. It’s comin’.

My plans for the garden this year are relatively modest compared to last year. Between our raised beds, trellises, hose and gate, the infrastructure is all in place.

The quadrant layout is working for us. So now I’m just thinking about how to fill those quadrants. (Reminder, here was last year’s plan).

Round garden plan for 2016

Top on my list is adding a few more perennials this year, and I’d love your input on what would work best.

You may remember that I tried to domesticate some wild black raspberries, and ended up ripping them out when they ran wild. So I have a row of raspberry trellis that’s empty. My established raspberries reproduce prolifically, so it would be easy to transplant some new canes into the empty row. But I’d love to try something different.

I’m come across Arapahoe blackberries. They’re supposed to be thornless, self-supporting (so not floppy like the wild raspberries), reasonably hardy for the Canadian climate and with smaller seeds.

Seed catalogues

The other addition I’m considering is more grapes. I’m a bit hesitant because I know nothing about grapes, and I’m not sure if the grapes I bought last year are going to be alive in the spring.

I bought eight vines last year, four red (Somerset) and four purple (Sovereign Coronation). In my mind, I’ve always considered 12–an even dozen–a nice number of grapes. Plus, I feel like four green would round out my collection.

Lakemont are supposed to be seedless, store well (my catalogue says “actually improves in cold storage”) and a “superior” table grape.

Anyone know anything about Lakemont or Arapahoes? Any other suggestions of berries or grapes to add to our garden?

How to renew your mortgage

The saga of renewing our mortgage is over. Thank goodness. This is one of the less fun parts of farm ownership.

But, it’s important.

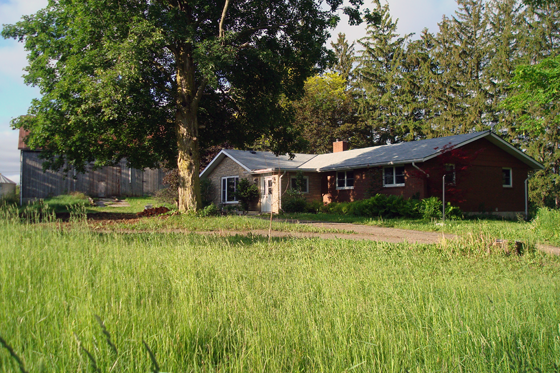
It’s because of careful financial planning that Matt and I were able to buy the farm in the first place. We stay on top of our finances and prioritize our mortgage to ensure we’re able to maintain the lifestyle that’s so important to us.

Farmhouse

Today I wanted to share a bit of our experience renewing our mortgage. Hopefully, there are a few lessons in here that might help others as well.

Start early

We were eligible to renew as of six months before the end of our mortgage term. It’s important to take advantage of this long lead time and not wait until the last minute.

Matt was watching the interest rate forecasts and suspected that the rates were going to go up, so he wanted to lock in as soon as possible. We also knew we would likely need time to negotiate the best deal.

Give yourself as much time as you can so that you’re not scrambling–and potentially paying more than you need to–at the end. I’ve also learned that rates are often lowest in the summer, so if you can work that into your timing you could have an advantage.

Organize your records

To renew, our lender needed up-to-date paperwork for our property taxes and insurance.

The credit union that holds our mortgage had gone through a merger in the last five years and changed its name as a result. We had to update our insurance to reflect their new name, which took time (much more time than it should have, but that’s just the one of the joys of home ownership).

Most cities will issue a tax certificate which shows the status of your property tax payments. Our city does this for a fee of about $60. For our credit union, our most recent tax bill showing it had been paid was sufficient.

If you’re going to transfer your mortgage to a different lender, you’ll likely need additional paperwork regarding your house, employment and income tax.

Negotiate for yourself

At our first renewal meeting at the credit union, they had little cards all around the office promoting a 2.69% interest rate. And then sitting in the meeting they offered us 2.99%. Ummm… what?

Even Baxter agreed that didn’t sound right.

Baxter at the bank

It turned out that the 2.69% was for new customers only. Matt, who knew I was about to lose my mind, was very careful not to look at me. Why do you not reward loyal, reliable customers?

After a conversation, our agent offered to put in a request to “head office” for 2.79%. I still wasn’t happy, but it was better than nothing.

Guess what rate was approved. 2.89%.

Matt’s reaction was, “Well, it’s better than what we’re paying now. And what if rates go up?”

I said, “Give me a week.”

I booked appointments at two other banks, gathered all of our paperwork (including extra paperwork about our personal financial situation) and went to work. In the end, I managed to secure two offers at 2.64%.

Because these companies weren’t familiar with the farm, we would have to go through an appraisal again. But both banks waived the fee.

Matt shared the emails with the new offers with the credit union—the written evidence was important. And… they matched the rate. Thank goodness.

Biggest lesson from this renewal process. Do not accept the first offer you receive. Work with your current lender. Engage a mortgage broker. Shop around to other lenders. Do everything you can to get the best deal for yourself.

While a quarter of a percent may not seem like a huge decrease, on hundreds of thousands of dollars over five years (or longer) every percent makes a difference.

Read your mortgage policy

Before you sign anything, read the paperwork—even the dense, legalese, policy parts. Understand what is expected of you and what flexibility exists for payments.

For Matt and me, being able to adjust our payments if needed and being able to make lump sum payments against the principle are important.

There have been some changes to our credit union’s policies, so it was important to understand how that would impact how we usually manage our mortgage.

Pay attention to your payments

Thanks to our lower interest rate, our new payments are much lower than they were before–or they could be. Matt and I have chosen to keep our payments at the same level, which means we’re putting more towards the principle than before–$63.80 every single week. That’s more than $3,300 extra that we’re taking off the principle every year, which means the farm will be completely ours that much sooner.

Consider your situation

Five years is a long time. Things may have changed since you first signed your mortgage. When renewing your mortgage think about where you’re at now in your life as well as what’s ahead and what you need.

Maybe interest rate isn’t most important to you. Maybe you want to change your payment amounts or timing. Maybe you’re ready to renovate and want to set aside money for that. Over the last five years, Matt and I have changed jobs, renovated, bought a new car. And who knows what’s ahead.

We’re confident that we’ve done our best to set up the new mortgage in the way that works the best for us and that we have the flexibility to adjust if we need to.

Anyone else have a mortgage story to share? What are your tips for negotiating with a financial institution? How do you balance lifestyle and finances?

Tips to create a stylish and dog-friendly home

I recently wrote an article for homify that combines my two loves–dogs and home decor. (My husband is another one of my loves, but that’s a post for another time).

I know that many of you are also dog lovers, so I thought I’d share my tips for creating a stylish and dog-friendly home. From dog beds (complete with a trio of super cute dachshunds) to dog showers, there’s a whole range of ideas–and cute puppy photos.

I’d love to hear what makes a dog-friendly home for you.

For many people, home isn’t home without a dog…

A dog-friendly home is one that is comfortable for both its human and animal occupants. There should be a balance of style and function and–good news–it’s easy to have both.

Read my tips.

What makes your home dog-friendly? What do you wish you had that would make your home friendlier? (For me, it’s definitely a dog shower in the mudroom).

How to encourage egg laying in the winter

Back in December, Sarah in Illinois shared some of the lessons she’s learned since adding laying chickens to her farm. In the post, she mentioned mentioned that their egg production had declined as winter set in. She had a few ideas to encourage more laying, and today she’s back to share what happened.

If you remember my post a couple months ago, I gave an update on the chickens and mentioned that their egg production had declined.

I thought that it was either from lack of daylight or cooler temperatures. I was willing to try to add some artificial daylight, but that I was not going to risk a barn fire by adding heat.

I am happy to report adding some light did the trick.

I went to the local home improvement store and purchased a light socket with metal shade. All you do is add a bulb and plug it in.

I took it a few steps further.

First, I chose an LED bulb. I am serious when I say that a barn fire is one of my worst fears, and I was going to take no chances in using a bulb that would get hot.

An LED did the trick. It produces almost no heat at all. I can rest my hand on the metal shield while it is on and there is no chance of me, or the chickens, getting burned.

As you can imagine with a traditional bulb there is no way I would be able to touch the shield, it would burn me instantly.

The second thing I did was to secure the fixture.

It came with a clamp to attach it where you need light. There is a good chance that it wouldn’t move, but I wanted to make sure it did not fall and rest in the straw in the bottom of the coop. So I ran a screw into the clamp after I had it where I wanted it.

No crazy chicken antics will cause the lamp to fall.

My final step was to add a timer. I have it set to come on every morning from 6 to 7 am and again from 4 to 8 pm.

After I had all of this in place I waited.

After about a week I found 2 eggs in the box.

And then a few days later I started getting 3 eggs a day.

I even had a bonus day yesterday where all 4 chickens laid an egg.

I can say that this project was a complete success, and I have no fear of burning our barn down.

I also have progress to report on my project goals that I listed in my last post.

One of my projects is to make over my Grandma’s Saint Francis statue.

I started by scraping off all loose paint. I did not intend to remove all the paint, only the paint that was loose and came off easily.

For the most part the concrete is in good shape but it has broken off of the base.

I am sure there are products meant for this type of project, but I chose to use what we had sitting around. We had a partial bag of thin-set mortar that we had used to install tile in our house. It sets up extremely hard, so I thought that once it is painted, it may work just fine.

I really don’t know about the longevity for this use, but I decided that it was worth a shot. I mixed some water and made it thick enough that I could apply it with a putty knife.

I knew that I wanted to add a couple layers instead of one thick layer so I purposely left the first layer bumpy instead of smooth so that the second layer will have something to attach to. I waited for it to dry and hoped that it would work.

24 hours after I added the thin-set to the statue, I started thinking that it is not going to work. I think the thin-set is too crumbly and will not hold up long term.

But that’s okay. I tried it, and I will try something else and report back how it goes.

Way to give things a try, Sarah. I’m glad that the chickens’ light worked so well. It’s great that you’re able to get fresh eggs again. I would miss those! Hopefully you’re able to find something that works for your Grandma’s statue too. 

Looking for robot vacuum recommendations

Vacuums are sucking up a lot of my thoughts these days. (Sorry. I couldn’t resist).

After much debate, we bought a Sebo canister vac several years ago, which works very well–when I use it.

I’m just not good at vacuuming, people. I don’t mean it’s beyond my ability. It’s just beyond my desire. There are approximately 8 million other things I’d rather do than vacuum.

So that means that dog hair, farm dirt, project dust (actual sawdust this week) accumulate. Our floors are regularly a disaster.

I long for a robot vacuum, but our Sebo was expensive. I feel like I can’t justify spending a not insignificant amount of money on another vacuum just because I’m lazy.

But then the universe started talking to me, sending me signs.

My sister got a Neato Robotics Botvac. (Isn’t that a great name?) And she loves it.

Neato Robotics Botvac

When I was at her house the other week, I spent some time following the vacuum around, watching it navigate the room and throwing things in front of it just to watch it pick them up. It did. (Aren’t I an amazing guest? You totally want me to come to your house, don’t you?)

John and Sherry at Young House Love talked about how their Roomba didn’t live up to their expectations in a recent podcast.

And then Thalita at The Learner Observer posted about her crumb-fighting, dog-hair-sucking sidekick bObi.

So I’m putting it out there to the universe. Anyone have any opinions on robot vacuums? Any recommendations on one that can handle an incredibly sheddy dog as well as farm dirt and a household under near constant renovation? Is it worth the investment? What chores do you struggle with?

Odds and sods

New buffalo check plaid skirt and shopping with my dog at Rona

Today, I have another odds and sods post for you, where I bundle together some of the little things that are happening around the farm and some things that I’ve seen out on the worldwide web.

  • I don’t shop at Rona a whole lot, but I ended up there last Friday, and they may become my favourite store because they allow dogs! I love stores that allow dogs–even though Baxter doesn’t quite have the energy for shopping.
  • Before I tore my office completely apart, I managed to sew a skirt that’s been in my head for a looooong time. Flannel buffalo check laid on the bias (AKA diagonal). It’s a little bit country and a whole lot comfortable for the winter.
  • We’re at an exciting time in our family. Nephew #1 has his driver’s license–so proud of him. Nephew #3 turned 3 a week ago. Nephew #5 should arrive in the next week or so–so extremely excited. Niece #1 arrives in a couple of months. Oh and Matt and I celebrated our 9th wedding anniversary yesterday and 19 years together this month. Craziness.
  • Alexandra Franzen is a writer whose posts inspire me. This one for the “the hard worker, the un-complainer, the tenacious warrior, grinding and slogging and striving to create something beautiful in this world” was a particularly motivating way to start the year.
  • Other words that are inspiring me right now: “No, we don’t do busy.
  • Thalita, who runs The Learned Observer, is someone I connected with online and then met in person a few years ago at Blog Podium. Now she’s a super busy Work At Home Mom of twin boys and is embarking on a new career as full-time blogger. The work that goes into making your dreams come true is significant, and I’m so impressed by what she’s been able to accomplish. I’m loving following her journey and cheering her on virtually.

I am more than ready for this weekend.

It’s been a bit of a tough week at the day job, with 26 meetings in the past four days and lots of extra hours to get at least a little bit of work done. I am grateful that I’m still on a four-day workweek schedule, so I’m willing to put in the extra time to get that balance.

However, I am looking forward to a few days of hiking, getting back to painting the furniture for my office, sleeping in, snacking and spending time with Matt at our farm.

What’s inspiring you this week? What have you been up to? What are your plans for the weekend?

Office oddities

My office,which we’re making over, is an odd little room. It is by far the smallest of our bedrooms. It has a weird floorplan. And it’s also apparently haunted. Yup. You read that right.

Here is a floorplan that is mostly to scale. Note the off-centre window and light. The weird little niche just inside the door. The pocket door that leads into our bedroom (which comes in handy as the switch for the second light is in our bedroom).

Office floorplan

When we scraped the ceiling, we uncovered evidence of earlier walls, and Matt came up with the best explanation I’ve heard so far to explain the odd layout.

It appears that at one time the room was divided roughly in two. Matt’s theory is that half the room served as a large pantry for the kitchen, and the other half was a big walk-in closet off the bedroom. (You can kind of see the lines on the ceiling around the dangling light bulb).

Evidence of old walls on the ceiling

The closet theory explains why there are three full-length mirrors in this one little room–even the pocket door is mirrored. As dated as the mirrors are, they come in handy when I’m sewing and want to see how things fit, so they will be staying.

My office before

I’m doing my best to make the layout work for me. You may remember that our long term plan is for this room to become the foyer when we relocate the front door to the house. So I don’t want to do any major renovations that will be ripped out down the road.

I think I’ve come up with a furniture plan that will work.

Office furniture layout

I figured out how to make use of the tiny niche a few years ago when I set it up as a command centre with a tall narrow dresser, bulletin board and our calendar.

Beside the pocket door, there’s a track light on the ceiling. This makes that wall the best location for my desk.

I bought the china cabinet specifically because it was the exact dimensions to fit on the wide side of the window. The cabinet could also go just inside the door (where our filing cabinet is currently located). However, I feel like a tall piece of furniture might crowd the entryway too much.

I’m hoping that all of the changes will exorcise the ghost in the office.

When we were scraping the ceiling, the room got a little humid. The words “Raven Room” appeared in the steam on the window.

Raven room

So very, very odd.

Do you have an odd room at your house? How about a haunted room? How would you lay out the furniture in this room?

Makeover plans for my office

Our first project of the year is well underway, so it’s past time for me to catch you up. As I mentioned in my Home Goals 2017 last week, we are redoing the last of our three bedrooms, the room that is going to be my office.

My office before

This room has been my office since we moved here, but it’s never been set up as a functional office. It had a filing cabinet to hold our paperwork and a desk (left by the previous owners), which held my sewing machine. That was pretty much it.

Along the way, we added furniture that we weren’t using elsewhere, which gave me a place to store magazines and patterns. But most of my fabric, office supplies and knickknacks were still in the cardboard boxes that I’d packed when we moved from our first house–almost five years ago.

Having a pretty, well-organized, high-functioning room where I can craft, sew, write and work is important to me, and we’re finally going to make it happen.

Here is some of my inspiration.

And here’s our to-do list and an update on where we’re at so far.

  • Scrape ceiling – It has become a tradition that over the Christmas holidays we scrape a ceiling. This year was no different.
  • Paint ceiling, trim and walls – With the ceiling scraped, everything could be painted. The trim, ceiling and closet look so fresh with a coat of white and the walls are a fun dark turquoise.
  • Add new shelf to closet – I bought the shelf on Friday. I just need to trim it to fit.
  • Redo china cabinet and desk – I’ve stripped and restained the tops of the desk and the cabinet and primed the bases. I’m hoping to continue painting this week.
  • Reupholster slipper chair – The legs of the chair got a beautiful dark stain while I was doing the desk and the cabinet. I have the fabric. I need some foam. Then I’ll teach myself upholstery.
  • Reupholster ironing board – Because a primary activity of the office is sewing, I have an ironing board in the room. It needs a new cover to match the new office.
  • Unpack all of my boxes and decorate – Oh I am so excited to do this finally.

I don’t have any pretty photos yet. Here are some progress shots.

First up, the guest room, which is holding all of the things that used to be in my office. Oy vey. My poor pretty guest room. I hope no one wants to come visit for a little while.

Clutter in the guest room

Matt doing the messy work of scraping the ceiling.

Matt scraping the stippled ceiling

Where we’re at as of yesterday afternoon. Beautiful smooth ceiling, bright trim, oh so purty turquoise walls… and a makeshift paint shop.

Progress in the office

I do not like refinishing furniture indoors, but it’s a necessity in January in Canada. My freshly painted walls were so dusty, and I don’t have enough space to lay out all of the pieces that need painted. Argh. This stage is going to take a little while, but I’m feeling good about the progress we’ve made so far.

What do you think about the progress and plans? Do you have an office? What do you use your office for? How do you balance the pretty and the function in a work space?

A walk by the creek

Creek flowing over rocks

Care to join me on an evening walk along the creek?

We’ll start at the front of the property where water from farms to the north of us drains onto our land. It flows along the border of the front field, cuts under the driveway and then picks up another stream. From here it snakes along the perimeter of the corner field following the edge of our pine forest.

Creek

Partway along, we come to an old bridge that once connected the field to the forest. I discovered this bridge on one of my first rambles in the early months of owning the farm. I remember how excited I was, although I have yet to attempt to cross the bridge.

Dilapidated bridge

Some day, we may repair the bridge and establish some pathways through the forest.

Dilapidated bridge

As we near the mouth of the pond, the creek drops, swirling under trees, around boulders and over rocks.

Creek flowing over rocks

Unusual weather for January in Canada–five degrees and day after day of rain this week–has the water high and flowing fast, yet ice still coats the grass along the shore.


Fast flowing water in the creek

We end our ramble at the pond where the ice is melting in this January thaw.

Pond during a January thaw

Just one small problem, we’re on the wrong side of the creek and the bridge is out. Be careful getting home. 🙂

Have a great weekend everyone. May I suggest you go for a ramble?

Building a garage in a barn

Have I mentioned how much I want a garage? So far this week we’ve started the days with heavy frost that took forever to scrape off the windshield and freezing rain that coated everything in ice. More rain is forecast this week, which means I will get wet coming and going from my car to the house.

Sarah in Illinois recently built a garage with a bit of help from family. She is here today to share the process and an extra special feature that makes it even more useful.

About a year ago, on a Friday night, Steve and I were laying underneath my SUV in our freezing cold garage. A few days earlier my transmission had went out, and since Steve has some experience as a mechanic and has no fear of tearing things apart and putting them back together, we decided to save some money by removing it and reinstalling a used transmission by ourselves.

Except things weren’t going well.

We were tired, sore, cold and frustrated. I drew the line when I laid my head down in a puddle of transmission fluid. Steve and I looked at each other, and he said, “I will own a car lift.” At the time I agreed but knew that lifts were really expensive, and we really didn’t have a good place to install one.

A couple months went by and a customer ordered a new car lift from the shop where I work. It is not often that we sell one, and I got to talking to him about his old lift. He said that it still worked. It just wasn’t working for him anymore. I grabbed my phone and called Steve and gave him the customer’s phone number. Two days later we owned a used car lift.

Now for the important part. Where the heck were we going to put it?

We have a large pole barn on our property, but it has a dirt and gravel floor. In one corner the previous owner had built a woodshop with a small concrete pad. We decided to extend this pad and basically make a garage inside a small part of the pole barn.

This picture is showing the woodshop inside the pole barn with two walls removed.

For several weeks we spent evenings and weekends tearing out two of the old walls of the woodshop and framing up for a concrete pad. When we had the framing ready Steve, my Dad and brother took a day off work and poured and finished the pad.

I am so thankful that my family is so helpful and knowledgeable with projects like that. They ended up saving us quite a bit of money.

Once the pad was cured, it was time to build the new walls.

We borrowed some scaffolding to help with the new tall walls and to install some insulation board on the ceiling.

Steve and I believe that having good insulation is very important in any building project. What we have chosen to put on the ceiling is not ideal, but we have limited options with a tin roof. We seriously considered spray-on foam insulation, and honestly it’s probably what we should have done. But right now we are settling with what we have.

To install the vertical supports of the lift, Steve and my dad used concrete anchor bolts. They drilled holes using a hammer drill then inserted the sleeve and bolt into the hole. When the bolt was tightened it expanded to hold tight to the concrete.

One of the final steps was to install an overhead door. The pole barn has huge sliding doors on two sides, but this wasn’t handy for the new garage. So once again family came in very useful. My dad is known for not throwing things away in case he needs it someday. Well, it worked out for us. He had all of the parts and pieces for an overhead door.

We had to frame in a smaller opening, and then Steve, my Dad and my stepson took some of the tin off of the sliding door and covered the new smaller opening.

This week Steve has been insulating the walls. We still want to add another overhead door and of course he has to fill it with all of his tools and supplies. But basically we are going to call this project done.

And I have one happy hubby!

Great job, Sarah and family. I love that you did this all yourselves. Your family sounds very helpful and very handy. How great that your Dad had the door already! It looks like a great space for you and Steve. That lift is pretty cool.