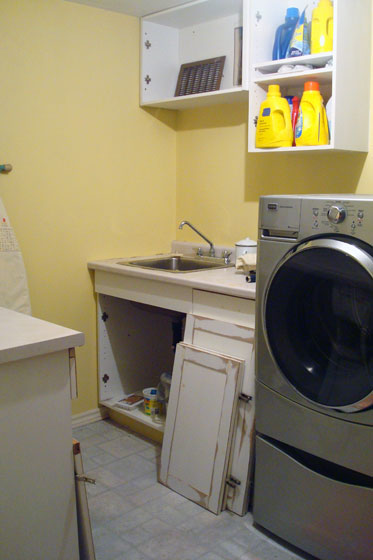
Yes, the laundry room makeover has begun. It kind of snuck up on me, but I can not tell you how excited I am by this project. I’ll be back on Monday with details.
Hope you have a great weekend. I’ll be in my laundry room and lovin’ it!
Yes, the laundry room makeover has begun. It kind of snuck up on me, but I can not tell you how excited I am by this project. I’ll be back on Monday with details.
Hope you have a great weekend. I’ll be in my laundry room and lovin’ it!
First post of the month means it’s time for another project. But I have something different for you this time around. You see, September’s my birthday month, so I’ve decided to give myself a break.
Of course, there’s still lots to do around here, and since I actually like to spend my time doing things, I will keep myself busy.
Finishing my bookshelves is at the top of the wishlist. My birthday was always my rough deadline to have the shelves completely set up and all of my books unpacked. Having my books back will be like reconnecting with old friends. I think that’s a pretty good gift to give to myself.

We made some really good progress this weekend. Matt and I painted the living room. The outer frames of the bookshelves are all primed, and I should be able to get two coats of paint on them today. The shelves themselves will come this week.

So despite this being an unlabour month, I was pretty productive this Labour Day weekend.
What were you up to this weekend? What are your plans for September?
Take a journey with me back to February, would you?
Don’t worry. You don’t have to actually go back to the time of snow and cold and dark.
Just remember back in February when we painted the foyer, kitchen and hallway.
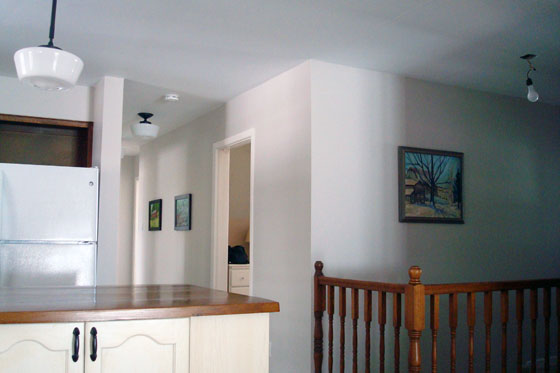
Now let’s go back a little bit further to January when I posted my 2014 Home Goals, and I said I wasn’t going to paint the living room this year.
Well, I lied… kind of.
The kitchen, hall, foyer and living room all run together, so I planned to paint them all the same colour. Knowing that I wanted to set up my bookshelves this year, back in February Matt and I painted one wall of the living room–the wall I planned to put the bookshelves on. I figured once my shelves were set up and full of books, I wouldn’t want to take everything down again to paint behind them.
So the living room has looked a little bit like this for the past six months. Stylish, I know.
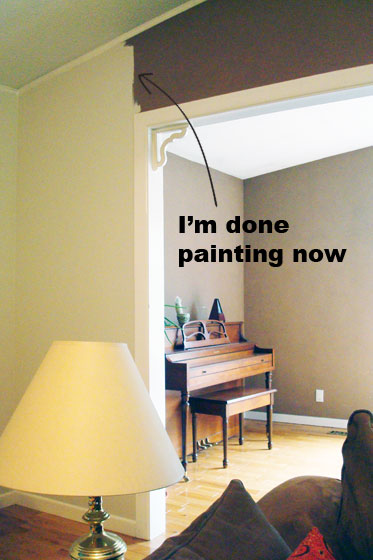
Well, the thing is, when I started the bookshelf makeover this month, I realized that if I put the shelves where I originally planned, we wouldn’t have room to walk around the couch and into the dining room. I decided to put them on the opposite wall. A wall which was unpainted. Whoopsie-doodle.
So my August project report goes something like this.
Here’s some evidence that I did actually do some work on the bookshelves.

Despite my progress, the bookshelves are kind of on hold right now. They’re all set up in the guest room ready to be painted. However, I’ve shifted my attention to the living room.
The prep process is exactly the same as what we had to go through for the hallway:
The living room is both simple and complicated to paint. Complicated because it’s a vaulted ceiling that requires a big ladder to reach the top of the wall. Simple because on the two walls I’m painting, there is an archway on one and a patio door on the other. The actual wall space is minimal.
And yes, you read that correctly. I am painting only two walls. Of the four walls in the living room one is already painted (as you saw) and the other contains the fireplace. I am not painting around the fireplace until we’re done whatever we do with the fireplace.
So my August project is another bit of a fail. I did manage to get the TV stand completely finished though. I’ve put it in place, even though we’ll likely have to move it when we paint. I had to finish something this month.

What did you accomplish this month? Have you ever gotten mid-way through a project and only to find your to-do list has grown?
The question of the day was can I strip paint off of melamine? The answer was kind of.
This is not my favourite piece of furniture. (Not the TV. I love my TV. My problem’s with the TV stand.)

I attempted to build it when we lived at our old house. We had gotten a new TV. We needed a TV stand. I had some white melamine left over. So I sliced it up and went to work.
Cutting went fine.
Assembling not so much.
I didn’t have the right tools or fasteners and as my rocky, shaky shelf collapsed for about the fifth time, I called my Dad.
My Dad and I knocked it together in no time, but when I painted it I ran into trouble again.
My roller was disintegrating as I painted, and I ended up with all kinds of bits stuck to my shelf. It didn’t improve with time. The dark brown paint showed dust really easily, and when I tried to wipe it down, the dust just got caught in the flecks and it looked even worse. Believe it or not, this is the bottom shelf after I’d wiped it down.

I decided to include the TV stand as part of my bookshelf makeover this month. I’m not planning to strip the paint off of all the bookshelves, but the finish on the TV stand was just too awful. I needed a fresh start.
I went with my usual chemical stripper, and it worked pretty well. The stripper made quick work of the paint, even though it’s a heavy-duty oil-based enamel. The stripper also took off the white coating on the melamine. I’m not too worried because I’m going to be repainting, but the finish was a little bit rough. I went over it with my sander to smooth everything out. It may not look great, but I think it’s going to be okay.

This week my Dad and I are tackling the rest of the shelves. We’ll be cutting down, putting back together and adding trim. Painting will come soon after. The TV stand should be looking much better the next time you see it. Maybe I’ll even like it by that point.
Have you ever tried to take paint off of melamine? Have you ever painted melamine in the first place? It’s not that hard to do… as long as your equipment is half decent. Has anyone else run into problems with disintegrating rollers? Do you have a piece of furniture that you don’t love?
I have two projects I wanted to complete this summer. First is getting rid of the stippled ceiling in the bedroom. Second is redoing my bookshelves.
Given my lack of success last month with the ceiling, I think both of these tasks are going on the August list.
You’ve already heard about the ceiling, so how about a little bit about the bookshelves?

(Yes, this corner has looked like this since we moved in more than two years ago).
My Dad and I made these bookshelves for our first house. They’re shallow, so they don’t take up much space. They have adjustable shelves, which is handy. They’re going to work well for us here with just a few tweaks.
First on the list is cutting down one of the shelves. It’s twice as deep as the others because it held our TV back when it was a giant square box. I figure I can get two bookshelves out of this one.
Second on the list is putting another bookshelf back together. It was damaged in our move and is pretty wobbly.
Then, I plan to add some trim and paint everything white.
I’ll replace the adjustable shelving tracks with white ones and set the shelves in place.
Then it’s on to the best part: loading the shelves.
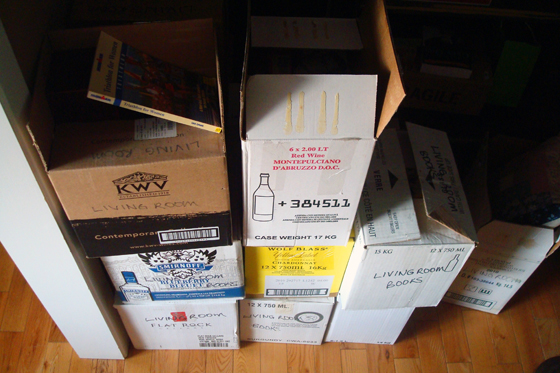
My books have been packed away for more than two and a half years. I want them back.
So July’s project was my biggest failure yet. Remember that dirty bumpy stippled ceiling in the guest room/soon-to-be master bedroom?

Yeah. It’s still there.
The week that I was planning to start operation popcorn, Kate posted about removing the stipple ceiling in the flip she and her husband are working on. She mentioned doing an asbestos test before she started. Our house is built the era where asbestos might have been used, so I thought a test sounded like a good idea.
However, finding a test kit was harder than expected. It seems home tests are an American thing. I ended up finding one online. So the extent of my progress this month is a credit card charge and my Dad’s drywall sander sitting in a corner of the guest room. 😦 (Please note as well the light switches behind the door. Really convenient.)

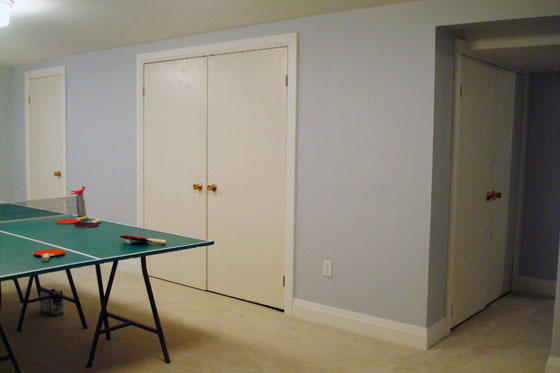
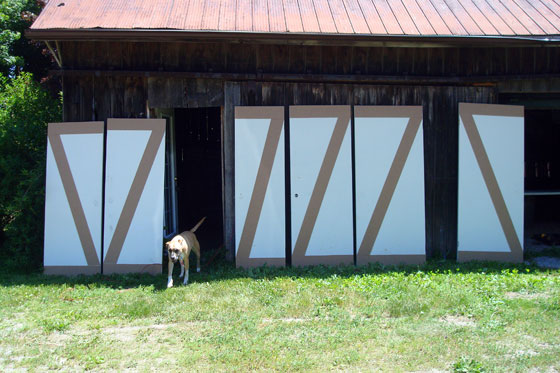
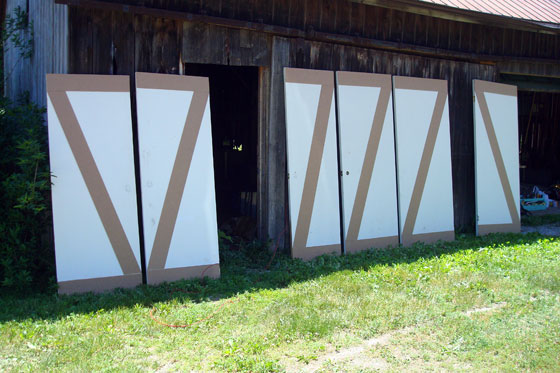
Wanna see some actual progress? Let’s look at some other doors instead.
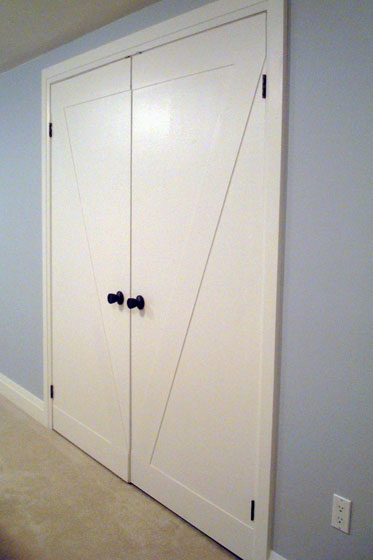
Hello basement barn doors.

Here’s the before picture just for reference.
Yes, redoing the doors was June’s project, but the painting was left until July. It must have been something about this month because, like with the stippled ceiling, the final stages of painting and hanging the doors didn’t go smoothly.
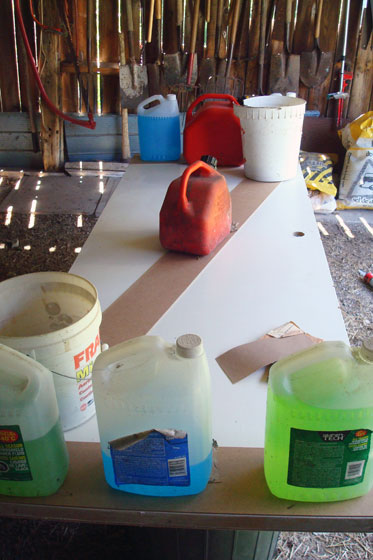
For painting, I planned to use my Dad’s sprayer… or rather I planned to have Matt use my Dad’s sprayer. Well, the air compressor conked out, so spraying was a no go. So much for all of the time we spent tarping the driveshed.
Our mechanical difficulties are totally on me. I was the one who set up the air compressor. Earlier the same day I’d killed the push mower, so I obviously had a hex working when it came to mechanical objects.
Painting became a team effort as Matt rolled and I brushed. Soooooo sloooooow.

Installing the doors turned out to be another headache. Only five out of the nine doors that we made over fit smoothly back in place. Somehow, two doors grew so that they were too fat for their openings. The closet door that we’d accidentally put the trim on the wrong side wouldn’t close because the trim hit the doorstop (I don’t know why I didn’t realize this would be a problem). The best one was discovering another door where I’d put the Z on the backside. No idea how I missed this. My mistake left the completely flat slab door facing out into the room–exactly the situation I was trying to correct.
Ugh. I was very frustrated.
It took a few hours of work spread over a few days to fix my mess ups, including repainting. Double ugh.
Matt was very patient, installing and removing the doors multiple times as I tested the fit.
Finally, all of the doors fit, swung smoothly and closed properly.
I installed the old hardware that I’d ORBed, and I called this one done.

The Z detail is subtle–the strips are only about an eighth of an inch thick–but I think it’s a really nice touch. Our barn doors are absolutely a lot more interesting than the flat slab doors. Plus they fit really well in our farm setting.

Issues aside, this is a pretty easy update–and much, much more affordable than buying nine new doors. It would have been even cheaper if I hadn’t bought all new hinges. All in, this makeover cost less than $200 (although I did use glue and nails that I already had):
Panels (two sheets of hardboard cut into 6-inch strips): $18.53
Hinges (Stanley Home Designs in Egyptian bronze-I couldn’t find the exact version online, but this one is close although a little more expense): $96.39
Paint (Benjamin Moore Cloud White in the pearl finish): $59.67
Spray paint (Rustoleum Oil Rubbed Bronze): $11.28
Total: $185.87 (just over $20 per door)
Our master bedroom makeover may not have started, but our basement makeover came a lot closer to finally being finished.
Let’s just not discuss that the basement was summer 2012’s project.
Not to alarm anyone, but we’re halfway through the year. (Sorry. Tempus fugit.)
It’s been nearly six months since I posted my home goals for 2014. Time for a mid-year performance review.
I had six projects on my list. Here’s how I’ve done so far.
1. Paint the main floor hallway and kitchen.
Big fat done on task number one. Matt and I knocked this one out in February.
2. Laundry room.
I haven’t started this one yet. I figure it will be a good fall project when I don’t want to/can’t work outside anymore. Besides, I can’t start anything until Matt digs out the foundation wall and fixes the basement leak. Hello summer honey-do list.
3. Master bedroom.
For the most part, this is another fall project. However, prep starts this month with removing the popcorn ceiling.
4. Furniture.
I’ve done fairly well in this department.

I have a few more pieces that I’m still on the lookout to buy or make. Top on the list is refreshing my bookshelves and the living room TV stand. My books have been packed away for more than two years. I want them back.
5. Living room fireplace.
Hope still springs eternal. The fireplace will be redone some day. Whether that day is this year depends solely on how much we’re able to rebuild our post-solar bank accounts.
6. Landscaping.

The pond shore is even more overgrown than last year and is pretty much inaccessible. Since this is my favourite part of the property, that is a bit of a downer. I’m willing to cut my losses on the pond this year, but I’m still hoping I’ll be able to clear and fence the vegetable garden before the end of the year.
And that brings us to the bottom of this year’s original goals.
However, there are a few things we’ve done beyond this list.
Obviously, the solar panels are a pretty massive project.

We’re also revisiting the basement, finishing off the reading nook, adding the ping pong table and making over the doors (in progress).
I’ve had a bit more success this year staying on task thanks to the monthly projects. Thanks as well to all of you for your encouragement along the way. It’s nice to look back and see that I’ve actually made some progress. We have half a year to go, and I have a bit more work to do yet, but I think I’m on the right track.
Have you ever given yourself a mid-year performance review? Who else feels like time is flying by? Is there anything you’d like to accomplish over the rest of the year?
You know those things that you have to do, want to do, but don’t really want to do? That’s this month’s project.
The plan is to start our master bedroom makeover. Step one is remove the popcorn ceiling (the fan’s on the list too).
I’ve been saving this project until I could open the windows, as there is likely to be a bit of dust and mess.
What are you up to this July? Do you have any tips for removing stippled ceilings? In the basement, I scraped some and sanded others. Sanding’s way messier, but I got a nice smooth finish and had to do less patching.
It’s not quite the end of the month, but I’m calling it close enough. Time for an update on how I did on June’s project. You may recall that the plan was to update the boring slab doors in our basement with some trim.
Here’s where we’re at:
A plastic bag full of old hardware.

And seven doors trimmed out. (I know there’s only six pictured here, but trust that the seventh one is laying in the driveshed with the trim in place. To make it up to you, I’ll give you a cute puppy instead.)
My timelines shifted a little bit (i.e. my bias to procrastinate came out), but I’m not too far off schedule. Here are the details of how the update went down.
1. Figure out design for the doors. By June 6. Done June 10
As you can see, I decide to go with a basic Z (that’s a Canadian ‘zed’). It’s a classic barn door motif for a reason. Plus, I was able to keep it simple and lay out my strips so they don’t interfere with the door knobs or hinges.
2. Buy material (and hopefully the store staff will cut it into strips for me). By June 13. Done June 13.
A very accommodating (if slightly math challenged) associate at Home Depot along with his beautiful panel saw ripped two sheets of hardboard into 6-inch strips for me. Thank goodness it was a quiet Friday night at the store.
3. Cut strips (if I have to). By June 14. Non-issue.
4. Remove doors. June 14/15. Done June 21.
My Dad came over and helped me get back on track last weekend. He popped all of hinge pins, and I schlepped the doors upstairs.
5. Remove hardware. June 14/15. Done June 22.
A lot of the handles were dummies, and it took me a few minutes to figure out how to detach them. This video was helpful, even though my handles didn’t slide off nearly as easily. I got them eventually.
6. Trim the bottom of the door to the electrical panel closet (since it rubs on the carpet). June 21/22. Done June 21.
No matter how much I practice, I still can’t cut as straight a line with my circular saw as my Dad does.
7. Install strips on the doors. June 21/22. Done June 21.
It took my Dad and me just two hours to add the panels to all seven doors. Easy-peasy (except for the door where we put the strips on the inside (closet side) of the door, hence only six doors in the picture below. Oops.)
To attach the panels to the doors, we put a smear of carpenter’s glue on the back of each strip and then tacked it with the nail gun. We let the doors sit for about 24 hours, and then I filled all of the nail holes and joints with wood filler and sanded it smooth.
I was on my own to fix the mess-up on the closet door. Since the nail gun went home with my Dad, I used construction adhesive on the panels and weighted them down with everything I could find in the driveshed.
I’ll be interested to see if one method holds up better than another. I sincerely hope that no matter what the panels stay securely in place.
8. Buy new ORB hinges. By June 27. Done June 25.
Upgrading the hinges is the biggest expense on this project. I figure I’ve saved everywhere else, so I can spend a little bit to get exactly what I want. The cost for 20 new hinges is still less than $100, so it wasn’t a huge splurge.
There are a few things left to do before this door makeover is complete, so here’s the plan for the final tasks and June’s final four days:
9. Paint the door jambs – By June 27
I haven’t started painting, so this task will not be done today. It should be an easy weekend project though.
10. Spray paint old knobs ORB – By June 29
Good weather is forecast for this weekend, so I’m planning to set up a spray paint station outside.
11. Paint the doors – Not my problem.
You might recall my plan is to have Matt paint the doors. Well, he starts summer holidays this afternoon. Happy holidays, honey.
Do you have any last minute projects you’re hoping to knock out this weekend?
June’s project might seem a bit unexpected. Weather has finally turned nice. Summer is almost here. Now is the time to be working outside.
However, this month, I’m going to turn my attention back inside to an area you haven’t seen too much of in a little while… the basement. The basement renovation was the big (all-consuming) project for Year One. That was not last summer, but the summer before. As with any renovation, there are still some finishing touches yet to be completed, even two years later.
This month’s project is the basement doors. There are 10 doors in the basement. Two of them are standard colonial style. The other eight (five of which you see below) are basic slab doors. Boooooooring.
All of the doors need to be painted. Smudges, scratches and yellowed paint make them look pretty shabby, especially next to our nice white trim.

Even more than paint, the slab doors need an injection of personality. I think their personality should be a little bit country, so I’m taking inspiration from barn doors.
A simple raised Z or X detail would be easy to apply, wouldn’t interfere with the hinges or knobs and would fulfill my interior design philosophy that every room needs at least one rustic element.
So the plan for this month is as follows:
You’ll notice that actually painting the doors and rehanging them are absent from this list. This is because my secret plan is to get the doors ready to paint, but then pass them on to Matt. He painted all of the doors in our last house, and I think it would be good to continue the tradition. Don’t you?
This probably is more of a one week project, rather than a one month. However, stretching it out will give me a chance to do some work outside still. It would be hard for me to spend the whole month of June indoors.
Have you ever dressed up basic doors? Are you on board with the barn door trend? What’s on your to-do list for June?

