Country style guest room before and after

The day is finally here. You’ve seen sneak peaks already, but today you see the whole thing–the brand new guest room.

Let’s start with the before. Going way back into the archives, here’s what the room looked like on day 1 when the farm became ours. A herd of dust bunnies all over the floor and dirty valances on the windows.

Guest room before

Look closer at the windows and you’ll see the extent of the decorating in this space–sparkly butterfly stickers. Unfortunately, no more my style than the curtains.

Stickers on the window in the guest room

We cleaned up the dust bunnies, removed the valances, kept the stickers and called this our master bedroom for our first three years. When we moved our master bedroom across the hall, this became a guest bedroom. But it wasn’t the most welcoming space.

Guestroom before

I found this photo for my inspiration.

And I came up with a pretty simple to-do list:

  • Scrape the stippled ceiling
  • Paint the ceiling, walls and trim
  • Replace the light fixture
  • Make window treatments
  • Refinish the desk chair
  • Strip the paint off the metal bedframe (and maybe repaint)
  • Decorate and personalize

Ready to see where we ended up?

Robin's egg blue country guest room

Robin's egg blue country guest room

Robin's egg blue country guest room

Robin's egg blue country guest room

Robin's egg blue country guest room

What do you think? Want to come for a visit? I confess, I’m in love with the way this turned out.

Next week I’ll share the details of what’s in the room. Hint, the sparkly stickers didn’t make it.

Deep thoughts on DIY from the dog

I’m excited to share that I’m now a regular contributor to ThatMutt.com. This gives me an outlet to write about dog training, care and of course my favourite dude, Baxter. You can read all of my posts at ThatMutt here. My latest post went up on earlier this week. A slight variation is below.

“I’d help you put up those curtain rods, but I don’t have a drill.”

Uh-huh? What about no thumbs, no vertical reach and a tendency to spend most of your time asleep, dude?

Baxter installing curtain rods

“You think a paintbrush makes up for not giving me a drill? This pooch likes power tools, lady.”

Baxter and his paintbrush

“Oh, and you made fun of my thumbs and my height. You’re on your own for painting that mirror. This is what I think of your paintbrush.”

Baxter avoiding painting

“Ahhhh… dreamland, where doggies have drills… and thumbs.”

Baxter dreaming of not painting

With Baxter’s help (or perhaps despite it), the guest room is now done. The reveal is coming up next.

Let’s get vertical

In the words of organizing guru Olivia Newton John,

Let’s get vertical, vertical
I wanna get vertical
Let me hear your closet talk

That’s not how it goes?

That’s how it went in the closet under the stairs… and it’s fabulous.

Building shelves in this closet was one of my home goals for this year.

We have a great storage space, but without shelves it was just a pile.

Messy closet

Disorganized closet

Confession, I hadn’t even put away our Christmas decorations because I didn’t want to go to the work of digging through the pile to find the storage bins.

But no longer.

Building shelves in the closet under the stairs

Christmas is tucked away, along with camping gear, electronics, artwork. There’s even a place for the vacuum and folding chairs.

Building shelves in the closet under the stairs

I used my very simple technique of affixing cleats to the wall (I used 1x3s) and then putting pre-finished white melamine shelves on top. The wrinkle with this closet was the stairs. I could only put the cleats on the back and one side wall, so I needed to find another way to support the end of the shelves that tucked under the stairs.

A few 2×3 braces screwed into the stairs solved that problem.

Building shelves in the closet under the stairs

Because I went vertical, we can fit a tonne of stuff in here. In fact, we have more than a shelf and a half empty–room to grow!

I think my favourite part is that I have a nook that perfectly fits the vacuum. Some mail organizers on the wall hold alternate attachments and extra bags.

Storing the vacuum and its attachments

Sturdy hooks hold our folding chairs and little step stool.

Store folding chairs by hanging them on the wall

And there’s still room to walk beside the shelves and access everything even at the far end.

Sing it with me, people. Let’s get vertical, vertical…

No till vegetable gardening

The no till philosophy has gained traction in farming. The more I learn about vegetable gardening, I’m realizing no till also applies on a smaller scale.

If you’re not familiar with no till, it basically means undisturbed soil is healthier soil.

Our experience with our vegetable garden last year really brought this home for me. We built the garden in an area that hadn’t been touched–at all–the whole time we’ve owned the farm. I don’t know how long it had been abandoned before then.

Longe ring

Inside the fence, grass and weeds grew as high as they wanted. Every fall they died. Over the winter and spring, the dead grass was matted down by snow and rain. New growth sprouted in the spring and grew high over the summer. Rooted in the fertile soil, the new sprouts fed on the previous year’s plants which were slowly decomposing around them.

When we cleared the ring and planted vegetables in place of the weeds and grass, the vegetables went crazy. They sucked up all of the nutrients from the soil and were super productive.

Vegetable garden harvest

As the season went on and we harvested more and more from the garden, I realized that if I wanted to continue this productivity in future years, I was going to have to focus on the soil.

I’ve heard other gardeners say that gardening isn’t about growing plants. It’s about growing soil.

So that’s why I started a compost bin for all of our kitchen scraps and I spent three weeks spreading a thick layer of manure over the whole garden at the end of the growing season.

Manure in the garden

That’s also why I’m contemplating going no till.

I’m sure this isn’t entirely accurate, but I have this circle of life idea playing in my head. Whatever nutrients the plants take from the soil as they grow are returned to the soil as the plant decomposes (aside from the fruit and vegetables that we eat, of course). So leaving everything untouched and in place means we have complete soil, not deficient in any element.

Last year, I was quite excited to get our hand-me-down rototiller. But the more I learn about gardening, the more I wonder if we should be using it.

Matt and I tilling the garden

I’ve read a bit about the deep mulch method. It’s supposed to be good for weed control, retaining moisture and also for returning nutrients to the soil. (See The Prairie Homestead and Reformation Acres for some info).

We already have a deep layer of straw on the garden thanks to the manure spreading, so maybe we can build on that. My plan is to work towards something like the raised row method from Old Word Garden Farms.

Anyone have experience with no till or mulch gardening? Aside from the health of our soil, my biggest concern is weeds. Any tips for dealing with weeds?

Keeping score

I feel like I’ve crossed a new milestone in blogger-dom. I used chalkboard paint.

I know. It’s like nearly four years in, I’m finally a serious blogger.

Tall chalkboard for score-keeping in the games room

I’ve been wanting to add a chalkboard to the long room in the basement for awhile now. This is the room that holds our pingpong table and dartboard.

I figured a chalkboard would give us a place to write down the score, and it could also play the role of “art”–one of my home goals for 2016 being to decorate the basement.

I used rough cut 1x3s for the frame and screwed them together with my Kreg Jig. Lesson learned, lumber this thin will split if you screw into it sideways. Cut a new piece, redrill the pocket holes, screw into the end grain, all is well.

Pocket holes with the kreg jig

The frame is stained with a mix of Minwax Classic Grey and Provincial. I find as I proceed with decorating this house, my style is getting more and more rustic–hence the rough cut lumber and the grey stain.

The chalkboard itself is a piece of hardboard coated with chalkboard paint. With chalkboard paint (for those that aren’t in the know), you have to “season” it before you use it. That means you rub it all over with chalk and then erase it. If you don’t do this, your writing won’t erase properly. However, this eliminates the beautiful black finish and makes your board very grey. I was a bit disappointed by this, but I think I can live with it. I’m not prepared to buy a big piece of actual chalkboard to fix it.

Tall chalkboard for score-keeping in the games room

The chalk and eraser sit on the floor in a wood bowl that my Dad made.

Chalk and erase in a wood bowl

Now we just have to clear Matt’s box collection off the pingpong table so we can actually use the chalkboard (darts is not my sport). Keeping it real for you.

Tall chalkboard for score-keeping in the games room

Speaking of sports, are you watching the Superbowl this weekend? Have you ever used chalkboard paint? Any darts tips to share?

Garden plans

I’ve held off posting about the garden until February.

Yes, today is the very first day of February. But I held off.

You see, I’ve been thinking about this garden since before the end of last season.

You’re impressed with my restraint, aren’t you?

You know who’s not impressed or excited? Baxter. Dude does not share my enthusiasm for the garden at all. In fact, he drooled on my garden plan as I was writing this post.

Baxter sleeping on the garden plan

But never mind him. I will carry on.

There are a few things feeding my obsession:

  1. I’ve wanted a garden ever since we moved to the farm and last year it finally happened.
  2. It turned out the garden was a project that both Matt and I enjoyed. Sometimes our projects tend to belong more to one of us, so it was nice to have something we were both invested in.
  3. The garden worked! We had so much food. It was amazing.
  4. There’s so much potential. Translation: So much more to do.

You saw some of my to-do list in my Home Goals 2016 post. Today I want to focus less on what has to be done and more on what could be done.

As in, what could be grown.

Here’s my initial idea for the upcoming season (minus the drool).

Round garden plan for 2016

The big news for this year is that we’re using the whole garden. Last year, we only cleared half.

So that means we can plant more of certain things (potatoes, beans) and more new things (broccoli, watermelon, eggplant, asparagus, sunflowers). You’ll see there are still a few blanks in the plan above. I’m open to suggestions.

I also feel like this is the year to sort out the best layout. I’m still wrapping my head around gardening in the round. The layout of two central axes crossing at right angles, and then shorter rows running perpendicularly (does that description make any sense?) is something I started last year. I found it’s a helpful way to divide this huge garden into manageable sections.

A couple of points to keep in mind:

  • The raspberries, squash and tomatoes are all going to be on trellises, so think vertical when you envision those.
  • The perimeter plantings are going to be in slightly raised beds. The rest of the garden is all at ground level.
  • The bottom left corner can be a wee bit shady late in the day.

As always, though, I would appreciate your input.

What plants would you suggest? How would you lay things out? What summer projects are you planning? What are you going to grow in your garden this year?

Halfway to a hospitable guest room

This house is the first time we’ve had an honest to goodness spare bedroom. We like it when people come to stay with us. However it doesn’t happen that often. Perhaps because the room has never been very welcoming.

You saw last week that making over the guest room is one of my home goals for 2016. Today I’m ready for the first progress report.

Here’s a really bad photo to show roughly where we started. (We usually put sheets on the bed when we have guests).

Guestroom before

The specialest features of this room were the stippled ceiling, ugly ceiling fan and pseudo wood paneling. And everything was dirty. Incredibly dirty, as is the norm for any untouched space in this house.

I’m almost ashamed to remember that we used this room as our bedroom up until about a year ago. When we scraped the ceilings after Christmas, the water running down the walls left brown and grey dirt tracks. So gross.

Despite its… specialness… this room is not going to be a hard fix. Here’s the to-do list:

  • Scrape the stippled ceiling
  • Paint the ceiling, walls and trim
  • Replace the light fixture
  • Make window treatments
  • Refinish the desk chair
  • Strip the paint off the metal bedframe (and maybe repaint)
  • Decorate and personalize

And here’s where we are so far.

Guest room makeover progress

Better, right? Even that paneling looks okay now that all of the holes are patched and it’s painted a pretty blue-green (Wythe Blue from Benjamin Moore).

We’ve obviously made really good progress, but despite appearances I feel like I’m only halfway. If I’m being completely honest, I’ve moved onto decorating (hanging pictures, adding the flowers) as a way to avoid starting on the curtains.

The finishing touches are usually the hardest part of any makeover, right? But if we truly want a hospitable room, we should give our guests the option of sleeping past dawn. Sigh. Curtains here I come.

Do you have fake wood paneling at your house? How about a guest room? What must-haves should I include in our guest room?

Home Goals 2016

I really enjoy the process every January of setting my home goals for the coming year. (If I’m being honest, I start thinking about them in December or even earlier). I’m not big on resolutions on the personal front, but on the home front my annual plan helps me stay focused.

This year, I’m going to try to continue last year’s plan of striking a balance between productivity and a bit of relaxation. There’s still lots to do, of course. But it’s been four years since we bought the farm. Obviously, our renovation pace is not even close to breakneck.

We are approaching the point where we have either really big projects (kitchen, bathroom, garage, master suite) or small stuff (paint the guest room, dining room, my office). For now, I’m keeping the focus on the small stuff.

Which will help me to continue another theme from last year: frugality. We did pretty well on that front in 2015. You’ve seen some of my long-term renovation plans already, so continuing to save money in 2016 will be helpful.

And that’s the first goal on the list: get an idea of how much the Big Reno is going to cost.

Beyond that, the focus is going to be on small, frugal things.
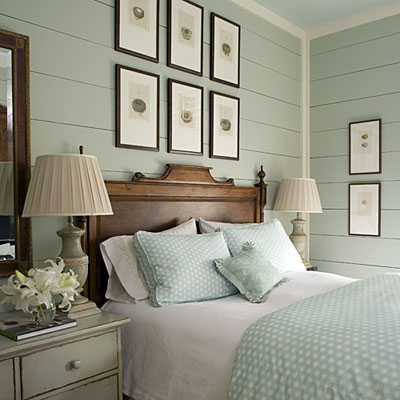
Guest room

Matt and I got a start on this at the tail end of last year by scraping the stippled ceiling. We have more to go to make it match the picture in my mind.

  • Paint the walls and trim
  • Replace the light fixture
  • Make window treatments (ugh… I really don’t want to sew curtains again)
  • Refinish the desk chair
  • Strip the paint off the metal bedframe (and maybe repaint)
  • Decorate and personalize

Finish the basement

Scrabble art for the basement

Source: insideways

The basement was our very first project when we moved to the farm. But the nit-picky finishing bits are still hanging around. I just need to get my butt in gear and get it done.

  • Trim around the cold cellar doorway
  • Finish the built-in storage area in Matt’s bathroom
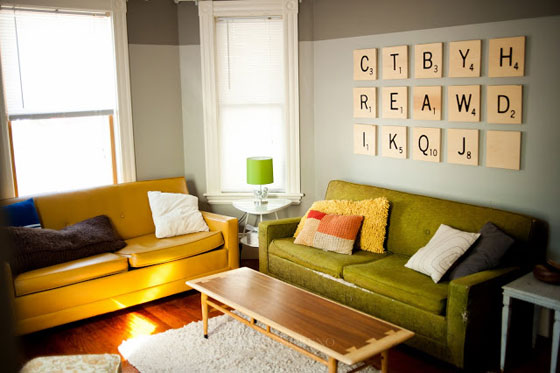
  • Make/buy art to finish off the space (this one’s a carry-over from the 2015 home goals)
  • Build shelving in the closet under the stairs

Furniture

My list of wanted furniture is getting shorter and shorter.

  • China cabinet for my office
  • Coffee table for the living room
  • Reupholster slipper chair for my office (in the same beautiful Brissac Jewel by P Kaufmann that I used for my bulletin board)

Vegetable garden

Last year’s top home goal returns. There’s still more to do to make my dream vegetable garden.

  • Hang the gate
  • Edge the garden
  • Build raised beds around the perimeter
  • Build trellises for the raspberries, tomatoes and squashes (we can’t have the squashes running rampant again this year)
  • Plant perennials: grapes, asparagus, rhubarb, more raspberries
  • Run a waterline out to the garden

Outdoor clean-up

Manicured meadow

Source: LandVest

I’m going to be a bit ambitious this year and add a second outdoor task to the list. The task of cleaning up this property could be a full year project for a full team of people. It’s a job of picking up rocks, extracting weeds (fire worked well last year), grading (and maybe adding a bit more topsoil), seeding grass, mowing. And it’s a matter of picking my spot… and being satisfied with a spot, not all of them. Here are my options:

  • North side of the house
  • West side of the house
  • On the edge of the woods at the north side of the house
  • Around the barn (all points of the compass)
  • Behind the driveshed and around the garden
  • At the foot of the driveway
  • Along the shore of the pond (oh how I want to clear the shore so that I can get close to my pond)

Six goals for 2016. I feel like there’s a bit of symmetry in that. Most important I feel like these goals should be relatively achievable.

In fact, the year is already off to a pretty good start.

The guest room is well underway, and I’ve started a few projects for the basement too.

You’ll see some of those soon.

Are you setting goals for 2016? What projects do you hope to complete this year?