This post has been a long time coming, and I’m not meaning just this week. Fixing up the mudroom was on the fall to do list last year. I started the project but never quite finished it. However, I am now declaring the mudroom done, and today is the day for the reveal–the first room reveal on the blog.
Aren’t you just so excited?
I know I am!
Just a reminder, here’s where we started.

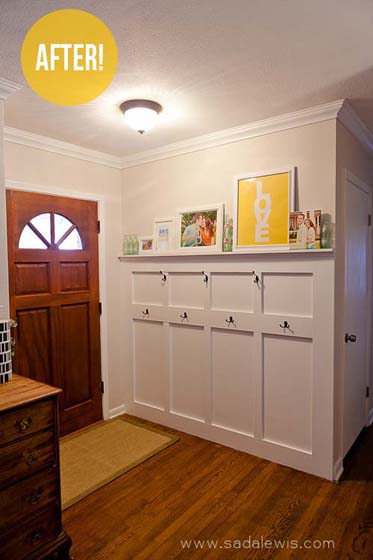
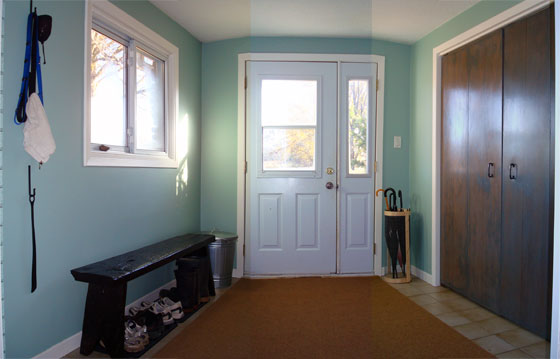
And here’s where we are today.
Better?
As I said at the beginning of the week, this was a cheap and cheerful update, so paint was the most important weapon in my arsenal. I took down the hooks on the walls and the old shelving in the closet, stripped the pinwheel wallpaper, patched the drywall and spread nice fresh paint over all of the walls–simple white primer in the closet, Wythe Blue on the walls and Cloud White on the trim.
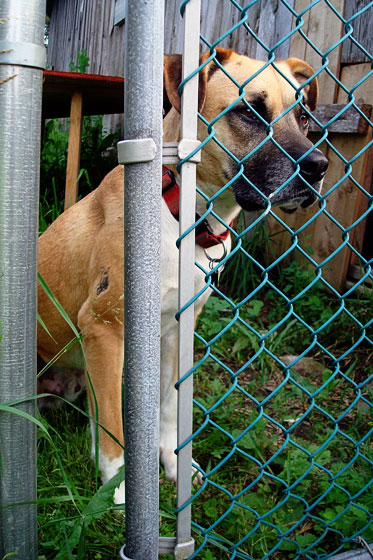
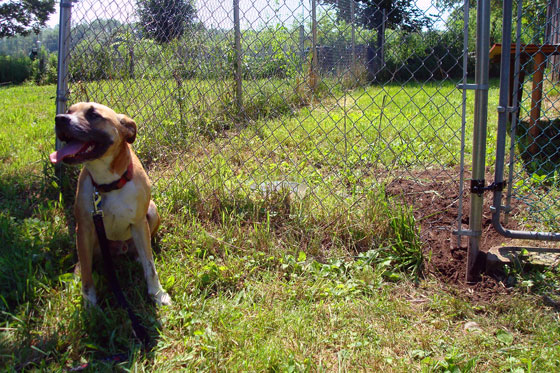
Painting the trim was the biggest delay on this project. I just could not motivate myself to do it, so the mudroom sat with blue walls and flesh trim all through the winter and spring. However, when we were trying to convince Baxter to spend time in the outdoor dog run, the mudroom proved to be a good place to hang out. I could listen for barking or whining to assess how he was doing, and I could see when he escaped… all while painting trim.
Along with addressing form, I also had to address function, which mostly meant the closet. I decided to split the closet in half, allocating one part for hanging some of our outdoor gear and storing taller items and at the other end adding floor to ceiling shelves for everything from shoes to cat treats to dog toys to work gloves to sport equipment.
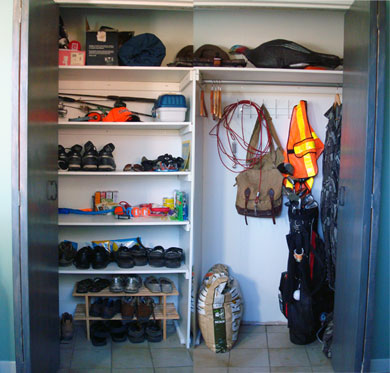
I reused the two sets of hooks from the old mudroom, installing the wire one in the cupboard and removing the three wrought iron hooks from their backing board and hanging them vertically to handle leashes, the towel we use to wipe Baxter’s feet before he comes in the house and our ever-so-handy shoe horn.
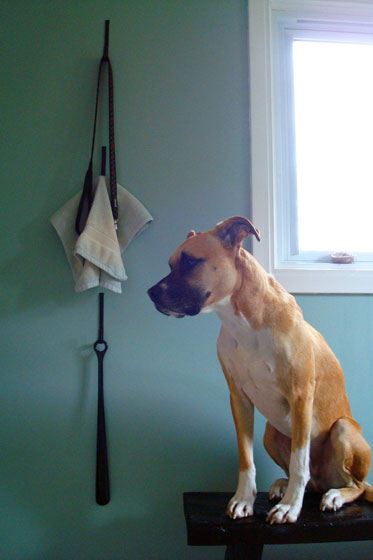
This ridiculous woman made me climb up on this bench when everyone knows dogs are not allowed on the furniture. I’ll just stare at my leash and think happy thoughts until she’s finished with that clicky thing. #pleasesendhelp
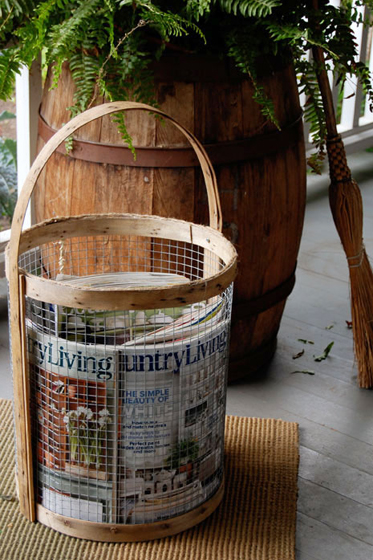
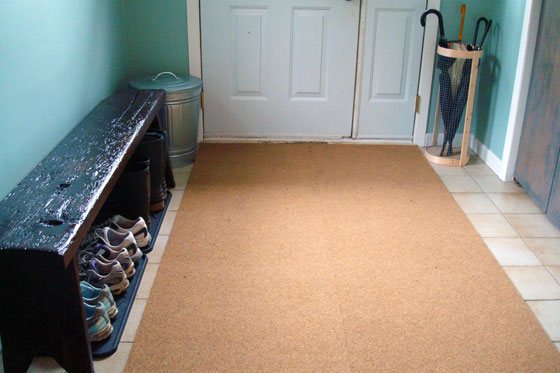
The bench that Baxter’s not so fond of is just about my favourite part of the makeover. It’s just a simple rustic bench, but it gives us a place to sit down and put on or our take off our shoes. Plus our most frequently worn shoes and boots tuck conveniently onto trays underneath. My Pinterest challenge umbrella stand hangs out in one corner and in the opposite a galvanized metal pail (Knodd from Ikea) holds bird seed. A large cocoa fibre mat covers the floor to trap dirt, leaves and puddles.
This is about the limit of the accessorizing I’ve done in the mudroom, unless you count rotating display of feathers, pebbles, egg shells and nests that I bring home and arrange on the window sill.

The mudroom is not heated, so we’re strategic about what we store out here. For example, on a freezing winter morning I can handle putting on chilly boots, but I absolutely need a warm coat. So coats live in the closet inside the house, and boots live on the tray under the bench.
The best thing about this makeover is that everything now has a place. Need a pair of safety glasses? I know exactly where they are. Hungry cats at the door? Oh look, here are some treats for them. Found a golf ball? Add it to Matt’s stash.
The second best thing about the makeover is that the first impression of our house is no longer cloaked in the smell of manure. For some reason, that’s what the mudroom smelled like when we first took possession. Yuck.
And yes, I do consider being organized more important than being not smelly.
In the category of “even better if,” I didn’t do anything to the popcorn ceiling, the boob light, or the unpainted front doors, so there could still be some work if I feel like it. For now, I don’t, and I’m not really too concerned with these leftovers.
The one thing that I really should fix is the doorbell. I managed to kill it during the makeover when I was trimming a section of drywall to prepare it for patching. (Don’t tell Matt. All he knows is the bell stopped working. He doesn’t know it’s because I accidentally cut through the wires). A wireless version would be a good fix… and prevent any future mishaps.
Overall, I’m thrilled with the mudroom, even though it doesn’t yet match my ultimate vision. This is a good interim solution. It looks nice. It works well. It was a simple update, and we didn’t have to spend a lot of money. Let’s look at it one more time, shall we?
I may be a year later than planned in finishing this project, but we are finally all set for whatever mud or snow Mother Nature throws at us this winter. And I’m even more thrilled to cross one room off my to-do list.
So, what do you think of the makeover? I know a lot of people were voting for opening up the closet and putting in some built-ins. Are you on board with my interim solution? How are you getting ready for winter at your house? Who hates painting trim? Has anyone else spent a full year making over one room?