Fall is here. That means the clock in my head is ticking as I review the things-to-do-before-winter list.
Today, I’m getting that to-do list out of my head.
There are the usual winterizing tasks like putting away the mowers and patio furniture, turning off the outside water, stacking firewood (thanks to Matt’s Dad, his brother and nephew for all their work last weekend), taking off the window screens, cleaning the eavestroughs. But there are a few special additions too.
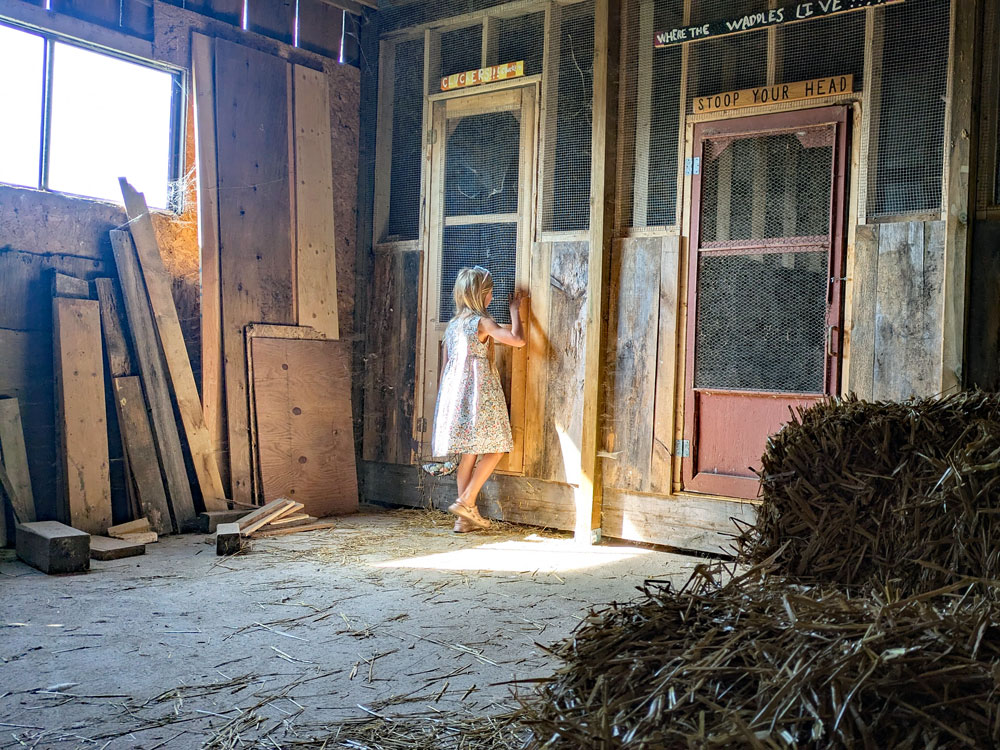
Coop
The most critical item on my list is the coop. I need to make sure the chickens are all safe and set for winter. Some of my tasks are basic, like clean out the pens and put in fresh straw (the turkey pen also needs cleaned, though they obviously don’t need fresh straw). Others are a little more involved like hunting down a few drafts in the walls and leaks in the roof and patching them. I also want to clean up the scrap wood that has been scattered around since I took down the old coop and set up a designated area for my bales of straw.
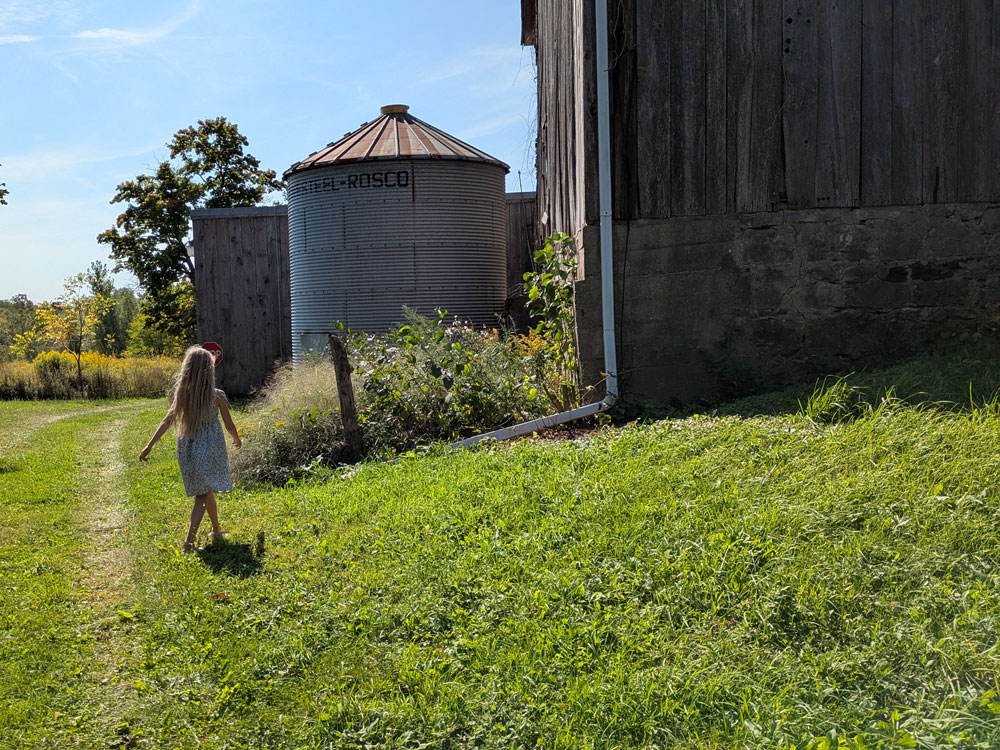
Barn grading
I have been slowly working my way around the barn for years, clearing brush from along the foundation and mowing closer and closer. I was able to get a few loads of dirt this summer from the landscaper who did our patio. He dumped them at one corner of the barn where the grade needs to be adjusted. The corner also held a bush, a wire fence and an old split rail fence. I’ve tackled most of the fence and have just one post left to pull. The bush needs a bit more time with the saw and perhaps a shovel. Then I need to spread the dirt and finally finish this corner.
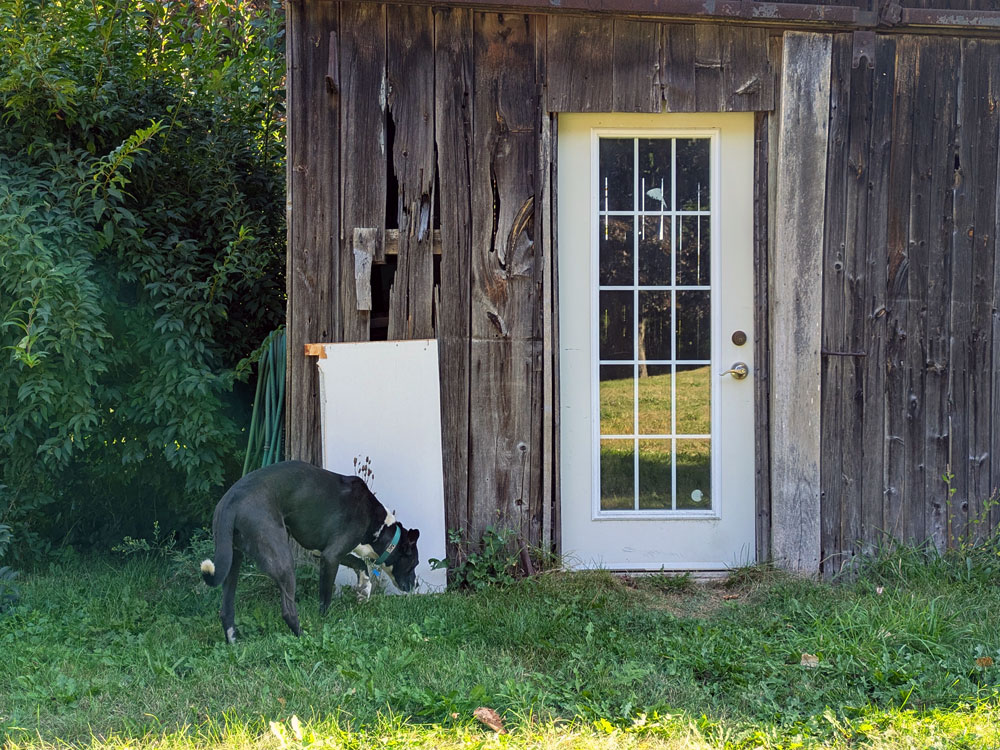
Driveshed siding
Some time ago (I’m talking more than a year), I noticed some boards on the driveshed were in rough shape. Just how rough became obvious when Cigo got into the driveshed while the door was locked. I didn’t know where he was, called his name and he popped out through the wall. I blocked the hole with a piece of plywood, but I need to do a proper patch with actual siding.
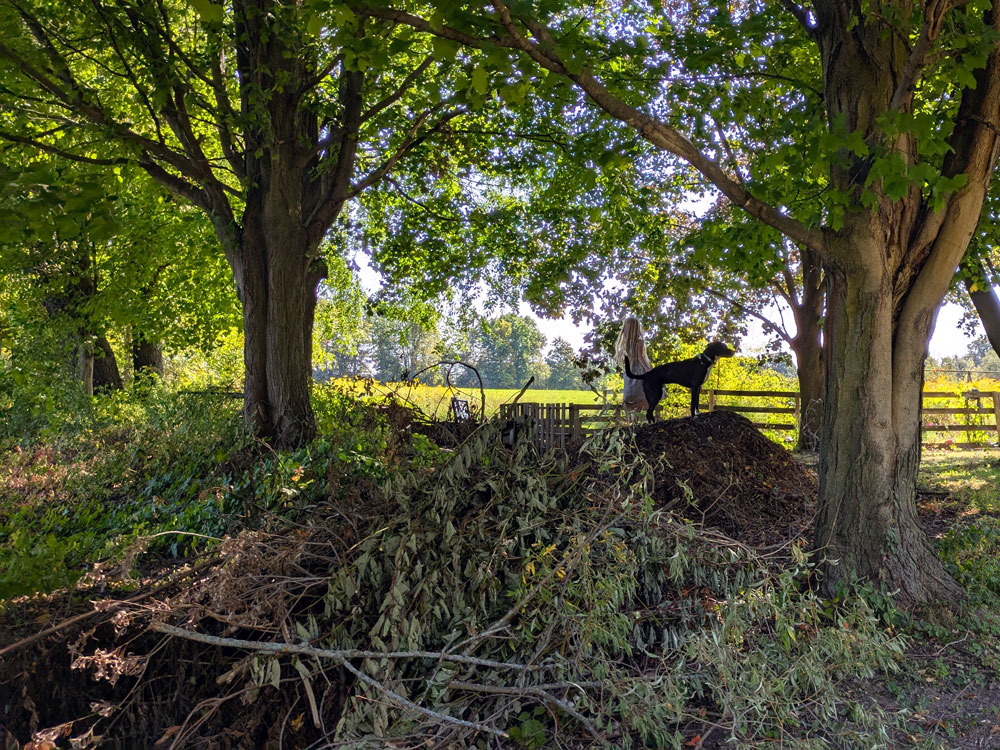
Mowing
I’ve made good progress at clearing the septic bed and alongside our front field over the past few years. To keep them clear, I need to mow them a few times a year with our big rotary cutter. I’ve done them once, but I want to do one more cut. Given that I haven’t cut the main grass at all this month, this is perhaps a bit optimistic. I feel like I have one more mowing in me, and while I have the tractor out, surely I can hook up the big mower and get it done. Right?
Brush chipping
After I disconnect the rotary cutter, the next attachment in line is the wood chipper. As always, I have a brush pile. In previous years, this pile has grown extremely large. If I can chip once a year, the pile will stay under control.
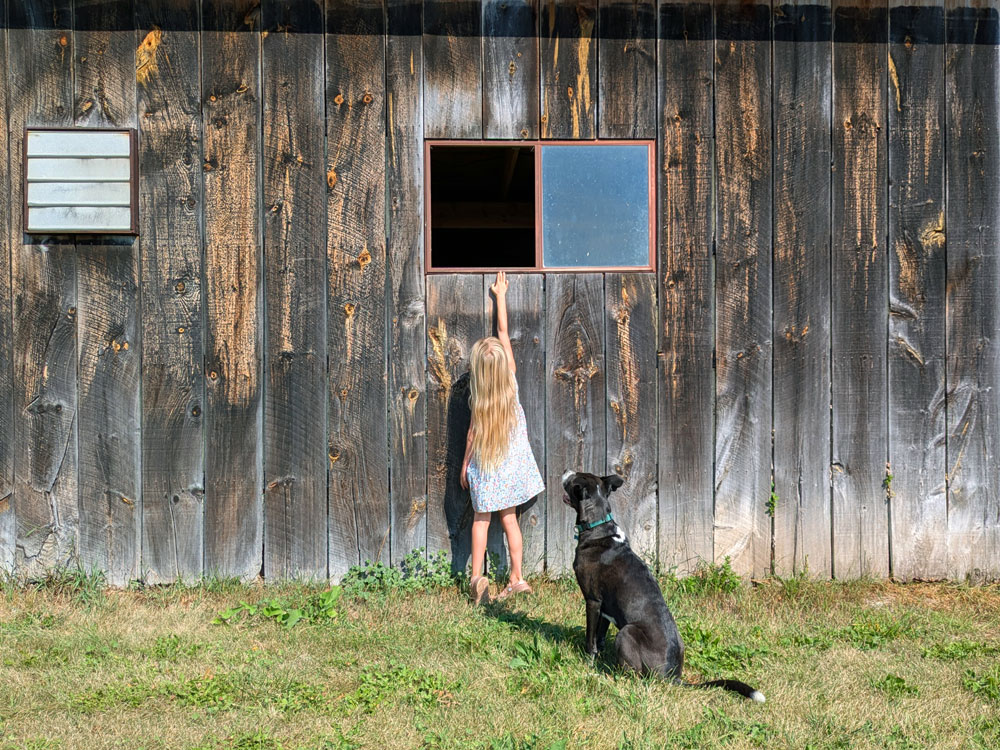
Swallow shutter
My final task is back at the barn. I uncovered a broken window on the back of the barn in the spring, so that the swallows would be able to get into the barn to nest. It worked well, but I now need to close it back up. I’d like to make a shutter so I can open the window again next spring. However, in the interest of time and simplicity, my “shutter” may be a piece of plywood I screw in place for now.
While the clock in my head is ticking urgently, making me feel like I’m already behind, I’m reminding myself I have three months until winter officially arrives. Laying my tasks out here is one step and a helpful one. Now, I will get to work.
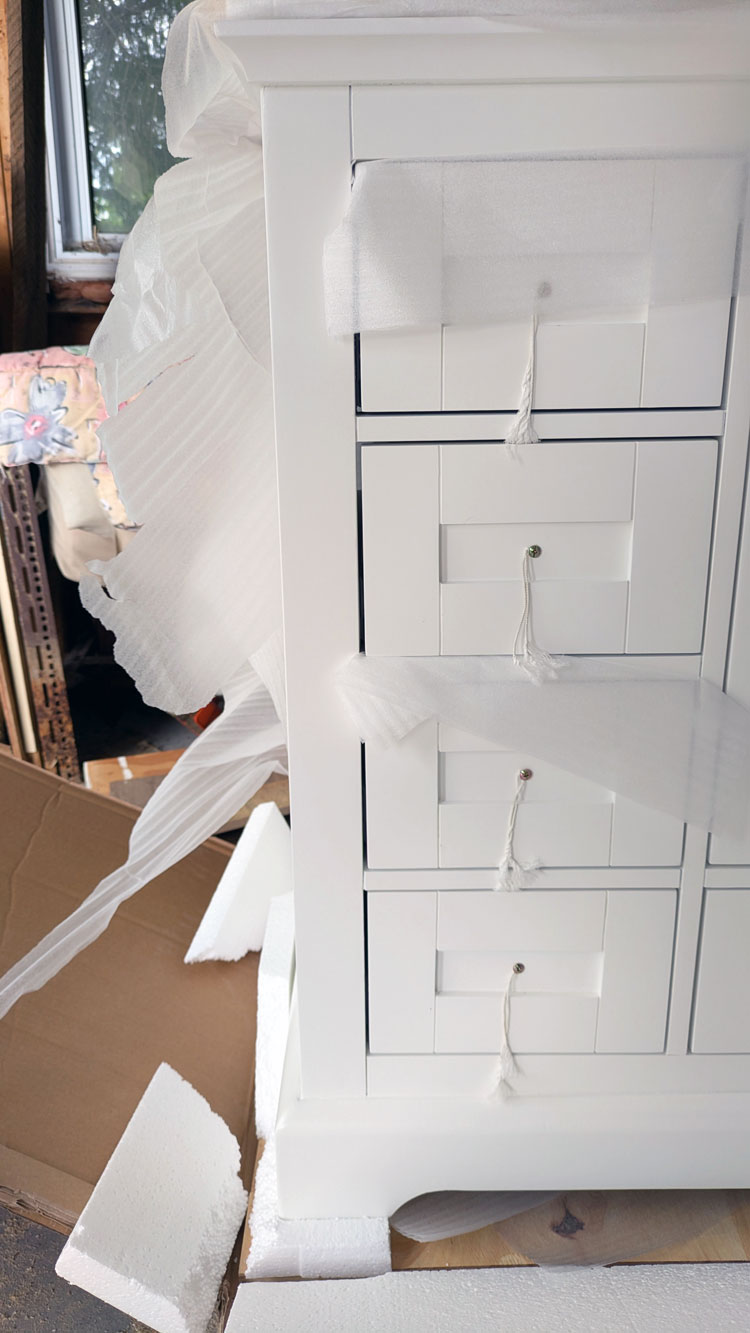
The bathroom is slowly approaching the finish line. Another big piece arrived a little while ago. And it is literally big.
Our new storage hutch.
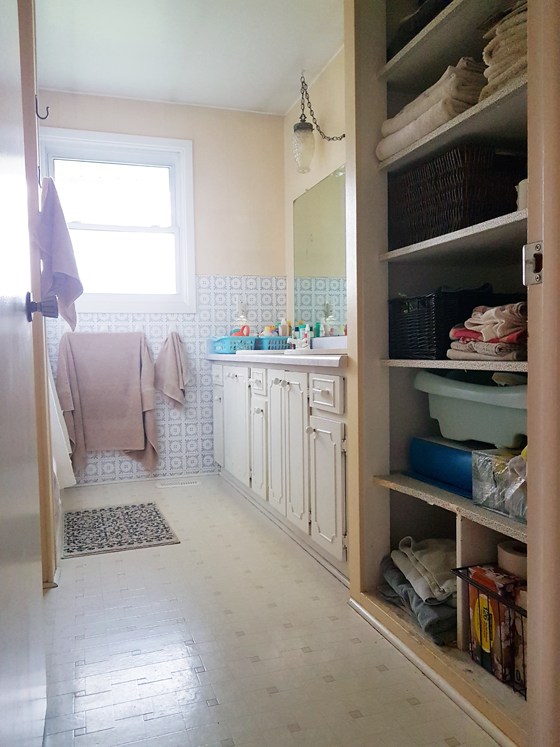
The bathroom is a good size, and it had a large linen closet. But the closet lacked both style and function. I tried to stack things neatly and used baskets to conceal less attractive things. The shelves could store a lot, but they were just one type of storage. With this renovation I was eager for an upgrade.
I decided I wanted a wood cabinet with a mix of drawers and shelves. I was envisioning an antique pine piece, something like might have been in an old farmhouse. I spent some time looking online and in antique shops and didn’t find anything the size I wanted, let alone with the storage configuration I was looking for.
Next I tried cabinet makers, but I struck out there too. Then one day I was driving by a local Mennonite furniture store and I pulled in. Maybe they did custom work?
They did.
They took my drawing and measurements, showed me wood options, and gave me a quote. It was $3,400, including finishing, delivery and set up. For a fully custom piece this size, that felt like a very reasonable price. I paid my deposit and carpentry began.
And finally it’s here.
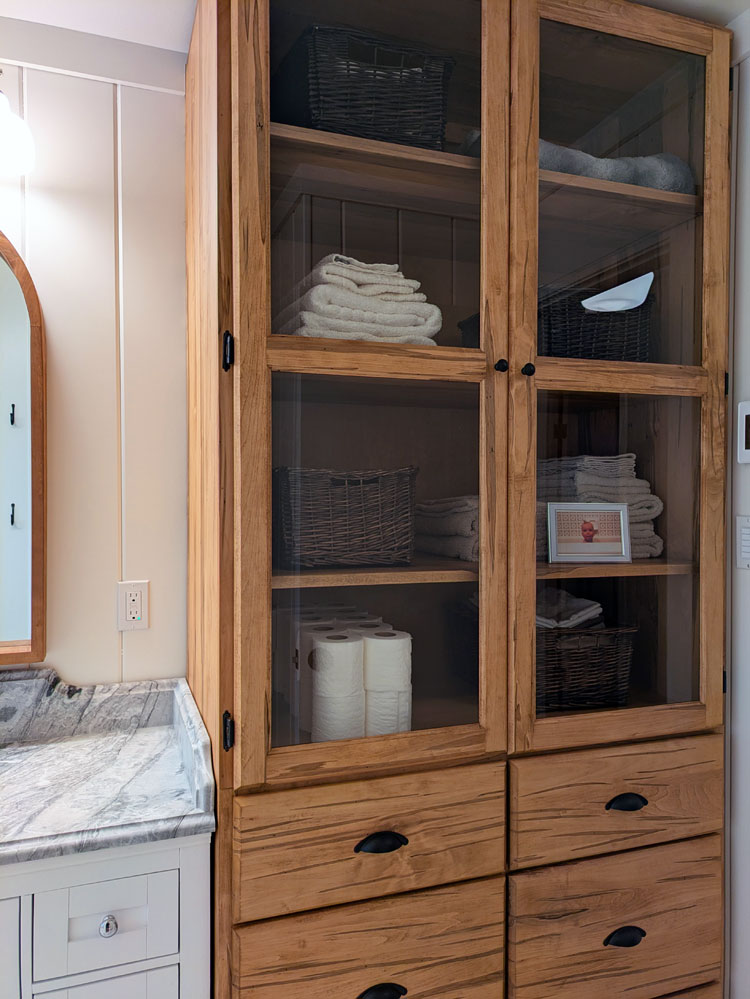
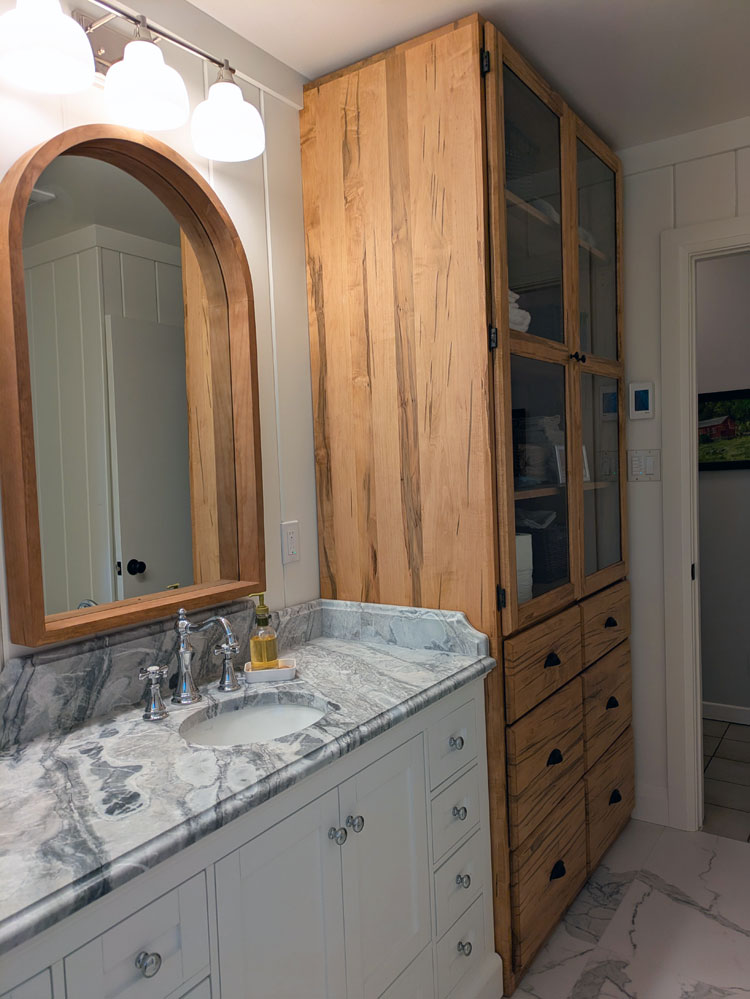
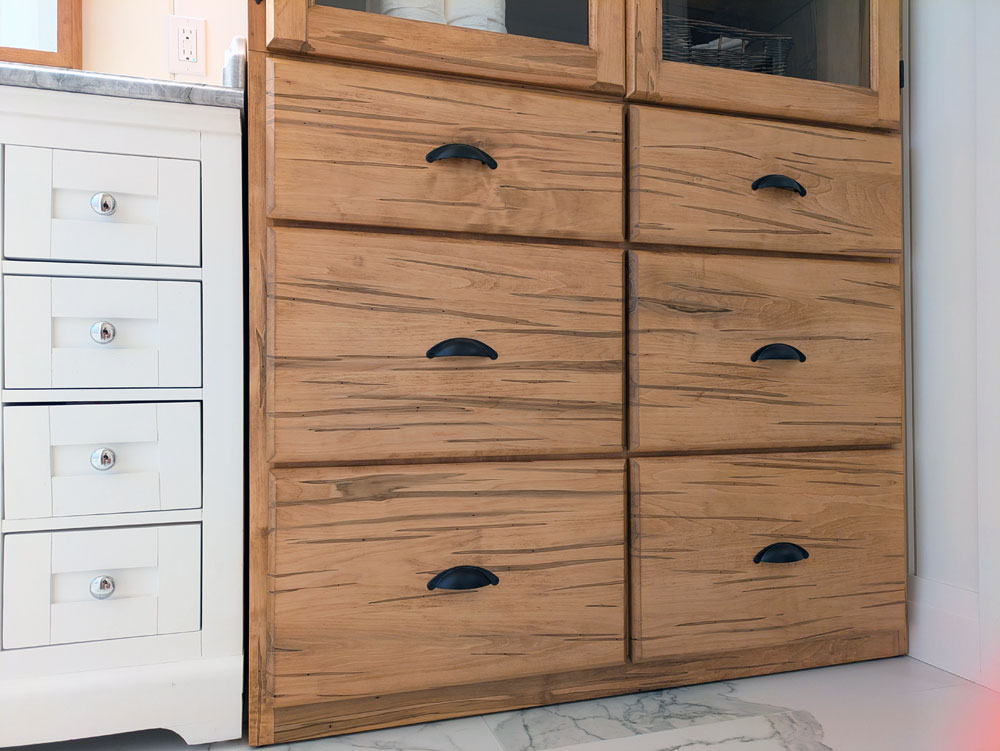
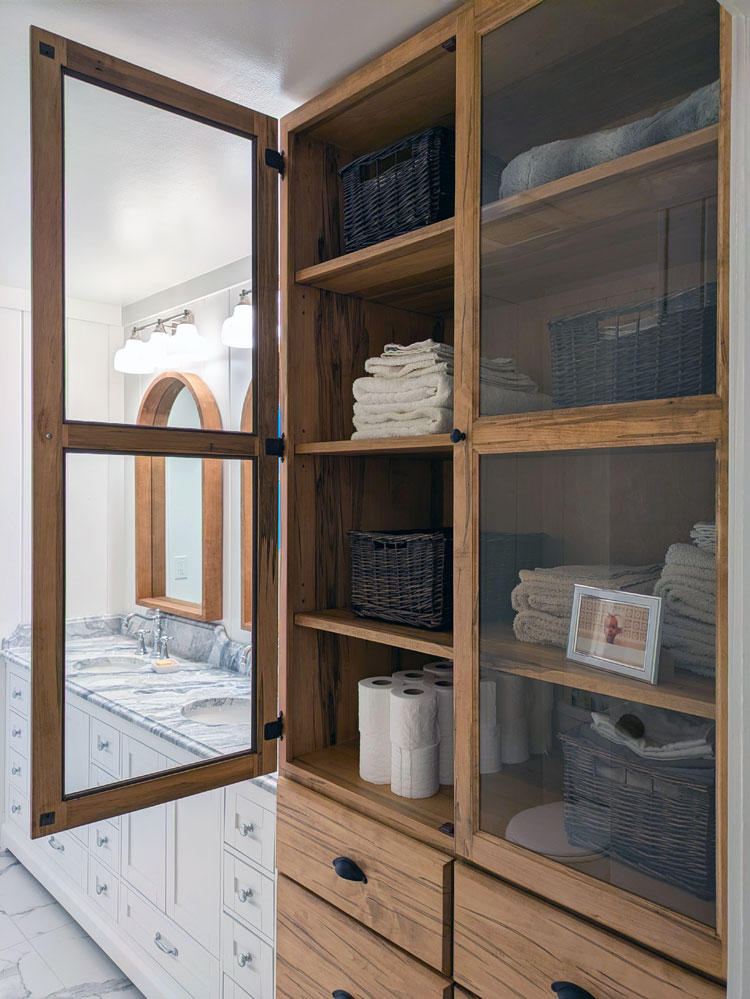
The whole cabinet is 22 inches deep (the same as the vanity counter), 42 inches wide and 8 feet tall. It is huge. It fits perfectly at the end of the vanity. Thank goodness (says she who did all the measurements).
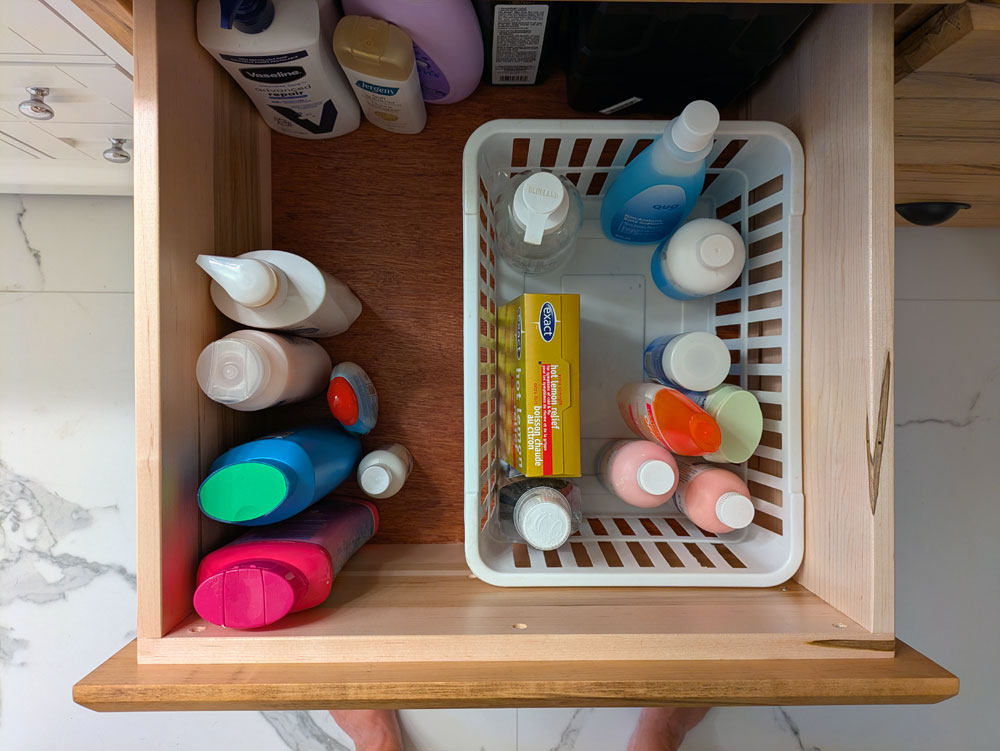
The cabinet has six drawers on the bottom. After living with the open linen closet, I wanted some closed storage. I was very specific about the measurements for the drawers, as I planned to store shampoo and other bottles standing up. So the four bottom drawers are 12 inches high. The top two are 8 inches. They hold so much.
The top of the cabinet has four shelves behind glass doors. I liked the idea of some more open storage, rather than closing off this corner entirely. The shelves are where I’m putting towels and toilet paper (stacked neatly, of course). The baskets from the previous linen closet (which are actually from our previous house) work well here too and hold things like sheets, Christmas towels and other less coordinated items.
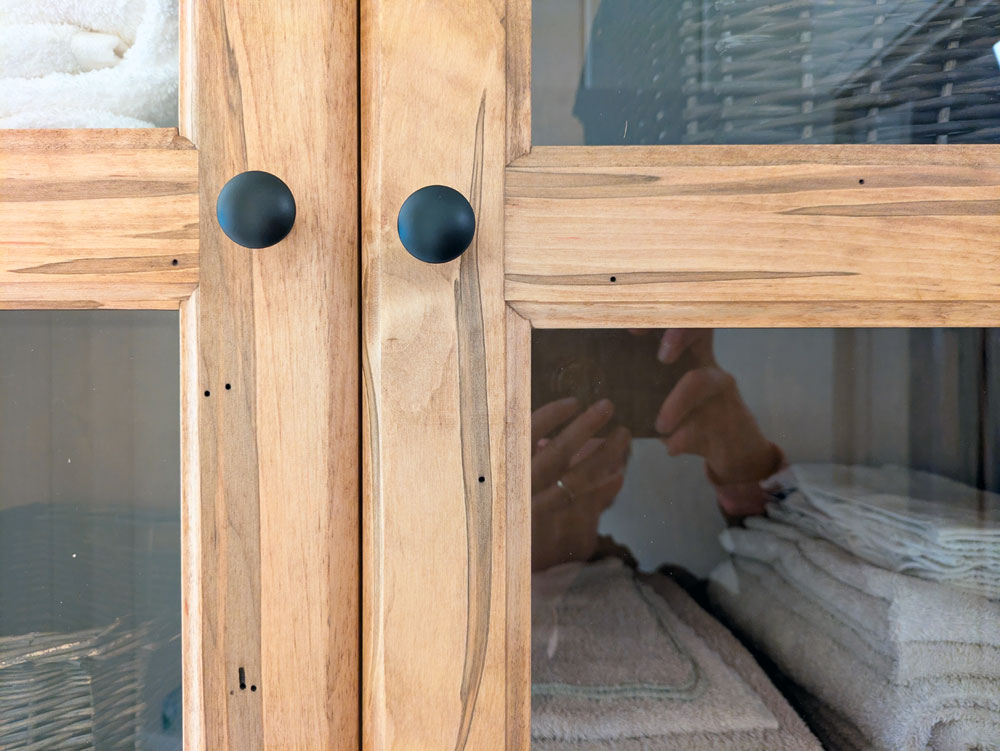
I chose black hardware to contrast with all of the polished chrome we have elsewhere in the bathroom. There are bin pulls on each drawer and small knobs on the doors.
The wood is wormy maple. It has lots of character with darker sections and actual worm holes. For the stain, I chose a finish that matched the wood frames on our mirrors. I feel like it has a bit of the warm antique tones I was going for.
The wormy maple is the one thing I’m questioning on the hutch. The drawer fronts are a little stripey, which I don’t love. I’m wondering about going back to the builder and asking for plain maple fronts.
But overall I love the hutch. It holds so, so much. Plus the beautiful wood tones add so much warmth. The vision that I had for our new bathroom is coming together.
Have you ever had custom furniture made? How do you mix wood tones into your house? What do you think about the wormy maple?
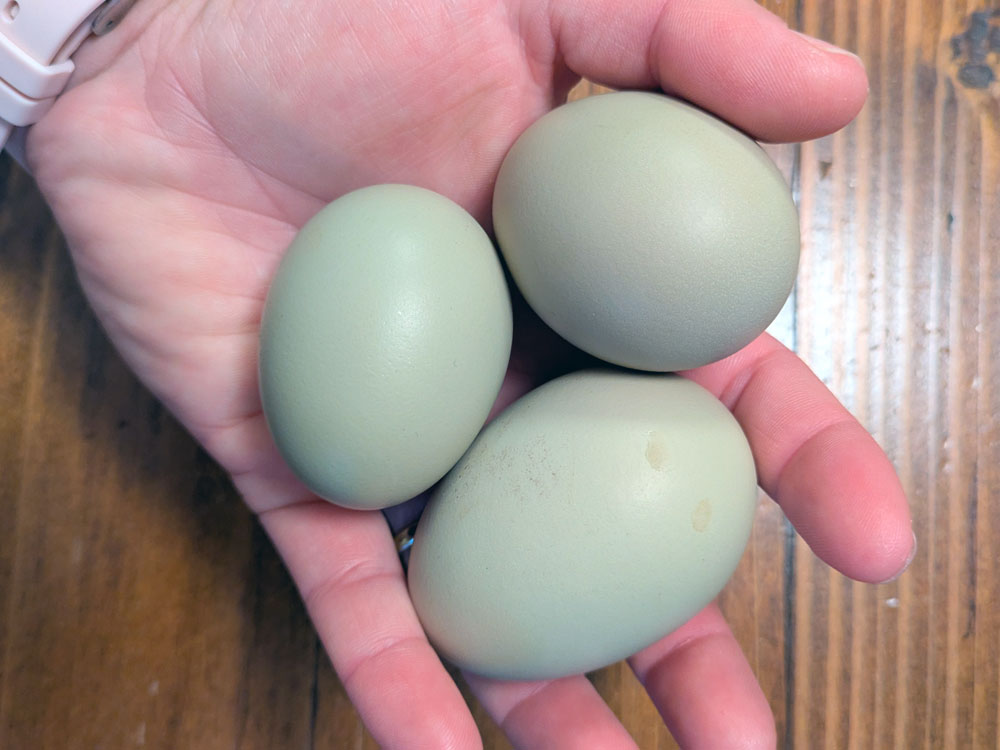
Mid-August our first egg arrived (the hens were about 16 1/2 weeks old at this point). It was laid on the roost and had a soft shell, so it was broken when I found it. We had one more soft shell roost egg, and then a few days later, I discovered three small greeny blue eggs in a corner of the coop. We ate them for breakfast–and one was a double yolker.
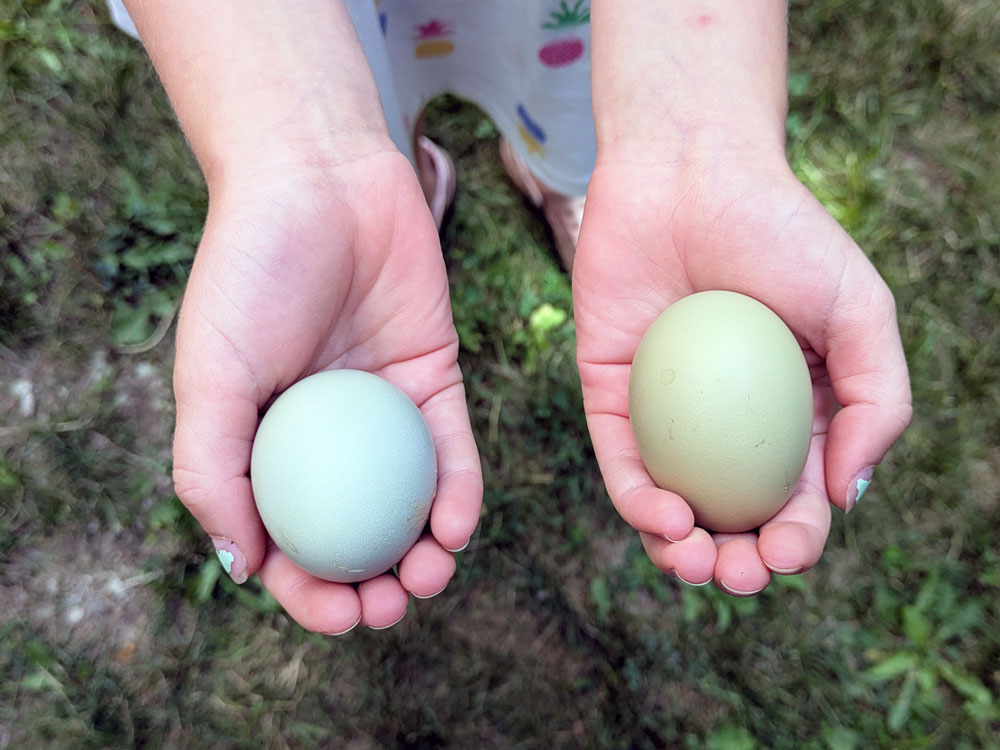
Since then, we’ve consistently had two eggs a day. They’ve been either olive or blue (it’s hard to tell) and small. We’ve had enough for ourselves and shared a few with Grandma and Papa.
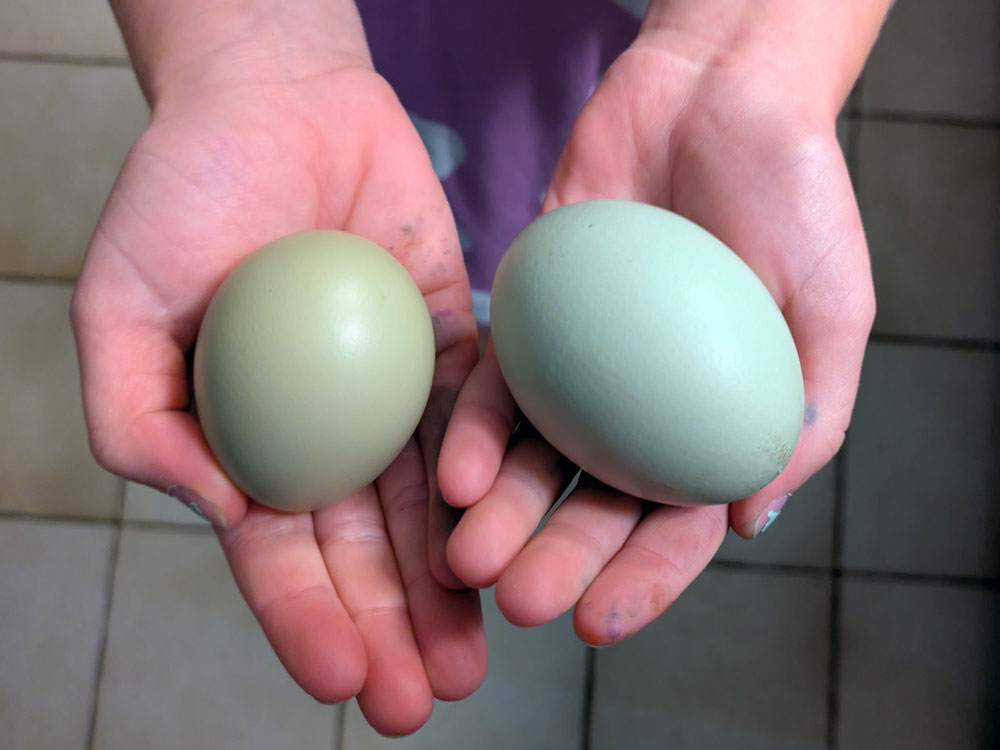
On Friday, we had our first full sized egg, which turned out to be another double yolker.
Ellie found some chicken patterned fabric and sewed a cloth to line her egg basket. She collects the eggs every day, as she has anticipated doing since before the chicks arrived.
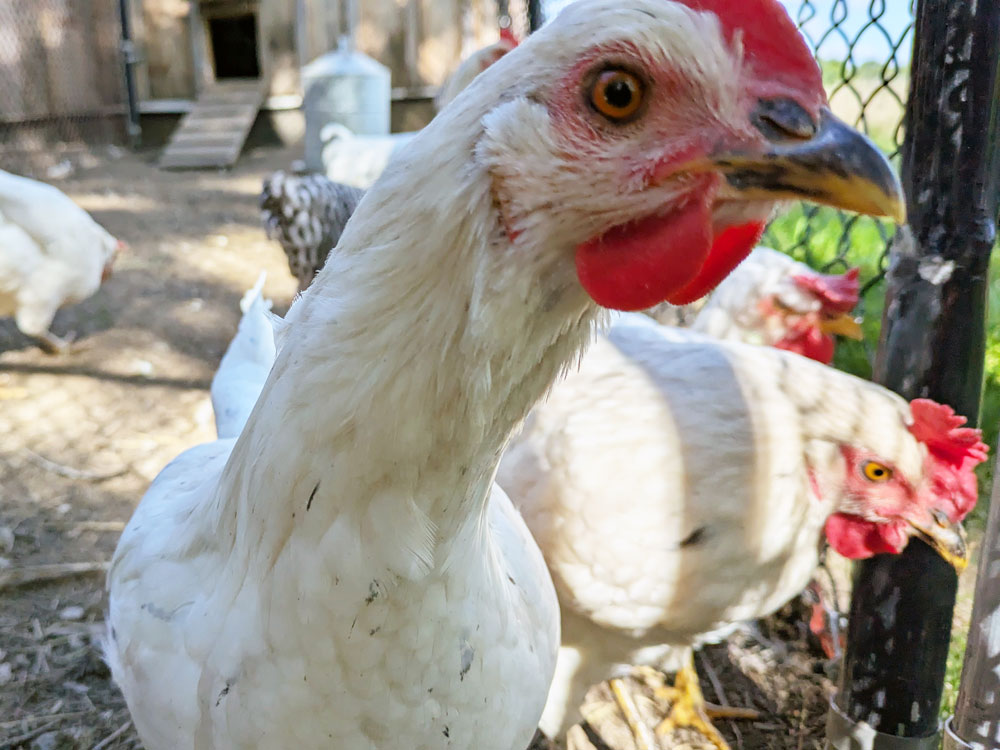
We’re waiting for everyone to start laying. My research says that most hens start to lay between 18-20 weeks. Today is the start of week 19, so we’re right in that window. We’re also waiting for them to try out the nesting boxes rather than the corner on the floor. We’ve switched the chickens to a layer food and added oyster shell to their diet, so I’m sure that will help move the other ladies along.
You want me to do what?
Every day is exciting to bring in new eggs, count how many there are, assess their colour and size, and eat our super fresh home grown breakfast. Also exciting? For the first time this weekend I didn’t put eggs on my grocery order.
Any other egg fans out there? Have you ever eaten a blue or green egg? Anyone else have experience collecting eggs?
Summer is such a special time. It’s hard to feel it coming to an end.
Ellie and I had a campout on Saturday. Probably our last campout of the year. As I was packing up the tent yesterday, I thought to myself, “I hope Ellie remembers this when she’s older.”
I hope she remembers the things we did and the fun we had. I hope she feels like her Mom put in the effort to make things special for her. I hope she realizes how much I love her and that she’s the most important thing in my life.
The two phrases below came up in one of the books I read this summer. They fit with how I try to live my life and feel especially appropriate now.
Hora pars vitae. Every hour is a part of life. Serius est quam cogitas. It’s later than you think.
Here are some other things I came across this summer
We are in the midst of our summer tradition of raising monarchs. We’ve released two butterflies so far and our last caterpillar changed into its chrysalis this weekend.
Ellie’s fascination with Greek mythology continues, and we’ve been “Greeking Out” with this podcast. The Oracle of Wifi is hilarious.
Another summer read that I’ve been thinking of as I prepare to return to the classroom.
“Every young person has the potential to contribute. When we respect, honor, and support that potential through a combination of high standards and high support, then we motivate and inspire young people from all groups to reach higher, accomplish more, and make our society stronger.”
We are continuing to “do” summer through this last week. There will be a park, possibly a beach, and our annual tradition of a “fancy waffle.” The more ice cream and toppings the better.
How are you feeling about the end of summer holidays? Do you have any favourite summer memories?
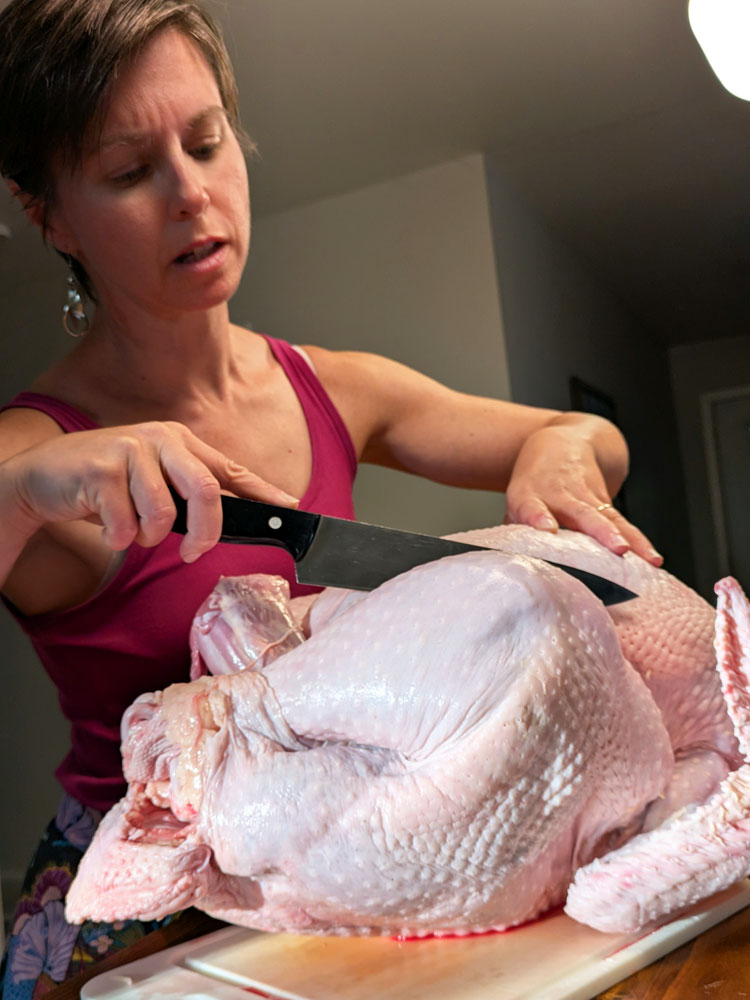
The turkeys went to the “processor” last week. Such a clean term for ending a life. It was hard for me, and definitely hard for Ellie.
Our plan from the beginning was to eat the turkeys. We spent three months with them, from little fluffballs who climbed onto Ellie’s lap to large birds with their own personalities. Ending that was a big responsibility–as it should be.
One of the things I have been thinking about is food should be hard.
Over the years, food has become easy. As we have become distanced from the labour of producing food, we have lost sight of the investment that goes into what we eat. We ignore or are ignorant of what it takes to grow food, whether it’s a turkey or a tomato. The work of raising, sheltering, feeding, watering, harvesting, killing, butchering, storing, cooking is hard.
There is also a cost. That cost comes in the toll we take on our soil by growing monocrops, using synthetic fertilizers, pesticides, herbicides, draining the water table. It comes in the quality of life for our animals, the diseases that spread, the pathogens and contaminations that arise. It comes in the nutrients and flavour in our food, or lack thereof. It comes in the physical, financial and mental health of farmers.
Food should reflect those investments and costs. It should be something we consider and value more than most of us do. Food is our connection to the land and to each other. It should be nourishment, health, community. It should reflect the quality of the soil, the care of the animals and the labour of the farmers. It should be grown, harvested, bought and eaten with respect and gratitude.
I am grateful to the turkeys. To Strawberry, Medea, Stewart and Tutu. The experience of caring for an animal and growing our own food is powerful.
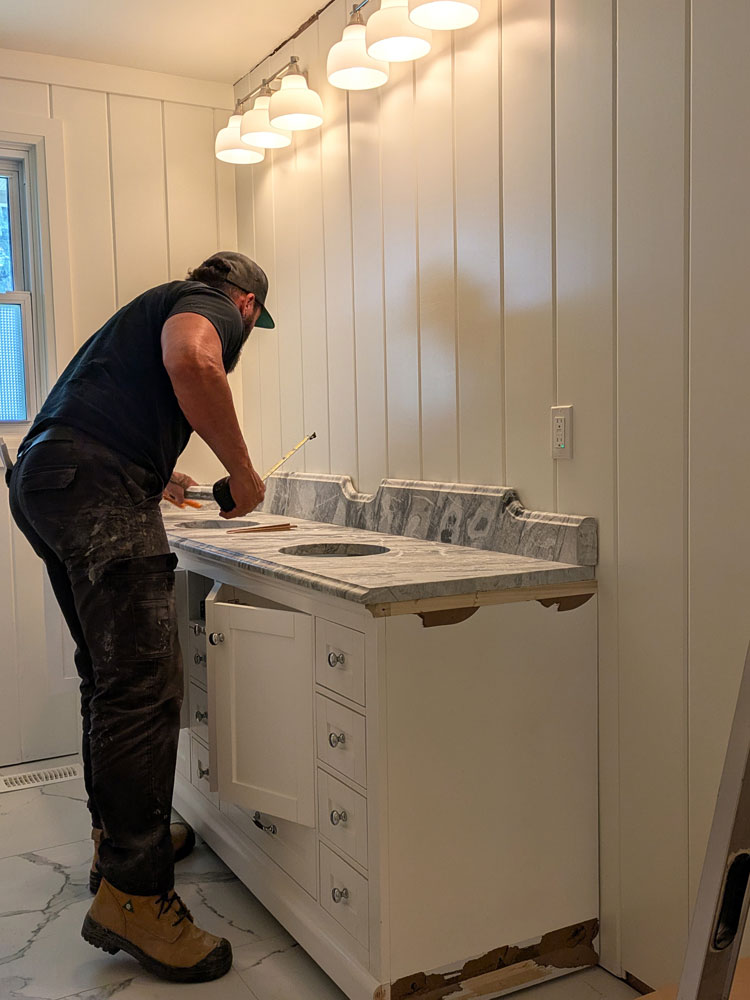
I am so excited to be back with a bathroom update. The countertop is in! Our fabricators were here on Friday installing the counter, backsplash and shower ledge.
The counter was making me very nervous. You may recall in the last update, I talked about selecting each element of the bathroom on its own and then hoping they all look good together. The countertop was allllll of that.
I loved the marble in the yard. But would it look good with our tile? Would it look good with the vanity? Would I like it in our bathroom? Would the fabricators lay everything out in the way I liked? Would everything fit?
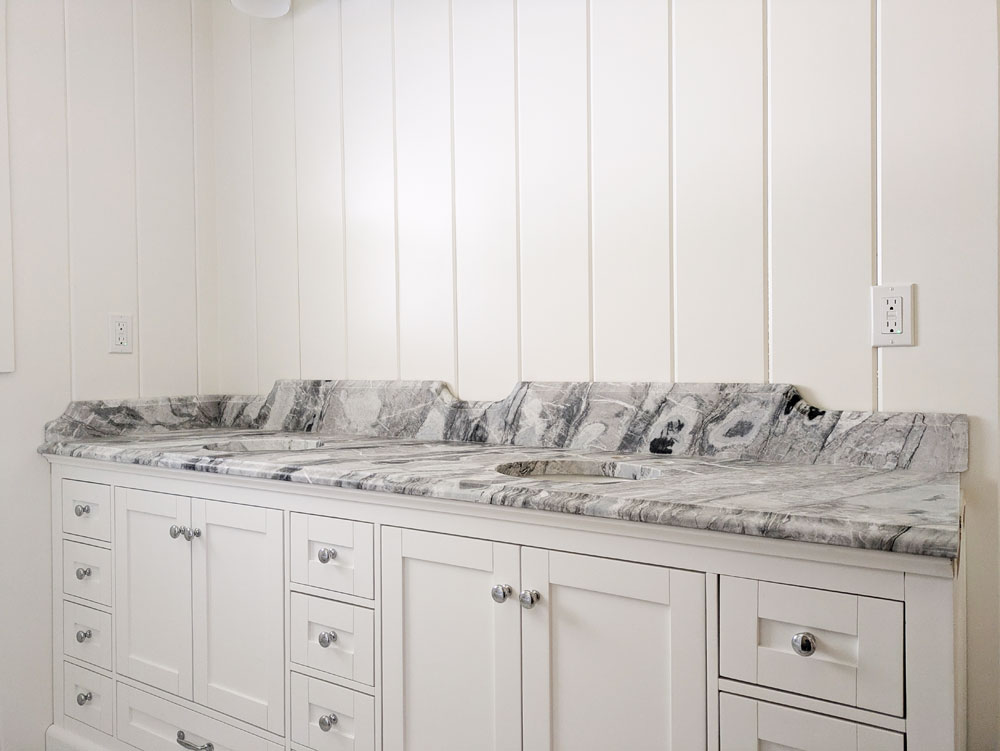
The answer to all of that is yes. 1000% yes. It is fabulous.
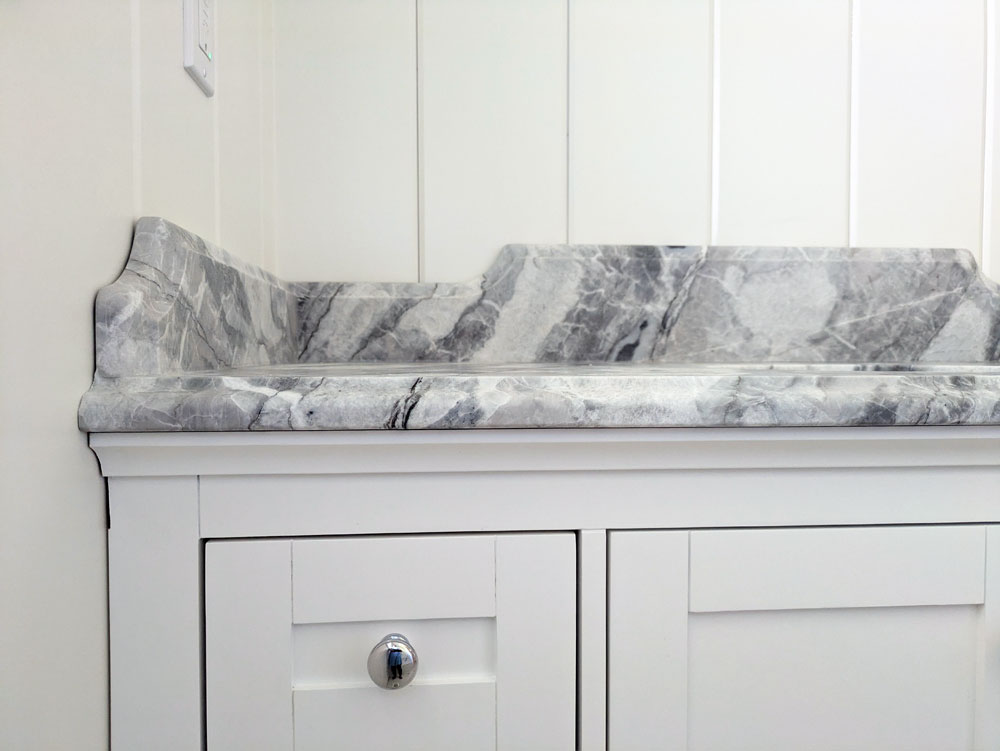
I chose Arctic Ocean marble in a leathered finish. I saw this marble in March on our first visit to the stone yard and immediately fell in love. When we went back in July to finally pick our slab, I still loved it.
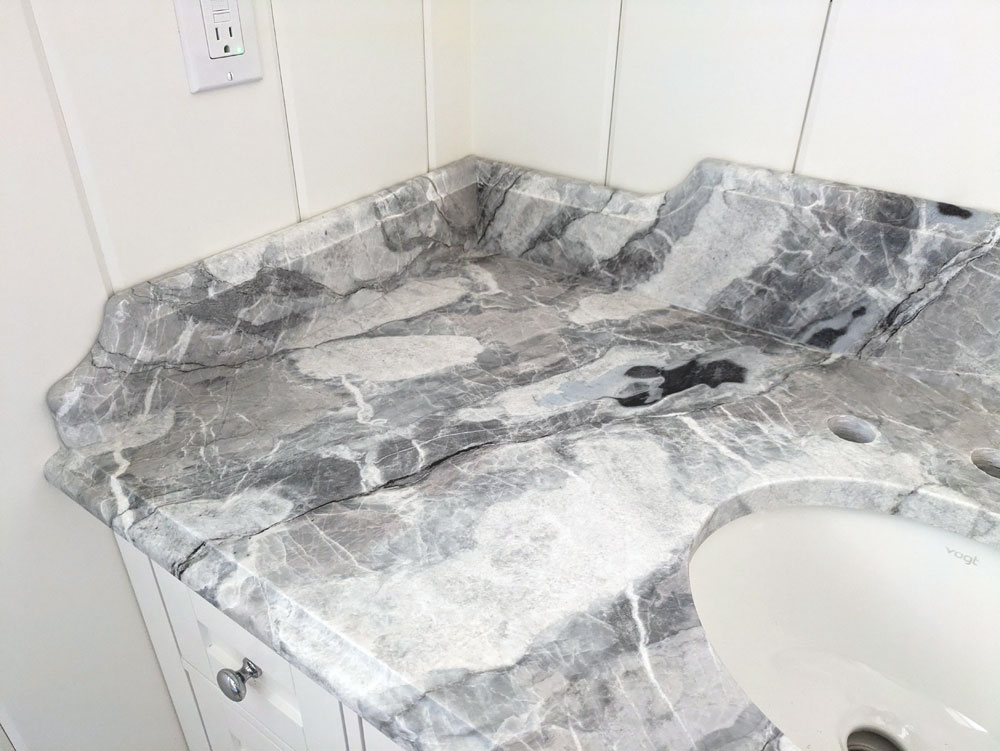
The Arctic Ocean is a busy stone with lots of veining and a big range of dark and light. I wanted the counter to be more dramatic, and AO was a perfect fit.
The leathered finish is super cool too. The stone has a texture. It’s smooth, but it’s not perfectly flat. It’s also extremely matte and not shiny at all. I feel like this highlights that it’s a real stone, which is a good fit for the farm.
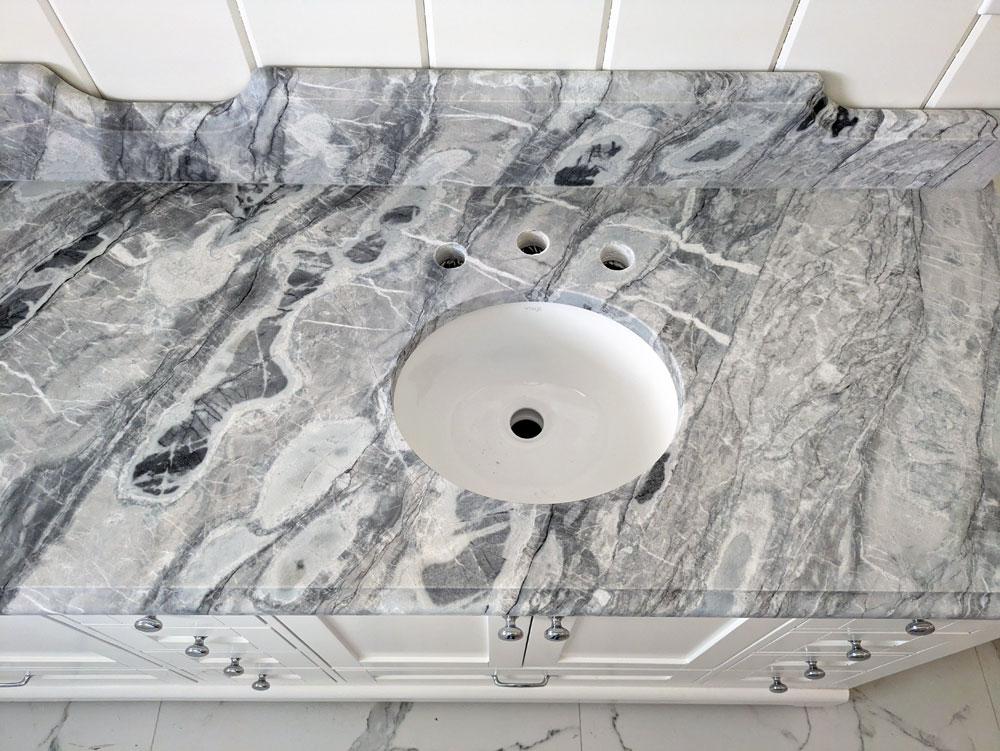
The other thing I wanted was a fancy backsplash. If you recall my inspiration picture, the counter comes with an ogee edge and some cutouts. I drew a few different designs and then quickly picked one and passed it off to my fabricator. They did a fabulous job of bringing my vision to life.
The backsplash was another source of worry though. I wanted the splash to go up 6 inches behind the sinks. Our faucets are quite tall, so I wanted the splash to look proportionate to them. But our mirrors are also very tall. Would I have room between the top of the backsplash and the bottom of the lights for the mirrors (which were one of the first things I picked for the bathroom)? We do. It’s a perfect fit.
The fabricators made two side splashes as well for either end of the counter. These have the ogee edge, some swoops and perfect corner joints to the backsplash.
The installers had a moment of confusion when they arrived and said, “Um, Miss? This counter is supposed to go wall to wall.” The second “wall” will be the wood storage hutch which is still with the carpenter. The installers left me a tube of silicone and I’ll install the second side splash myself when the hutch arrives.
The one wrinkle with the countertop was the sinks. When our fabricator came to measure a few weeks ago, I showed him the sinks and he said, “Those won’t fit.” The sinks were too wide (front to back) for our vanity. So I quickly went back to my bathroom supplier and ordered the narrowest sinks they had. The sinks are a bit small, but there’s room for the backsplash, faucets and mirrors–and we get to see more of the beautiful marble.
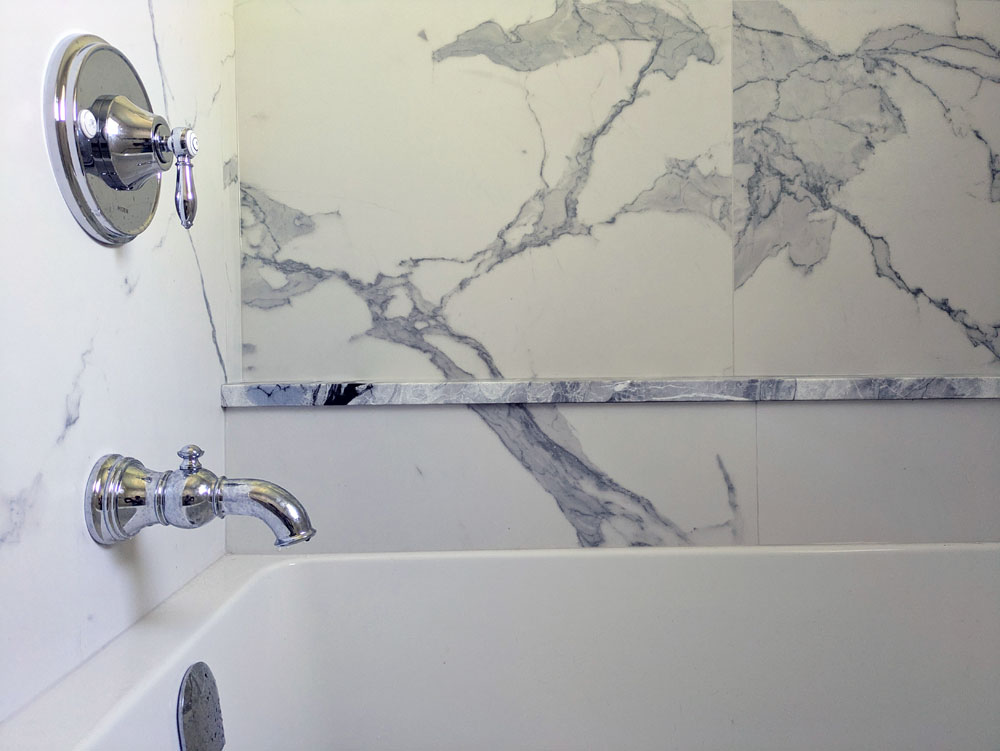
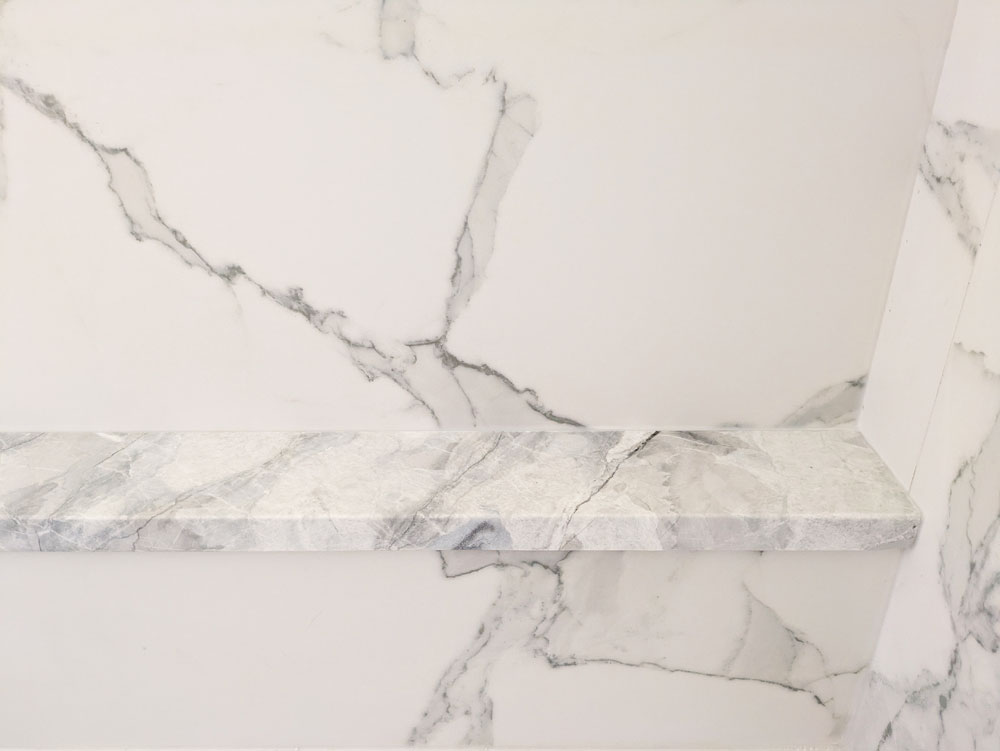
The final bit of marble we have in the bathroom is the ledge in the tub. I love that I decided to do this full-length ledge. It will hold everything we need and the marble is such a beautiful feature in the tub. This ledge highlights what a good match the Arctic Ocean is for the tile and also the colour variation of the AO (see the hint of blue by the taps?).
All of this marble is so special. It’s definitely a major showpiece in the bathroom. Even better, with this installation, we are definitely nearing the end on this bathroom renovation.
Do you have any marble in your house? Do you like dramatic veining or a more quiet pattern?
More than a year ago I mentioned I was thinking about buying a ceiling fan for our front hall. I was hoping a fan might help regulate the temperature between upstairs and down, particularly in the summer, particularly when we’re using the air conditioner.
The feedback I collected and the brief amount of research I did suggested that the ceiling fan might be more helpful in the winter. The fan would push the warmer air downstairs, more than it would pull the cooler air up.
Shortly after those musings, I was in a local store that was going out of business and I spied a basic ceiling fan on sale. I decided I was done thinking. I bought the fan.
But that’s as far as I got. The prospect of installing the fan over our stairwell was not something I was enthused about. So the fan sat in its box on the mudroom landing. For more than a year.
Then summer returned. Temperatures rose higher than ever. The basement was frigid. I really wanted to give the fan a try.
Finally, I had a brainwave. Our electricians were here for the bathroom. I could ask them to install the fan. Problem solved.
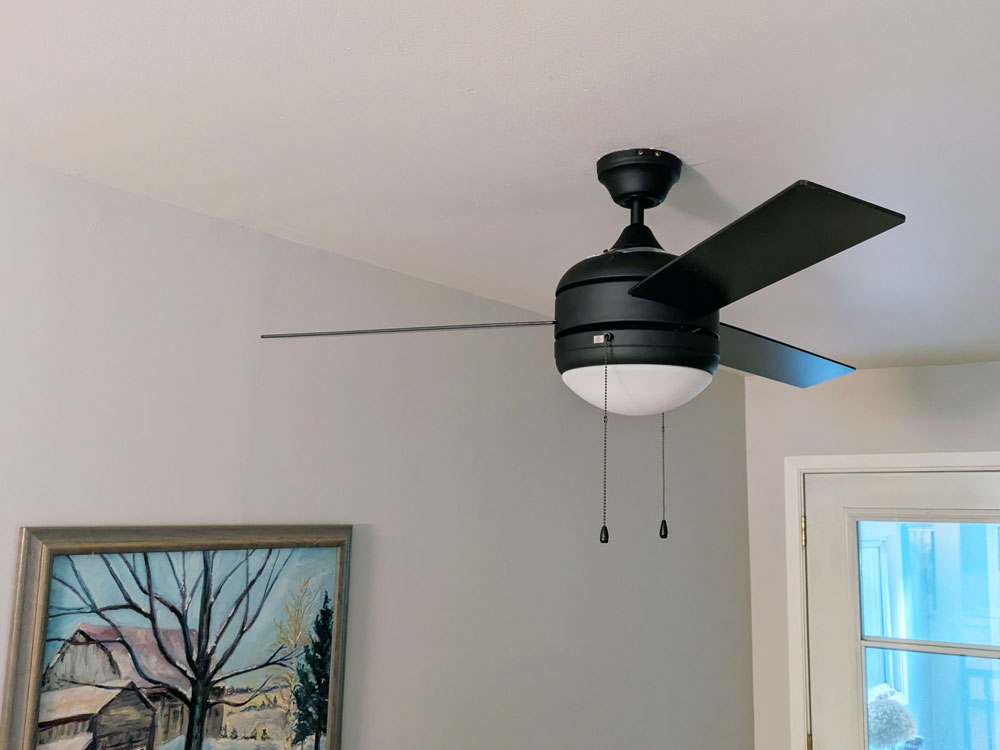
The electricians were happy to take care of the fan for me. And I’m very glad I asked them to do it, as install included switching the electrical box with a fan-rated box, something I wouldn’t have known was needed. (Also, there was the whole hovering over the stairwell while holding a large heavy fan over your head thing.)
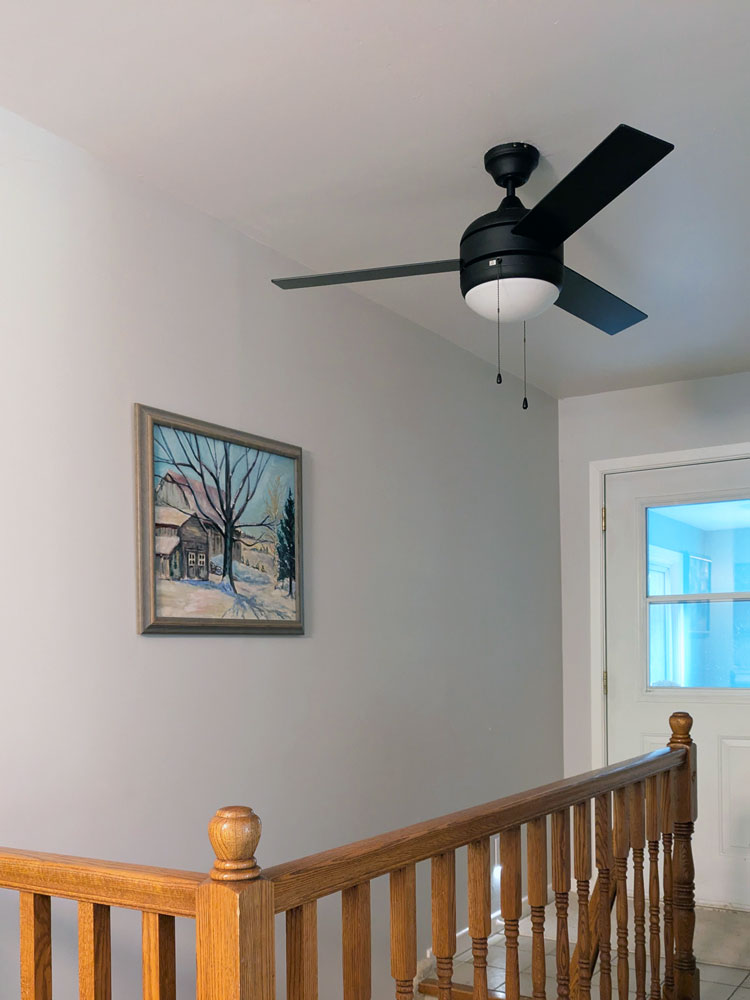
So we now have a fan in the front hall. I’ve been running it most days. It does move the air around, though I’m not sure I’ve noticed a huge change in the upstairs and downstairs temperatures. The air currents extend into the kitchen, so I feel a nice breeze sometimes when I’m in there.
I’m curious to see if I notice any difference in the winter.
For now, I’m happy the fan is no longer on the mudroom floor and instead on the foyer ceiling as intended.
Are you a ceiling fan fan? Any tips for this fan newbie? Who else has bought something and then gotten stuck on the install?
I love summer. We’ve had beach days, cottage days, home days, adventure days. We are doing our best to “do” summer, and we’re having so much fun.
This month’s round-up is outdoorsy, cottagey and summer-inspired.
If you’re able to give this video a watch, you’ll be using YouTube to plant a forest. (Please take a minute to watch the video.)
I have cottages on my mind after our annual getaway with my family. I love Sarah Richardson’s designs, and her “Island Rescue” project was fun to follow. I think the living room is my favourite space. Or maybe the kitchen.
My love of summer started at my grandparents’ cottage. This cottage is on the same lake that I grew up on.
This book was a call to keep moving, keep adventuring. Just what we’re going to keep doing this summer.
“I was also being given a continual positive primate about aging… I learned that one’s advancing years can be a time of growth and revelation. You march boldly toward the setting sun, marveling at the golden hour, then the twilight, becoming happier and more confident with each step.”
Anyone want to go to the bathroom? (I realize that may be an odd question, but I really hope you say yes, because I have things to show you.)
Our main bathroom is looking so good. We are still under renovation, but I’m making progress (one of the realities of DIY is that things usually take a while).
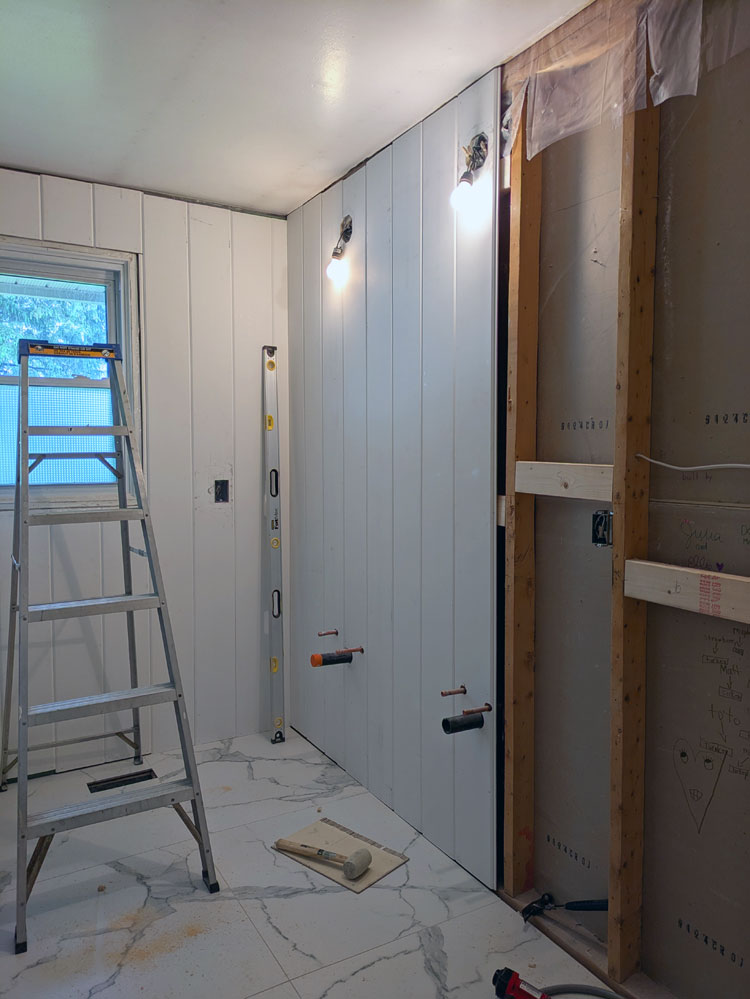
My last update took you through demo, plumbing and electrical rough-in, tile and the start of the wall panelling.
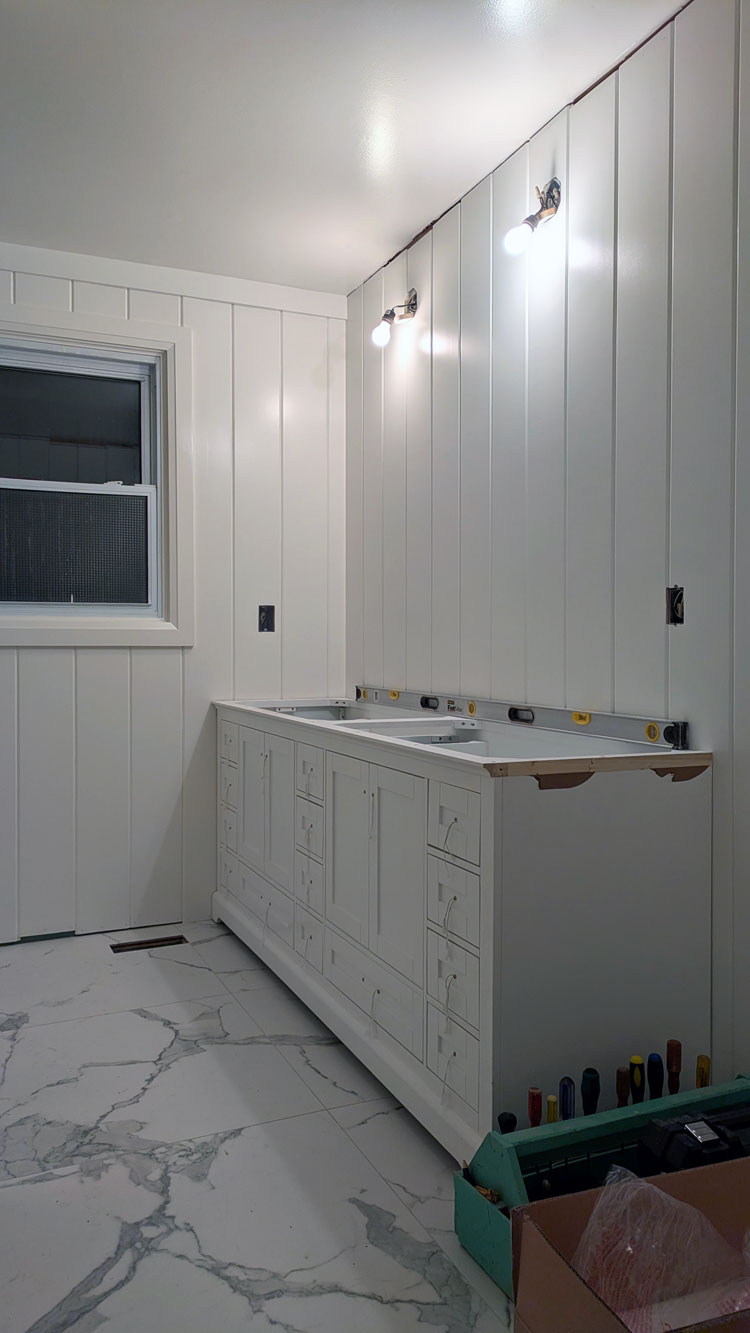
Now, the panelling is up and painted. The vanity is in place. And the electrical is complete. Today I’m going to share the details of how it all went.
This bathroom has been a stretch for me in terms of my skills, and panelling was something I’ve not done before. I chose a pre-primed, tongue and groove, pine V-groove for all the walls. I started installing it behind the door so I could hide any mistakes, but everything worked out fine.
I prepped for the panelling by installing blocking between all the studs about halfway between the ceiling and the floor. This gave me an extra spot to nail the boards and ensure they were fastened securely. I used my Dad’s long level to make sure each board was straight and a rubber mallet to make sure the joints were tight. Then I face nailed each board top and bottom and one nail through the tongue into the blocking.
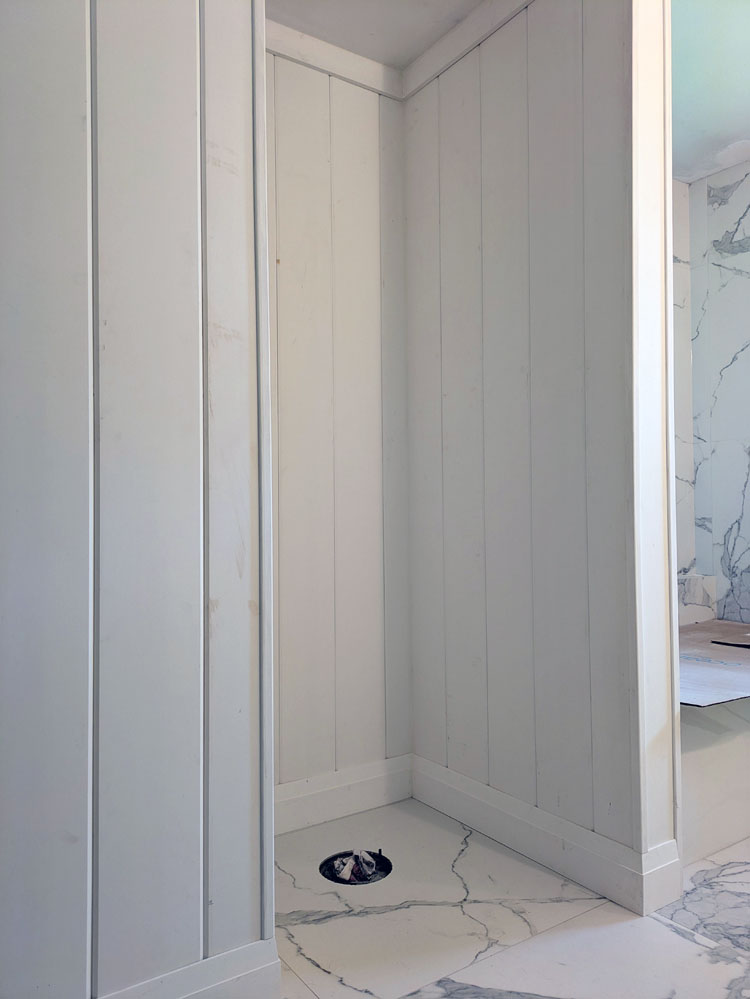
Once the panelling was up, I moved onto the trim. Trim was essential because it covered all of the gaps with the V-groove. I did window and door casing, baseboard, flatstock along the ceiling, and corner pieces over every outside corner. There are a few spots that still need trim, but I’m waiting until the vanity and hutch are complete before I install these finishing touches.
Trim is slow and challenging because I had to be super precise with every measurement, every cut and every install. But it turned out really well and finished off the panelling beautifully.
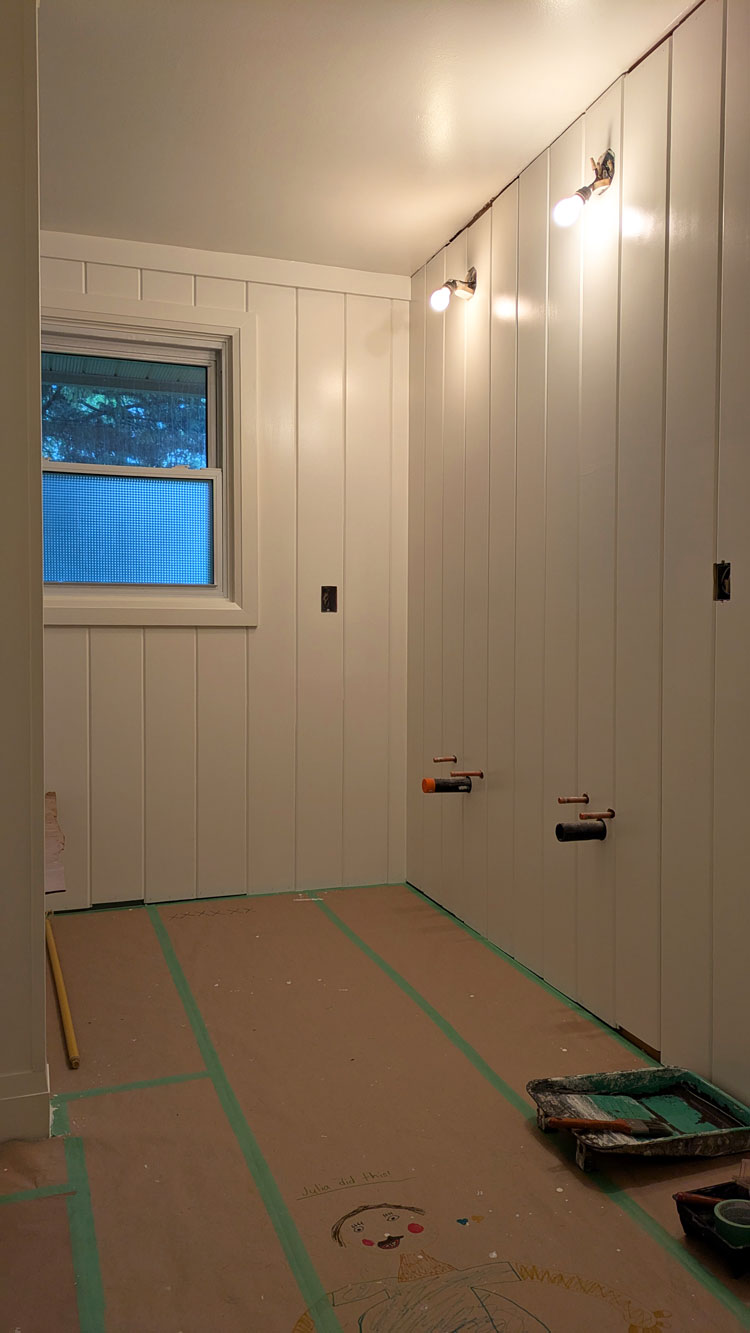
Then came paint. While I hadn’t installed panelling before, I had painted it in the mudroom. There, I rented a sprayer to ensure I got into every groove. I didn’t love the sprayer. The rental process was not straight forward, and my spraying technique wasn’t great. For the bathroom, I decided to try a roller and brush and hope I could get into the grooves and achieve a good finish.
It ended up working out really well. I cut in around the ceiling, floor, corners, door and window with my brush. It was tedious, but I covered everything well. Then, as I hoped, I was able to squish my roller into the V-grooves between each panel, so they were completely painted. Then I carefully went over the whole board with the roller to smooth out any excess paint.
I chose to paint the bathroom white. I’m not a white room person usually, but I really like the warm white we have on trim and furniture throughout the house (Benjamin Moore Cloud White). I thought it would look good for the bathroom. The V-groove adds a lot of texture to the walls, so there is good visual interest. Plus the white lets the other elements of the bathroom–the tile, counter and wood hutch–stand out.
I used Benjamin Moore’s Advance line. This is my go-to cabinetry paint, so I figured it would be extra durable for the bathroom.
Next up was the vanity. I picked the vanity design a very long time ago (before Ellie was born). I had stumbled across an image of a vanity with cabinets under the sinks, but they were shorter than usual. Under the cabinets were drawers. I loved the idea of drawers for extra storage, rather than wasting space with a big cupboard.
I knew I wanted simple shaker doors and it was going to be white.
When I ordered all of the bathroom fixtures, the consultant I worked with looked at my plans and said, “You’ll need custom for the vanity.” So I called numerous cabinetry companies and tried to find someone to make my dream vanity. When I finally found one to give me a quote, the estimate came in at $9,000 and they couldn’t build it until the fall. Umm. No.
I hopped online and was amazed to discover a vanity very close to what I wanted at Home Depot. It was the size, colour, profile and even more important drawers I wanted. It was half the price of the custom vanity. And it could be here in a week. Sold.
The vanity did need some adjustments. It’s meant to be free-standing, but I wanted it tight to the wall and the hutch I’m having built. To make that happen I had to cut off a bit of trim at the top and bottom on either end.
Cutting into a brand new vanity is a bit nerve wracking. The amputation also required turning the vanity upside down, which was too heavy for me to do on my own.
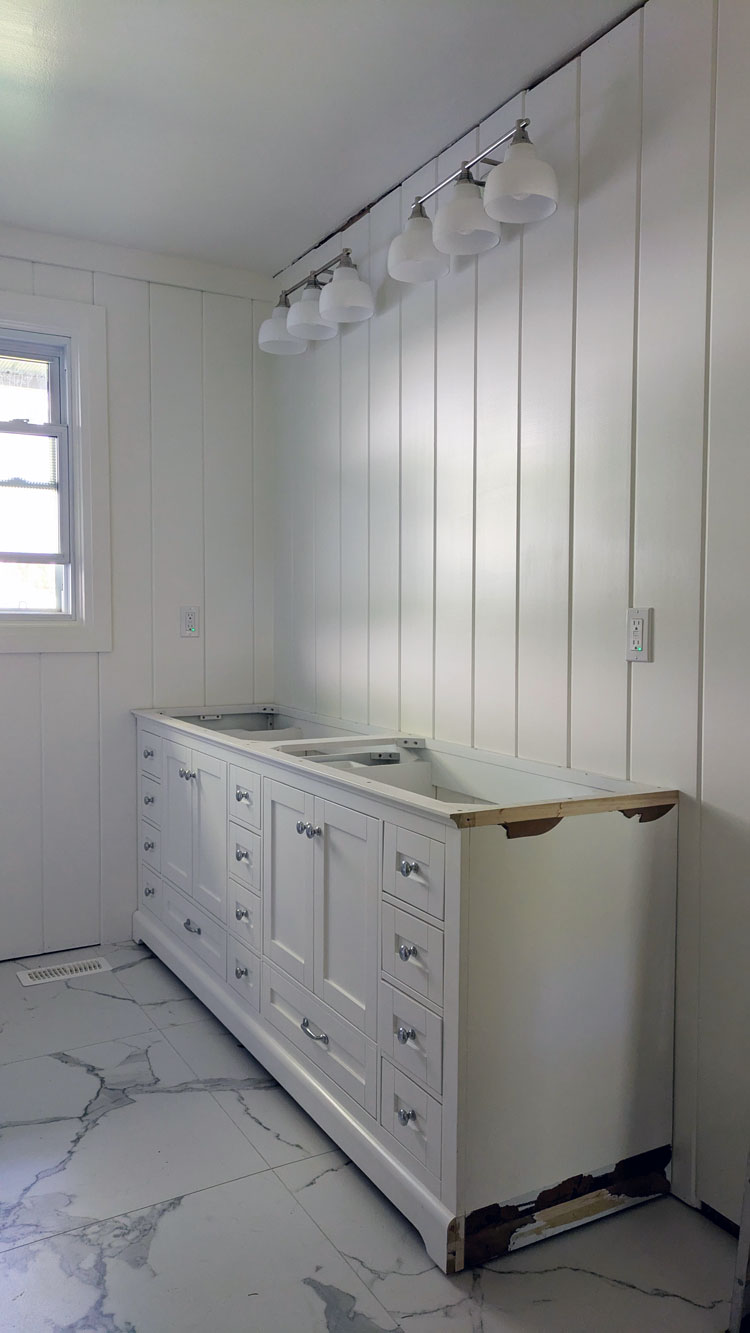
So I exercised my phone-a-friend option and that friend, her very precise engineer husband, and weight-lifting son came over to help. They removed the necessary pieces and then carried the vanity inside. It was a tight fit, but they made it into the bathroom, and I was so pleased once I saw it in place.
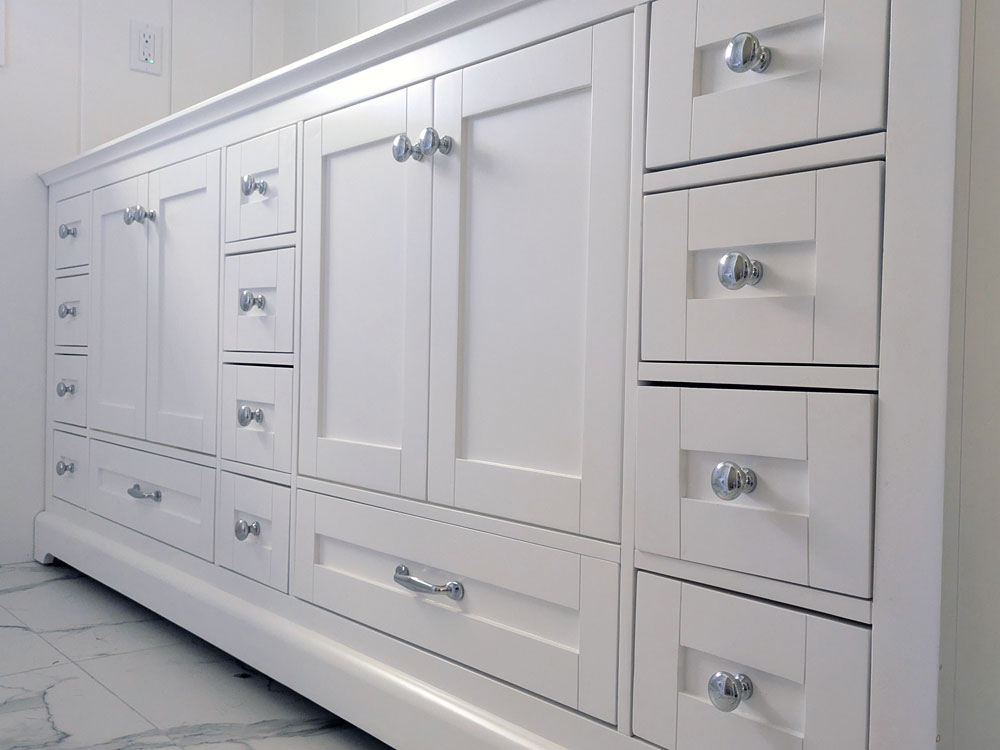
One of my concerns with the vanity was the colour. Would the white be too cool against my creamy walls? Would I have to paint the vanity? The white looks great. It’s not an exact match to the walls, but it is definitely on the warmer side. The surgery worked and the vanity fits tight to the wall. All of the nicks and cut marks will be hidden.
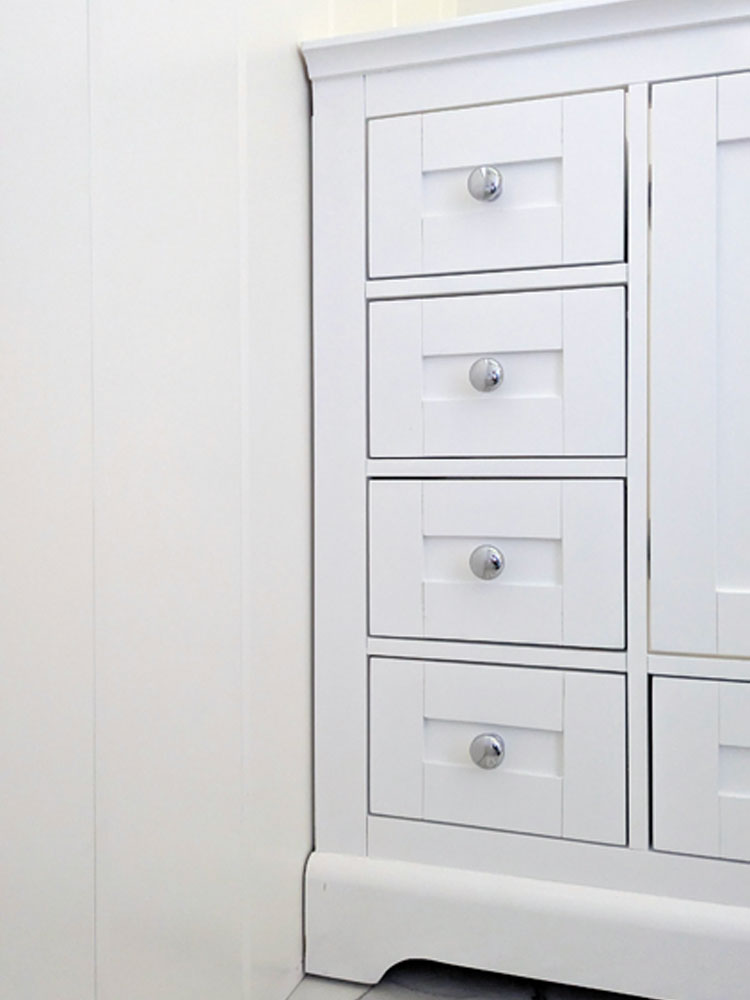
One of my other concerns with the vanity was the hardware. The online listing said it came with brushed nickel hardware, which was not the look I was going for. I planned to source hardware that fit the pre-drilled holes. But as I unscrewed the hardware (it was installed backwards for shipping), I discovered it was polished, so I decided to install it.
The decision to go with the polished hardware solved another dilemma–the lighting. In my original mood board for the bathroom, I had thrown in a light, but I really had no idea what kind of light I wanted.
I planned to mix metals. Chrome on the taps and maybe towel bars? Black on the hutch hardware and hooks? Brass on the lights and vanity hardware?
I searched through so many lights online and couldn’t find ones that seemed exactly right. I wandered lighting boutiques and big box stores. I added to my Pinterest board. I polled my family with various options.
I finally ordered a gold light that I liked. But when it arrived, it turned out I didn’t like it that much. The gold was very brown. Almost copper. It blended with the frame of the mirrors, when I wanted it to stand out. It was not the look I was going for.
The polished vanity hardware helped me decide to skip bringing brass or gold into the bathroom. I would still have the touches of black I was planning, but the lights were going to be shiny silver.
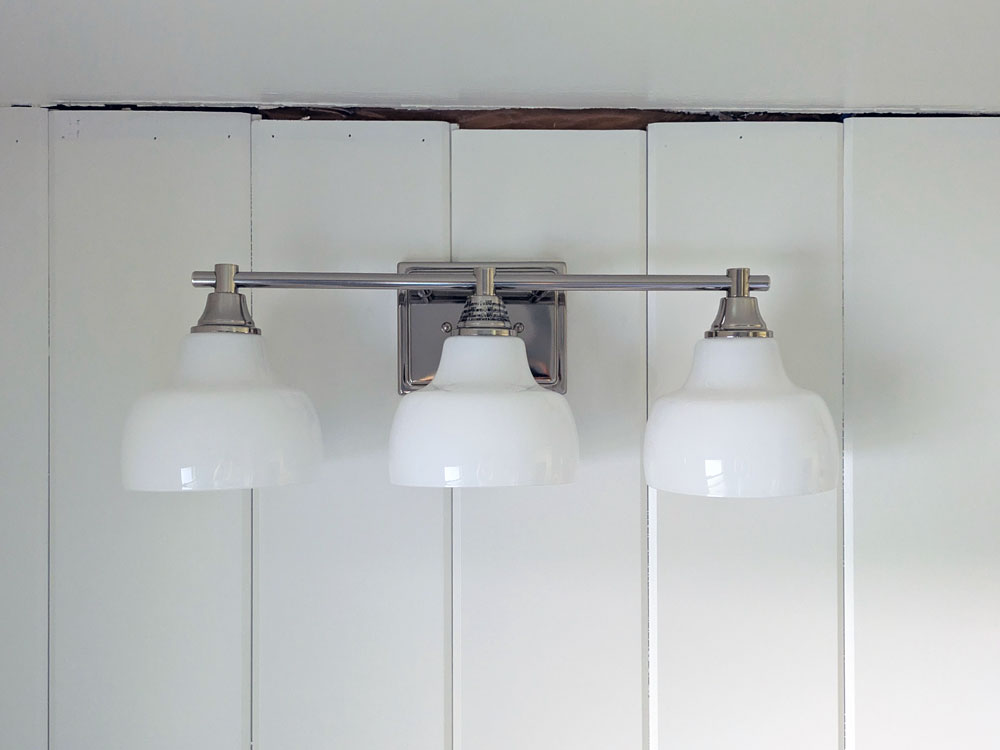
I went back to a light I’d seen at Home Depot. It had white milk glass-esque shades like the schoolhouse lights we have in the hall and kitchen. It had bright shiny polished metal. Even better, it was in stock at my local store–critical since the electricians were coming in 5 days.
So I bought the lights. When I unpacked them at home, I decided I still liked them.
The electricians came and installed the lights, plugs, floor thermostat, timer for the fan and dimmer switch for the lights. So electrical is done.
The bathroom feels extremely bright with our new lights and white walls. We went from two bulbs to six, which is a big glow up. Fortunately, we have the dimmer switch. We also went from one plug to two. And of course there’s the heated floor. So many upgrades.
I’m really glad to have one trade completely finished. The biggest tasks that I had to tackle are also done. I managed to finish the painting before Ellie finished school for the summer. All of my jobs now are very manageable.
As more and more pieces come together, I’m thrilled with how everything looks together. I had a very clear idea of what I wanted in the bathroom and how I wanted it all to look. But when designing a bathroom, you pick these big, really hard to change things like a tub, tile, vanity, countertop mostly in isolation. Then you cross your fingers and hope they all look good in the room together. So far, they do, which makes me very happy.
I’m documenting the bathroom reno and sharing it in a series of videos on Instagram. Follow me at juliaon129acres, and catch up on all the construction in the bathroom highlights Part 1 and Part 2.
Have you ever modified a brand new piece of furniture? How do you feel about the metal mixing trend? Are you a polished or brushed person? Are you a white room person?
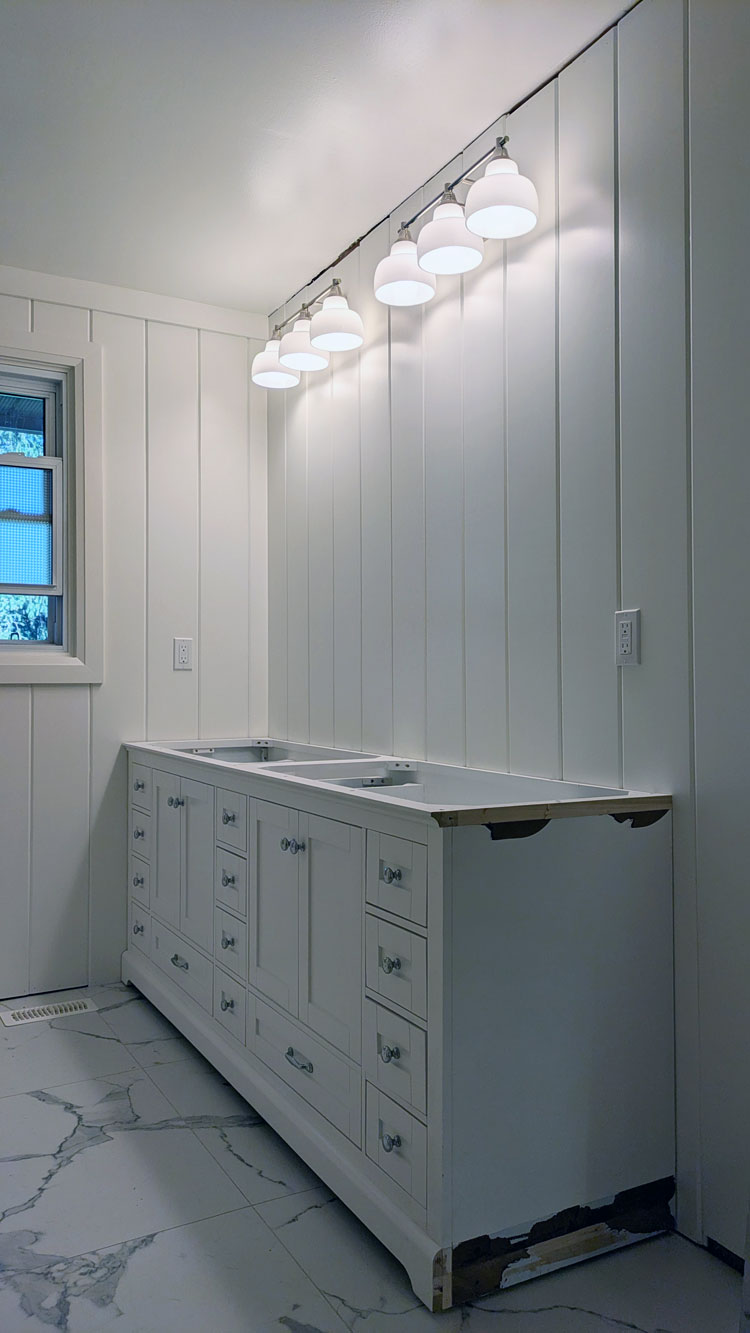
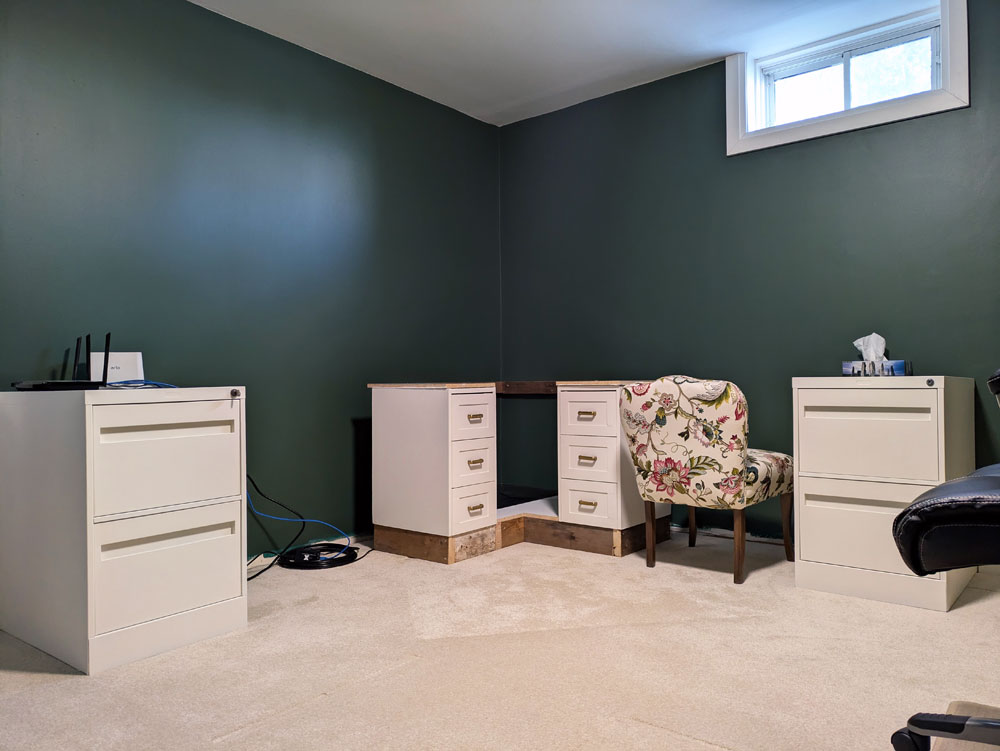
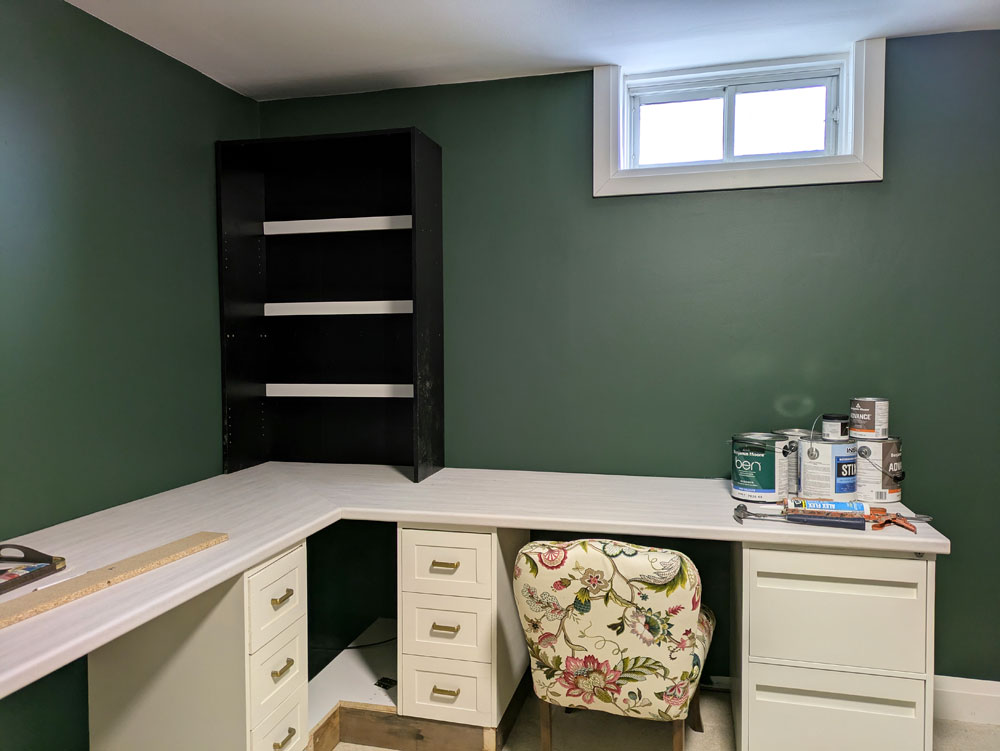
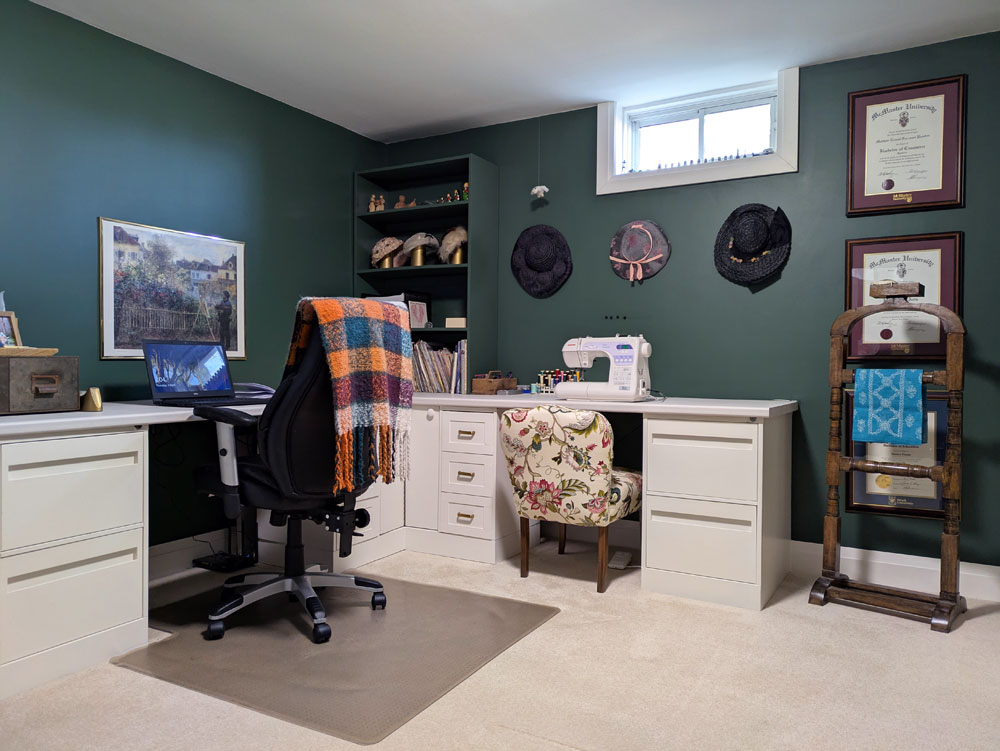
Take one old desk, two file cabinets, a bookshelf, a countertop and a dream and what do you get? The desk in my new office.
My vision for the desk was pretty clear right from the start. I knew I wanted two work stations. I knew I wanted file storage. And I knew I was cheap.
Fortunately, I also knew I was handy.
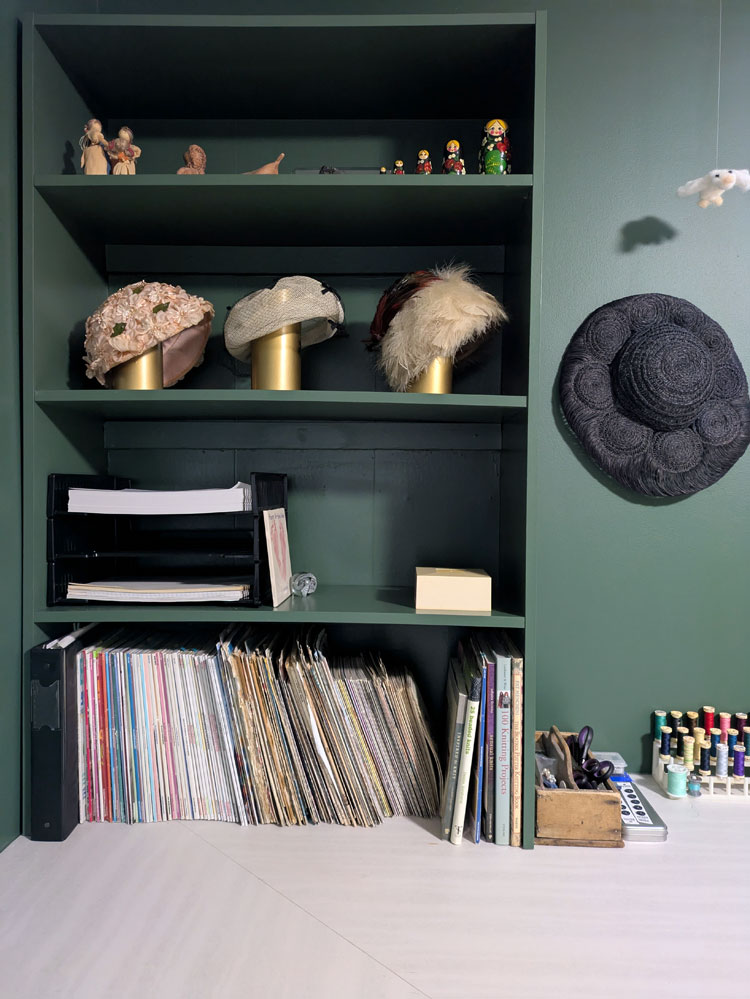
I came up with the idea of a long counter that wrapped around the corner. Underneath there would be regular desk drawers and file drawers. In the corner on top there would be open shelves for storage and display.
I knew what I wanted. Now I had to make it happen.
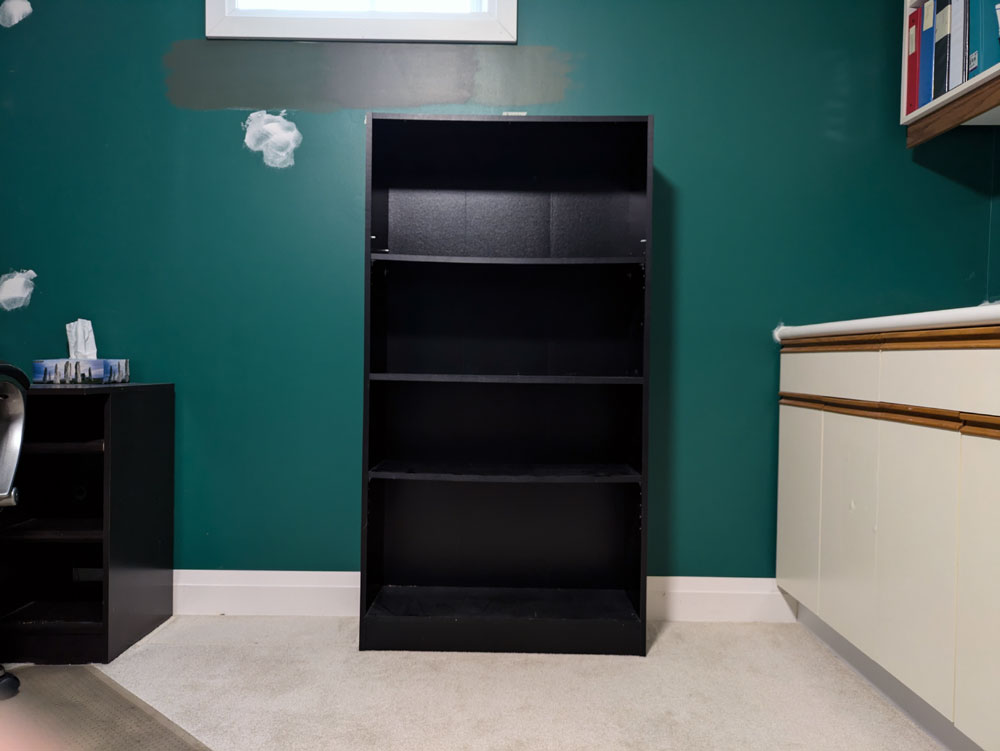
When we cleaned out Matt’s office, I left one bookshelf behind with the plan to use it for the hutch on top of the desk. One component, check.
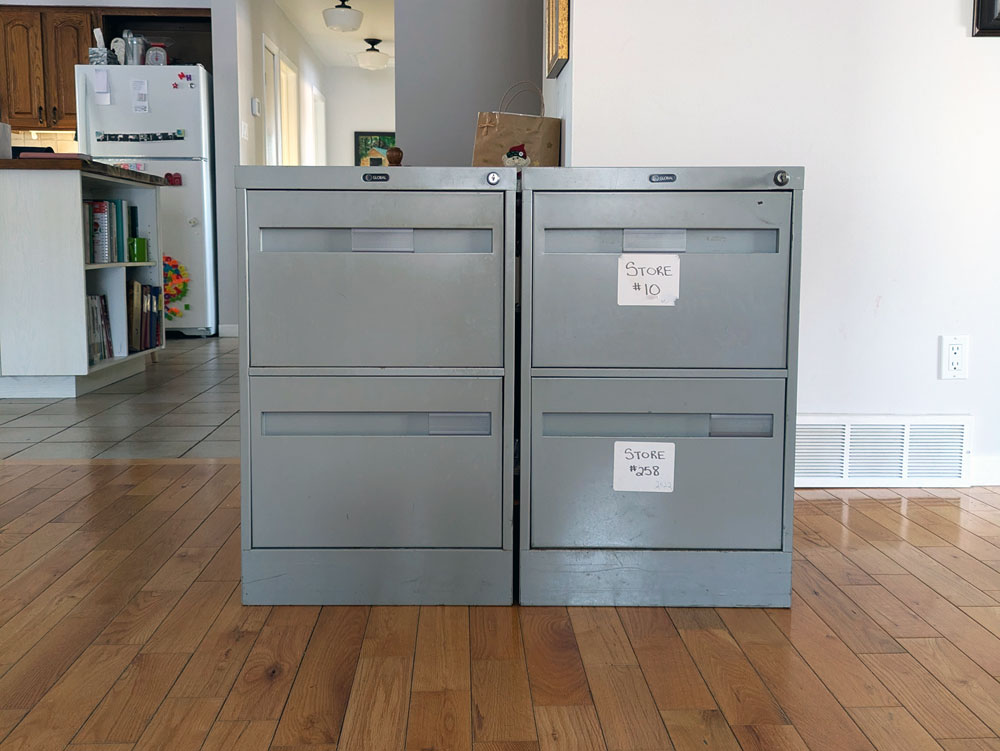
Then I moved on to the file cabinets. I wanted cabinets with a decent amount of storage that were the right height to support a counter. I found a matching pair at a used office supply surplus store.
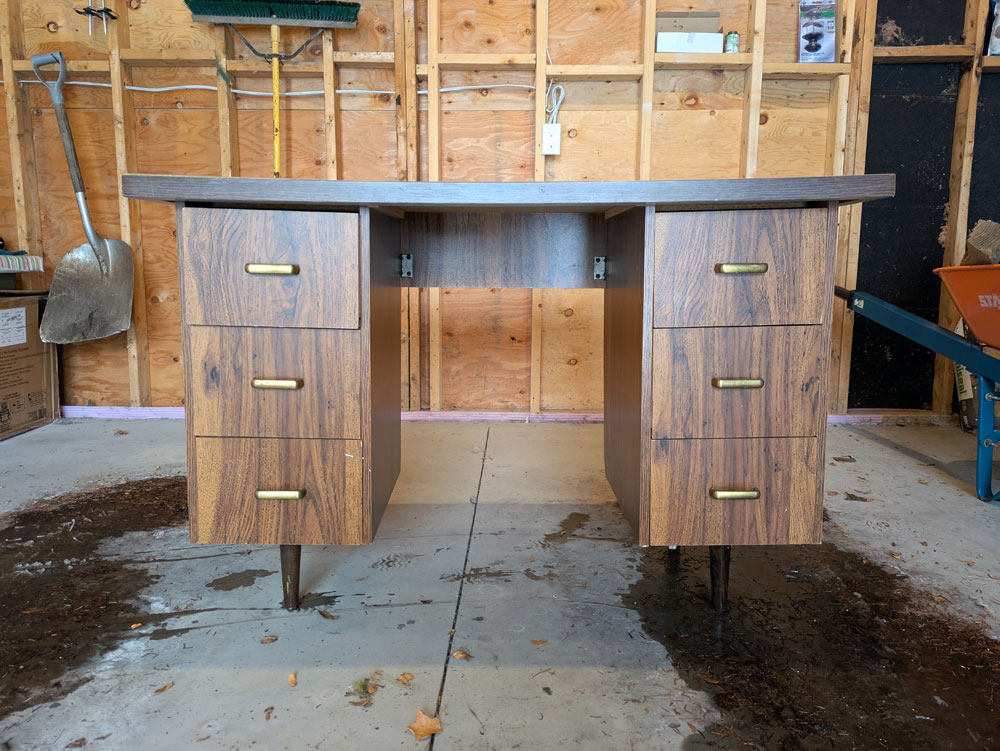
Next came the drawers. I considered building them and really didn’t like that idea. A search on kijiji netted me an old desk with two towers of simple drawers.
When we picked up the desk, the seller asked Ellie, “Is this going to be your desk?”
She said, “No it’s my Mom’s.”
The seller was a bit horrified. (The desk was pretty rough.) He said, “I have a nicer one in the house.”
I said, “No. This is exactly what I’m looking for.” And in my head, “You’ll never recognize it when it’s done.”
Elements procured, it was time to put them together. Or take them apart and then put them together.
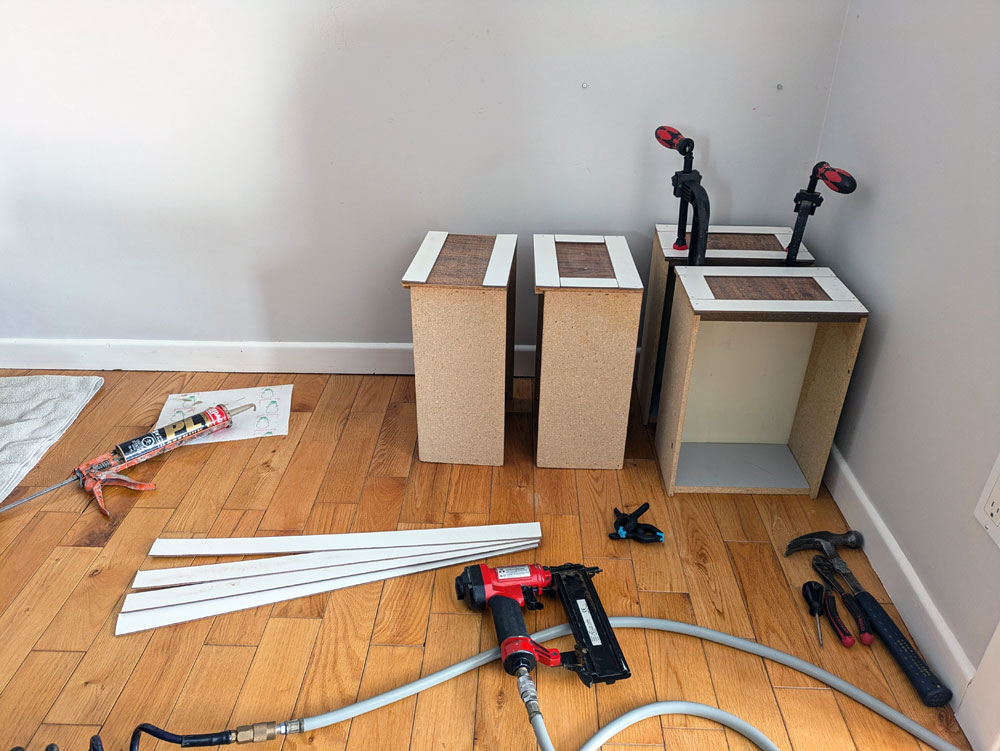
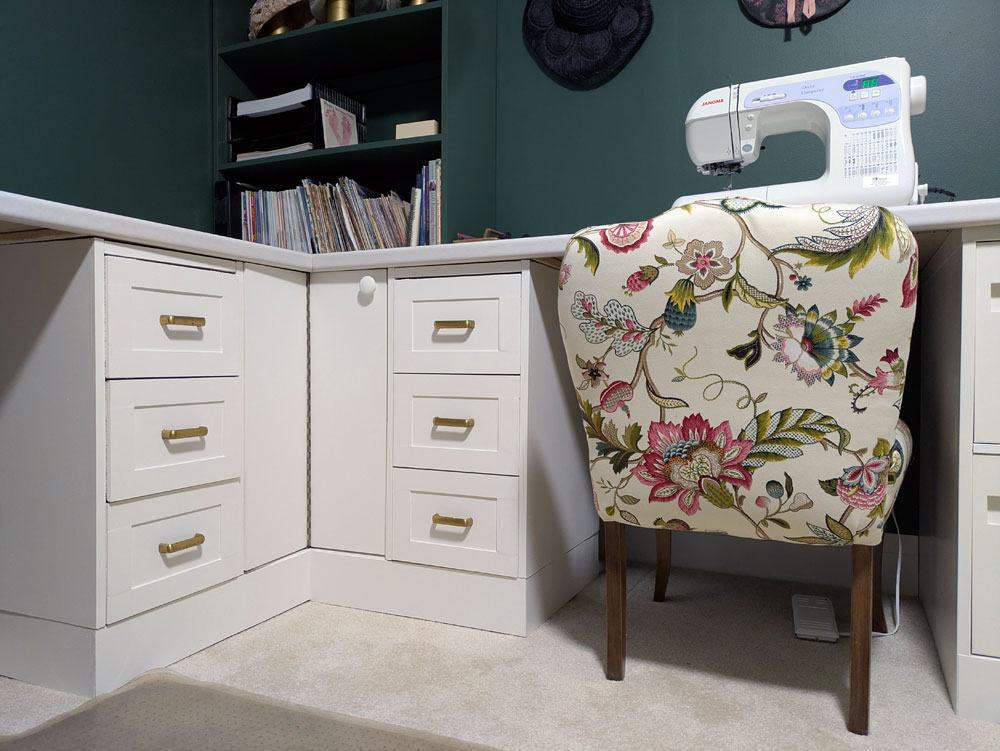
I removed the legs from the desk then cut the top so that I had just the two towers of drawers. Then I revisited the fake shaker technique I used in our laundry room and added strips around the edges of the drawers to give them the recessed panel profile. This is always the stage where I’m questioning my life choices and wondering how this is ever going to look good.
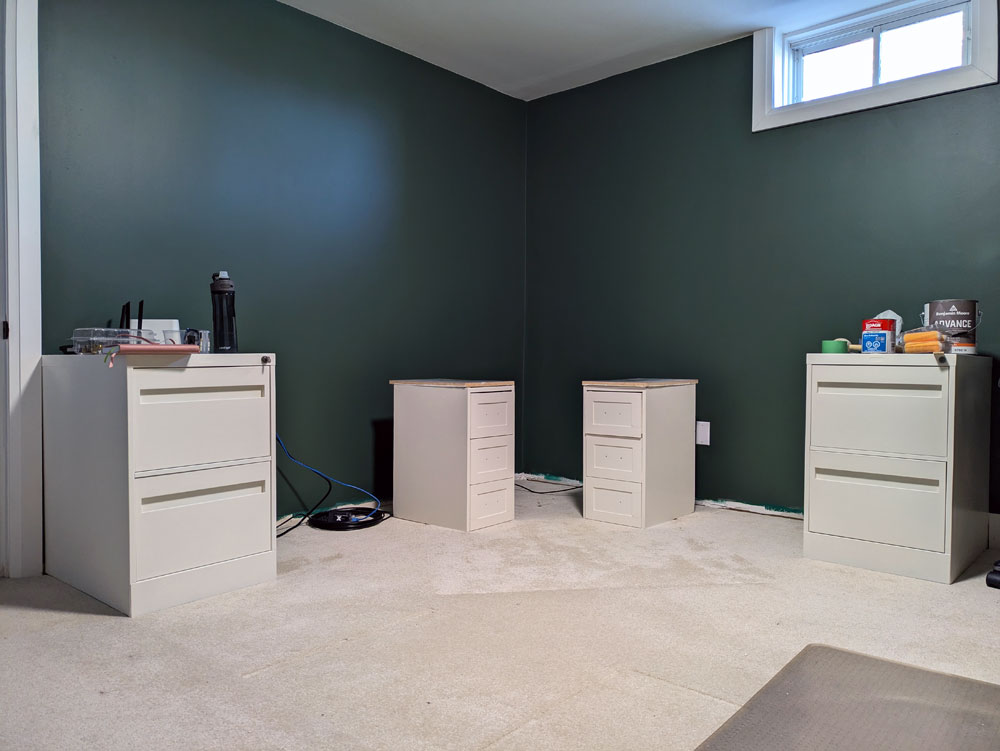
Wood filler, sanding and paint make everything better. I also painted the file cabinets my go-to furniture colour, Benjamin Moore Cloud White.
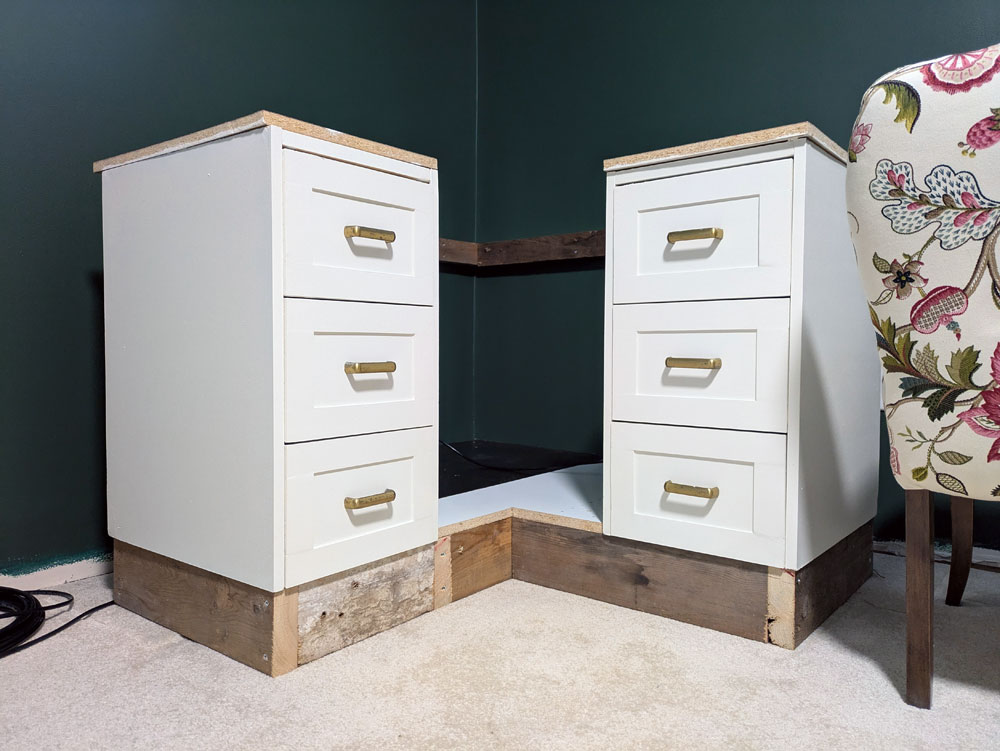
I was finally at the reconstruction stage. I set the file cabinets at either end of my L-desk. The drawers were going to go in the corner of the L, but they were a bit short.
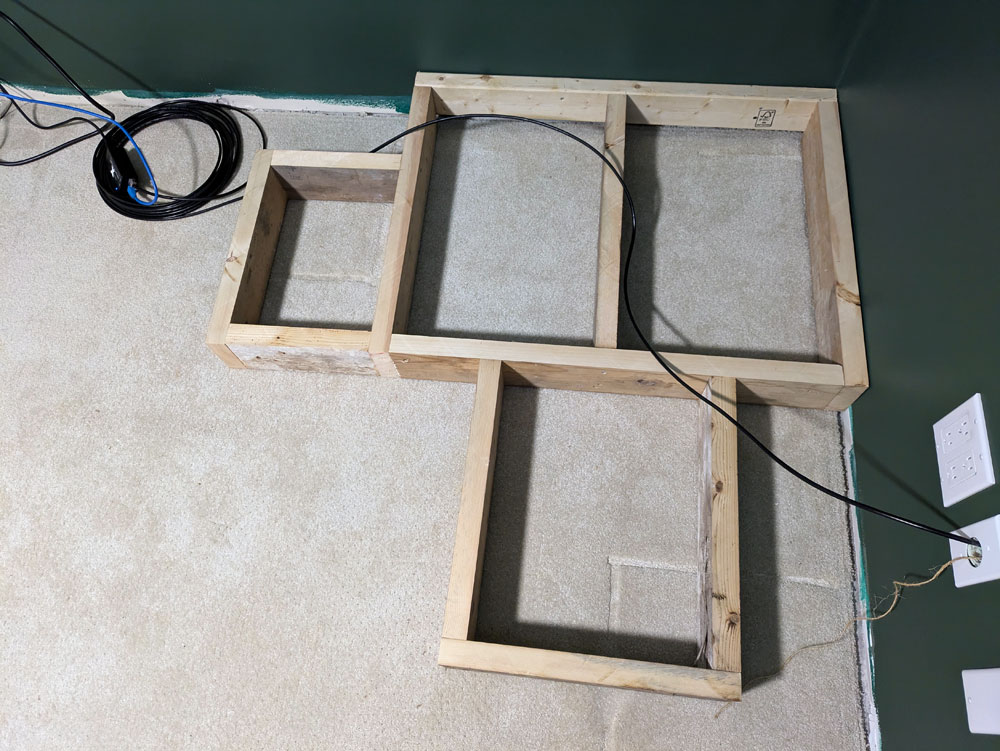
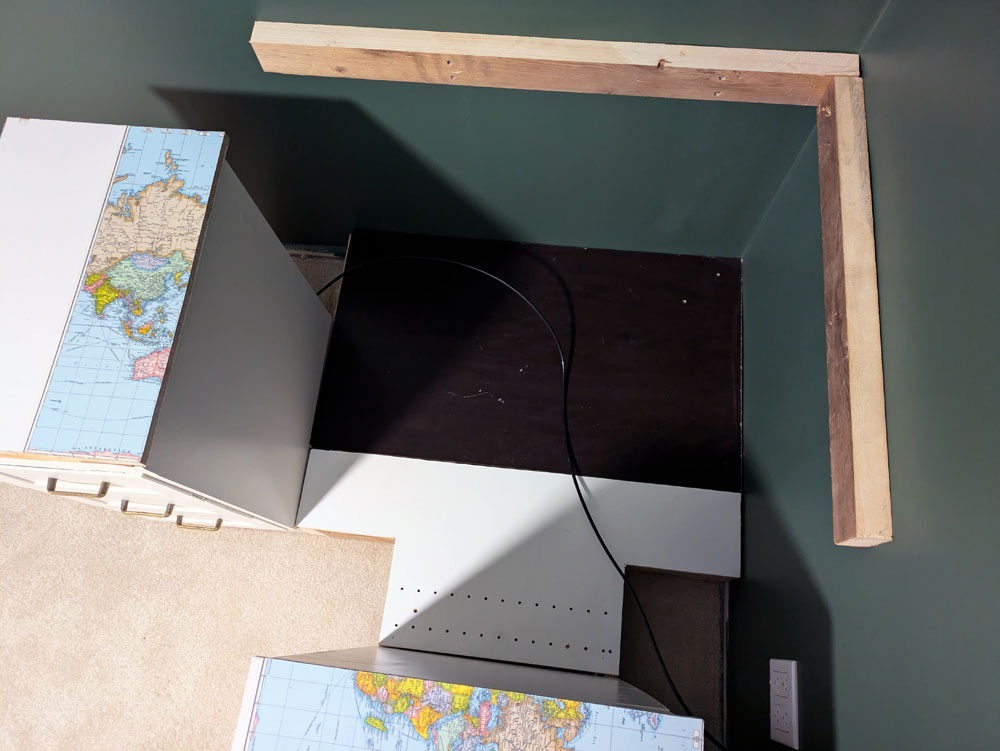
I built a little platform in the corner that raised the drawers up to be even with the file cabinets. The drawers are shallower than the file cabinets and I had to make sure I had access to some electrical outlets, so the platform appears to be oddly shaped.
After debating spacing and dimensions a bit, I decided to make the corner into a functional cupboard, albeit with a very small doorway and a patchwork floor. This is the spot for memorabilia and rarely used things.
With the drawers in place, I threw a piece of plywood on top and took the desk for a test drive.
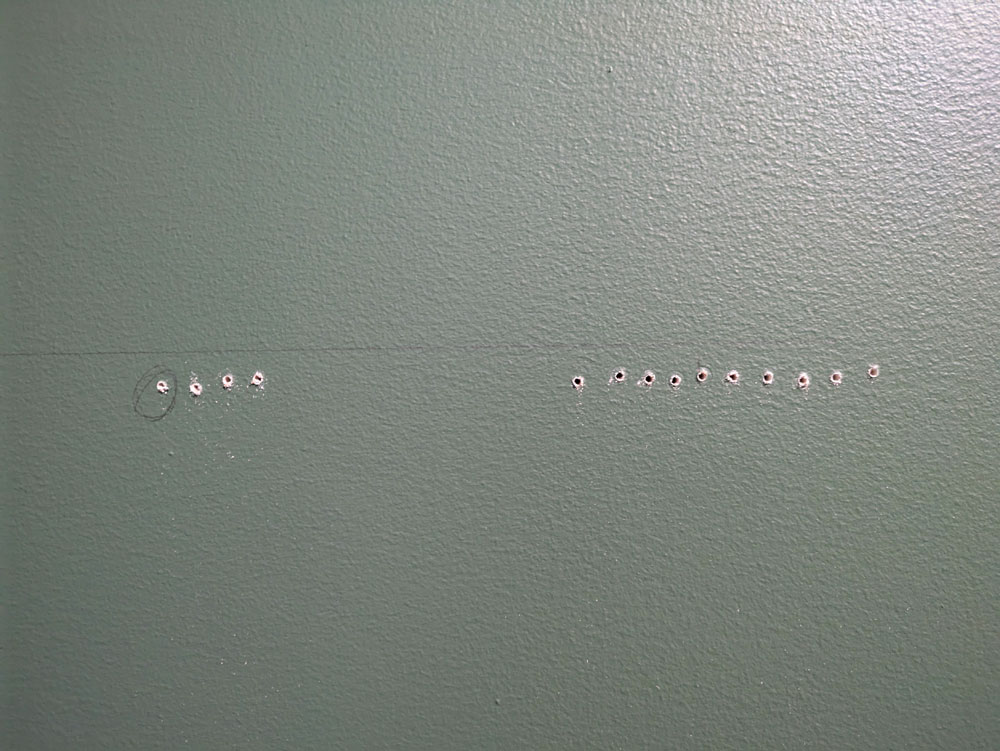
Everything was level and felt good, so I placed my order for a countertop. I went with a simple laminate counter. I added some ledger boards on the walls for additional support (after drilling just a few holes to find a stud).
The counter also rests on all the drawers. Thanks to the size of my file cabinets, the desktop is extremely deep. Lots of space to spread out.
Bottom half done. Onto the hutch.
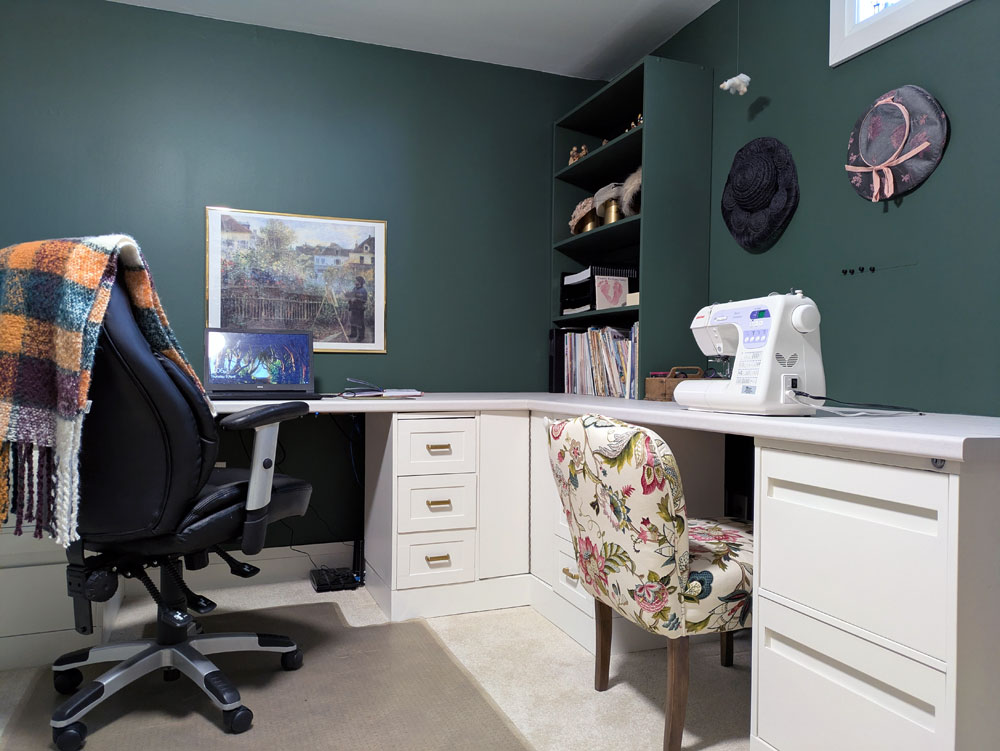
I cut Matt’s bookcase so it was the height I wanted and then I positioned all of the shelves and fastened them in place. I added extra bracing along the back as well.
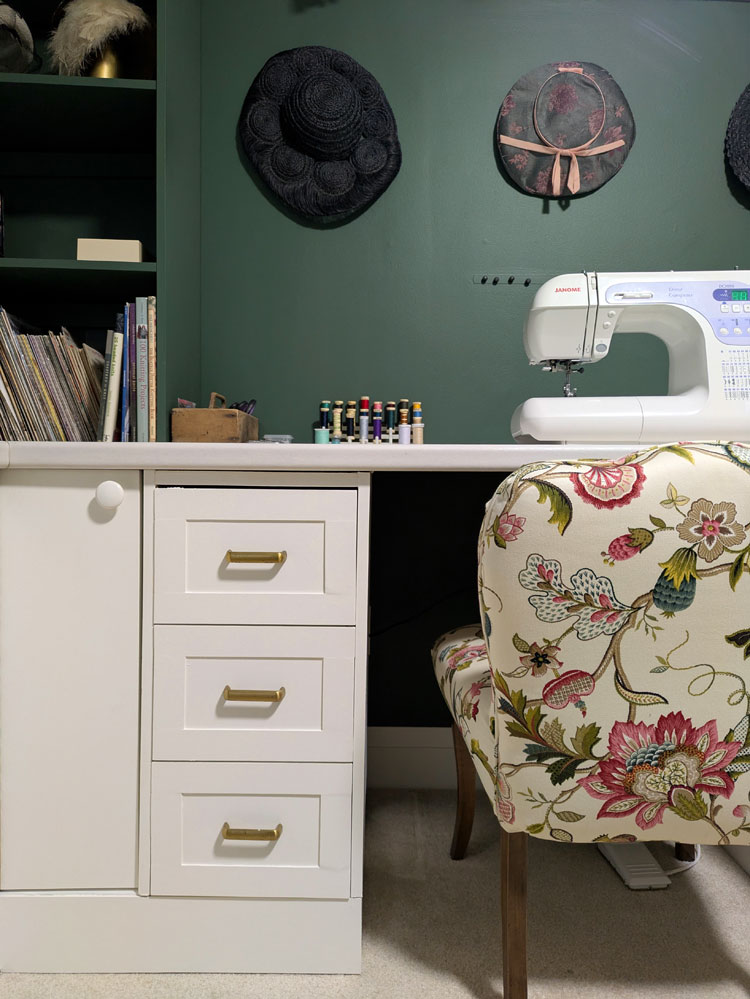
I debated what colour to paint the shelves and ended up deciding on the same green as the walls, rather than white. After few coats of paint, I lifted it onto the desk, set it in place and screwed it to the wall. Some wood filler and paint touch-ups finished it off.
The final step was a door for the corner cupboard–and we just happened to have a corner cabinet in the barn. I removed the door, cut it down to the size I needed (carefully preserving the hinges), gave it a coat of paint and… couldn’t figure out how to fit it in place. Fortunately, I live with a small person who is keen to help, so she climbed into the cupboard with a flashlight and pencil and marked the hinges for me. (Throughout the construction process, she liked the idea that the corner was a hidden fort just for her, so she had no problem climbing in when asked.)
I was then able to drill the holes and screw in the hinges. A wooden knob, some painted hardboard for the toe kick and reinstalling the baseboard were the final touches. The desk was done.
I am not a cabinet builder and fine carpentry is not my strength. I am really proud of how the desk turned out. I was able to take an idea, a bunch of furniture pieces, put them together and create an awesome, functional, attractive result.
Anyone else have any Frankenstein furniture? Have you every remade a piece of furniture? How do you prefer to work? Do you have a dedicated desk? Or do you move around?