The trouble with our trails

I completely love that we have a property where we can go for a hike. However, I have two issues with our trails.

1. Our trails are slightly extremely overgrown. Because we’re not riding horses over them, because we don’t have a mower that we can take on them, because in the spring the trails are mostly underwater, because the mosquitoes were so bad this year that we haven’t been on them in months, hiking requires a fair bit of bushwhacking.

2. Our trails do not loop. They are all out-and-backs. Despite knowing this, I persist in trying to find a way around. The result is predictable: I end up either in water that is higher than the tops of my boots, or I end up in impassable brush. Sometimes both.

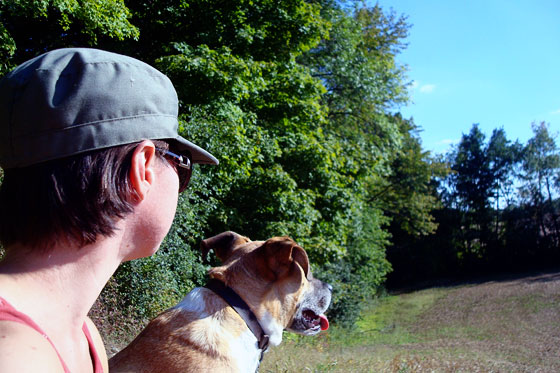
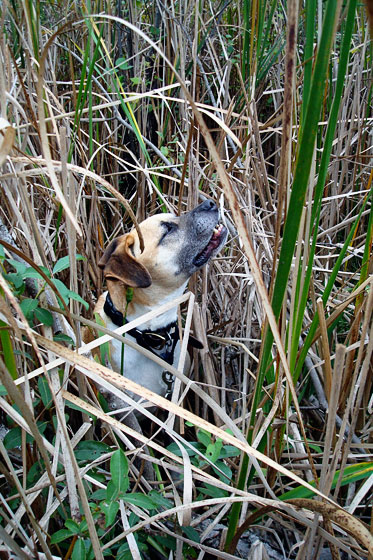
This was the situation Baxter and I found ourselves in recently. Deep in a marsh, tangled in grass so thick that at one point we actually lost each other, and we were right beside each other.

Completely true. I had a panic attack that I’d lost the dog, looked to my left and saw him sitting there staring at me.

Baxter’s reaction was, “I don’t know where we are, but it smells delicious.” Helpful, dude. Very helpful.

Baxter sniffing in the marsh

The bright side was that since it’s fall, the marsh had dried up a bit, so the water didn’t quite reach the top of my boots.

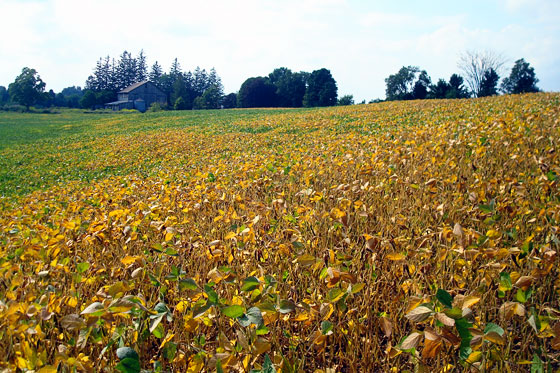
Here is a completely accurate fully to scale rough map of our trails. (For context, the trails go through the forest that covers roughly the back half of the property. This post has a full overview of the entire property in case you want to see how it all fits together).

Map of the trails on our property

The west trails are our best ones, but they’re also our wettest ones. We could probably get Wiley in the first 10 feet or so, but then things get squishy. And see that blue line above? There’s a creek that never completely dries up. I don’t think Wiley can swim. And I have no idea how we’d get him out if he ever got stuck.

The east trail is on higher ground and has much less grass, so it really doesn’t need mowing. It does however need a battalion of forest rangers with chainsaws. There is so much deadfall that this is less of a trail and more of an obstacle course. The dotted lines show how you can make this trail loop–if you’re willing to risk being poked in the eye with a stick (also completely true–I thought I’d done serious damage).

My looooooong term goal (seriously, this is so far in the future I have no idea when it might happen) is to one day have nice clear looping trails and boardwalks through the marsh. I’ve been saving any skids that we come across in the hopes that they might work as boardwalks. Now just to find my battalion of forest rangers to move them into place…

Do you like to hike? What’s your favourite trail like? Has anyone else gotten lost recently?

Reflections on life and making a living

When I first started this blog, I wondered where it might go. I started blogging for myself to track our journey as we moved to the farm. I also blogged for friends and family so that they could keep up with what we were doing. Another reason I started blogging was because I wanted a different kind of writing in my life, a new creative outlet.

However, when I started blogging, I also saw a lot of other bloggers, some of whom were making a full time living off their blogs. I wondered if that might happen for me someday.

It seemed like a wonderful gig: being at home, doing what I want, writing about it, and getting paid.

But it’s not that simple.

When I came back from Blogpodium two years ago, I let go of the idea of making a full time living through blogging. I loved the conference in part because it gave me clarity about what I did and didn’t want to do.

I didn’t feel like I wanted to seriously monetize my blog. I didn’t want to “hustle” the way I felt I’d need to. Writing for advertisers, writing for sponsors, writing for a huge community of readers with very specific expectations, picking and choosing the projects I worked on so that the site would get the most number of hits, promoting everything on every social media channel–it just didn’t appeal.

About two weeks ago, I listened to a podcast by John and Sherry of Young House Love. For those who don’t know, John and Sherry were the ultimate in DIY blogosphere–both of them making a full-time living off their blog, tonnes of projects on the go, top to bottom home makeover in progress. And then a year ago, they walked away. Shut down their blog. Went dark. Dropped out of the blogosphere.

The podcast is a really in-depth reflection on how their blog became their life and their life became their blog. There was no division for them, and that became really hard–more than they wanted to deal with. Even though I’ve not reached the heights that John and Sherry did, I completely get it. Kit at DIY Diva, a blogger that I absolutely love, has written about this in the past too.

This blog is a part of my life. But just part. I share what I want, write the way I want, do the projects I want. I don’t really want that to change.

Over the past month, I admit, I’ve enjoyed the little break that I’ve had thanks to the other bloggers who have written about their favourite tools. The past little while was a really busy time for me in the day job, there’ve been some challenges in my family, and not having to come up with three posts every week was kind of nice (although I know my three post per week schedule is totally self-imposed).

I still think it would be pretty nice to work at home. I looooove being at the farm. I feel so much guilt every morning when I walk out of the house and leave Baxter alone. And honestly, often the day job isn’t all that fulfilling. Sometimes, in fact, it’s downright draining.

So for little while now, I’ve been exploring some other options. I’ve been trying some freelance writing. I’ve reached out to some old contacts. I’ve tossed around some ideas with a few people.

I’m open to opportunities. I’m also aware that if I want a change, I have to work at it and not wait for it to come to me. As Sherry says in the podcast, “If something feels wrong or unnatural you have to change it because no one’s going to change it for you.” This isn’t going to happen right away, and I’m willing to be a bit patient. However, I’m also putting myself out to the universe. (Want me to write for you? I’m available!)

I’m not planning on changing the blog, and I know I don’t often get super personal here, but I felt like I wanted to put some of my thoughts out here.

Thanks for reading.

My favourite tool: Heather in Heels

Today, I’m thrilled to welcome Heather of Heather in Heels to the blog for the final installment in the “My Favourite Tool” series. If you’re just joining us, this series came about when I was thinking about what I should put on my tool wishlist. To help me make up my mind, I reached out to a few bloggers and asked them to share their favourite tools.

I was thrilled when Heather said yes to my email. Heather is a woman after my own heart–she’s all about all kinds of DIY, good food, lots of love for her pups, oh, and she’s Canadian too. She blogs at Heather in Heels. I especially love that her favourite tool is one that I love as well. Take it away Heather.

When it comes to my DIY habit, nothing helps me feed the monster like having the right tools for the job. I realized many moons ago the one critical tool for all the painting and refinishing projects I wanted to tackle was a sander. So I stole one from my mom and step dad’s basement. It took my step dad 20 years to realize it was missing. (I won’t the list the other items I’ve taken yet – they still don’t know they’re missing… he he).

It was old and made your whole body vibrate when using it, but it did the job. It did the job until it didn’t any more. I almost had a funeral for it. That sander and I did many wonderful things together.

We’ve transformed doors and we’ve taken a super-drab-free-on-the-side-of-the-road find and made it beyond fabulous. But I had to say goodbye to it.

Interior door painted blue

White credenza

And then I promptly got over my loss when my new sander arrived. And together we’re already busy making new memories! I’ve just finished refinishing a bar cart and while the paint dries I’m already busy with my biggest furniture project yet – a huge dining room buffet server. (Spoiler alert. Since writing this post, Heather’s finished the buffet. No surprise, it’s fabulous).

Ryobi sander

Why a power sander? Well, for one thing it saves your manicure. (This is an essential in my books). It also greatly increases the speed of any project requiring sanding. I’m not sure I would even contemplate some of the projects I’ve done (or am in the process of doing) if I had to sand by hand. I don’t even pumice my own feet for goodness sake!

The power sander, followed closely by my trusty staple gun, is definitely my favourite tool in my tool box. It saves me time, increases my productivity, saves my manicures, and it’s the best way to remove old and ugly to make room for new and fabulous.

Removing old and ugly to make way for new and fabulous. That definitely sums up Heather’s approach to home reno and decor–and life in general. Thanks for being part of the “My Favourite Tool” series, Heather. Be sure to check out Heather in Heels to see more of Heather’s quest to add more fabulous to daily life.

#Harvest15

Happy first day of fall!

I had a different post planned for today, but this is too timely not to share.

I had a great day yesterday. I had booked it off work, and set everything up so that I wouldn’t have to look at my phone or open my computer all day. The result of a random Tuesday off is a very relaxing day.

Bax and I started the day with a long walk. On our way home, we saw our farmer. He shouted out the window of his truck that he’d be on our fields in a couple of days.

At least that’s what I heard.

When B and I drove past the farm on our way back from the dump (where they stock doggie treats at the gatehouse) and headed for the charity scrap metal bin at the local therapeutic riding centre, we saw a combine circling around the east field.

Apparently the farmer had said he’d be on our fields today.

Harvest is such a special time. I love that I was home to see it.

B and I walked out to the “four corners” (the crossroads where four of our fields meet) to watch.

We timed it perfectly to see the combine coming up the hill to the truck.

Combine harvesting soybeans

I missed seeing the combine unload the beans last year, so I was glad we were able to watch the transfer this year. In just a matter of minutes, the beans had slid through the chute into the truck.

Combine loading soybeans into a dump truck

It turned out that the truck was full after this transfer, so we got out of the way so that it could hit the road. Can I just say how cool it is to have such a large property that a dump truck driving across it looks small? And this is far from our biggest field.

Dump truck driving across the field

Bax and I decided to stay out of the way of the combine and investigate the freshly cut east field. We sat at the crest of the hill (just above the dump truck path) and watched the combine through the gap between the fields.

Combine in the distance

Bax and I watching the harvest

What a great way to spend the last afternoon of summer.

Last hurrah

We’re officially in the last days of summer.

However, summer isn’t letting go easily here at the farm.

The lilies, which finished blooming at the beginning of August, have pushed a few buds out in the last week.

Yellow lily blooming in September

One random shasta daisy, the one I somehow missed when I trimmed the dead flower stalks, popped out in bloom too.

Shasta daisy blooming in September

Notice the sedum blooming like crazy? Sedum and lilies and daisies don’t usually bloom together.

Sedum blooming in September

When I was taking these photos, a particularly resilient mosquito even appeared. They just won’t go away!

Mosquito biting my hand

Summer is my favourite season, so I’m not ready to let it go any more than my lilies and daisies are. However, I’d be happy to lose the mosquitoes.

What signs of the season are you seeing your house? Do you have any late bloomers in your gardens? Anyone else have mosquitoes still hanging around?

The Porch Jacking: Chad’s Crooked House

I’m happy to welcome Chad of Chad’s Crooked House to the blog today for the third installment in the “My Favourite Tool” series. If you’re just joining us, this series came about when I was thinking about what I should put on my tool wishlist. To help me make up my mind, I reached out to a few bloggers and asked them to share their favourite tools.

I’ve been following Chad’s adventures in restoring and updating his Philadelphia row house for awhile now. It seems like he might be finally heading into the homestretch on his reno (or at least, Phase 1). I’m glad he could take some time away from painting, lighting, closets, kitchen cabinets (!) and other work to share a project from the past here today.

Julia asked me to write about my favorite tool. Usually picking favorites is the hardest thing in the world for me, but this time I have one with a perfect combination of weirdness and a good back story. We’re going back about 8 years to when I was in college for this project.

My parents have a screen porch on the side of their house. It was always a favorite spot even though it was kind of in sorry shape. The columns were wrapped in finished wood that was visibly rotting away and the screen frames were patched up with corner braces that were rusted all over. It was time to give it a face lift. My dad called me to get my approval to use aluminum capping. He’s not dumb, so he had to have known he would never get it. Especially for a spot where people would be sitting 2 feet away and really see the fakeness. I told him that capping over rotting would be flirting with disaster (see how practical I am?), and that we should re-wrap the columns with new wood. And then I took my final.

Fast forward a week or two, and I was home to investigate. The screens were down, and I started hammering a crowbar into the most rotten column, at one of the corners. The first thing I saw was bad – like 6 million bugs scurrying out and tunnels all through the wood. But the second was even worse – nothing inside! I was ripping apart a column that was holding up the porch roof!

I called my dad in a panic. He said no big deal, we’ll just put in new pressure treated 6×6 posts. I was half crying. “What about the temporary bracing? It’ll be so much work!”

He replied in a high pitched mocking tone pretending he thought I was crazy. Not that he actually thought this, but he likes to mess with us.

“What? We’ll just use the railroad jack!”

“The what?”

“Come on, Chad. You know we have a 30 ton jack in the garage.”

I never did know that, but it sure was good news. Here it is. I always thought this giant bar was for heavy digging in the garden, but actually it’s the lever for the jack. The whole thing is cast iron and weighs 67 pounds.

30 ton railroad jack

So he found a 4×6 in his hoard, cut it down to fit on the jack, and set it up next to the first column. Up went the porch roof and out came the column. We cut the new 6×6 to match the height of the old column, stuck it in place, let the porch down and moved on to the next one. All 7 new columns were in place in a day! Here it is 7 years later.

Screened porch

Good job, Chad (and Chad’s Dad). That porch looks like a beautiful spot to spend time in the nice weather. Thanks so much for sharing your favourite tool, Chad. If you’re interested in reading more about Chad’s adventures in Philadelphia, check him out at Chad’s Crooked House.

Yard tool maintenance tips

Sarah in Illinois is back today with another post. She has some very helpful tips for taking care of our yard tools–timely as we wrap up outdoors season and prepare to tuck our tools away for winter. (Yes, I did say the “w” word.)

One thing I am trying to do more of is take better care of things around my house so that they last longer. I know that should be an obvious habit, but we seem to live in such a disposable world that it often gets overlooked. Instead of just throwing away and buying new, we should be extending the life of items we already have.

Not long ago I noticed that my wheelbarrow looked terrible. It was getting such a thick coat of rust, and it wouldn’t be long before it rusted right through.

Rusty wheelbarrow

Flakes of rust in the bottom of the wheelbarrow

The first thing I did was to remove as much rust as I could. This could have been done by hand with a wire brush, but I had this handy attachment for my drill, so I tried it out. It worked like a charm!

Drill attachment for removing rust

After I had all of the loose rust removed, I sprayed it off with the hose and let it thoroughly dry in the sun. And I was correct; I already had two pin holes in the metal.

The next thing I did was to try to prevent any further rust.

I used a rust treatment that we sell at work, but I am sure is available at any home improvement store. I made one mistake though. I did not read all of the directions.

I knew from selling the product that when it reacted with the rust it was supposed to turn black. I waited an hour with it sitting in the sun, and it never turned black. I went on with the next step of painting with spray paint in a color close to the original. And it really does look great.

The mistake I found later was that the can clearly says to wait 24 hours to paint. During those 24 hours, it turns black.

In the long run, I don’t know that I will have any issue with not following the directions completely. Since it is just a wheelbarrow, I am not too worried, but in the future I will be better prepared.

I also put a coat of deck sealant on the handles. We had some sitting around, and it took me just minutes to do. It will help protect the handles from rot.

Green painted wheelbarrow

I also decided to do something similar to our garden tools. I started by spraying them off with the hose and using a nylon brush to remove any caked on dirt, and then let them dry. I used the same method as I did with the wheelbarrow to remove the rust.

Garden tools before cleaning and sharpening

Using a hoe in the garden is not my favorite chore but I have learned that having a sharp edge makes it so much easier. My dad is very skilled at putting a sharp edge on with a hand file, but when I need to do it myself I use our electric grinder and this grinding wheel.

Sharpening a hoe with a hand grinder

Just a couple of passes and it is sharp as a razor blade!

Sharp hoe

I didn’t see the need for rust treatment or paint for the tools, so I just finished by spraying a light coat of WD40. Any type of oil based spray would have worked. I have even heard of using motor oil. The goal is to coat the bare metal to keep it from moisture.

Oiling and sharpening garden tools

It took me just a couple hours one afternoon to finish the wheelbarrow and only about 30 minutes to prepare the tools. Hopefully in that short time I have considerably lengthened the life of my garden tools.

Thanks so much for the helpful tips, Sarah. The transformation of that wheelbarrow is amazing! And I love that it’s already dirty and in use. My fingers are crossed that the finish lasts for you.

How do you put your tools away for winter? Any tips for dealing with rust? Have you ever painted a wheelbarrow?

Linking up to Think and Make Thursday at the Heathered Nest.

A changing view

Soybeans turning gold

At the end of August, over the course of just one week, our soybeans suddenly turned gold. We knew it was coming after our first soybean crop last year. However, we were amazed at how quickly it happened this year.

And within a short time of going gold, the plants went brown. They dropped their leaves and the beans are starting to dry. I love hearing them rattle as we walk through the field–a familiar sound from last year.

We do still have a few spots of green–the random corn stalks that were mixed in with our soybean seed lot.

Cornstalk in the soybeans

Pretty much any view across the fields is special to me. It’s awesome to look over the property and know that it’s all ours. Seeing the productivity of the land and how it changes over the year is something that I’ve come to treasure since moving to the farm.

If we go with last year’s experience, we are still about a month away from the harvest. We’ll continue enjoying the view and monitoring the crop.

What’s the view like at your place? How do you track the progress of the seasons? What harvests are happening in your area? Does anyone else have random plants that spring up on your property?

My favourite tool: white dog vintage

It’s time for another installment in the “My Favourite Tool” series. If you’re just joining us, this series came about when I was thinking about what I should put on my tool wishlist. To help me make up my mind, I reached out to a few bloggers and asked them to share their favourite tools.

Today’s post comes from Brittany at white dog vintage. Brittany and I connected during last fall’s One Room Challenge. She made over her kitchen–so ambitious and such a great result. I really like her style–her makeovers are colourful, full of DIY and  super personal. And I was thrilled when she said she’d be happy to share her favourite tool with all of you. Over to you, Brittany.

Hello Home on 129 Acres readers, and thank you so much to Julia for inviting me to be part of this series! Just a few words about myself: I’m Brittany from white dog vintage. I live in Springfield, Missouri (plumb in the middle of the US) with my husband, Justin, and three chihuahuas. Justin and I love old homes and especially love working on them. In January of this year, we moved into a 1921 bungalow, and we’ve been spending our nights and weekends fixin’ her up ever since.

When it come to Number 1 All-Time Favorite tool, in truth, I have to go with a caulk gun. There’s very little in the world of home improvement as simple and satisfying as applying a bead of caulk. However, that’s all I really have to say about a caulk gun, and one sentence seems like a pretty lazy contribution to this series. So I decided to go with some a little louder. A little flashier. Something that requires electricity. A POWER TOOL. And in that vein, I chose the thing that powers some of my favorite tools to work with–an air compressor.

I love my air compressor (white dog vintage)

An air compressor is a support tool. On its own, it generates compressed air in a little tank, which sounds nice but isn’t too helpful until you connect it with the tool that’s doing the actual work. There are a variety of air-powered guns of different sizes and purposes. Over the course of different jobs, we’ve ended up with four.

Air compressor attachments (white dog vintage)

Staple gun – I use this for upholstering furniture, primarily with 3/8″ heavy duty staples, though occasionally I use up to 9/16″ staples if several layers of fabric need to be attached.

Pin, Brad, and Finish Nailers – These are all used for attaching trim and molding, but each is generally designed to handle a different length of weight of nail. Pin nailers shoot extremely skinny nails and are used for small, light-weight trim, brad nailers have a similar purpose but shoot slightly heavier nails (depending on the gun, they may also be able to shoot staples), and finish nailers shoot larger nails necessary for applying heavier duty trim like baseboards or crown molding.

I first started using an air compressor when I decided to try my hand at upholstery. A staple gun is a necessary upholstery tool, and when it comes to staple guns, pneumatic is the only way to go. I remember once, before I had done much upholstery, helping a friend recover her dining chairs with about a $7 manual staple gun I bought at some generic hardware store. I believe our strategy was for her to pull and hold the fabric while I put a knee on the seat bottom to hold it in place and, at the same time, used all the strength I could muster in two hands to squeeze the trigger of the staple gun. If only I’d have known how easy the whole thing is with a little air behind it. Here’s a little action shot from an ottoman I made recently.

Upholstering with white dog vintage

We’ve also been replacing all the trim in our new house, so I think you can imagine how handy the air compressor has been for attaching baseboards and molding. Justin recently started constructing capital style moldings for the tops of our doors and windows, and he reports he used all three nail guns to put them together. I got into the action a bit when it came to attaching the baseboards to the wall.

Installing trim with white dog vintage

The truth of the matter is that using a pneumatic gun or nailer is just plain fun. There’s a little bit of a thrill in the pop of the nail hitting the wood, and it’s a really easy and safe tool to use (the tip of basically any nailer must be compressed before the gun is capable of firing–eg, it’s impossible to shoot a nail into the air). I can be kind of absent minded, so I tend to stay away from saws and other potentially dangerous instruments, but thanks to my trusty air compressor, I don’t have to miss out on all the fun. 🙂

Thanks again for reading!

Thanks for sharing, Brittany. An air compressor (and its various attachments) moved up my wishlist as I was reading. Be sure to check out white dog vintage to see more of Brittany’s and Justin’s projects.

Garden update

It’s been a little while since I’ve shown what’s in the garden–and it’s awesome.

Our tomatoes have done super well. They just keep growing and turning red. Our cherry tomatoes in particular have grown super tall. Taller than Matt.

Tomatoes ripening in the garden

Next to the tomatoes, Matt’s onions are getting ready to take their first steps.

Onions growing in the garden

Our beets and zucchini are producing like crazy. I have to pick every day to stay on top of the zucchini. I finally tried out the grater attachment on my food processor for the first time and grated up 34 cups of zucchini. They’re tucked into the freezer. It appears that I’m going to be making zucchini something all winter long–and pretty much every day between now and then.

Beets and zucchini growing in the garden

Despite having only four plants, we’ve had a decent crop of beans. Although Matt did make fun of me one night when I steamed just 10 beans for us both. I thought they were pretty much done, especially given that I broke the main stem on our biggest plant, but new blossoms are appearing on the other plants, so I think more beans are on their way.

Bush beans

I’m probably most excited about our raspberries. I have a full row of reds that have all successfully transplanted from my parents. The blacks haven’t done so well, save for this one plant, which has lots of green shoots. I’m going to try to transplant a few more blacks to see if they’ll establish themselves before winter sets in.

Black raspberry shoots

The biggest challenge is to protect the raspberries from the squash.

Raspberries next to the squash

Matt and I are both a little bit afraid of the squash. Seriously. They have ambitions to take over not just the garden, but also the farm… and perhaps the world. Keep an eye out. They’re coming for you.

We have acorn, butternut and pie pumpkins. And we’re going to have tonnes of them. I’ve already notified Matt’s and my families to not buy any squash at any point in the future.

Anyone know how to tell when squash are ready to harvest? Some of these are looking pretty close, and some of the leaves on the vines are starting to die.

Squashes growing in the garden

The east front of the squash advance is headed by the pumpkins. They’ve broken through the fence and are heading for the soybeans. Matt mows them every so often, but a few fruit have climbed the fence to get out of range. These green globes are my test case to see if the stalks are strong enough to hold the pumpkins while they mature. I’m adding squash trellis options to my Pinterest board as I plan for next year’s growing season.

Pumpkin growing hanging on a fence

The northern advance of the squash has already consumed the rutabags and potatoes. My only hope is that both of these crops grow underground, so they might survive the surface invasion.

Rutabagas

Just to the edge of the advancing squash are our poor peppers. They’re actually looking a bit better finally. They’re growing bigger and they’re blooming again. I’m hoping that the blooms finally set into actual peppers.

Pepper plants

We have one lone pepper in the first bunch of plants that we planted at the opposite end of the garden. He’s a little bit warped, so maybe this is a symptom of the other problems we’ve had this year with the peppers?

Misshapen pepper

The lettuce have officially bolted. We’re leaving them alone as Matt wants to see how tall they’ll grow–apparently he has a thing about height.

Lettuce that has bolted

A nice touch that I’m also enjoying is the stone bench that we’ve added to the garden. This sits at one end of the raspberry rows–the cross axis of the garden. The curve of the bench fits in well with the curved edge of the garden. I’m looking forward to sitting here and seeing the view across the garden and out over the fields.

Stone bench in the vegetable garden

For now, the other half of the garden is still under wraps with a tarp and some old carpet. (The rope marks the centre axis, so I can keep the raspberry rows lined up). This photo is definitely about keepin’ it real for all of you fellow non-Pinterest-perfect gardeners.

Tarps on the unfarmed half of the garden

I’m patient enough to wait for next year to farm this other half. I’m definitely satisfied with what we’ve accomplished this year. And we’re more than satisfied with the harvest we’ve had.

Basket of tomatoes, beets, zucchini and beans harvested from the garden

Basket of tomatoes, zucchini and our first rutabaga

What fresh food are you enjoying this season? Have you grown anything this year? Any thoughts around what might be wrong with our peppers? Have you had any sightings of our squash yet invading your neighbourhood?