Service call

Wiley has come of age. Our little Kioti tractor had his 50 hour service. Sniff.

Now, lest you think this is a how-to-do-a-50-hour-service-on-a-Kioti-CS2410-post, let me correct you.

We dropped off the tractor manual with my extremely obliging, mechanically-inclined cousin. He studied it for a few days and provided us with a list of materials to buy.

Kioti CS2410 manual

Matt spent nearly $200 on fluids and filters at the tractor dealership.

Fluids and filters for tractor service

Then, my cousin and Dad came up and did the service while Matt, Baxter and I watched.

Changing the oiil on our tractor

Well, we helped a little bit.

Matt blew the dead grass and dust off the engine screen with my cousin’s air compressor. My Dad and I greased all of the fittings. Matt was responsible for detaching the grease gun when the nozzle got stuck on the first fitting.

Grease gun stuck on a fitting

Then Matt and my Dad cleaned the battery terminals with baking soda. Another use for baking soda. Who knew? (My Dad, that’s who).

Cleaning battery terminals with baking soda

Our little tractor is two years old. We probably should have done an oil change by now, but we were waiting for the 50-hour milestone as instructed by the dealership. Most people would have gotten there sooner than we did, but we apparently don’t use the tractor that much.

However, after making multiple comments about how black the oil was, my Dad has now guilted me into taking better care of my equipment.

Changing the oiil on our tractor

Besides, my cousin volunteered to come up and do it for us any time. He even took our push mower home with him and got it running again (yeah, we’re not at all mechanically inclined and we pretty much abuse our equipment).

Who out there is mechanically inclined? Did you know you could clean a battery with baking soda? Anyone else have a handy obliging family members?

Raised dog food stand

Special occasions should be marked by presents. So for Baxter’s Gotcha Day, I made him a dinner table all his own.

Dog food stand made of old barn wood

I took inspiration from the DIY Pet Food Station that Kim and Scott made for their Jack over at Yellow Brick Home. As much as I coveted the hairpin legs that they used (love the industrial-rustic mix), I didn’t find any at a price I was willing to pay. So I went to the bench I made for the mudroom and adjusted it to be doggie size.

Like with the bench, I dug into my beat-up antique lumber stash in the barn. People, these planks are absolutely amazing. Sure they weigh 3 tonnes and are covered in poop and who knows what, but they’re phenomenal. The plank I chose was too big and heavy for me to move on my own, so I lopped off a 4 foot piece with my circular saw and got to building.

I think the details on the construction are pretty self-explanatory, especially if you reference my bench plans. I used my Kreg jig to attach the legs with three screws each. In terms of finished measurements, the stand is 10 inches high, 24 inches long, and 10 inches deep. The legs are at about a 15 degree angle and are 8 1/4 inches end to end. The bowls are 7 1/2 inches in diameter.

Dog food stand made of old barn wood

Cutting the circles for the bowls was the hardest part. I drew my circles using the bowls for a template. Then I drilled a hole so that I had a spot to insert my jigsaw blade, and I cut along the line. I think I figured out why this wood is so darn heavy. It is super duper dense. My jigsaw blade broke before it was even halfway around the first cutout. Initially the cutting was so slow that I thought my blade was dull. But when I installed the new blade after my first one snapped, it still took a significant amount of force to push the jigsaw along the line ever, ever so slowly. And I had to do it twice! Darn dog needing water as well as food.

To seal and protect my dense, hard, beat-up beautiful wood, I turned to Waterlox, the same solution we used on our DIY kitchen counter. It’s food safe for humans, so it’s an appropriate finish to use on a stand whose sole purpose is to hold (dog) food. Nothing’s too good for my puppy.

Dog food stand made of old barn wood

From my past experience with the bench when it turned black because it sucked up so much stain, I knew that the wood would be thirsty, and boy was I right. It took about three coats before the finish started to build up and look shiny on the wood. Even then, there were some sections (the ones with the most worm holes) that just sucked the Waterlox right in. All in all, I did a total of 6 coats of finish.

After that, it was simply about putting the bowls in the stand and filling them up! Tip: kibble on its own isn’t very appetizing. Sweet potatoes make it much more palatable. (That is, if you’re Julia. If you’re Matt you give in to the sad eyes and put ketchup on it. Yeah, my husband and the dog are totally related.)

Dog food stand made of old barn wood

Bon appetit, Baxter. Or as Matt says, “Mangey, mangey”–as in French “mange” with an “ee” ending. (He and the dog share their own language as well as the same taste buds.)

Do your pets get presents? How do you handle pet food at your house? What’s your pet’s favourite food?

Gotme Day

Hey there y’all,

Baxter here. Apparently it’s been a year since I came to live with Matt and Julia. Y’all must be counting in people years, ’cause I swear I’ve been here for longer than that.

I like the farm. I get to sniff and sleep and sunbathe and walk and zoomies. I get excellent scratches, which is helpful ‘specially now ’cause the mosquitoes really, really, really like me. Like as much as Julia and Matt like me.

Belly scratches

Besides Matt and Julia, I have a bunch of other friends. There’s Frank down the road, Ella, Penn, Cocoa and Chloe at class, and Pinky, Bluey and Monkey at home. My stuffies are special. When I’m really, really happy, like when Matt comes home, I’ll go and find one of them and share her with Matt ’cause he’s special too.

Baxter with his stuffies

The one friend I really, really want is Ralph. She still doesn’t like me too much, but she’s coming so much closer to me now. I still want to run up and sniff her, but sometimes when I’m out, we’ll just sit there and look at each other for awhile. I like it that she doesn’t run away or hiss or scratch as much. I’m trying so hard to be patient with her. Julia says it’s working, but I think it’s taking a dog’s age for her to get used to me.

Dog training class

Out of everybody, I like Julia and Matt best.

I’m Julia’s partner. We do lots of things together, and she says I’m a very good help. We hike, wade in the pond, play in the creek, check the fields, garden, cook, paint, build. She gives excellent scratches. She also gives me baths. It’s usually right after we’ve been playing in the pond. I don’t understand that. I mean, I already got wet. Why does she think I want to get wet again? After a big play, I just want to lay down! I do like the towel part, though. It’s like an extra lot of scratches.

Matt and I are good bros. He and I go for long walks to see my friends the turtles, visit Frank the German Shepherd or check the back field. When he calls for his footman, I go and help him find his socks and get ready for walking. I’m a very good footman. The best thing that Matt and I have in common is that we’re really good relaxers.

Baxter and Matt

I think it’s pretty clear that Matt and Julia and me are all related. I mean, I still say y’all, but last week Julia declared me officially a Canadog.

Baxter wearing a Canada bandana

Doggally, I think I was official after the winter. I went outside every day, no matter how deep the snow was or how cold it was. I think that’s pretty Canadian.

Baxter digging in the snow

I know my accent or my nationality really don’t matter. Neither does the time before or the first year, you know. What really matters is now. Matt and Julia love me. I love them. I’m happy.

Baxter

Read Baxter’s first post from a year ago

Gotcha Day

Dear Baxter,

Today is a special day. Your Gotcha Day. One year ago you came to live with us.

I know you’re a low-key guy who doesn’t like a whole lot of fuss, but this is a special occasion.

When Matt and I started looking for a dog to join our family, you were the only one who stood out. You looked out at me through the computer screen with your floppy velvet ears and your dark worried eyes, and something clicked.

My dog Baxter's profile on Petfinder

I wasn’t sure Matt would like you as much as I did, but he agreed that we could try to adopt you.

As soon as we brought you home, Matt and I both fell in love.

I realize now looking back at pictures of your first day that you were a little unsure.

Baxter on his first day with us

I saw some small changes in you in the first few months as you adjusted to life at the farm, but it seemed like it took next to no time for you to fall in love with us too. At night when you sometimes have your squeaky twitchy dreams, I hope that you’re chasing rabbits and not remembering something not nice from before. I want only good things for you.

I love that you’re such an easy-going fellow who likes to be with us, whatever we’re doing. You’re content to lay on the grass (or dig a hole in the dirt) and hang out with me while I weed the gardens. You’re also happy to sunbathe in front of the dining room window while Matt works in his office. You’re good at keeping me company in the kitchen while I’m cooking dinner, and you know exactly where you have to lay down to get samples every so often.

When we’re not home, we know that you’ll keep a good eye on things around the house. I don’t even mind that every so often you and the pillows have a party on my bed. Matt and I sometimes make fun of you for sleeping 23 hours of the day, but we really do like how relaxed you are. You definitely make things easy for us.

We realized exactly how easy you are when we started going to doggy class a month ago. I know you don’t get to be the example dog very often, but that’s only because you won’t misbehave and help the trainer show us what to do.

Dog training class

Now that we’ve progressed to off-leash lessons, you’re going to have to work a lot harder, bud. You’re such an independent dude, confident to do your own thing. But last year’s three run-away incidents are quite enough. I hope that you’re able to learn how to focus and ignore your nose a little bit more.

Dog training class

It was pretty much a gong show trying to get four dogs to sit together on a park bench, but everyone worked so hard for this picture that I had to include it, even though you haven’t got your footing.

Classes have also helped me realize what a people person you are. Not every dog would make the effort to greet all of the people as well as each of the dogs the way you do. At the dog park, you meet everyone, whether they have two legs or four. Whenever new people want to say hi, that makes you very happy. The trainer thought you might have potential as a therapy dog.

Baxter at Christmas

One of the neatest things you’ve given me this past year, Baxter, is getting to know a different side of Matt. I knew he was a loving, caring person. But watching him with you is very special. He’ll do pretty much anything to make sure you’re safe and healthy and happy. And you love him just as much as he loves you. You give him your best helicopter tail when he comes home and work so hard to say your very best speak when he asks you to. Sure sometimes I feel left out when you do your manly dude things together, but seeing the bond between the two of you is pretty amazing.

Baxter looking for his best bud

As I was writing this letter, I thought back to this time last year when I was begging our rescue organization to let us adopt you. At the time, I thought my heartfelt pleas were because I’m not good at taking no for an answer. Now, I realize it’s because we were meant to be together.

Happy Gotcha Day, bud.

Love,
Julia

Later this week you’ll hear from the dude himself.

Baxter’s adoption story

Six-month performance review

Not to alarm anyone, but we’re halfway through the year. (Sorry. Tempus fugit.)

It’s been nearly six months since I posted my home goals for 2014. Time for a mid-year performance review.

I had six projects on my list. Here’s how I’ve done so far.

1. Paint the main floor hallway and kitchen.

Big fat done on task number one. Matt and I knocked this one out in February.

Hallway painted Benjamin Moore Abalone

2. Laundry room.

I haven’t started this one yet. I figure it will be a good fall project when I don’t want to/can’t work outside anymore. Besides, I can’t start anything until Matt digs out the foundation wall and fixes the basement leak. Hello summer honey-do list.

3. Master bedroom.

For the most part, this is another fall project. However, prep starts this month with removing the popcorn ceiling.

4. Furniture.

I’ve done fairly well in this department.

  • Sofa table for the living room. Found this one in an empty office at work (I asked permission before I took it).
  • Narrow dresser for my office. DIYed this one out of two nightstands.

Tall and narrow DIY dresser

  • Cabinet for the laundry room. Bought this one from Canadian Tire. (There was some DIY, since we had to assemble it ourselves).
  • Ottoman for the basement reading nook. Made this one out of a plastic barrel.

How to make a round footstool

I have a few more pieces that I’m still on the lookout to buy or make. Top on the list is refreshing my bookshelves and the living room TV stand. My books have been packed away for more than two years. I want them back.

5. Living room fireplace.

Hope still springs eternal. The fireplace will be redone some day. Whether that day is this year depends solely on how much we’re able to rebuild our post-solar bank accounts.

6. Landscaping.

  • Reestablish the flowerbeds around the house. I’m slowly, ever so slowly, working my way around the house.
  • Continue to plant the turnaround. The turnaround is looking awesome, albeit a bit weedy.

Garden with a brick path and park bench under a big tree

The pond shore is even more overgrown than last year and is pretty much inaccessible. Since this is my favourite part of the property, that is a bit of a downer. I’m willing to cut my losses on the pond this year, but I’m still hoping I’ll be able to clear and fence the vegetable garden before the end of the year.

And that brings us to the bottom of this year’s original goals.

However, there are a few things we’ve done beyond this list.

Obviously, the solar panels are a pretty massive project.

Solar panel array

We’re also revisiting the basement, finishing off the reading nook, adding the ping pong table and making over the doors (in progress).

I’ve had a bit more success this year staying on task thanks to the monthly projects. Thanks as well to all of you for your encouragement along the way. It’s nice to look back and see that I’ve actually made some progress. We have half a year to go, and I have a bit more work to do yet, but I think I’m on the right track.

Have you ever given yourself a mid-year performance review? Who else feels like time is flying by? Is there anything you’d like to accomplish over the rest of the year?

Operation popcorn

You know those things that you have to do, want to do, but don’t really want to do? That’s this month’s project.

The plan is to start our master bedroom makeover. Step one is remove the popcorn ceiling (the fan’s on the list too).

Popcorn ceiling

I’ve been saving this project until I could open the windows, as there is likely to be a bit of dust and mess.

What are you up to this July? Do you have any tips for removing stippled ceilings? In the basement, I scraped some and sanded others. Sanding’s way messier, but I got a nice smooth finish and had to do less patching.

Barn door makeover – Progress report

It’s not quite the end of the month, but I’m calling it close enough. Time for an update on how I did on June’s project. You may recall that the plan was to update the boring slab doors in our basement with some trim.

Here’s where we’re at:

A plastic bag full of old hardware.

Bag of door knobs and hinges

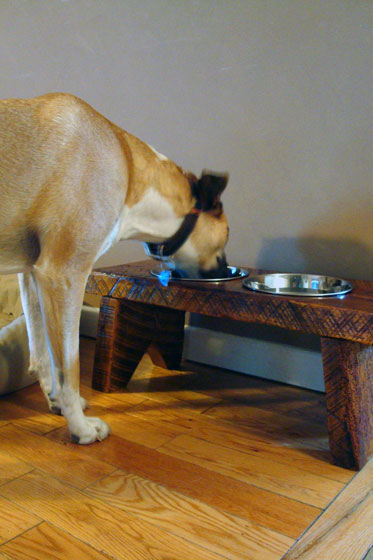
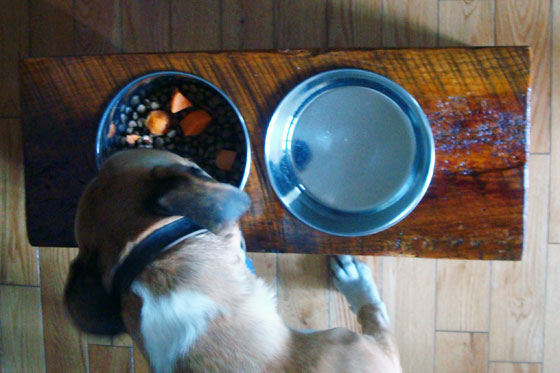
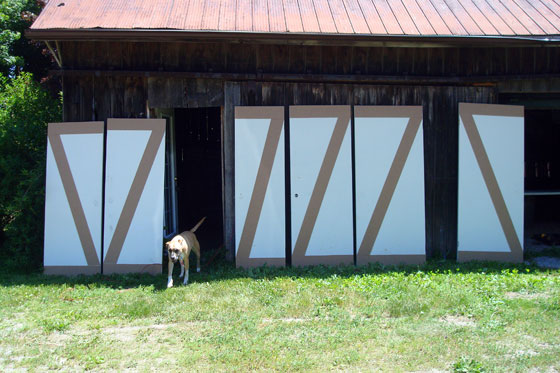
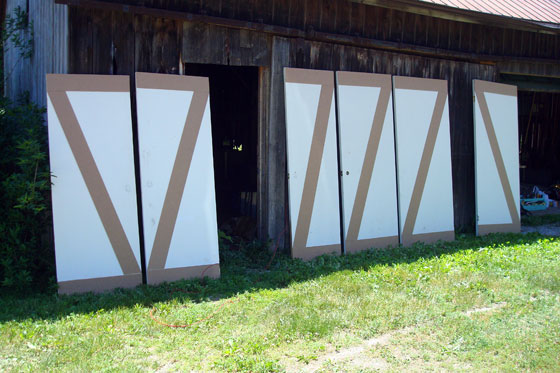
And seven doors trimmed out. (I know there’s only six pictured here, but trust that the seventh one is laying in the driveshed with the trim in place. To make it up to you, I’ll give you a cute puppy instead.)

Making slab doors into barn doors

My timelines shifted a little bit (i.e. my bias to procrastinate came out), but I’m not too far off schedule. Here are the details of how the update went down.

1. Figure out design for the doors. By June 6. Done June 10

As you can see, I decide to go with a basic Z (that’s a Canadian ‘zed’). It’s a classic barn door motif for a reason. Plus, I was able to keep it simple and lay out my strips so they don’t interfere with the door knobs or hinges.

2. Buy material (and hopefully the store staff will cut it into strips for me). By June 13. Done June 13.

A very accommodating (if slightly math challenged) associate at Home Depot along with his beautiful panel saw ripped two sheets of hardboard into 6-inch strips for me. Thank goodness it was a quiet Friday night at the store.

3. Cut strips (if I have to). By June 14. Non-issue.

4. Remove doors. June 14/15. Done June 21.

My Dad came over and helped me get back on track last weekend. He popped all of hinge pins, and I schlepped the doors upstairs.

5. Remove hardware. June 14/15. Done June 22.

A lot of the handles were dummies, and it took me a few minutes to figure out how to detach them. This video was helpful, even though my handles didn’t slide off nearly as easily. I got them eventually.

Bag of door knobs and hinges

6. Trim the bottom of the door to the electrical panel closet (since it rubs on the carpet). June 21/22. Done June 21.

No matter how much I practice, I still can’t cut as straight a line with my circular saw as my Dad does.

7. Install strips on the doors. June 21/22. Done June 21.

It took my Dad and me just two hours to add the panels to all seven doors. Easy-peasy (except for the door where we put the strips on the inside (closet side) of the door, hence only six doors in the picture below. Oops.)

Making slab doors into barn doors

To attach the panels to the doors, we put a smear of carpenter’s glue on the back of each strip and then tacked it with the nail gun. We let the doors sit for about 24 hours, and then I filled all of the nail holes and joints with wood filler and sanded it smooth.

I was on my own to fix the mess-up on the closet door. Since the nail gun went home with my Dad, I used construction adhesive on the panels and weighted them down with everything I could find in the driveshed.

Weighting down the panels until construction adhesive sets

I’ll be interested to see if one method holds up better than another. I sincerely hope that no matter what the panels stay securely in place.

8. Buy new ORB hinges. By June 27. Done June 25.

Upgrading the hinges is the biggest expense on this project. I figure I’ve saved everywhere else, so I can spend a little bit to get exactly what I want. The cost for 20 new hinges is still less than $100, so it wasn’t a huge splurge.

There are a few things left to do before this door makeover is complete, so here’s the plan for the final tasks and June’s final four days:

9. Paint the door jambs – By June 27

I haven’t started painting, so this task will not be done today. It should be an easy weekend project though.

10. Spray paint old knobs ORB – By June 29

Good weather is forecast for this weekend, so I’m planning to set up a spray paint station outside.

11. Paint the doors – Not my problem.

You might recall my plan is to have Matt paint the doors. Well, he starts summer holidays this afternoon. Happy holidays, honey.

Do you have any last minute projects you’re hoping to knock out this weekend?

Pretty peonies

Bright pink peonies in front of a steel silo and old barn

We’re fortunate that we have numerous peony plants growing around the property.

Fuschia peony

I’ve moved a few into the gardens that I’ve reclaimed, but most are still out in the undomesticated wilderness.

White peony bud

They’re all different shades and are a beautiful splash of colour.

Light pink peony

I never pick a bouquet of peonies because I’m cautious about ants, but it would be nice to have some the beauty inside as well as out. Am I worrying unnecessarily?

Who else is a peony fan? Do you have a favourite colour? Any tips for peony care?

The cost of country living

You’ll have to excuse me today. I have a bit of a rant.

I said last week that I am most looking forward to getting to the payback stage of our solar panels. Friday night, we came home to an envelope from the hydro company. Inside was not a payment, but a bill.

The panels use a little bit of power to operate. Once our account is fully set up, this amount will be deducted from the total we generate. The payment side, though, isn’t set up yet. The billing side is. Funny how that works, eh?

Delays in getting our payments are not my complaint.

Country living is not simple, and it’s not cheap. One of my biggest surprises in moving to the farm was how much electricity costs.

Well, it’s not so much electricity. The rates are the rates. What changes depending on where you live is the delivery rate. In the country, where the population is less dense and there are fewer houses, delivery (the cost to get electricity from the generating station, through the lines and up to my house) is more than half my regular bill. Ouch.

I’m willing to suck it up and pay for the privilege of living where I do. However, this latest bill for our solar is completely out of whack. Look at the numbers.

Hydro bill

We used 1 kWh of electricity. One. Delivery was $5.40. Five freaking dollars and 40 freaking cents. Oh, and let’s throw 70 cents of tax on there just for fun. The total bill of $6.10 does not include a charge for using any actual electricity. It’s all just delivery and tax. Ridiculous.

Ask Matt and he’ll tell you that I’m a little bit bitter about the delivery charge. I’ve hated it for pretty much every hydro bill during the last two and a half years. I cannot wait until the hydro company finally starts paying us for the electricity we’re generating.