Garden Dueling DIY Week 4

Sarah in Illinois and I are in week 4 of our Dueling DIY challenge.We’ve been making slow progress on our gardens (you can check out the progress in our previous posts), but recently Sarah’s attention has been directed elsewhere.

Distractions. It sounds a lot better than: “I am really far behind and worried that Julia may very well win the competition.”

What has me distracted?

Bad weather:

Weather forecast

A full day of shopping at an antique/craft market and then shopping at a HUGE garden center with my mom and my brother’s girlfriend:

Antique shopping

Antique shopping

Plant shopping

My purchases: rhubarb, cucumbers, spaghetti squash, rosemary, parsley, fun flowers and a micro cherry tomato plant. (I can’t wait to see what it produces!)

And then finally a surprise litter of kittens:

Kittens

I mean, seriously, who can get any work done when you have this to cuddle?

Kitten

I knew that one of my cats was very likely pregnant and when one day she was noticeably thinner, I started searching. She hid them very well and it took me four days to find them. But now that I have, I can’t stay away. I will be sure to find homes for all of them as soon as they are old enough but until then, I get to love on them!

Thankfully I did take advantage of some beautiful weather the last few days of April, and I made great improvement to the landscaping on the north end of the house. I hand washed the siding to remove all of the green that has been building up.

Before:

Dirty siding

After:

Clean siding

My mom gave me two of the roses I had planted when I still lived at home and I transplanted to this bed.

Rosebud

However, until I get some mulch, I can’t mark this off my list. So I hate to admit it, Julia, but I cannot mark a single thing off this week.

  • Make some kind of designated area (possibly raised bed) for annual vegetables such as asparagus and strawberries — Area is tilled and asparagus planted but strawberries need planted and needs border
  • Neaten, and define north flower bed and add mulch — So close!
  • Divide mums and spread around deck
  • Make a designated gardening area complete with workbench

I am very aware of how few days are left in this challenge. So I am going to dig down and find the drive to make these last two weeks count (between kitten snuggles)!

Yawning kitten

Okay. Sarah definitely wins in the cuteness category. And some of the shopping and roses are in the gardening category, even if they’re not on the to-do list. I’m ahead for now. Hopefully it stays that way for the next two weeks.

Garden Dueling DIY Week 3

Sarah in Illinois and I have entered into a friendly competition this spring to help us get our gardens in shape. We’re now at the conclusion of week 3 of this Dueling DIY, and I’m sharing my second update. You can check out all of the previous posts here.

It was just noon on Sunday. I had a long list of things that I wanted to do in the garden, but I was running out of steam. I managed a few more hours before I hobbled retreated indoors. (Sarah, take note that I said the garden claimed a temporary victory. I am not conceding anything yet in this DIY duel).

I still don’t have any dramatic before and after pictures to share yet. But I can report some progress.

The big accomplishment so far is edging the garden.

Our garden is 2,462 square feet, which means, if I’m remembering my geometry formulas correctly, its outer perimeter is roughly 175 feet. Whatever the distance, it felt like it took a very long time to go around the whole outer edge.

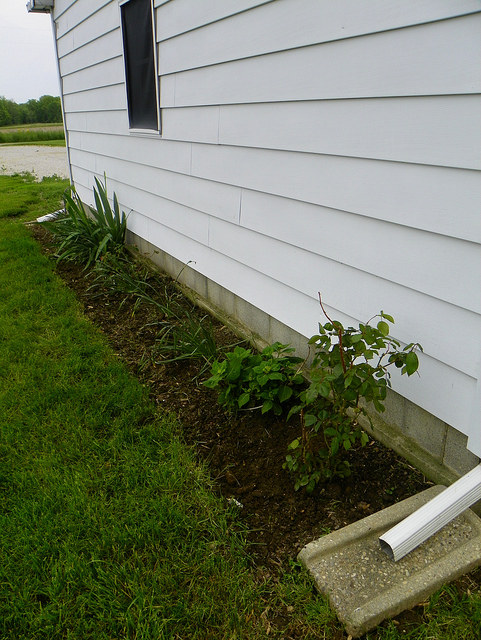
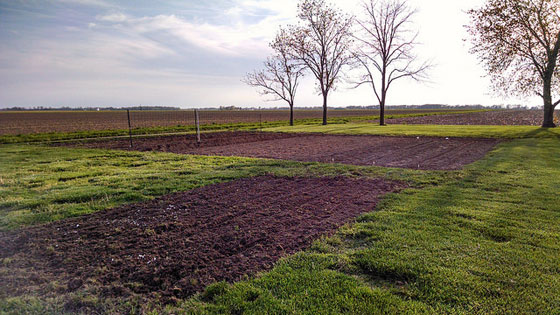
Here’s what the edge looked like at the start. Ugh.

Edging a weedy garden

Here’s the progress shot.

Edging the vegetable garden

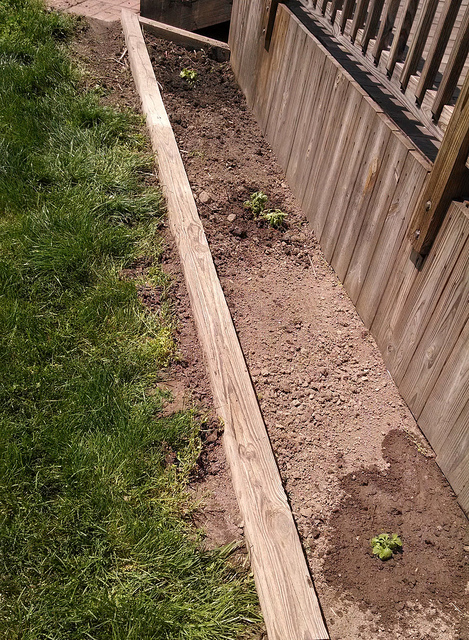
And here’s the final.

Wood "curbs" to edge a vegetable garden

We used the fence posts (or in the case of the image above, the telephone pole) as “curbs.” I’m hoping they accomplish two things: 1) Keeping weeds out of the garden. 2) Keeping small critters from crawling under the chainlink and into the garden.

Matt cut the fence posts to length with his chainsaw and then we dropped them into the shallow trenches that I’d dug around the perimeter.

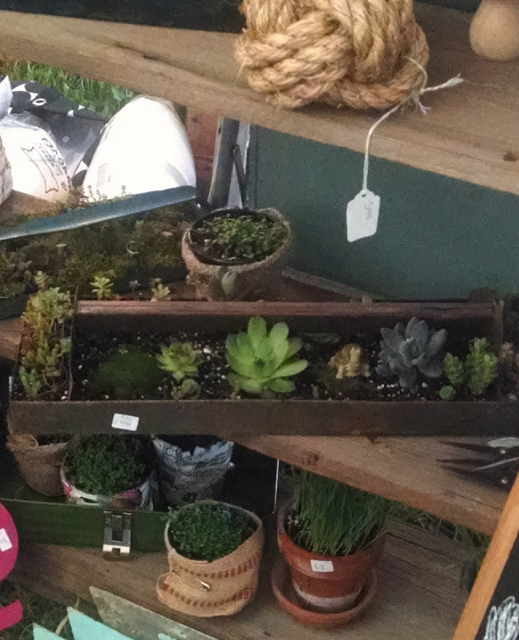
Remember this picture from my last update of all of the materials for the garden?

Materials for the garden update

We’re now down to a single pile of posts (and some firewood).

Fence posts

I also made a dent in the lumber part of the pile when I went on a marathon stake making session.

An electric mitre saw is perhaps not a conventional garden tool, but I wanted a lot of stakes.

Cutting garden stakes with a mitre saw

How many stakes? I couldn’t find the energy to count. More than 10 gallons worth.

Pails of garden stakes

The stakes came into play with my plan for the other half of the fence posts: the raised beds.

My plan is to build shallow raised beds just around the outside edge of the garden. These will host asparagus, grapes, rhubarb, sunflowers, and probably beets, lettuce and who knows what else.

Again, I’m using the fence posts as curbs, and I’m holding them in place with the stakes.

Shallow rustic raised vegetable garden beds

After digging my way around the outside of the garden, I have no desire to do more weeding, so I’m giving the lasagna method a try within the raised beds.

I used cardboard for my base layer. (Die weeds, die).

Using cardboard to kill weeds in the vegetable garden

Then I covered that with a layer of straw mulch that has been composting in the garden since last fall. I was surprised how much the straw has broken down already. I think it should be good food for the new beds.

Straw mulch

Four yards of topsoil arrived yesterday morning, so I will top up the beds this weekend.

The raised beds were where I lost my mojo. I had a small sledge for hammering in the stakes, but swinging the hammer over and over (and over and over) was surprisingly tiring. So I’ve made it halfway around the garden.

I know it’s halfway because I’ve marked the centre aisle with our super long rope. The picture below doesn’t look like a lot of progress, but you might be able to see the curbs at the far right waiting to be set in place.

Unfortunately, you’re also able to see all the weeds. Matt got the rototiller running with no trouble, which got us very excited, but as soon as he started to till it stalled. And stalled. And stalled. So frustrating. So the straw and weeds and ash are all still sitting on the soil.

Gardening progress

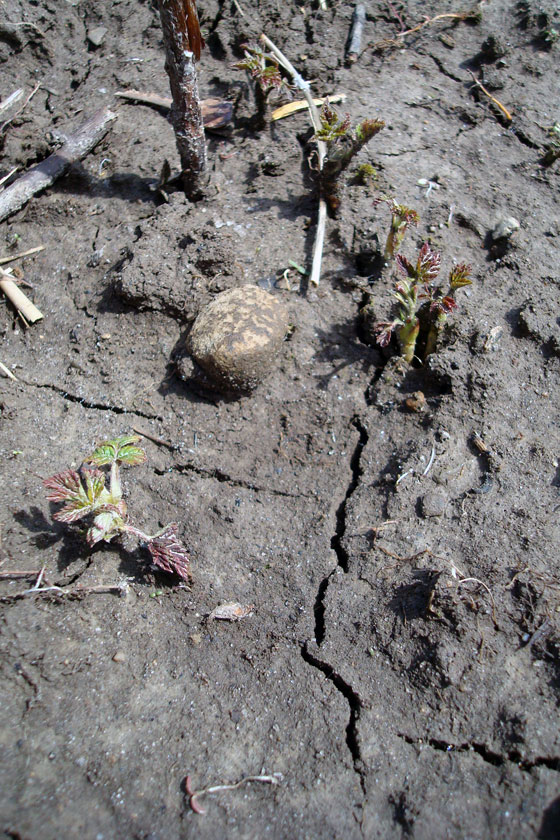
One place the weeds are gone is in the red raspberry row. Woo-hoo for small victories. (The twine is to mark the row until I get a proper trellis in place).

Raspberry row marked with stakes and twine

A bigger victory is how much the raspberries have expanded. Look at all those little plants. This is going to be good. And the black raspberries next door–while still weedy–also appear quite healthy.

Raspberry sprouts

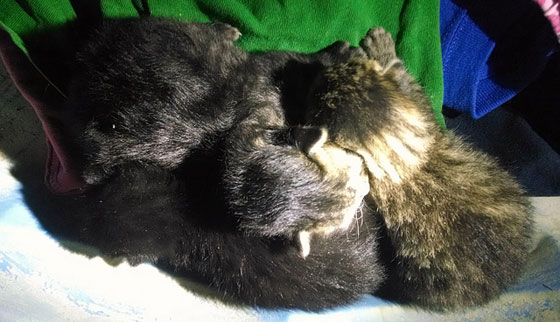
My usual gardening sidekick is Bax. It was nice to be a trio this weekend thanks to Matt’s help with the fence posts. However, as soon as Matt was done cutting, Bax was more than ready for bro time–indoors. Apparently he’s only interested in gardening if he can work on his tan at the same time. The weather was cloudy and drizzly, and as much as dude likes to pretend he’s an outdoor dog, he’s a fairweather outdoor dog.

Thankfully, Ralph is much tougher than her brother, so she braved the weather to keep me company. And unlike the sunbather, she actually participated, inspecting the raised beds and even assisting with some weeding.

Ralph in the garden

Ralph in the garden

Eventually, though, even I gave in and retreated to the indoors. (Ralph as always stayed outside).

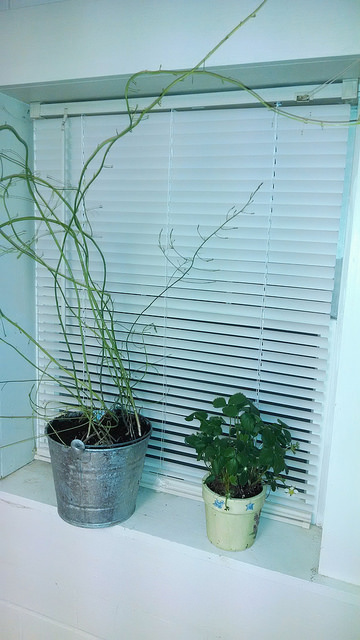
However, there’s still some more progress inside. Tomatoes (Sicilian Saucers) and peppers (a random mix) have sprouted, and I transplanted our tallest watermelon sprouts already.

Watermelon sprouts

We cut our seed potatoes down to isolate individual sprouts, and they’re firmly at the grody stage. We really need to get them in the ground this weekend.

Chitted potato sprouts

The weather forecast is supposed to be bright and warm this weekend, so I have high hopes again for progress and productivity. However, I’m away from the farm a bit (have to remember Mother’s Day) and… guess what… picking up my grapes. I’m excited to have my first vines. Finger crossed I can keep them alive and help them grow the way they’re supposed to.

Before I get to that, though, let’s go back to my original to-do list. I can cross at least a couple more things off.

  • Hang the gate
  • Edge the garden
  • Build raised beds around the perimeter (half done)
  • Build trellises for the raspberries, tomatoes and squashes
  • Start a few seeds indoors
  • Till in the ash, straw and manure

Three weeks to go, Sarah. We’re halfway through this Dueling DIY. Are you going to make it? The garden may have kicked my butt last weekend, but I’m going to be back and better than ever in just a few days. Watch out.

What progress have you made on your spring projects at your house? Any tips for lasagna gardening? Or building raised beds? How about growing grapes? Or keeping a rototiller running? Do you have any furry gardeners at your house?

Garden Dueling DIY Week 2

Sarah in Illinois and I have entered into a friendly competition this spring to help us get our gardens in shape. We’re now at the conclusion of week 2 of this Dueling DIY. (Week 2 already, yipes!) Sarah is here today to share her first official update. You can check out all of the previous posts here.

Lots of rain and cool weather has continued here, and I was running out of time to work on this week’s challenge. I was getting nervous because I could just picture Julia having beautiful weather and getting ahead of me. (Ha-ha-ha. Be afraid, Sarah. Be very afraid). I was able to do a second till of the garden Tuesday before another round of rain came through, but that was as far as I had gotten.

However, the forecast called for perfect weather Sunday, and I had a list a mile long to work on. Of course at the top of the list were projects on our challenge. I can’t mark very much off of the list yet, but I sure got a great start.

The first thing I did was divide up my two big mums and spread them around the deck.

Splitting mums

I was easily able to make 7 different clumps of plants. I dug holes and planted them and watered them well.

Transplanting mums

While I was doing that, Steve changed the oil and put new blades on the mower. Then I mowed while he tilled the garden for the third time and then we decided where our “annual garden” would go.

We made a few first passes over then new garden, but I still have to make some type of borders and plant it.

The foreground is our new bed for plants that won’t get tilled up every year such as strawberries and asparagus and in the background is our yearly vegetable garden. You can see the fencing ready for the cucumbers and sugar snap peas. And in front of it is the hill for our row of potatoes.

Tilled garden

The beautiful weather also meant it was time to bring out our deck furniture from the barn. I got everything scrubbed and hosed off. I let it all sit in the sun to dry and then we set it up on the deck. We finished our hard day of yard work with brats and shish-kabobs on the grill and ate it outside on the deck. It was a perfect end to a perfect day.

Despite all of that hard work I was only able to check one thing off of my challenge list:

  • Make some kind of designated area (possibly raised bed) for perennial vegetables such as asparagus and strawberries.
  • Neaten, and define north flower bed and add mulch.
  • Divide mums and spread around deck
  • Make a designated gardening area complete with workbench.

It may not look like much was accomplished, but I am setting myself up for the kill! So how was your weekend, Julia?

Oooh. See how she throws in that little jab at the end? We’re pretty much tied up right now. Sarah and I have each officially crossed just one thing off our lists. However, I have big plans for both Matt and me this coming weekend. Watch out, Sarah.

Sprouts

Sarah in Illinois will be sharing her update in our Dueling DIY gardening challenge later this week. I couldn’t help sharing a small–very small–garden update of my own today.

We have sprouts!

Watermelon sprouts

Two of the seeds we planted last week have sprouted. These are sugar baby watermelons.

There are 36 little soil pellets in this container, so we have a lot more sprouts to go. And we have a long way to go until the garden is ready for these sprouts. Dueling DIY continues.

Do you have any sprouts at your house? Have you ever used pellets like this before? (This is our first time). Any watermelon growing tips?

Garden Dueling DIY Week 1

Fire in the field

In this Dueling DIY garden challenge, I am on fire. Literally.

These were my jeans at the end of Saturday.

Burned cuffs on my jeans

And this was the back of my neck at the end of the weekend. Ow-ee.

Sunburned neck

If you’re new to this Dueling DIY series, Sarah in Illinois and I are undertaking some friendly competition to help us get our gardens in shape this spring. You can check out all of the previous posts here.

Now, if you look again at that top picture and squint through the smoke, you might notice that the fire is some ways away from the garden itself–that big round thing with the fence around it.

Fire in the field

Blame it on my pyromaniac tendencies. Blame it on the other outdoor task on my 2016 Home Goals list–general property cleanup. Blame it on the first nice weather of the year. I got a little bit distracted over the weekend.

I cleared a stack of about a dozen incredibly heavy metal siding panels that had been hiding in the weeds on the south side of the garden.

Sheets of metal siding

Wiley and me moving the siding

Then I cleared the weeds themselves–using my preferred method of fire.

Burning weeds in the south field

Burning weeds in the south field

I cleared a very large pile of lumber at the edge of our centre field–and lit some of the really punky stuff on fire. (I might have a problem).

Lumber pile at the edge of the field

Field after clearing the lumber pile

I cleared a stack of old fence posts beside the driveshed.

Pile of old wood fenceposts

I’ve moved these fence posts once before, picking them up from where they were scattered around the property and tucking them behind the driveshed. I had to remind myself a couple of times that I had moved them before, and I could move them again.

Moving the fenceposts

These things were heavy. The very last one was the girth and almost the length of a telephone pole–not even close to a fence post. Example 8,694 of why I don’t need a gym membership.

Moving the fenceposts

But I digress. All of these clearing tasks do actually have something to do with the vegetable garden.

The fence posts are going to become the “curbs” around the outside of the garden and the raised beds.

Some of the lumber from the field is going to be trellises for the tomatoes and stakes to hold the curbs in place.

The metal T-posts that were mixed in with the lumber pile are going to be the trellises for the raspberries.

So my big accomplishment in this Dueling DIY is that I have amassed all of my materials. A whole lot of materials.

Materials for the garden update

My other accomplishments are on the non-heavy lifting side: I ordered seed potatoes and grape vines, and we’ve started some watermelon, tomato and pepper seeds inside.

Here’s my original to-do list that I shared last week. I can cross just one thing off.

  • Hang the gate
  • Edge the garden
  • Build raised beds around the perimeter
  • Build trellises for the raspberries, tomatoes and squashes
  • Start a few seeds indoors
  • Till in the ash, straw and manure currently spread over the garden

But here’s how I’d calculate my scorecard so far:

  • I cleared the weeds from a space roughly equal to the size of the garden. Maybe this means fewer weeds to go to seed and infiltrate the garden itself.
  • I am prepped–and stocked–in the garden materials department.
  • I moved a telephone pole all by myself–in fact the equivalent of several telephone poles if you put all of those fence posts together.
  • And I lit myself on fire.

Beat that Sarah.

Thanks to everyone who shared their garden/spring to-do lists last week. Please share your progress. How is your spring project coming? Are there any pyromaniacs out there? Who else gets distracted from the primary project? What are you working on in your garden?

Spring Garden Dueling DIY – The Challenger

This week I kicked off a Dueling DIY Challenge to help get the vegetable garden ready for planting. Sarah in Illinois is my opponent in this challenge, and she’s here today to share her to-do list. Another Sarah, she of Ugly Duckling House and one of the original Dueling DIYers, issued another challenge yesterday–she admonished Sarah and me to “throw down.” I’m not usually one for smack talk, but I’ve seen Sarah’s to-do list, and I think I’ve got this.

There’s nothing I love more than a little friendly competition, whether it is during bowling league, golfing, or predicting the outcome of professional football games. So when Julia suggested a competition that would also help me get my garden and yard in better shape, I was all for it.

Last weekend I looked around the yard and garden and made a list of things that I really want to get done.

Our temperatures have been unseasonably cool so far so I still have not made any type of raised bed or containment for my asparagus and strawberries. Remember I stuck them in a pot temporarily? Well, they are not going to last there much longer.

Asparagus and strawberry plants

If you look closely, the strawberries are already blooming. And I really don’t know what to say about that asparagus other than it needs planted badly!

I have a small flower bed on the north side of our house that needs some attention. It needs mulch and the division between it and the yard either needs neatened up or maybe a more permanent border.

I shared this picture of my mums back in October and said that I wanted to divide them and spread them around our deck. Now that they are starting to come up, it is time to do just that.

Deck with mums

For my final and most ambitious project, I want to make a designated gardening area. I have pinned a few gardening benches on Pinterest.

While cleaning out one of our barns this weekend I found what will make a perfect bench top and that gave me the kick to get started on a work area.

So here is my summary:

  • Make some kind of designated area (possibly raised bed) for annual vegetables such as asparagus and strawberries.
  • Make a designated area (or raised bed) for a new cutting garden.
  • Neaten, and define north flower bed and add mulch.
  • Divide mums and spread around deck
  • Make a designated gardening area complete with workbench.

I am inspired Julia, let’s go!

Let’s go indeed. Bring it on, Sarah.

The woman can’t even control her asparagus. Yup, I’ve got this.

Vegetable garden dueling DIY challenge

I’ve been eagerly waiting to get back into the vegetable garden, but Mother Nature has not cooperated so far this spring. In fact, we had snow three times in the last week, negative temperatures and windchills.

But I’ve decided it’s time. No matter what Mother Nature thinks, gardening is going to happen.

Now I’m in Canada, so it’s not going to happen for a little while. The traditional start date for the Canadian gardening season is Victoria Day–also known as May 24 (or the 23rd this year because we’re all about the holiday Monday).

That’s six weeks away, which I think is perfect. There’s lots of work to keep me busy until frost has passed.

Garden at the beginning of April

It turns out, I’m not the only one with a gardening to-do list. Sarah in Illinois has one too. Inspired by DIY Diva and Ugly Duckling House, we’re kicking off a Dueling DIY challenge. Today, I’ll share my spring garden to-do list. On Wednesday, Sarah will share hers. Every week from now until Victoria Day, we’ll post progress reports and help keep each other on track.

We hope that you’ll join in too. Share your to-do list in the comments today, and come back each week to share your updates.

Raspberry canes sprouting

Here’s what I want to accomplish in the next six weeks:

  • Hang the gate
  • Edge the garden
  • Build raised beds around the perimeter
  • Build trellises for the raspberries, tomatoes and squashes
  • Start a few seeds indoors
  • Till in the ash, straw and manure currently spread over the garden

And a couple of maybes:

  • Weather permitting, plant grapes and potatoes
  • Run a waterline out to the garden (this one’s Matt’s… I’m not sure he’ll be as enthusiastic about Dueling DIY as Sarah is)

I think it’s do-able. I just need a little co-operation, Mother Nature.

Are you looking forward to gardening season? Or do you have another spring project? What’s your to-do list?

Surprise pussy willow

Growing up, an elderly lady lived next door. She couldn’t take care of her gardens very well, so things ran a bit wild. At the very back of her yard at the end of one of the overgrown flowerbeds was a huge pussy willow bush.

I loved that bush and its unique fuzzy flowers. And I’ve always wanted a pussy willow of my own.

This year I think I might have one.

What looks like a pussy willow is growing in the creek alongside the driveway.

Pussy willow

Pussy willow

Pussy willow

The flowers–can I call these fuzzy things flowers?–are perhaps a bit sparser than the pussy willow of my memories, but other than that they look the same.

Anyone know if I can transplant this from the creek? I’d like to put it in one of the flowerbeds that are closer to the house.

April 2

April 2 has become my barometer of how spring is going to go.

The first year we moved to the farm, the forsythia was blooming on April 2. It hasn’t been that early since.

Each year I take a photo of the forsythia on April 2 and try to evaluate how long until we see blooms.

Given the mild winter we had this year, I’m thinking the forsythia might be close, but so far there’s no sign of the yellow blossoms.

You might recall that the past two years haven’t been great for our forsythia. The yellow blossoms have been few and far between. I gave the bushes a pretty vicious pruning last spring in the hopes that it might encourage some new growth.

We have what I think might be a few buds. And you can see where I hacked off the woody stalks.

Forsythia buds

Things were looking a little green around the farm, but then we got a dusting of snow Saturday morning.

Forsythia early spring 2016

It had mostly melted by afternoon, but then we got several inches of snow Saturday evening and more snow rolled in yesterday afternoon, so we’re back to winter now.

Forsythia bushes covered in snow

Looking at the pictures from April 2 going back to 2012, the snow rather than the forsythia tells the story of what kind of winters we’ve had.

Collage of forsythia through the years

Just a week ago, the forsythia was coated in ice, thanks to the ice storm.

Ice covered forsythia blossoms

So far, this spring has been very up and down. I’m not making any predictions of when the forsythia will actually bloom.

What’s spring been like where you are? What signs of spring are you watching for?

Harvest basket

Sarah in Illinois is still looking ahead to garden season. In fact, she’s looking far ahead to harvest time. She’s made a super cute harvest basket. I’ve admired these on other blogs, and I love the special twist Sarah added to hers (read on to find out what it is).

I have several projects pinned on Pinterest that I have wanted to work on, but making a harvest basket has been at the top of my list for a while. I have a few images pinned.

I did not click on any of the pins to know what kind of instructions they give. I just used the images as a guideline to make my own.

Wooden vegetable harvest basket with a twig handle

I started with cutting two boards for the sides and two boards for the uprights that would hold the handle. I took no measurements. I just “eyeballed” what I thought would be a good width and what I thought would be a good height. I am sure there are much more precise directions on Pinterest.

How to make a wooden vegetable harvest basket

I wanted the bottom to be rounded so that it was easier to attach the hardware cloth. So I used whatever I could find (which happened to be a can of spray paint) and drew my rounded corners.

How to make a wooden vegetable harvest basket

I wanted the sides to match so I clamped both boards together and cut the rounded corners with a jigsaw.

How to make a wooden vegetable harvest basket

I also needed to notch out the corners for the side rails. I did this the same way as the rounded corners, by clamping the two together and using the jigsaw.

How to make a wooden vegetable harvest basket

It was at this point that I attached everything together. The frame work was fairly flimsy, so I used both wood glue and screws.

How to make a wooden vegetable harvest basket

I could have used just a dowel rod for the handle, but in my barn are several branches. Someone took the time to find very straight ones and remove all of the limbs. And those branches have been out there since way before we moved here. So I thought they would make a nice handle.

I used a paddle bit to cut a hole in the top part of each upright. Since the limb was not a perfect fit, I used a nail to secure the limbs in the holes.

How to make a wooden vegetable harvest basket

Then I spread a quick coat of stain over the whole thing.

Wooden vegetable harvest basket with a twig handle

The final step was to attach the hardware cloth. It is very sharp so I was sure to wear gloves and used metal snips to cut a piece to size. Then I stapled it to the frame.

How to make a wooden vegetable harvest basket

Wooden vegetable harvest basket with a twig handle

This was not a difficult project. It took me about two hours and now that I have done it once, I think that I could do the next one even faster.

And I am thinking I know of a few people with gardens that might like one as a gift!

I hope that we put this one to good use this year. I can’t wait to take it out to our garden and fill it with fresh vegetables for supper.

Isn’t that a great basket? I love the twig handle so much. Clamping the wood together and cutting it as one is such a smart way to get precisely identical pieces. Oh, and I think I know at least one person with a garden who would absolutely like a harvest basket like this! 😉