Surprise pussy willow

Growing up, an elderly lady lived next door. She couldn’t take care of her gardens very well, so things ran a bit wild. At the very back of her yard at the end of one of the overgrown flowerbeds was a huge pussy willow bush.

I loved that bush and its unique fuzzy flowers. And I’ve always wanted a pussy willow of my own.

This year I think I might have one.

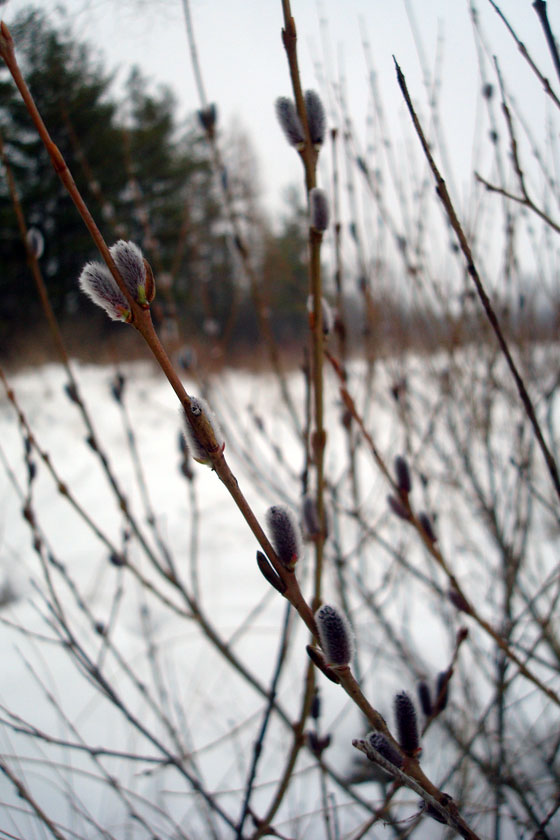
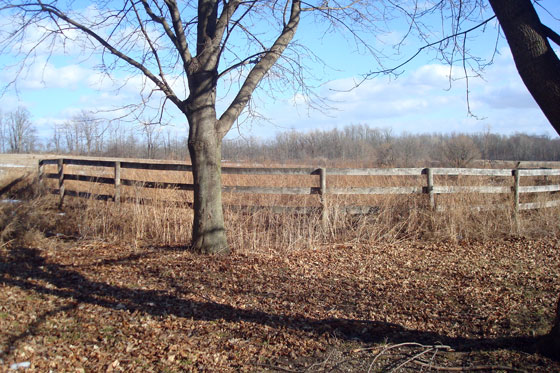
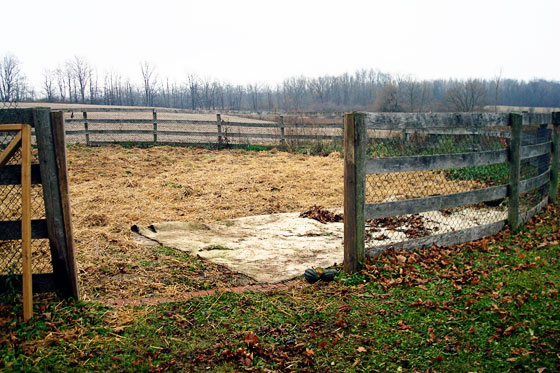
What looks like a pussy willow is growing in the creek alongside the driveway.

Pussy willow

Pussy willow

Pussy willow

The flowers–can I call these fuzzy things flowers?–are perhaps a bit sparser than the pussy willow of my memories, but other than that they look the same.

Anyone know if I can transplant this from the creek? I’d like to put it in one of the flowerbeds that are closer to the house.

April 2

April 2 has become my barometer of how spring is going to go.

The first year we moved to the farm, the forsythia was blooming on April 2. It hasn’t been that early since.

Each year I take a photo of the forsythia on April 2 and try to evaluate how long until we see blooms.

Given the mild winter we had this year, I’m thinking the forsythia might be close, but so far there’s no sign of the yellow blossoms.

You might recall that the past two years haven’t been great for our forsythia. The yellow blossoms have been few and far between. I gave the bushes a pretty vicious pruning last spring in the hopes that it might encourage some new growth.

We have what I think might be a few buds. And you can see where I hacked off the woody stalks.

Forsythia buds

Things were looking a little green around the farm, but then we got a dusting of snow Saturday morning.

Forsythia early spring 2016

It had mostly melted by afternoon, but then we got several inches of snow Saturday evening and more snow rolled in yesterday afternoon, so we’re back to winter now.

Forsythia bushes covered in snow

Looking at the pictures from April 2 going back to 2012, the snow rather than the forsythia tells the story of what kind of winters we’ve had.

Collage of forsythia through the years

Just a week ago, the forsythia was coated in ice, thanks to the ice storm.

Ice covered forsythia blossoms

So far, this spring has been very up and down. I’m not making any predictions of when the forsythia will actually bloom.

What’s spring been like where you are? What signs of spring are you watching for?

Harvest basket

Sarah in Illinois is still looking ahead to garden season. In fact, she’s looking far ahead to harvest time. She’s made a super cute harvest basket. I’ve admired these on other blogs, and I love the special twist Sarah added to hers (read on to find out what it is).

I have several projects pinned on Pinterest that I have wanted to work on, but making a harvest basket has been at the top of my list for a while. I have a few images pinned.

I did not click on any of the pins to know what kind of instructions they give. I just used the images as a guideline to make my own.

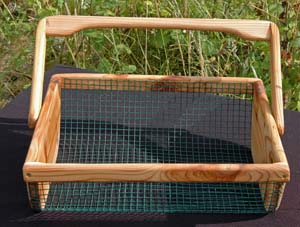
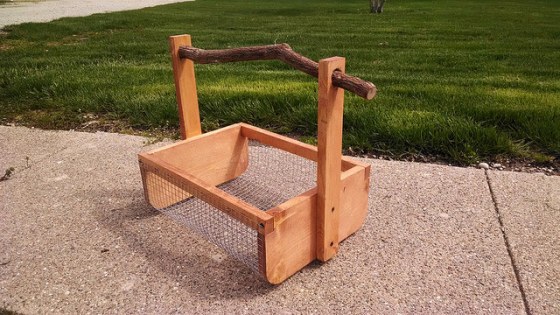
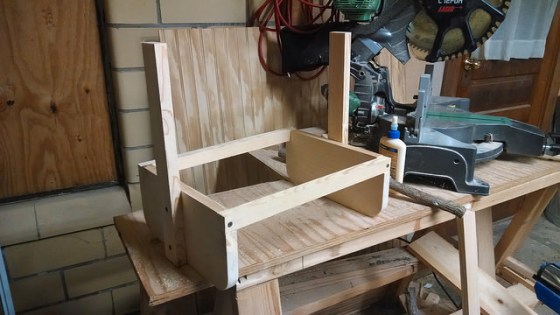
Wooden vegetable harvest basket with a twig handle

I started with cutting two boards for the sides and two boards for the uprights that would hold the handle. I took no measurements. I just “eyeballed” what I thought would be a good width and what I thought would be a good height. I am sure there are much more precise directions on Pinterest.

How to make a wooden vegetable harvest basket

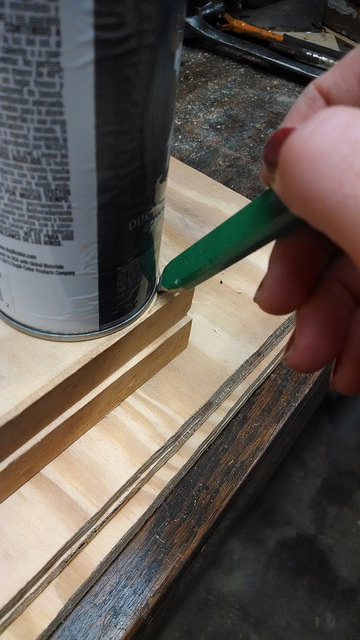
I wanted the bottom to be rounded so that it was easier to attach the hardware cloth. So I used whatever I could find (which happened to be a can of spray paint) and drew my rounded corners.

How to make a wooden vegetable harvest basket

I wanted the sides to match so I clamped both boards together and cut the rounded corners with a jigsaw.

How to make a wooden vegetable harvest basket

I also needed to notch out the corners for the side rails. I did this the same way as the rounded corners, by clamping the two together and using the jigsaw.

How to make a wooden vegetable harvest basket

It was at this point that I attached everything together. The frame work was fairly flimsy, so I used both wood glue and screws.

How to make a wooden vegetable harvest basket

I could have used just a dowel rod for the handle, but in my barn are several branches. Someone took the time to find very straight ones and remove all of the limbs. And those branches have been out there since way before we moved here. So I thought they would make a nice handle.

I used a paddle bit to cut a hole in the top part of each upright. Since the limb was not a perfect fit, I used a nail to secure the limbs in the holes.

How to make a wooden vegetable harvest basket

Then I spread a quick coat of stain over the whole thing.

Wooden vegetable harvest basket with a twig handle

The final step was to attach the hardware cloth. It is very sharp so I was sure to wear gloves and used metal snips to cut a piece to size. Then I stapled it to the frame.

How to make a wooden vegetable harvest basket

Wooden vegetable harvest basket with a twig handle

This was not a difficult project. It took me about two hours and now that I have done it once, I think that I could do the next one even faster.

And I am thinking I know of a few people with gardens that might like one as a gift!

I hope that we put this one to good use this year. I can’t wait to take it out to our garden and fill it with fresh vegetables for supper.

Isn’t that a great basket? I love the twig handle so much. Clamping the wood together and cutting it as one is such a smart way to get precisely identical pieces. Oh, and I think I know at least one person with a garden who would absolutely like a harvest basket like this! 😉

Starting from seed

Sarah may be in Illinois, but her mind is in the same place mine is–the vegetable garden. However, Sarah’s doing something that I’ve never tried before–starting her own plants from seed. She’s sharing the lessons she’s learned and the progress she’s made so far.

Every year Steve and his parents have grown a very large garden. And when I came along six years ago, I jumped right in to help and have become more and more interested every year.

I had always planted a few tomato and pepper plants before, but until I started helping at Steve’s I had never seen broccoli, or cabbage or brussel sprouts growing in a garden.

For several seasons I have tried to start plants from seed. And that usually starts off great and then fails miserably.

Steve likes to say that I have a “brown thumb” but that isn’t really true.

I just am terrible at hardening off the starts. I am impatient, and I am forgetful! So I push plants to be ready when they are not, and I forget to water them or forget to bring them in during the hardening phase.

This year I am going to use my “word for the year” that I mentioned around New Year’s and I am going to FOCUS on the hardening off process.
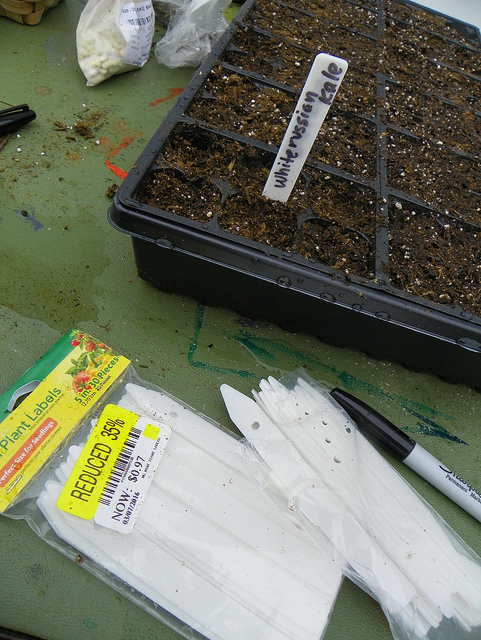
Starting plants from seed

This weekend I started my first seeds. I looked up online when the last predicted frost for my area will be and it said April 18. So I thought this was the perfect time to start some kale and lettuce.

Now I am going to make note here for the future that Steve says his farming sources predict a late frost for us and that we could get a frost up until May 5. That is a huge difference and I am really curious which source will be more accurate.

Over the next week or two, I plan to also start tomatoes and pepper plants from seed.

I found some plants on sale and used a black marker to label them. I was sure to not only write the variety of the plant but on the back I also wrote the brand of the seed. That way I can make notes of which seeds worked best and then I will have reference of where to buy my seeds in the future.

My mom and I had placed a small order for seeds and plants and those arrived last week. So besides the kale and lettuce seeds, I also had to do something with the strawberry and asparagus starts that I had ordered. Since I do not have my raised beds ready yet, I just stuck them in a bucket and pot temporarily. But now making those raised beds needs to be a priority.
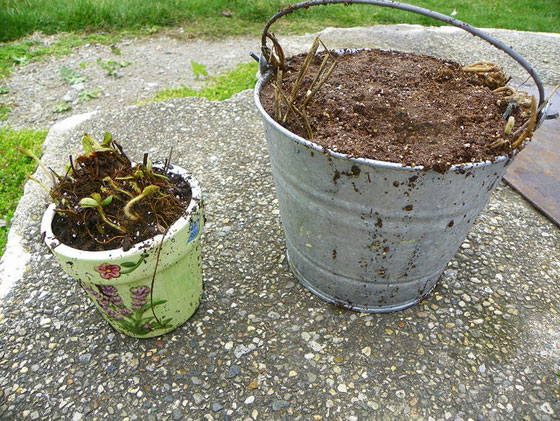
Strawberry and asparagus starts in a bucket

While I was digging through my gardening supplies I found a grocery bag with daffodil bulbs from last fall. So when I say I am forgetful, I am not exaggerating.
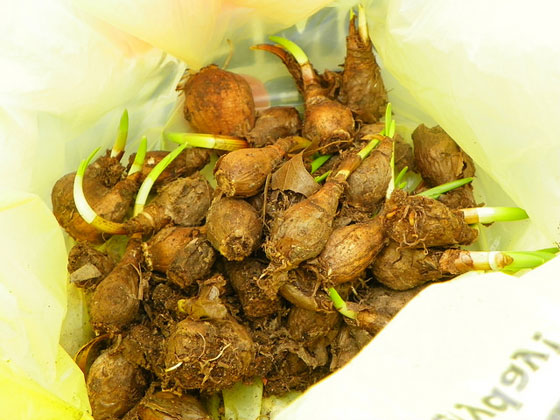
Daffodil bulbs

I stuck them in the ground since they were still alive, and I reminded myself that “FOCUS” has to remain my theme!

Next post I will update with the progress of my seeds.

Do you have a green thumb or a brown thumb? Do you have any helpful hints for the hardening off process? Do you have trouble staying focused?

Good luck, Sarah. Funnily enough, plants are one area where I get impatient or forgetful too. I hope you find your focus this year. I’m looking forward to following your progress–and seeing who’s right about the last frost.

No till vegetable gardening

The no till philosophy has gained traction in farming. The more I learn about vegetable gardening, I’m realizing no till also applies on a smaller scale.

If you’re not familiar with no till, it basically means undisturbed soil is healthier soil.

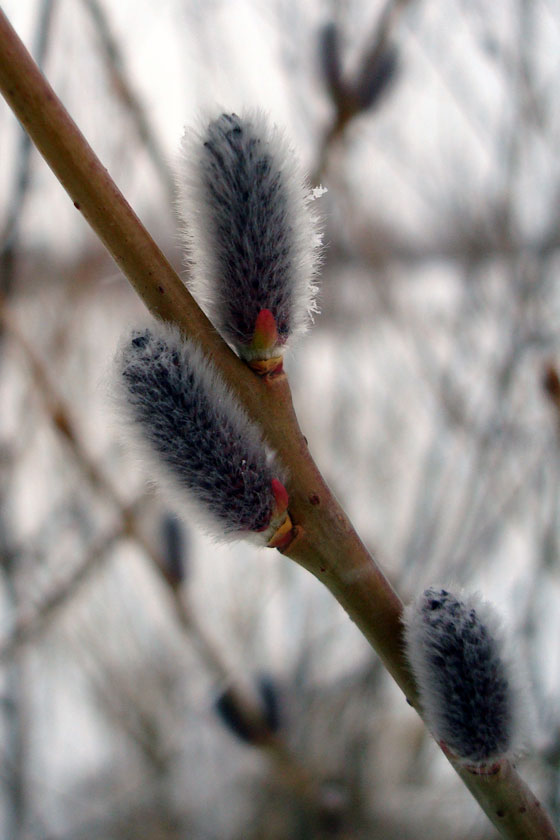
Our experience with our vegetable garden last year really brought this home for me. We built the garden in an area that hadn’t been touched–at all–the whole time we’ve owned the farm. I don’t know how long it had been abandoned before then.

Longe ring

Inside the fence, grass and weeds grew as high as they wanted. Every fall they died. Over the winter and spring, the dead grass was matted down by snow and rain. New growth sprouted in the spring and grew high over the summer. Rooted in the fertile soil, the new sprouts fed on the previous year’s plants which were slowly decomposing around them.

When we cleared the ring and planted vegetables in place of the weeds and grass, the vegetables went crazy. They sucked up all of the nutrients from the soil and were super productive.

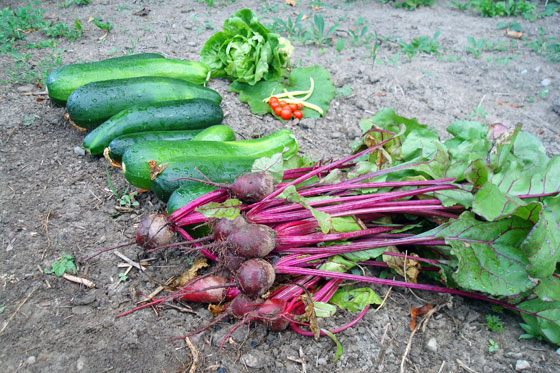
Vegetable garden harvest

As the season went on and we harvested more and more from the garden, I realized that if I wanted to continue this productivity in future years, I was going to have to focus on the soil.

I’ve heard other gardeners say that gardening isn’t about growing plants. It’s about growing soil.

So that’s why I started a compost bin for all of our kitchen scraps and I spent three weeks spreading a thick layer of manure over the whole garden at the end of the growing season.

Manure in the garden

That’s also why I’m contemplating going no till.

I’m sure this isn’t entirely accurate, but I have this circle of life idea playing in my head. Whatever nutrients the plants take from the soil as they grow are returned to the soil as the plant decomposes (aside from the fruit and vegetables that we eat, of course). So leaving everything untouched and in place means we have complete soil, not deficient in any element.

Last year, I was quite excited to get our hand-me-down rototiller. But the more I learn about gardening, the more I wonder if we should be using it.

Matt and I tilling the garden

I’ve read a bit about the deep mulch method. It’s supposed to be good for weed control, retaining moisture and also for returning nutrients to the soil. (See The Prairie Homestead and Reformation Acres for some info).

We already have a deep layer of straw on the garden thanks to the manure spreading, so maybe we can build on that. My plan is to work towards something like the raised row method from Old Word Garden Farms.

Anyone have experience with no till or mulch gardening? Aside from the health of our soil, my biggest concern is weeds. Any tips for dealing with weeds?

Garden plans

I’ve held off posting about the garden until February.

Yes, today is the very first day of February. But I held off.

You see, I’ve been thinking about this garden since before the end of last season.

You’re impressed with my restraint, aren’t you?

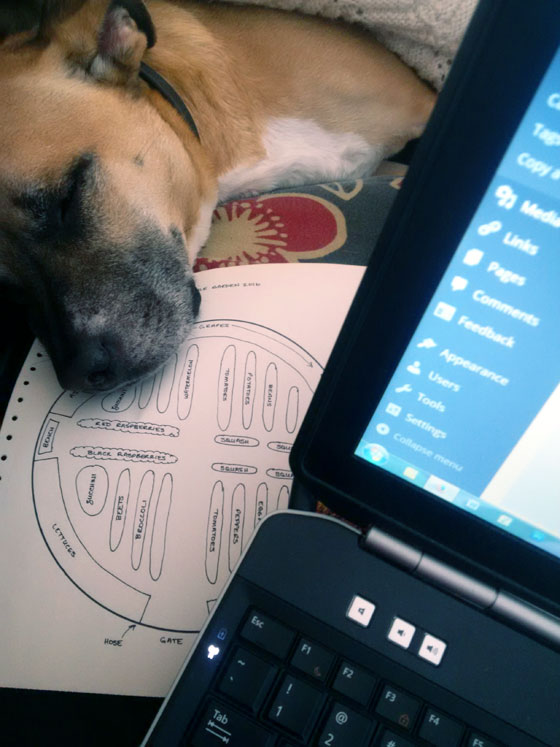
You know who’s not impressed or excited? Baxter. Dude does not share my enthusiasm for the garden at all. In fact, he drooled on my garden plan as I was writing this post.

Baxter sleeping on the garden plan

But never mind him. I will carry on.

There are a few things feeding my obsession:

  1. I’ve wanted a garden ever since we moved to the farm and last year it finally happened.
  2. It turned out the garden was a project that both Matt and I enjoyed. Sometimes our projects tend to belong more to one of us, so it was nice to have something we were both invested in.
  3. The garden worked! We had so much food. It was amazing.
  4. There’s so much potential. Translation: So much more to do.

You saw some of my to-do list in my Home Goals 2016 post. Today I want to focus less on what has to be done and more on what could be done.
As in, what could be grown.

Here’s my initial idea for the upcoming season (minus the drool).

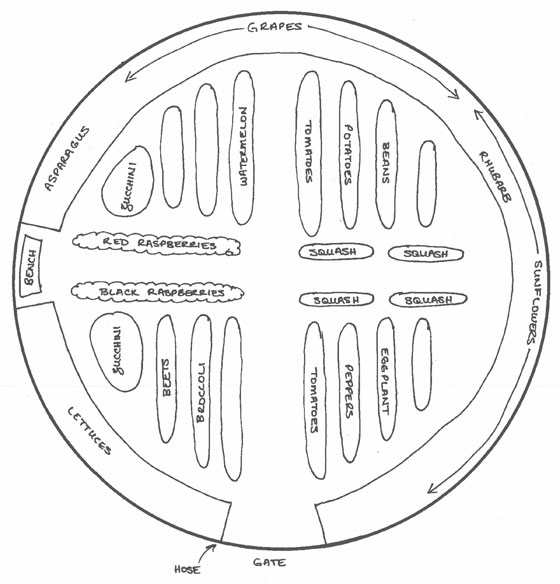
Round garden plan for 2016

The big news for this year is that we’re using the whole garden. Last year, we only cleared half.

So that means we can plant more of certain things (potatoes, beans) and more new things (broccoli, watermelon, eggplant, asparagus, sunflowers). You’ll see there are still a few blanks in the plan above. I’m open to suggestions.

I also feel like this is the year to sort out the best layout. I’m still wrapping my head around gardening in the round. The layout of two central axes crossing at right angles, and then shorter rows running perpendicularly (does that description make any sense?) is something I started last year. I found it’s a helpful way to divide this huge garden into manageable sections.

A couple of points to keep in mind:

  • The raspberries, squash and tomatoes are all going to be on trellises, so think vertical when you envision those.
  • The perimeter plantings are going to be in slightly raised beds. The rest of the garden is all at ground level.
  • The bottom left corner can be a wee bit shady late in the day.

As always, though, I would appreciate your input.

What plants would you suggest? How would you lay things out? What summer projects are you planning? What are you going to grow in your garden this year?

Planning a cutting garden

Sarah in Illinois is back today, sharing how she’s coping with her winter cabin fever. Hint: warmer times plus pretty flowers figure in her plans.

One of my goals for 2016 is creating a cutting garden. Having a vase of flowers on my counter always makes me smile. Steve usually buys me flowers for special occasions and my mom gives me flowers sometimes, but the idea of walking out to the yard and creating my own bouquet just sounds perfect.

I’ve had the idea of a cutting garden for a while. We have a small ditch that is hard to keep mowed, and I considered planting wild flowers there. That is something we still might do, but I have decided to create a designated cutting garden in another spot. We have started receiving seed catalogs in the mail and email and planning a garden has been keeping my cabin fever away.

I have made up my mind to do a raised bed for my cutting garden. I will probably follow the plans that Kit shared with us over at DIYdiva. She was able to make some great looking beds that did not break the bank. And while I am making them, I will add one for asparagus and one for strawberries.

But I am going to have to talk to Steve and decide where we want to put all of these beds and plan them so that they are easiest to mow and weed around. So those ideas are still rolling around in my head.

I need to make a list of flowers that I want to include. This Old House website gave a list of fast-growing cutting flowers, and I thought that would be a great place to start.

It mentions that Black-Eyed Susans are good for deer deterrent, which I didn’t know. I occasionally see deer tracks in my yard and near the garden so it won’t hurt to plant Black-Eyed Susan. Plus they are so bright and cheerful! I know I want to plant cosmos and poppies, and I am sure I will be picking flowers by what catches my eye at the time.

I am surprised at how much planning there will be in this garden. Should I plant in rows like a traditional garden or in a more free-form design? I want to plant close together to keep weeds down and use as little chemical weed treatment as possible. I want to have a mix of colors, a mix of annual and perennials, and I will probably plant seeds along with plants. Since this is my first time with a cutting garden, it is really going to be an experiment, and I plan to take notes so that I can improve on it each year.

Have any of you created a cutting garden? Do you have any suggestions for me? Any flowers that you would be sure to add?

I plan to keep you updated through the year on how it is going.

Ahhh… beautiful flowers spread around your home. That sounds lovely. I’m never good at picking flowers to bring them inside, but I admit I’ve considered having my own cutting garden. And poppies are definitely on my list too. I’m really interested to learn from Sarah’s experience this year.

Home Goals 2016

I really enjoy the process every January of setting my home goals for the coming year. (If I’m being honest, I start thinking about them in December or even earlier). I’m not big on resolutions on the personal front, but on the home front my annual plan helps me stay focused.

This year, I’m going to try to continue last year’s plan of striking a balance between productivity and a bit of relaxation. There’s still lots to do, of course. But it’s been four years since we bought the farm. Obviously, our renovation pace is not even close to breakneck.

We are approaching the point where we have either really big projects (kitchen, bathroom, garage, master suite) or small stuff (paint the guest room, dining room, my office). For now, I’m keeping the focus on the small stuff.

Which will help me to continue another theme from last year: frugality. We did pretty well on that front in 2015. You’ve seen some of my long-term renovation plans already, so continuing to save money in 2016 will be helpful.

And that’s the first goal on the list: get an idea of how much the Big Reno is going to cost.

Beyond that, the focus is going to be on small, frugal things.

Guest room

Matt and I got a start on this at the tail end of last year by scraping the stippled ceiling. We have more to go to make it match the picture in my mind.

  • Paint the walls and trim
  • Replace the light fixture
  • Make window treatments (ugh… I really don’t want to sew curtains again)
  • Refinish the desk chair
  • Strip the paint off the metal bedframe (and maybe repaint)
  • Decorate and personalize

Finish the basement

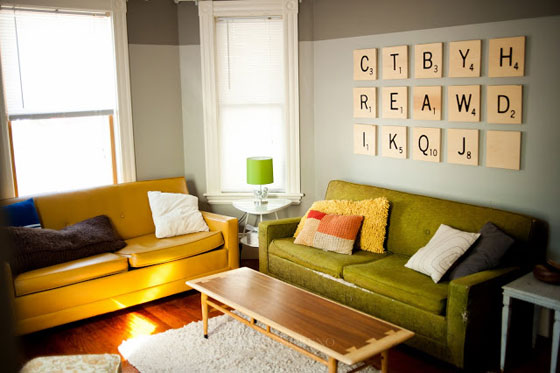
Scrabble art for the basement

Source: insideways

The basement was our very first project when we moved to the farm. But the nit-picky finishing bits are still hanging around. I just need to get my butt in gear and get it done.

  • Trim around the cold cellar doorway
  • Finish the built-in storage area in Matt’s bathroom
  • Make/buy art to finish off the space (this one’s a carry-over from the 2015 home goals)
  • Build shelving in the closet under the stairs

Furniture

My list of wanted furniture is getting shorter and shorter.

  • China cabinet for my office
  • Coffee table for the living room
  • Reupholster slipper chair for my office (in the same beautiful Brissac Jewel by P Kaufmann that I used for my bulletin board)

Vegetable garden

Last year’s top home goal returns. There’s still more to do to make my dream vegetable garden.

  • Hang the gate
  • Edge the garden
  • Build raised beds around the perimeter
  • Build trellises for the raspberries, tomatoes and squashes (we can’t have the squashes running rampant again this year)
  • Plant perennials: grapes, asparagus, rhubarb, more raspberries
  • Run a waterline out to the garden

Outdoor clean-up

Manicured meadow

Source: LandVest

I’m going to be a bit ambitious this year and add a second outdoor task to the list. The task of cleaning up this property could be a full year project for a full team of people. It’s a job of picking up rocks, extracting weeds (fire worked well last year), grading (and maybe adding a bit more topsoil), seeding grass, mowing. And it’s a matter of picking my spot… and being satisfied with a spot, not all of them. Here are my options:

  • North side of the house
  • West side of the house
  • On the edge of the woods at the north side of the house
  • Around the barn (all points of the compass)
  • Behind the driveshed and around the garden
  • At the foot of the driveway
  • Along the shore of the pond (oh how I want to clear the shore so that I can get close to my pond)

Six goals for 2016. I feel like there’s a bit of symmetry in that. Most important I feel like these goals should be relatively achievable.

In fact, the year is already off to a pretty good start.

The guest room is well underway, and I’ve started a few projects for the basement too.

You’ll see some of those soon.

Are you setting goals for 2016? What projects do you hope to complete this year?

Looking back at Home Goals 2015

There are all kinds of retrospectives and reflections happening in the blogosphere right now. My look back will not be nearly as emotional or deep as some of the ones going around.

I feel like 2015 was a pretty good year for this blog and our projects at the farm. Last January, I said I wanted to be flexible and not knock myself out renovating all the time. I definitely feel like I managed that. I also had a few more personal posts mixed in over the course of the year, and I’ve made some progress on that front too.

For now, it’s time for the annual report on how we did on Home Goals 2015.

1. Master bedroom Check!

Thanks to the One Room Challenge, we have a beautiful master bedroom. I love having another room completely done.

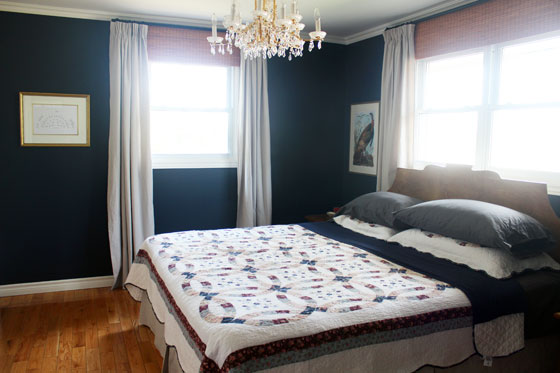
Dropcloth curtains in a navy master bedroom

2. Basement art No check.

The smallest task on the list–and the one I was most enthused about at the start of last year–was the one where I made no progress. This one will carry over to 2016.

3. Furniture Partial check.

Looking back over the year, I was a bit surprised at how much furniture we bought, made or made-over. We did better than I thought. However, there’s always more on the list, hence the partial check.

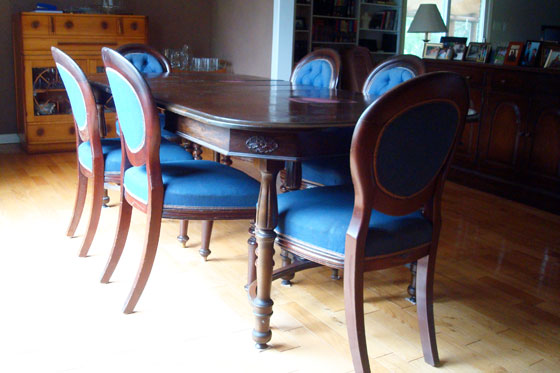
  • Found 2 bookcases that I’m going to make into a china cabinet for the dining room. They still need their makeover, but they’re working okay for now.
  • Found a set of 8 dining room chairs that match our table nearly perfectly. They’ll need to be reupholstered and refinished someday, but once again, they’ll do for now.
  • Found a ladder/step-stool/chair that reminded me of my grandmother–and a lot of you of yours.
  • Made a headboard and painted a dresser as part of the master bedroom makeover.

Dining chairs and table

4. Vegetable garden Big fat check.

My one and only outdoor goal for the year was a huge success. It started when I decided to build the garden in Matt’s “goat ring.” To get rid of the weeds, our nephew and I lit it on fire, I spread out the world’s biggest tarp, and then Matt rototilled the whole thing. We planted and watered and then we harvested… and harvested… and harvested. Along the way, I built a gate, and Matt and I put up chainlink all the way around. And then at the end of the season, I spread manure over the whole thing.

Tomatoes ripening in the garden

There’s still more work to be done. It’s a garden, which I’ve learned is synonymous with work. However, it’s established. It produced food. We’re still eating our harvest. And I’m so enthused about this year’s plans.

But that’s the stuff of home goals 2016. Those will be coming up next week.

How did you do on your goals in 2015? What was your big accomplishment?

Garden wrap-up

I’m calling the garden done for the year. I didn’t do quite as much as I wanted (edging it and putting in some raised beds around the perimeter), but I’m satisfied with where we ended up.

Matt and I spread manure (and a lot of straw) over the whole 2,000+ square feet. We couldn’t get Fairfield, the rototiller, going, and we suspected the soil might be too wet and sticky for him anyways.

So Matt drained the gas from the tiller, and we’ll revisit the cultivating in the spring. Let’s just say that for now we’re embracing the no-till philosophy.

Garden covered with straw

This post should perhaps not be called a wrap-up, as for the first time the garden is unwrapped… pretty much.

Since spring, half the garden has been covered by a tarp and a section of carpet. Matt and I finally lifted them to spread the manure.

The coverings did a great job of killing the weeds. We have one little corner that escaped the tarp, so we moved the carpet over that patch… another thing to revisit next spring.

Carpet covering a corner of the garden

In fact, we were so impressed by how effective the tarp method is that we moved the tarp around to the back of the house where I want to tame the “jungle.”

Here’s the view from last summer:

Jungle of weeds behind the house

And here’s the view now from the roof. Trust that this isn’t a garbage bag weighted down with bits of gravel. That’s the whole area behind the house covered with a very large tarp.

Tarp covering the backyard

But that’s for next year. For now, look at the garden.

Manure in the garden

Oops. Sorry that’s horse poop in the garden.

Let’s see… what can I show you beside more manure.

We discovered four more acorn squash–just what we need. Anyone want some squash?

Acorn squash

I think we finished gardening season just in time. As of yesterday morning, the farm was covered with our first dusting of snow.

Garden dusted with snow

How did you spend your weekend? Have you seen any snow yet where you are? Will you?