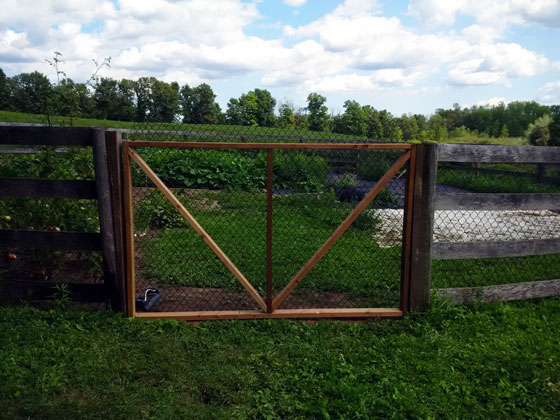
Great gardening weekend, fall edition

We’re basically a month away from winter. Just enough time to squeeze in another weekend of work in the garden.

Never mind that winter is forecast to arrive on Saturday with our first snowfall of any substance.

Weekend weather

Back at the start of October, I said that I had four things I wanted to do in the garden before winter:

  • Hang the gate
  • Edge the garden
  • Put in raised beds
  • Spread manure

I’ve still not made great progress on any of these… except for one.

Over the last few weeks, I’ve been working my way through the barn, emptying the stalls of their manure. As of this morning, the score stands at 10 stalls done, 4 to go.

Cleaning out the stalls in the barn

The plan for the weekend is to clean out the remaining 4 stalls, and then Matt has pledged to till the manure into the garden (if the snow melts).

I’d still love to tackle the other items on my to-do list, but I’m willing to call this it for the year… maybe.

I’ll see how much snow we get.

What’s your plan for the weekend? What’s the forecast where you are? Have you seen any snow yet this year? What outside work are you trying to squeeze in before winter starts?

Garden #harvest15

In case you haven’t heard, a vegetable garden was my biggest home goal for this year. Well, I am officially declaring the garden a success.

We did our last harvest a week or so ago.

And just in time too. Frost is a regular occurrence now, and the plants have all shriveled up. They’re not producing any more produce. But they were pretty productive for most of the season.

Especially the squash.

I knew the squash was going to be plentiful. When it was time to pick, I didn’t even consider a basket. I got out the wheelbarrow.

This is the first load. Please note that there are still numerous pumpkins hanging on the fence, just waiting to be picked.
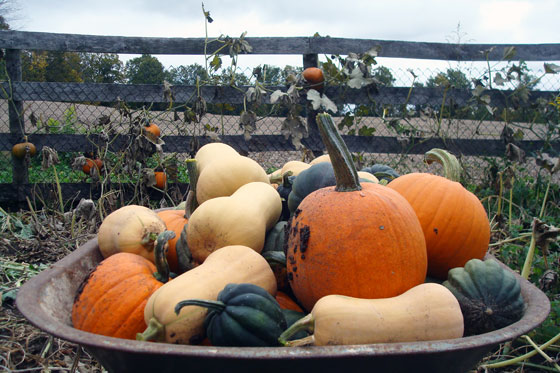
Wheelbarrow full of acorn squash, butternut squash and pumpkins

The second load.

Wheelbarrow full of acorn squash, butternut squash and pumpkins

The grand tally is 37 pumpkins, 39 butternuts and about 70 acorns. We donated several of them to Thanksgiving dinners on both side of our family, and then brought them as party favours for all of the guests. We’re also eating them ourselves, of course.

This is the corner of my dining room where they are currently living. Lovely dinner party decor, aren’t they? Apparently, there was a reason I didn’t toss the cartons that held the fireplace stone.
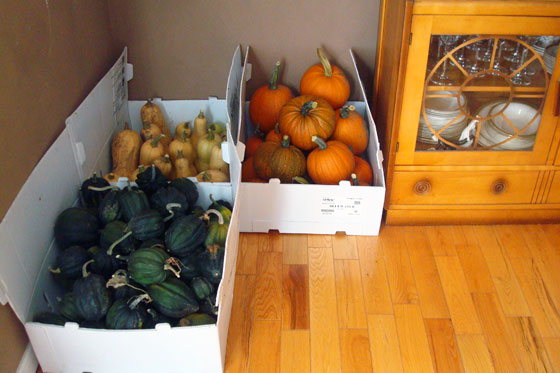
Squash curing in the dining room

The cartons also came in handy for the rutabagas.

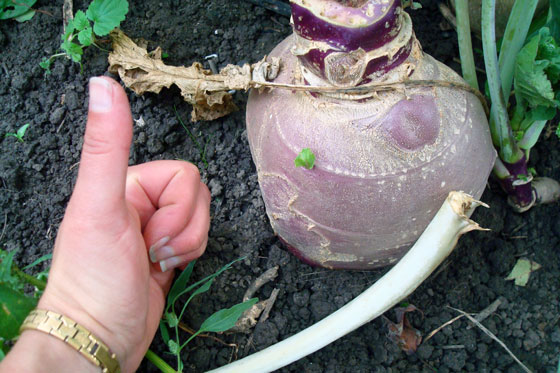
Matt was joking when he suggested we plant rutabagas. Neither of us knew what they were. I don’t think I’ve ever eaten one. I know I’ve never cooked with one. Seeing a carton full of these large vegetables was a bit daunting.
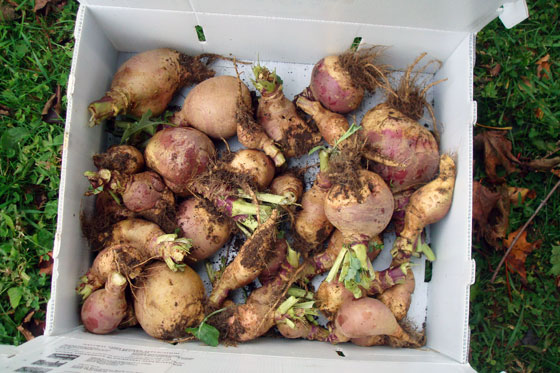
Rutabagas

We strategically picked the rutabagas the week before Thanksgiving. Then we divvied them up, and Matt and I took two-thirds of them to work. Thankfully, many of our coworkers were enthused by the idea of adding rutabagas to their Thanksgiving menus, and we were able to get rid of most of them.

Rutabaga

I did cook one for our own Thanksgiving dinner. The recipe called for one large rutabaga “about 1 1/2 pounds.” My version of a large rutabaga weighed in at 3 pounds–double the recipe. Thankfully, we liked the rutabaga, so we didn’t mind that we had a lot of it.

The other star of our harvest were Matt’s potatoes. We had just three plants, but they produced some beautiful taters.

Harvesting red potatoes

There were some big ones, some medium ones, and some wee-tiny potato-lets.

Potatoes

That big guy came in at more than a pound all on his own. In total, we had 6 pounds 4 ounces of potatoes.

Weighing a potato

And they taste amazing. I definitely notice a difference between our fresh homegrown ones and the grocery store. (This may be cruelty to vegetables).
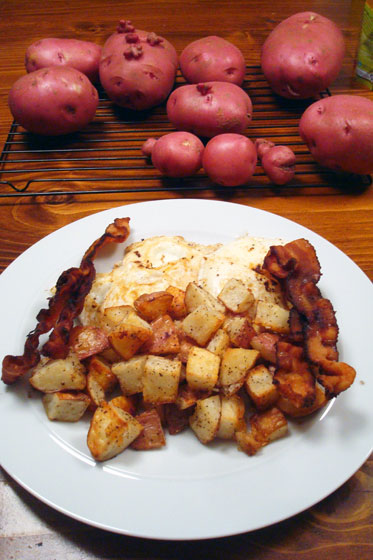
Breakfast for dinner

The only things that did not do well–and I’ve talked about this before–are our poor peppers. We had 8 red pepper plants and 12 (supposedly) jalapenos, all of which did pretty much nothing. We got probably about 6 peppers total, and they all resembled misshapen green bell peppers.

The one pepper that started to turn red shriveled up and fell off. And note how the plant is blossoming again even though fall leaves are on the soil around it? These guys just could not get it together.

Red pepper

Our final harvest included those last few peppers, a small bushel of tomatoes, half a basket of beets, and of course, more zucchini. Those things just kept coming.

Not pictured are two more baskets of Matt’s onions.
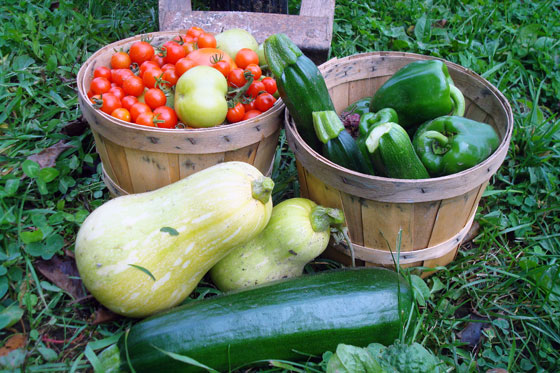
Harvest 2015

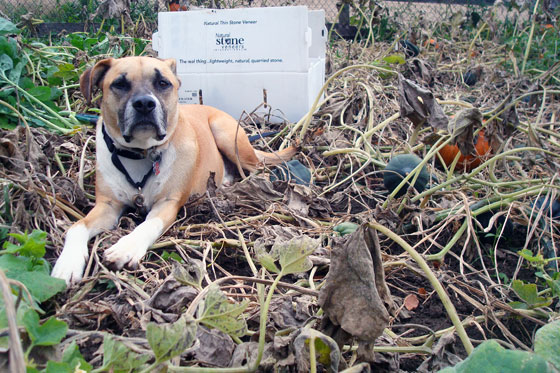
Oh, and we grew a puppy too!

Baxter in the garden

The last of the tomatoes and peppers are now on the dining room table, ripening the rest of the way in front of our best window.

Tomatoes ripening in front of the window

It’s so great to have finally fulfilled my dream of having our own garden and growing our own food. And it’s something that Matt and I both really enjoyed–I love projects that happen like that.

We have more to do to wrap up the garden for the season. I’m already full of plans for next year. But for now, I can pretty much check vegetable garden off the 2015 wishlist.

Did you have a vegetable garden this year? How did your garden grow? Do you have any favourite squash or pumpkin recipes to share?

Birthday birdbath

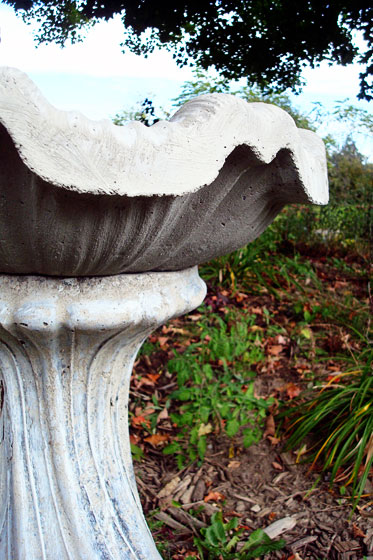
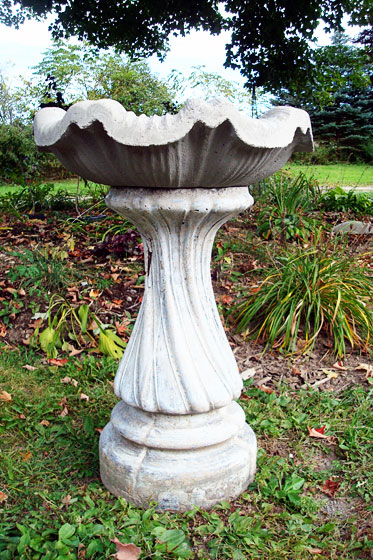
Everyone who guessed last week got it right. Our new addition at the farm is our birdbath.

As usual, when it came to my birthday last month, my wishlist was pretty short–as in there was only one thing on it. This year, what I wanted most was a top for the birdbath.

Birdbath

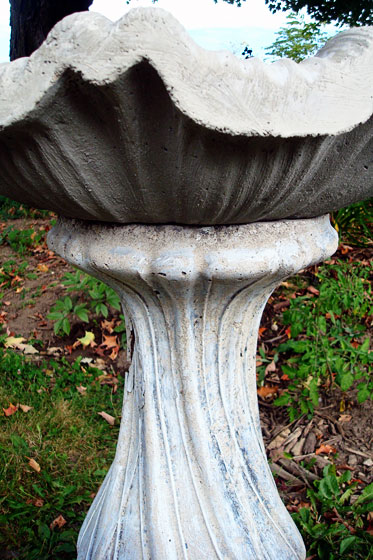
The base has been here at the farm all along, but we’ve not seen any sign of the top. It probably broke sometime ago, so we resigned ourselves to having a new top made.

Concrete birdbath

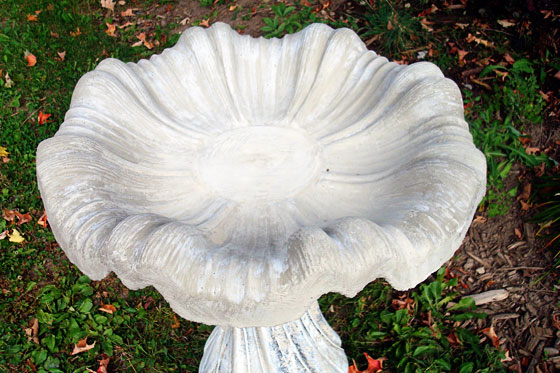
A house down the road has a sign out front for pre-casting and a yard full of concrete animals, fountains and birdbaths. They said yes, they could cast us a basin.

Concrete birdbath basin

I picked out a design that I liked and that I thought would work well with the base. About a week later, they delivered the birdbath (delivery was so helpful, as it weighs about 3 tonnes).

Concrete birdbath

It’s obviously the end of birdbath season here in Canada. So we’ll be tucking this away for a few months, and I’ll be getting my morning bird-watching fix from the birdfeeder.

Nonetheless, I’m thrilled to finally have a complete birdbath. Thank you, Matt!

Do you have a birdbath at your house? Have you ever had anything cast in concrete?

Birthday presents previously:

The trouble with our trails

I completely love that we have a property where we can go for a hike. However, I have two issues with our trails.

1. Our trails are slightly extremely overgrown. Because we’re not riding horses over them, because we don’t have a mower that we can take on them, because in the spring the trails are mostly underwater, because the mosquitoes were so bad this year that we haven’t been on them in months, hiking requires a fair bit of bushwhacking.

2. Our trails do not loop. They are all out-and-backs. Despite knowing this, I persist in trying to find a way around. The result is predictable: I end up either in water that is higher than the tops of my boots, or I end up in impassable brush. Sometimes both.

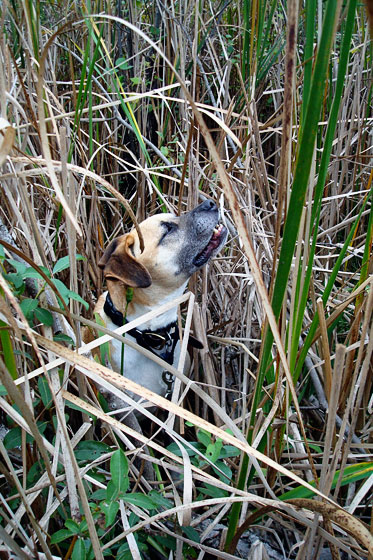
This was the situation Baxter and I found ourselves in recently. Deep in a marsh, tangled in grass so thick that at one point we actually lost each other, and we were right beside each other.

Completely true. I had a panic attack that I’d lost the dog, looked to my left and saw him sitting there staring at me.

Baxter’s reaction was, “I don’t know where we are, but it smells delicious.” Helpful, dude. Very helpful.

Baxter sniffing in the marsh

The bright side was that since it’s fall, the marsh had dried up a bit, so the water didn’t quite reach the top of my boots.

Here is a completely accurate fully to scale rough map of our trails. (For context, the trails go through the forest that covers roughly the back half of the property. This post has a full overview of the entire property in case you want to see how it all fits together).

Map of the trails on our property

The west trails are our best ones, but they’re also our wettest ones. We could probably get Wiley in the first 10 feet or so, but then things get squishy. And see that blue line above? There’s a creek that never completely dries up. I don’t think Wiley can swim. And I have no idea how we’d get him out if he ever got stuck.

The east trail is on higher ground and has much less grass, so it really doesn’t need mowing. It does however need a battalion of forest rangers with chainsaws. There is so much deadfall that this is less of a trail and more of an obstacle course. The dotted lines show how you can make this trail loop–if you’re willing to risk being poked in the eye with a stick (also completely true–I thought I’d done serious damage).

My looooooong term goal (seriously, this is so far in the future I have no idea when it might happen) is to one day have nice clear looping trails and boardwalks through the marsh. I’ve been saving any skids that we come across in the hopes that they might work as boardwalks. Now just to find my battalion of forest rangers to move them into place…

Do you like to hike? What’s your favourite trail like? Has anyone else gotten lost recently?

Last hurrah

We’re officially in the last days of summer.

However, summer isn’t letting go easily here at the farm.

The lilies, which finished blooming at the beginning of August, have pushed a few buds out in the last week.

Yellow lily blooming in September

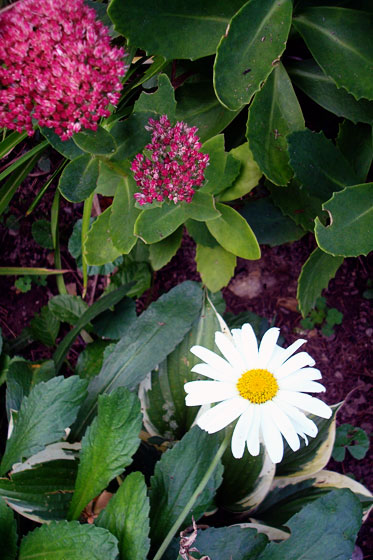
One random shasta daisy, the one I somehow missed when I trimmed the dead flower stalks, popped out in bloom too.

Shasta daisy blooming in September

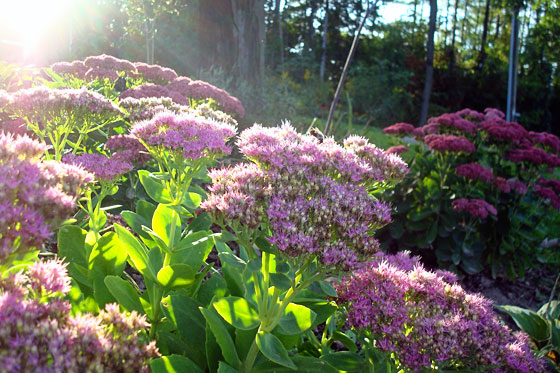
Notice the sedum blooming like crazy? Sedum and lilies and daisies don’t usually bloom together.

Sedum blooming in September

When I was taking these photos, a particularly resilient mosquito even appeared. They just won’t go away!

Mosquito biting my hand

Summer is my favourite season, so I’m not ready to let it go any more than my lilies and daisies are. However, I’d be happy to lose the mosquitoes.

What signs of the season are you seeing your house? Do you have any late bloomers in your gardens? Anyone else have mosquitoes still hanging around?

Yard tool maintenance tips

Sarah in Illinois is back today with another post. She has some very helpful tips for taking care of our yard tools–timely as we wrap up outdoors season and prepare to tuck our tools away for winter. (Yes, I did say the “w” word.)

One thing I am trying to do more of is take better care of things around my house so that they last longer. I know that should be an obvious habit, but we seem to live in such a disposable world that it often gets overlooked. Instead of just throwing away and buying new, we should be extending the life of items we already have.

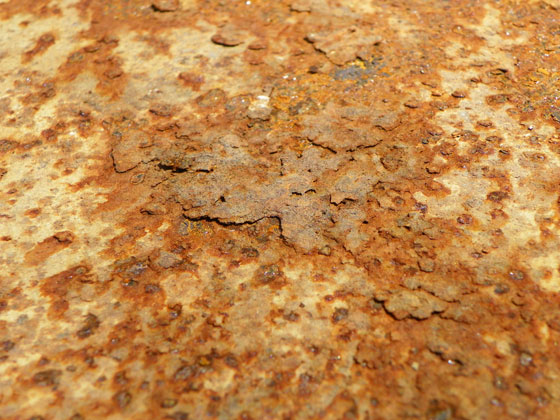
Not long ago I noticed that my wheelbarrow looked terrible. It was getting such a thick coat of rust, and it wouldn’t be long before it rusted right through.

Rusty wheelbarrow

Flakes of rust in the bottom of the wheelbarrow

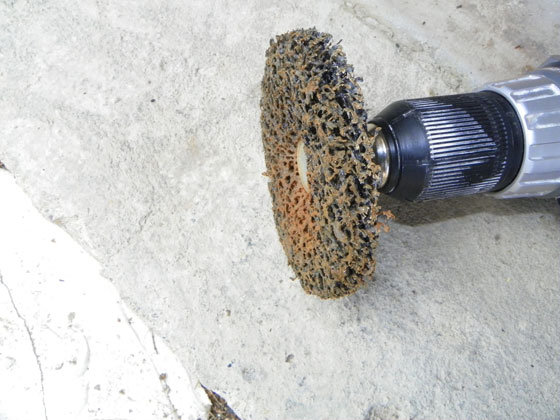
The first thing I did was to remove as much rust as I could. This could have been done by hand with a wire brush, but I had this handy attachment for my drill, so I tried it out. It worked like a charm!

Drill attachment for removing rust

After I had all of the loose rust removed, I sprayed it off with the hose and let it thoroughly dry in the sun. And I was correct; I already had two pin holes in the metal.

The next thing I did was to try to prevent any further rust.

I used a rust treatment that we sell at work, but I am sure is available at any home improvement store. I made one mistake though. I did not read all of the directions.

I knew from selling the product that when it reacted with the rust it was supposed to turn black. I waited an hour with it sitting in the sun, and it never turned black. I went on with the next step of painting with spray paint in a color close to the original. And it really does look great.

The mistake I found later was that the can clearly says to wait 24 hours to paint. During those 24 hours, it turns black.

In the long run, I don’t know that I will have any issue with not following the directions completely. Since it is just a wheelbarrow, I am not too worried, but in the future I will be better prepared.

I also put a coat of deck sealant on the handles. We had some sitting around, and it took me just minutes to do. It will help protect the handles from rot.

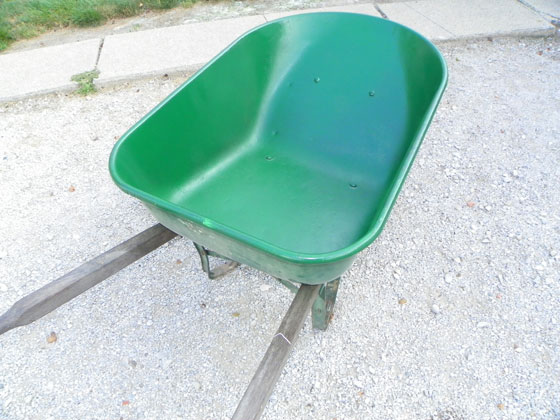
Green painted wheelbarrow

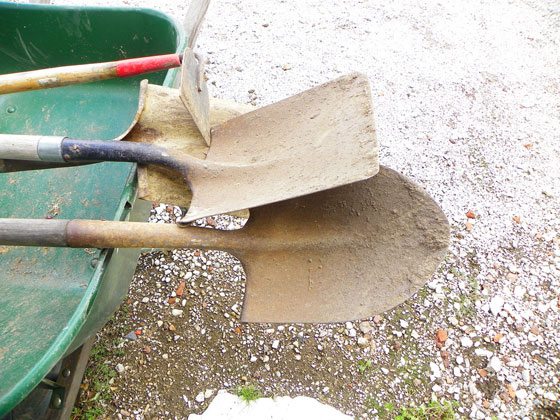
I also decided to do something similar to our garden tools. I started by spraying them off with the hose and using a nylon brush to remove any caked on dirt, and then let them dry. I used the same method as I did with the wheelbarrow to remove the rust.

Garden tools before cleaning and sharpening

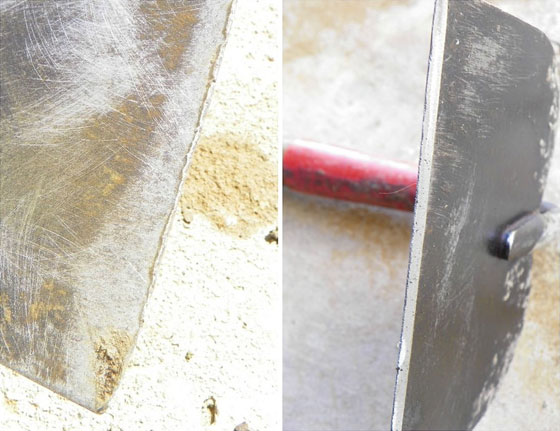
Using a hoe in the garden is not my favorite chore but I have learned that having a sharp edge makes it so much easier. My dad is very skilled at putting a sharp edge on with a hand file, but when I need to do it myself I use our electric grinder and this grinding wheel.

Sharpening a hoe with a hand grinder

Just a couple of passes and it is sharp as a razor blade!

Sharp hoe

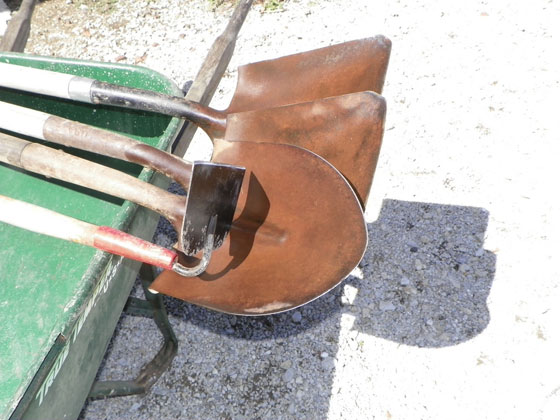
I didn’t see the need for rust treatment or paint for the tools, so I just finished by spraying a light coat of WD40. Any type of oil based spray would have worked. I have even heard of using motor oil. The goal is to coat the bare metal to keep it from moisture.

Oiling and sharpening garden tools

It took me just a couple hours one afternoon to finish the wheelbarrow and only about 30 minutes to prepare the tools. Hopefully in that short time I have considerably lengthened the life of my garden tools.

Thanks so much for the helpful tips, Sarah. The transformation of that wheelbarrow is amazing! And I love that it’s already dirty and in use. My fingers are crossed that the finish lasts for you.

How do you put your tools away for winter? Any tips for dealing with rust? Have you ever painted a wheelbarrow?

Linking up to Think and Make Thursday at the Heathered Nest.

Garden update

It’s been a little while since I’ve shown what’s in the garden–and it’s awesome.

Our tomatoes have done super well. They just keep growing and turning red. Our cherry tomatoes in particular have grown super tall. Taller than Matt.

Tomatoes ripening in the garden

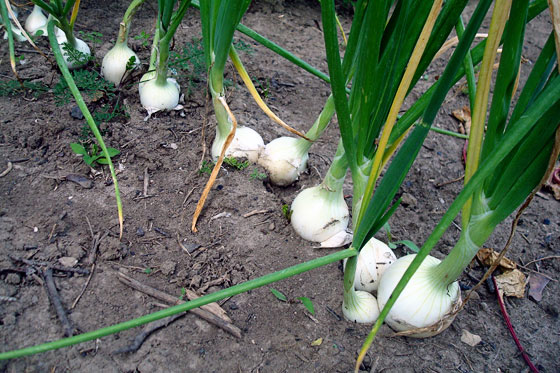
Next to the tomatoes, Matt’s onions are getting ready to take their first steps.

Onions growing in the garden

Our beets and zucchini are producing like crazy. I have to pick every day to stay on top of the zucchini. I finally tried out the grater attachment on my food processor for the first time and grated up 34 cups of zucchini. They’re tucked into the freezer. It appears that I’m going to be making zucchini something all winter long–and pretty much every day between now and then.

Beets and zucchini growing in the garden

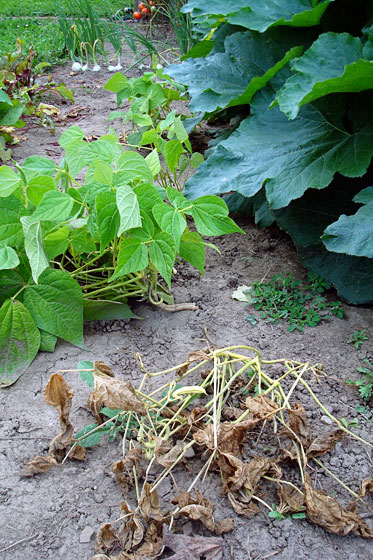
Despite having only four plants, we’ve had a decent crop of beans. Although Matt did make fun of me one night when I steamed just 10 beans for us both. I thought they were pretty much done, especially given that I broke the main stem on our biggest plant, but new blossoms are appearing on the other plants, so I think more beans are on their way.

Bush beans

I’m probably most excited about our raspberries. I have a full row of reds that have all successfully transplanted from my parents. The blacks haven’t done so well, save for this one plant, which has lots of green shoots. I’m going to try to transplant a few more blacks to see if they’ll establish themselves before winter sets in.

Black raspberry shoots

The biggest challenge is to protect the raspberries from the squash.

Raspberries next to the squash

Matt and I are both a little bit afraid of the squash. Seriously. They have ambitions to take over not just the garden, but also the farm… and perhaps the world. Keep an eye out. They’re coming for you.

We have acorn, butternut and pie pumpkins. And we’re going to have tonnes of them. I’ve already notified Matt’s and my families to not buy any squash at any point in the future.

Anyone know how to tell when squash are ready to harvest? Some of these are looking pretty close, and some of the leaves on the vines are starting to die.

Squashes growing in the garden

The east front of the squash advance is headed by the pumpkins. They’ve broken through the fence and are heading for the soybeans. Matt mows them every so often, but a few fruit have climbed the fence to get out of range. These green globes are my test case to see if the stalks are strong enough to hold the pumpkins while they mature. I’m adding squash trellis options to my Pinterest board as I plan for next year’s growing season.

Pumpkin growing hanging on a fence

The northern advance of the squash has already consumed the rutabags and potatoes. My only hope is that both of these crops grow underground, so they might survive the surface invasion.

Rutabagas

Just to the edge of the advancing squash are our poor peppers. They’re actually looking a bit better finally. They’re growing bigger and they’re blooming again. I’m hoping that the blooms finally set into actual peppers.

Pepper plants

We have one lone pepper in the first bunch of plants that we planted at the opposite end of the garden. He’s a little bit warped, so maybe this is a symptom of the other problems we’ve had this year with the peppers?

Misshapen pepper

The lettuce have officially bolted. We’re leaving them alone as Matt wants to see how tall they’ll grow–apparently he has a thing about height.

Lettuce that has bolted

A nice touch that I’m also enjoying is the stone bench that we’ve added to the garden. This sits at one end of the raspberry rows–the cross axis of the garden. The curve of the bench fits in well with the curved edge of the garden. I’m looking forward to sitting here and seeing the view across the garden and out over the fields.

Stone bench in the vegetable garden

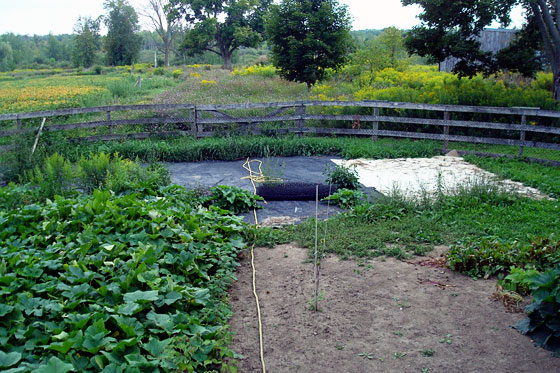
For now, the other half of the garden is still under wraps with a tarp and some old carpet. (The rope marks the centre axis, so I can keep the raspberry rows lined up). This photo is definitely about keepin’ it real for all of you fellow non-Pinterest-perfect gardeners.

Tarps on the unfarmed half of the garden

I’m patient enough to wait for next year to farm this other half. I’m definitely satisfied with what we’ve accomplished this year. And we’re more than satisfied with the harvest we’ve had.

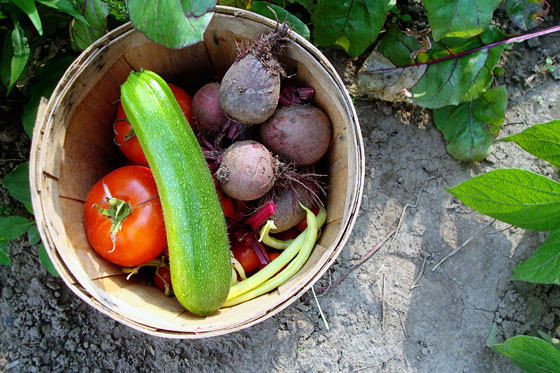
Basket of tomatoes, beets, zucchini and beans harvested from the garden

Basket of tomatoes, zucchini and our first rutabaga

What fresh food are you enjoying this season? Have you grown anything this year? Any thoughts around what might be wrong with our peppers? Have you had any sightings of our squash yet invading your neighbourhood?

Tool wishlist

Last year, I finally bought myself an official carpenter’s square (also known as a speed square). Now to most people, I’m sure this doesn’t seem like a big deal. Once I had it in my toolbox, though, I felt so much more official. Marking right angles and 45 degree angles is a piece of cake. I can even do more official carpenter-y things if I am so inclined.

Swanson speed square

I’ve had an informal tool wishlist bumping around in my head for awhile. It was time to finally write it down (especially since September is my birthday month–ahem, family). I thought the blog would be a good place to share it–and get input from all of you.

In fact, I’ve also reached out to a few other bloggers and asked them to share their favourite tools. So over the next few weeks, you’re going to get to hear from some other people, see some inspiring projects and maybe even find some tools to add to your own wishlist.

Some of the items on my list are like the carpenter’s square–relatively minor and decently attainable. Other things are a little more–shall we say–involved (as in I’ll need to save up for a little while).

I’d really love to hear your suggestions and feedback. What are your favourite tools? Any can’t live without gadgets? What should I add to my list?

Simple tools

  • Heavy duty extension cord
  • Heavy duty, long handle clippers (for trimming trees and shrubs)
  • Dremil (is this useful?)
  • Small, basic electric weedeater (our big gas powered version is overkill for me, and it rarely works well)

Power tools

  • Router
  • Upgraded compound mitre saw (I have one thanks to my Dad, but it only does so many angles)
  • Soldering iron (since my hand-me-down iron from my Grandpa popped–literally–and died)
  • Paint sprayer
  • Sawzall (since our hand-me-down saw from my Dad recently also died)

Heavy duty tools (and tractor attachments)

  • Air compressor
  • Bush hog
  • Auger

Matt and I are fortunate that most times that we need a tool, we’re usually able to borrow it from one of our Dads (wood splitter, air compressor, nailer, hammer drill, tile saw, sturdy extension ladder).

Over the years, our Dads have also passed along a lot of their tools to us (skillsaw, table saw, socket set, drywall tools). Of course, we’ve also bought some of our own equipment too (sander, Kreg jig, quality drill, favourite hammer, chainsaw, tractor–and all of its attachment$). It would just be a bit handier to have some of our own tools on hand.

What’s on your tool wishlist? Any tools that you’ve bought, but wish you hadn’t? For those tractor owners out there, I’m really interested to hear what’s your favourite attachment?

And be sure to tune in for more inspiration from other bloggers coming up.

Gated

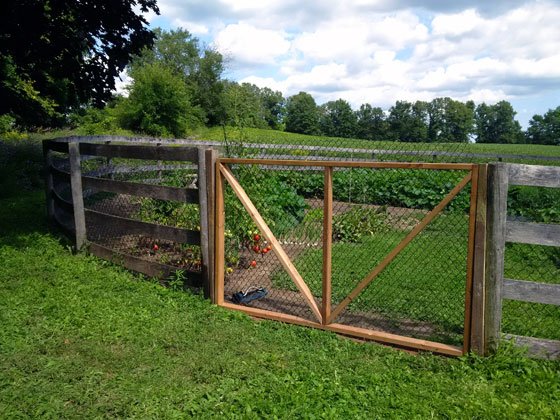
We’ve crossed an important milestone in the garden. We are now fully enclosed. I finally built the gate last weekend.

Garden gate

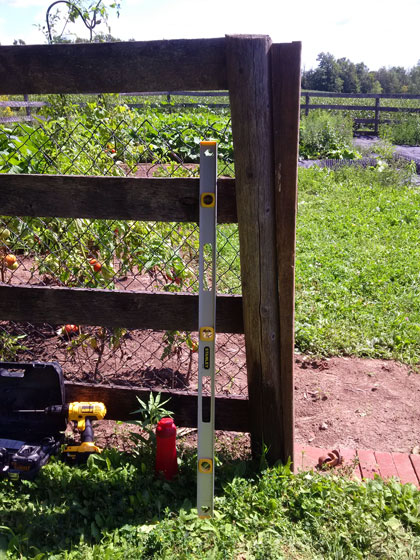
The first step, and the most time consuming part of this project, was to plumb my posts. The fence posts were anything but straight. They were meant to be fence posts, not gate posts. You might recall that this only became the gate when my nephew and I cut through the fence rails.

I found two 4x4s and ripped them down for each post. They were attached to the posts with the longest screws I could find. Not too difficult. Just fiddly, but worth it so that I could build a rectangle gate rather than a trapezoid or parallelogram.

Making fence posts plumb

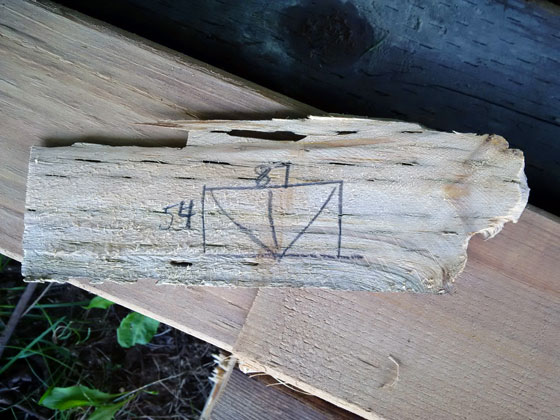
So I drew up my plans and got to the easiest part of this project, the gate itself.

Plans for the garden gate

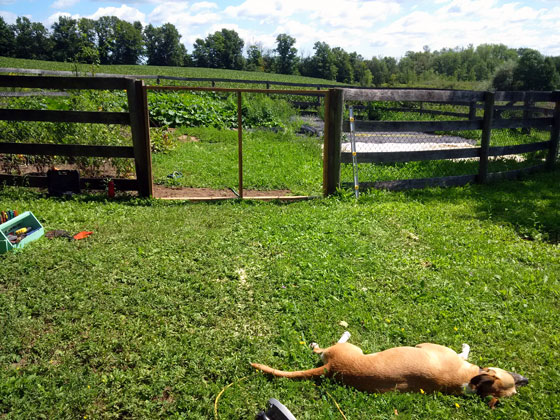
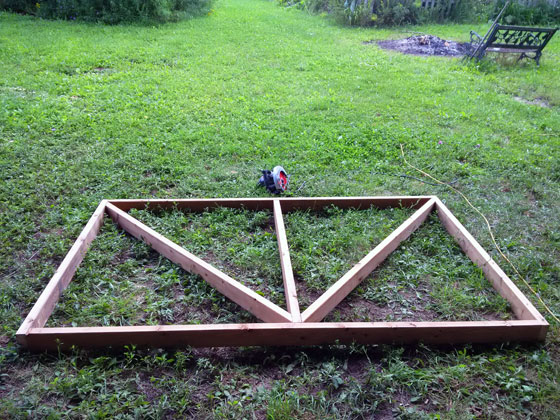
I made the outside frame, added a centre brace and tested the fit. It was too wide. I knew my tape was sagging when I measured the opening, but I thought I’d compensated enough. Ugh. Baxter was very concerned.

Baxter supervising gate construction

I unscrewed one end and trimmed off an inch, and that fixed the problem. This still wasn’t a difficult project. I squared the gate and added my diagonals.

Building the garden gate

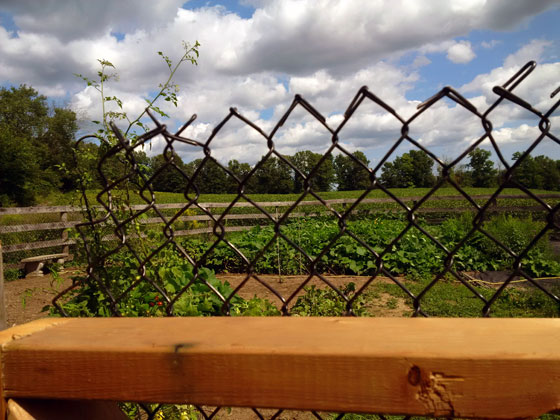
Our usual chainlink mesh adds some extra stability to keep everything tight and square. We had both 4 foot and 5 foot chainlink on hand. I picked the 5 foot because I wanted it to run all the way from top to bottom. I’ll borrow my FIL’s heavy duty wire cutters and clip off the excess height. (Allow me to brag a bit by pointing out our extremely tall tomato plant towering over the mesh).

Chainlink fence over the top of the garden gate

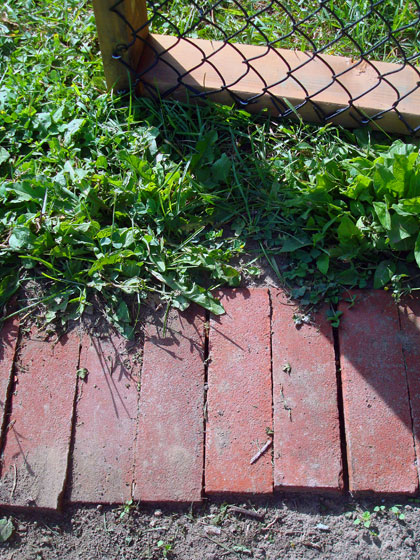
Even though these are just 2x4s, the gate is pretty heavy–a factor of being 7 feet wide and nearly 5 feet tall. I’m considering adding a little wheel on the underside so that we don’t have to muscle it all the way open and closed. I just don’t want the wheel to be too tall because I don’t want much of a gap between the gate and the brick threshold I put in. As well, if the wheel ends up tangled in the grass, it’s not going to be much help. I may end up with just a handle of some kind to make the gate easier to lift.

Brick threshold at the garden gate

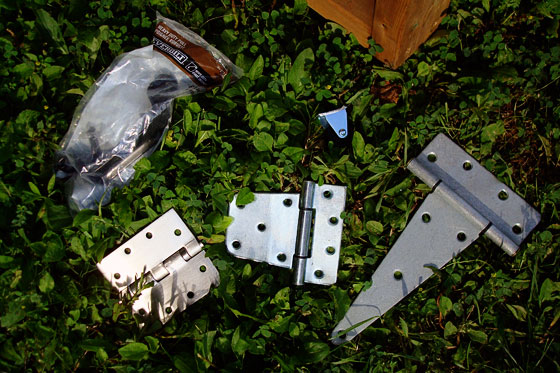
While I’m still sorting out these details, the gate is just propped in place. The other details I’m trying to sort out are the best hinge solution. Between the narrow 2x4s of the gate, the tapered 4x4s of the posts and the excessive weight of the gate, there isn’t a clear hinge choice. I really value Home Depot’s easy return policy in this situation. I can buy pretty much every option and bring them home to see what will work best. (And I did buy a handle and small caster as well).

Gate hinges

Hinged, handled, wheeled or not, the gate is still doing its job.

Garden gate

And the vegetable garden is continuing to take shape.

What have you built this week? Have you ever constructed a gate? Any thoughts on whether the wheel will work? How long do you think it’ll take for the new wood to weather so that it matches our fence?