I was unsure what colour I wanted to paint the office for a long time. Back when we first set up the room, Matt picked a forest green (Benjamin Moore Manor Green). It was not my favourite colour, but it was his room, so I didn’t say anything.
Once I decided the office was going to be mine, I was more than ready to repaint.
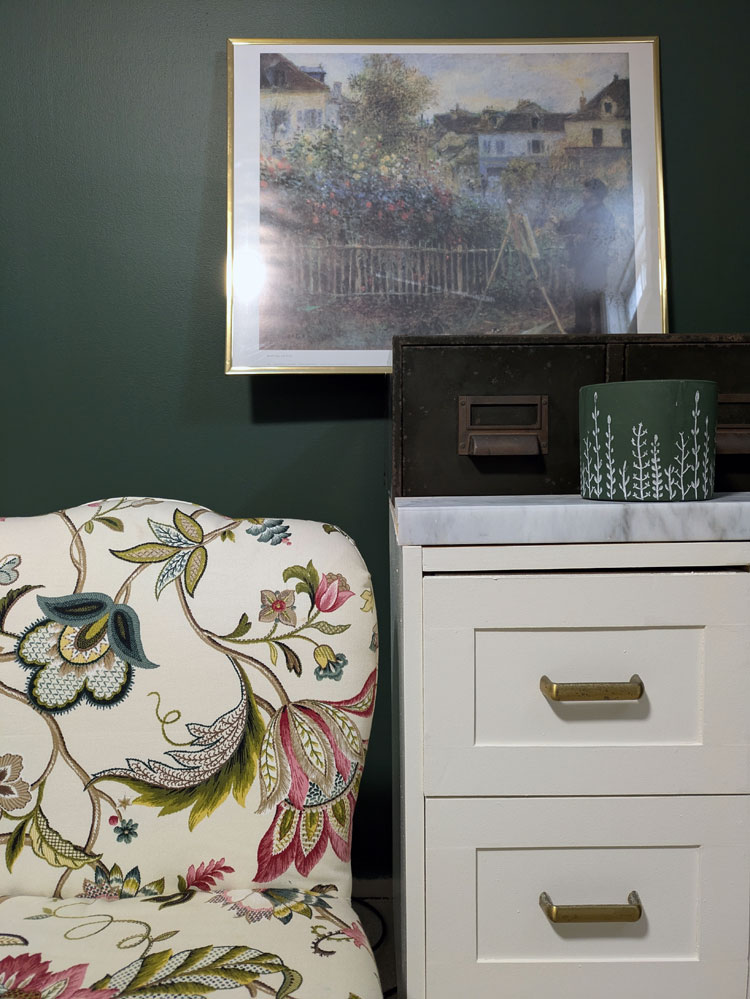
I liked the idea of sticking with some shade of green. I like green and it would be another memory of Matt. I knew I wanted dark olive green a few places in the room (namely the vintage metal drawers I found years ago at an auction). Did I want it on the walls too?
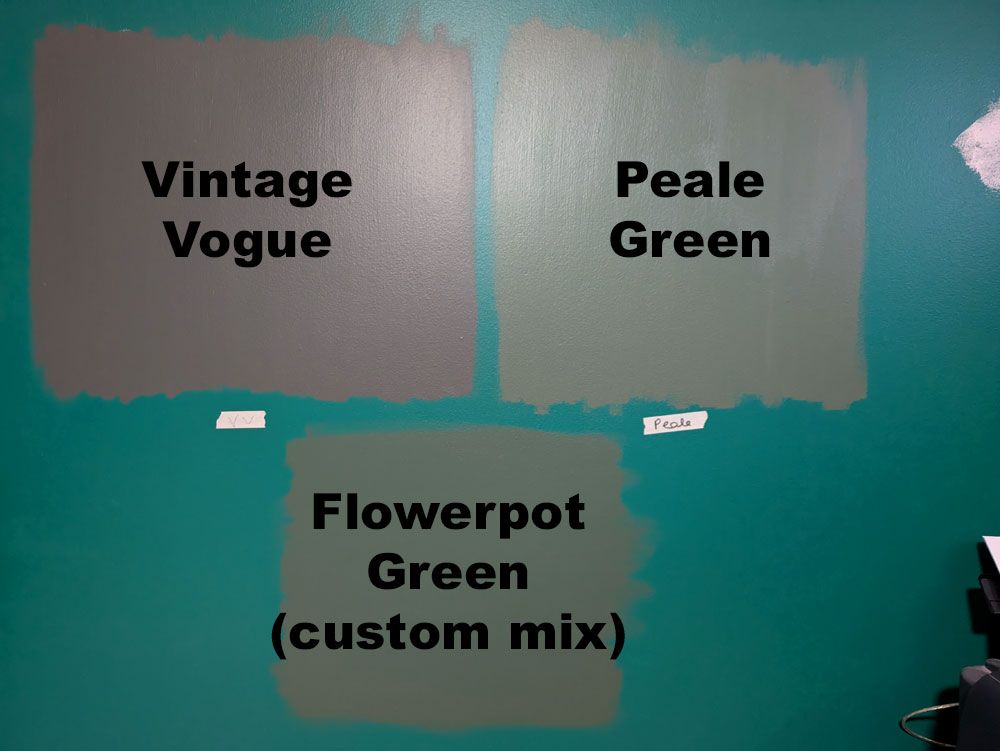
I finally decided to go for it. But then I had to figure out what green. I sampled several: High Park, Rosepine, Cushing Green, Peale Green. They were too light, too grey or too brown.
Ellie’s comment was, “So you’re painting the office garbage can green.”
Thanks, girl.
I returned to the paint store in search of my goldilocks–not garbage can–green.
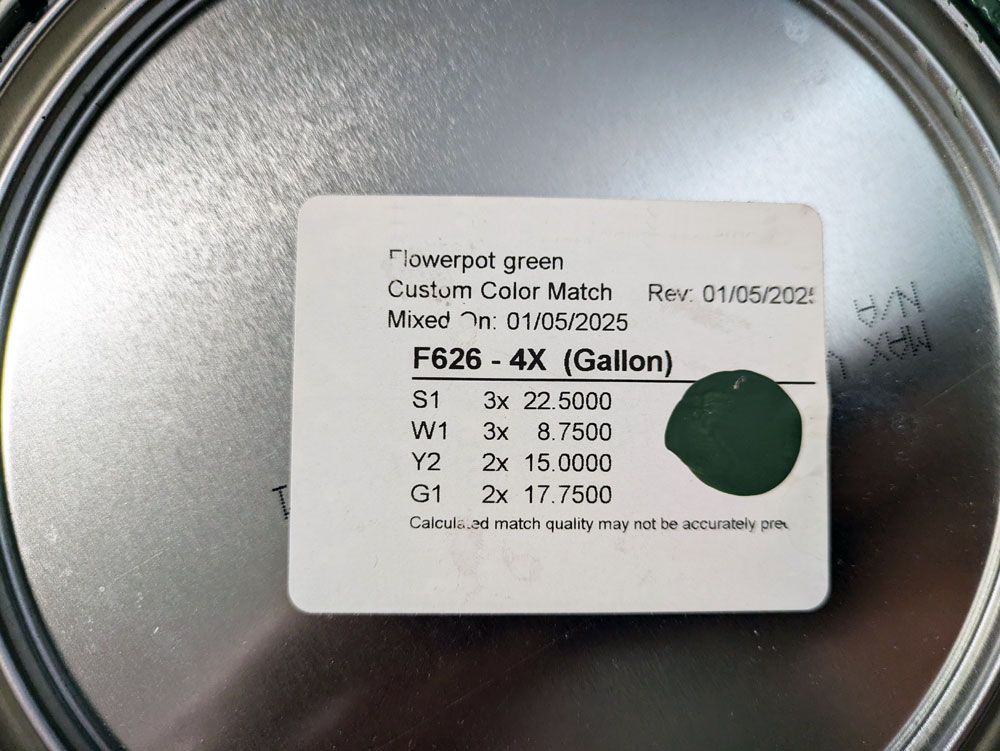
I bought two more samples: the oh so popular Vintage Vogue and a custom shade matched to a flowerpot my sister gave me for Mother’s Day.
Back at home, I put them on the walls… and Flowerpot Green was the winner. It’s dark, but not black, not brown, not grey. It is definitely green, and it picks up the tones of so many of the things I used in this room.
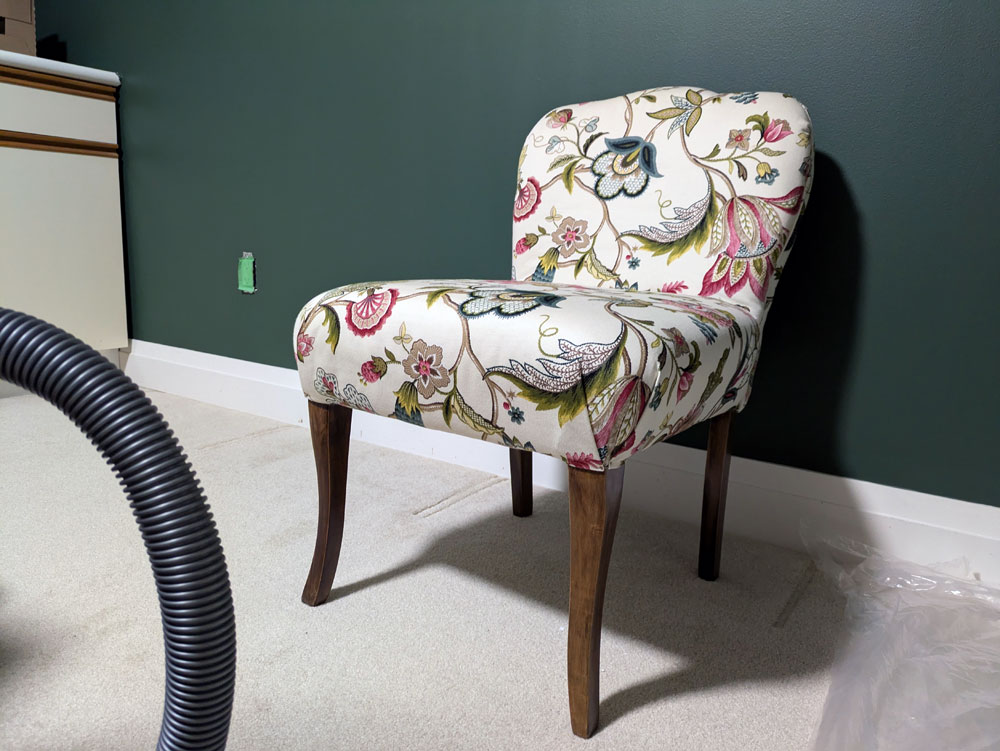
I had a few moments of hesitation as I was painting the first coat, but then I decided I liked it. When I moved my vintage slipper chair in just to see, I loved it.
My Mom’s reaction gave me another reason to love it. Her comment the first time she saw the room was, “Oh, this is the colour we had in the living room and dining room at home!” She was remembering a time that my grandmother (a frequent redecorator) got new furniture, painted the living room dark green, and then sewed curtains to match.
So from my grandmother to Matt to my sister taking care of me on Mother’s Day, my new office paint is full of history and meaning and family. That feels like a good choice to me.
Do you have a favourite colour? Have you ever had a custom paint colour mixed for you (this was my first time)? Are you a fan of neutrals? Or do you go for colour? Who prefers light shades over dark?
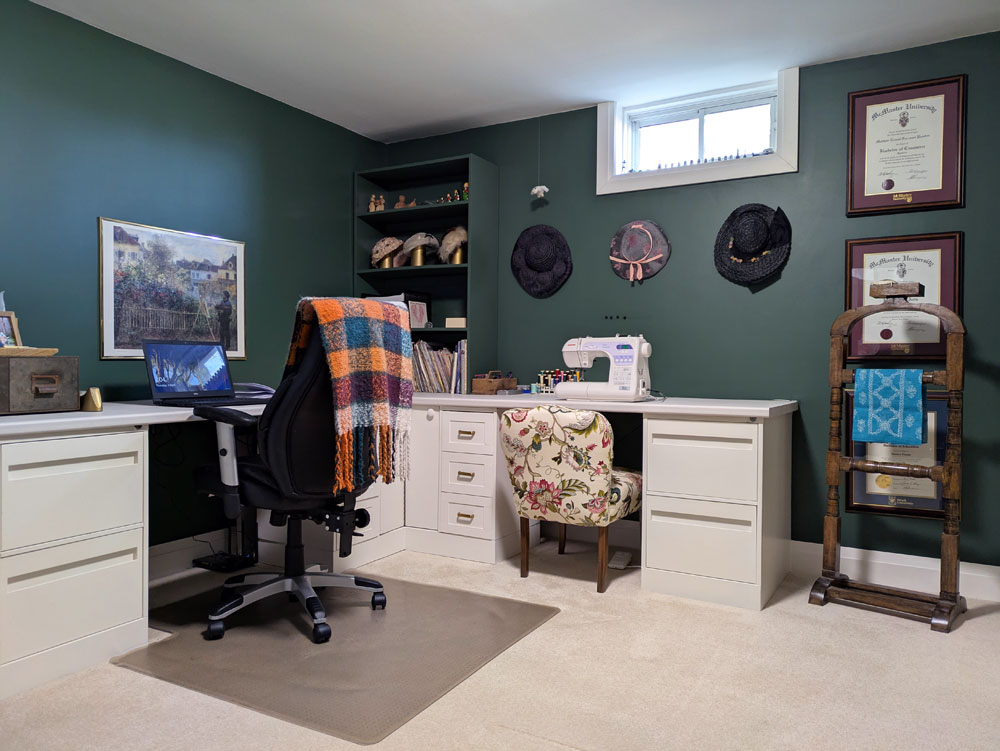
My Mom taught me to sew when I was young, as her Mom had taught her. As my great-grandmother taught my grandmother. Now I have a new space for sewing, crafting, writing, working, creating. A space filled with heritage and history from these women and so many other special people in my life.
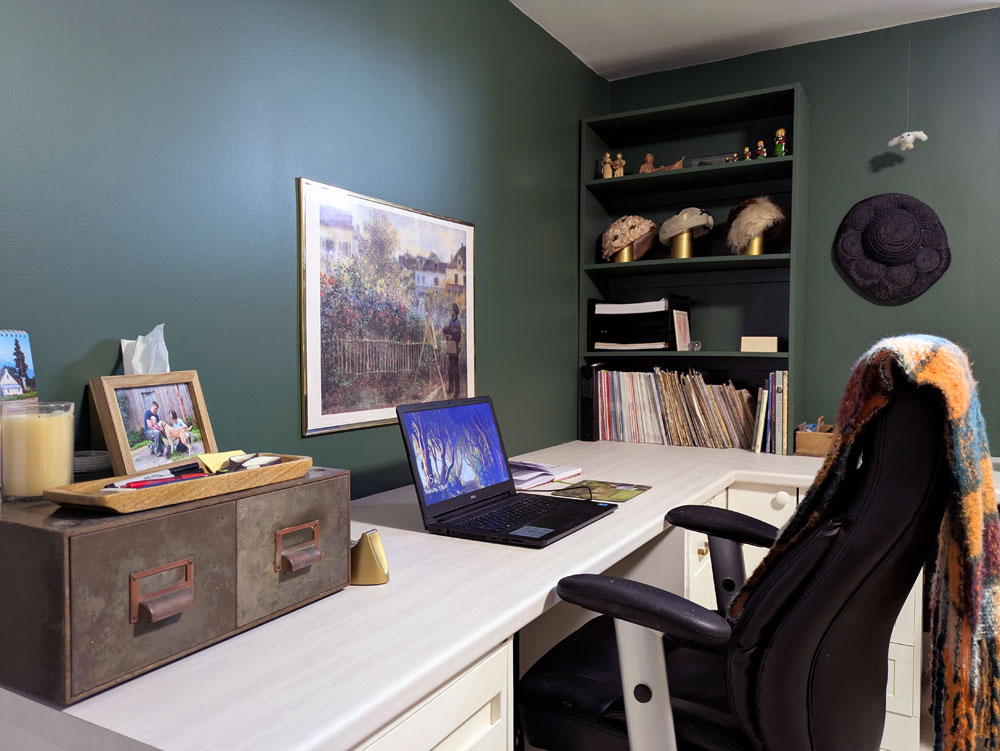
Welcome to my new office.
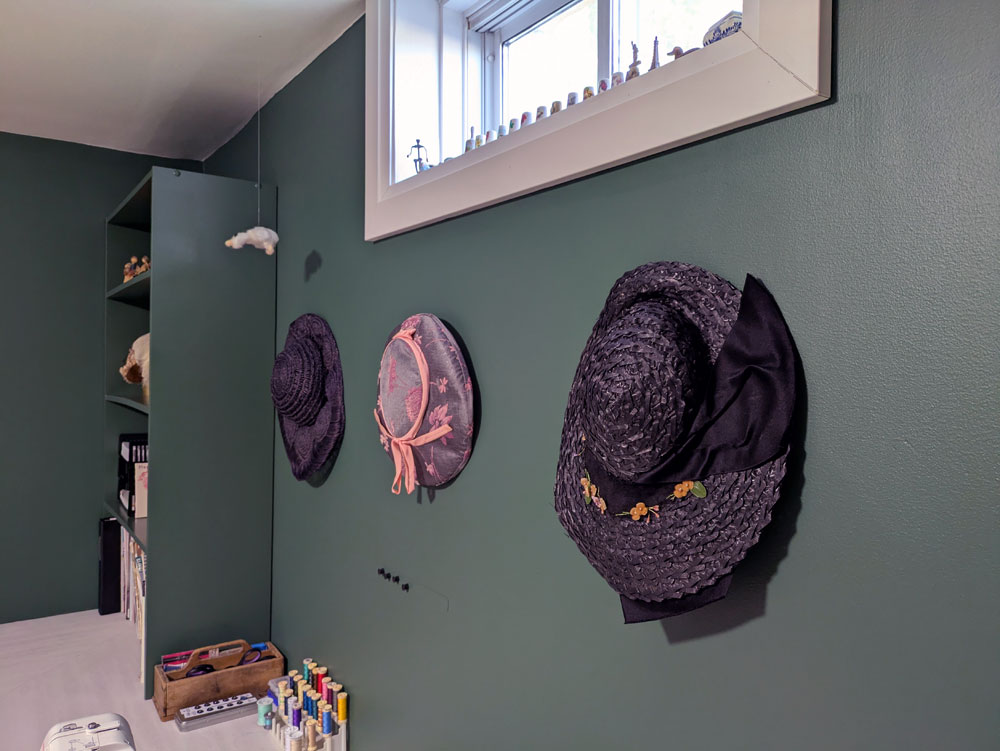
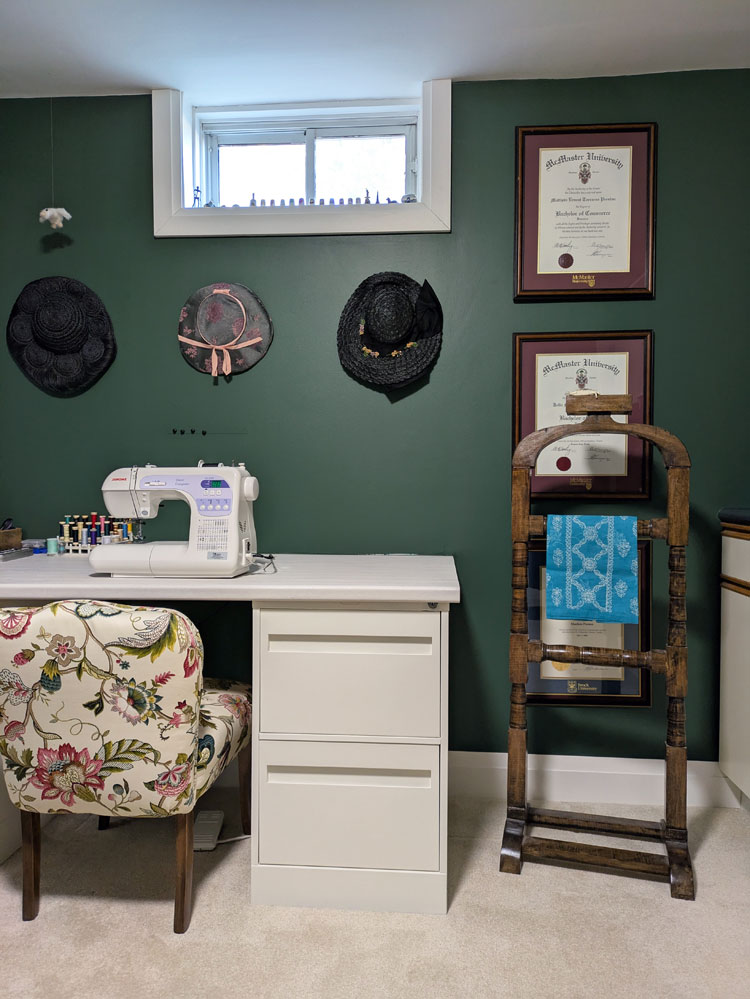
Spread around the room, you will see my collection of vintage hats. Most of these are my grandmother’s. One was made by my great-grandmother. I remember finding a scrap of material in my Grandma’s stash and recognizing it from the hat. I was blown away that someone could simply make a hat. This legacy of creativity and ability is something that I’m very proud of and try to live up to.
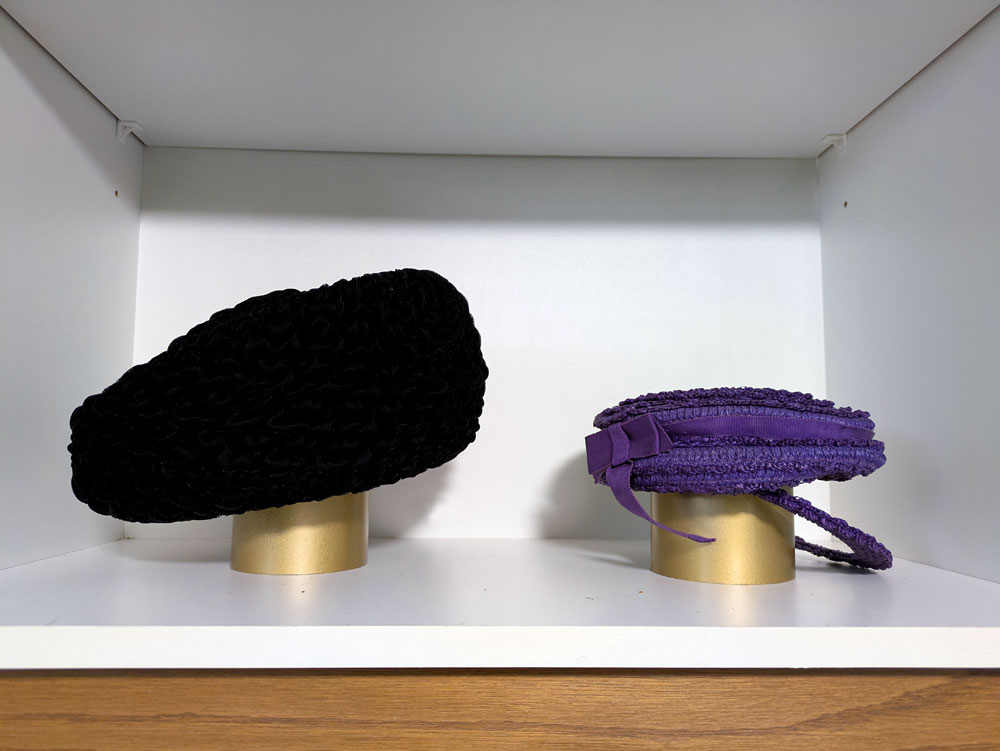
As I was decorating the room and styling the shelves, I realized that the hats needed some support. They didn’t look right just sitting on the shelves and I couldn’t see their details clearly. Of course, my initial thought was, “I need some heads.” But I quickly came up with another solution. I chopped up a broken pipe we had left over from redoing our sump pump outflow. I sprayed the pipes gold and voila. Cheap, simple, fancy hat stands. Creativity and ability, check.
The rest of the shelves are filled with books, photos, sewing patterns, mementos. There’s a pickle bottle Matt’s Dad found that is made by Matt and Steve–their names. There’s a football my Dad bought me when I was a baby. There’s a collection of buttons in a powder box that smells just like my Grandma when I open it. So many precious, special things that I can see and enjoy now that they have a home.
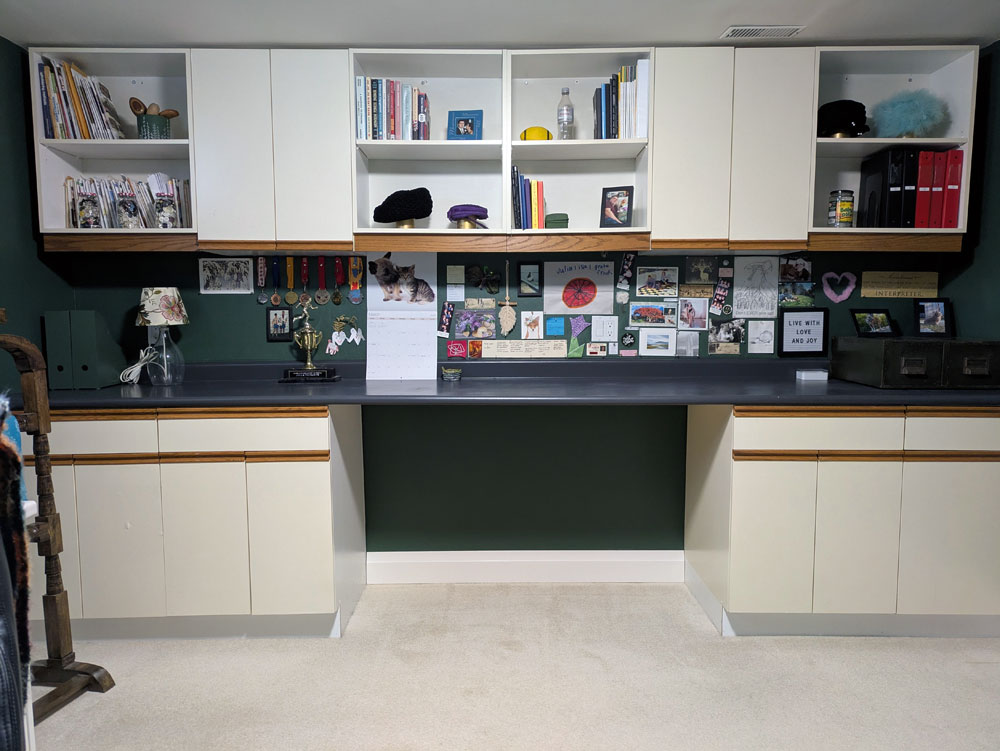
Matt and I installed the cabinets when we set up this room as his office. They provide such great storage for all of my sewing, knitting, wrapping and other supplies. I would like to update the doors and give everything a coat of paint some day, but for now I am enjoying their storage and ignoring their style. This is the first time I have ever had all of my sewing and knitting materials in one spot, and it’s so helpful for projects.
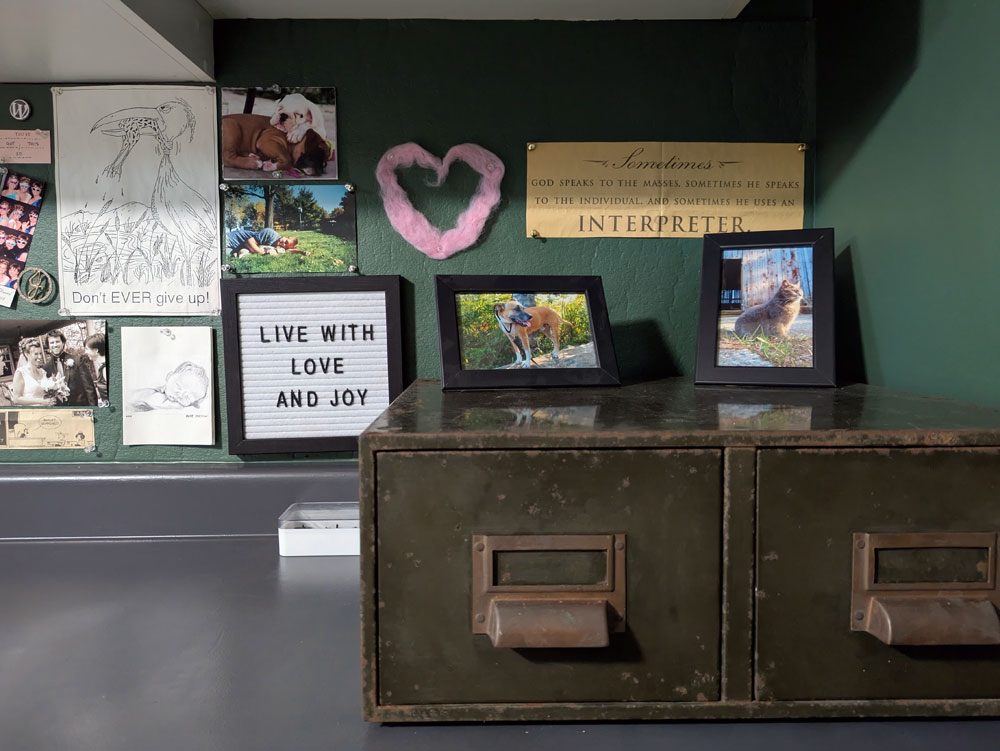
The backsplash is a very long bulletin board. This corkboard is full of things that I find inspiring, beautiful, fun. Cards from friends, crafts from Ellie, even a few notes from Matt. I will be sharing more details about this project in a future post.
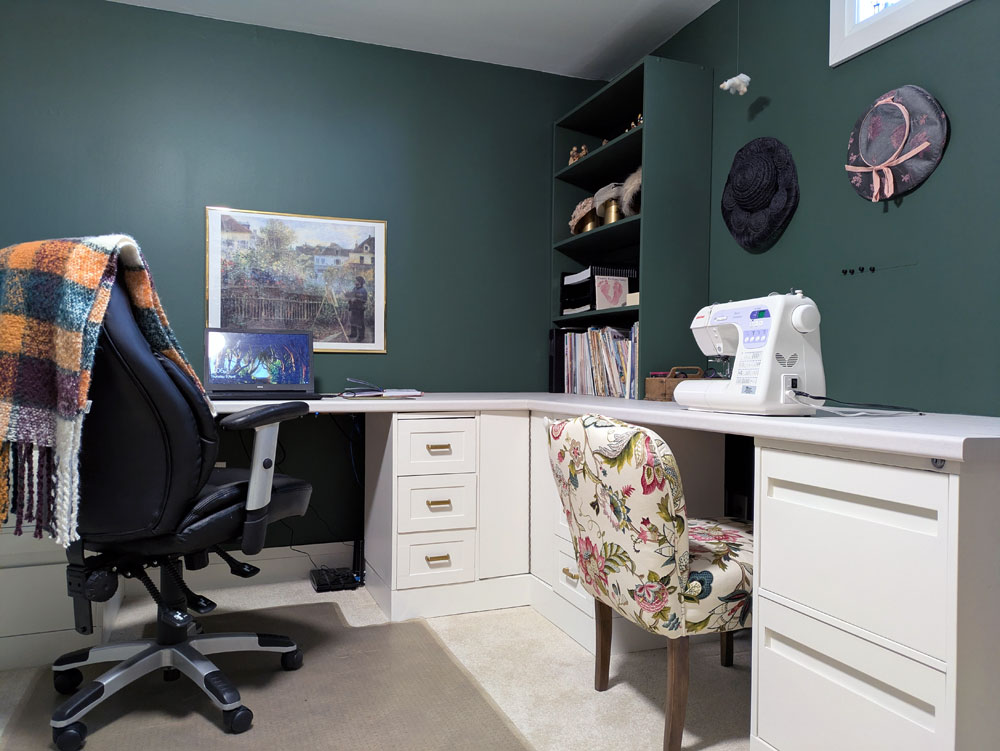
The biggest function is the huge corner desk. I have two workstations here, one for my computer and one for my sewing machine. Each zone comes with its own drawers for office supplies or sewing materials. There are also four large file drawers that hold all of our paperwork and even some extra crafting supplies. Above the desk, I have some open shelves for more storage and display. I’ll be going into more details of how I built this desk in an upcoming post because I am very proud of how it turned out (more creativity and ability).
As part of the sewing zone, I have a valet stand that my Dad built for me. When he took up woodturning, he had some signature things he liked to make. One was valets like this. It is perfect for holding in progress sewing projects. Behind the valet I hung Matt’s and my diplomas. They fit perfectly in this space, and I like that Matt and my Dad are both part of this room. So many legacies in this one corner.
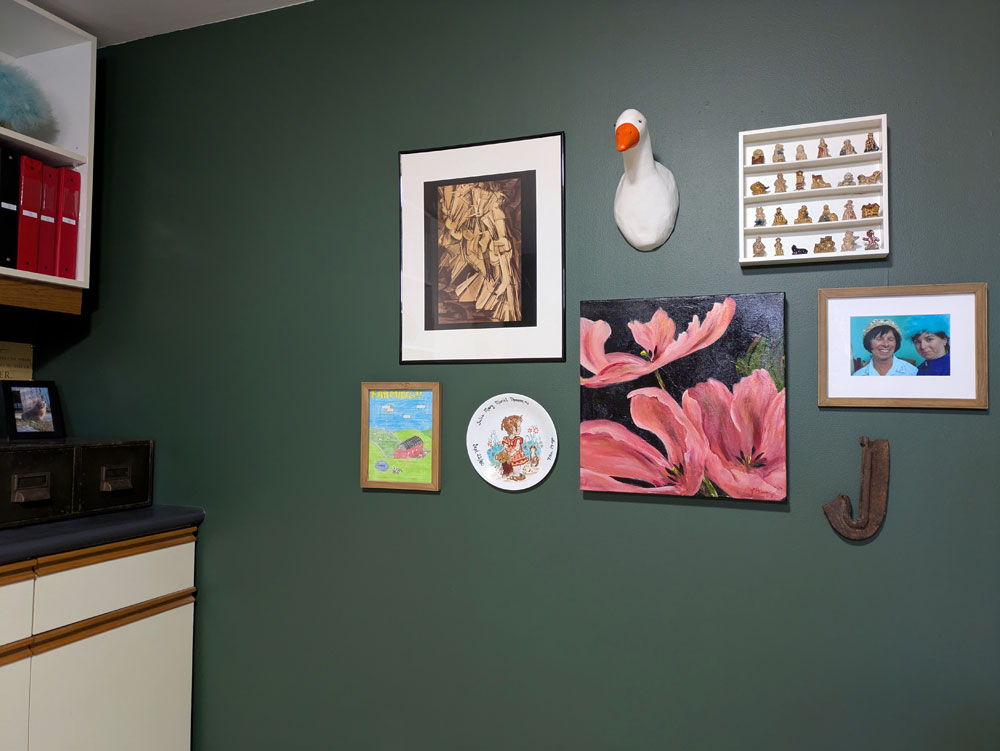
A gallery wall on the other side of the room holds more pictures and things that are special to me. The window sill holds a collection of thimbles from Matt’s Mom and other small trinkets. Ellie needle felted a goose to look like my long ago pet Bill and I hung it from the ceiling so it flies over my sewing machine.
The two sets of green metal drawers came from an auction we went to years ago. They’ve been in the driveshed ever since waiting for the right spot. Now, one sits on the counter and the other on my desk. They give great extra storage, and I love their rustic green patina.
There are so many details in this room, I feel like I could keep going forever. There are a few things I’m still hoping to add (Matt chose the cheapest light fixture possible, and it’s terrible), but I love how this room turned out right now. It is functional. It is pretty. And, like all my spaces, it is personal.
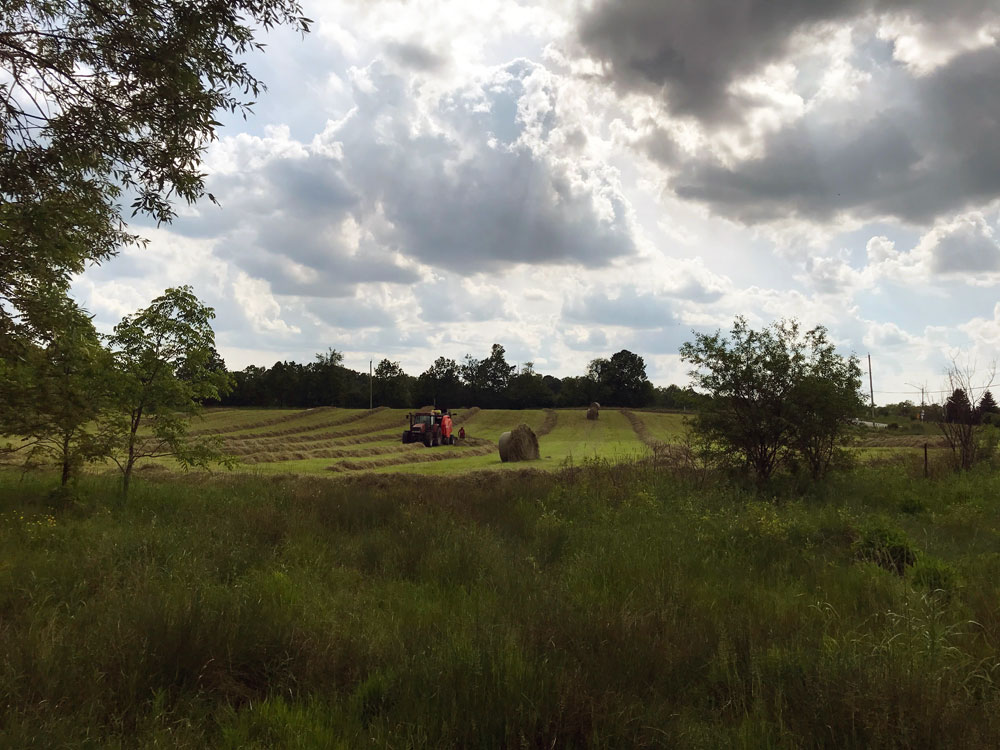
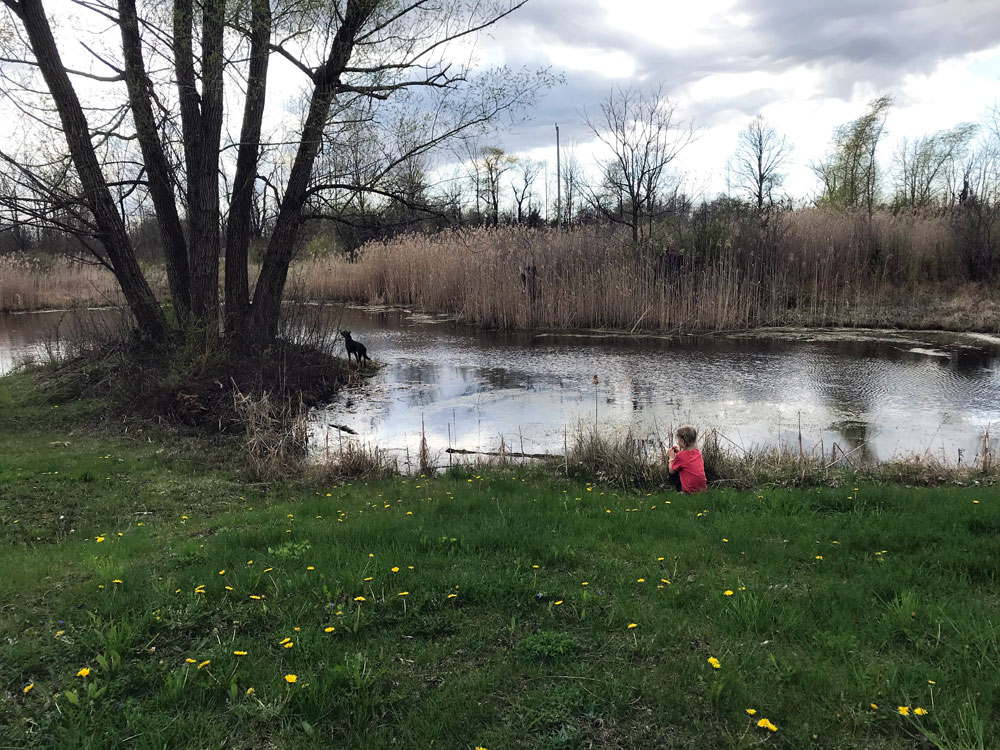
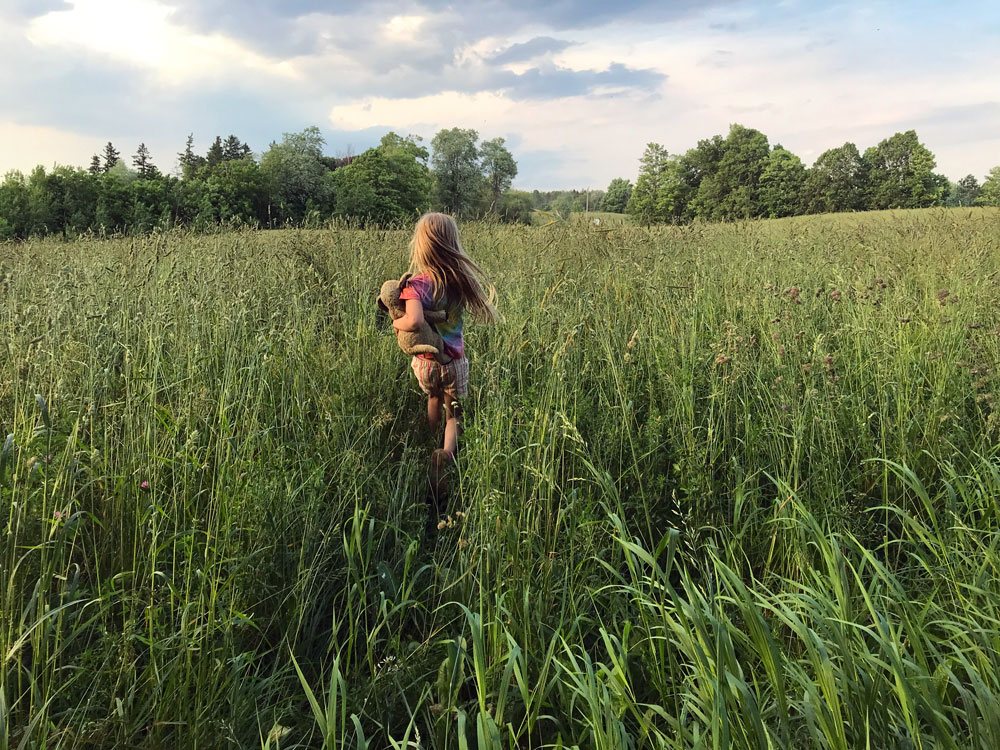
March Break was always a highlight for me when I was growing up. A whole week off school. This year, it was a highlight again. Ellie and I didn’t do anything extravagant. We rested, played outside, puttered around and enjoyed the time. Ellie returned to her bike and learned to skip. The power of simple things, being together and enjoying this special place always amazes me. We had such a special week.
The highlight of the week was ordering our birds! Thank goodness the coop is close to being done.
I’ve also made progress on some other projects. The office is nearly finished, and I’ve made most of my selections for the bathroom. I’ll be sharing some updates soon.
I got to visit this special home and reconnect with some special people. Every detail was so carefully considered.
I took my Dad’s air compressor and my chop saw to a “dare to repair” workshop. The services were free, and the volunteers got both tools working again. I’m so glad to be able to reuse rather than replace.
Climate change is happening, and our homes, cities and towns are not built for this.
Canada is in an election campaign. The Conservatives are following Donald Trump in their strategy, philosophies and policies. This is not the direction I want for Canada. I encourage you to vote and vote strategically.
Book of the month is The Overstory. It was devastating and beautiful. The writing is amazing.
“But people have no idea what time is. They think it’s a line, spinning out from three seconds behind them, then vanishing just as fast into the three seconds of fog just ahead. They can’t see that time is one spreading ring wrapped around another, outward and outward until the thinnest skin of Now depends for its being on the enormous mass of everything that has already died.”
With only one day left in March, I’m looking ahead to April. This week has four (!) family birthdays. I’m also meeting with a cabinet maker who will hopefully be a good fit for our bathroom. Then there’s the coop, the office, teaching… life is full.
What was the highlight of March for you? Have you heard of repair clinics like the one I went to? I encourage you to seek them out in your area. Anyone else feeling anxious about this election? Who else is wrapping up projects? Or looking ahead to new arrivals!
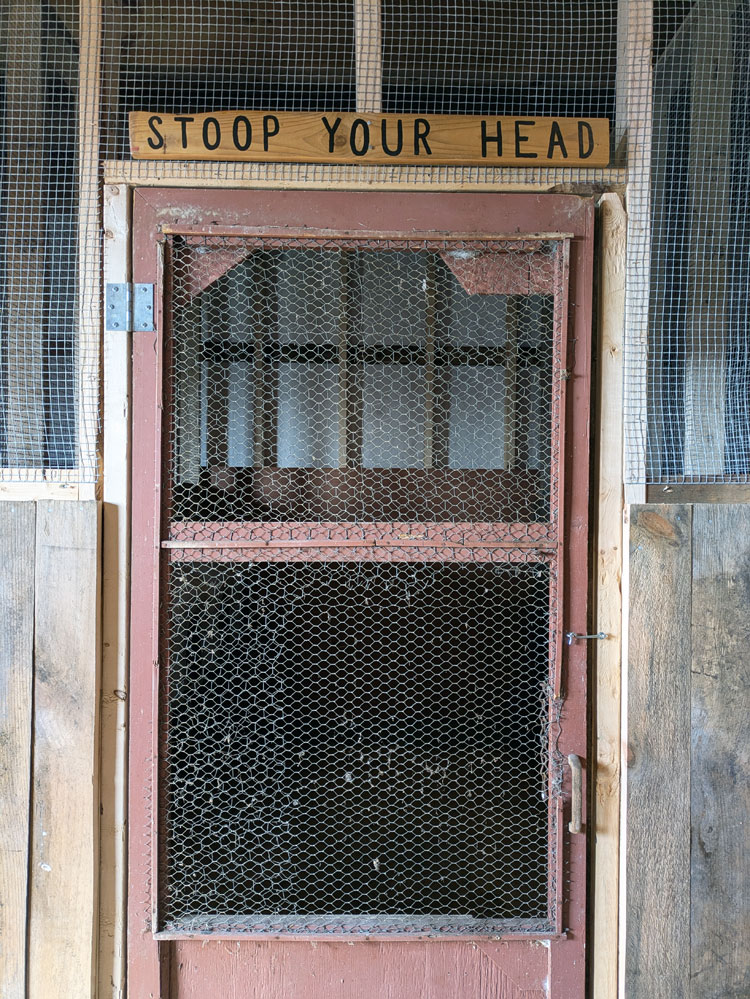
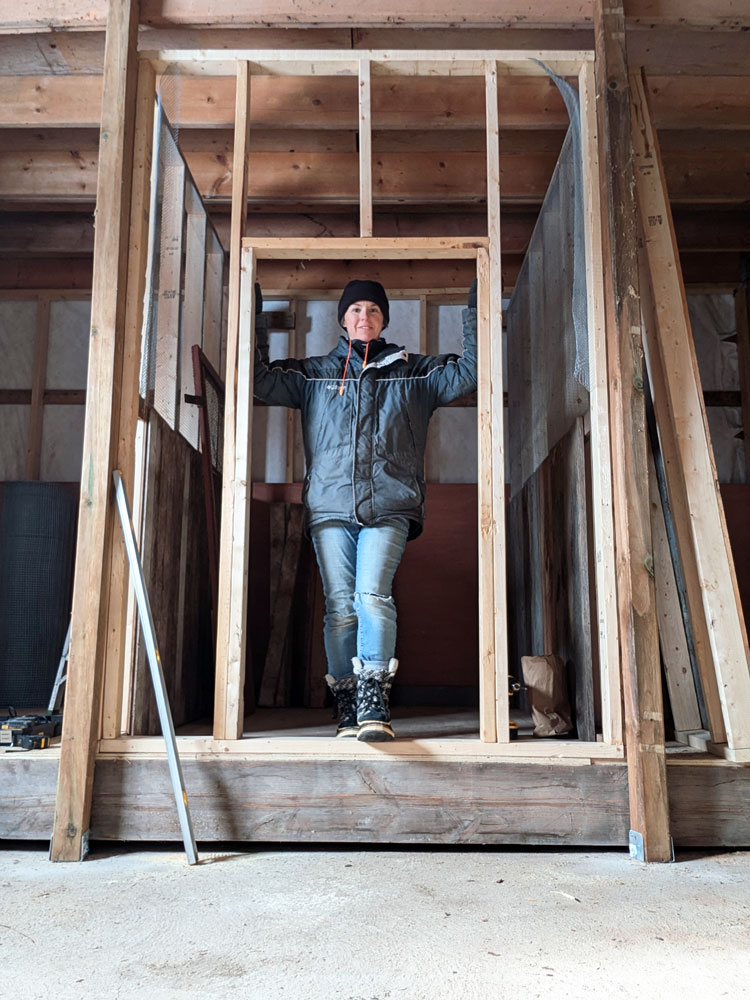
In my last coop update, I had found one door (a sentimental memory that my Dad made for our childhood coop) and resigned myself to making two more.
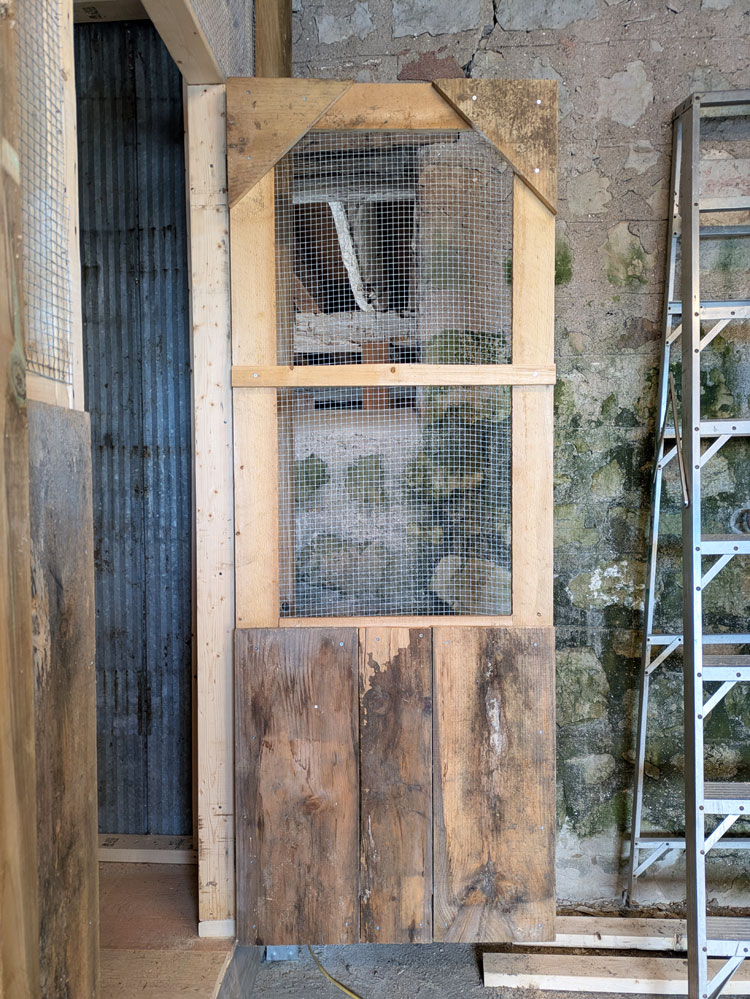
Making the doors turned out to be a much bigger deal in my mind than in real life. They went so smoothly. I’m still really proud of them.
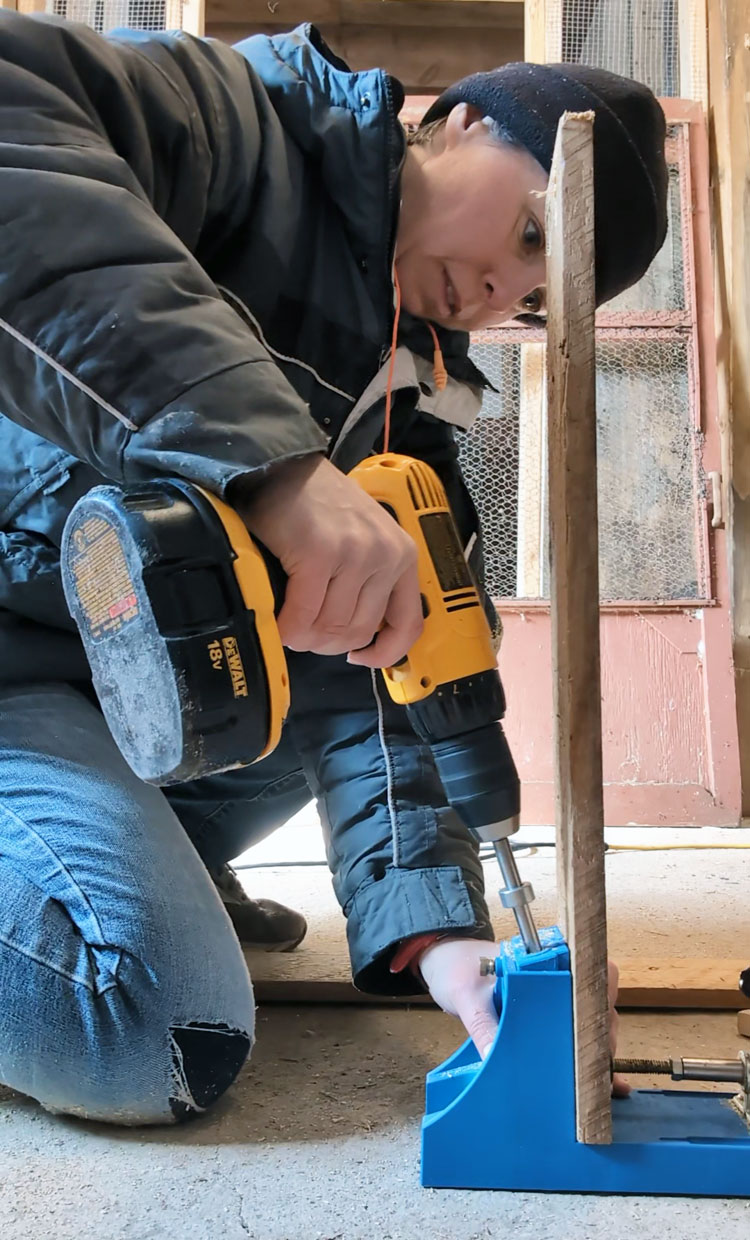
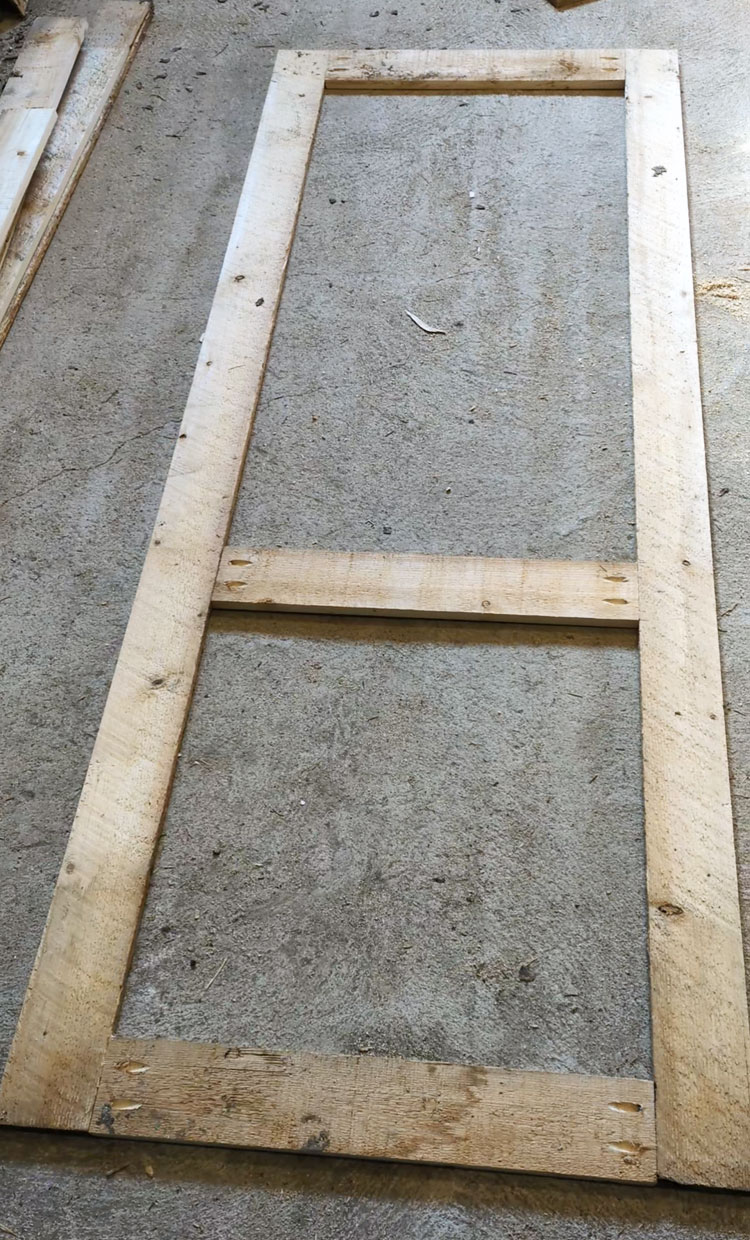
I was able to use some of the leftover siding. I ripped a few pieces in half on my Dad’s table saw for the outer frame and then used my Kreg jig to drill pocket holes and screwed them together. The jig is a super easy way to do joinery, though it took me a minute to remember how to use it (it’s been awhile).
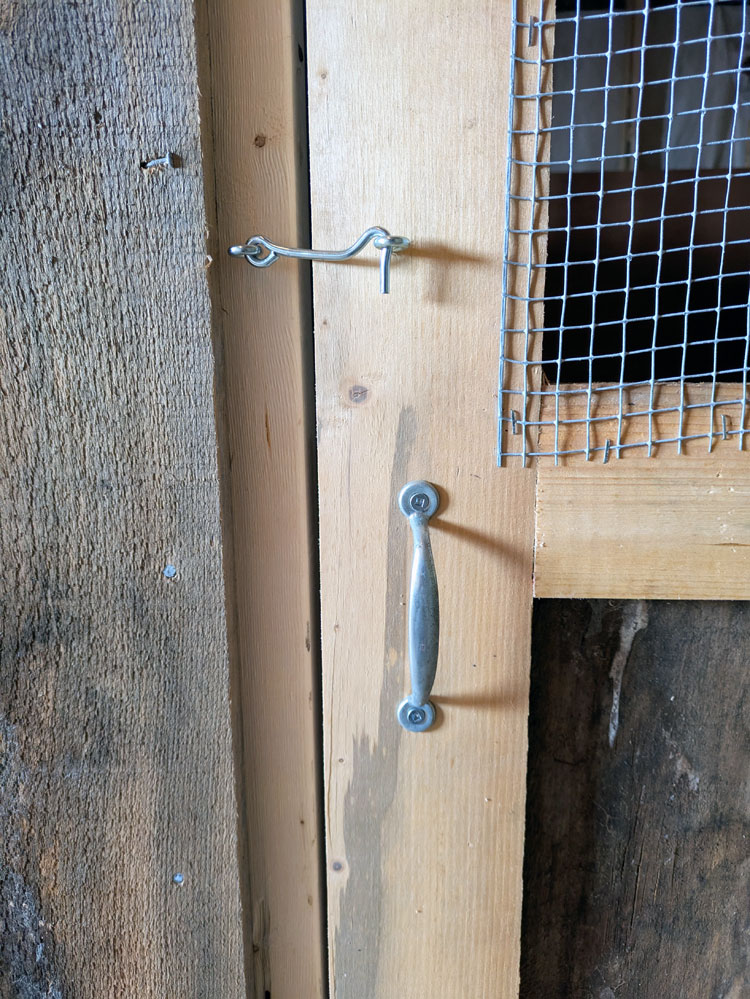
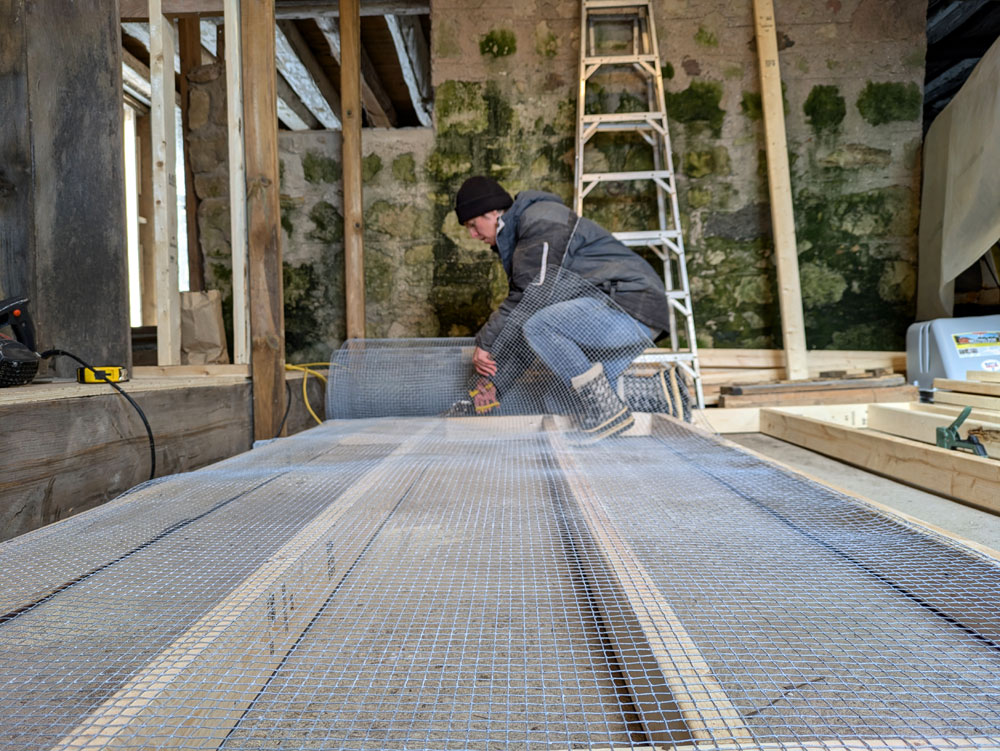
I reinforced all the corners for extra stability. Then I stapled mesh on the top section so that we can peek in at the birds.
My Mom raided my Dad’s hardware stash for hinges. She also found hooks and eyes to keep the doors closed. I found handles in my hardware stash.
The finishing touch was a fun one. Above my Dad’s door (which is a bit short), I made a sign that says “stoop your head.” This is another sentimental memory. On the last night of our Ireland trip, we went to a restaurant called Stoop Your Head. Inside the restaurant was a low doorway with a sign above. I copied the sign and hung it above my Dad’s door. Seeing the sign in our coop is a fun–and helpful–reminder.
We are so close to finishing the coop. We are so close to birds! In fact, they’re on order. ETA April 22!
To see the doors in action, check out the videos I’ve been sharing on Instagram. Follow me at juliaon129acres, and catch up on all the construction in the coop highlights (part 1 and part 2).
For the last two and a half months, I have been breaking one of my major rules of DIY. I’ve been working on more than one project. <<Gasp>> There are no DIY police coming to arrest me and no real consequences for breaking my own rules. But the start of this year has confirmed that this is not the way I like to work. It also made me think about some of the DIY rules I follow and how I make renovating enjoyable and productive.
I’ve been a DIYer my whole life. My Dad and Mom both worked in construction and they involved my siblings and me in projects from the time we were very little. Once I got older, I worked with my Dad officially, labouring for him every summer.
Then Matt and I bought our first house. We fixed it up, sold it and bought the farm. Here we found another fixer upper, which was exactly what I wanted. Over the years, I’ve learned a lot about construction and how I like to tackle projects. So today, I’m sharing a few rules I (usually) follow to ensure DIY is successful.
Tackle one project at a time
Have you ever walked into someone’s house to find they have a project on the go over here, and oh they’re working on that over there, and yep that needs fixed over there too? With DIY, and especially with a fixer upper, it’s easy to get pulled in different directions. So many things need fixing!
Or maybe you get bored. That project that was so exciting a few weeks ago has now become a slog. Or you got stuck and weren’t sure what to do next, so you started something else.
At the start of this year, I broke my own rule. I started redoing the office downstairs while I was still working on the coop outside and I began planning the bathroom reno. I justified it that it was winter, so having an indoor and outdoor project made sense. Plus I really, really wanted the office.
But it was hard. I was thinking about three different projects, which for me meant I didn’t have a clear vision of what had to happen next for any of them. Also I was working all the time and got really, really tired. Progress slowed and I wasn’t having fun anymore. Eventually, I stepped back from the office and prioritized the coop.
DIY requires a singular focus. Pick a project, stick with it and don’t let yourself get distracted.
Have a schedule and stick to it
For most of us, DIY is something extra. We have our jobs, our families, our lives. And then we try to fit in home renovations. Having a plan of where and how you’re going to squeeze it into your schedule can help you complete your project.
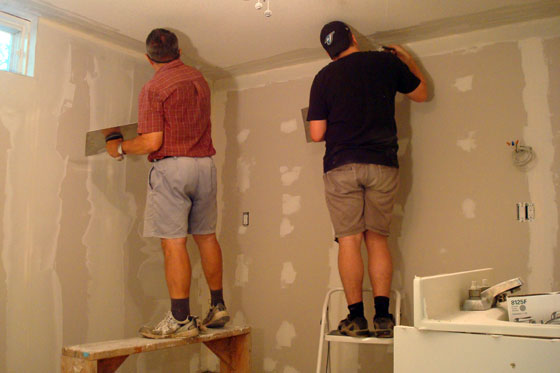
When Matt and I were drywalling the basement, we set every Wednesday night and all day Saturday as our work time. Sure most Wednesday nights we would have rather sat on the couch and watched TV, but we had a vision of that couch and TV in our beautiful finished basement, so we stuck to the plan and eventually finished the drywall.
For the coop, I committed one day a week to construction. Some weeks were very cold. Sometimes something came up and I couldn’t give it the full day. But knowing I’d made the commitment to myself got me out each week and kept progress moving.
Know your limits (but push them a little)
DIY comes in all shapes and sizes. Some projects are super simple and others are complex. Make sure the scope of the project you are tackling is (mostly) within your capabilities. If you take on something too big or too complicated, you may get stuck or frustrated or make a mistake. Certain mistakes like messing up the wiring, plumbing or structure of your house can have serious consequences.
We watch YouTube or HGTV and think renovation is no big deal. But many parts of construction require special expertise and professional training. There’s a difference between knowing something’s possible and knowing what’s possible for you to do. Be realistic what you can handle and when to call in professional help.
At the same time, DIY is a learning opportunity. Simple projects can lead to bigger things as you build your skills and confidence.
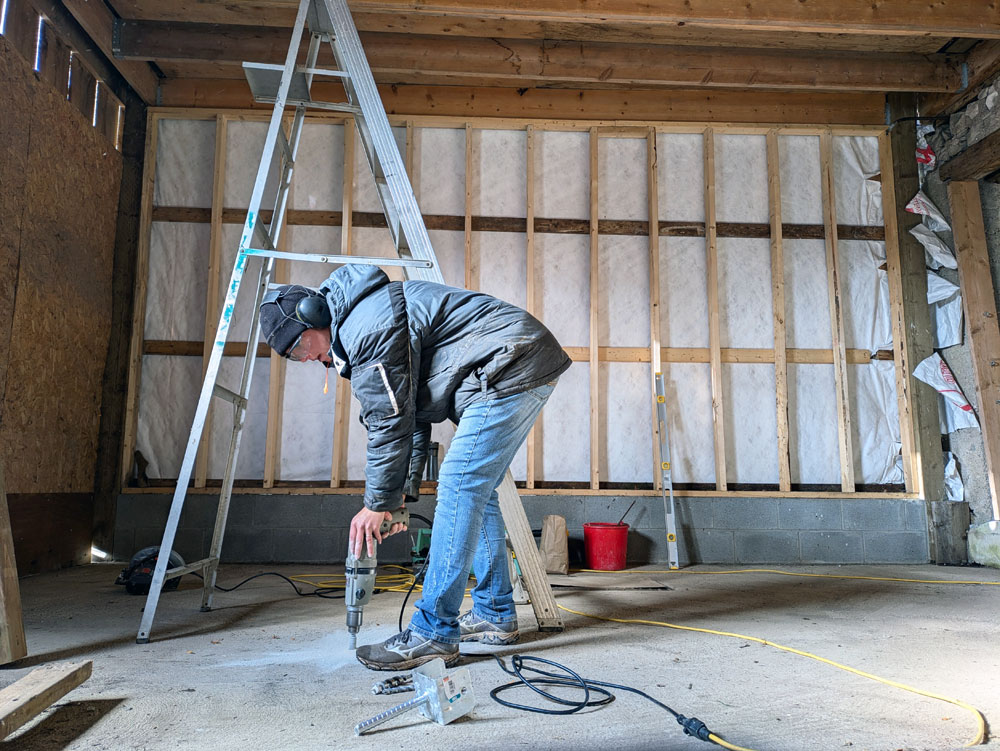
The coop has stretched me. Figuring out how to build it took me a while. Constructing the floor–with so much drilling into concrete–was a bit intimidating. It’s not something I’ve done before on my own, and I wasn’t sure I was doing it right.
I asked for advice, looked up construction standards (the building code, not YouTube, is a good source), thought about how to tackle different parts of construction and then I did it. I had a foundation from a lifetime of DIY that I could build on to accomplish that project. And I’m so proud of it. Now I have more skills and confidence to tackle something else in the future.
I think I’ve been pretty successful with DIY. I’ve saved money, grown my skills and built a really nice home for myself and Ellie. Plus, I enjoy it. For me, one of the biggest signs of success is simple. I get stuff done. Finishing a DIY project is hard. These three rules help me do it.
What do you think of my rules? Do you agree? Do you have any DIY rules you follow? Have you broken any of your own or my rules?
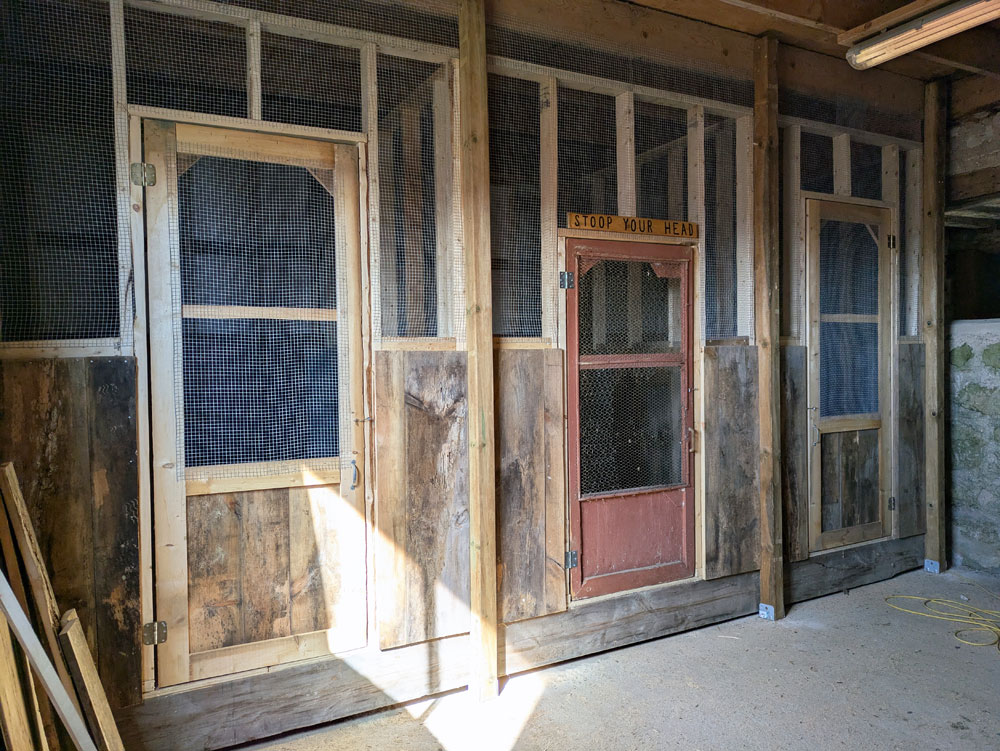
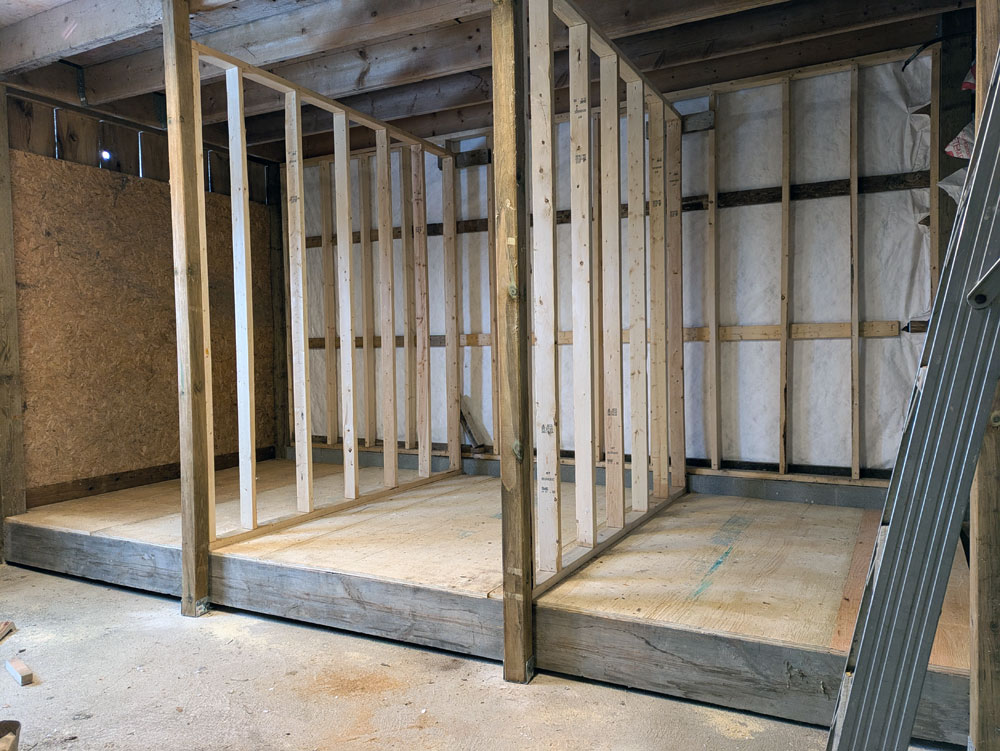
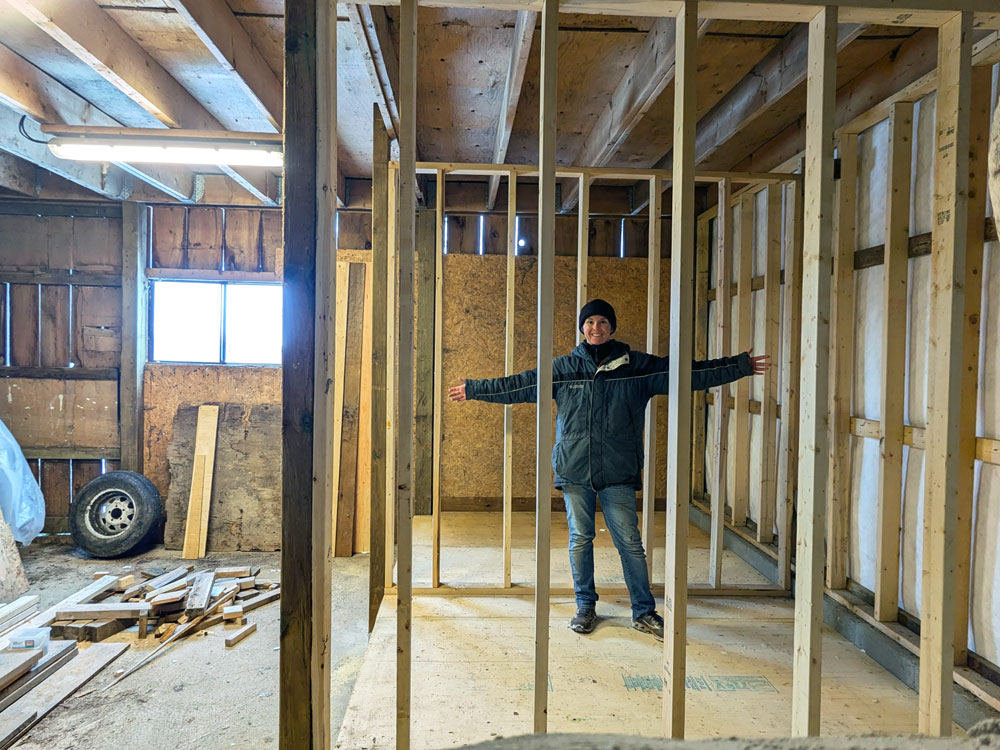
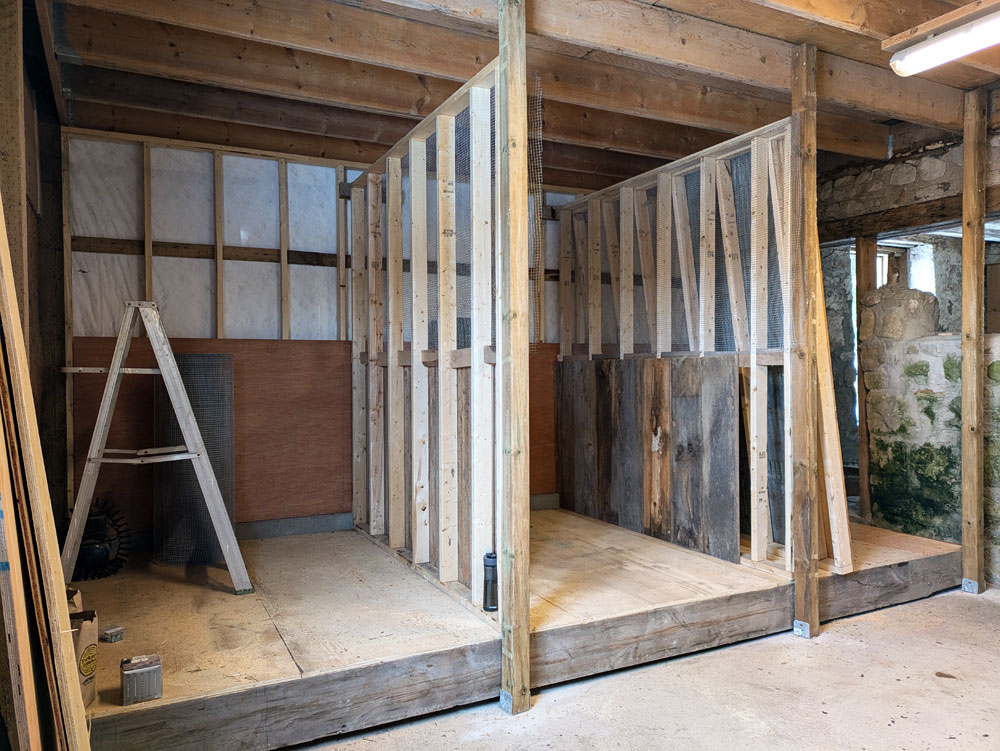
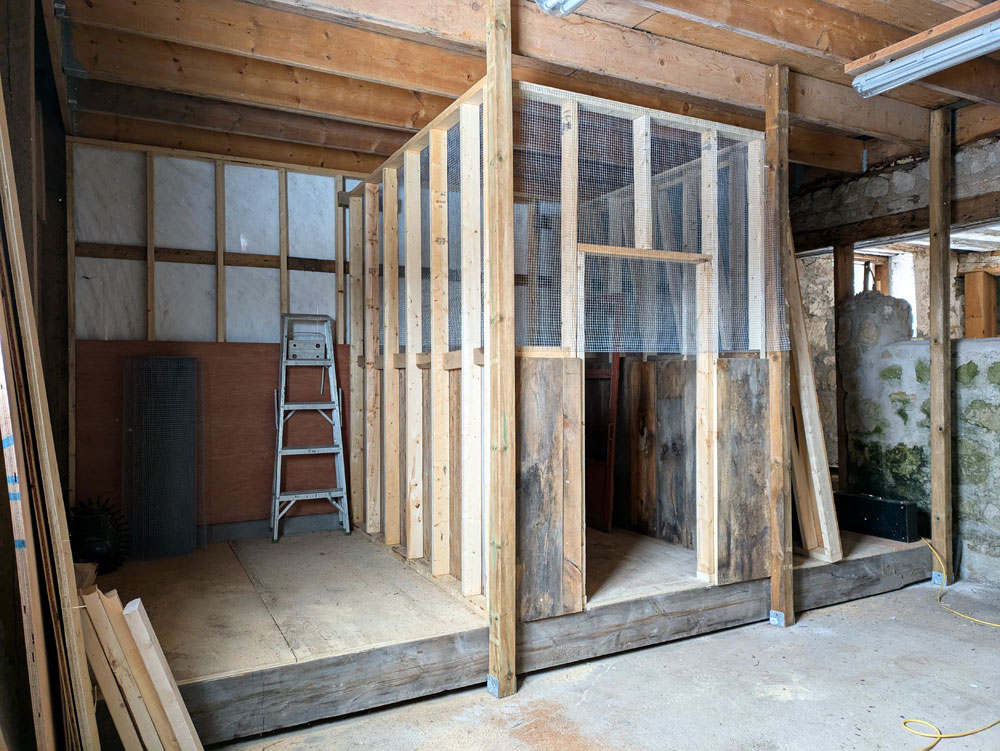
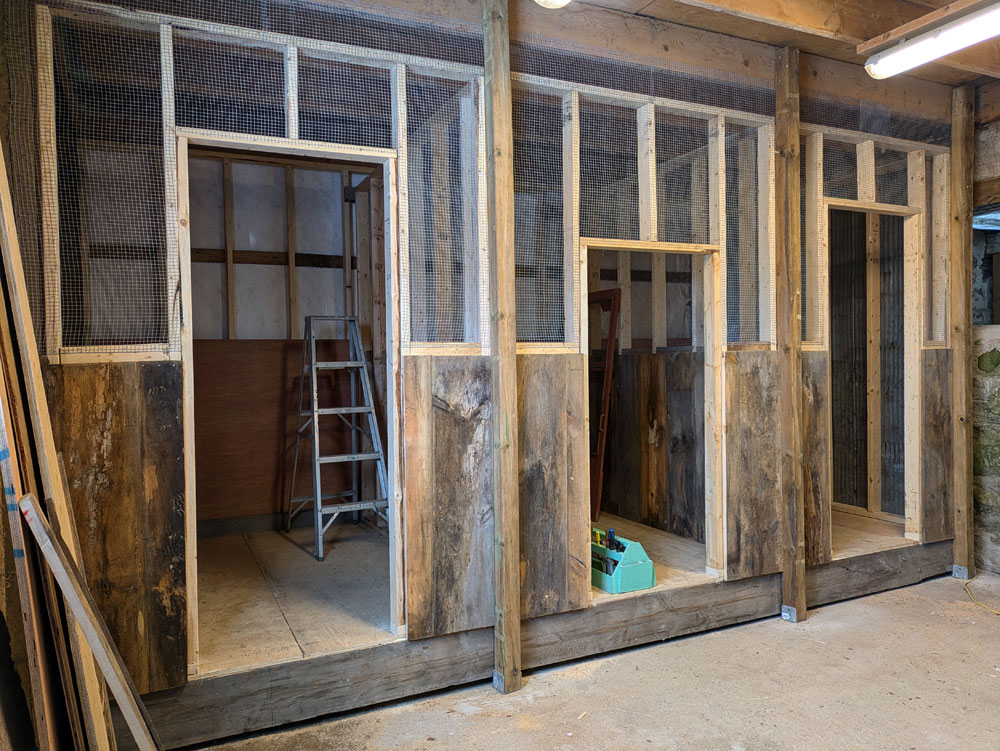
There has been major progress in the coop. All the walls are in place.
I actually built the two interior partition walls on the last day before Christmas holidays (when I finished the floor). Then, when I returned to construction in January, I put up the cladding and built the rest of the walls.
Of course, there’s more to the story. Let me back up a bit. As always, I have details.
Reminder, the coop is going to have three pens. Each partition sits on the new floor I built and lines up with posts I put in. (This post shows the plans for the coop.)
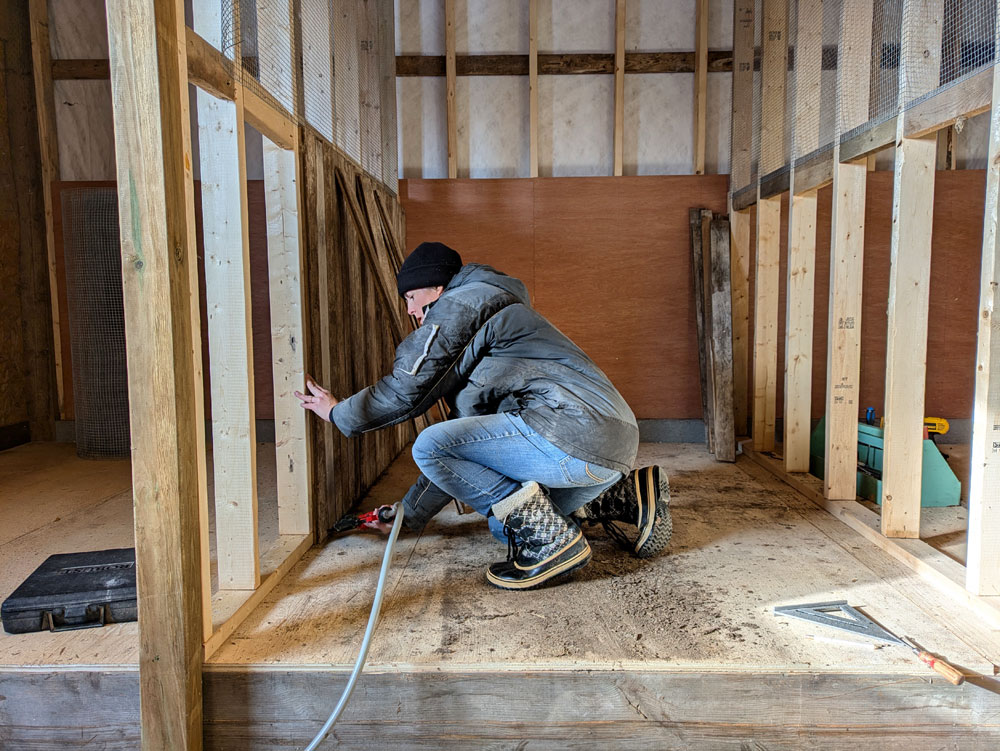
The interior walls between the pens were easy. Studs 16 inches on centre. Wood cladding on the bottom half (including some fancy tongue and groove salvaged from the old coop). Mesh on the top.
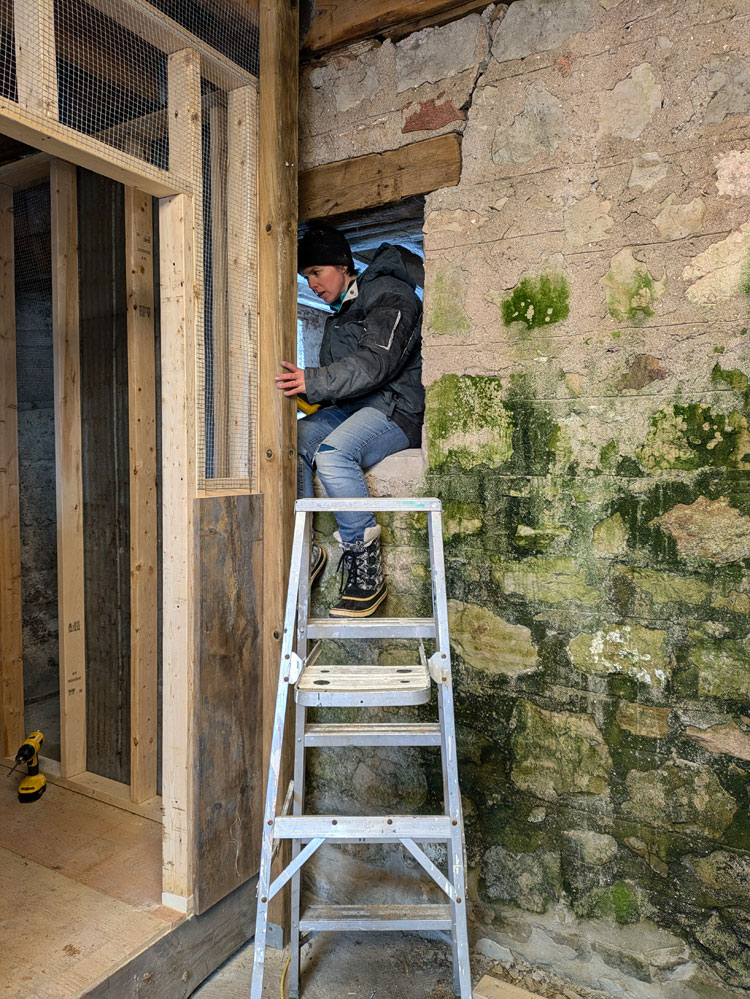
At one end, I decided I could use the exterior wall of the barn as the wall for the coop. At the other end, I needed to build a new wall to achieve my room-within-a-room plan. This wall gave me a bit of trouble.
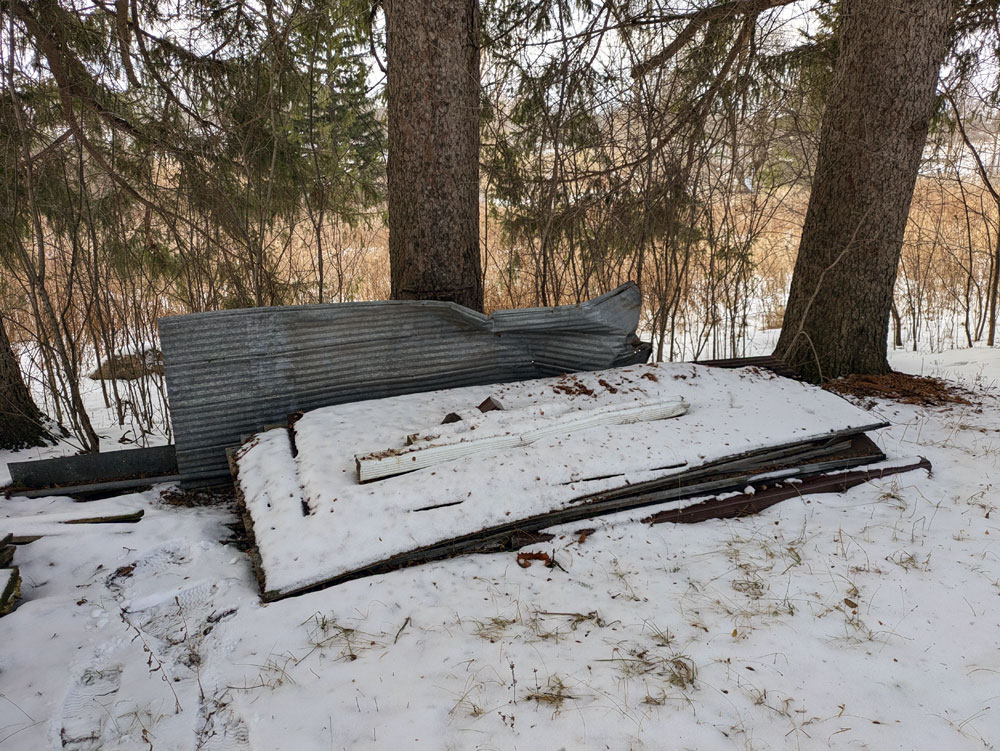
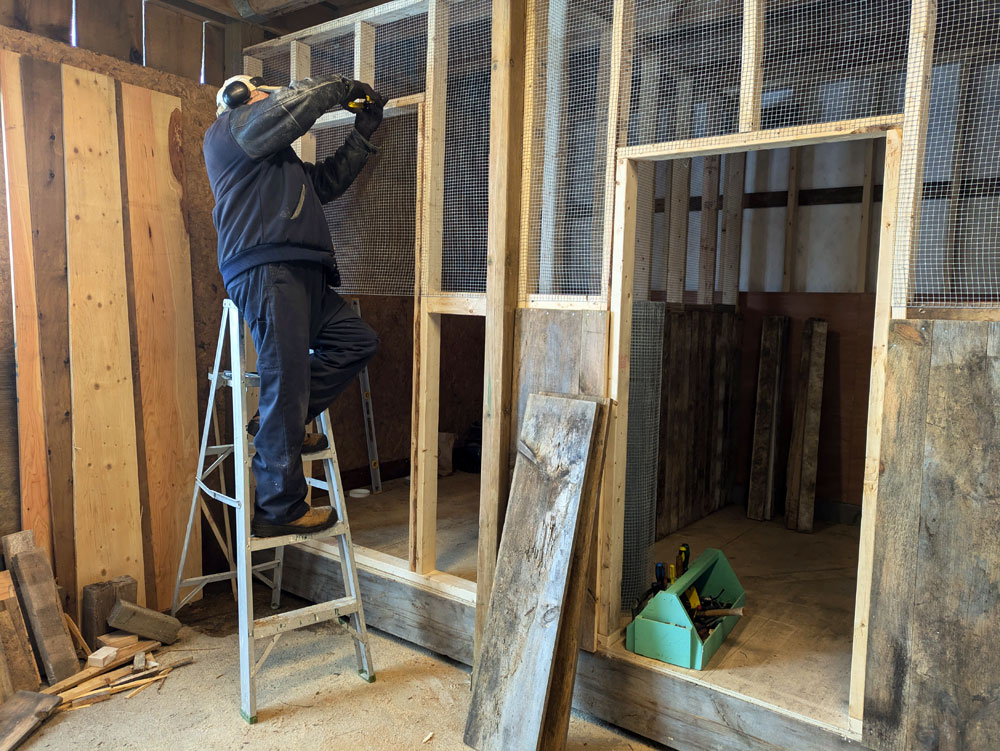
Like the other walls, I built it flat on the floor and then lifted it into place. Given that this wall was going to be against part of the stone of the barn, I thought it would be helpful to put the cladding on before it was installed. I stapled my mesh, then I decided to use a piece of metal roofing from the old coop to cover the other half.
As I lifted it onto the platform, I realized I’d missed a crucial step. I forgot to square up the wall before putting on my cladding. When I tried to slide the wall into place, sure enough, it didn’t go. The wall was a parallelogram. The opening was a rectangle.
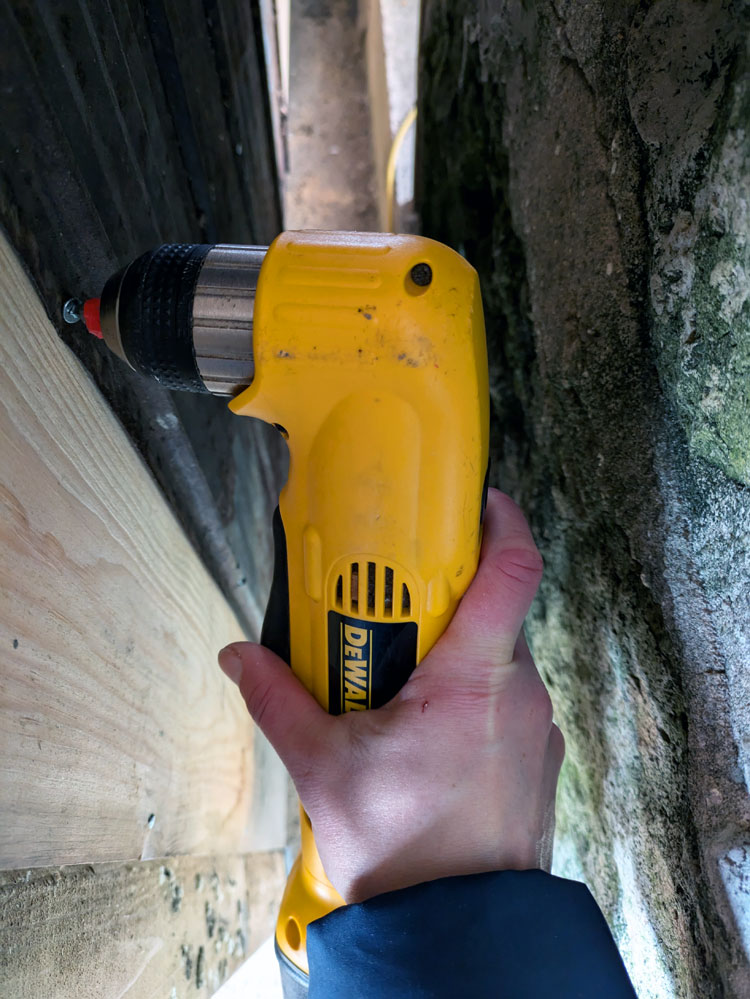
I took off all the cladding then Matt’s Dad (who came to help me out) and I lifted it out, laid it back down on the floor and tried to square it up. We couldn’t line it up, so we put it back in the opening, where it straightened itself out perfectly. Only problem, the cladding wasn’t attached, and I had very limited space up against the stone of the barn. After borrowing my Dad’s right angle drill and testing my limits in stretching and contortion, I managed to get the metal back on.
The front walls of the coop were much more straightforward. I had been holding off building these ones, as I wanted to have my doors so I knew what size openings to build. I had a plan to use old screen doors, but it turned out secondhand screen doors are very expensive. Once I accepted that I was going to be building doors, I realized I could make the openings any size I wanted.
The first wall I built was the middle one because I was able to find one door. This is a very special door because my Dad built it for my childhood coop. The coop is now a storage shed in my Mom’s backyard, and she, knowing I was looking for doors, suggested I could take the one off the old coop.
I love having a door from our family’s coop built by my Dad as part of our coop. My Dad set me on this path of birds when I was younger than Ellie. I remember him building the coop in my grandfather’s garage. Now I’m building our own coop and continuing something that he really enjoyed.
Like the partition walls, the front wall has wood cladding on the bottom and mesh on the top, then the doorway is centred.
The last two front walls, Matt’s Dad and I knocked out in one very productive day. I built these doorways a bit taller to accommodate the doors that I planned to make.
Having the walls in place is another major milestone. It actually looks like a coop!
As I mentioned in my last update, I’ve been documenting the coop construction on video and sharing on Instagram. If you want to see more about the coop, follow me at juliaon129acres, and catch up on all the videos in the coop highlights (part 1 and part 2).
“We are only ever custodians of our farms and of the land. It will be part of the cycle of nature that we too will move on and our farms will welcome the generations that come after us. And so it is with me and Fallowlees, who has stood for hundreds of years and will stand for many more.”
My Farming Life by Emma Gray
I think living at a farm is a different experience than living anywhere else. Perhaps an old or architecturally significant house would be similar. Somewhere you feel that you’re part of something bigger and older than yourself. Something that will persist long after you.
What is my part in the life of this farm?
I have been here for 13 years. A small amount of time in the history of the farm. Miniscule in the age of the land.
I think about my word of the year, care. How can I care for this land and this home so that we can coexist in harmony?
For much of the 13 years, I have left the land alone, aside from the grass we mow, the fields our farmer harvests and the dead trees my father-in-law cuts. Part of it is time, energy, money. Part of it is also knowledge. What native plants should we be growing? How do we restore habitats? Which invasive species should we prioritize? How can we rebuild the soil?
When we moved here, I said I had no plans to be a farmer. I still don’t, but living here I can’t help feel connected to the land and want to be part of a healthy ecosystem. I have been learning over the years and there is so much more to learn and to do.
Initially, I might have said my role is a caretaker of this property. It is a temporary role. I am here to do my best for the land and the house and the barn and take care of it all until the next generation (hopefully Ellie) takes over.
Now, I think the best description I have is partner. How can I work with the land to make it as healthy as possible? To make a safe, helpful place for Ellie to live, yes. And also for the land itself. Nature is amazing and powerful and healing. She can do a lot on her own. But humans have messed things up and we can try to work with the environment to straighten them out again. There are many examples of people living in harmony with nature. I’m hoping that we can get there here at the farm. And some day, when I am gone, the farm and this land will continue.
“I hope she will nurture them as she has nurtured me. I am honoured to have been part of her legacy.”
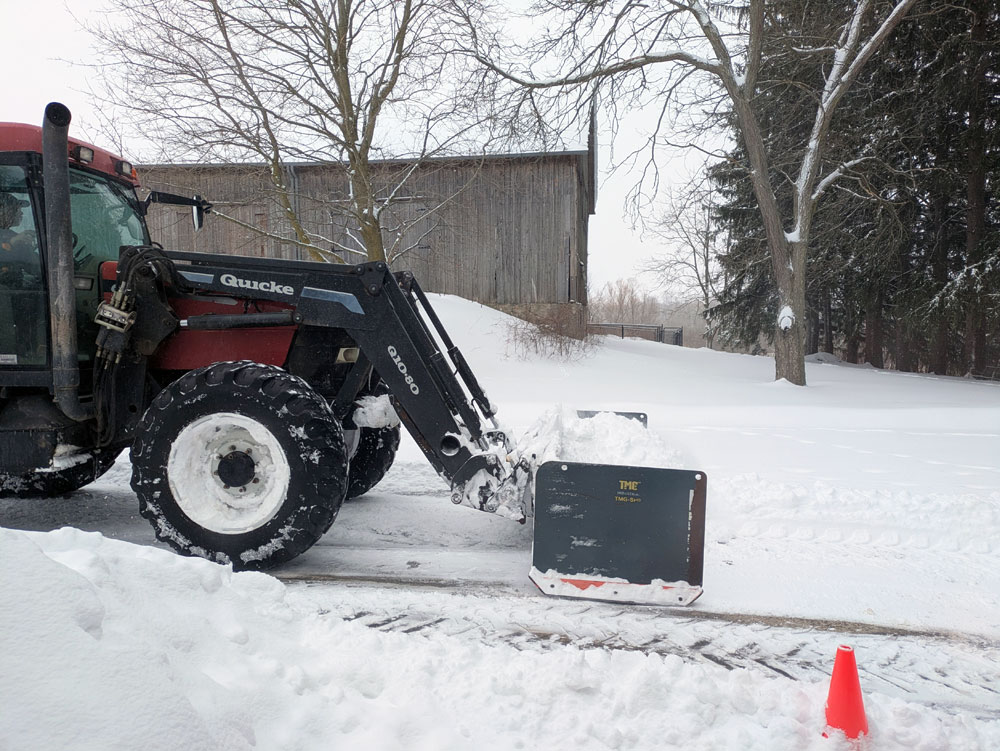
Ups: Snow like we haven’t had in years (thank goodness for our farmer and his big tractors). (A little) more project progress. Ellie’s birthday.
Downs: I got sick.
February took my word of the year–care–and gave me a hard reminder that I need to take more care. I was sicker than I’ve been in a long time. Five days of chills, aches, not sleeping, and generally feeling miserable. Projects halted, the couch and I spent a lot of time together, my focus became what was absolutely necessary and going to bed early.
I of course was extremely frustrated to be so unproductive.
But I know I’ve been pushing myself for years and I need to take better care of myself. I’m hoping this illness was the wake up call I need. I’ve been slowly working my way back. I haven’t made any significant progress on the office, bathroom or coop. I’m taking twice as long to mark my students’ latest assignment. I’m going to bed about an hour earlier than usual (sometimes more). I’m still a bit frustrated at what I see as a lack of productivity, but I’m also proud of myself for making smarter choices.
Here are some of the things I’ve been up to this month.
I’m finishing off the month with a surprise adventure day for Ellie’s birthday (celebrations have been epic), lunch with a friend, a consultation for the bathroom renovation, and hopefully a return to the coop.
How has February been for you? Have you had any celebrations? Illnesses? What is your snow situation? Any documentary recommendations?
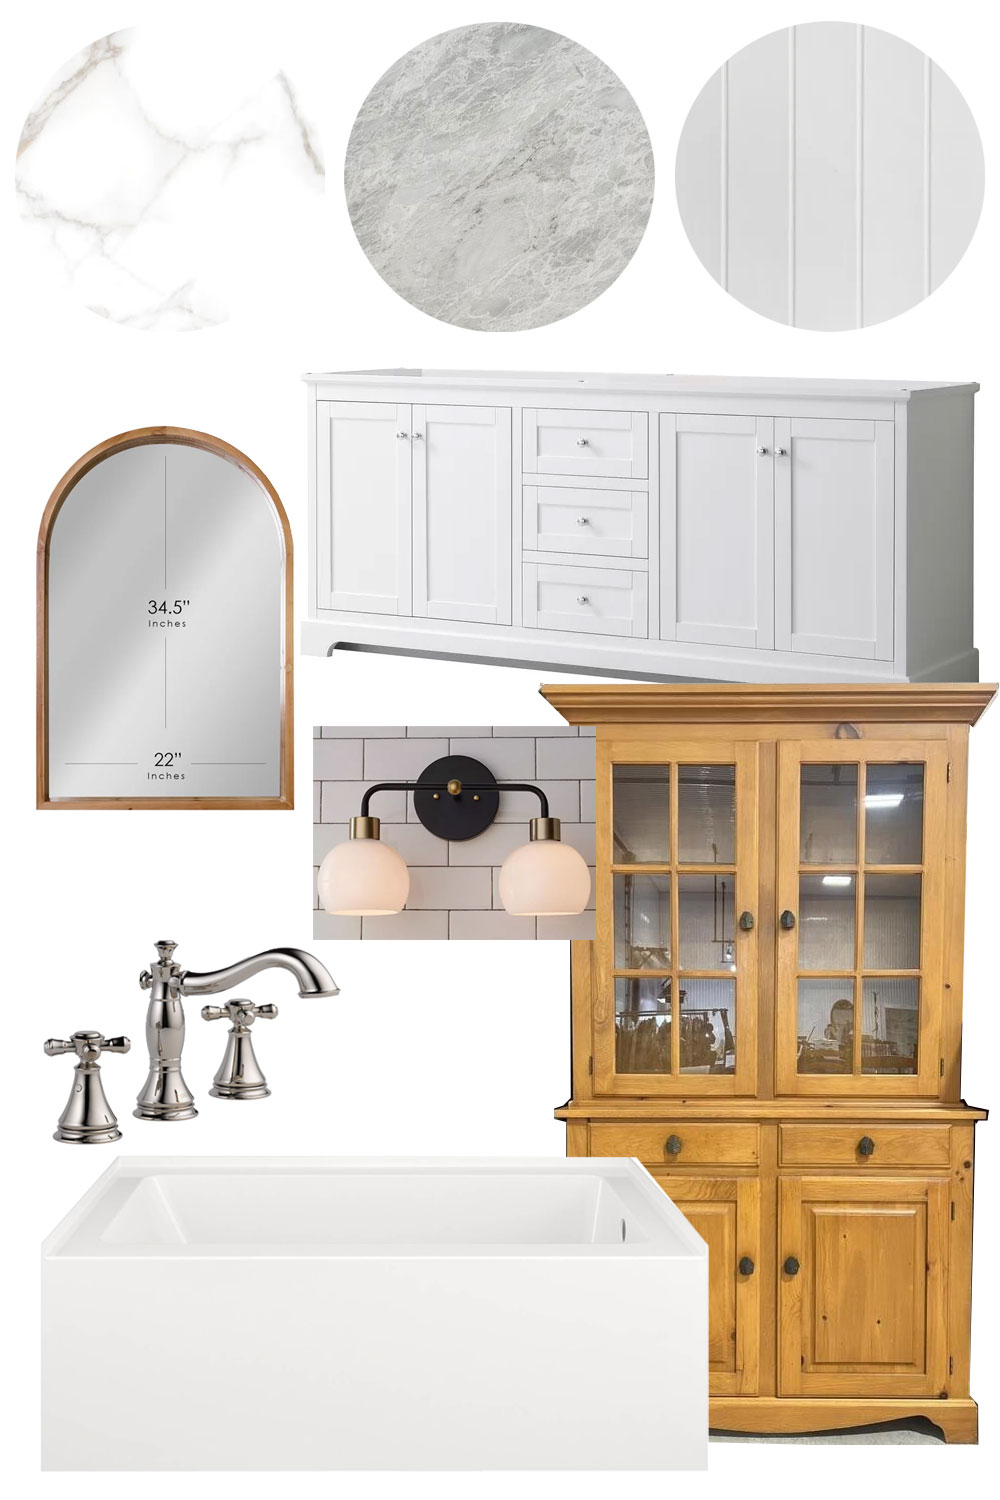
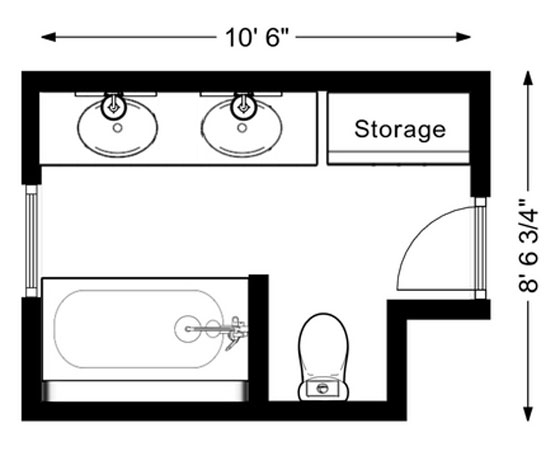
Renovating our main bathroom has been a long time coming. I’m really excited to finally tackle this project this year.
I am planning to do as much of the work myself as I can. I have a great plumber who worked with my Dad (and by extension me), and he’s going to be my main resource. When I called him at the start of the year to talk about the project he said, “I assume you’re going to be doing most of this yourself?” I love it when someone knows me and trusts that I’m capable.
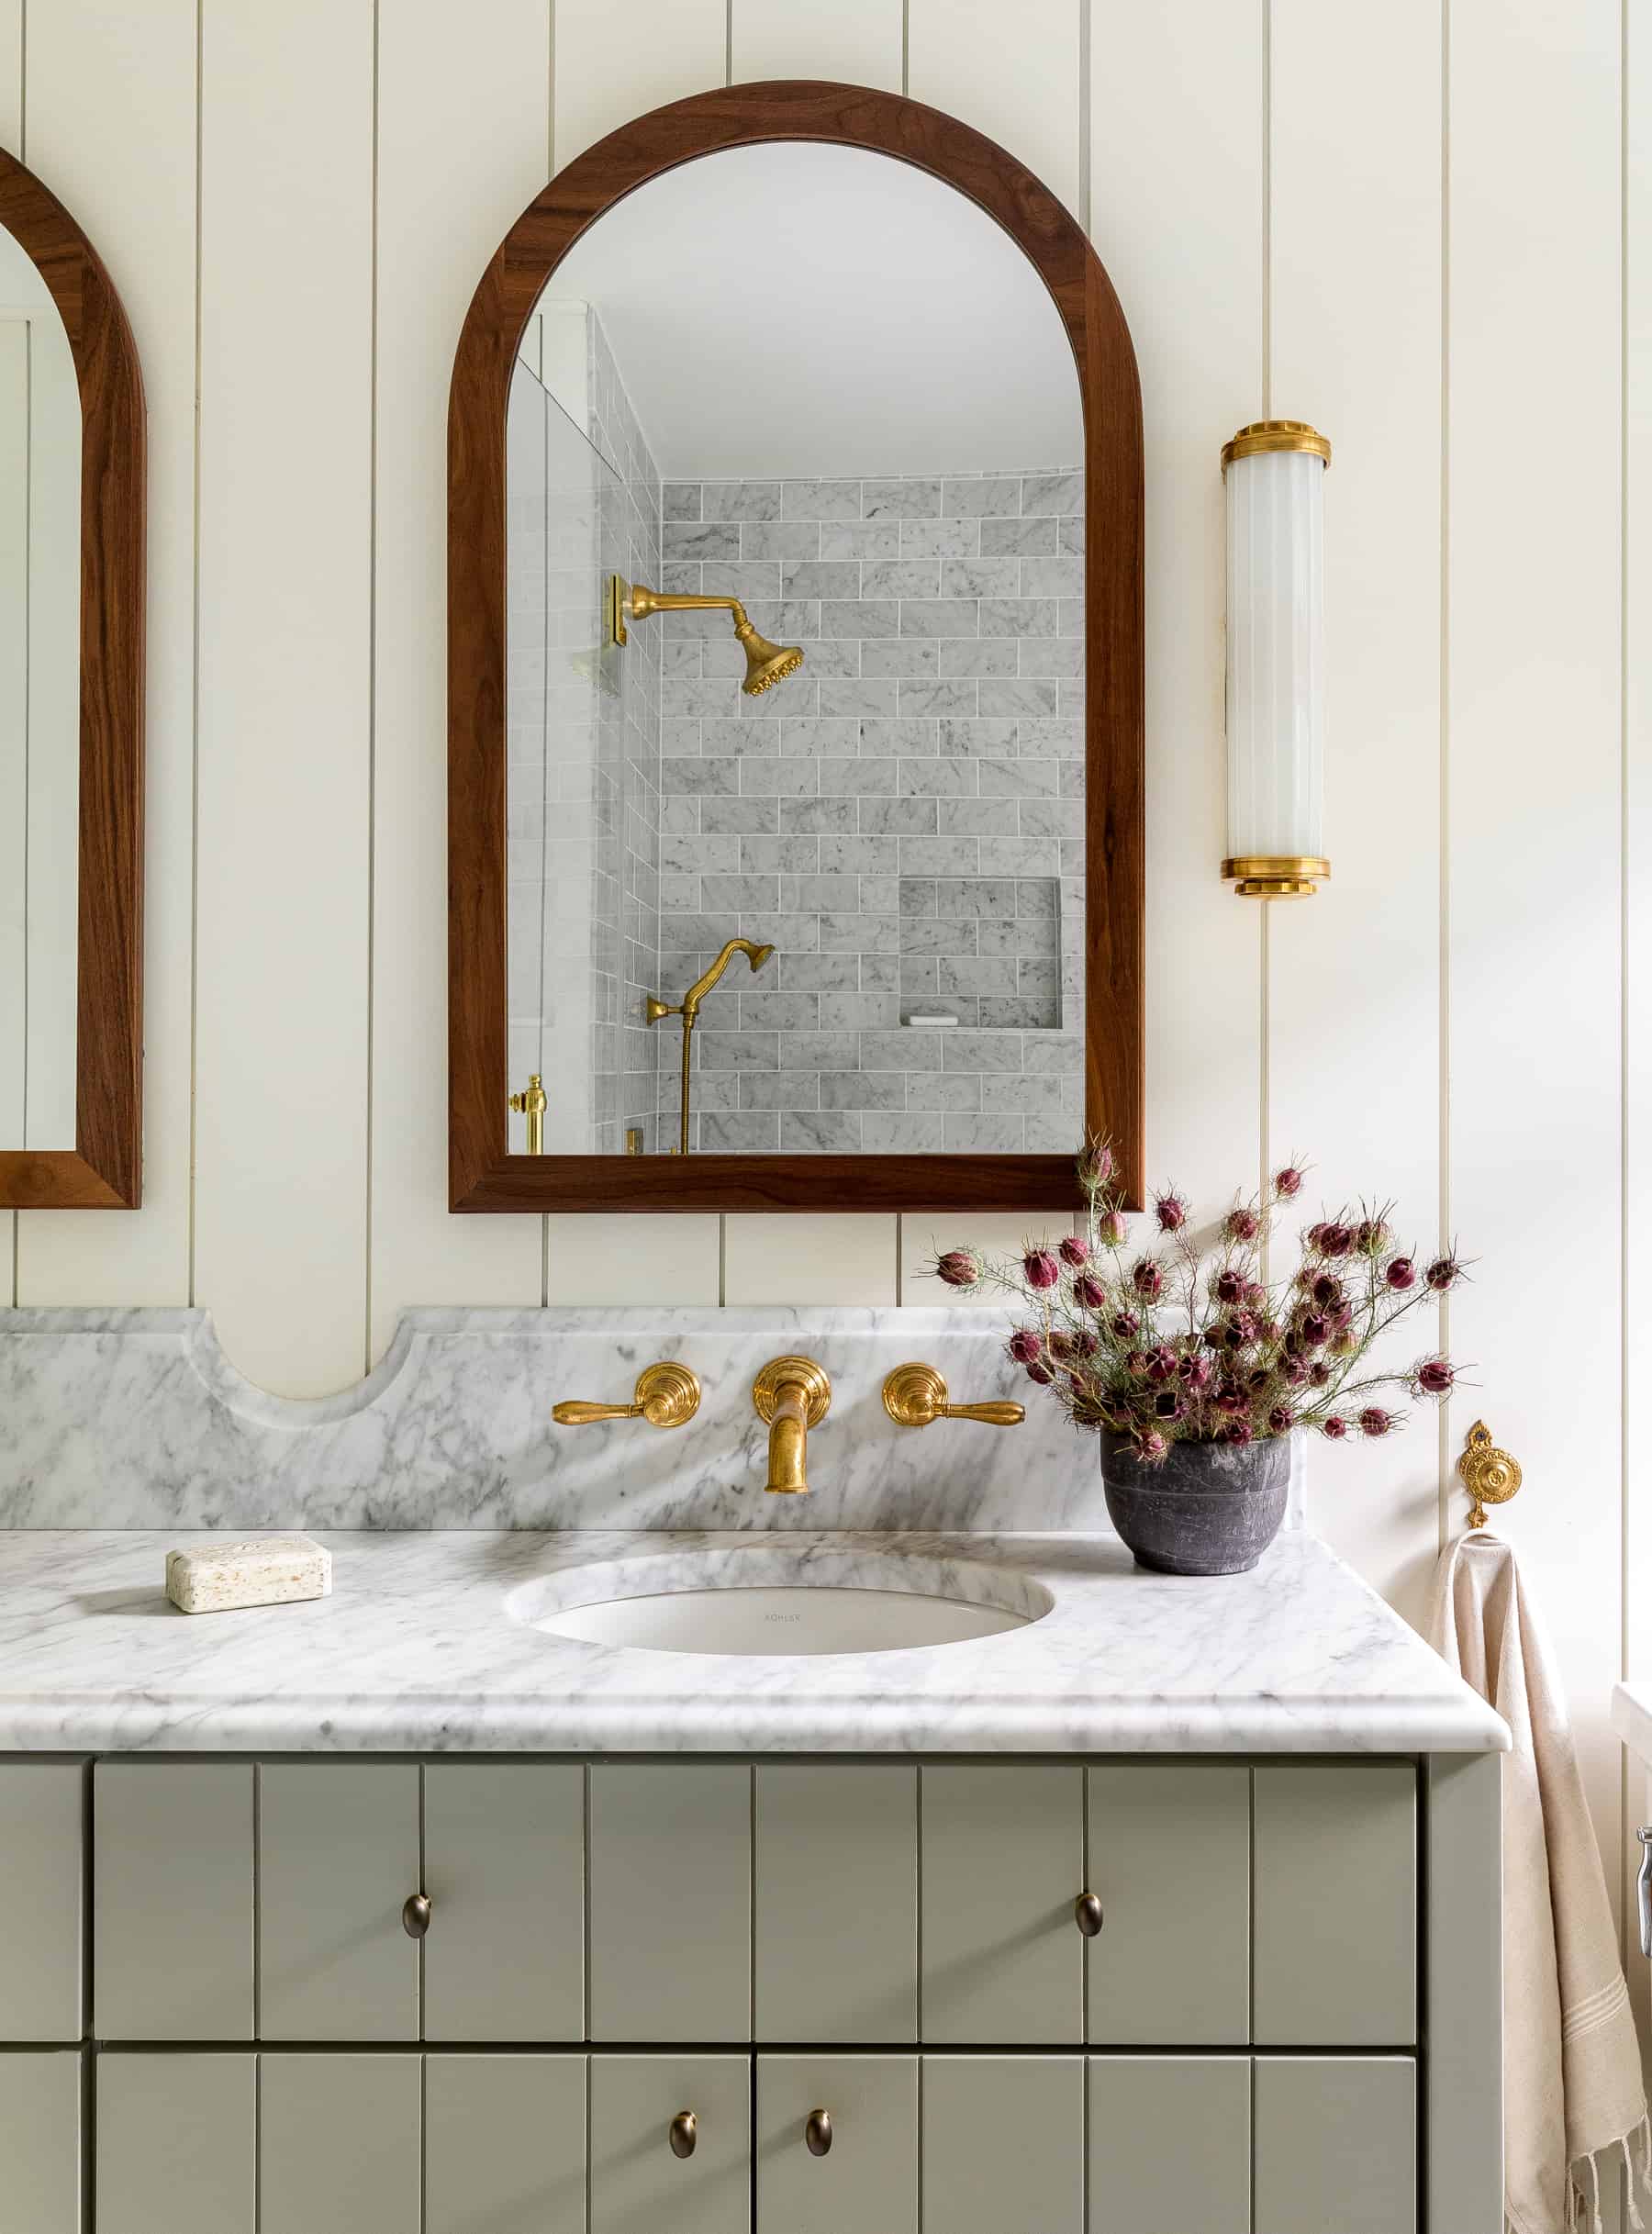
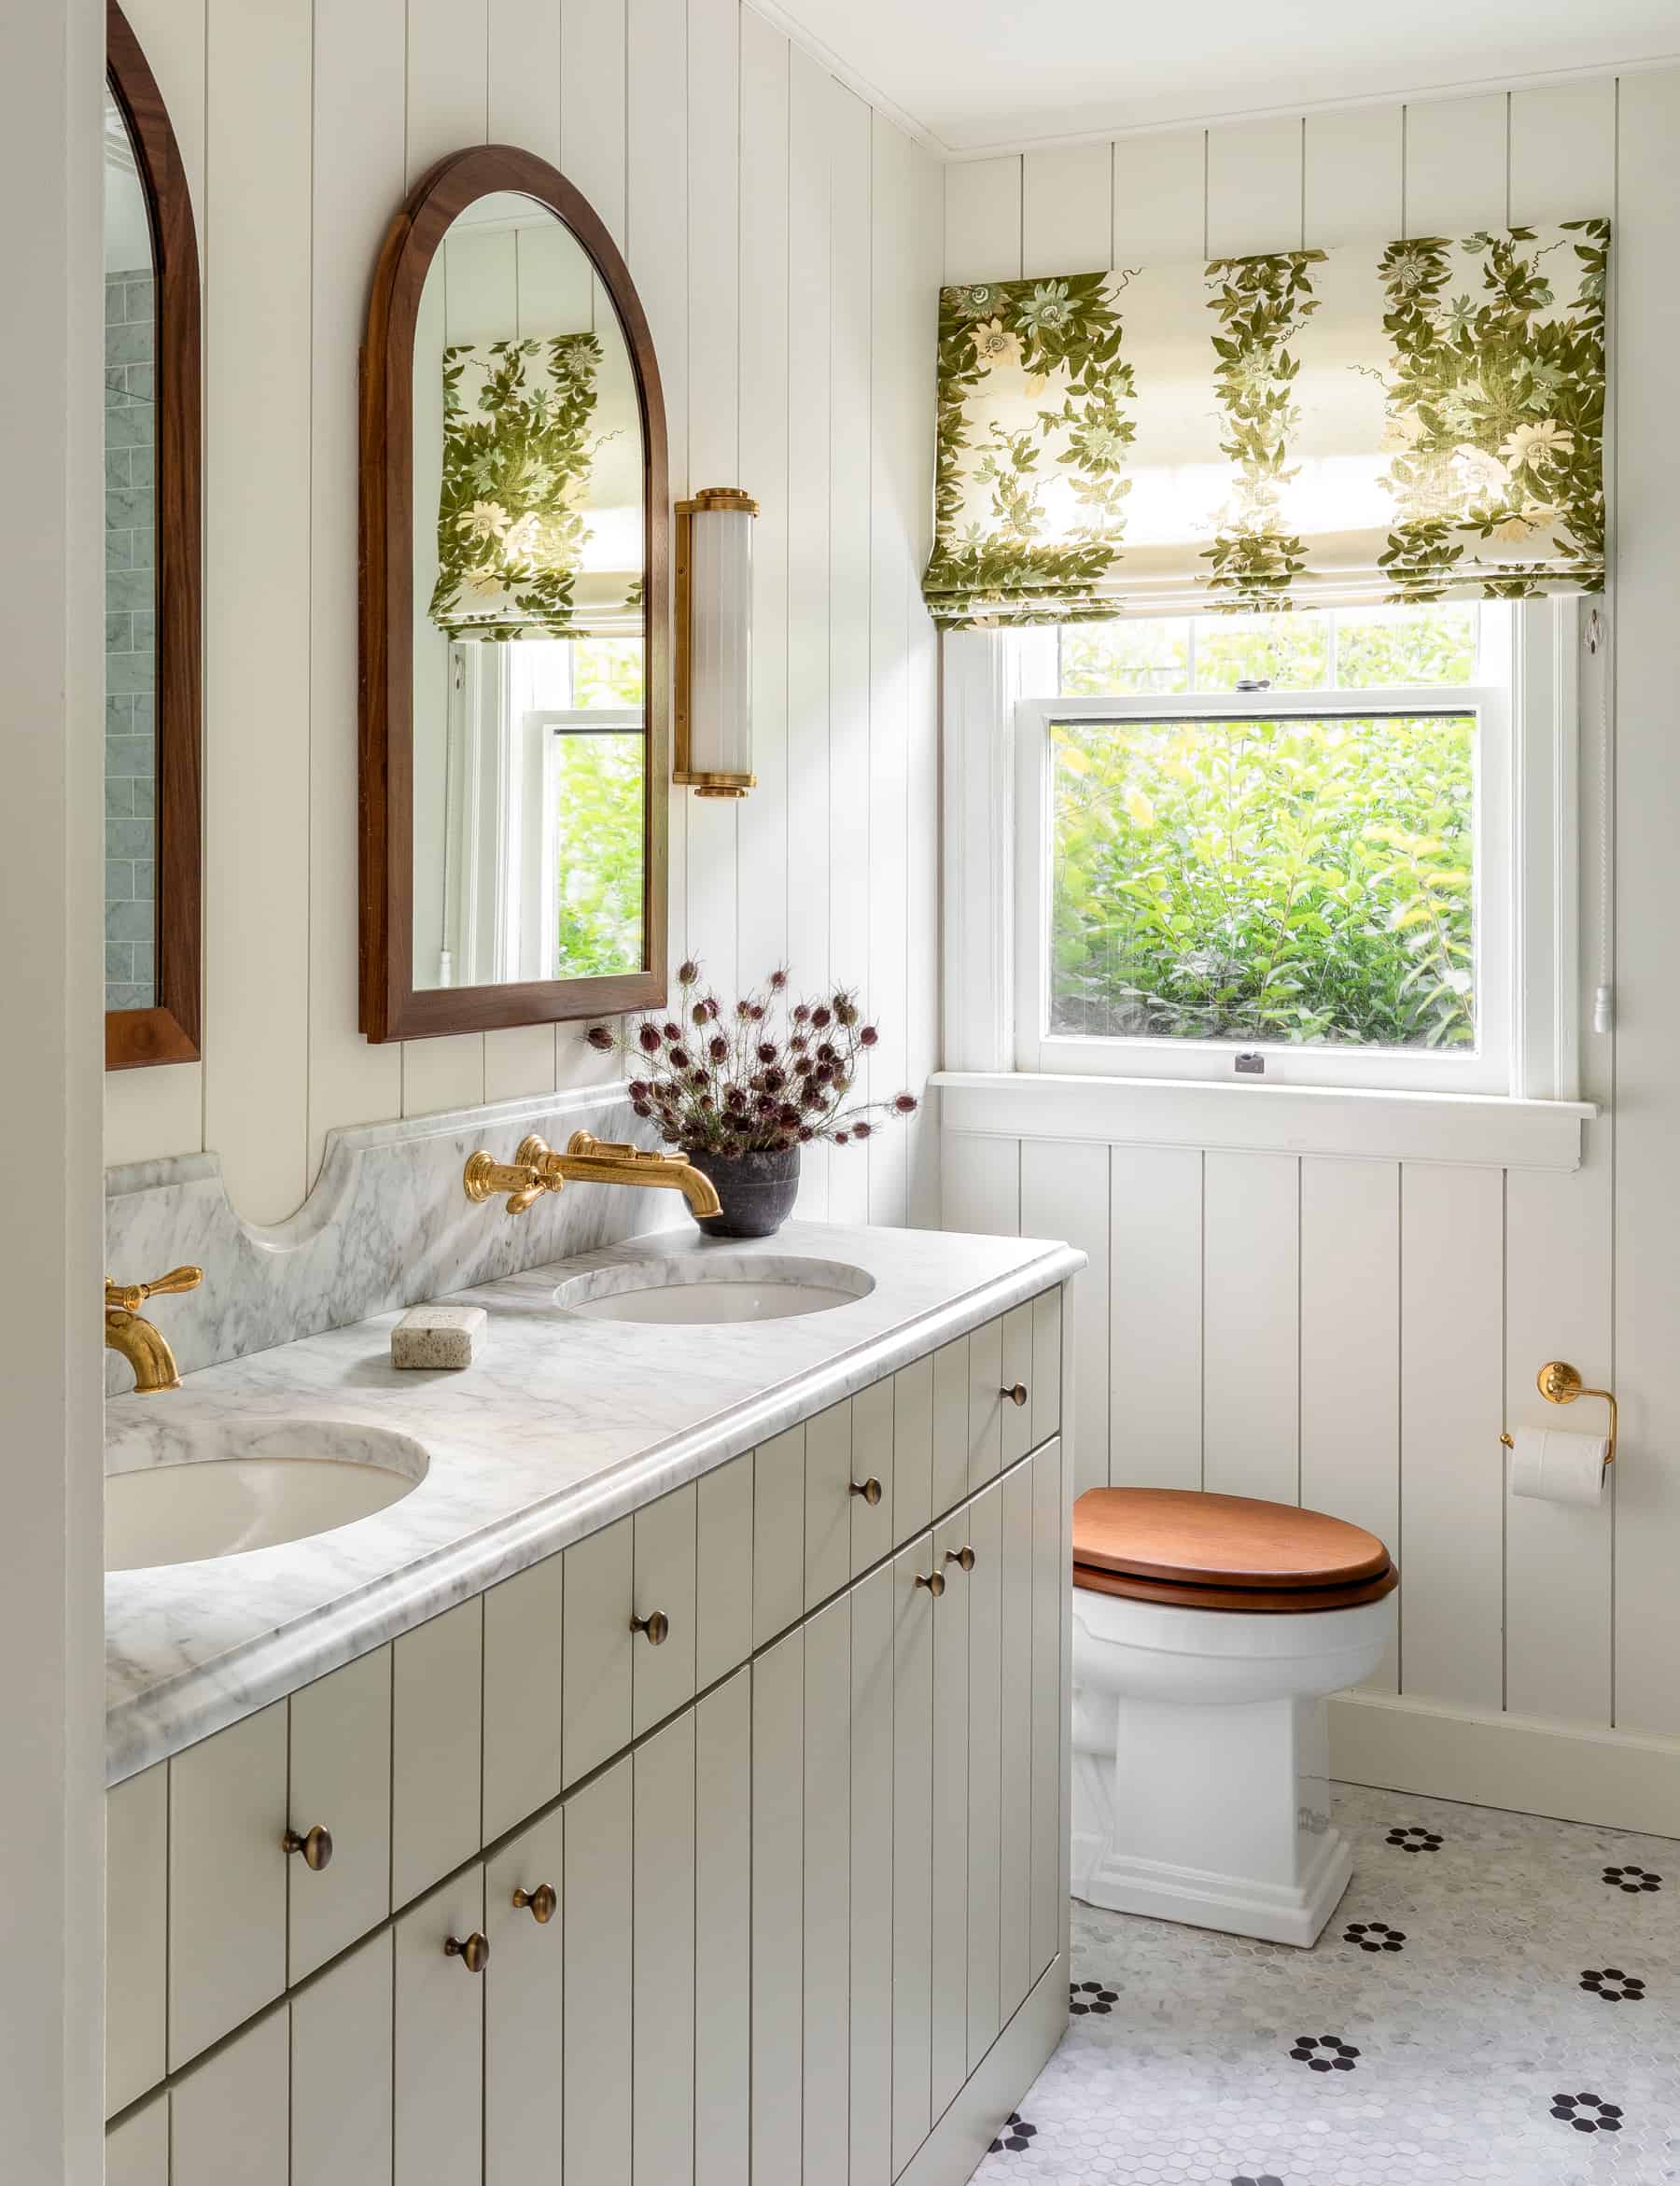
The vision is for a bright, fresh, farm bathroom. For me, this means white, wood and chrome. It means paneled walls, natural stone (no more Care Bear countertop), shaker cabinets, and cross handle faucets. Here is a moodboard of some of what’s in my mind.
This bathroom from Heidi Callier continues to inspire me. I love the edging on the countertop, the V-groove on the walls and the wood-framed arch mirrors.
The layout of the bathroom is going to stay the same, but everything is getting a major upgrade–including insulation, electrical and storage. I’m also going to finally fix that creak in the floor in front of Ellie’s sink.
I have two months between when I finish teaching this spring and Ellie finishes school, so that will be my renovation window. My mission between now and then is to have everything ready to go. So I’m lining up my trades (I want an electrician and a tiler, along with my plumber), making all my decisions and ordering all of my materials.
I’m hoping that I can make the final result as beautiful and functional as I imagine.
Do you have any bathroom reno tips to share? What makes a farmhouse bathroom for you? Do you have a project you’ve been waiting to tackle at your house? What’s the biggest project you’re doing this year?
The office makeover is a project I’ve been dreaming about for more than a year. I’ve been working for myself from home since before Ellie was born, yet I don’t have a dedicated workspace.
If I feel like sunshine and a view, I sit at the dining room table. If I’m feeling cozy and the fire is on, I sit on the living room couch. Most nights, I’m on the downstairs couch. I like the flexibility, but having an actual office would also be nice.
It took me a while to realize that I could turn Matt’s office into my office. As soon as I did, I got very excited thinking about everything this room could be.
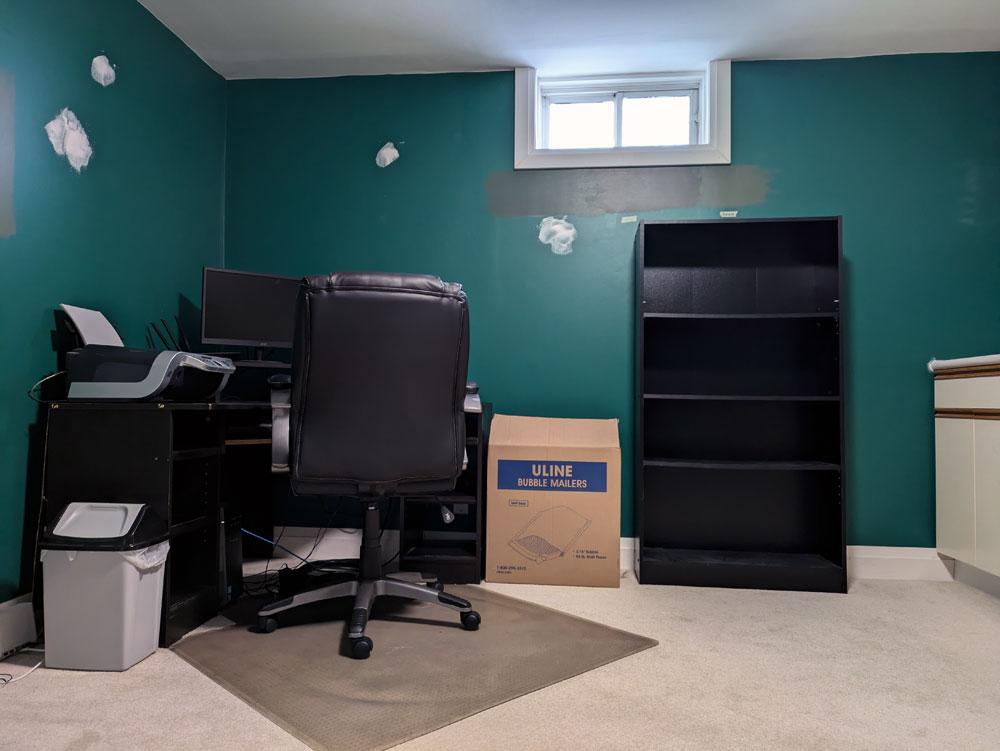
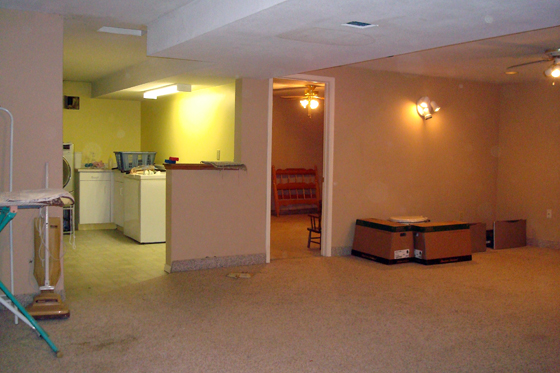
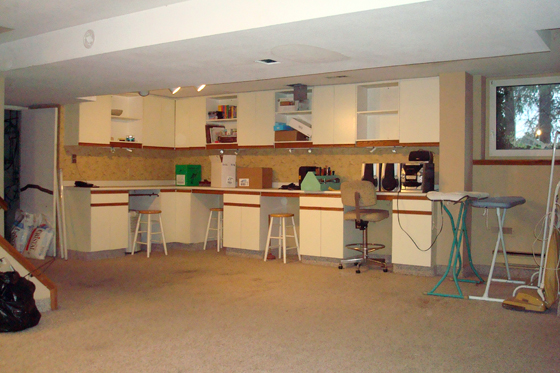
Matt’s office is a room that only appeared on the blog waaaaaay back when we first moved in and were renovating the basement. After Matt set up his space, he wasn’t keen on sharing it and it wasn’t very photogenic, so I never featured it here.
That is all about to change.
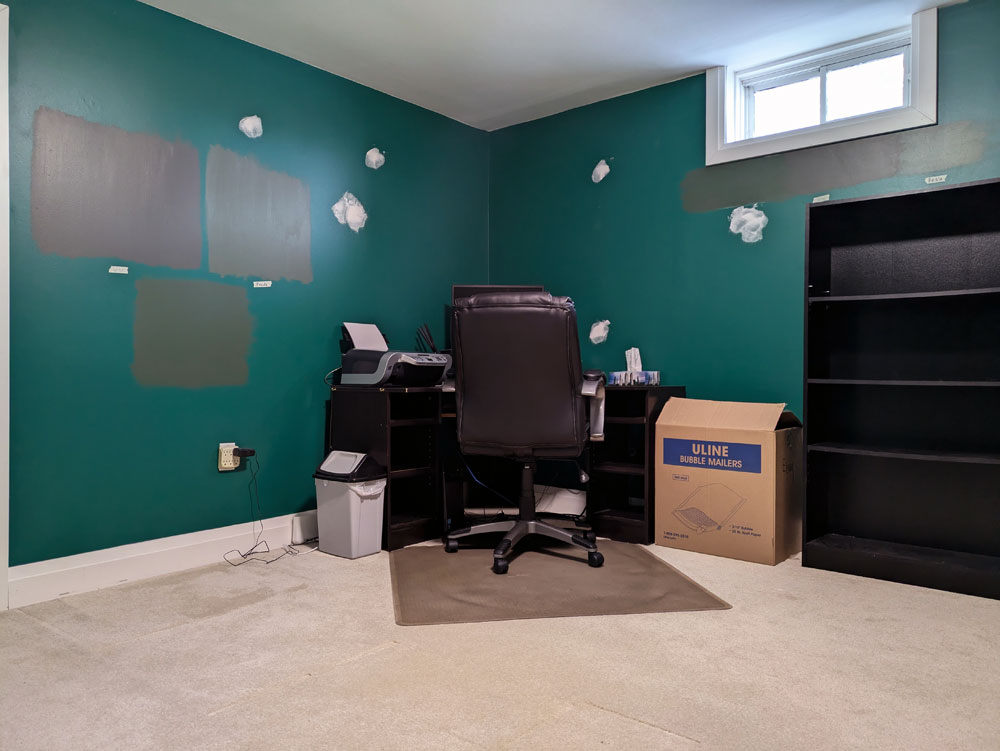
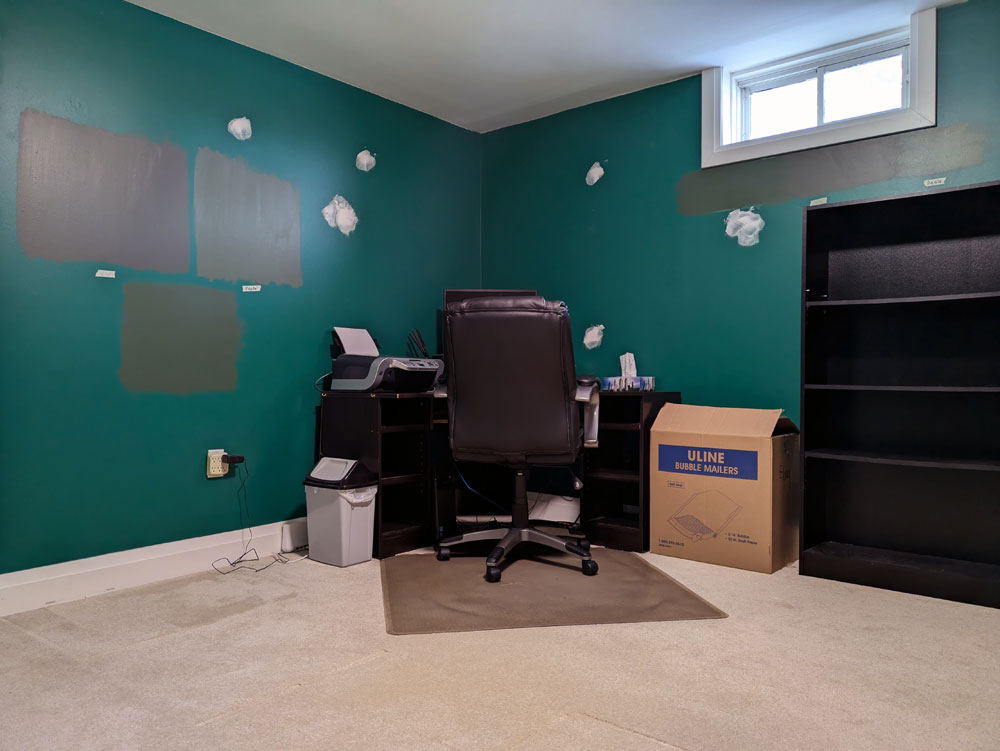
This is the before, a mostly clean slate. (In my excitement to start this project, I couldn’t resist patching nail holes and putting some paint samples on the wall.)
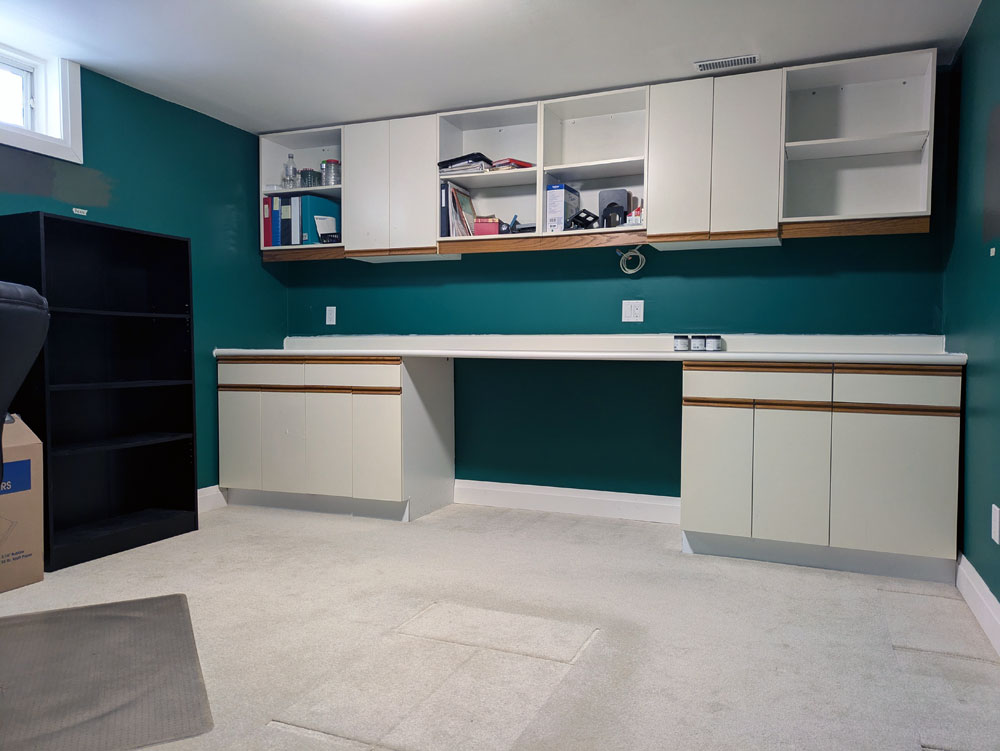
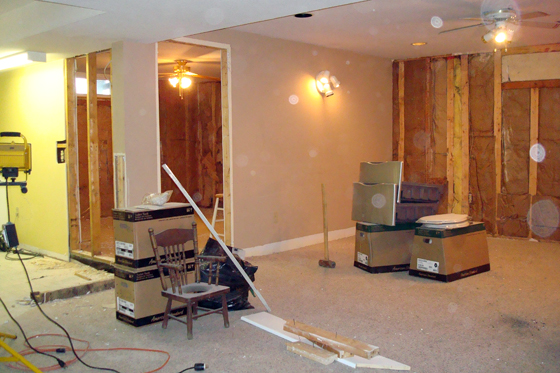
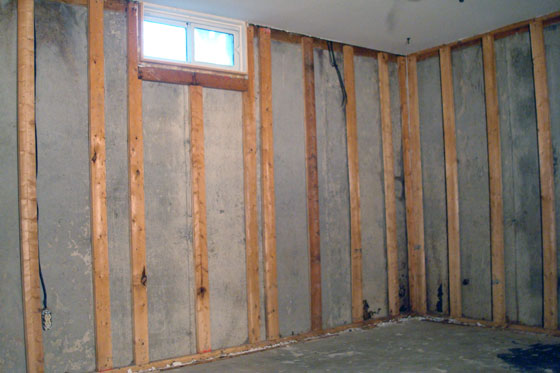
When we did the basement renovation, we reinsulated all of the exterior walls, moved the office door around the corner, put up new drywall, had new carpet laid, and installed the cabinets (which used to live in the main room of the basement).
The foundation of the room was good. But I wanted to make it work for me.
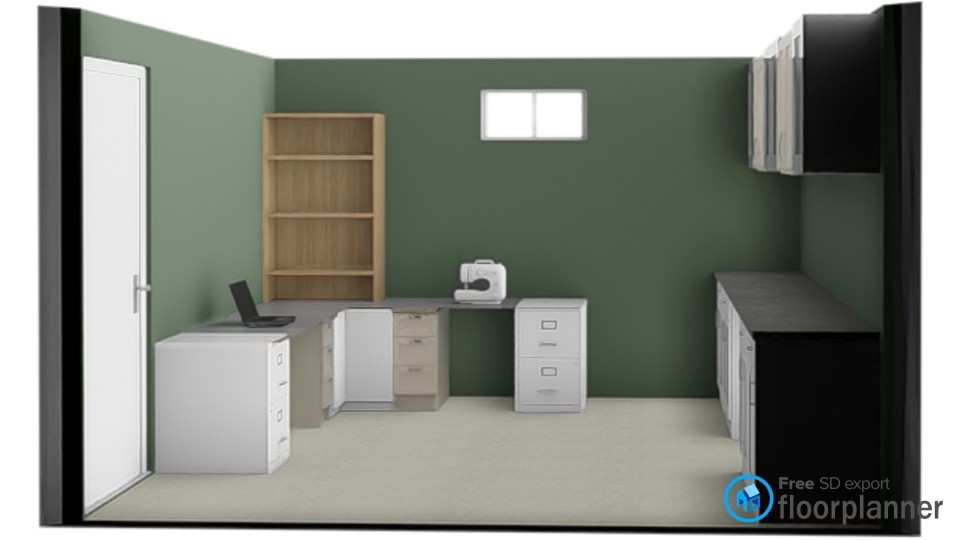
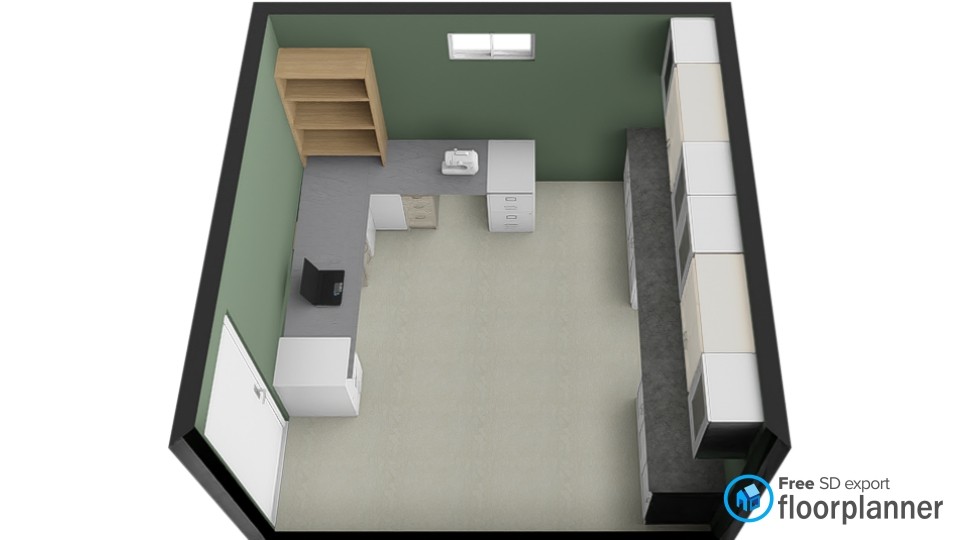
Here’s a collage of some of the things that are in my plans.
First up is the colour. I’m going to be sticking with green for the walls, but a slightly different tone.
My plan is to have a large desk with two work stations that wraps around the corner. On one side, I’ll have my computer. On the other, I’ll have the sewing machine.
The base of the desk will be two filing cabinets and two banks of drawers, all painted white. Above the desk in the corner I’ll have some open shelving (likely painted green) for storage and display.
The cabinets are staying where they are, as they are (for now). I’d love to transform these into shaker doors like I did in the laundry room and give them a coat of paint, but that’s a later plan. For now, I’m grateful to have the cabinets as they provide a lot of really useful storage for fabric, yarn, office supplies, wrapping paper and more. I am planning to add a corkboard “backsplash,” as I love a bulletin board.
Then the rest of the room is decorating. I have art and objects that are special to me, and I want to finally have a nice spot to display them.
I am very excited for this project, and work is already underway. Stay tuned for more updates.
Do you have an office at your home? What’s your must-have (or wishlist) for an office?