Robins update

Our baby robins didn’t make it.

They sadly didn’t grow much beyond the naked pink creatures I showed you in my first post.

Baby robins in a nest

I honestly didn’t know whether to write this post or not. I’d love to be able to show you pictures of cute fuzzy chicks, or awkward fledglings, or even the nest abandoned since the babies learned to fly. However, that’s not how the story goes this time around. This blog is about cataloging our life in the country–the good and the bad. In this case, there’s not a happy ending.

For the first few days after they hatched, Mama and Daddy stayed close, feeding them and sitting on them, keeping them warm. But then something changed. Mama didn’t come back to the nest one night. Maybe she got spooked or got attacked. Temperatures were still too cold for the babies, and they died.

When I first saw the babies, I thought they were the most helpless things I’ve ever seen.

Even though it was too late when I realized Mama wasn’t around, I started thinking about things like heat lamps and eye droppers. But the reality is that as much as I’m compassionate about animals, I’m also a “let nature take its course” kind of woman.

Growing up with chickens and ducks and geese–many of whom we raised from eggs and then ate, and many of whom had their own ailments and injuries over their lives–gave me a somewhat unique perspective on animals. Farm living has refined my attitude even more.

Nature is amazingly wondrous and exceedingly harsh. This is a fact of life… and death… that I’m reminded of every so often.

June project plan

June’s project might seem a bit unexpected. Weather has finally turned nice. Summer is almost here. Now is the time to be working outside.

However, this month, I’m going to turn my attention back inside to an area you haven’t seen too much of in a little while… the basement. The basement renovation was the big (all-consuming) project for Year One. That was not last summer, but the summer before. As with any renovation, there are still some finishing touches yet to be completed, even two years later.

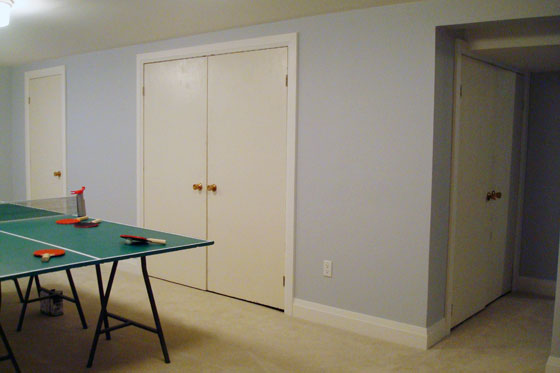
This month’s project is the basement doors. There are 10 doors in the basement. Two of them are standard colonial style. The other eight (five of which you see below) are basic slab doors. Boooooooring.

Slab doors

All of the doors need to be painted. Smudges, scratches and yellowed paint make them look pretty shabby, especially next to our nice white trim.

Smudges on white doors

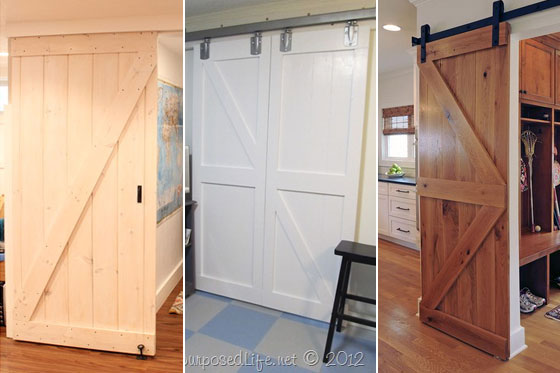
Even more than paint, the slab doors need an injection of personality. I think their personality should be a little bit country, so I’m taking inspiration from barn doors.

Barn door options

Sources: 1, 2, 3

A simple raised Z or X detail would be easy to apply, wouldn’t interfere with the hinges or knobs and would fulfill my interior design philosophy that every room needs at least one rustic element.

So the plan for this month is as follows:

  1. Figure out design for the doors – By June 6
  2. Buy material (and hopefully the store staff will cut it into strips for me) – By June 13
  3. Cut strips (if I have to) – By June 14
  4. Remove doors – June 14/15
  5. Remove hardware – June 14/15
  6. Trim the bottom of the door to the electrical panel closet (since it rubs on the carpet) – June 21/22
  7. Install strips on the doors – June 21/22
  8. Buy new ORB hinges – By June 27
  9. Paint the door jambs – By June 27
  10. Spray paint old knobs ORB – By June 29

You’ll notice that actually painting the doors and rehanging them are absent from this list. This is because my secret plan is to get the doors ready to paint, but then pass them on to Matt. He painted all of the doors in our last house, and I think it would be good to continue the tradition. Don’t you?

This probably is more of a one week project, rather than a one month. However, stretching it out will give me a chance to do some work outside still. It would be hard for me to spend the whole month of June indoors.

Have you ever dressed up basic doors? Are you on board with the barn door trend? What’s on your to-do list for June?

May progress report

Let’s see how many excuses I can come up with to explain my attitude towards working outside during most of May.

  1. Weather was cold and rainy.
  2. My Dad jetted off to England.
  3. The tractor still had the snowblower attached to it up until the middle of the month.

Despite sounding like a big whiner, I actually did accomplish a few things this month. In fact, I surprised myself by how much I was able to cross off my ambitious list of landscaping to-dos for May.

Here’s how I did.

Turnaround

  • Weed the flower garden half
  • Spread wood chips on flower garden – I nearly didn’t get to this one, but knowing I had to report back to all of you made me get my butt in gear.
  • Make a top for the bird bath – I still haven’t figured out what I’m going to do for this one. The idea that I had for the top is a little bit… well… little.

Trying to find a basin for a bird bath

  • Put the bird bath in place
  • Place the bench
  • Continue to fill in the garden with more plants

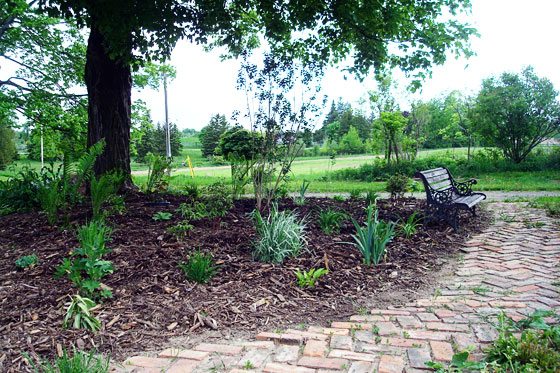
Garden with a brick path and park bench under a big tree

The turnaround is looking awesome IMHO. It’s turning out even better than I expected. Obviously the plants still need to fill out a bit (okay, a lot) more, but I think it’s going to be beautiful.

Front garden

  • Edge the garden
  • Transplant a few bushes, trees and other plants out of this bed and into some of the other gardens
  • Fill in the pit from the woodstove chimney
  • Fix the downspouts
  • Weed as I go

Trees

  • Pick up fallen branches
  • Cut branches to firewood lengths
  • Split firewood
  • Burn brush – We have three massive piles of brush, but the wood is still a little damp and isn’t that interested in catching fire.

Matt got an in-depth hands-on session with his new chainsaw when his Dad came over to help us with the clean up. This to-do was definitely a team effort. Lesson learned: The chainsaw is heavier than you think, a fact that becomes obvious after working with it all day. Second lesson learned: Your wife doesn’t care that you just learned how to use a chainsaw. She’ll still send you up an extension ladder to trim branches off the pines outside the kitchen window, all so that she can have a better view of the pond. Third lesson learned: Baxter was a big help, as usual.

Baxter supervising ice storm clean up

Grass

  • Add top soil beside the front stoop and seed
  • Overseed in front of raised bed under the dining room window
  • Rake solar trench smooth and seed

Wop-wop. Big fat nothin’ on the grass front. We did mow before it got knee-high, which is an improvement over the past two springs, so I guess that’s something.

Hoses

  • Turn on water to exterior taps
  • Install hoses at side and back of house
  • Install a proper hose bib at the driveshed, so that the hose isn’t laying on the ground. – My Dad’s going to help me with this one, but he couldn’t do very much from England.
    1. Shorten waterline
    2. Attach to waterline to wall
    3. Install a splitter so that I can someday add another hose bib at the opposite corner of the driveshed
    4. Reinstall tap on shortened waterline
    5. Install hose hanger
    6. Hook up hose

Hose coiled in the grass

My plan to focus on one area per week (or weekend) went a little off track due to weather, support crew and motivation, but I still feel like I put a good dent in this year’s landscaping plan.

Work is ongoing and will continue for a few months (years) yet.

What progress have you made outside so far? Have you learned to use any new equipment this spring? Are your four-legged friends as helpful as Baxter? How do you handle your hoses?

The epee umbrella

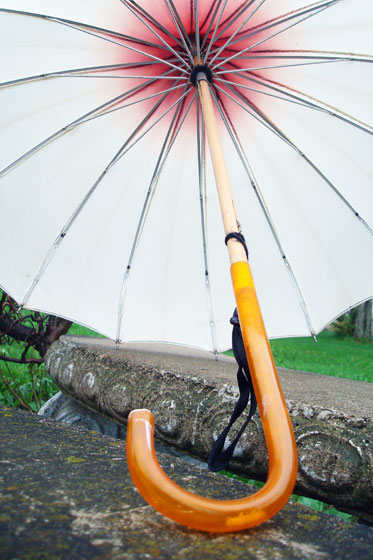
Rumour has it that one night in my grandparents’ apple orchard, there were some thieves stealing gas from the tank my Grandpa kept for the tractors. My uncle–who was a salesman and not the first person I would choose as a defender (no disrespect intended to Uncle Bob)–went out to run them off. This umbrella is what he took as his weapon.

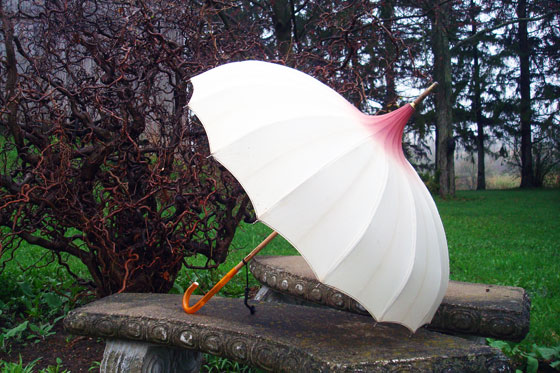
Vintage pagoda ombre umbrella

En garde!

The gas incident was well before I was born. Eventually, this umbrella made its way to my grandparents’ cottage. Every so often, it would be pulled out on rainy days so that people could make their way back and forth between cottages. When my grandmother sold the cottage, the umbrella became mine.

Vintage pagoda ombre umbrella

The April issue of Country Living magazine featured vintage umbrellas, including one that looked a lot like mine. The shape is called pagoda, and according to CL, “Asian-inspired shapes generally indicate an older piece.” Given its illustrious family history, my umbrella is obviously somewhat old. The umbrella in the magazine was made in Montreal. That Canadian lineage makes me wonder if mine might be related.

Vintage pagoda ombre umbrella

I saw another umbrella very similar to mine at an antique show on the weekend. It was even rose ombre but reversed with the pink on the bottom and white on the top. The tag said it was from Montreal too. It was priced at $80. Country Living valued their umbrella at twice that–$160. I’m not sure that mine is worth that much, but maybe it’s about the price of a tank of gas–even at today’s prices.

Do you have any family hand-me-downs with interesting pasts? Have you ever spotted any of your heirlooms in  a magazine?

Featured

Over the past month or so, I’ve been really excited to have some of my posts picked up by other bloggers and other sites.

Site logo collage

Pattern Review published my tutorial on how to match horizontal seams across an invisible zipper in their Tip Tuesday feature. The post got some really kind comments, and a few people even said they tried my technique.

Homedit included my DIY umbrella stand as one of 10 Budget-Friendly Entryway Makeovers For A Great First Impression.

My DIY wood island countertop made Shelterness’ list of 12 DIY Wooden Kitchen Countertops To Make.

You all saw the Mad Men dress that I posted a few weeks ago. Julia Bobbin included that dress as well as my yellow bridesmaid dress in her round up of outfits inspired by Joan Holloway’s wardrobe.

One Lovely Blog Award iconAnd finally, The Optimistic Househusband, AKA Nick, nominated me for One Lovely Blog Award. I’m not going to do a full post like I did last time, but I did want to share a link to Nick’s blog and thank him for the nomination.

Thanks to everyone who featured my posts. It’s neat to see the interconnectedness of the blogosphere. Thanks as well to all of you for following this little blog.

It’s tough being a puppy

Baxter has a bit of Friday fun for you today as you head into the weekend.

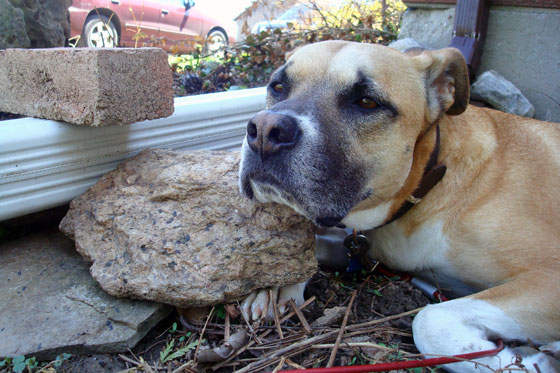
“My head… it’s so heavy. I can’t hold it up any longer… Sigh… I guess I’ll have to use this here rock as a pillow.”

Rock pillow

If a branch falls in the forest, does it make a sound?

“Yes. Yes, it did. I heard that. My worry eyebrows and ears are on full alert.”

Worried puppy

“Excuse me. My pillow is not properly positioned for optimal sunbathing.”

Napping in the sunbeam

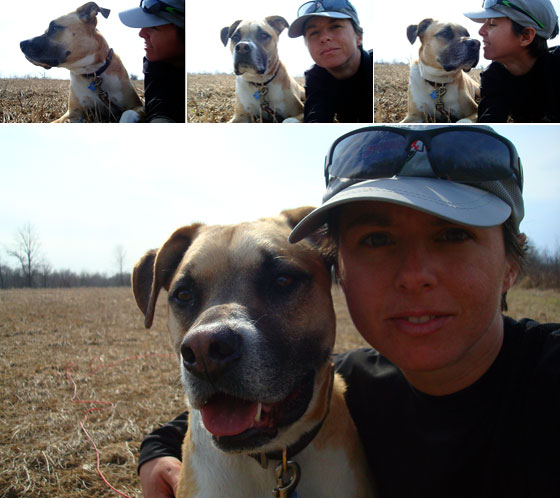
“I just want to lay here and sniff, and she keeps trying to take a picture… Oh alright. Here you go.”

My buddy and me

Life sure is tough for a puppy dog.

I hope your weekend is easier than Baxter’s hard, hard life. For my American readers, happy Memorial Day.

Blue eggs and baby birds

You want a sure sign that spring is here?

How about this?

Blue eggs in a robin nest

A robin built a nest right outside of the kitchen window on top of the clothesline post.

Robin's nest

She’s an artistic robin and decorated her nest with long streamers of hosta and hay.

Robin's nest

The only way I could get a picture of her was to shoot through the kitchen window, hence the grid of the screen.

Robin sitting on her nest

Over the weekend, I thought that something might have changed. So on Sunday, when I didn’t see her on the nest, I snuck out for a peak. The eggs were gone. In their place, we had these.

Baby robins in a nest

Amazing.

It was a little chilly over the weekend, so Mama stayed close, keeping everybody warm. Mr. Robin brought her snacks every so often. On Monday, Mama and Daddy were both on duty bringing a near constant buffet of bugs and worms to the babies.

Obviously, we’re keeping a very close eye on our new little family.

Do you have any spring babies at your house? Is there any more perfect colour than robin’s egg blue? How long does it take for baby robins to grow feathers?

Forsythia of ’14

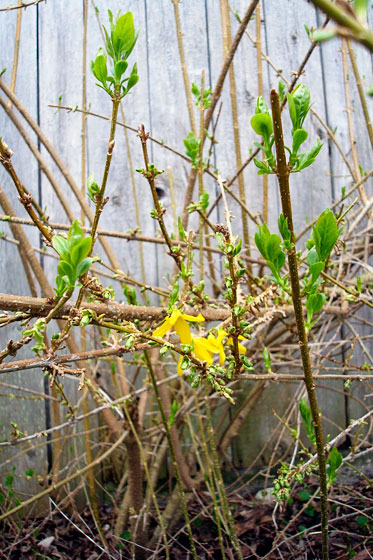
Two weeks later than last year, six weeks later than our first year, our forsythia is finally in bloom… if you can call it that.

Frost-bitten forsythia

I think the harsh winter gave our forsythia frost bite. We have just a handful of yellow blossoms on the very tip of a few branches.

Frost-bitten forsythia

Rather than going golden this year, I think our bushes are going to straight to green. Green is better than the dismal grey days we’ve had so far. I think spring is here.

Has spring arrived at your house? Have any of your plants been frost bit?

Trilliums!

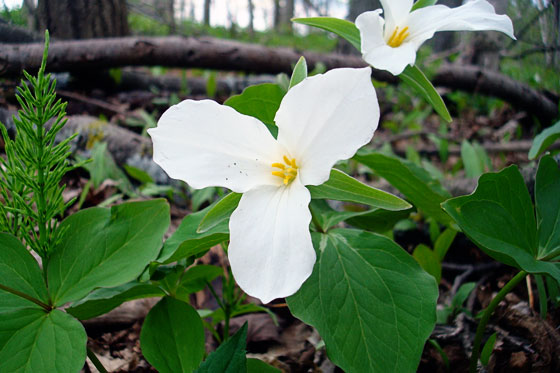
Trilliums

When we moved to the farm, I thought there must be trilliums somewhere on the property. After two springs, though, I still hadn’t seen any. Then, on Monday morning, I found them. In the small grove between the front field and the east field, alongside the creek, there are trilliums. Lots and lots of trilliums.

Trilliums

For those that don’t know, trilliums are Ontario’s official flower. There’s a common perception that you’re not allowed to pick trilliums in Ontario. But, according to Wikipedia, trilliums are only protected in conservation areas or provincial parks (and in some areas in the States). However, picking a trillium can kill the plant.

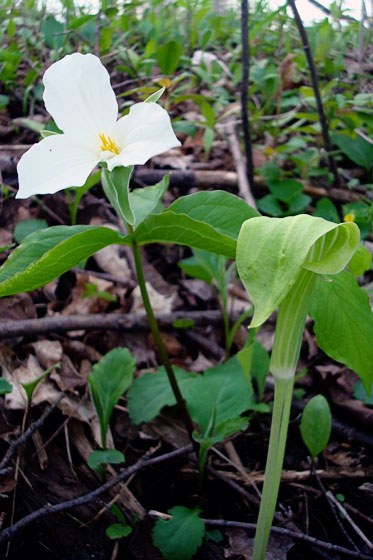
Trilliums tend to be a bit elusive. They hide away in the woods and aren’t seen very regularly, so I’m super excited that we have some on our property. I even spotted some Jack in the Pulpit, which I’ve never seen before.

Trillium and Jack in the Pulpit

Happy spring!

How to make a fabric-covered bulletin board

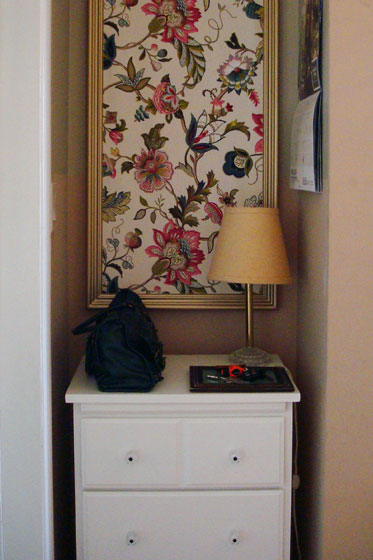
While the dresser may be the workhorse of my new office nook, the beauty queen is definitely the fabric-covered bulletin board that hangs above it.

Pretty home command centre

Since I was working with such specific measurements in this tiny space, I decided that my best option was to make my own bulletin board.

Home Depot sells prefab cork panels that are 48 inches by 24 inches, very close to the dimensions I needed, so I started with that. Then I found a piece of decorative molding to build my frame. I considered some of the very fancy crown moldings, but a lot of those are very wide. Given that I only had about 20 inches total to work with, I didn’t want to take up too much space just with the frame. I wanted as much pin-up space as possible.

For the back of the frame, I bought some 5/8 inch by 2 inch strips. After ripping them in half, they were about half an inch narrower than my molding. By attaching them to the back of the molding with some glue and little nails, I was able to make a recessed area for the cork to sit.

How to make a bulletin board

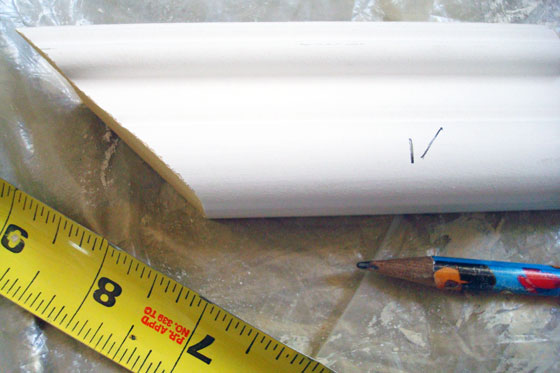
I used my mitre saw to cut each side of the frame to the right length at a perfect forty-five degree angle. Tip: When you’re cutting pieces on an angle, mark your desired length as you usually would at 90 degrees. Add a tick mark to the left or right to remind yourself which way you’ll need to angle your cut your.

Cutting decorative molding on an angle

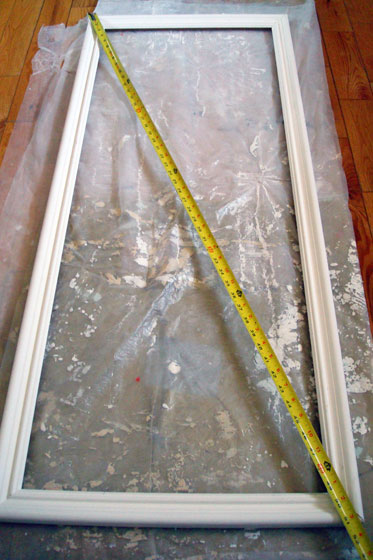
Each corner got a few dabs of glue, and then I nailed them together with my Dad’s nail gun. Tip: To check that your frame is square, measure diagonally from corner to corner. The dimensions should be the same between each diagonal pair. Twist your frame a bit to the left or right until your measurements match exactly.

Checking for square

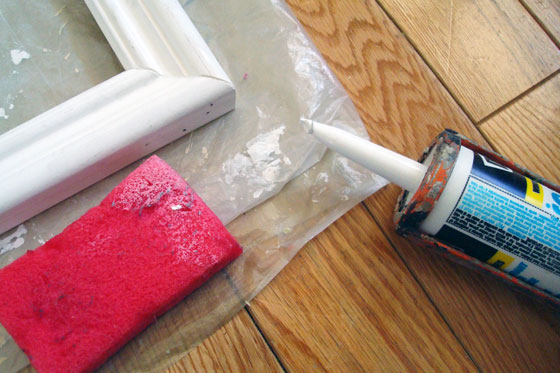
Once my frame was perfectly square, I caulked all of the nail holes and corner joints. Tip: Keep a damp sponge on hand as you’re caulking. Wetting your finger before smoothing out the caulk gives a nice even finish. Plus the sponge gives you a spot to wipe any excess caulk off your hands before you get it all over yourself. Not that I’m speaking from past experience, or anything. Oh, and make sure you choose paintable caulk.

Wet your finger before smoothing out caulking

I let everything dry and then it was time for paint. I knew I wanted a bit of glitz, so I decided to go with gold. A few light coats of spray paint did the job.

With the frame done, I moved on to the cork. The prefab piece was close, but just a bit too wide. It cut easily with a knife, and then a quick rub with fine sandpaper smoothed any ragged edges. Tip: Cut the the cork about 1/8 inch to 1/4 inch smaller than the frame. A little bit too loose is better than too tight. Plus any gap will be hidden by the recessed channel behind the frame.

Cutting cork with a knife

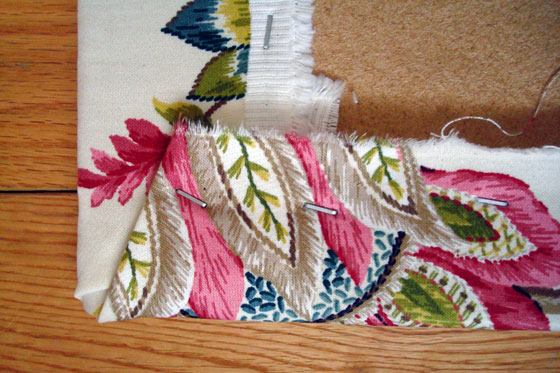
Covering the cork in fabric was no more complicated than wrapping a present. I cut the fabric about 6 to 7 inches bigger than the cork panel, so that I had plenty to wrap around the back. I pulled it taunt and stapled it in place. The corners got a bit of extra pleating and a few extra staples.

Staple the corners on the backside of the cork

I slipped the cork into the frame. To hold it in place, I tacked staples part way into the frame at four different points around the back side of the frame. I can easily pull these out if I ever want to change the fabric.

Use staples to hold the bulletin board in the frame

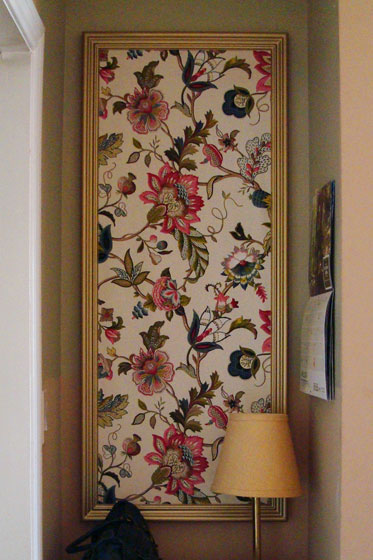
I flipped it over and was dazzled. Pretty! Pink! Flowers! Colour! Gold!

Fabric covered bulletin board

I was so dazzled that I didn’t spend too much time coming up with a technical solution to hang it on the wall. I just wanted it up. My solution was two finishing nails hammered into the drywall on the same level. Their small heads fit easily between the edge of the frame and the cork, and the board is light enough that that’s all the support it needs.

Anchoring securely might be more important if you have small children or other things you don’t want bulletin boards falling on, although we’ve had no issue with the board shifting or falling since I installed it.

Fabric covered bulletin boards are a pretty easy and popular DIY. Have you ever made one? How do you bring beauty to functional pieces like bulletin boards? Are you a floral sparkle fan?