How to recover a chair seat

As part of preparing for the family dinner that we hosted on Good Friday, I had to put new cushions on our dining room chairs.

We had our dining room set refinished just before we moved into the farm, and since moving in the chairs have been naked.

Naked dining room chair

Yikes, naked chair!

I know it’s not a hard core renovation, but it is DIY, so I’m posting a brief how-to. I should be clear though that this was my first true upholstery project, and I am sure I made a few mistakes along the way. There are lots of great tutorials online by people much more skilled than me. However, here’s the method that I used for our dining room chairs.

1) Remove the seat from the frame. In my case, this meant unscrewing the seat from four corner braces that were underneath.
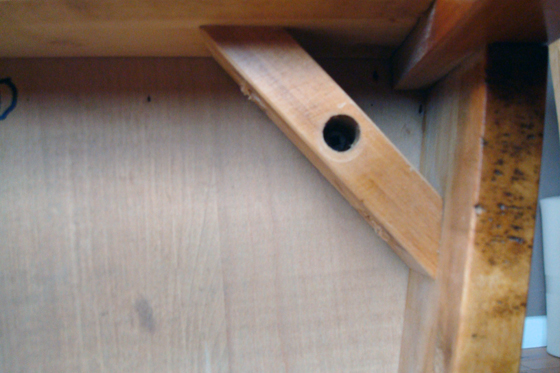
Bracket

Brace under the seat that holds the seat to the chair frame.

2) Cut your foam. My foam was 1 1/2 inches thick. I cut the foam about a 1/2 inch bigger all the way around than the seat (no measuring, I just eyeballed it). If you’re fancy or a professional, you’ll probably want to use a foam saw for this step, or even an electric knife. I didn’t have either of those things. I tried a utility knife but ended up having the best luck with my kitchen scissors. The edge wasn’t perfect, but it was smooth enough for me.
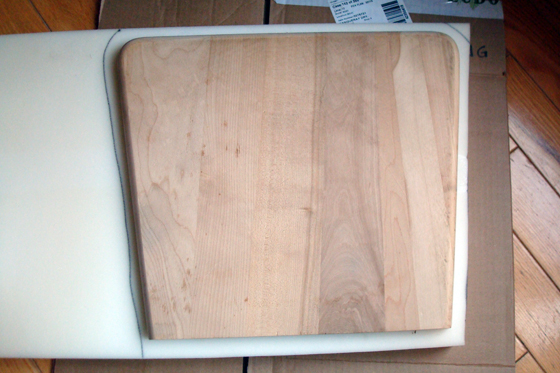
Cutting the foam

I allowed about a 1/2″ border all the way around.

3) Using the tips in this video, I tacked the foam to the top of the seat. I stapled about every 3 inches around the three outside edges. Again, if you’re fancy or a professional, you will likely use a pneumatic staple gun for this. I am neither of those things, so I used my manual staple gun that’s a hand-me-down from my father-in-law (pictured in the upper right below). It takes a bit more muscle, but you can do this project without fancy (or professional) tools.

Foam tacked in place

Foam tacked in place

4) The next step is batting. Cut a square of batting that’s about 8 inches bigger all the way around than your seat. Lay the foam covered seat face down on the batting, fold the batting around your seat and staple it on the bottom. Make sure to pull the batting taunt. This is the moment to make a nice smooth surface for your fabric. Start on the straight edges in the middle and work your way out to the edges. Do the corners last. For the corners, I didn’t have a special technique. Usually, I just tried to smooth and squish the batting into position and then I stapled the heck out of it. Once you’ve stapled all the way around, trim off the excess batting.
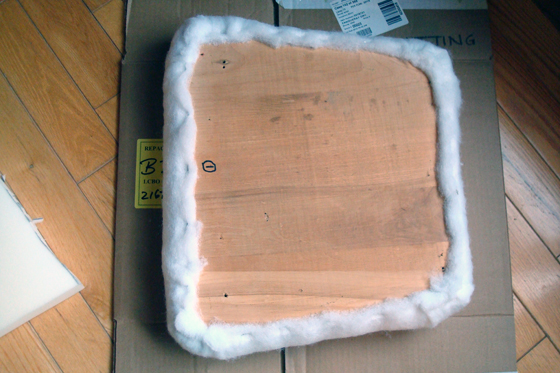
Batting

Bottom of the chair with the batting stapled in place

5) Flip over your seat and admire the lovely cloud that is now your cushion. At this point, you’re ready for fabric.
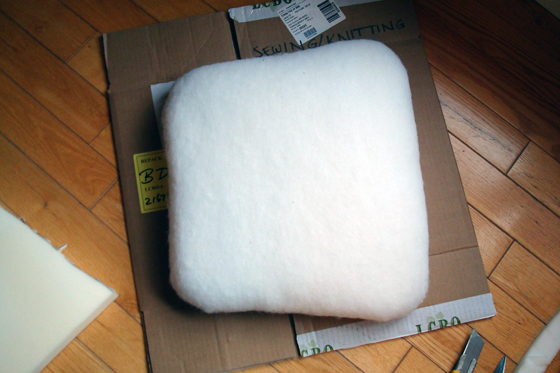
Chair seat ready for fabric

Chair seat ready for fabric

6) The process for installing your fabric is the same as the batting. Make sure to allow yourself lots of extra fabric all the way around your cushion, start in the centre of the front edge and staple in place. Pull your fabric taunt as you go and make sure it’s square on your cushion–especially important if you’re using a plaid or striped fabric. I probably stapled every inch or so. For the most part, I used 5/16″ staples, but I switched to longer staples for the corners where I had to staple through a lot of batting and pleats of fabric. The corners are the spots where you’ll have to spend a bit of time figuring out exactly how you want your cushion to look. For me, because I had rounded corners at the front, the best solution seemed to be a double pleat. It took some time to get my fabric to lay exactly the way I wanted it. And then it took some more time to make sure the other corners all looked roughly the same as my first pleat.

Pleats on the front corner

Pleats on the front corner

At the back I did a simple single pleat that’s pretty much hidden by the chair frame.

Back corner pleat

Pleat on the back corner (ignore the wrinkle)

7) Once your cushion is complete, the next step is to reattach the seat to the frame. In my case, this meant rescrewing the seat to the corner braces. I ended up having to get longer screws for this because, with the batting and fabric, the old screws were too short.

Finished chair

A finished chair

As I said at the beginning, this is my first upholstery project (beyond sewing toss cushions for the couch), and my verdict is that this is a very easy DIY. You don’t need any sewing expertise, and you need very minimal equipment. My chairs are not perfect by any means, but I still think they look great, and I’m really pleased with the fabric I chose.

I picked a linen blend that looks very natural. It has a slightly rough texture that I think is appropriate for a farm setting.

Close up of the new fabric

Close up of the new fabric

We’ve had this dining set for five years (I’ll save the story of how it came to be ours for another post), and during all that time the cushions have been torn, mis-matched and not at all cushy. It’s so nice to walk through the dining room and see the chairs finally finished.

Dining room set with finished chairs

Dining room set with finished chairs

For a more comprehensive (and professional) tutorial, I recommend you check out this video which I mentioned in step 3. I used this as a reference when I was beginning my project. Jenny on Little Green Notebook also tackles a lot of upholstery projects and posts great step-by-step tutorials, including this one for chairs that are much more complicated than mine.

Demo done

Our Friday night looked something like this.

Matt declares victory over a pile of drywall and insulation.

Matt declares victory over a pile of drywall and insulation.

The upside of schlepping 28 garbage bags of insulation up from the basement and out to the drive shed at 11:30 on a Friday night is that you don’t have to do it on Saturday. That means you have time to pull every nail, staple and screw out of the studs, rip up all of the carpet, load everything in to the truck and trailer and make it to the dump before it closes–with a half hour to spare.

Demo in the basement is pretty much done now. The next items on our to-do list include fixing up the electrical.

Does this look right to anyone? I think we may need professional help.

Does this look right to anyone? I think we may need professional help.

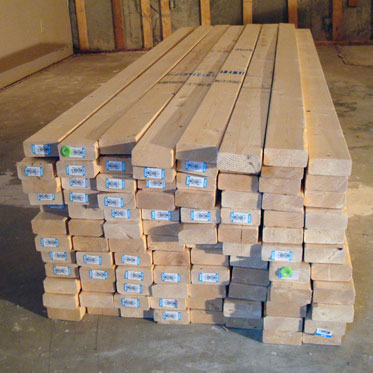
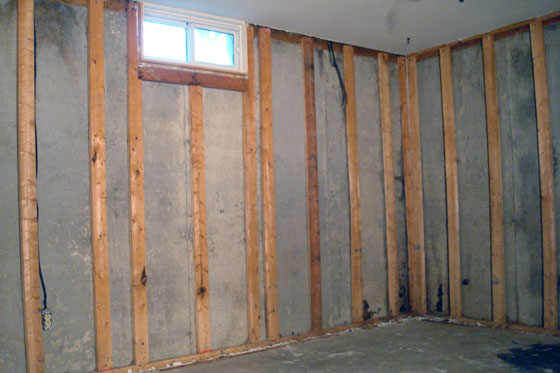
And beefing up the existing studs, which have been laid flat, leaving us only 1 1/2″ for insulation–not enough.

New lumber to fur out our existing studs.

New lumber to fur out our existing studs.

Our formerly finished basement is now very much unfinished, but I’m actually really happy to see the clean slate. And I feel like we’re approaching the point where we finally start to put it all back together.

Matt's office

Hello clean slate (also known as Matt's office)

What did you do on your weekend? Productivity is satisfying, but I do hope someone out there got to sit and relax a bit.

Our first deer

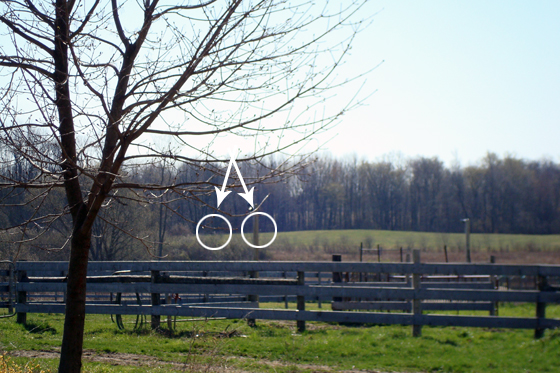
Deer in the back field

Deer in the back field. Can you see them? I promise they are actually there.

One of the nice things about a holiday weekend is that you’re around to see things you wouldn’t normally see.

Last Friday morning, eagle eyes Matt spotted two deer in the back field. We walked back to get a closer look and we were actually able to get near enough to see it was a small doe and yearling.

We’ve been waiting to see deer on the property. Up to now, all we’ve seen is tracks.

I didn’t have the camera with me, so I wasn’t able to get a picture of them.

However, a trio of deer showed up in the same field on Saturday morning. Unfortunately, this group was a lot more skittish and as soon as we started to walk towards the field they took off. The photo above shows their white tails as they bounded away. If you squint really hard at the circled areas and use your imagination, you might be able to envision them there.

We’ll keep an eye out this weekend and try to get actual photo proof that deer pass through our property. What’s on your weekend wish list?

Wishing everyone a great one.
Basement plans

So I realized I talked a lot about what we have to do to the basement, but not a lot about what it will be.
The main words to describe this space are cozy, comfy and casual.
Sarah Richardson Sarah's House Season 1 basement

Not our basement. Inspiration picture from Sarah’s House Season 1

We’re starting with a pretty good space. We have great ceiling height, large rooms and really good bones. You’ve already seen a sneak peak of the room I’ve dubbed the long room and heard about some of our early demo work. Here are the other rooms that make up our basement.

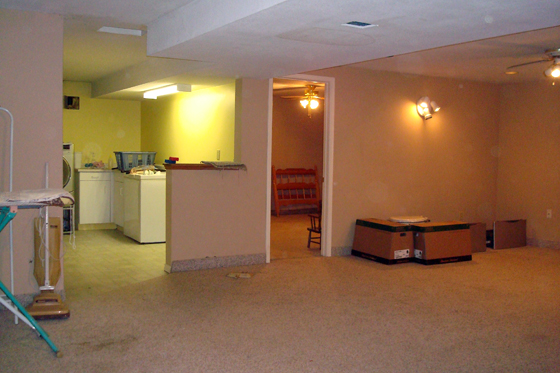
The main room before

The main room. Picture a large, comfy sectional couch where the wood stove is and a big TV on the wall opposite the staircase.

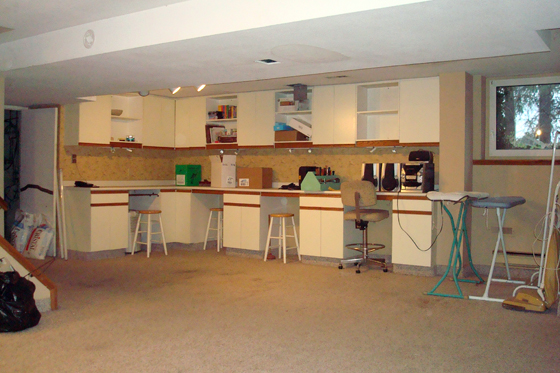
The basement before

The other side of the main room in the basement. Not sure what the deal is with all of the cabinetry and the workstations. This has all been removed, but some of the cabinets will be reused in Matt’s office. Picture a ping pong table and games table in this space.

Basement bathroom before

The basement bathroom, soon to be known as Matt’s bathroom. This project will get its own post.

Basement before

Another view of the basement before. The laundry room is to the left and Matt’s soon-to-be office is through the doorway in the centre. The half wall has already been demolished and a new doorway to the office has been cut behind it.

The basement also includes our cold cellar and utility room, but we’re focusing our renovation on the actual living space.

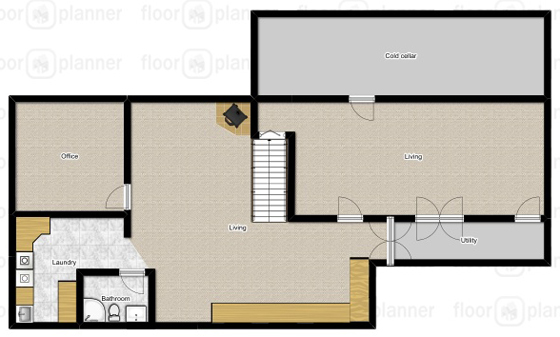
Here’s a floor plan showing how the spaces fit together.

Basement floor plan before

Basement floor plan before (Image courtesy of floorplanner.com)

And here’s the plan showing the changes I’d like to make.

Basement floor plan after

Basement floor plan after. Just subtle changes (except for the aforementioned bathroom). Just moving some things around and dialing up the cozy factor. (Image courtesy of floorplanner.com)

In the end, the main spaces in the basement will be used for TV watching, games and hanging out.

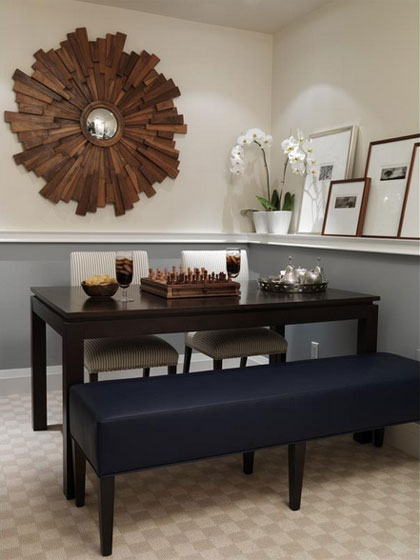
Sarah Richardson is known for putting a full size table in her family rooms as a spot for games, work, crafts or dining.

I think that’s a great idea and we’ve got the space for one, so that’s on the list too.

Sarah Richardson Sarah's House Season 1 basement

Inspiration photo from Sarah’s House Season 1.

I’ve already made some fun board game-inspired artwork to go on the walls.

We found a ping pong table top in the barn, so we’ll be making a base for it and bringing it into the basement. There’s a dartboard in the office that we’ll be hanging up somewhere. We’re also storing my brother’s pool table for him and I’ve told him not to be surprised if it ends up in the long room while it’s here.

The basement was Matt’s main priority when we were house-hunting, so I’m excited to make it a nice space that’s special for him.

For more of our inspiration images, visit my Basement board on Pinterest.

And feel free to add your input in the comments. What makes up your perfect basement? Are you a rec room fan or a home theatre enthusiast?

This

Sunday morning, this arrived at the farm.

Woodsplitter

And with it came these.

Chainsaws

Soon, there was lots of this.

Matt and his dad cutting wood

And a whole bunch of this.

Me splitting wood

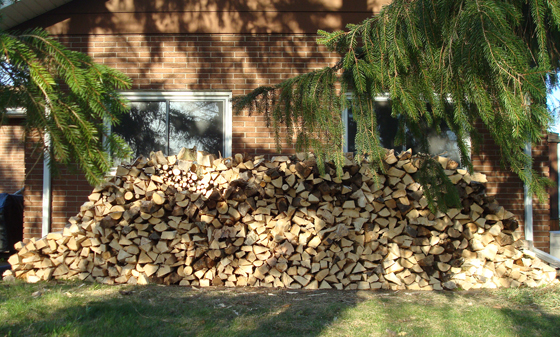
By Monday evening (yes, that means this exercise in lumberjacking went on for a full two days), we had this.

Our new wood pile

Hello, crackling fires on cold winter nights

A huge thanks to Matt’s Dad for all of his work, time, equipment and expertise. He took down the tree on our first weekend and then came back to help us finish the job–and do battle with two huge stumps. End result is three rows of wood, each about 16 feet long, 5 feet high, and all of it cut, split and stacked.

I love my father-in-law’s wood splitter. You might say we cheated and didn’t do it the way a real farmer would. I say it’s magic. The best invention ever.

Scenes from Good Friday

Forsythia in my grandmother's vase

Forsythia in my grandmother's vase

Table set ready for guests

Table set ready for guests

Mom's lemon meringue pies

Mom's lemon meringue pies

A golden moon rising over the fields

A golden moon rising over the fields

Family gathered around the table

Family gathered around the table

We have a tradition in my Mom’s family of getting together every Good Friday. My grandmother hosted every year, and when she died, Matt and I took over.

It was very special to host everyone at the farm this year.

Basement reno

When moving into a new house, the first reno project for many people might be the kitchen or the bathroom, something in the main living space. But not for us. Nope, we’re going underground and doing the basement.

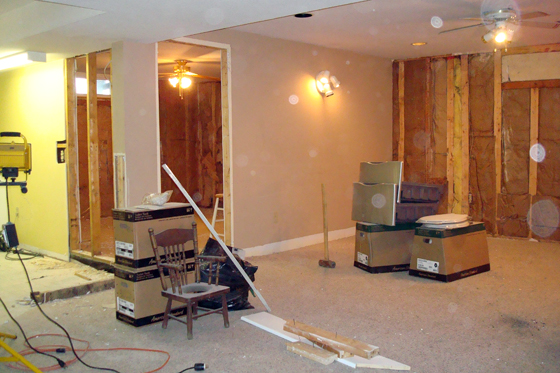
Basement demo in progress

Basement demo in progress

We knew from the first time we saw the basement that we were going to rip out the bathroom entirely right away. Very quickly on the first weekend we realized we were also going to rip out the carpet. Then, when Matt started taking down the paneling in the long room, we realized we needed to upgrade the insulation in all of the exterior walls.

This is when scope creep began to happen. Scope creep happens when you say to each other, “Since we’re doing A and B, we might as well do C, D, E, F and G.”

So, here is the to-do list for the basement reno:

  1. Redo the bathroom (this is a big project that will get its own post)
  2. Replace all the carpet
  3. Remove the wood stove
  4. Relocate the built-in cabinetry
  5. Brick up one window
  6. Redo all the insulation and drywall on the exterior walls
  7. Remove barn board paneling
  8. Relocate office doorway
  9. Deal with electrical (remove baseboard heaters, fix lighting issues)

So yeah, this isn’t just a slap some paint on the walls project. Oh well, we just came from a basement reno at our last house. We can do it all over again. It’ll just take a little more time and energy than we’d initially planned on.

Hopefully the scope of this project doesn’t creep any further!

We’ve already made pretty good progress. Most of the exterior walls are opened up, the wood stove is out, the new office doorway has been cut and the cabinetry is down.

Our weekend involved things like discovering peg board, floor to ceiling, wall to wall installed behind the drywall on every single wall of Matt’s new office. Just FYI, peg board is not easy to remove. Drywall, you can usually pop that right off. Peg board, not so much. I now officially hate peg board and will never ever be using it anywhere.

We also discovered that our wood stove is even heavier than our piano. Matt and I were able to get it off of its tile platform together, but we couldn’t move it very far just the two of us, so we decided to save it until my Dad was there to help us (you’re welcome, Dad!). Turns out, the three of us couldn’t move it very far either.

We managed to heave it onto a dolly, which allowed us to wheel it to the bottom of the basement stairs. Then we set up planks on the stairs and tried to wheel the dolly up our makeshift ramp. We made it about 6 inches.

Plan B involved a very long, very heavy rope that we discovered coiled up outside the drive shed. The rope went around the dolly and the wood stove about 6 times. Some creative knots were tied. Then the rope went up the stairs, out the front door and was tied to the trailer hitch on my Dad’s truck (can you guess where this is going?).

I have no photos of any of this, because, as I’m sure you can understand, our hands were a little full.

With me driving, Matt directing me from the top of the stairs and Dad guiding the dolly from the bottom, the extrication began. Eventually, even the truck gave up as the back wheels started spinning while the wood stove was still about 3 feet from the top of the stairs. The rope was creaking, the planks were sliding and we were still so close–yet so far!–from victory.

But by that point, we were not going to surrender to our iron adversary, so with Matt and me pulling and my Dad pushing we managed to heave the wood stove up the final few feet. Dad’s comment was that he had no choice but to get it up since he was on the bottom and the wood stove was going to go through him if gravity prevailed. When it was finally on level ground, the three of us just slumped against the floor, the wall, the stairs, wherever we were, chests heaving, hands still gripping the stove, a little bit stunned that we actually managed to get this beast out of the basement.

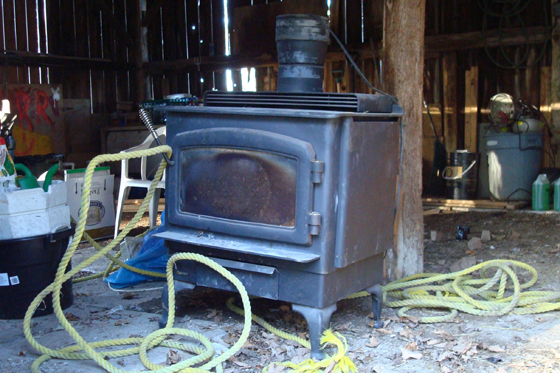
Wood stove

Wood stove, in its new temporary quarters in the drive shed.

So, I now have a wood stove for sale. You want it, you come and get it. I will not be helping you load it.

Buying a farm – House wish list

You already know what we were looking for when it came to the property. Now for the house.

Growing up in a custom built home and with a Dad that worked construction (and working construction so much myself), I always planned to build my own house. So initially, our search was just for the property. I wanted vacant land, a blank slate, something that I could make completely my own.

Unfortunately, on the type of property we were looking for, a blank slate meant we’d have a lot of extra costs: septic, well, hydro, driveway. Never mind the plans, permits and actual construction costs.

So, the criteria evolved. We decided we wanted a house with “potential.” I won’t go as far as saying we wanted a fixer-upper, because for me “fixer-upper” means major problems. I wanted something that I could put work into and make it into the dream house I’d always envisaged. Matt was just hoping we ended up with something we could actually live in, because there were a few along the way that were a little iffy.

So here’s the house wish list:

  1. Potential
  2. Traditional farmhouse look
  3. Useable basement (Matt’s biggest priority)
  4. Wood burning fireplace or the potential to have one
  5. At least 2,000 square feet
  6. Generous-sized rooms
  7. 3 bedrooms
  8. 2 bathrooms
  9. No pool

And here’s what we ended up choosing:

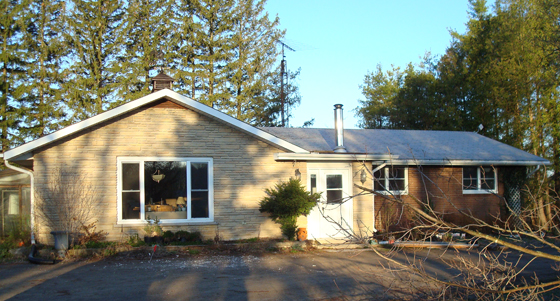
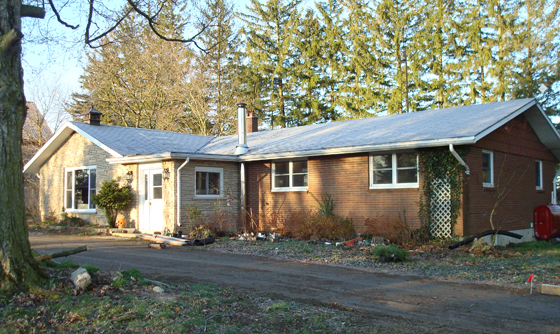
The house

Our new farmhouse.

It soon became clear that a few of our criteria were at odds. Old farmhouses for the most part don’t come with useable basements or generous-sized rooms. I eventually realized I wanted the old fashioned farmhouse exterior with a new, built for the way people live today interior.

So when we found a 30-40 year old bungalow with many of the elements we were looking for on the perfect property, we decided it was the one.

The house is just a smidge under 2,000 square feet. It has three bedrooms and two full baths, lots of closets and a huge useable basement.

On the potential front, this might be a bit more of a fixer-upper than we hoped for (to-do list includes new heating/cooling system, new roof, adding insulation, upgrades to the well and water system and dealing with some weird electrical before we get to the “fun” stuff), but we still think we made a good choice.

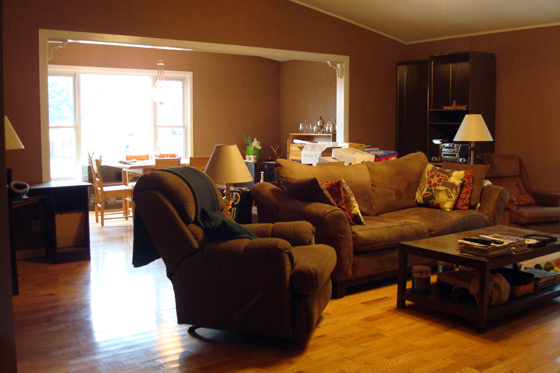
Living room

A great, large, bright living room open to the kitchen with a vaulted ceiling and plenty of room for lots of comfy furniture.

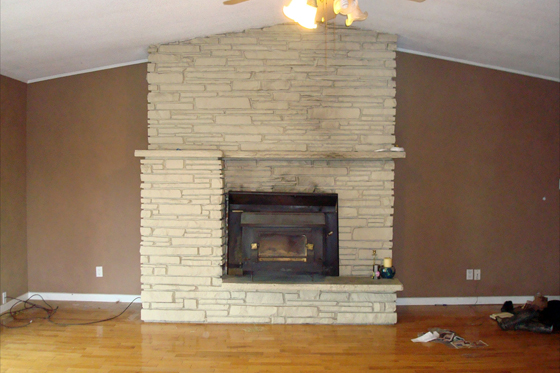
Living room fireplace

A stone-faced wood burning fireplace.

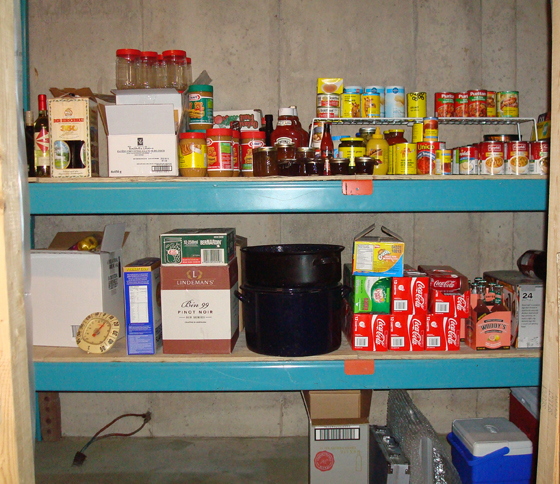
Cold cellar

A cold cellar (not a necessity, but I grew up with one of these, and they're kind of hard to add-on once a house is finished. I'm glad I have one of my own now). And yes, Matt shops with the apocalypse in mind.

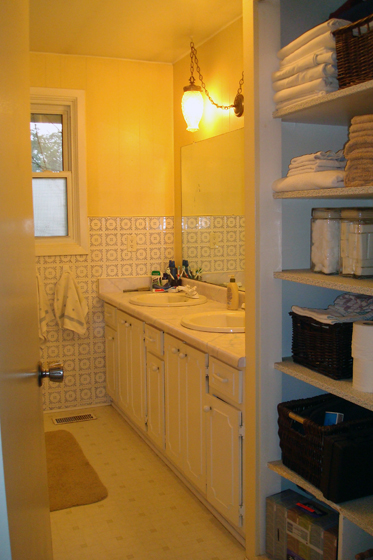
Main bathroom

A huge main bathroom with double sinks, a huge vanity and tons of storage. (The cracked sink, 1970s tile, painted paneling on the walls and Care-Bear-colour-palette on the counter top are examples of potential.)

On the compromise side of things, there were two major things I compromised on. Here’s the first:

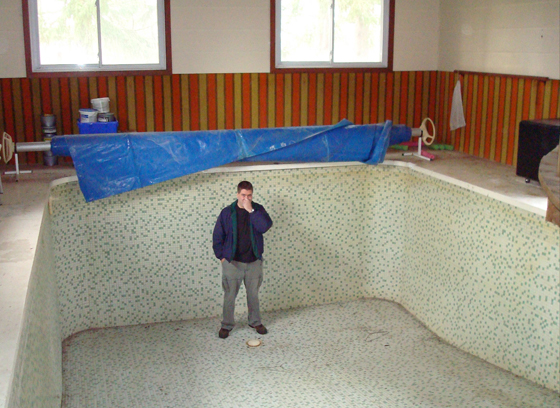
Yes, this is our lovely indoor pool (and Matt on home inspection day demonstrating how to hold your breath in imaginary water).

So I didn’t want a pool in the first place, and now I have one in the house! As far as we’ve been able to determine, the pool has not been used (or filled) in at least 2 years. There are some issues with the equipment, and there may be some issues with the pool itself. We’re not sure exactly what we’re going to end up doing with this space, but suffice it to say that you probably shouldn’t plan on bringing your bathing suit when you come to visit.

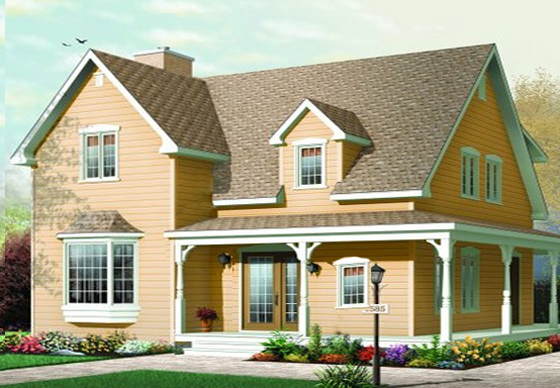
The biggest compromise is on the traditional farmhouse look. But I think there’s a solution for that one too. Don’t you think this…

Our house

… could become something like this?

Someday farmhouse

Original image available here (I made a few edits)

Can you see it?

Obviously, this is a very long term renovation plan we’re working with. Good thing this is our forever house. We’re going to need to be here for awhile!

Forsythia

Forsythia by the drive shed.

Forsythia bushes at the side of the drive shed.

One thing about buying a property in January is that you don’t know exactly what you bought until the property reveals itself in the spring.

It’s been fun watching the new shoots poke up out of the ground and the buds sprout on the bare branches as the plants come back to life.

These forsythia bushes revealed themselves at the side of the drive shed. There is some old lattice tangled in them that needs some attention, but they’re a pretty addition to the property, and the cheerful blooms are a sure sign of spring.

Forsythia always reminds me of my youngest sister. She has gorgeous blond hair that’s bright like the yellow flowers, and her name is Cynthia.

Cynthia lives far away now, so this blog is a way that she can be part of the farm, even though she can’t be here in person. Seeing the forsythia come into bloom this spring has been a nice reminder of her.

I always think of forsythia as “for-Cynthia.”

Buying a farm – Property wish list

For all of the time that we’ve been together (this is our 15th year for those that are counting), Matt and I both knew that we eventually wanted to live on a farm. However, for most of that time “farm” was just an abstract concept in our minds.

When we started actually looking for a farm that we wanted to buy, we had to give some actual thought to what it was we truly wanted. I thought it might be helpful to lay out our wish list and see how we measured up.

I’m going to start with the property, and next I’ll do the house.

Throughout our search, we (Matt will tell you it was mainly me) were very, very picky. We knew this was going to be our forever house, so we didn’t want to compromise on anything. This is the main reason that the search took a year and a half.

Advice to people looking for the perfect country property? Be patient. It will come and everything will work out the way it’s supposed to.

In the end, here’s the criteria we used when evaluating potential properties:

Property wish list:

  1. A large property, ideally 50 acres+
  2. Not more than an hour (ideally 45 minutes) from work and family
  3. Not too many out-buildings, but definitely a large old wood frame barn
  4. Water of some kind, a pond ideally, but a creek would work
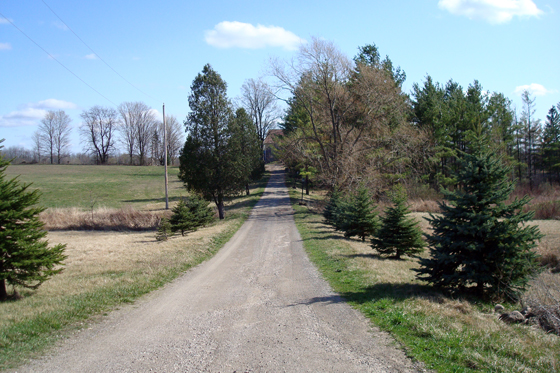
  5. A long tree-lined driveway
  6. Forest or bush that’s not too far from the house
  7. Fields that we can rent out to a tenant farmer
  8. A quiet country road, maybe even a gravel road

So let’s see how we did:

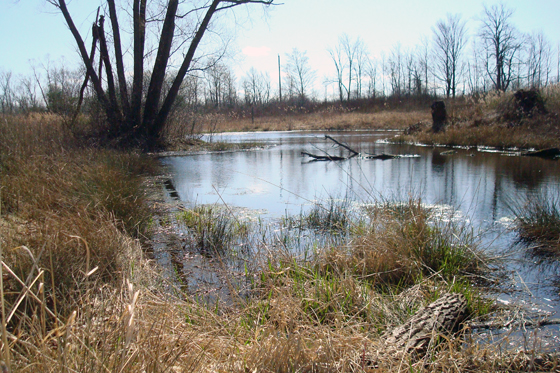
Pond

Pond, check.

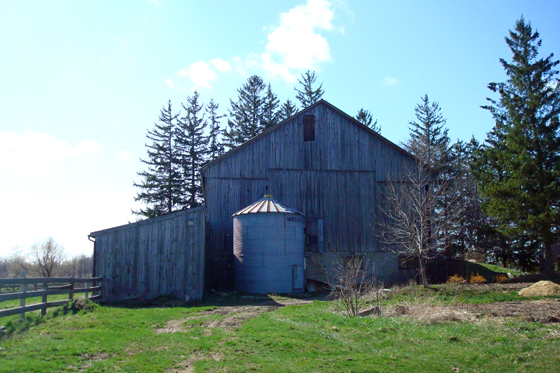
Barn and silo

Old wood frame barn, check.

View up the driveway

Long driveway, check.

Fields and forest

Forest, check. (Yes, all of those trees in the distance are actually ours)

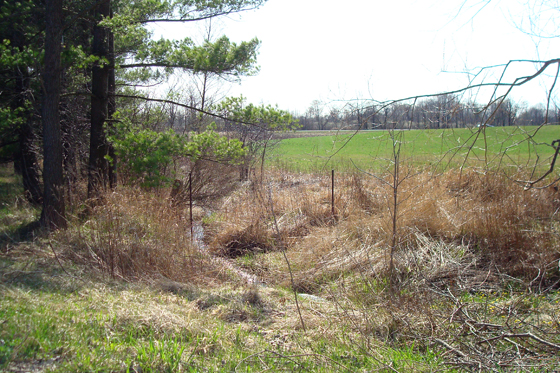
One leg of the creek

Creek, check.

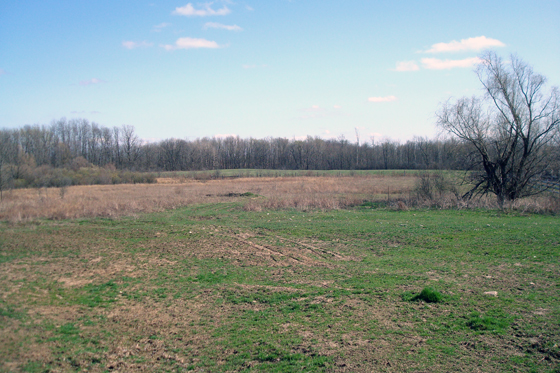
Paddocks and fields

Fields, check. (And paddocks complete with run-in shelters).

Here’s the summary of what we ended up with:

  1. A very large property at 129 acres
  2. 20 minutes from Matt’s parents, 30 from mine, 35 from my work, 45 from his
  3. One large wood frame barn (estimated at ~100 years old) that’s in great shape and a large wood frame drive shed
  4. A good-size pond near the house (I love to look out the kitchen window and see the water glisten in the sunlight) fed by a small stream that then flows into a huge marsh area
  5. 150 metre driveway
  6. Approximately 50 acres of forest, marsh and wild land on the back half of the property, plus a good grove of trees and a stand of huge pine right by the house
  7. Approximately 60 acres of cleared fields
  8. Our road is a little bit busy by country standards–the only miss

There were numerous times throughout our search where we were asking ourselves if we should re-evaluate our criteria or compromise on a particular element. In the end, I don’t feel that we did, and I am absolutely certain that we ended up with the right property for us.